Courses
Giới thiệu về AI Agents
1 giờ 30 phút
119.7K
Google just shipped something genuinely interesting for developers. A Google Workspace command-line interface that gives you structured, scriptable access to your entire Google Workspace including your Drive, Gmail, Calendar, Sheets, Docs, Chat, and more in a single tool.
The codebase is almost entirely Rust (99.3%), but it's distributed via npm as pre-built native binaries, so you never need a Rust toolchain installed.
In this tutorial, you'll set up the Google Workspace CLI from scratch, authenticate it and build a Gemini-powered RAG assistant that lets you query your Drive files in natural language. By the end, you'll have:
gws installed and authenticated against your Drive
A Python virtual environment with ChromaDB, Sentence Transformers, and the Gemini SDK
A working local RAG pipeline that fetches files via gws, embeds them with a local model, and streams answers with Gemini 2.5 Flash
Note: This is not an officially supported Google product.
The Google Workspace CLI (gws) is an AI-optimized command-line tool for your entire Google Workspace ecosystem. Here's what makes it stand out:
Dynamic command discovery: Rather than shipping a hardcoded command tree, gws reads Google's Discovery Service at runtime. When Google adds new API endpoints, the CLI picks them up automatically without a version bump.
Agent-native design: The CLI ships with 100+ pre-built agent skills and 50 curated recipes for common workflows that summarize emails, move Drive files, create calendar events, and more. Every output is structured JSON, so LLMs can consume it directly.
Native MCP server support: Run gws as a local MCP server and give your AI agent full Workspace tool access without writing a single API client.
Model Armor integration: For production agents that read user-controlled content, you can pipe API responses through Google Cloud Model Armor to sanitize against prompt injection before your LLM sees it.
You can browse the full skill library here: github.com/googleworkspace/cli/blob/main/docs/skills.md.
In this tutorial, we'll build the RAG assistant step by step. At a high level, here's what the app does:
Authenticates against your Google Drive using the gws CLI and fetches your most recently modified Docs, Sheets, and text files
Chunks each document and embeds it locally using Sentence Transformers via ChromaDB
Persists the vector index to disk so subsequent runs skip already ingested files and go straight to chat
Accepts a natural-language question, retrieves the top-3 most relevant chunks from ChromaDB, and builds a grounded context prompt
Streams a cited, context-only answer from Gemini 2.5 Flash token-by-token directly in your terminal
Let's build it step by step.
Full tutorial code: https://github.com/AashiDutt/Google-Workspace-CLI-Demo
The CLI is distributed as an npm package wrapping pre-built Rust binaries. No Rust toolchain is needed.
npm install -g @googleworkspace/cliVerify the installation by running the following commands one by one:
gws --version
which gws
If gws isn't found after install, make sure your npm global bin directory is on your PATH.
The CLI authenticates through a GCP project's OAuth client, so you need one before logging in. To create or select a project from GCP:
Set up OAuth credentials:
Navigate to APIs & Services and select Credentials
Click Create Credentials and go to OAuth 2.0 Client ID
Choose Desktop app as the application type
Note the Client ID and Client Secret which we’ll use for gws auth setup.
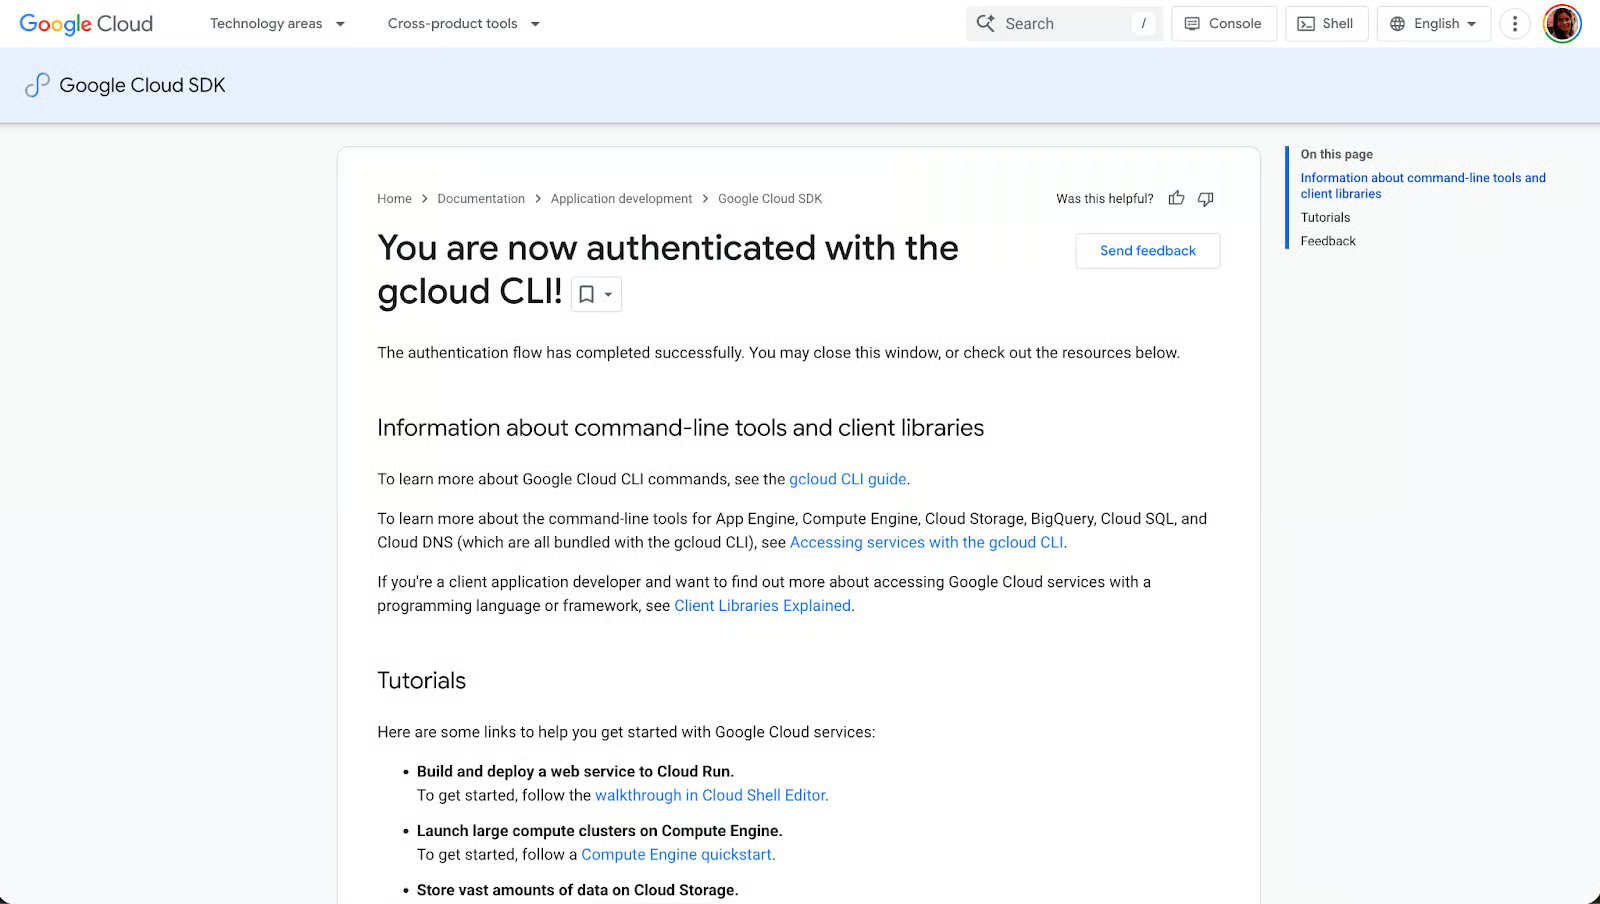
The CLI completes OAuth by starting up a temporary localhost server. Desktop app clients handle arbitrary localhost ports automatically. Web application clients require you to manually add every http://localhost:PORT to the authorized redirect URIs list.
If you use a Web application client and hit "Access blocked: This app's request is invalid", go to Credentials and click OAuth client followed by Authorized redirect URIs and add the exact http://localhost:PORT URL shown in the error.
To wire gws to your GCP project, first export your OAuth credentials as environment variables so the setup wizard can pick them up automatically:
export GOOGLE_WORKSPACE_CLI_CLIENT_ID="CLIENT_ID"
export GOOGLE_WORKSPACE_CLI_CLIENT_SECRET="CLIENT_SECRET"
Then run:
gws auth setup --project YOUR_PROJECT_ID --login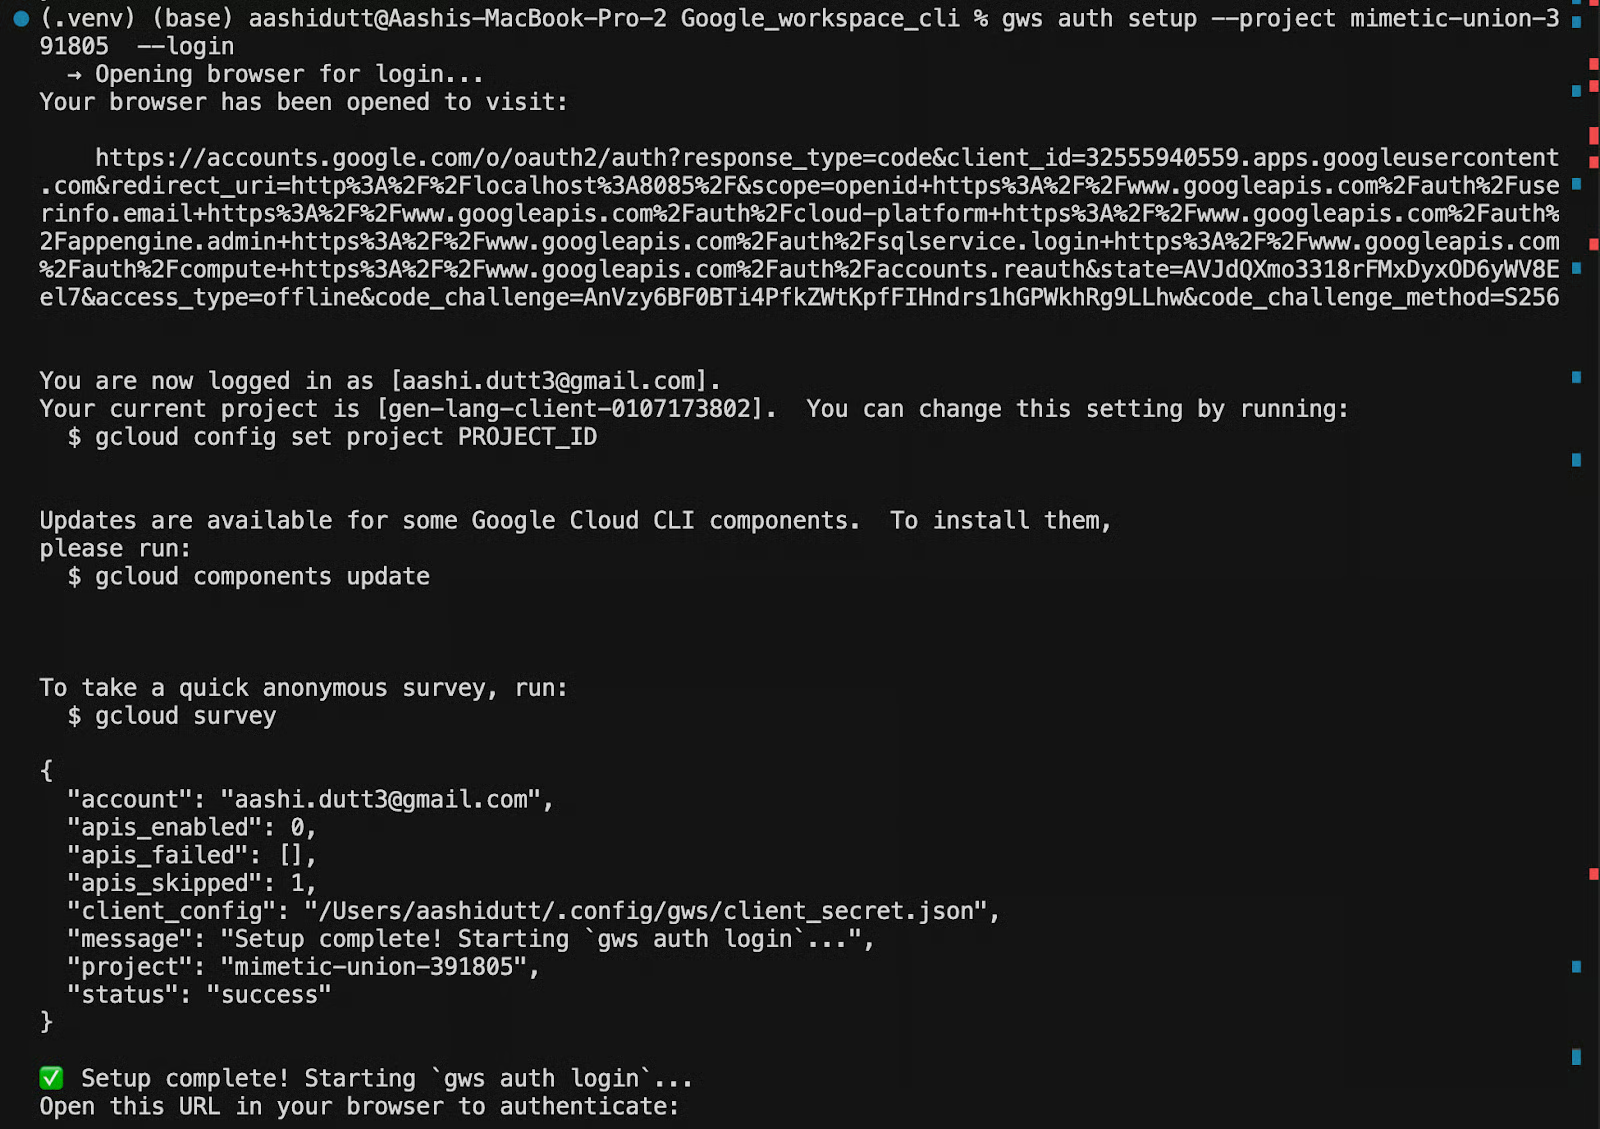
The setup wizard will:
Once complete, you'll see: Setup complete!
Credentials are stored in ~/.config/gws/. To confirm everything is wired correctly, run:
gws auth statusThis prints the authenticated account, the linked GCP project, and the active scopes. If anything looks wrong, then re-run gws auth setup with the correct flags rather than trying to edit the config files manually.
Before writing any Python, it's worth doing a quick sanity check directly from the terminal to confirm the CLI is authenticated and can talk to your Drive. Let’s quickly run the following command to list your five most recent Drive files:
gws drive files list --params '{"pageSize": 5}'The --params flag accepts a JSON string that maps directly to the Drive API's query parameters. Here, pageSize: 5 limits the response to five results which are enough to confirm connectivity without dumping your entire Drive.
If authentication is working correctly, you'll get back a structured JSON response like this:
{
  "files": [
    {
      "id": "1BxiMVs0XRA5nFMdKvBdBZjgmUUqptlbs74OgVE2upms",
      "name": "Q3 Strategy Doc",
      "mimeType": "application/vnd.google-apps.document"
    },
    ...
  ]
}
Every response from gws is a structured JSON with no parsing, no scraping, no brittle text output.
If instead you see a “403 error” mentioning serviceusage.services.use, it means your OAuth credentials are pointed at a different GCP project than the one with billing enabled. Re-run setup with the correct project ID to re-link everything:
gws auth setup --project YOUR_PROJECT_ID --loginWith Drive access confirmed, we're ready to enable the API and start building the Python side of the pipeline.
At this point, gws can authenticate against your GCP project, but it can't actually read Drive file content yet. GCP separates authentication (proving who you are) from API activation (declaring which services your project uses). Even with valid OAuth credentials, any attempt to fetch file content will return a 403 accessNotConfigured error until the Drive API is explicitly enabled on the project.
To enable it, open this URL in a browser and replace [PROJECT_ID] with your actual project ID and click Enable:
https://console.developers.google.com/apis/api/drive.googleapis.com/overview?project=[PROJECT_ID]
Alternatively, if you have the gcloud CLI installed, you can enable it directly from the terminal:
gcloud services enable drive.googleapis.com --project YOUR_PROJECT_IDBoth methods do the same thing. Running either on an already-enabled API is safe because the operation is idempotent and won't reset any existing configuration.
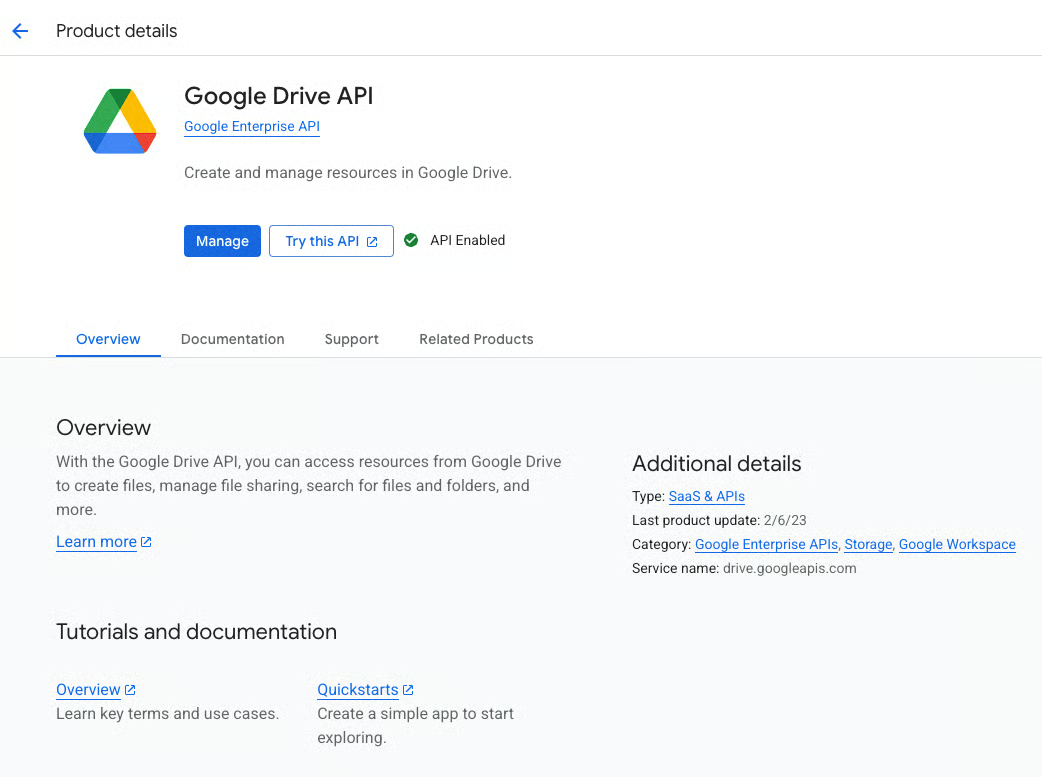
Once enabled, GCP may take a few seconds to propagate the change. If you immediately run gws drive files list and still see a 403, wait 30 seconds and try again.
With the CLI side fully configured, we can now set up the Python environment that handles the embedding and retrieval logic. The RAG pipeline is intentionally lightweight with four packages, no GPU required, and all embedding happens locally on your machine.
Start by creating a virtual environment by running the following commands one by one:
cd /path/to/your/project
python3 -m venv .venv
source .venv/bin/activate
python -m pip install --upgrade pip
pip install -r requirements.txt
Then install the dependencies from requirements.txt:
.txt
chromadb==1.5.5
google-genai==1.70.0
langchain-text-splitters==1.1.1
sentence-transformers==5.3.0
Here's what each package contributes to the pipeline:
chromadb: This is the local vector database which stores document embeddings to ./chroma_db on disk and loads them on subsequent runs, so the app doesn't need to re-embed files it has already processed.
google-genai: This is an official Python SDK for Gemini. The app uses it to send the retrieved context and user question to Gemini 2.5 Flash, streaming the response back token-by-token.
langchain-text-splitters: This package provides the RecursiveCharacterTextSplitter, which breaks large documents into overlapping chunks before embedding. The overlap ensures sentences at chunk boundaries aren't severed from their context.
sentence-transformers: The sentence transformers runs the embedding model locally via ChromaDB's DefaultEmbeddingFunction. So, every document chunk is embedded on the machine with no external API calls.
Note: The embedding model (~90MB) is downloaded automatically on first use and cached locally.
With the Python environment ready, the last piece before writing code is getting your Gemini API key.
The RAG pipeline uses Gemini as the answer-generation layer because it takes the retrieved document chunks and the user's question, and streams back a grounded response. To connect to Gemini, you need an API key from Google AI Studio.
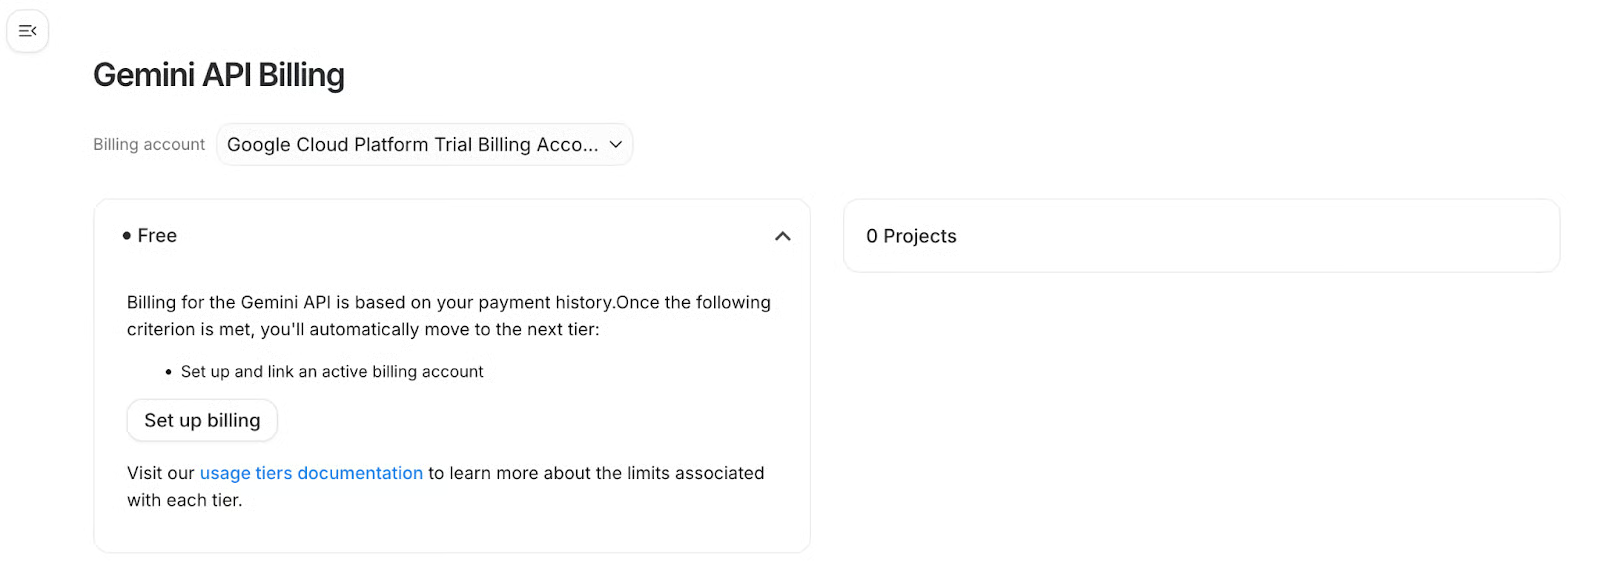
Sign in with your Google account, and click Get API Key, then select Create API Key. Select your GCP project when prompted so quota and billing. Link a billing account in the GCP dashboard under Billing then select Link a billing account.
Once you have your key, export it as an environment variable:
Export the key in your terminal:
export GEMINI_API_KEY="YOUR_GEMINI_API_KEY"To persist it across terminal sessions, run:
echo 'export GEMINI_API_KEY="YOUR_GEMINI_API_KEY"' >> ~/.zshrc
source ~/.zshrc
The app reads this key via os.getenv("GEMINI_API_KEY") at startup. If the variable isn't set, it will prompt you to paste the key interactively.
Model note: The app defaults to gemini-2.5-flash. You can override this by exporting GEMINI_MODEL="gemini-2.5-pro" if you want stronger reasoning on complex documents. Note that gemini-2.0-flash has been retired for new API keys, so don't use it here.
With auth, the Drive API, dependencies, and the Gemini key all in place, we have everything we need. Let's build the pipeline.
Now let's wire everything together. We’ll work with four files, including fetcher.py, vector_store.py, main.py, and requirements.txt. Each file has a single responsibility, like fetcher.py handles all CLI interaction, vector_store.py owns embedding and retrieval, and main.py orchestrates the full loop from ingestion to streaming chat.
On first run, gws fetches your Drive files, the content is chunked and embedded locally, and the vector index is written to ./chroma_db on disk. On subsequent runs, ChromaDB loads from disk, only new files are fetched and embedded, and the chat loop starts immediately without re-processing anything.
Let's walk through each file.
fetcher.py — Drive access via gwsThis module is the bridge between the gws CLI and Python. All Drive interactions like listing files, exporting content, and checking auth go through subprocess calls to gws, and the structured JSON output is parsed into Python dicts. The result is that the Python code never needs to deal with OAuth tokens, HTTP clients, or API response schemas directly; gws handles all of that and hands back clean JSON.
def _gws_json_stdout(stdout: str) -> str:
    if not stdout or "{" not in stdout:
        return stdout or ""
    return stdout[stdout.find("{"):]
The _gws_json_stdout helper handles a subtle issue where gws sometimes emits keyring or logging lines before the JSON payload. Here, calling json.loads(result.stdout) directly would fail as it strips everything before the first {.
def check_auth() -> bool:
    cmd = ["gws", "drive", "about", "get", "--params", '{"fields": "user"}']
    result = subprocess.run(cmd, capture_output=True, text=True)
    payload = _gws_json_stdout(result.stdout)
    try:
        data = json.loads(payload) if payload.strip() else {}
    except json.JSONDecodeError:
        print("Error checking authentication status (could not parse gws output).")
        return False
    if "error" in data or result.returncode != 0:
        handle_error_output(result.stdout, result.stderr)
        return False
    return True
The check_auth() function is called at startup in main.py which makes a lightweight Drive API call and inspects the response. If auth is broken or scopes are missing, the app exits cleanly before attempting ingestion.
The error handler also catches specific failure modes and prints actionable messages:
def handle_error_output(stdout, stderr):
    output = _gws_json_stdout(stdout or "") or (stderr or "")
    if "insufficientPermissions" in output or "unauthenticated" in output.lower():
        print("Please run: gws auth login -s drive")
    elif "serviceusage.services.use" in output or "serviceUsageConsumer" in output:
        print(
            "GCP quota project error: run gws auth setup --project YOUR_PROJECT_ID --login"
        )
    else:
        print(f"API Error: {output}")
The document list fetcher targets only text-exportable MIME types:
def fetch_document_list(limit=10) -> list[dict]:
    q = (
        "(mimeType='text/plain' or mimeType='application/vnd.google-apps.document' "
        "or mimeType='application/vnd.google-apps.spreadsheet') and trashed=false"
    )
    cmd = [
        "gws", "drive", "files", "list",
        "--params",
        json.dumps({"q": q, "pageSize": limit, "orderBy": "modifiedTime desc"}),
    ]
The query filters to plain text, Google Docs, and Google Sheets, each ordered by most recently modified. Binary files (PDFs, images) are excluded since they can't be cleanly exported as text via this approach.
However, downloading is handled differently per MIME type:
def download_document(file_id: str, mime_type: str) -> str:
    fd, out_path = tempfile.mkstemp(prefix="gws_", suffix=".bin")
    os.close(fd)
    try:
        if mime_type == "application/vnd.google-apps.document":
            cmd = ["gws", "drive", "files", "export",
                   "--params", json.dumps({"fileId": file_id, "mimeType": "text/plain"}),
                   "-o", out_path]
        elif mime_type == "application/vnd.google-apps.spreadsheet":
            cmd = ["gws", "drive", "files", "export",
                   "--params", json.dumps({"fileId": file_id, "mimeType": "text/csv"}),
                   "-o", out_path]
        else:
            cmd = ["gws", "drive", "files", "get",
                   "--params", json.dumps({"fileId": file_id, "alt": "media"}),
                   "-o", out_path]
        ...
        with open(out_path, "rb") as f:
            return f.read().decode("utf-8", errors="replace")
    finally:
        os.unlink(out_path)
The gws writes exported file bytes to disk via -o, not to stdout. Stdout carries JSON metadata. The code uses a temp file to capture binary output, reads it, and cleans up in a finally block, so temp files are always removed even on error.
vector_store.py — Local embeddings with ChromaDBThis module chunks incoming text, generates embeddings locally using Sentence Transformers, persists them to disk via ChromaDB, and exposes a simple query() method that the chat loop calls for every user question.
class VectorStore:
    def __init__(self, persist_directory="./chroma_db"):
        self.client = chromadb.PersistentClient(path=persist_directory)
        self.collection = self.client.get_or_create_collection(
            name="drive_documents",
            embedding_function=embedding_functions.DefaultEmbeddingFunction()
        )
        self.text_splitter = RecursiveCharacterTextSplitter(
            chunk_size=1000,
            chunk_overlap=200
        )
PersistentClient writes the vector index to ./chroma_db and loads it on subsequent runs with no re-ingestion needed unless you delete the directory. The DefaultEmbeddingFunction uses Sentence Transformers locally, while embeddings are computed on your machine at zero marginal cost.
The splitter uses chunk_size=1000 with chunk_overlap=200, so that the overlap ensures context at chunk boundaries isn't lost when sentences split across two chunks.
def add_document(self, file_id: str, filename: str, text: str):
    chunks = self.text_splitter.split_text(text)
    ids = [f"{file_id}_{i}" for i in range(len(chunks))]
    metadatas = [{"source": filename, "file_id": file_id} for _ in chunks]
    self.collection.upsert(documents=chunks, metadatas=metadatas, ids=ids)
    print(f"-> Added {len(chunks)} chunks for {filename}")
upsert in the above code snippet means re-running the pipeline on an already-ingested file updates chunks rather than throwing a duplicate ID error.
def document_exists(self, file_id: str) -> bool:
    try:
        results = self.collection.get(where={"file_id": file_id}, limit=1)
        return len(results["ids"]) > 0
    except Exception:
        return False
This fast pre-check in main.py's ingestion loop avoids re-downloading files you've already embedded, making the subsequent runs instant.
main.py — Ingestion, retrieval, and streaming chatThe main.py file runs auth checks, drives the ingestion loop, initialises the Gemini client, and runs the interactive chat loop. It's intentionally thin as the heavy lifting is delegated to fetcher.py and vector_store.py.
def setup_gemini():
    api_key = os.getenv("GEMINI_API_KEY")
    if not api_key:
        print("Please enter your GEMINI_API_KEY (get one from Google AI Studio).")
        api_key = input("Key: ").strip()
    return genai.Client(api_key=api_key)
If GEMINI_API_KEY isn't set, the app prompts interactively rather than crashing. You can set your GEMINI_API_KEY as we did in the previous step.
def ingest_documents(store, limit=10):
    files = fetch_document_list(limit)
    for file in files:
        file_id = file.get("id")
        if store.document_exists(file_id):
            print(f"Skipping {file.get('name')} (already in vector store)...")
            continue
        content = download_document(file_id, file.get("mimeType"))
        if content:
            store.add_document(file_id, file.get("name"), content)
The document_exists check is the incremental ingestion mechanism with only new files that are downloaded and embedded on each run. The chat loop retrieves the top-3 semantically similar chunks and annotates each with its source filename:
def chat_loop(model, store):
    while True:
        query = input("\nYou: ")
        results = store.query(query, n_results=3)
        documents = results.get("documents", [[]])[0]
        metadatas = results.get("metadatas", [[]])[0]
        context_parts = []
        for doc, meta in zip(documents, metadatas):
            source = meta.get("source", "Unknown")
            context_parts.append(f"Source: {source}\nText:\n{doc}\n")
        full_context = "\n---\n".join(context_parts)
        prompt = f"""You are a helpful assistant. Answer the user's question based ONLY on the following context from their Google Drive. If you cannot answer from the context, say "I don't know based on your documents."
Context:
{full_context}
Question: {query}
"""
        model_name = os.getenv("GEMINI_MODEL", "gemini-2.5-flash")
        response = model.models.generate_content_stream(model=model_name, contents=prompt)
        for chunk in response:
            if chunk.text:
                print(chunk.text, end="", flush=True)
        print()
The above prompt is strictly grounded such that the LLM is instructed to answer only from provided context and say "I don't know" if the answer isn't there. This prevents hallucination of information that isn't in your Drive. Responses stream token-by-token via generate_content_stream, so output appears immediately.
With all four files in place, start the app with:
python main.pyOn first run, the app checks auth, initialises ChromaDB, downloads the embedding model if it's not already cached, fetches up to 10 Drive files, embeds and stores them, then drops the user into the chat loop. You'll see incremental progress printed for each file as it's ingested:
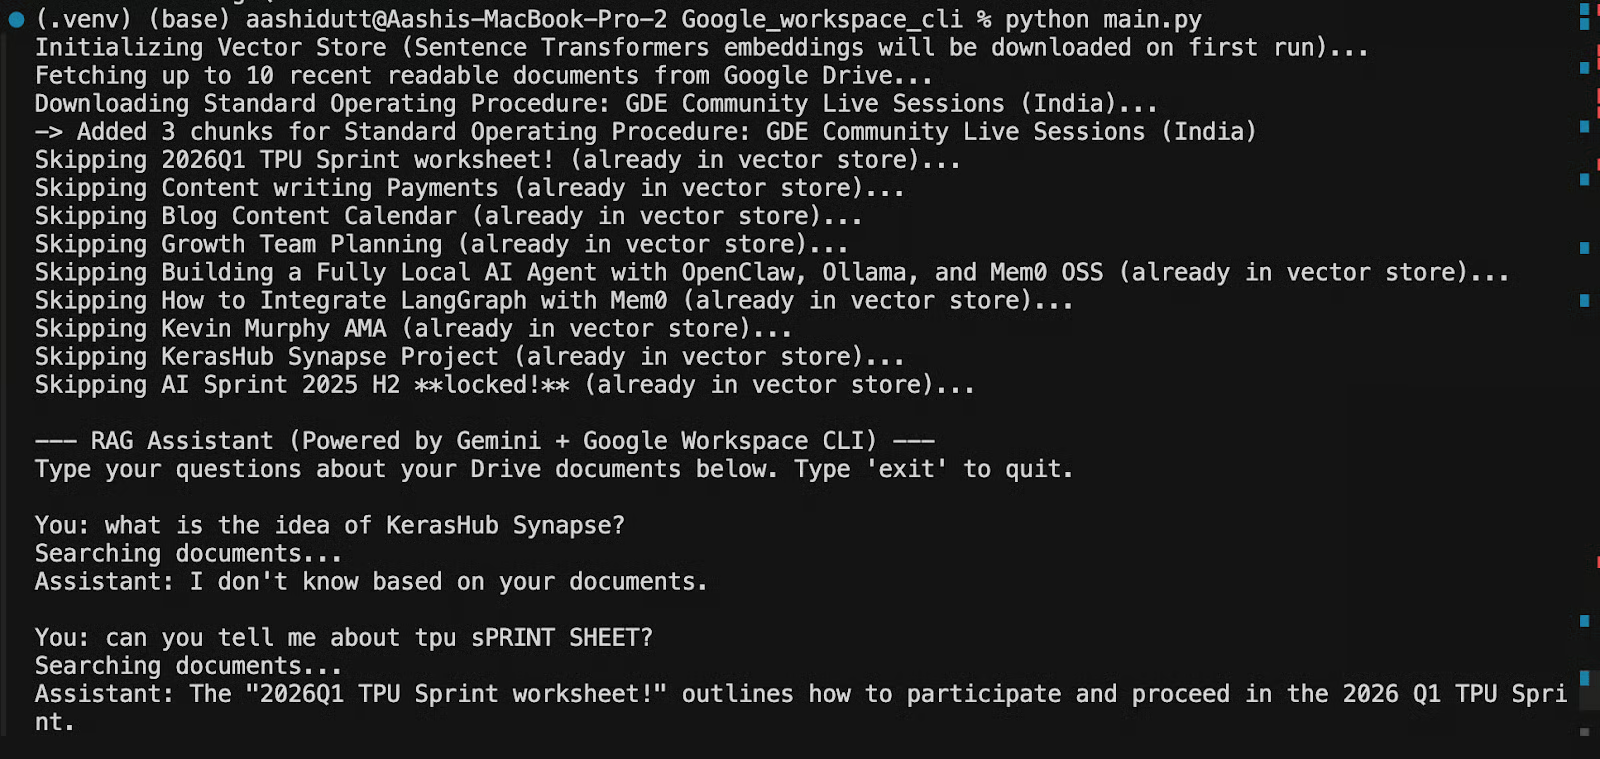
On subsequent runs, ChromaDB loads the persisted index from disk, already-ingested files are skipped, and you reach the chat prompt almost instantly.
However, to re-ingest everything from scratch, for example after adding new Drive files you want to include, you need to delete the ChromaDB directory and re-run:
rm -rf ./chroma_db
python main.py
To verify auth independently without running the full pipeline, run fetcher.py directly:
python fetcher.pyThis executes check_auth() and prints a list of your Drive files to confirm that CLI, OAuth, and Drive API are all working before you commit to a full ingestion run.
The RAG assistant we built with Google Workspace CLI is deliberately minimal where gws fetches, Sentence Transformers embeds locally, ChromaDB stores, Gemini streams the answer. Four files, zero cloud embedding costs, incremental ingestion on every run. The architecture scales cleanly if you want to add Gmail and Calendar as additional ingestion sources, swap in a larger Gemini model, or replace the chat loop with a LangGraph agent. The foundation stays the same.
Learn with DataCamp
Courses
Courses
Courses
Tutorials
Bex Tuychiev
Tutorials
Aashi Dutt
Tutorials
Aryan Irani
Tutorials
Aashi Dutt
Tutorials
Josep Ferrer
Tutorials
Bhavishya Pandit