Track
GitHub Foundations
10 hr
GitHub Copilot CLI brings AI assistance directly into the terminal to help developers write code, automate tasks, and manage workflows using natural language. It extends the capabilities of Copilot beyond the editor and turns the command line into an intelligent, context-aware workspace.
This guide walks through everything you need to know: how the Copilot CLI works, how to install and configure it, and how to use it in real-world scenarios.
To effectively use the Copilot CLI, you need to be comfortable with the CLI itself. The Introduction to Shell course builds the foundational muscle memory that the Copilot CLI aims to automate.
GitHub Copilot CLI is a command-line tool that brings AI assistance straight into your terminal. You can prompt it for commands, understand complex scripts, and debug issues directly from your shell. Instead of breaking your flow to skim the documentation or memorize obscure flags, you can simply describe what you want to achieve.
You can also manage remote repositories, open issues, create pull requests, and work with GitHub Actions using natural-language commands. This significantly reduces context switching, allowing you to handle almost everything you normally do on the GitHub website right from the CLI.
The GitHub Copilot CLI is shifting from a simple command-line helper to a more autonomous agent. This section explores that transition and its new capabilities.
The earliest version of terminal AI support came through the gh-copilot extension. It worked as an add-on to the GitHub CLI. You can type a natural language prompt and receive a command or script that fits the task you described. For example:
gh copilot generate "Write a bash script that deletes merged branches"#!/bin/bash
git branch --merged main | grep -v "main" | xargs git branch -dYou can copy the output and run it in the terminal. Please note that you still need to copy and execute it on your own. What if the tool did this itself? That’s what the new GitHub Copilot CLI brings.
To match today’s AI advancements, GitHub officially deprecated the old extension on October 25, 2025, and released the new Copilot CLI. This version offers a far more agentic experience in the terminal. It understands context, runs multi-step workflows, applies code changes, and helps debug issues directly from the command line.
The Copilot CLI complements the Copilot IDE extension, and both use GitHub’s AI models to support different parts of the development workflow. In the editor, Copilot helps you write, refactor, and complete code. In the terminal, you use Copilot CLI for terminal-based workflows.
For example, you might use Copilot in VS Code to generate a Dockerfile, then switch to the terminal and ask Copilot CLI to build the image and containerize the application.
This release introduces a suite of powerful features that transform the CLI from a passive assistant into a proactive, autonomous development partner.
The old gh assistance could only explain code or generate basic shell scripts. The new Copilot CLI goes beyond that. It’s an autonomous agent that plans and executes multi-step tasks. It can debug code, modify files, create new project structures, and handle complex workflows entirely from the terminal.
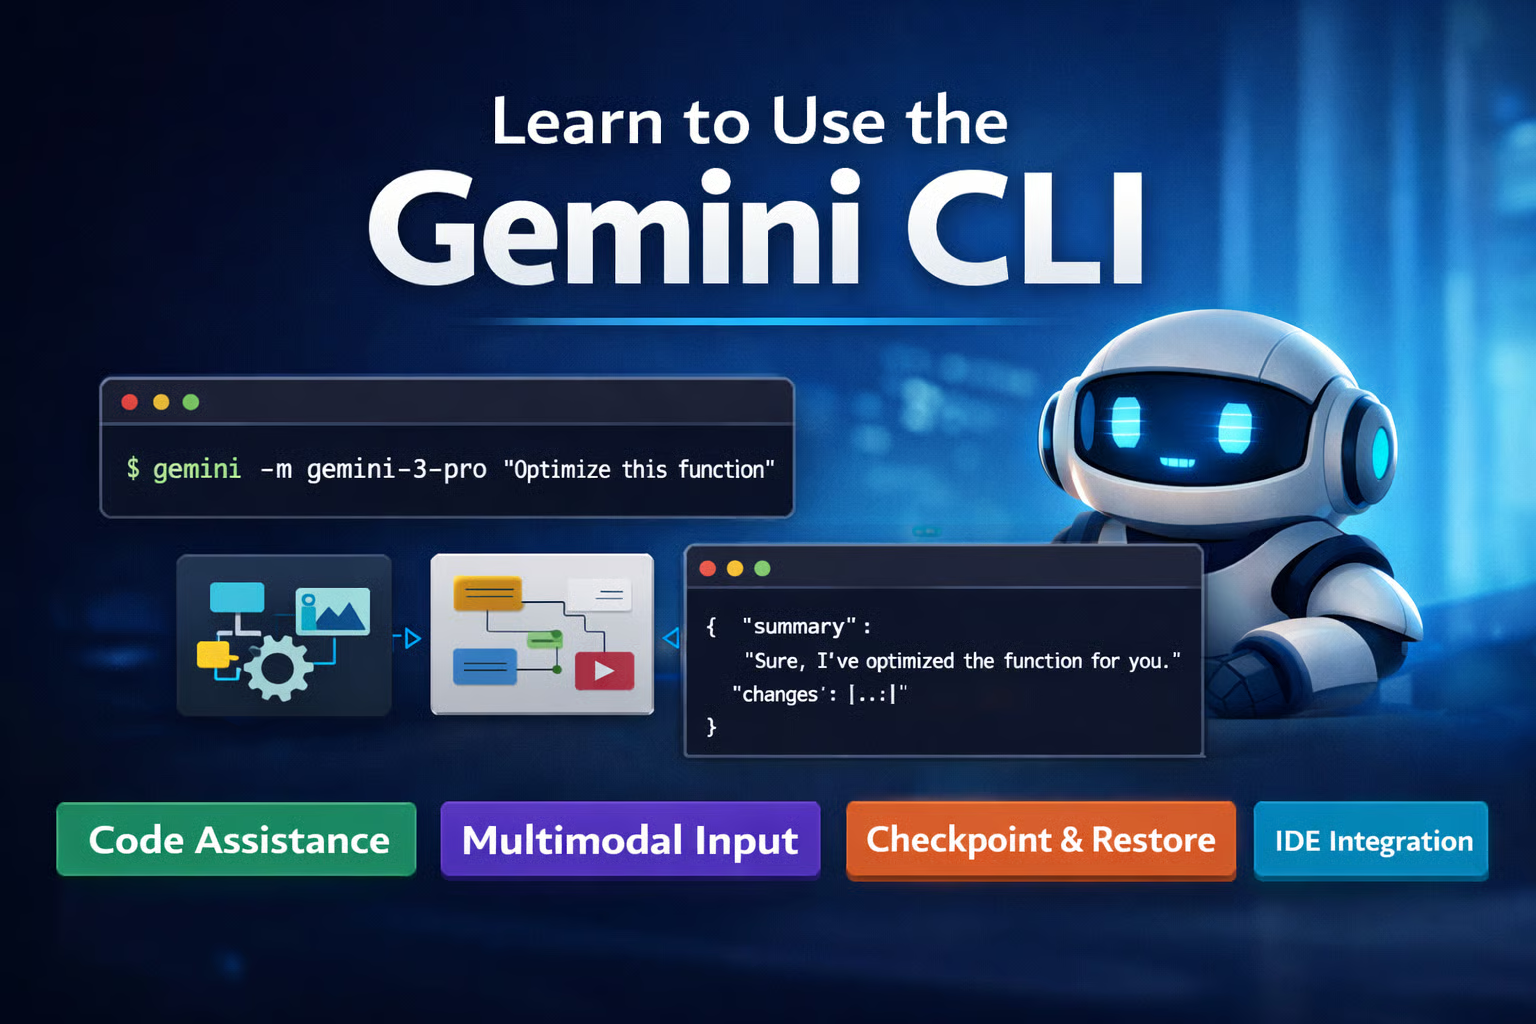
The new Copilot CLI gives you access to the latest models from Anthropic, OpenAI, Google, and others. This multi-model approach offers more flexibility than single-provider tools like the Gemini CLI or OpenAI Codex CLI.
It uses Claude Sonnet 4.5 as the default model, and you can switch models at any time by running the /model slash command and selecting a new option from the list.
Model Context Protocol (MCP) lets the CLI access internal datasets, specific knowledge bases, and generate domain-specific solutions for your use case.
The Copilot CLI includes a preconfigured GitHub MCP server, so it easily interacts with GitHub.com and manages remote repositories directly from the terminal. You can also connect the Copilot CLI to custom MCP servers and fetch context from your proprietary tools or databases.
When you start the Copilot CLI, you enter a session that stays active until you exit. Inside a session, Copilot remembers and builds context with each interaction.
For example, you can ask Copilot to revise the output from your last request, extend a script it just generated, or apply follow-up changes without repeating all the context in every prompt.
You can run the Copilot CLI on macOS, Linux, or Windows and connect it to your repositories, workflows, and organizational settings. Here’s how the architecture works and what you need to run it.
You need three prerequisites before you can use the GitHub Copilot CLI:
There are a few things to keep in mind when accessing GitHub Copilot CLI, depending on the operating system.
GitHub Copilot CLI fully supports Linux and macOS. It runs natively on bash and zsh, and both platforms handle Node.js, npm globals, and shell integrations smoothly. If you want the most stable Copilot CLI setup with full feature compatibility, Linux and macOS are the best.
On Windows, the recommended way to run the Copilot CLI is through WSL. WSL gives you a full Linux environment inside Windows, so you get the same stability and shell compatibility you would find on native Linux systems.
The Copilot CLI also runs on native Windows PowerShell, but this option is currently experimental. It requires PowerShell 6 or higher, but even the latest version of Windows 11 ships with Windows PowerShell 5.1. Therefore, you must manually install PowerShell 6 or later if you wish to use native PowerShell.
Let’s get started with GitHub Copilot CLI.
Verifying the mandatory prerequisites prevents most installation failures, so start with that. Check your Node.js and npm versions by running:
node --version
npm --version
You also need a GitHub account with an active Copilot subscription. If any prerequisite fails, fix it before you continue to avoid installation errors.
Install the official Copilot CLI:
npm install -g @github/copilotYou can confirm the installation by running:
--version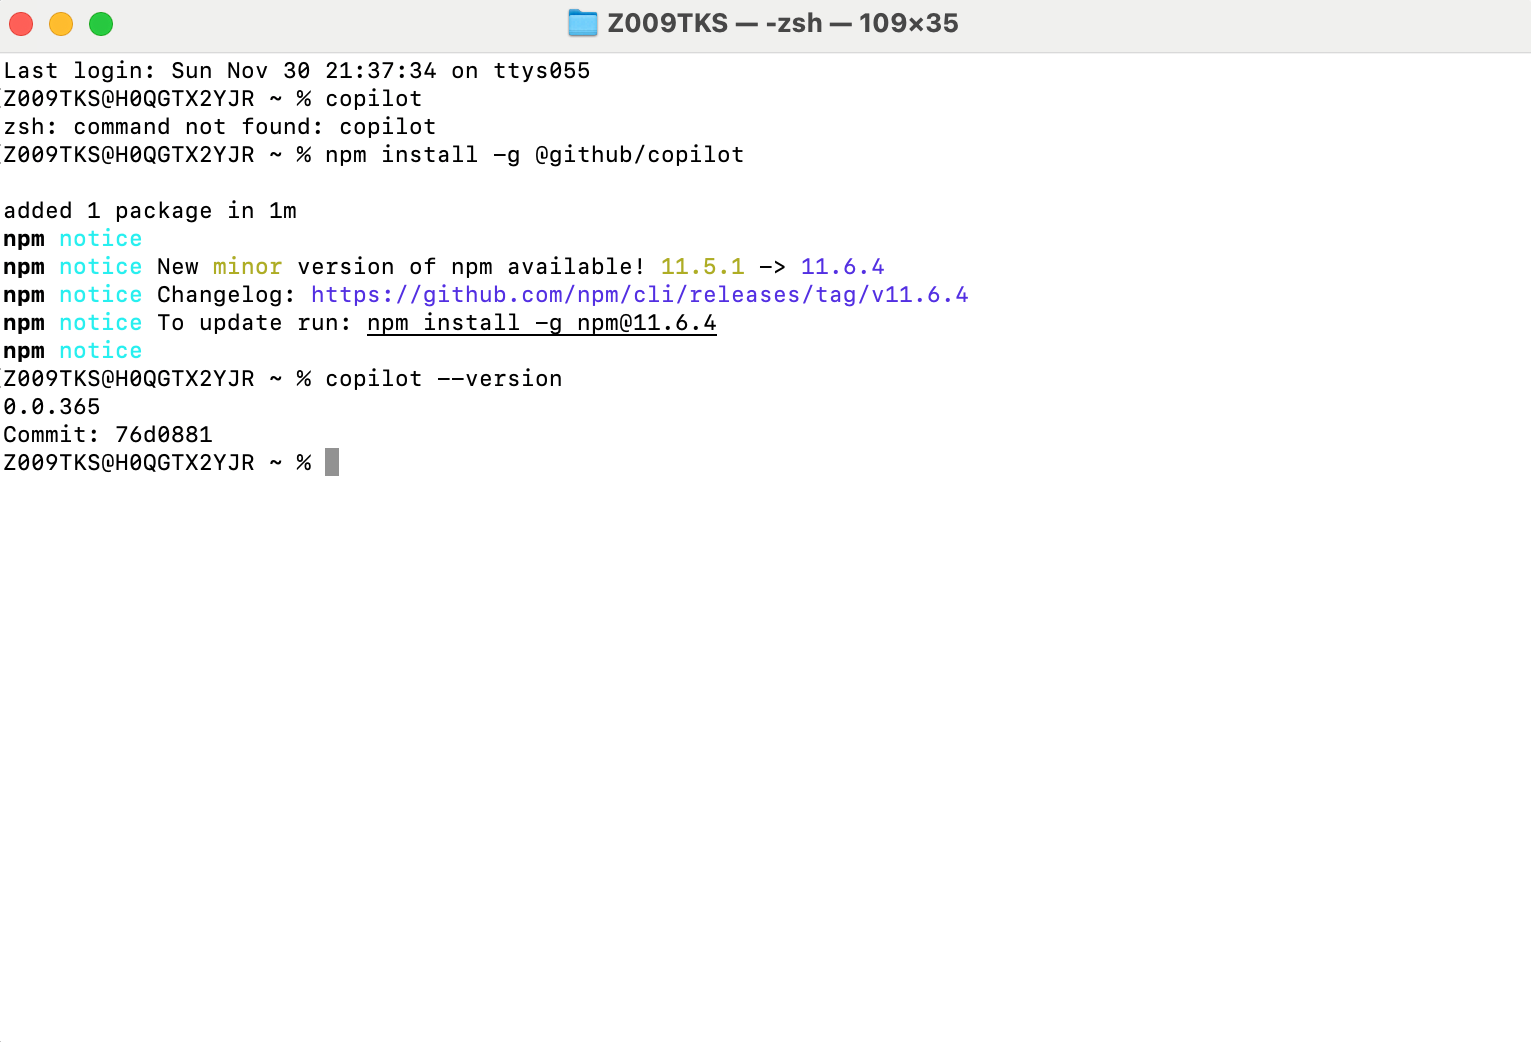
If the command prints a version number like in the image above, you installed the Copilot CLI correctly.
If this is your first time, you should authenticate with GitHub by following the steps below:
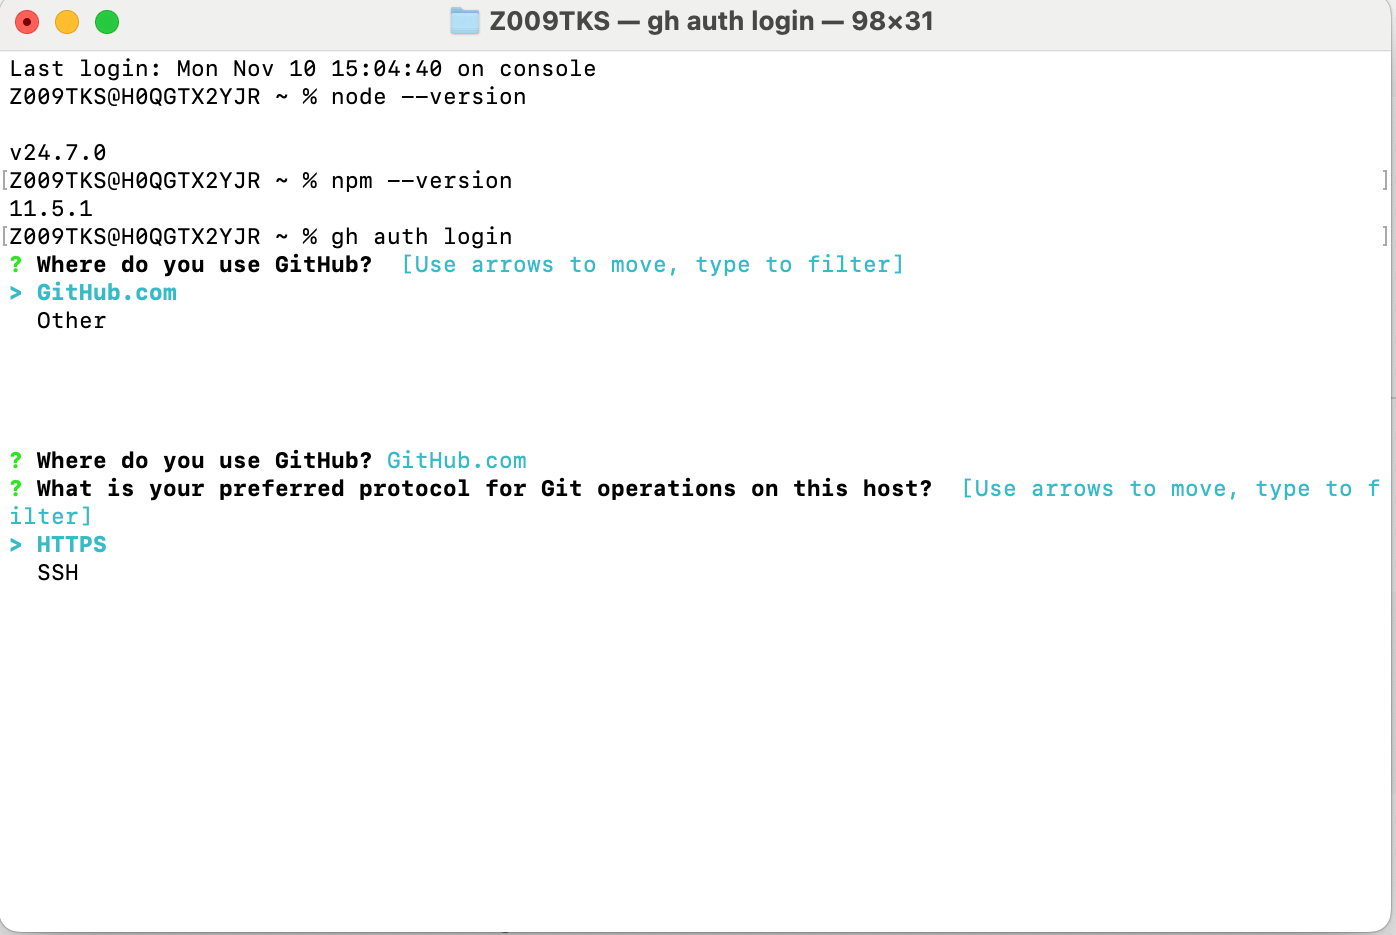
Run the command: gh auth login.
When GitHub CLI asks: “Where do you use GitHub?”, select GitHub.com and press Enter.
When it asks: “What is your preferred protocol for Git operations on this host?”Select HTTPS and press Enter.
When asked for an authentication method, choose “Login with a web browser.”
GitHub CLI then shows a one-time code and a GitHub URL. Go to the URL, enter the one-time code, approve the login request, and confirm access to your GitHub account.
After you approve the request, return to your terminal and verify the login by running gh auth status. If it shows your GitHub username, you authenticated successfully.
To start GitHub Copilot CLI after authenticating, follow these steps:
Open your terminal and navigate to the code repository where you want to use the Copilot CLI.
Type copilot and press Enter. This starts an interactive mode where you can ask follow-up questions in a single session.
You can also run a one-off prompt, for example, copilot -p “explain what this function does: [function_name]”. Here, the CLI generates the explanation and immediately closes the session.
There are quite cool features in the Copilot CLI that power agentic workflows. Let’s look at them in practice.
The Copilot CLI uses an agent-based architecture that understands your prompt, plans the necessary actions, and executes multi-step tasks directly in the terminal.
The agent can break down complex instructions and orchestrate tasks that involve reading files, generating scripts, transforming data, or chaining multiple operations automatically.
Let me show you how it works in action:
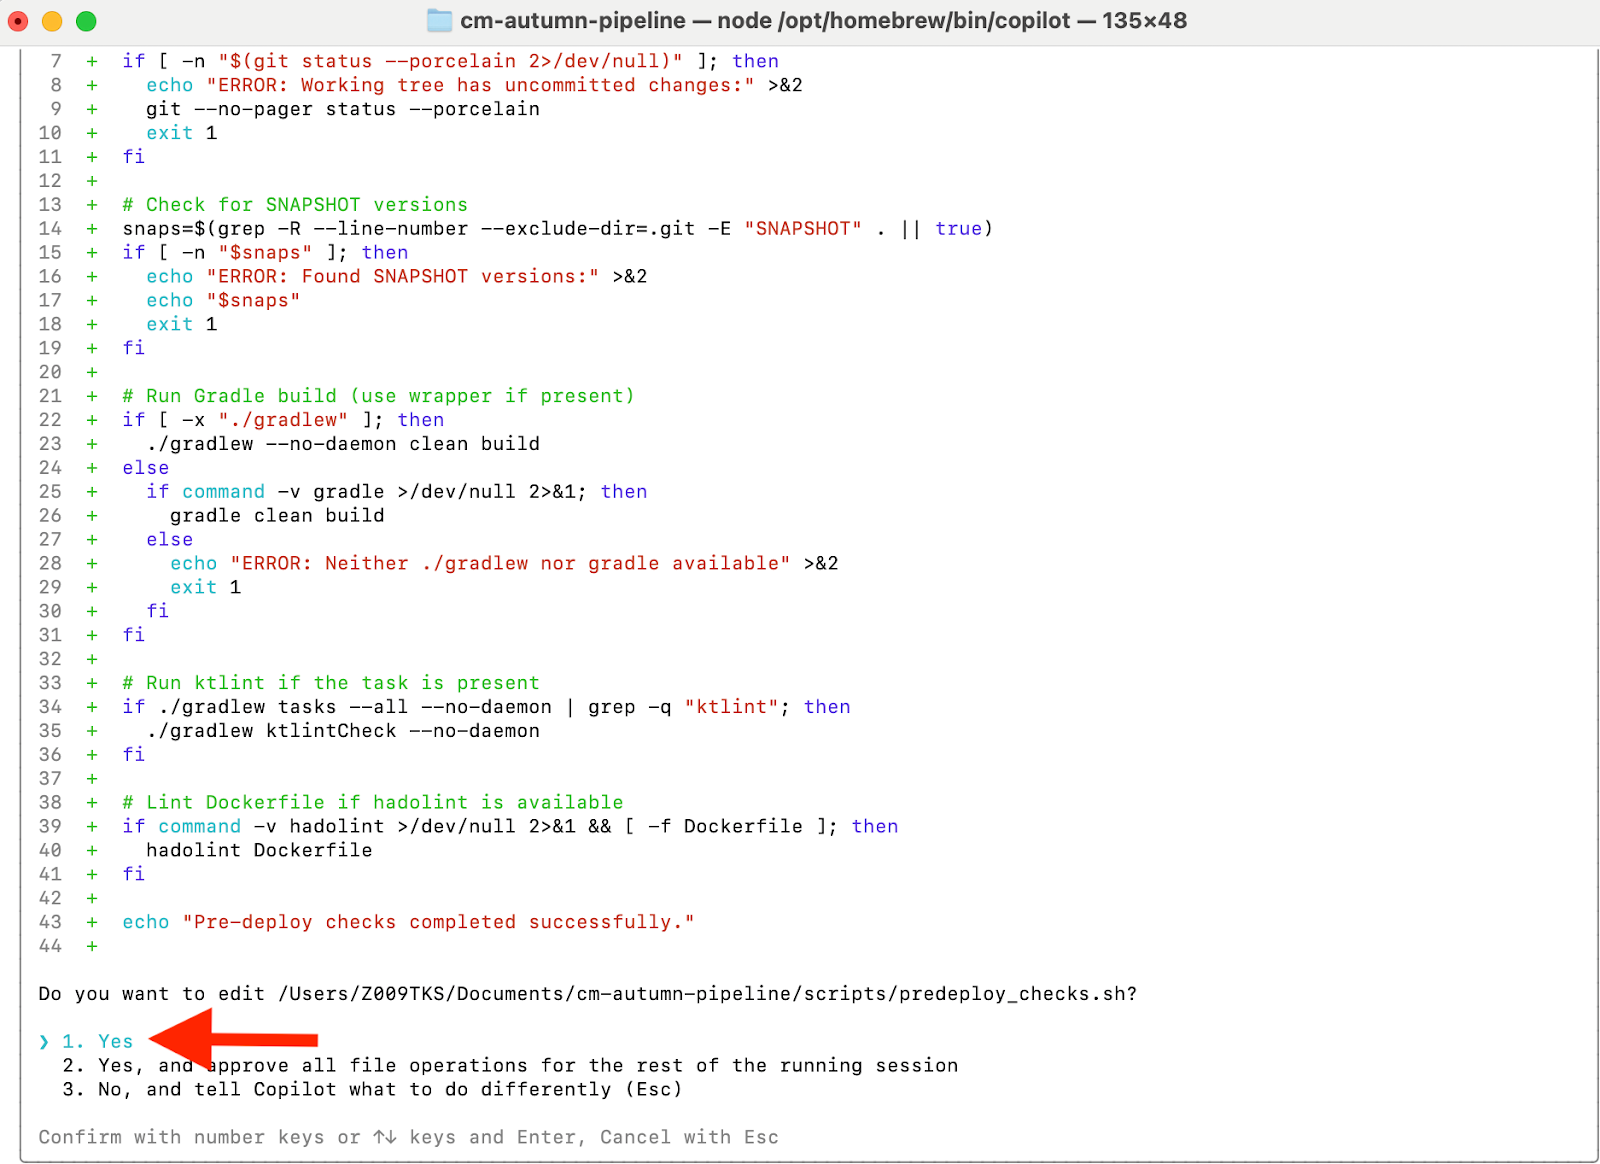
I asked Copilot to create a script that automates pre-deployment checks. Copilot scanned the repository, created a new file (deploy_prep.sh), and wrote a script that performs common checks such as verifying a clean Git state, running a Gradle build, and building a Docker image.
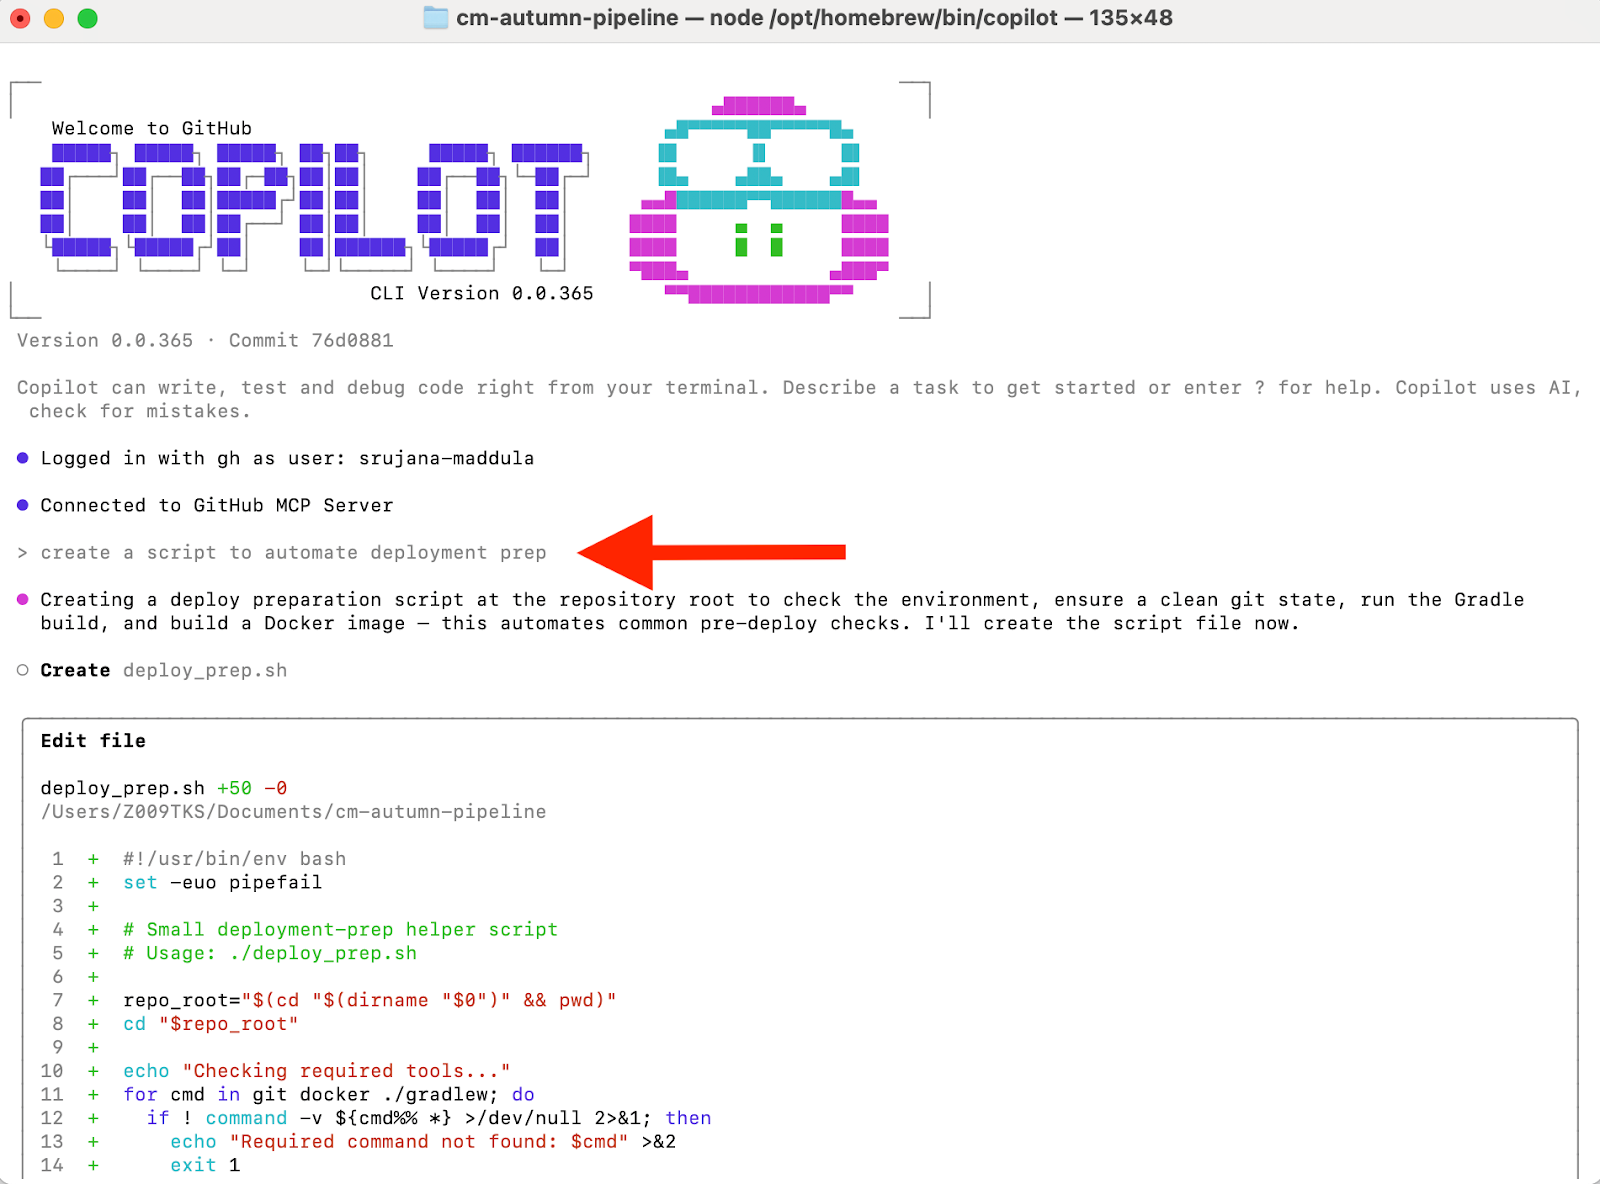
After I accepted the diff, Copilot automatically added the script to the repo. This shows how the agent handles the entire workflow, from understanding the prompt to creating the file and writing the complete script.
The Copilot CLI runs natively in the terminal and keeps your entire workflow in one place. You can plan tasks, generate code, and execute commands without switching tools.
The CLI also maintains session context, so it remembers your previous steps as you work. This continuity makes it easier to handle multi-step tasks and troubleshoot complex issues.
The Copilot CLI integrates directly with the GitHub ecosystem, giving you access to your remote repositories, branches, and workflows from the terminal.
This integration streamlines GitHub operations. You can create pull requests, review diffs, or fix open issues with simple natural-language prompts. For example, you can ask the CLI to create a new PR with a summary of your changes, and it will prepare the request, generate the description, and push it to GitHub.com.
To give you the right level of control for different tasks, the CLI is organized into three distinct operational modes: ask, edit, and agent mode.
In “Ask” mode, you can request definitions, examples, comparisons, or step-by-step guidance, and Copilot responds conversationally.
For example, if you’re unsure how a flag works, what a pipeline does, or why a script is failing, “Ask” mode gives you a direct explanation without leaving the terminal.
When you prompt Copilot in “Edit” mode, it analyzes your project, identifies the files that need updates, and generates the changes. You review the diffs in the terminal and approve them.
You can use it to refactor functions, update configuration files, rename variables across a project, or migrate code to new patterns.
Agent mode is where the Copilot CLI moves from assisting with tasks to executing them autonomously. The agent interprets your request, creates a multi-step workflow, runs each step, checks the results, and adjusts as needed.
This mode handles tasks that require several commands or manual planning. For example, the agent can set up a development environment by creating directories, generating files, and installing dependencies.
After having covered core features and operational modes, let's take a look at a few more advanced features.
Slash commands act as shortcuts for common operations in the Copilot CLI. They trigger actions instantly without full prompts, which makes them useful for quick or repetitive tasks. Common examples include:
/explain to interpret a command or script
/commit to prepare a commit message from staged changes
/pr to draft a pull request description
/fix to identify issues in code and propose corrections
/review to summarize or review local changes
/run to generate and execute a command
Copilot CLI stores its settings in a JSON configuration file inside the default Copilot directory: ~/.copilot. This file includes your default AI models, editor integration settings, and workflow preferences.
You can edit it manually to control how Copilot behaves. Because the file lives in your home directory, it applies globally to every project, enabling consistency across projects.
The CLI also includes commands to adjust configuration without editing files manually. Common commands include:
copilot config view to display your current settings
copilot config set <key> <value> to update a specific configuration value
copilot config reset to return everything to default
In multi-user or enterprise environments, teams can distribute standard configuration templates or use onboarding scripts to set default behaviors for every developer.
Each user still keeps their own configuration directory, but administrators can combine shared defaults with individual customization. This balance creates a consistent Copilot experience across the organization while preserving the flexibility developers need.
For sensitive data such as tokens or enterprise-specific identifiers, the Copilot CLI uses environment variables. You can add these variables to your shell profile, load them from a secrets manager, or define them per session for short-lived authentication. This keeps secrets out of version control and reduces security risk.
This section highlights how the CLI can enhance productivity across common development tasks.
Start with simple prompts to get comfortable with the Copilot CLI. While the agent is powerful, the quality of the output depends on your input. To master the art of writing effective instructions, check out our Understanding Prompt Engineering course.
You can use it to explain shell commands, summarize errors, or generate small snippets. For example, we could ask it to clean up unused Docker images and containers:
copilot -p "Clean up unused Docker images and containers"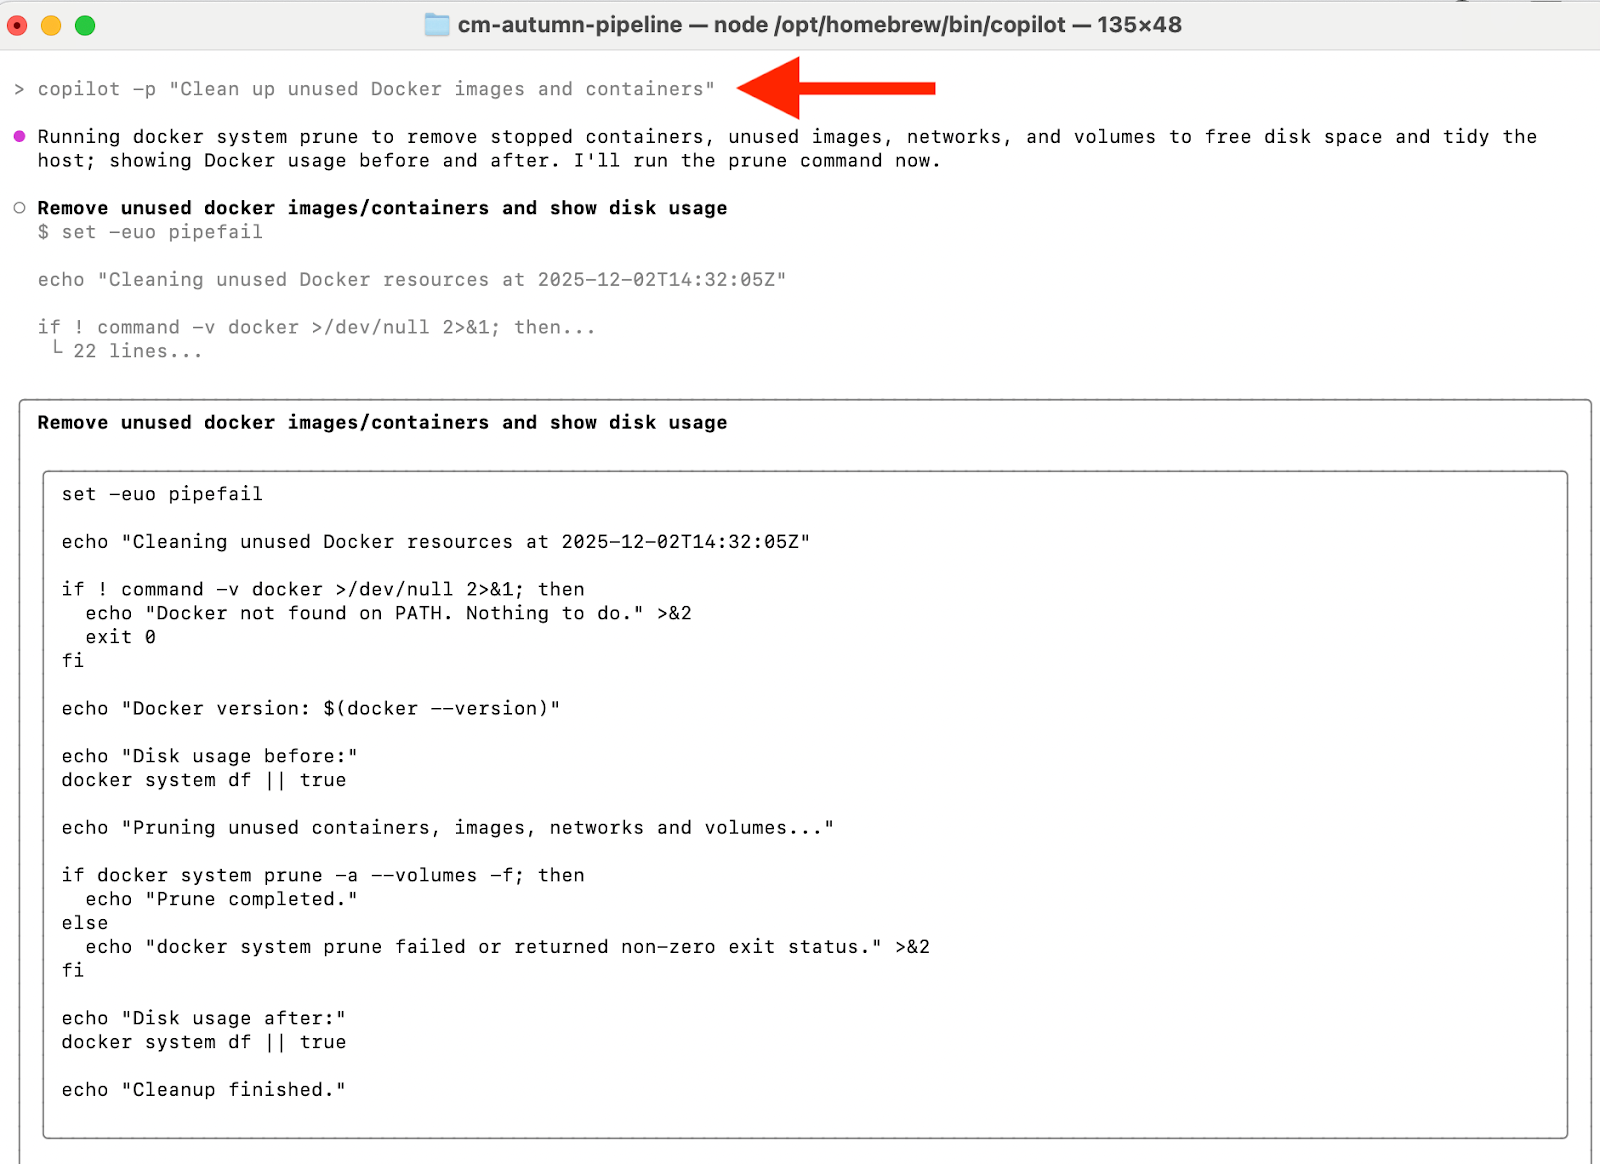
As the image shows, a complete script is generated, and when you accept the suggestion, it runs and removes the unused images and containers, just like we wanted.
You can ask Copilot to generate documentation, add inline comments, or update existing docs. Let’s see how it can generate a README file for a repository:
copilot -p "Generate a README for this repo: include purpose, install, basic usage, and example commands."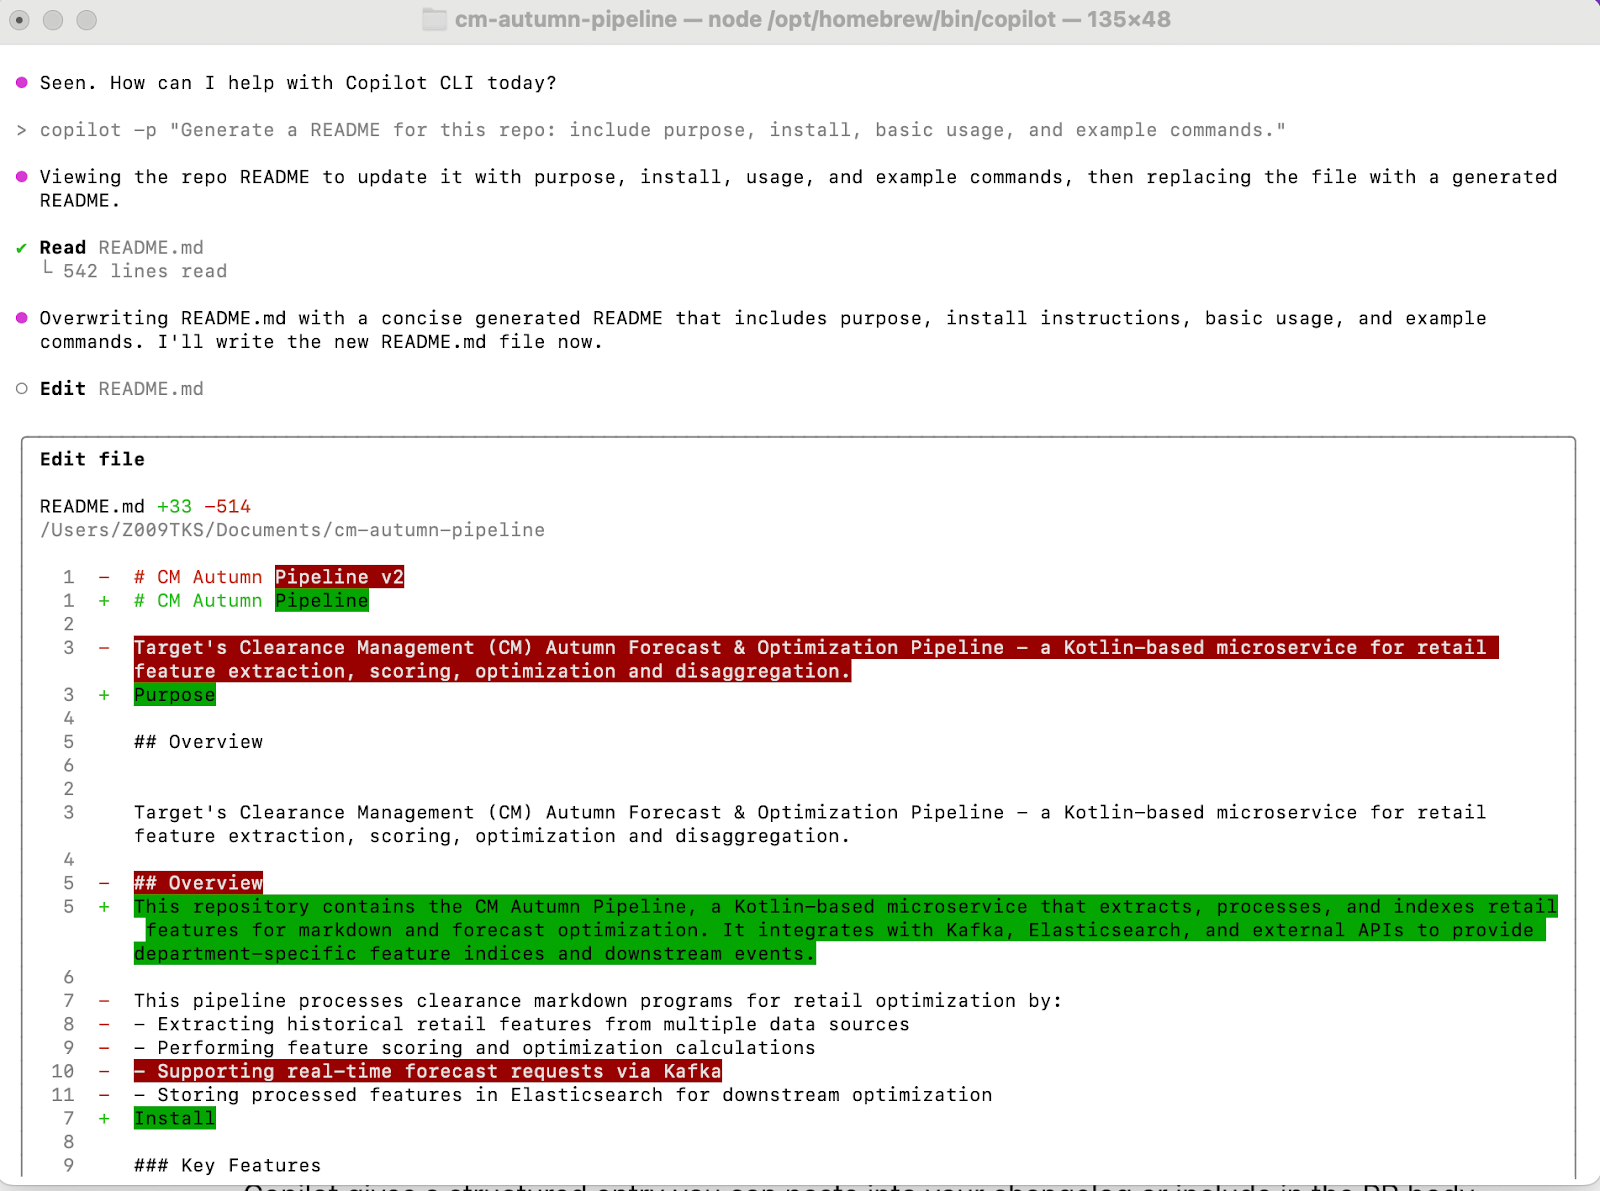
Since I already had a README file, Copilot updated it to match the new requirements given in my prompt. The diff shows removed text in red and added text in green, making the changes easy to review and approve.
In legacy codebases, developers use the Copilot CLI to replace deprecated APIs, migrate old patterns, or perform project-wide refactors. You can also ask Copilot to upgrade outdated libraries, rewrite code for new APIs, or prepare migration notes for major releases.
For example, I prompted it to upgrade all Gradle dependencies to their latest safe versions:
copilot -p "Upgrade all Gradle dependencies to their latest safe versions"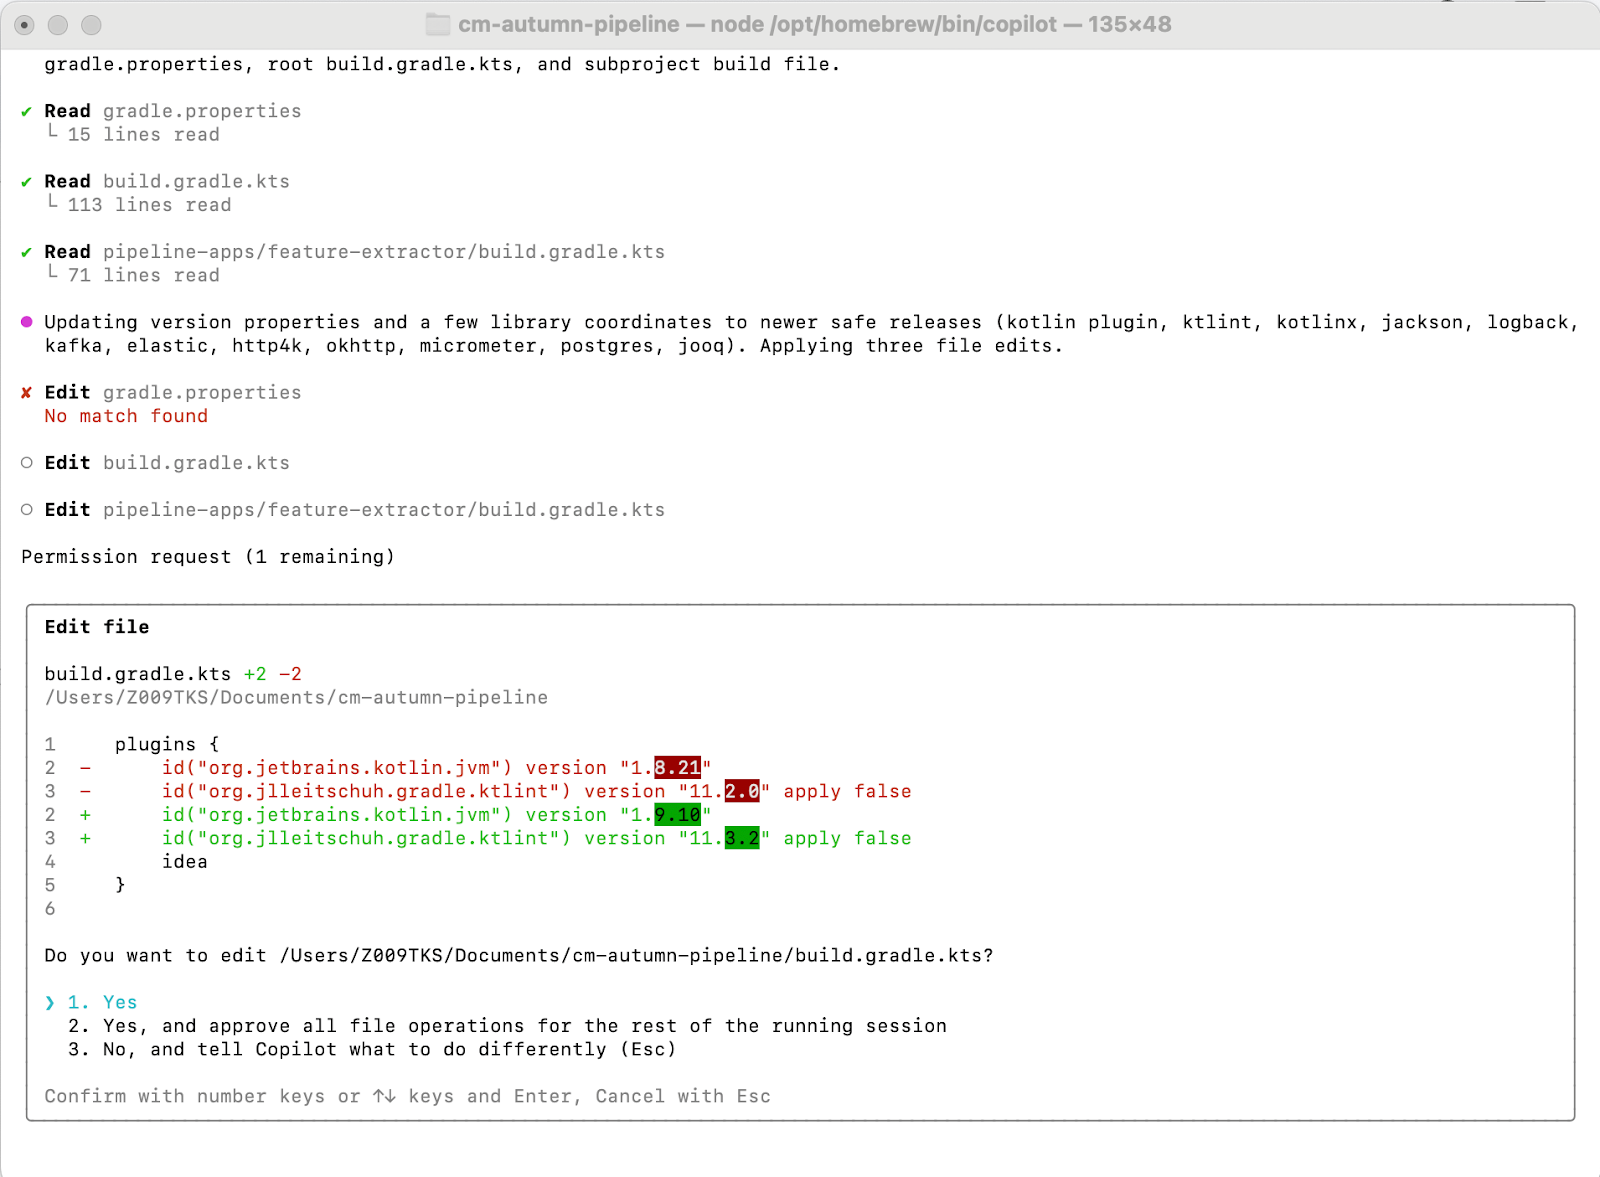
Two dependencies with relevant updates were found, and we can simply accept the diff to include those newer versions.
GitHub Copilot CLI transforms the terminal from a static command prompt into an intelligent agent capable of understanding and executing complex development workflows. By combining deep repository context with autonomous planning, it empowers developers to automate tedious tasks and manage their entire GitHub lifecycle without ever leaving the command line.
The Copilot CLI will continue to evolve with deeper MCP server integrations and more reliable agent-driven automation. The future of agentic AI is also moving toward the integration of vision models. This will allow AI tools like Copilot to interpret screenshots of bugs or design mockups, and support more autonomous workflows directly from visual input.
For a smooth organizational rollout, start with a shared onboarding guide covering installation and authentication. Maintain consistency by using JSON-based configuration templates and secure environment variables. For larger environments, offer role- or team-specific configuration profiles to maintain consistency.
If you want to master agentic workflows and explore the full potential of AI-assisted development, continue learning with our AI for Software Engineering track.
GitHub and AI Courses
Track
Track
Course
blog
Khalid Abdelaty
10 min
blog
Nikhil Adithyan
13 min
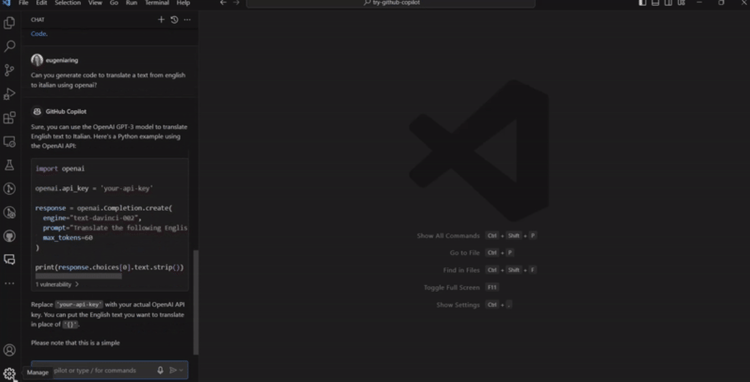
Tutorial
Eugenia Anello
Tutorial
Aashi Dutt
code-along
Ari LiVigni
code-along
Nuno Rocha