Track
EU AI Act Fundamentals
9 hr
MidJourney is known for its image generation models. The newest version, the MidJourney V7 image generation model, is a big upgrade.
One great new feature is the personalization profile, which means the model can learn what kind of images you like and create pictures that match your taste. Another update is draft mode, which lets you quickly try out ideas and make changes fast.
However, MidJourney V7 is much more than that. In this article, I’ll walk you through how to make the most of MidJourney V7, step by step, using several examples.
We keep our readers updated on the latest in AI by sending out The Median, our free Friday newsletter that breaks down the week’s key stories. Subscribe and stay sharp in just a few minutes a week:
In this section, I’ll explain step-by-step how to access MidJourney. If you’re already familiar with the app, then you can jump straight to the examples section.
First of all, in order to use MidJouney V7, you will need to get your Midjourney membership here.
As you can see, there are different subscription plans available depending on how often you use Midjourney and what features you need.
Here is a side-by-side comparison of all plans (as of April 16, 2025):
|
Plan |
Price |
Fast Hours |
Key Features |
|
Basic |
$10/month |
~200/month |
Good for casual use |
|
Standard |
$30/month |
15 hours |
Adds unlimited relaxed mode |
|
Pro |
$60/month |
30 hours |
12 jobs at once + stealth mode |
|
Mega |
$120/month |
60 hours |
Best for heavy users and pros |
Once you have your membership, to get started with V7, you have two main options: join the MidJourney Discord or access through the website app.
You can join the Midjourney Discord and interact with the Midjourney Bot there. In order to start generating images, go to one of the "newbie" bot channels. Then, type /imagine followed by whatever you want to create.

You will get four images in about a minute. If you don’t see them right away, scroll up a bit in the chat, and you should be able to see them.
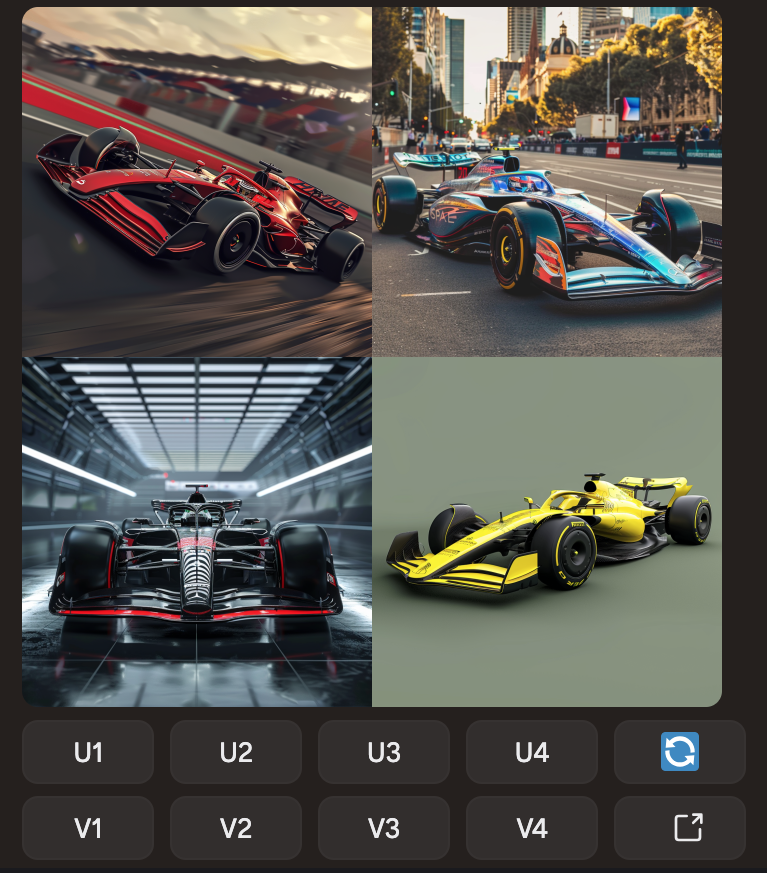
You’ll see buttons below the images:
You can also use the new Midjourney Website to generate and explore your creations in a more visual, web-based interface. In this tutorial, I will be focusing on images generated through the website.
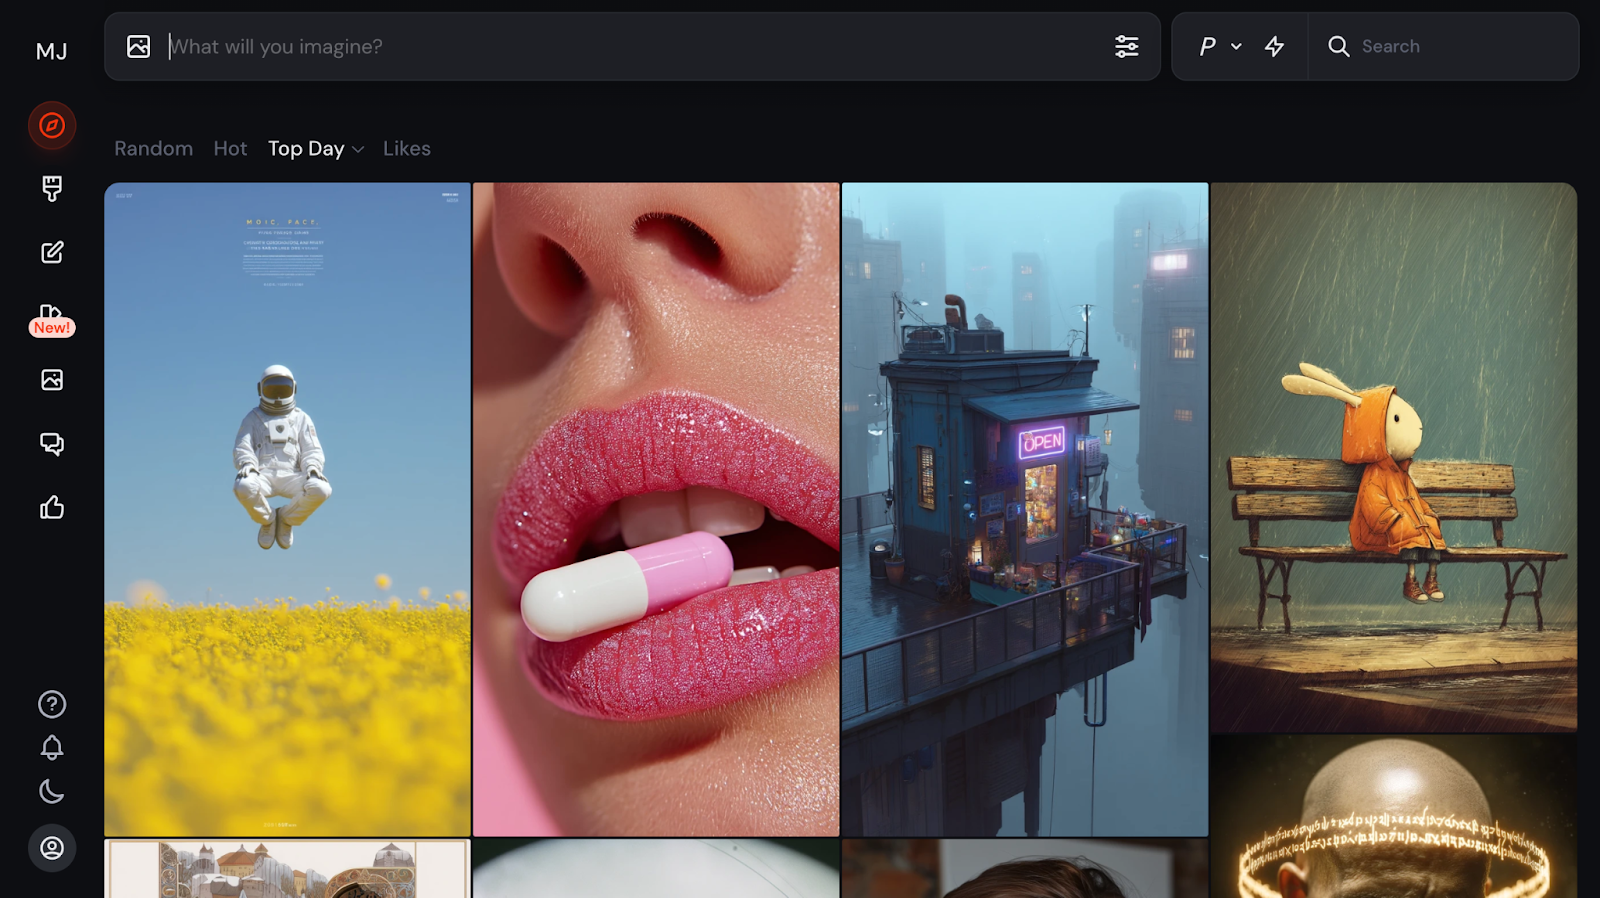
Before we start generating images, let’s have a look at the functionalities and parameters we can tweak.
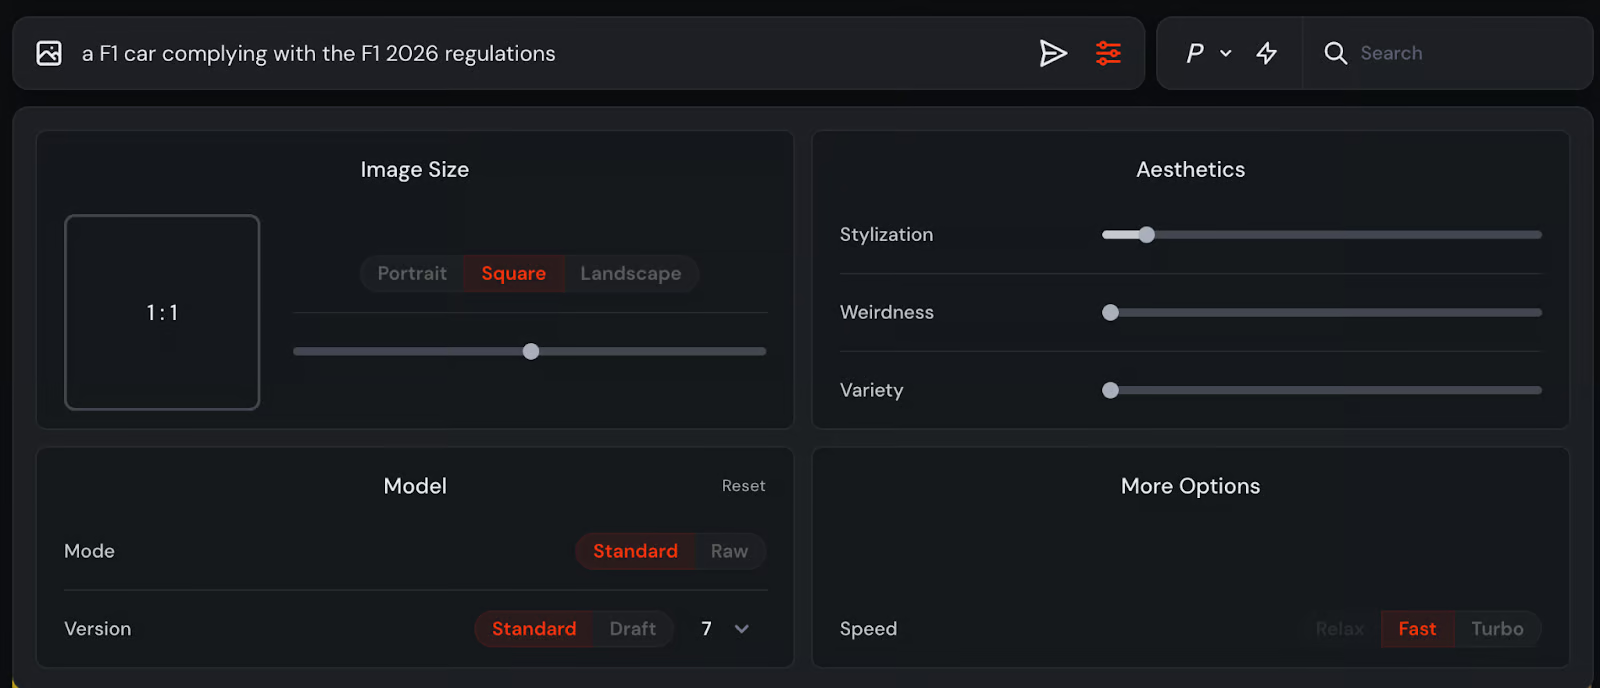
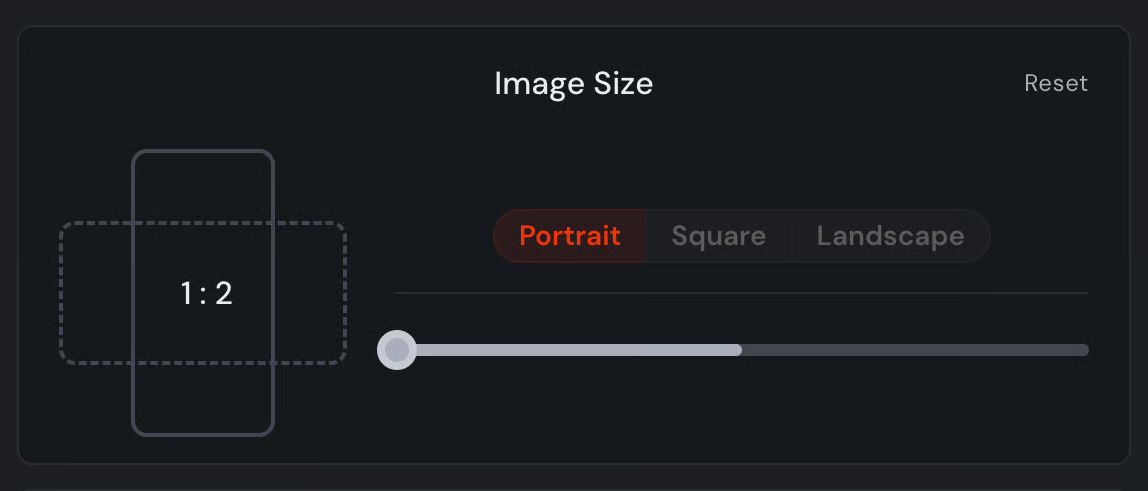
First of all, let’s take a look at the image size options. You can choose the output format you want for your images—portrait, square, or landscape—in various aspect ratios.
For aesthetics, we have the option to tweak different levels of stylization, weirdness, and variety. Let’s have a closer look at them:
Now let’s look into the model options:
Finally, we have three options for the speed parameter:
When you turn on personalization, you’re teaching Midjourney what kind of images you like. For example, if you often prefer cute animals, old buildings, or sleek futuristic designs, Midjourney will start to learn that and adjust its generations to better match your taste.
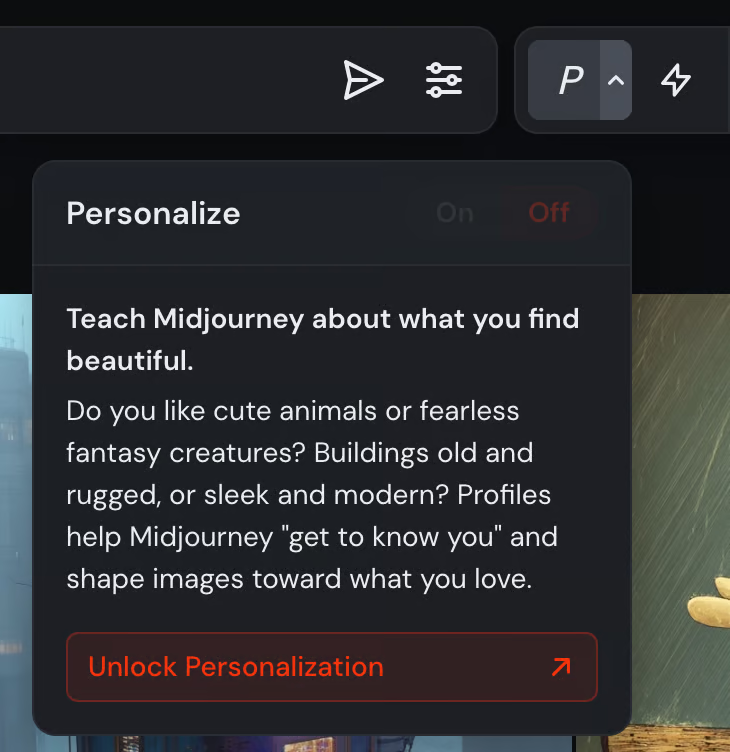
This helps the model "get to know you" and shape future images to feel more visually in line with your preferences. You can turn it on or off at any time, depending on whether you want personalized results or a more neutral style.
Draft mode generates images ten times faster while reducing GPU costs by half. Although Draft Mode produces lower-resolution images, it’s perfect for rapid prototyping and refining ideas.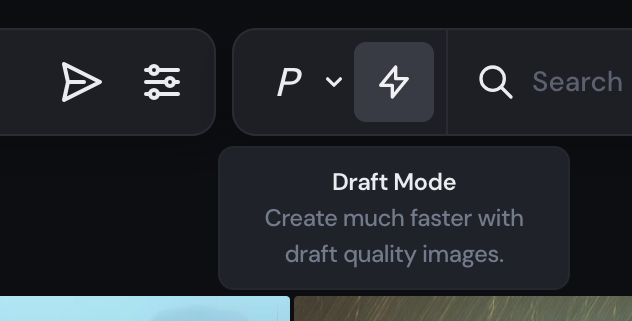
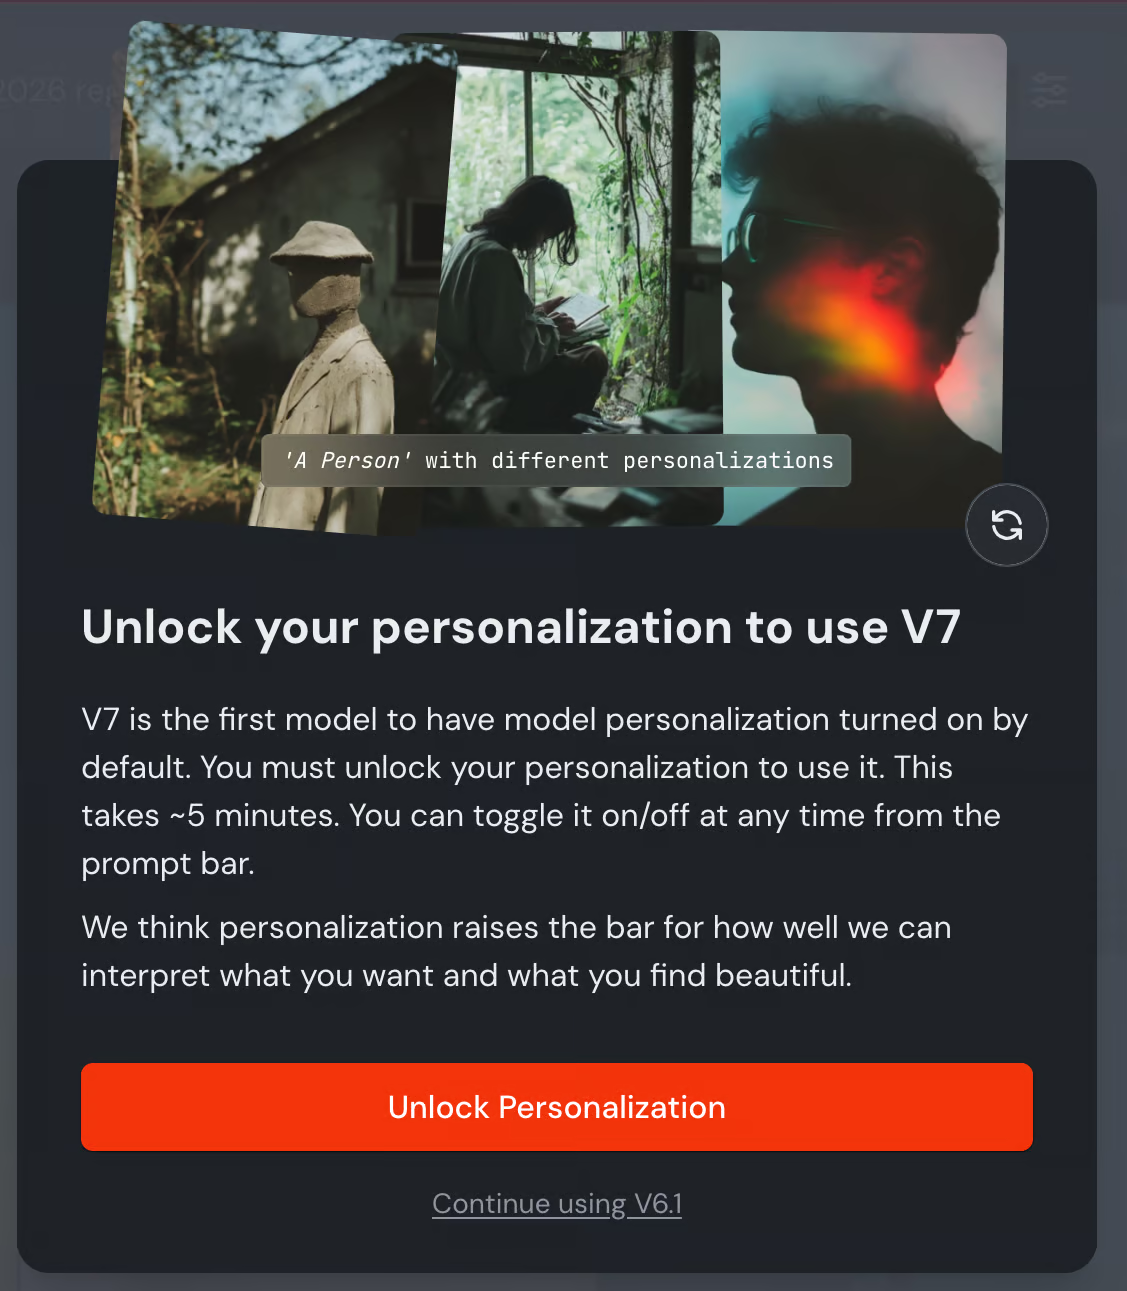
Now, something important to take into account is that before you can use V7, you’ll be prompted to rate about 200 images to help create your personalized profile. This takes around 5 minutes and helps the model tailor its generations to your taste. You’ll see prompts asking you to like or dislike various image styles. This process helps the model understand your aesthetic preferences, ensuring tailored outputs for your prompts.
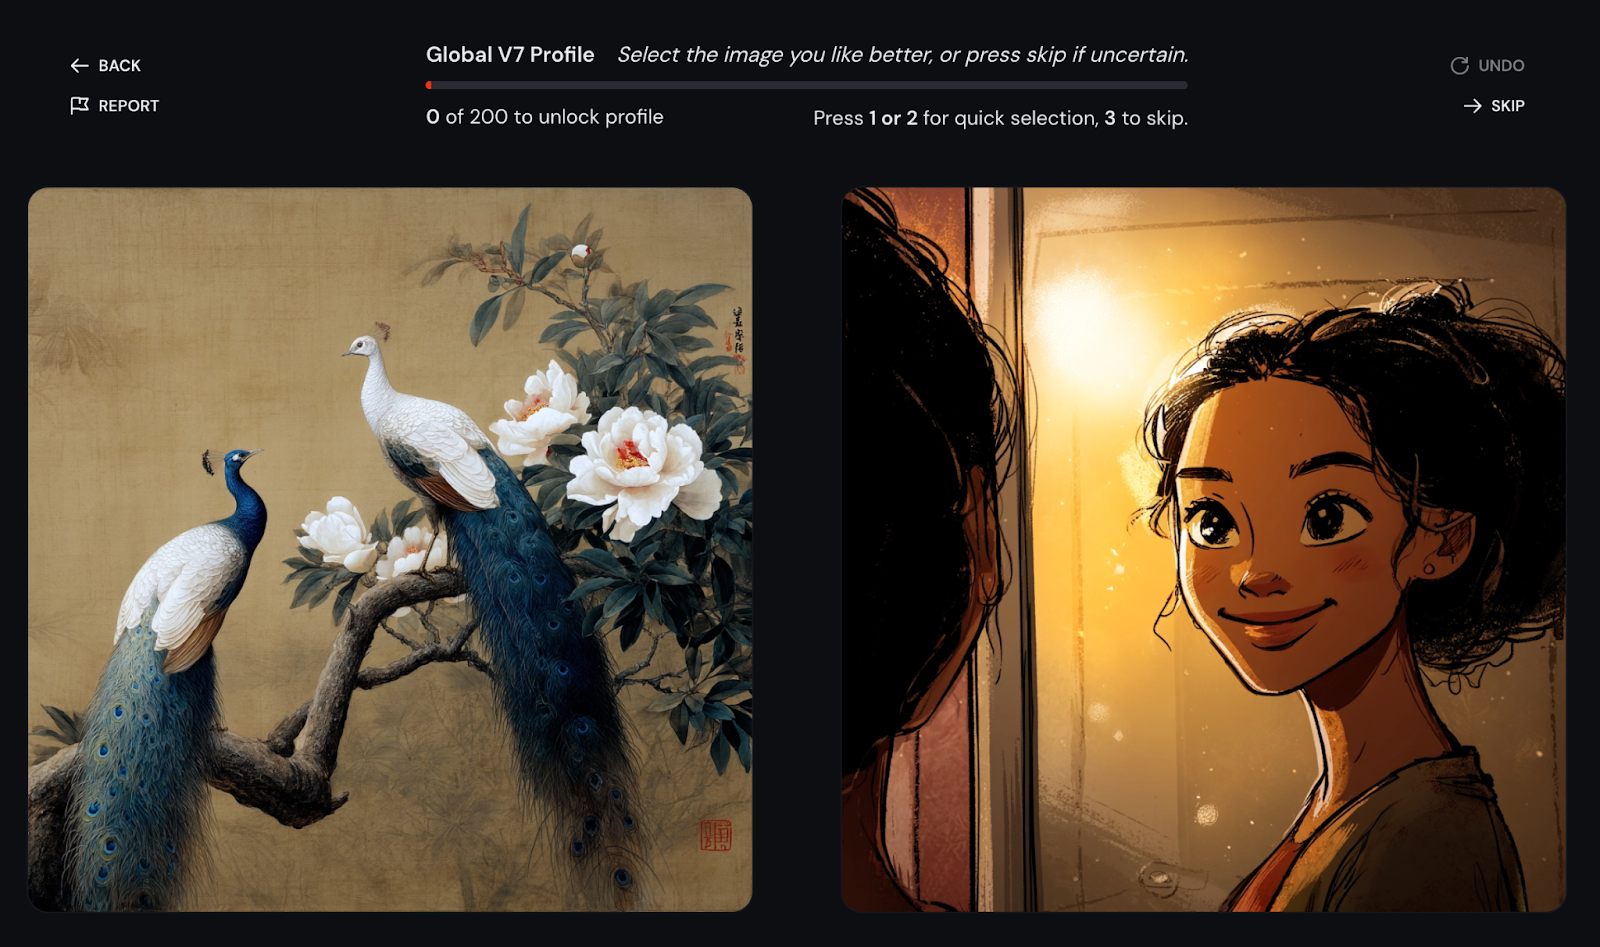
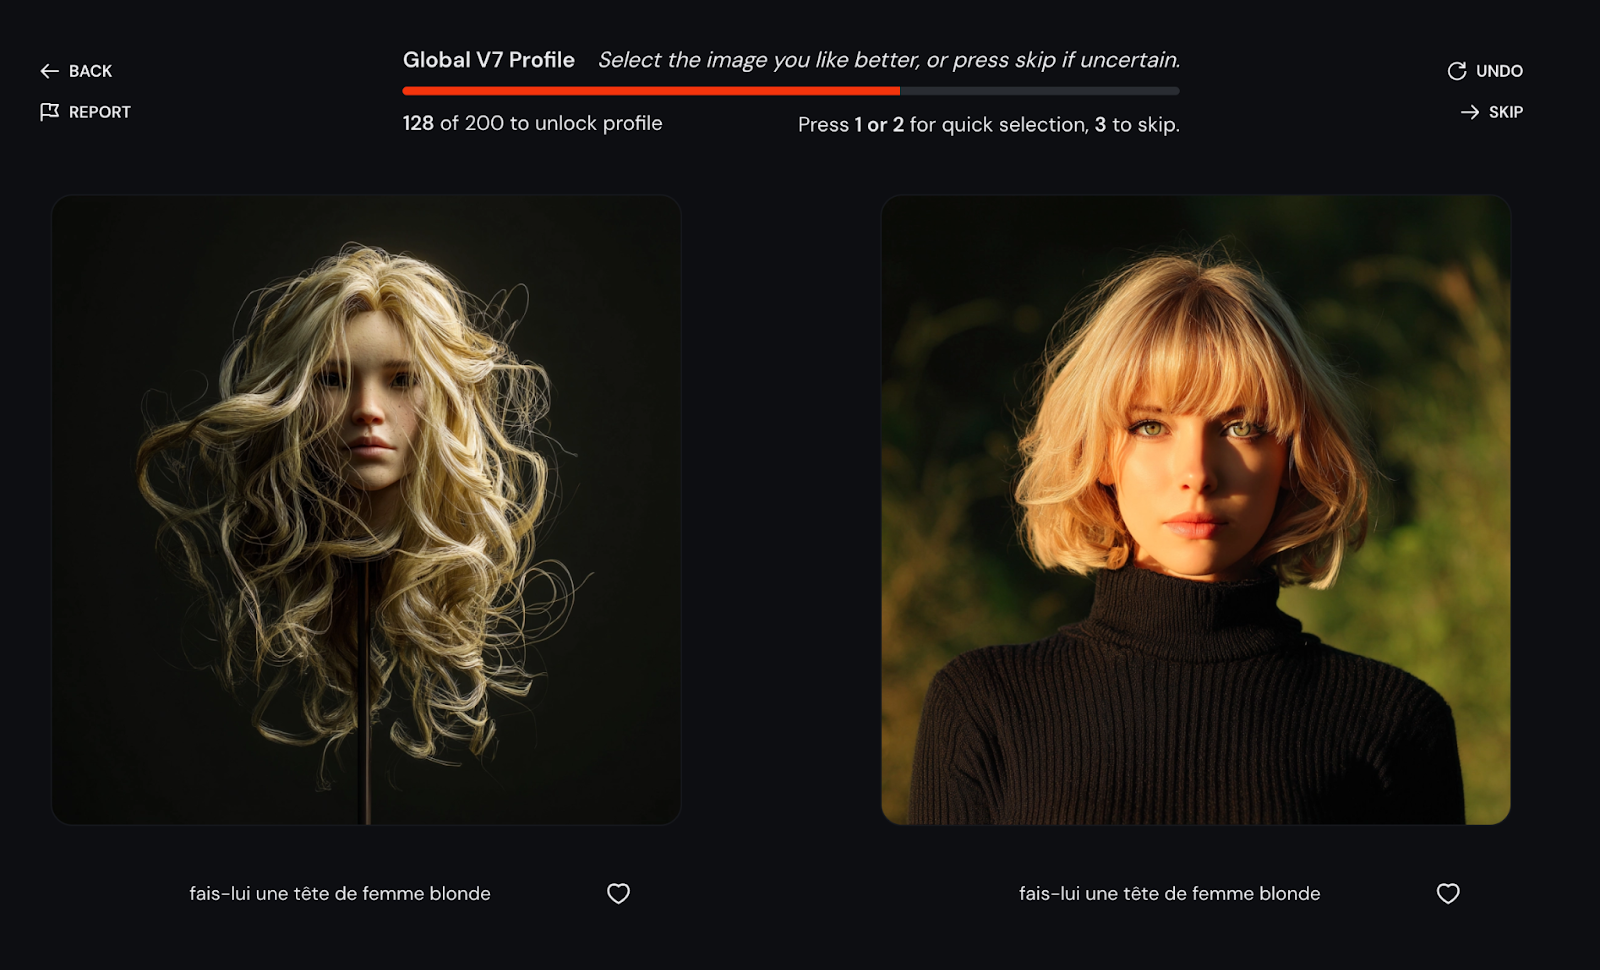
 Here, I’m showing you some of the choices you need to make. Press 1 if you prefer the image on the left, 2 if you prefer the image on the right, or 3 if you’re unsure. The process is complete once you’ve selected 200 images—so if you skip a comparison, you’ll still need to choose an image for that step later.
In this section, I am going to explore eight examples that showcase how Midjourney V7 improves the creative workflow.
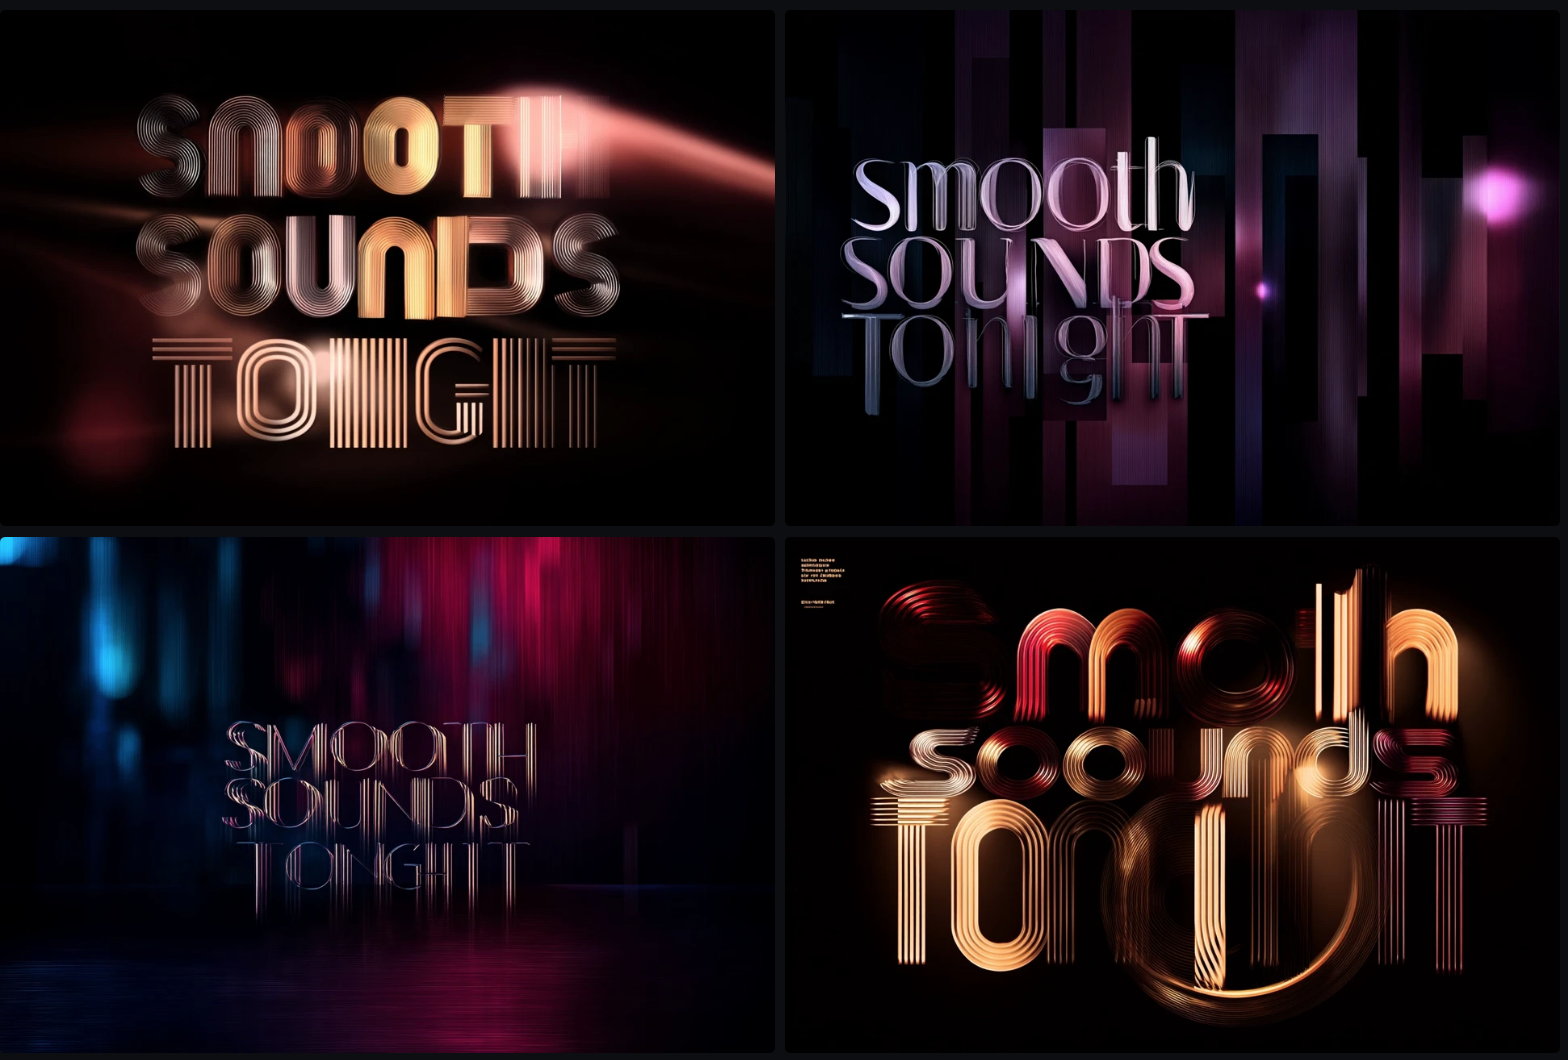
Prompt: “A digital poster for a jazz night event with the words ‘Smooth Sounds Tonight’ in glowing letters”
Let’s say I’m the owner of a cozy cocktail bar, and I want to promote a weekly jazz session. I don’t have a graphic designer on hand, but I want something that feels like the vibe of my place—moody lighting, glowing neon, and smooth atmosphere.
Midjourney V7 understands my prompt well enough to place the phrase “Smooth Sounds Tonight” directly into the design. The text isn’t always perfect, but for mockups and quick promo ideas, it’s incredibly useful.
I got these ones toggling personalization on:
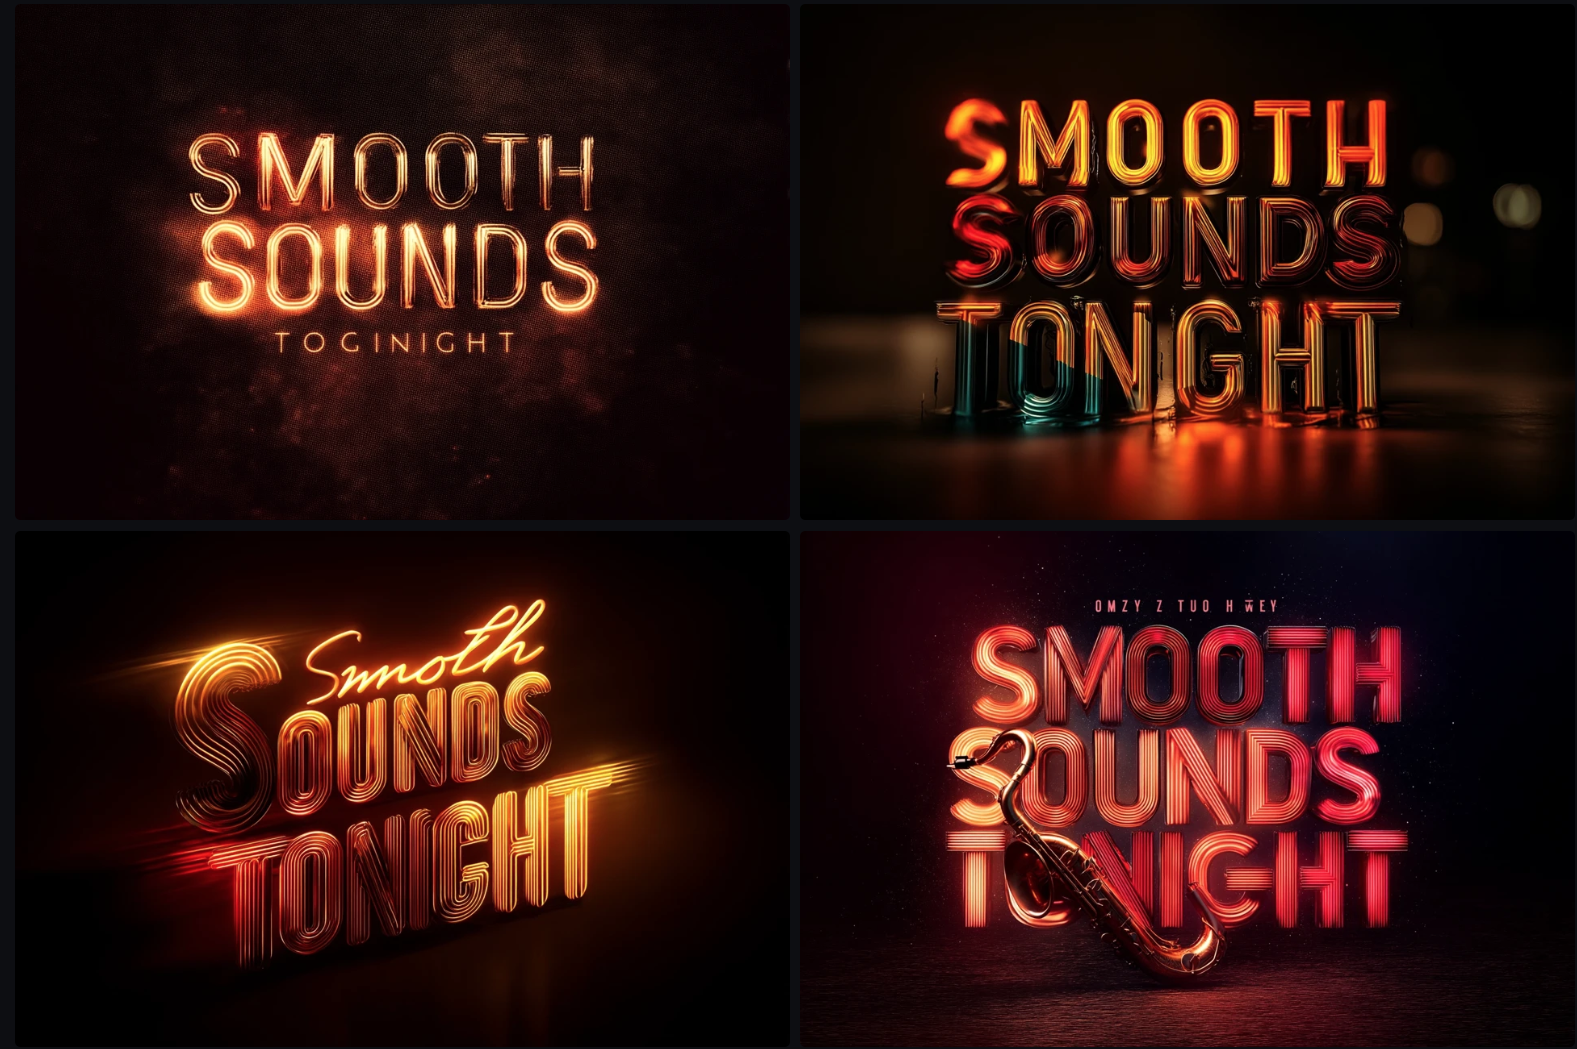
And these ones without personalisation:
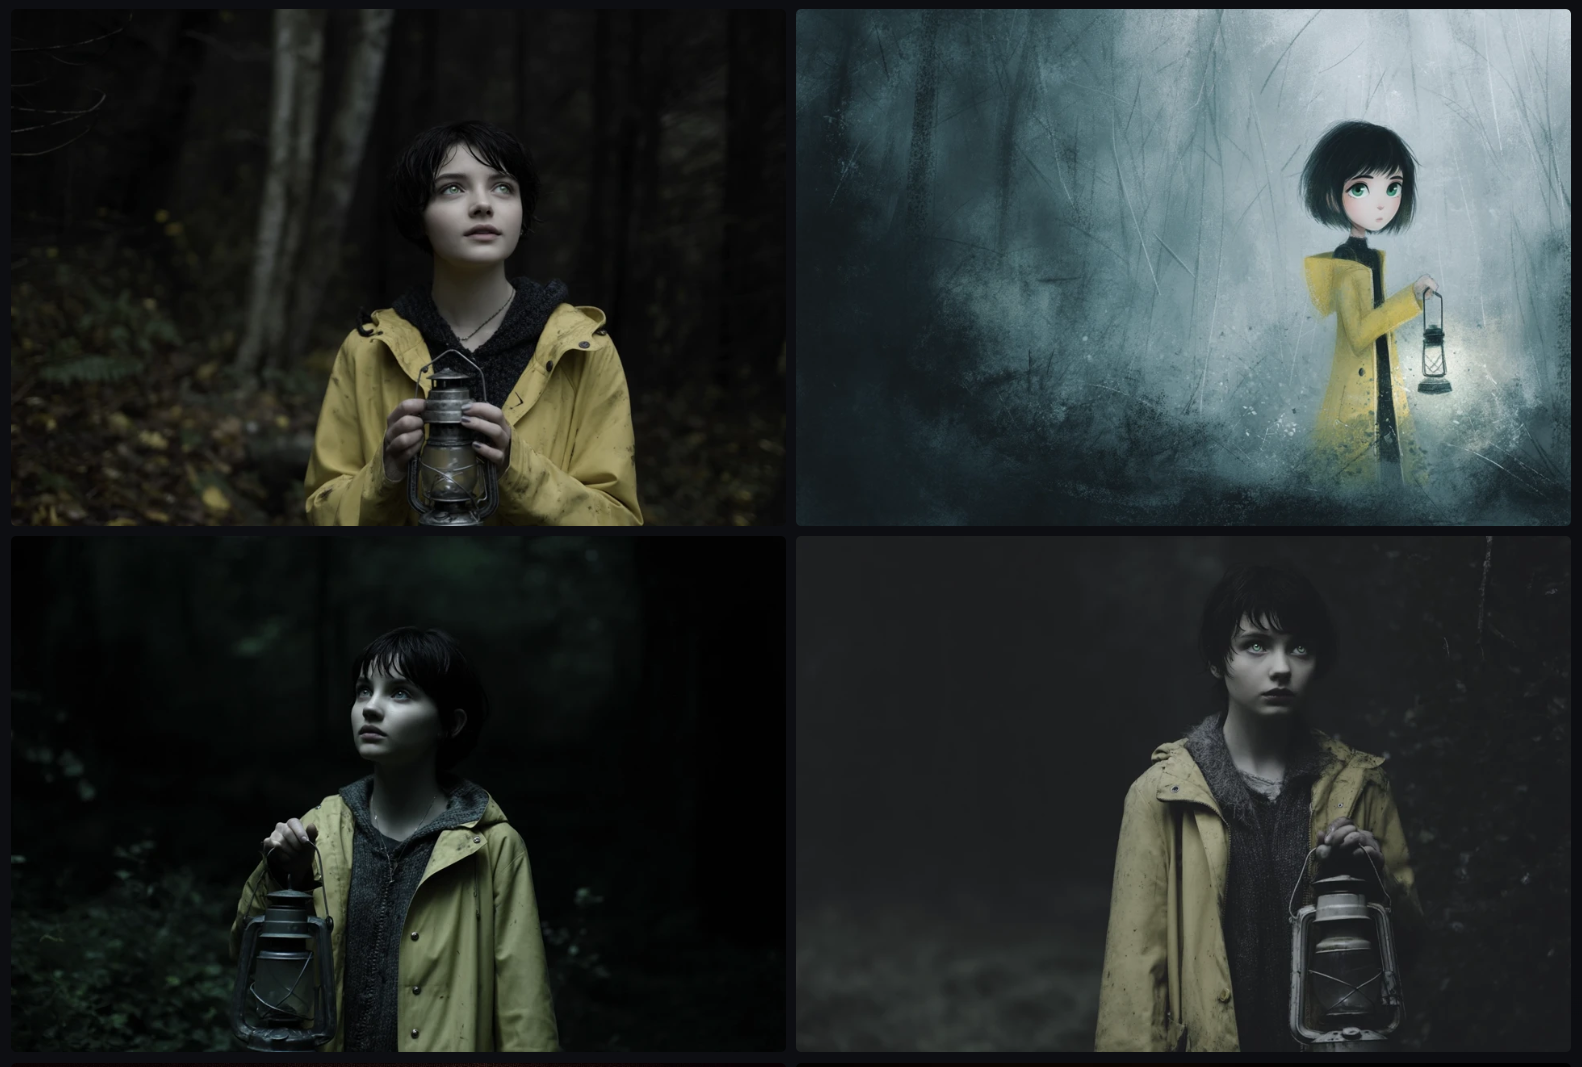
Prompt: “A young girl with short black hair and green eyes wearing a yellow raincoat, holding a lantern in a forest”
Let’s say I’m writing and illustrating a children’s story about a curious little girl who explores magical places. In one scene, she’s wandering through a mysterious forest with a lantern. In another, she’s back in the library, researching the creatures she saw.
With Midjourney V7, I can keep her look consistent across different settings—from her green eyes and short black hair to her signature yellow raincoat. This is huge for storytelling, especially when you're building a character that readers will recognize from scene to scene.
MidJourney V7 makes it easier to maintain character identity visually without redrawing from scratch.
This is the image I liked the most:
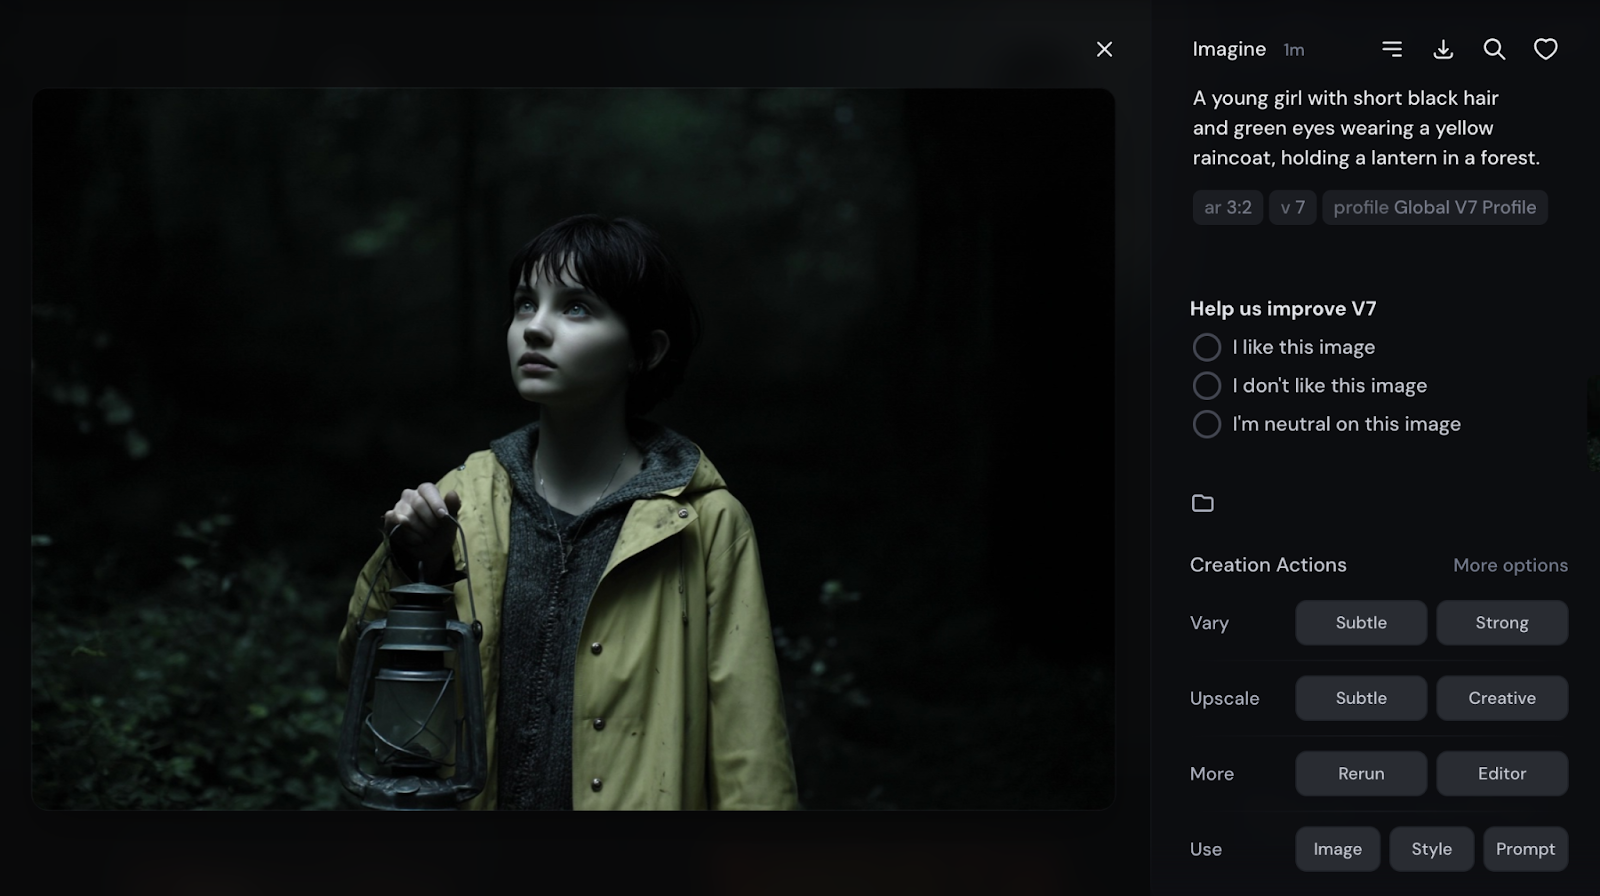
Now, there are a couple of options you can play with when you get your image:
For my preferred image, I am going to use the image asa reference for my next prompt, which is “Same girl sitting in a library reading a book”
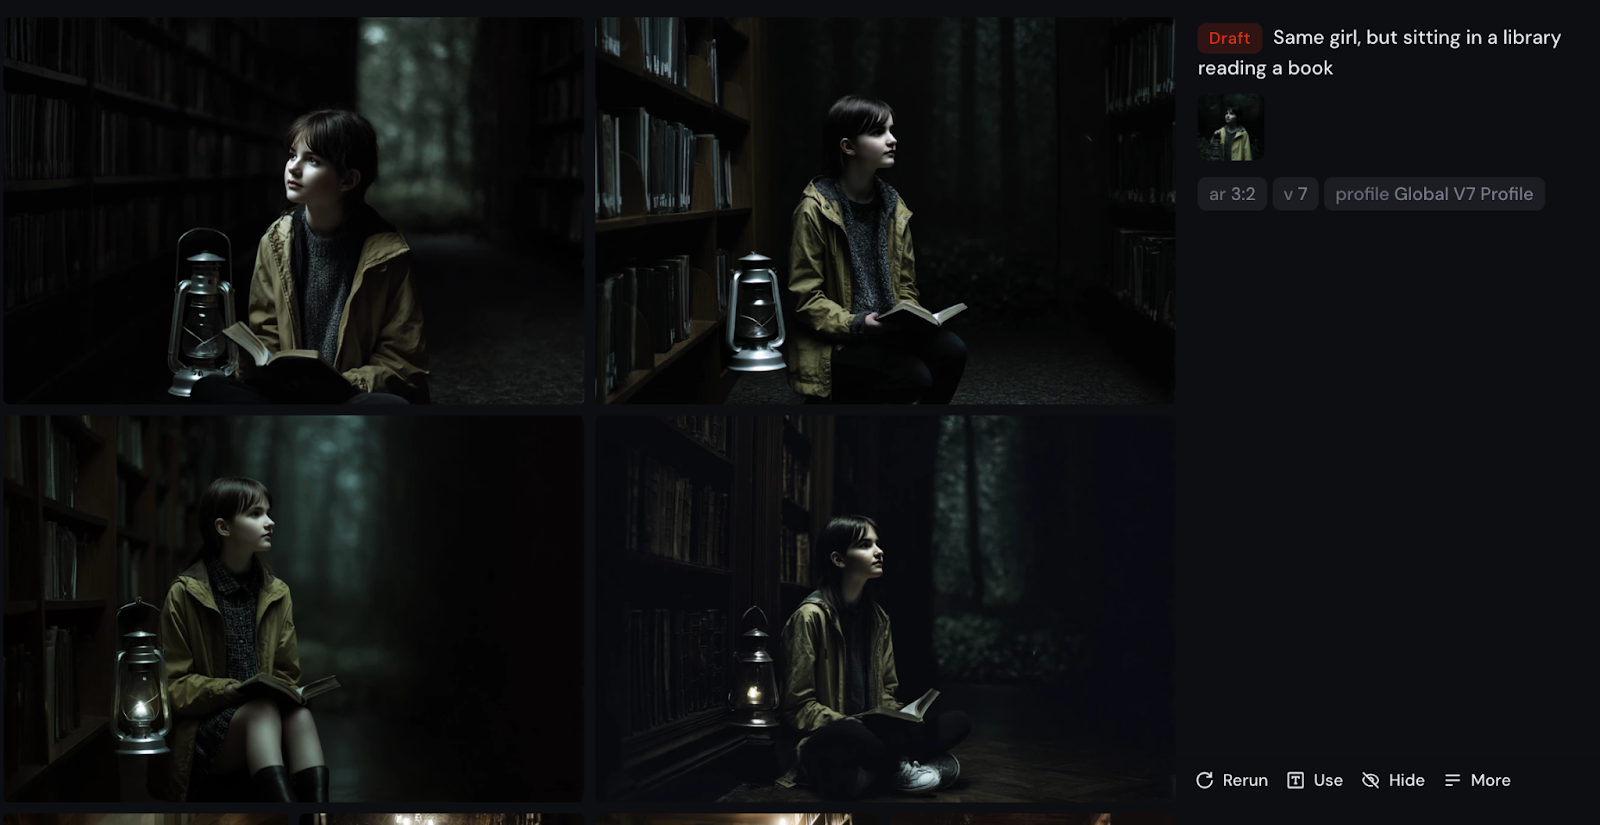
The character consistency is not perfect, but it’s close to what I need.
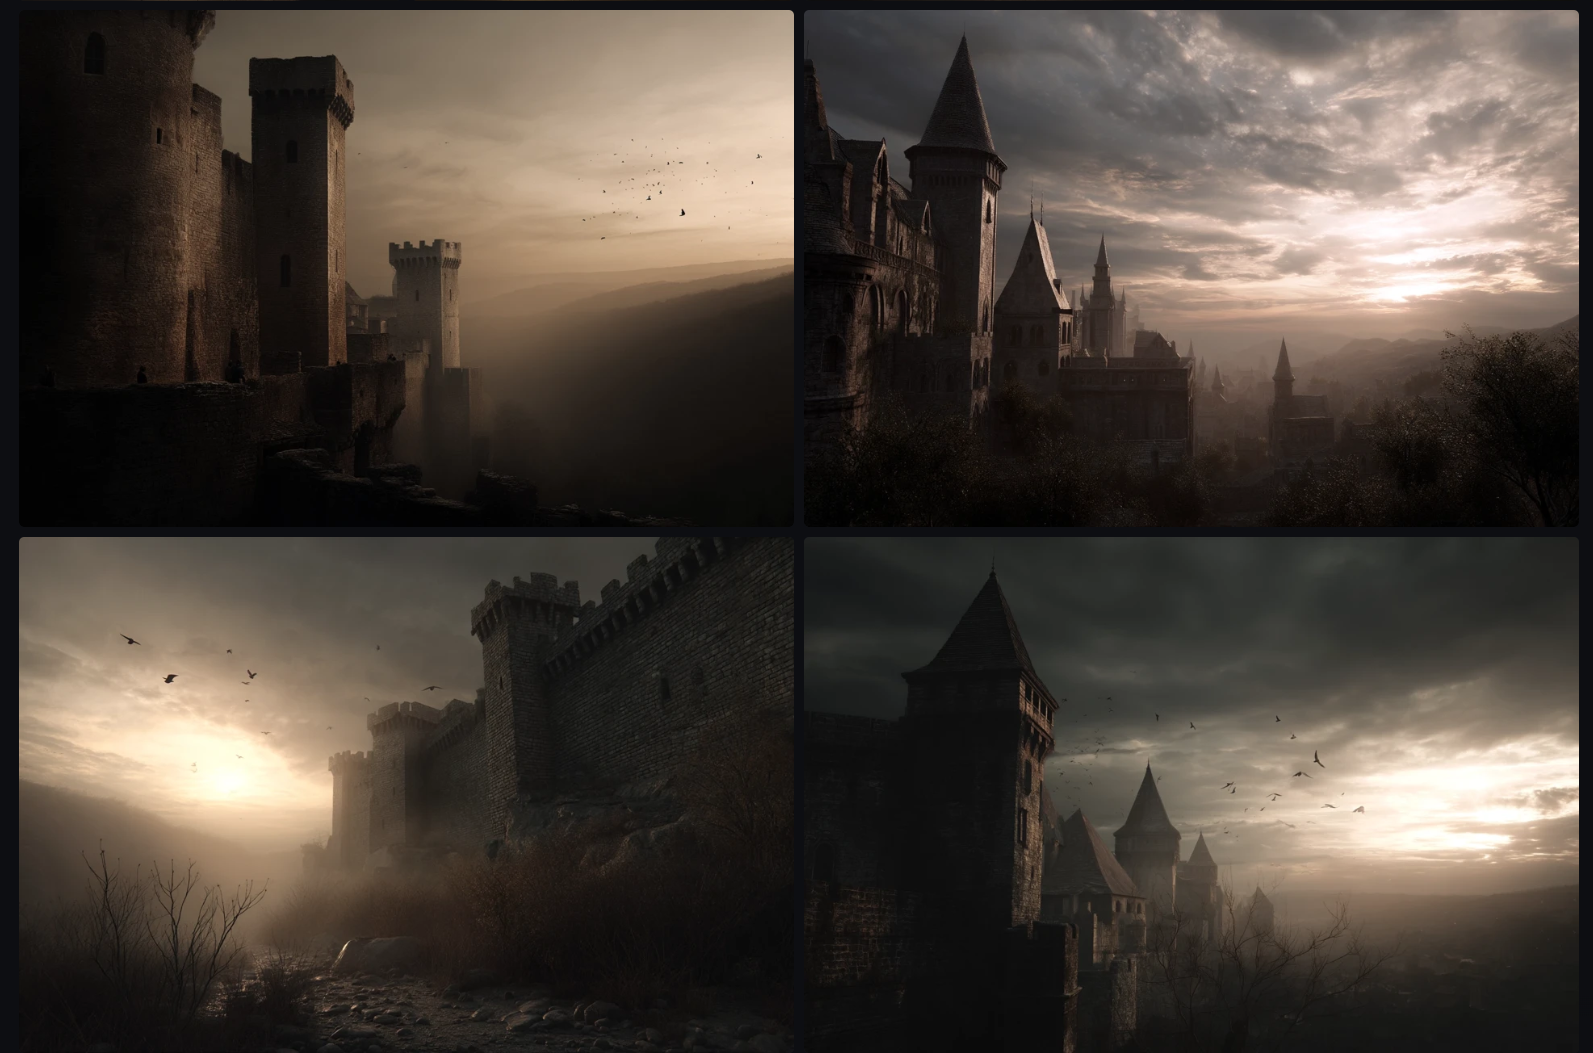
Prompt: “A medieval castle at sunset, warm tones, cinematic lighting”
Imagine I’m a filmmaker working on a pitch for a fantasy movie. I need to convey the look and feel of a key scene—an ancient castle glowing in the last light of day, with a magical, dramatic vibe.
Instead of spending hours searching for reference photos or manually editing images, I can just describe the mood: warm tones, cinematic lighting, sunset. Midjourney V7 picks up on these words beautifully and creates a rich, moody image that fits my vision.
This kind of quick color grading via prompts is perfect for building moodboards, setting the tone for branding, or visually communicating ideas to a team.
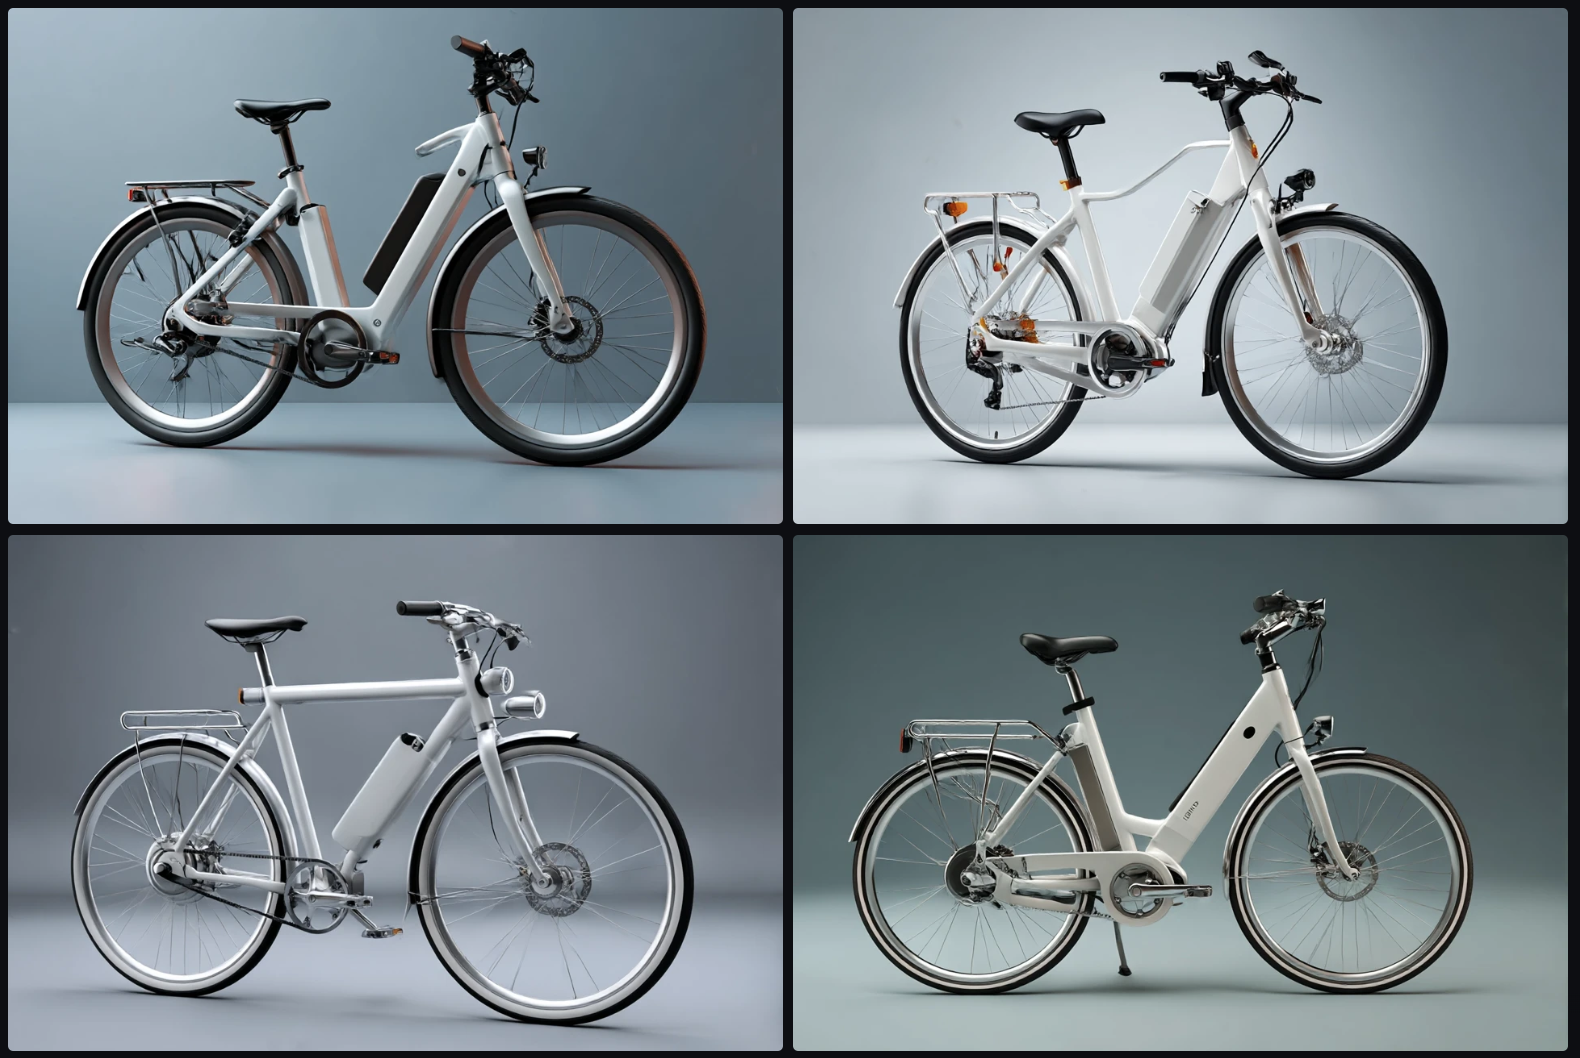
Prompt: “An electric bicycle designed for city commuters, modern style, white and silver color palette, minimal background”
Let’s say I’m a startup founder with an idea for a next-gen electric bike—lightweight, stylish, and made for urban commuters. I want to create a few concept visuals to share with my team, pitch to investors, or even test on social media.
With Midjourney V7, I don’t need a 3D model or product photos. I can describe my vision in plain language, and the model generates a clean, high-concept image. I use Draft Mode to explore different shapes and styles quickly, then upscale my favorite for a polished, high-quality render.
This is great for early-stage prototyping or visual storytelling—especially when you want to move fast and make an impression.
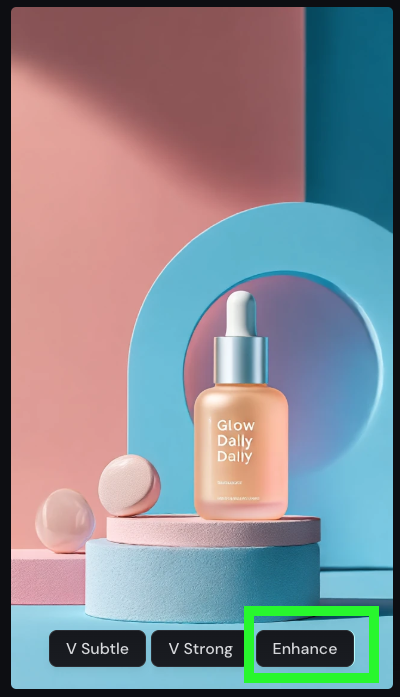
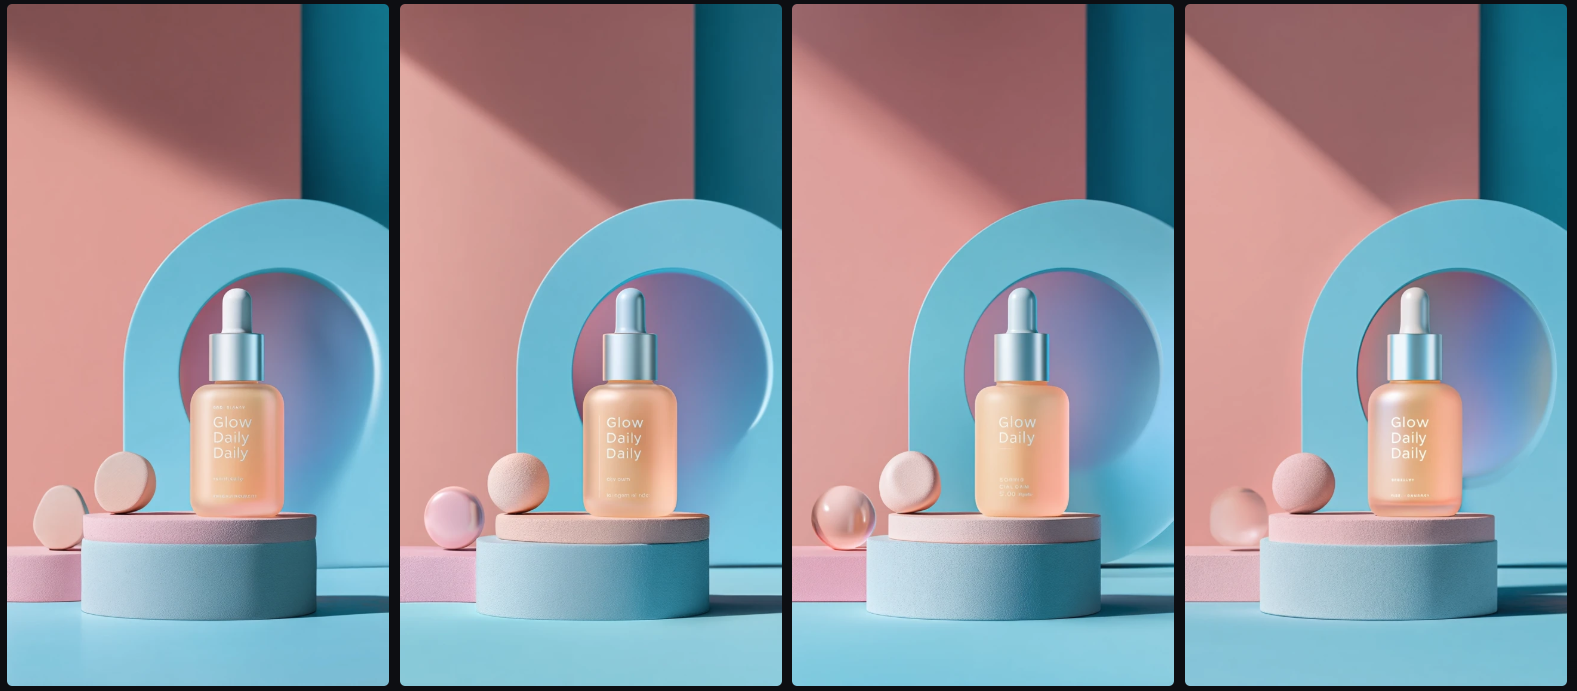
Prompt: “A minimalist Instagram ad for a skincare brand, pastel color palette, with a bottle of serum and a short tagline ‘Glow Daily’”
Imagine I’m a freelance social media manager working with a new skincare brand. The client wants to see a few visual concepts for a campaign, but we don’t have product photos or a designer on hand yet.
With Midjourney V7, I can quickly mock up a clean, branded Instagram ad by describing the look I want: soft pastels, a serum bottle, and a catchy tagline. V7 handles product placement and background balance much better now, so the result actually looks like a real ad.
This is perfect for testing different visual directions with clients or creating temporary content while waiting for a full design shoot.

Now, from the images that MidJourney has produced, I am interested the most in the last one. But I would like to modify the image. There are a couple of things I could do. First I could edit the image directly in the editor.

Alternatively, or in addition, I can hover over the image I like and click ’’Enhance’’. MidJourney will improve the image and will give me again four different options.
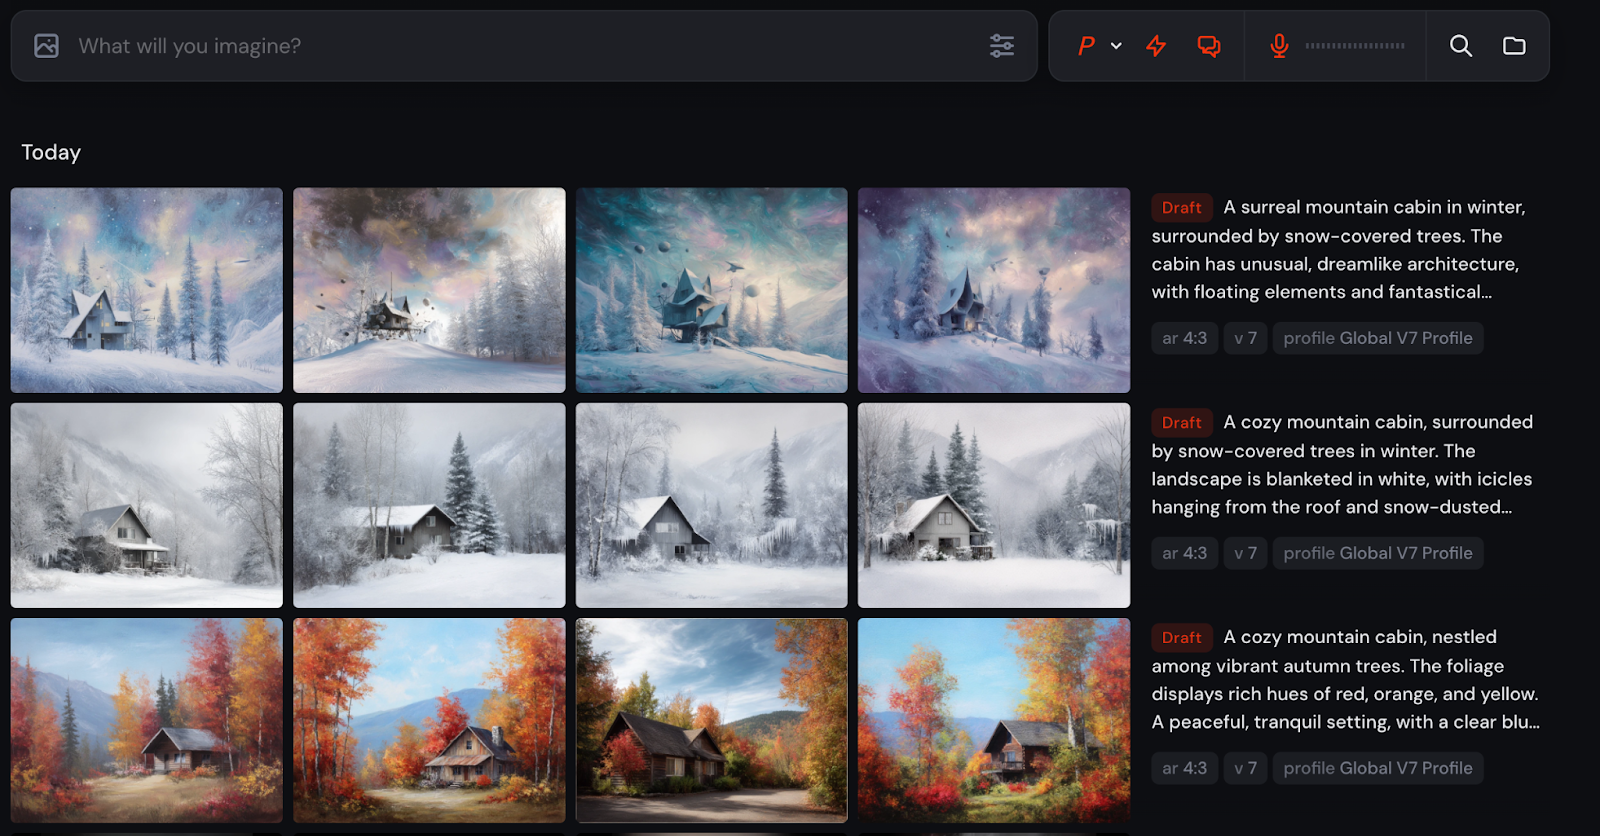
Prompt: “A mountain cabin surrounded by autumn trees”
Second prompt (using voice mode): “Make it winter”
Something great about MidJourney is the conversational mode.
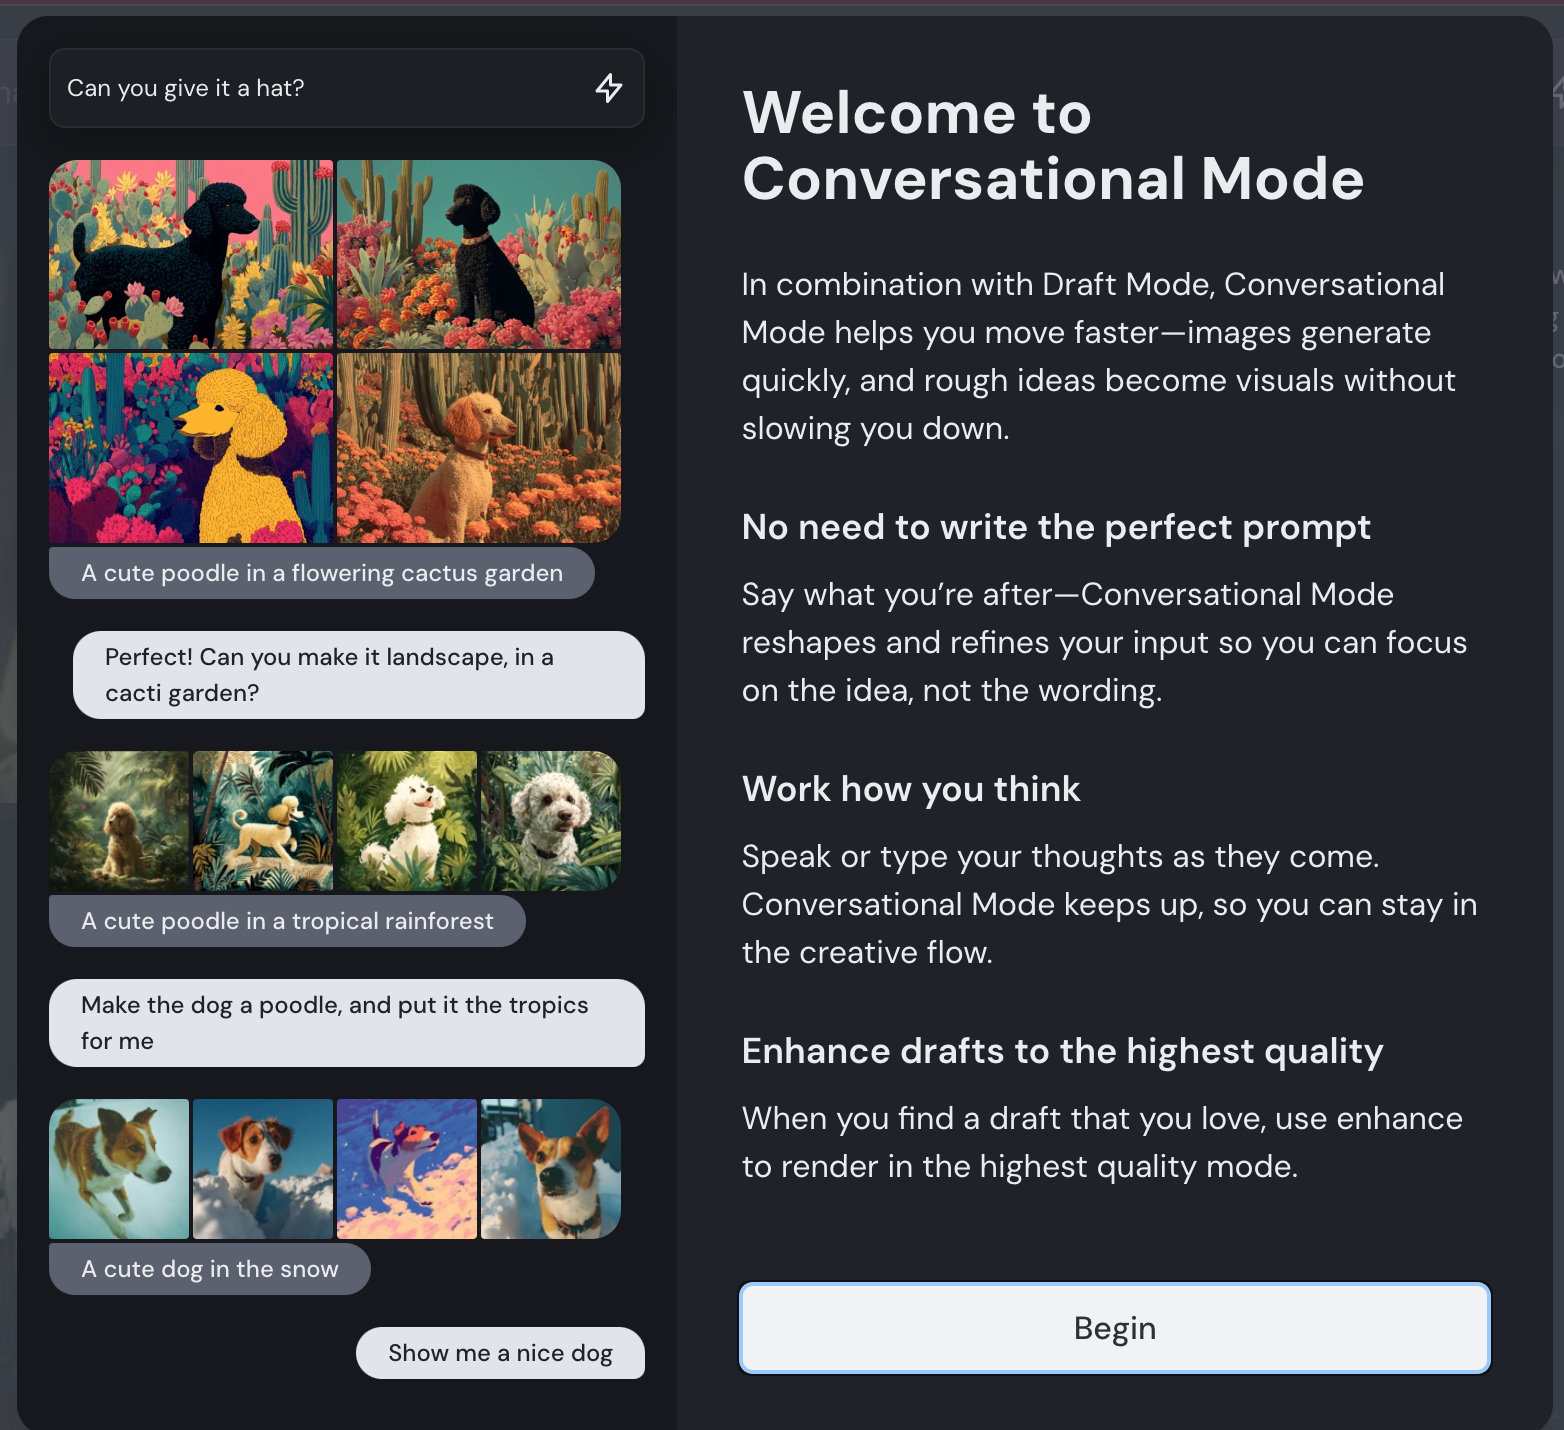
Imagine I’m a web designer working with a travel company that wants to showcase a mountain cabin getaway across different seasons. The team and I are having a virtual meeting, and we want to brainstorm ideas. I turn on conversational mode and start by generating an autumn scene—warm colors, falling leaves, cozy vibes—enabling voice mode.
Then, I simply say: “Make it winter.” In seconds, the scene updates—now it’s snowy, serene, and frosty, all while keeping the same cabin and layout.
This kind of real-time scene variation is perfect for testing moods, comparing options, or planning seasonal campaigns without having to retype full prompts or wait long for results.
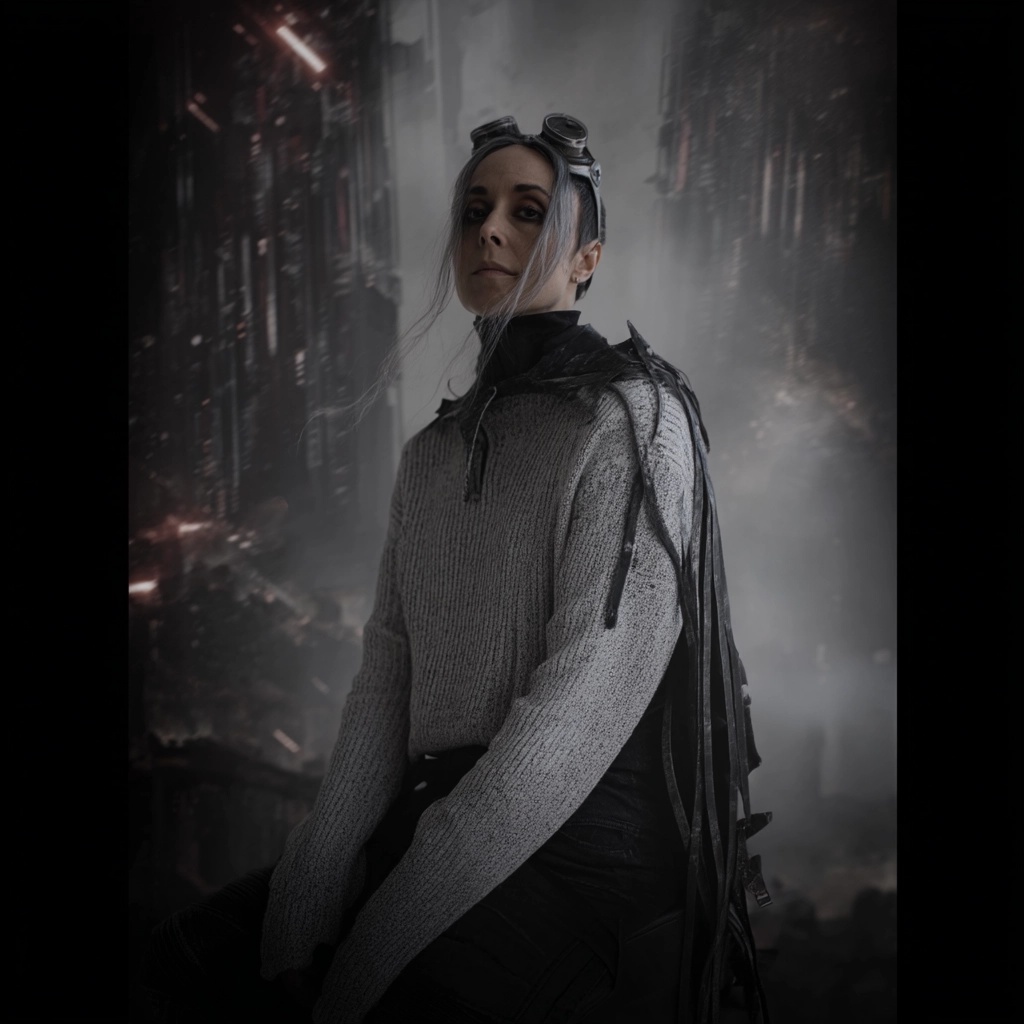
Prompt: “Post-apocalyptic superhero in a dystopian and futuristic world”
Let’s say I’m working on a personal comic project and want to visualize myself as the main character—a lone superhero surviving in a futuristic, dystopian world.
With Midjourney V7, I can upload a photo of myself and use it as a reference for generating custom artwork. This feature lets the model build on your facial features, pose, or general vibe, blending it with the style and theme of your prompt.
So when I combine my photo with a prompt like “post-apocalyptic superhero in a dystopian and futuristic world”, V7 gives me high-concept visuals that look like me—reimagined in another world.
It’s an amazing tool for character creation, cosplay design, or even visual storytelling where you want to put yourself into the scene.

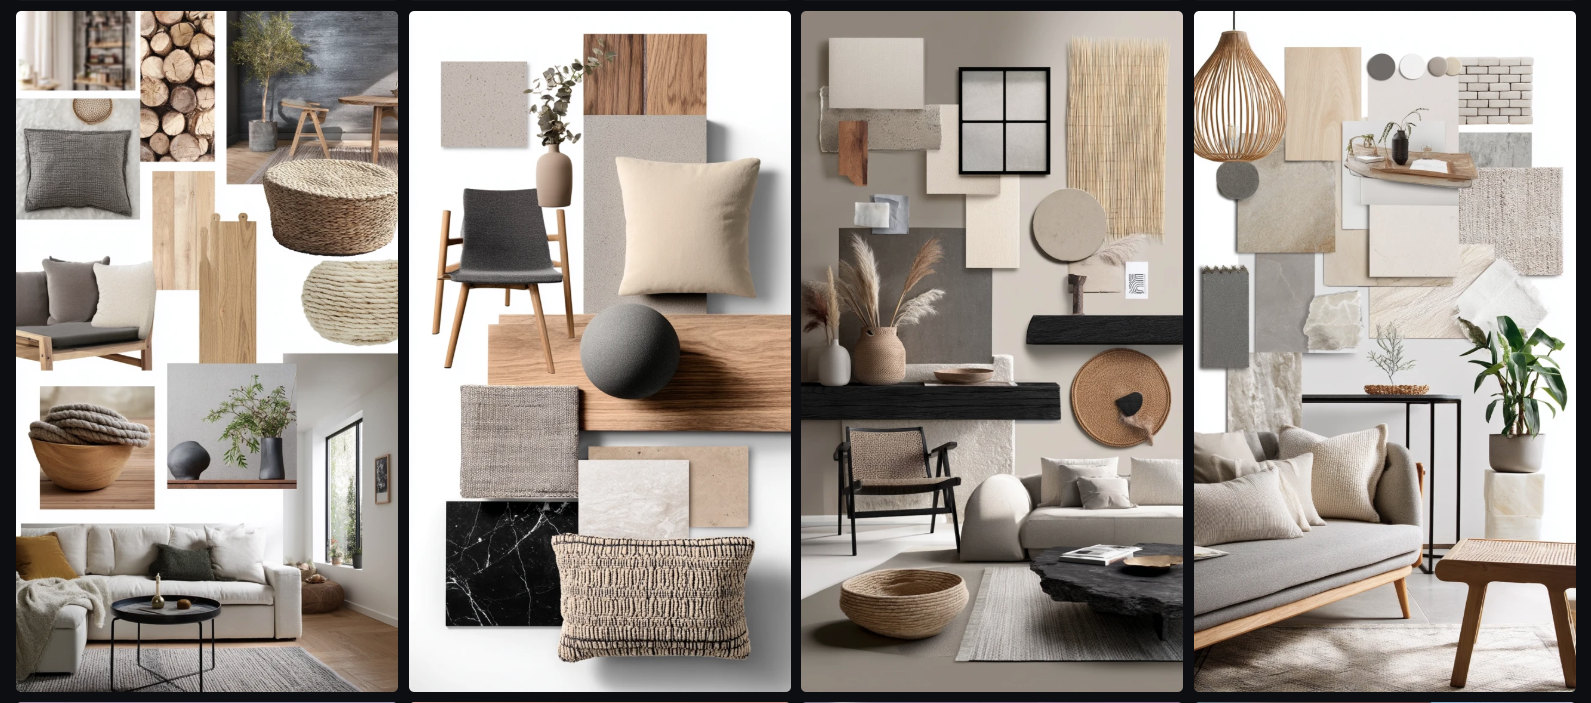
Prompt: “Interior design moodboard for a modern Scandinavian living room, neutral tones, natural materials”
Let’s say I’m an interior designer working on a proposal for a new client. They’ve asked for a Scandinavian-inspired space—clean lines, cozy textures, and a calm, neutral palette.
Instead of pulling random images from Pinterest, I use Midjourney V7 to generate a cohesive moodboard tailored to the exact style I have in mind. The model now understands prompts like “natural materials” and “neutral tones” more accurately, so all the images feel like they belong together.
Midjourney V7 brings upgrades that matter for real creative work: better control over style, smarter prompt interpretation, faster ideation, and improved visual coherence.
If you're looking for tutorials or tips, head over to Midjourney’s official docs.
Learn AI with these courses!
Track
Track
Course
blog
Alex Olteanu
8 min
blog
François Aubry
8 min
Tutorial
Kurtis Pykes
Tutorial
François Aubry
Tutorial
Amberle McKee
Tutorial
François Aubry