Course
Introduction to Python
4 hr
6.9M
Having the latest version of Python and its package installer, Pip, can make a huge difference in your work or data projects. If you are new or a little bit new to programmer, upgrading Python and Pip might seem like a complex job, especially since there are different methods to upgrade Pip and Python for Windows, macOS, and Linux.
Here I will walk you through each step and make the process and simple and straightforward as possible. Just skip to the section for the operating system that you currently use. And if you are totally new to working with Python, take our Introduction to Python course today. Also, the Python Cheat Sheet for Beginners is another always helpful DataCamp resource.
Finally, if you are interested in troubleshooting or learning more about Pip as it relates to package management, read our comprehensive Pip Python Tutorial for Package Management.
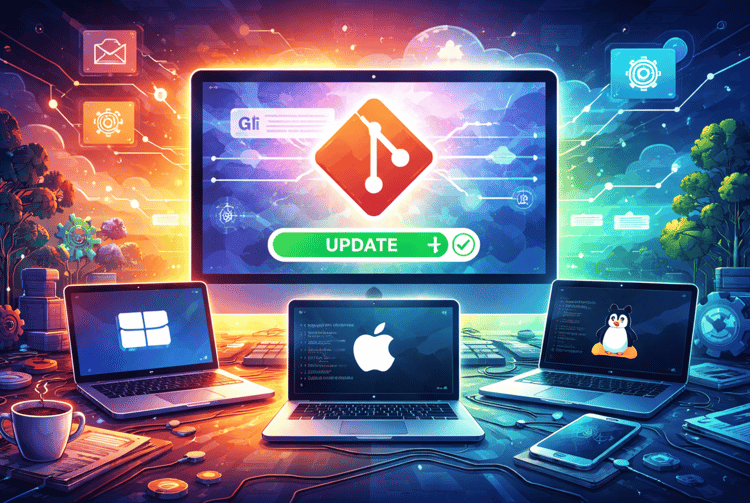
 Upgrading Python and Pip. Image by Author.
When you want to use an external library or module in your Python project, Pip is the tool you use to fetch and install that library from the Python Package Index (PyPI), which is the repository software for the Python programming language. Keeping Python and Pip up-to-date will bring a host of benefits, including:
Let’s now go into the process to upgrade Pip in Python on three major operating systems: Windows, macOS, and Linux. Before you start the upgrading process, it’s useful to know the current versions of Python and Pip installed on your system.
Note: Windows users should typically use the python command, while macOS and Linux users should use python3. If you're unsure which command to use on your system, try both commands to see which one works.
You can check the versions by running the following commands in your terminal or command prompt:
python --version
pip --version
These commands will display the installed versions of Python and Pip. Make a note of these versions so you can confirm that the upgrades have been successful later on.
Let’s look at how to upgrade Pip on Windows in three easy steps.
To download the latest Python installer for Windows, visit the official Python website and click on the Download Python button. This will allow you to obtain the most recent version of the Python installer.
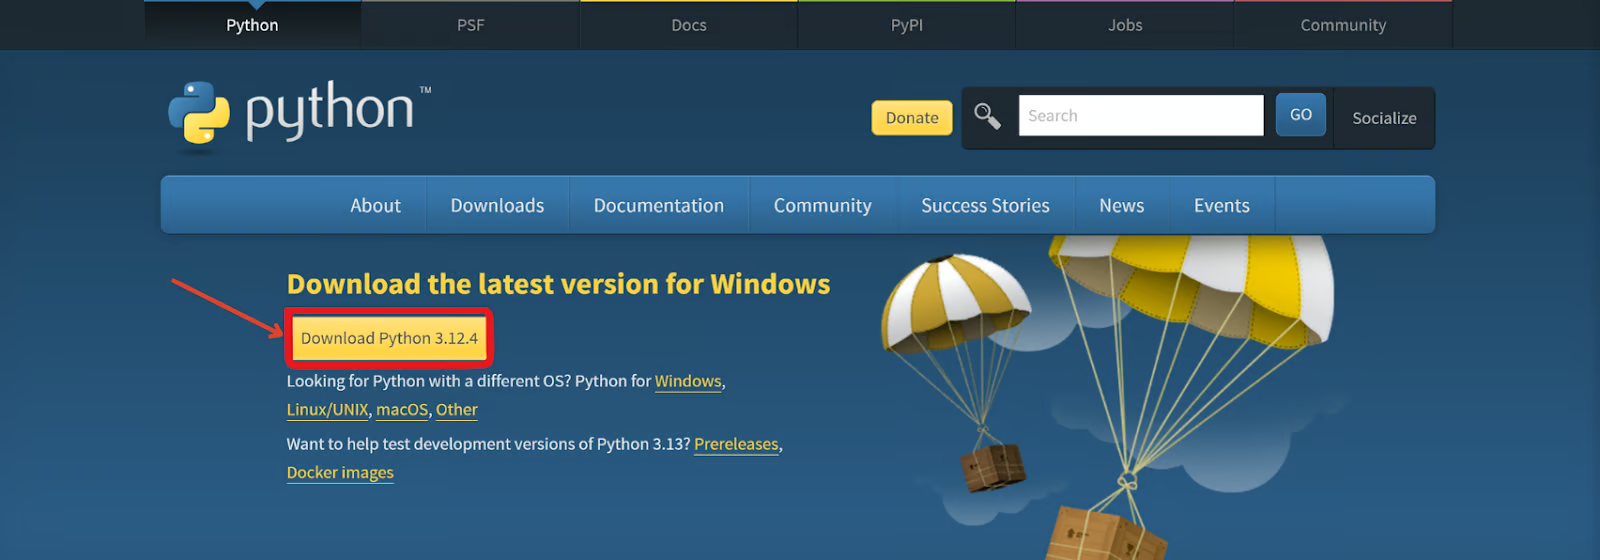
Download Python. Image by Author
Note: Python 3.9 and later versions do not support Windows 7. If you're using Windows 7, you'll need to upgrade your operating system or use Python 3.8 (which reached end-of-life in October 2024).
After downloading the latest Python version from the official Python website, locate the downloaded installer file and double-click to open it. In the installer window, ensure to check the "Add Python to PATH" option. Running the installer will upgrade both Python and Pip, which are included with the installer.
To upgrade Pip using the command prompt after upgrading Python, type cmd in your search bar to open the command prompt. Then, run the following command to upgrade Pip:
python -m pip install --upgrade pipThis command ensures you have the latest version of Pip installed. If you encounter permission errors, you can use this command:
python -m pip install --upgrade pip --userYou can verify the upgrade you have done by rerunning the version check commands to confirm the upgrades.
Here, we will be exploring how you can do the same upgrade on your Mac.
Homebrew is a popular package manager for MacOS that simplifies the installation and management of software. If you don’t have Homebrew installed, open your terminal and run the following command:
/bin/bash -c "$(curl -fsSL https://raw.githubusercontent.com/Homebrew/install/HEAD/install.sh)"To upgrade Python using Homebrew, open your terminal and run the following commands:
brew update
brew upgrade pythonAfter upgrading Python, upgrade Pip by running the following command:
python3 -m pip install --upgrade pipIf you encounter permission errors, you can use this command:
python3 -m pip install --upgrade pip --userFor Linux users, the upgrade process may vary slightly depending on the distribution, such as Ubuntu or Fedora.
The first step is to update the package list. You can do this by opening your terminal and running the following command:
sudo apt updateYou can then upgrade Python by installing the latest version. Open your terminal and run the following command:
sudo apt install python3The next step is to upgrade Pip. Once Python is upgraded, you can run the following command to upgrade Pip:
python3 -m pip install --upgrade pipIf you encounter permission errors, you can use this command:
python3 -m pip install --upgrade pip --userBy following these steps, you can ensure that you have the latest versions of Python and Pip installed on your system, regardless of the operating system you are using. This will help you stay current with the latest features, performance improvements, and security updates.
Even with careful management, you may encounter issues while using Pip and Python. This section addresses some common problems and provides solutions to help you troubleshoot effectively. We will cover resolving version conflicts, handling permission issues, and ensuring that Pip and Python paths are correctly configured.
Let’s start by looking at common issues that might come up if you are working with Windows.
Incorrect paths can lead to errors when running Pip or Python commands. To verify and ensure your Python and Pip paths are correctly set, start by checking the Python installation path using the where command:
where python
where python3
Ensure that the output points to the correct Python executable. Next, check the Pip installation path:
where pipEnsure that the output points to the correct Pip executable. If the paths are incorrect, update the PATH environment variable to include the correct directories:
setx PATH "%PATH%;C:\Python314;C:\Python314\Scripts"Replace C:\Python314 with the directory where Python is installed on your system.
If you see a pip: command not found error, it indicates that Pip is not installed or not in your PATH. To install Pip, download the get-pip.py script by opening your web browser and navigating to the get-pip.py URL, then save the file to your computer. After downloading the file, it automatically moves into the Downloads folder. You can then run the following command in the command prompt to install Pip:
python get-pip.pyYou might encounter a python: can’t open file error. All you have to do is to change the directory to Downloads using the following command:
cd Downloads
python get-pip.pyIf you encounter SSL certificate errors, try upgrading Pip or setting up a trusted certificates path.
python -m pip install --upgrade pipIf the problem persists, you can set the REQUESTS_CA_BUNDLE environment variable to point to your trusted certificates path:
set REQUESTS_CA_BUNDLE=C:\path\to\certificatesReplace C:\path\to\certificates with the actual path to your trusted certificates.
To set the REQUESTS_CA_BUNDLE variable permanently, you can add it through the System Properties.
First, open System Properties (Right-click on My Computer > Properties > Advanced system settings). Then, click on the Environment Variables button. Finally, under System variables, click New, and add the variable name REQUESTS_CA_BUNDLE and its value as the path to your certificates.
Now let’s take a look at some common issues that might come up if you are working on MacOS or Linux.
To verify and ensure your Python and Pip paths are correctly set, start by checking the Python installation path. Use the which command:
which python
which python3
Ensure that the output points to the correct Python executable. Next, check the Pip installation path:
which pipEnsure that the output points to the correct Pip executable. If the paths are incorrect, update the PATH environment variable to include the correct directories. Add the following lines to your .bashrc, .bash_profile, or .zshrc file:
export PATH="$PATH:/usr/local/bin:/usr/local/sbin"After updating the file, reload the shell configuration by running:
source ~/.bashrcIf you see a pip: command not found error, it indicates that Pip is not installed or not in your PATH. Install Pip or adjust your PATH variable as described above. To install Pip, use the following commands:
curl https://bootstrap.pypa.io/get-pip.py -o get-pip.py
python get-pip.py
If curl is not available, you can download the get-pip.py script using a web browser and then run the above command to install Pip.
If you encounter SSL certificate errors, try upgrading Pip or setting up a trusted certificates path. To upgrade Pip, run the following command:
python -m pip install --upgrade pipIf the problem persists, set the REQUESTS_CA_BUNDLE environment variable to point to your trusted certificates path. On macOS and Linux, you can temporarily set this variable in your terminal session or permanently in your shell configuration file. For the temporary terminal session approach, use the following commands:
export REQUESTS_CA_BUNDLE=/path/to/certificatesReplace /path/to/certificates with the actual path to your trusted certificates. To explore the permanent approach, which is done in the shell configuration file, add the following line to your .bashrc, .bash_profile, or .zshrc file, depending on the shell you are using:
export REQUESTS_CA_BUNDLE=/path/to/certificatesAfter updating the file, reload the shell configuration by running:
source ~/.bashrcReplace .bashrc with the appropriate configuration file you edited, such as .bash_profile or .zshrc. These steps ensure that the REQUESTS_CA_BUNDLE environment variable is set correctly on macOS and Linux systems.
In this guide, we have covered the essentials of upgrading Python and Pip, managing dependencies, and using advanced Pip features to keep your development environment stable and secure.
For official documentation, the Pip documentation and the Python documentation are excellent starting points. They provide comprehensive guides and references for managing Python packages and understanding the core language.
For a structured learning approach, DataCamp has many resources, including our Intro to Python for Data Science course and our Python Programming skill track, which both offer foundational knowledge. For those looking to advance further, the Python Fundamentals skill track, Python Developer career track, and Data Analyst with Python career track all provide in-depth learning paths tailored to different aspects of Python programming and data analysis.
Learn Python with DataCamp
Course
Course
Course
blog
Richie Cotton
14 min
Tutorial
Allan Ouko
Tutorial
Matthew Przybyla
Tutorial
J. Andrés Pizarro
Tutorial
Javier Canales Luna
Tutorial
Allan Ouko