
Course
Building AI Agents with Google ADK
1 hr
6.5K
If you clicked on this article, you probably use one of the existing AI-powered coding agents and want to see how Roo Code stacks up. Well, if I were to sum up Roo Code in a few words, it would be:
These are the advantages Roo Code has on top of the common features all AI coding agents offer like MCP support, codebase chat, terminal command execution and file edits.
In this tutorial, we are going to explore Roo Code and all of its mentioned features in-depth and compare it to Cline. We’ll walk through practical examples and see how its different interaction modes make it stand out in the crowded AI agent market.
Roo Code is an open-source AI coding assistant that works as a VS Code extension. Unlike typical autocomplete tools, it serves as a customizable development partner that can create files, run terminal commands, browse websites, and handle multi-step tasks across specialized modes. You get granular control over everything from auto-approve permissions to codebase indexing providers.
The tool supports multiple AI providers, including Anthropic, OpenAI, Google Gemini, AWS Bedrock, and local models through Ollama. It understands large codebases through configurable semantic indexing and includes browser automation, MCP protocol support, and intelligent context condensing for complex projects.
This is what sets Roo Code apart:
This combination turns Roo Code from a simple assistant into a configurable development environment that adapts to your workflow patterns and scales with project requirements.
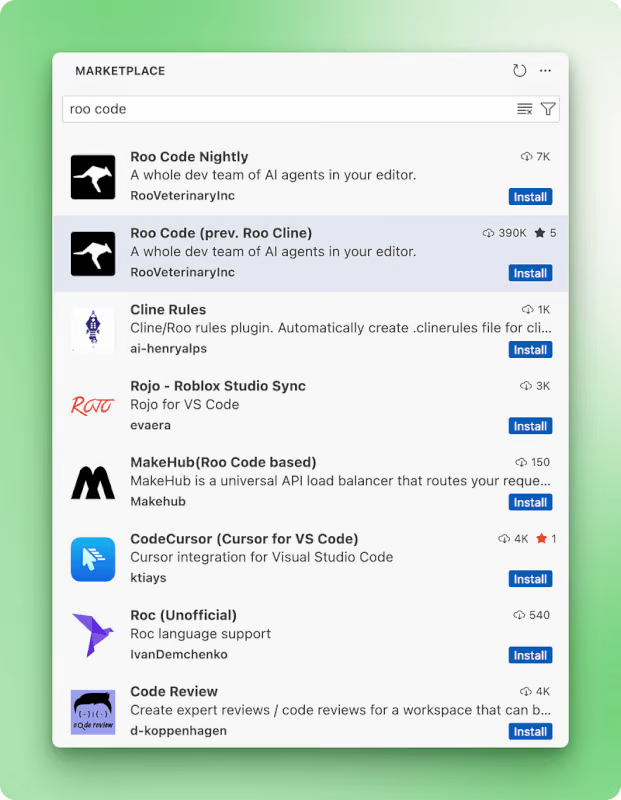
Roo Code can be easily installed through the VS Code extensions marketplace:
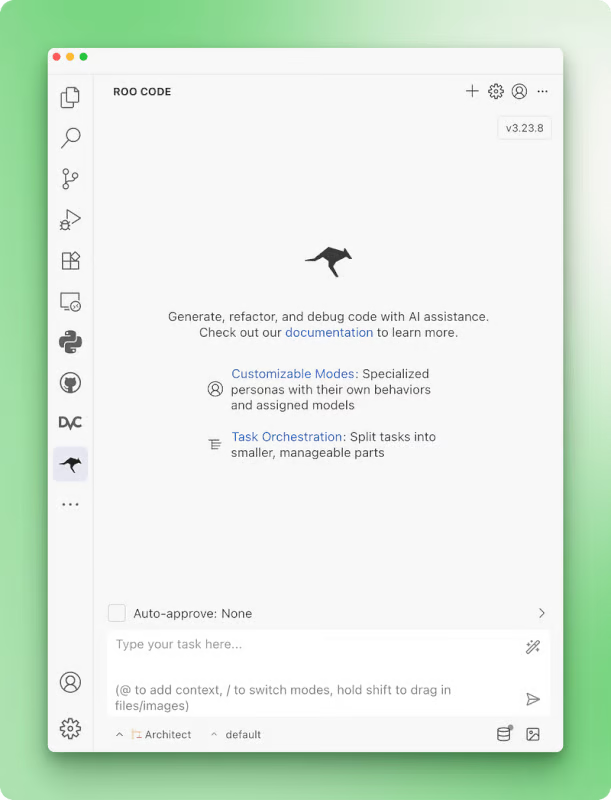
After installation, restart your VS Code (or Cursor, Windsurf) and the Roo Code extension will appear in the left sidebar. Click on it and follow any onscreen prompts that will walk you through account setup and initial configuration. You should then see this interface:
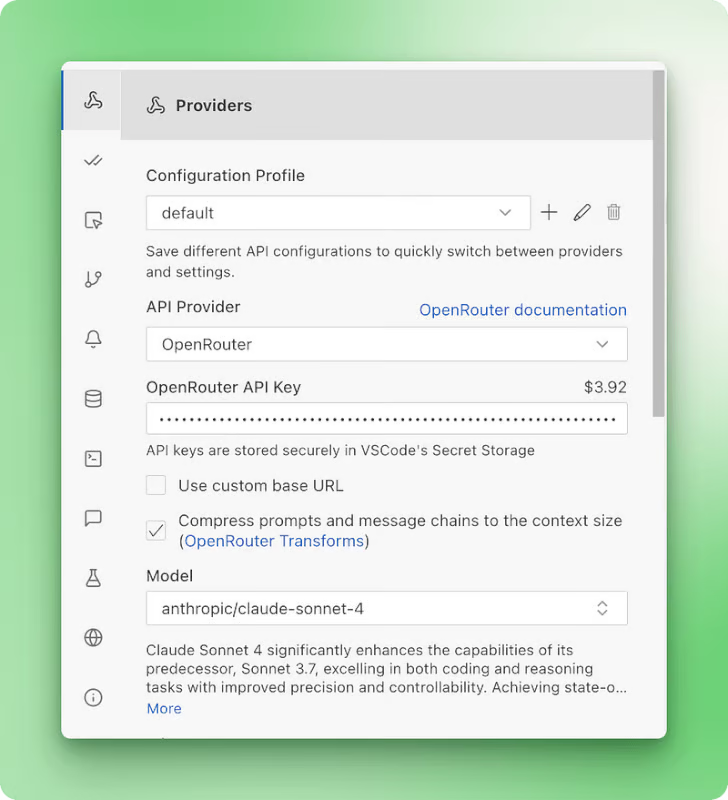
Next, you’ll need to select a model provider from the settings since Roo Code is open-source and doesn’t include pre-paid credits:
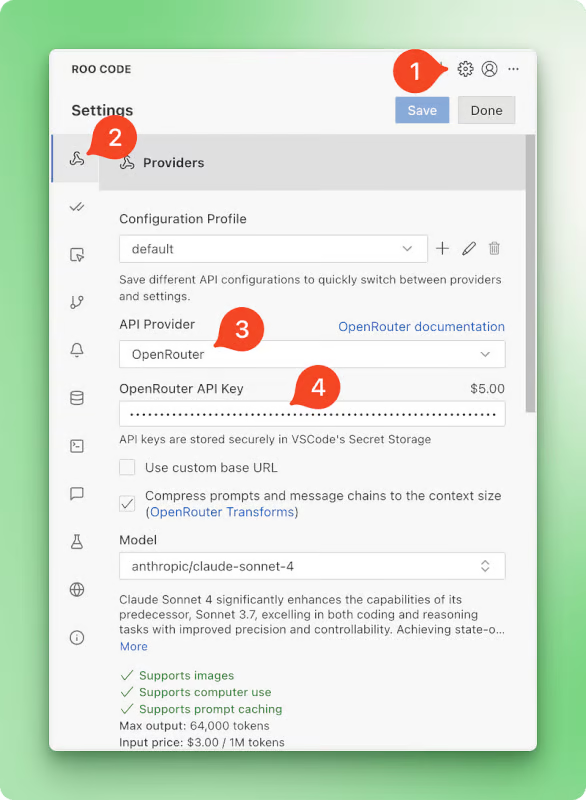
Roo Code works with all major and minor AI vendors. While I personally use Claude models exclusively, you can opt for third-party routers like OpenRouter, Requesty, or enterprise solutions like Google Vertex and AWS Bedrock. I’d suggest starting with OpenRouter.
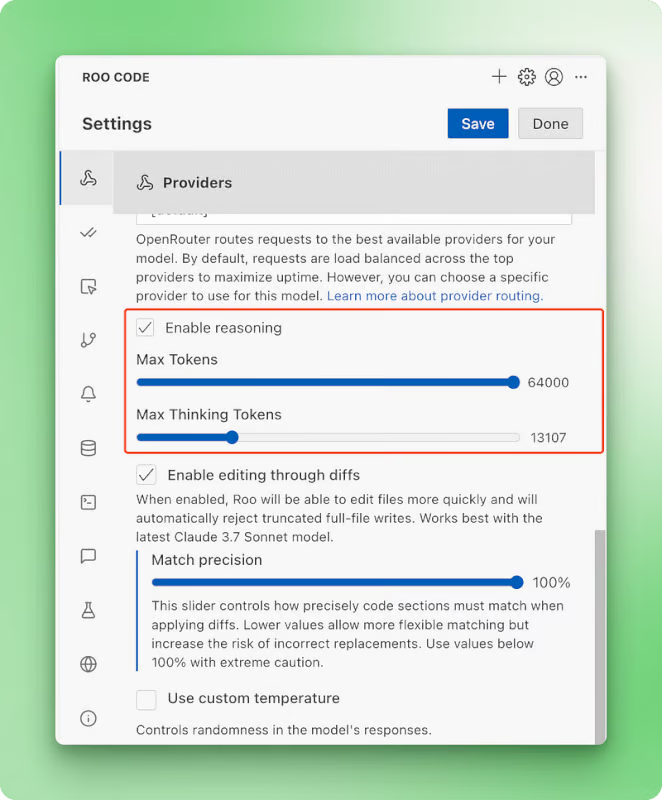
Roo Code provides $5 credit, and you can set it up with just a single API key and have access to all the models OpenRouter hosts (nearly any model you can think of). After setting up the OpenRouter API key, be sure to scroll down in the same settings page and enable reasoning for your chosen model (we will be using Claude 4 Sonnet in this tutorial):
You’re now ready to start using Roo Code!
In this section, we will explore all major features of Roo Code as we build a simple 4x4 tic-tac-toe game. This example is simple enough to keep API costs low for experimentation while also being complete enough to showcase all features.
Let’s get started!
In the beginning, we mentioned that Roo Code allows almost total control over the coding agent’s behavior. This statement is echoed in all features Roo Code has to offer — starting with the auto-approve settings:
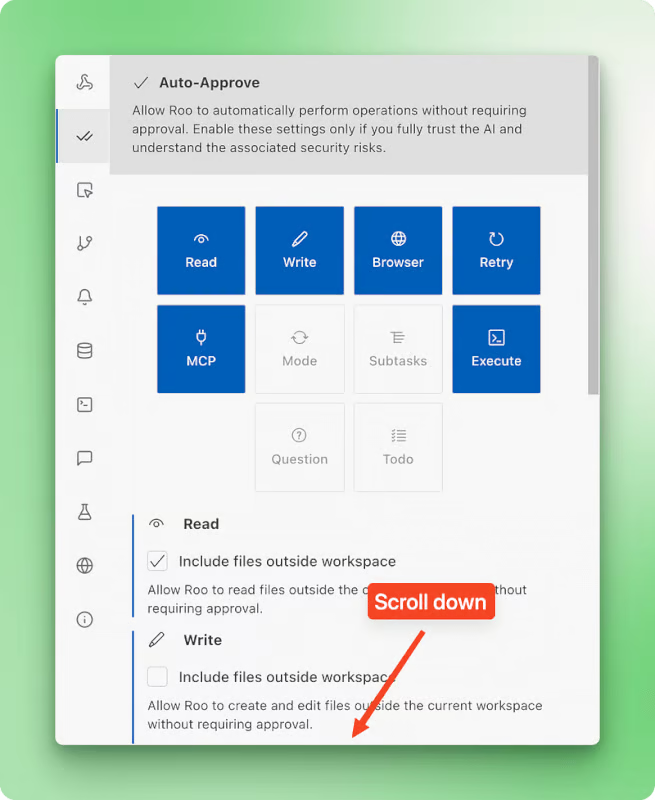
Granular control over auto-approve settings matters because it lets you decide exactly which AI actions happen automatically and which ones need your approval first. You can let routine tasks like quick code edits go through without stopping, while keeping bigger actions like file deletions or terminal commands under manual review to avoid any unwanted surprises.
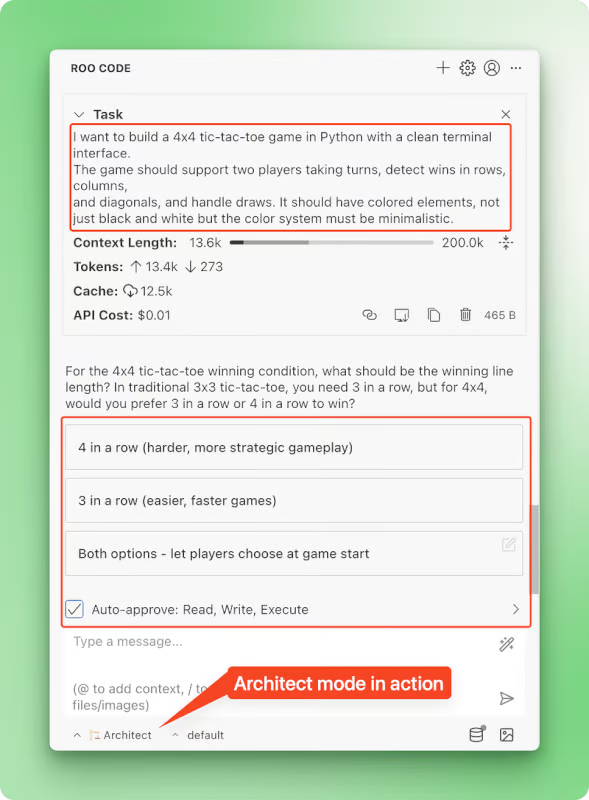
Roo Code takes a thoughtful approach to AI-powered development that sets it apart from tools like Cursor or Windsurf. While most agentic IDEs push you straight into execution mode the moment you describe what you want, Roo Code recognizes that jumping into coding without proper planning often leads to problems.
I want to build a 4x4 tic-tac-toe game in Python with a clean terminal interface.
The game should support two players taking turns, detect wins in rows, columns,
and diagonals, and handle draws. It should have colored elements, not just black and white, but the color system must be minimalistic.
Think about the downsides of immediate execution: code that doesn’t align with your broader architecture, rushed implementations that create technical debt, and solutions that miss edge cases because there was no time to think through requirements. These issues compound over time, creating maintenance headaches and forcing you to revisit supposedly “finished” work.
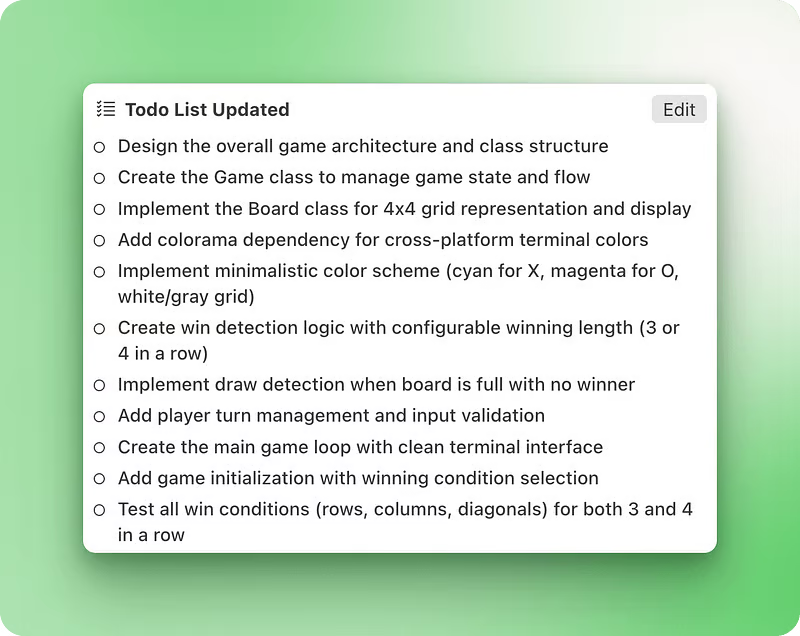
That’s why Roo Code offers different interaction modes for different phases of software development:
You can switch modes from the dropdown menu in the bottom left corner or use slash commands like /ask, /architect, /debug, /code in the chat input. I particularly appreciate having a dedicated mode for asking questions that doesn't affect your project or its code—something I constantly do in my projects. In other IDEs, this means switching to a new chat thread or using ChatGPT/Anthropic, which always disrupts my workflow.
These modes aren’t just variations of a single agent with different prompts. Each mode comes with pre-defined tools and access permissions set by the Roo Code team. For example, while Architect mode is read-only on your project, Code mode has access to all tools like editing, terminal commands, and MCPs.
Debug mode deserves special mention because it uses a mathematical approach to narrow down bug possibilities, with custom instructions to reflect, distill possibilities, add logs (something LLMs rarely do unless explicitly told), and confirm before fixing.
Additional mode features that make them powerful:

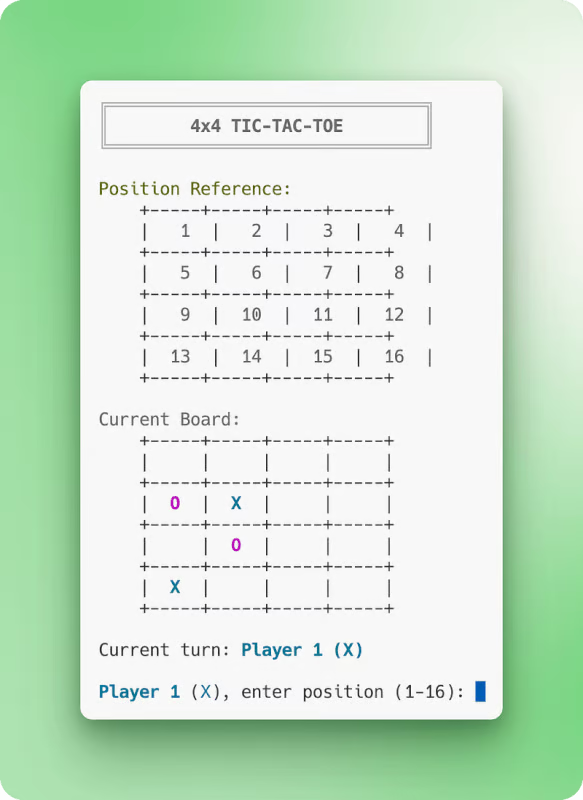
Final game generated by Roo. Position reference grid looks off because all LLMs have problems with counting and aligning output in the terminal.
Another unique feature in Roo Code is the ability to create custom configuration profiles. While interaction modes determine agent behavior, config profiles let you customize it at the API level by creating various LLM configurations with different model settings.
When you have configured a provider like OpenRouter, you’ll see a default profile displayed next to the interaction mode in the bottom left corner of the interface. Opening the settings reveals that this default profile contains specific configurations for your chosen model like Claude 4 Sonnet with specific reasoning limits, rate limits, and temperature parameters.
By clicking the plus icon, you can create additional config profiles that you can later assign to different interaction modes. This opens up some interesting possibilities:
The ability to pair specific models and configurations with specific interaction modes gives you control that you won’t find in other agentic platforms. You could have o3 mini handling your architect planning while Claude Sonnet 4 executes the actual code, each with their own optimized settings.
Roo Code allows you to configure another aspect of itself that most agentic coding platforms keep locked away: codebase indexing. This feature powers natural language queries like “How is authentication handled?” or “Show me where we delete the customer records,” even when you don’t know specific functions or filenames.
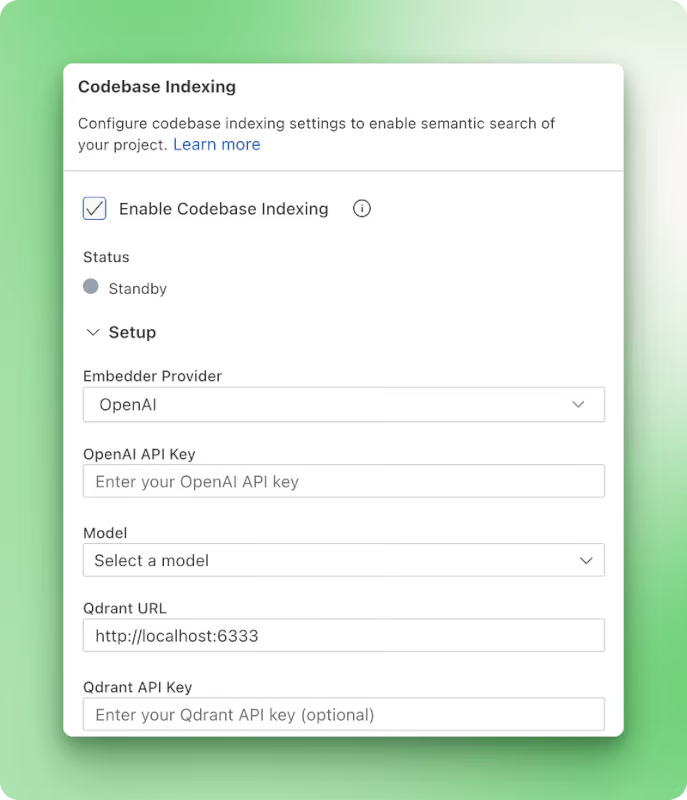
While other IDEs hide their embedding providers from users, Roo Code gives you full control over how your codebase gets indexed and searched. This transparency matters because different embedding models excel at different tasks, and you might want local processing for sensitive projects or cloud solutions for convenience.
The system requires two components to work:
For the embedding provider, you can choose from:
For the vector database, your options include:
Both setups cost nothing to try.
Beyond choosing your providers, Roo Code lets you fine-tune the search behavior:
The configuration flexibility opens up several advantages:
The indexing system respects your project’s ignore patterns from .gitignore and .rooignore, so it won't waste time processing dependency folders like node_modules. It also watches for file changes and updates the index automatically, so your searches stay current as you code.
Context window is perhaps the most important constraint of coding models. Window size determines how much information the AI can consider at once, directly affecting its ability to understand your project and make informed decisions across multiple files.
That’s why context engineering is crucial, which is the process of designing the information flow that goes into the model context. Again, Roo Code allows you to have low-level control on what goes into context and what doesn’t.
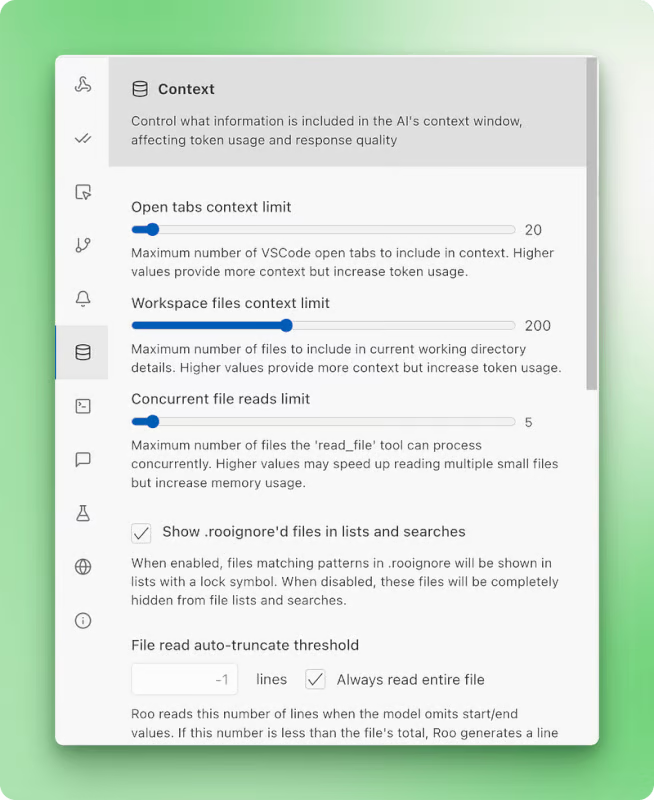
In the settings, there is a separate pane for configuring context. From there, you can see options to configure:
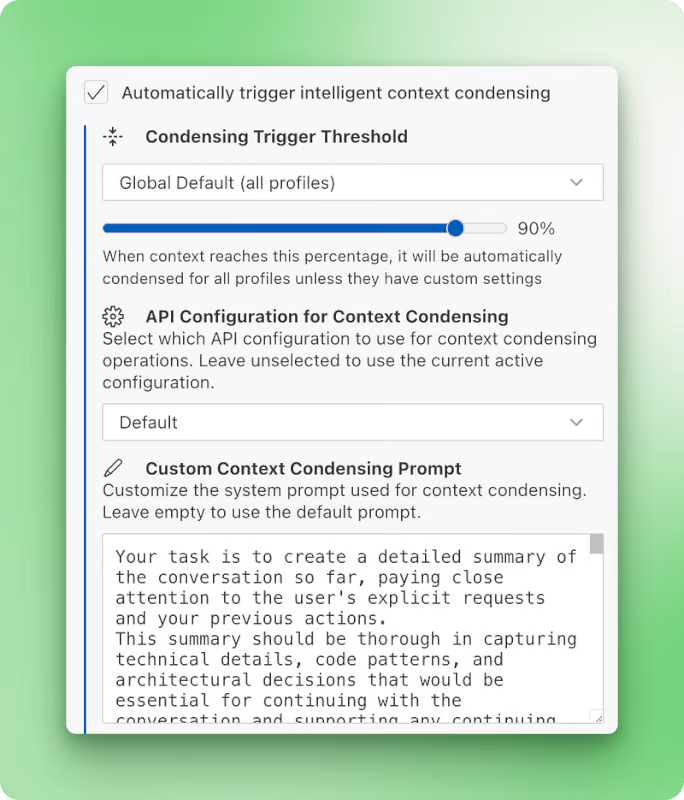
If you scroll down in the same pane, you’ll see another option to automatically trigger intelligent context condensing. What this does is that when the context window fills to a certain threshold, a custom summarization prompt (you can write this yourself) is triggered. This condenses the context to just the summary, freeing up space to continue the conversation and your work.
In IDEs like Cursor or Windsurf, you have to switch to a new chat thread when you hit context limits. When doing so, information from the current thread is lost or you have to do manual engineering to move the information to the new chat thread.
Roo Code can automatically connect to VS Code’s internal terminal, execute commands, and read outputs in real-time. If you prefer, it also provides a faster inline terminal option that displays results directly in the chat interface.
While terminal execution exists in other agentic platforms, Roo Code’s customization options set it apart. The shell integration system works automatically without requiring setup and gives you several abilities:

You can configure several terminal-specific options in the settings:
The system also handles complex shell setups well. If you’re using ZSH with Oh My Zsh and powerlevel10k, or other customized configurations, Roo Code provides specific workarounds and timeout settings for shells that take longer to initialize. There are also dedicated options for PowerShell users on Windows and WSL setups.
Beyond the major features we’ve covered, Roo Code includes many thoughtful improvements that make daily development smoother and more productive.
Context @mentions provide a powerful way to include specific information directly in your conversations. You can reference files, folders, terminal output, git commits, VS Code problems, and even images by using @ symbols in the chat input. This makes it easy to give Roo Code precisely the context it needs without manual copying and pasting.
Roo Code offers strong MCP (Model Context Protocol) integration with a dedicated marketplace for one-click server installation. While the marketplace currently has limited options, you can contribute by opening pull requests to add official MCP servers to the Roo Code repository. This opens up access to specialized external tools and services that extend Roo Code’s capabilities far beyond built-in features.
Checkpoint management works through a shadow Git repository that runs alongside your existing code. This provides a safety net for your work, allowing you to create restore points and track changes without interfering with your normal Git workflow. You can easily roll back to previous states if something goes wrong during development.
A dedicated chat management window helps you organize your conversations by filtering them based on workspace, creation date, token usage, context window consumption, and actual API costs. This visibility into usage patterns and expenses helps you understand and control your AI development costs while keeping your work organized.
You can import and export custom modes as text files, making it easy to share coding practices between team members. There’s also a separate marketplace for modes where you can contribute your custom-created modes for others to use with one-click imports. This helps standardize approaches across teams and share proven workflows.
An always-visible button in the chat input field lets you optimize and improve your prompts before sending them. You can even write your own “prompt optimizer” prompt in the dedicated settings page, tailoring the optimization process to your specific needs and style.
You can enable browser actions through computer use capabilities in the settings. This allows Roo Code to interact with web applications directly, opening up possibilities for testing, web scraping, and automated interactions with browser-based tools.
For more guidance on making the most of these features, see the tips & tricks page in the Roo Code documentation.
Roo Code and Cline share DNA but have evolved in different directions. Roo Code actually started life as “Roo Cline,” a fork of the original Cline project. The developers behind Roo Code saw potential in Cline’s foundation but wanted to take it further — moving away from LangChain dependencies, improving performance, and adding features like multiple interaction modes and deep customization options. The rebranding to “Roo Code” reflected this broader vision and clearer developer focus.
Where Cline emphasizes simplicity and partnership, Roo Code pushes for control and flexibility. Cline’s human-in-the-loop approach means every action needs approval — perfect for developers who want to stay involved in each decision. Roo Code takes a different path with its mode system, letting you switch between planning-only Architect mode, execution-focused Code mode, or specialized Debug mode. This granular control extends to everything from codebase indexing providers to terminal output limits.
The feature sets reflect these different philosophies:
Choose based on your development style and needs. Cline works best when you want a straightforward AI partner that keeps you in the loop for every change — ideal for careful, methodical development or when working with critical codebases. Roo Code suits developers who want to fine-tune their AI assistant’s behavior, experiment with different working modes, or need specialized configurations for different project types. Both tools respect your control over the development process; they just offer different levels of customization to achieve it.
Roo Code caters to power users working on large, complex projects that require careful context management and precise control over agent behavior. For small-to-medium projects or quick prototyping, Roo Code’s setup requirements may be too much. If you’re just getting started with AI-powered coding, I’d recommend beginning with Cline for its simpler approach, or even Cursor which is an advanced ChatGPT directly in your VS Code.
Roo Code works best when you’re an experienced user who already understands AI-powered coding agents and wants full control over your workflows. The time spent learning its configuration systems becomes worthwhile when you need features like mode-specific model assignments, custom codebase indexing, or boomerang task coordination.
For more resources on AI coding assistants, check out these resources:
Learn AI with these courses!
Course
Course
Course
Tutorial
Bex Tuychiev
Tutorial
Abid Ali Awan
Tutorial
Aashi Dutt
Tutorial
Bex Tuychiev
Tutorial
François Aubry
Tutorial
Bex Tuychiev