
Track
AI Fundamentals
10 hr
Learn how to work with LLMs in Python right in your browser
This video was created by using:
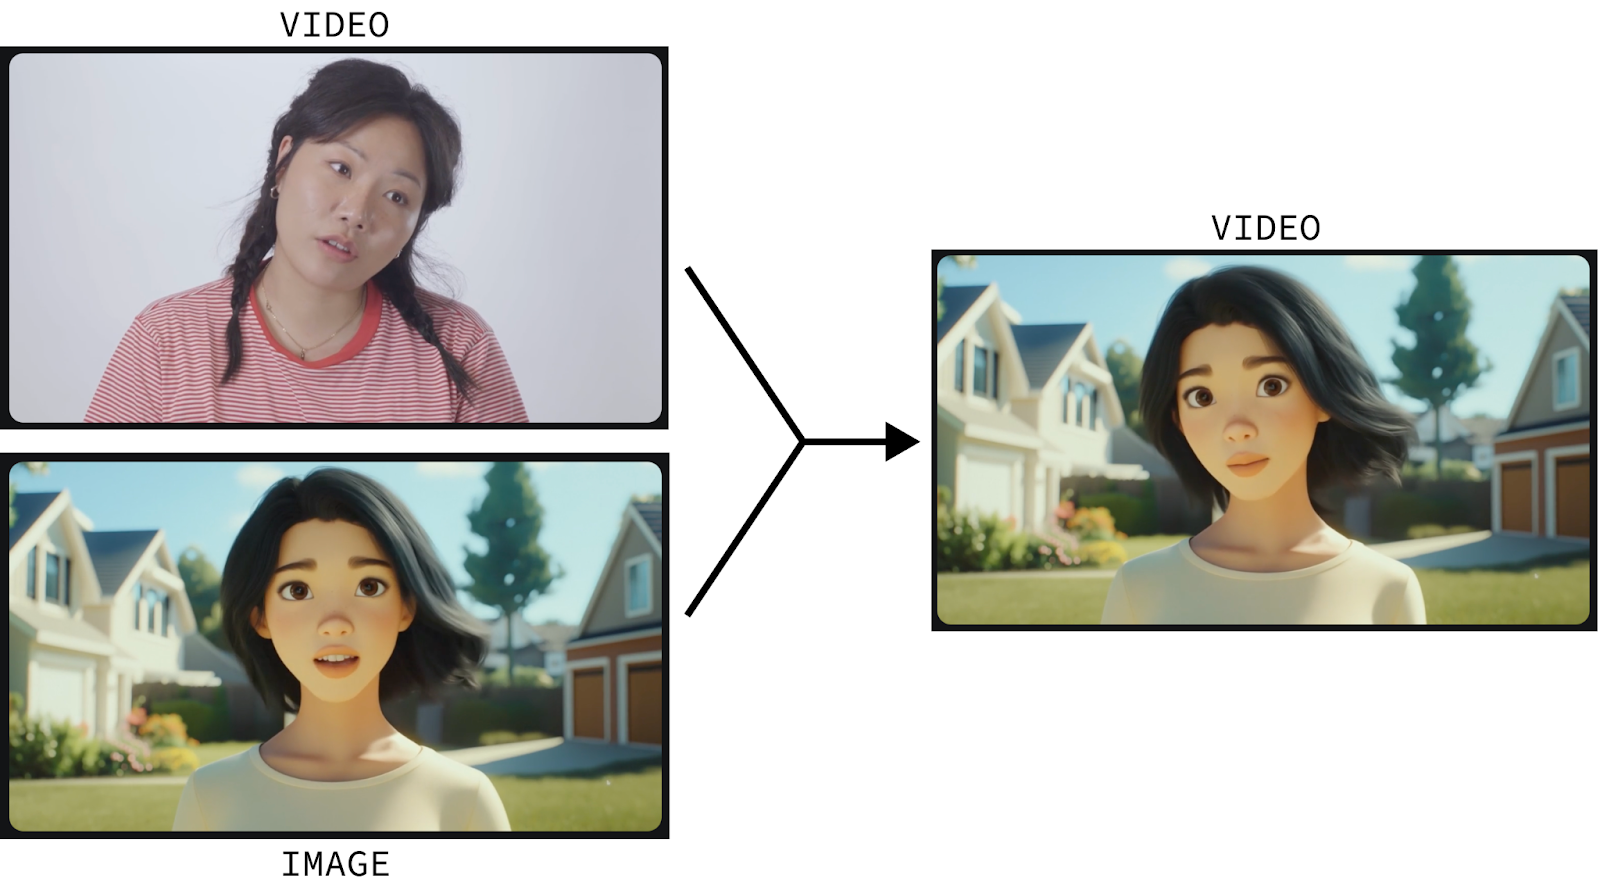
Runway Act-One then animates the character to mirror the facial movements and expressions of the human actor.
Animating characters is a sophisticated process that only highly trained professionals can do from scratch. Act-One tries to change the game by enabling anyone to animate a character simply by recording themselves and providing a still image of the character they wish to animate.
And it’s not limited to animated characters. It also works on cinematic and realistic characters. And we can also create a compelling dialog by creating multiple short videos of the characters speaking back and forth and joining them together:
Let's explore Runway Act-One ourselves. While a free tier is available, offering 125 credits and queuing options, Act-One is not included in this tier and requires a subscription.
First, go to Runway’s login page and log in or create an account. Next, subscribe to one of their available plans. It’s important to note that even with a subscription, there’s a limit to the amount of videos we can generate. I tried the $15 monthly subscription which gave me 625 credits (plus the 125 free credits for a total of 750 credits).
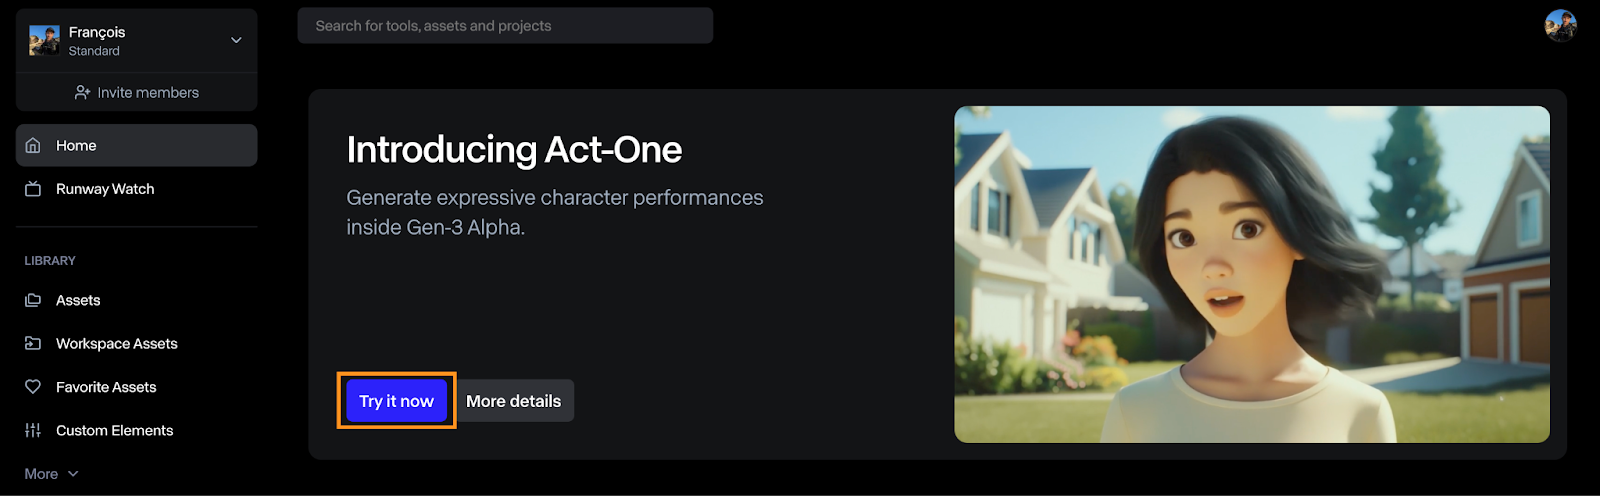
To generate a video with Act-One, click the “Try it now” button on the dashboard.
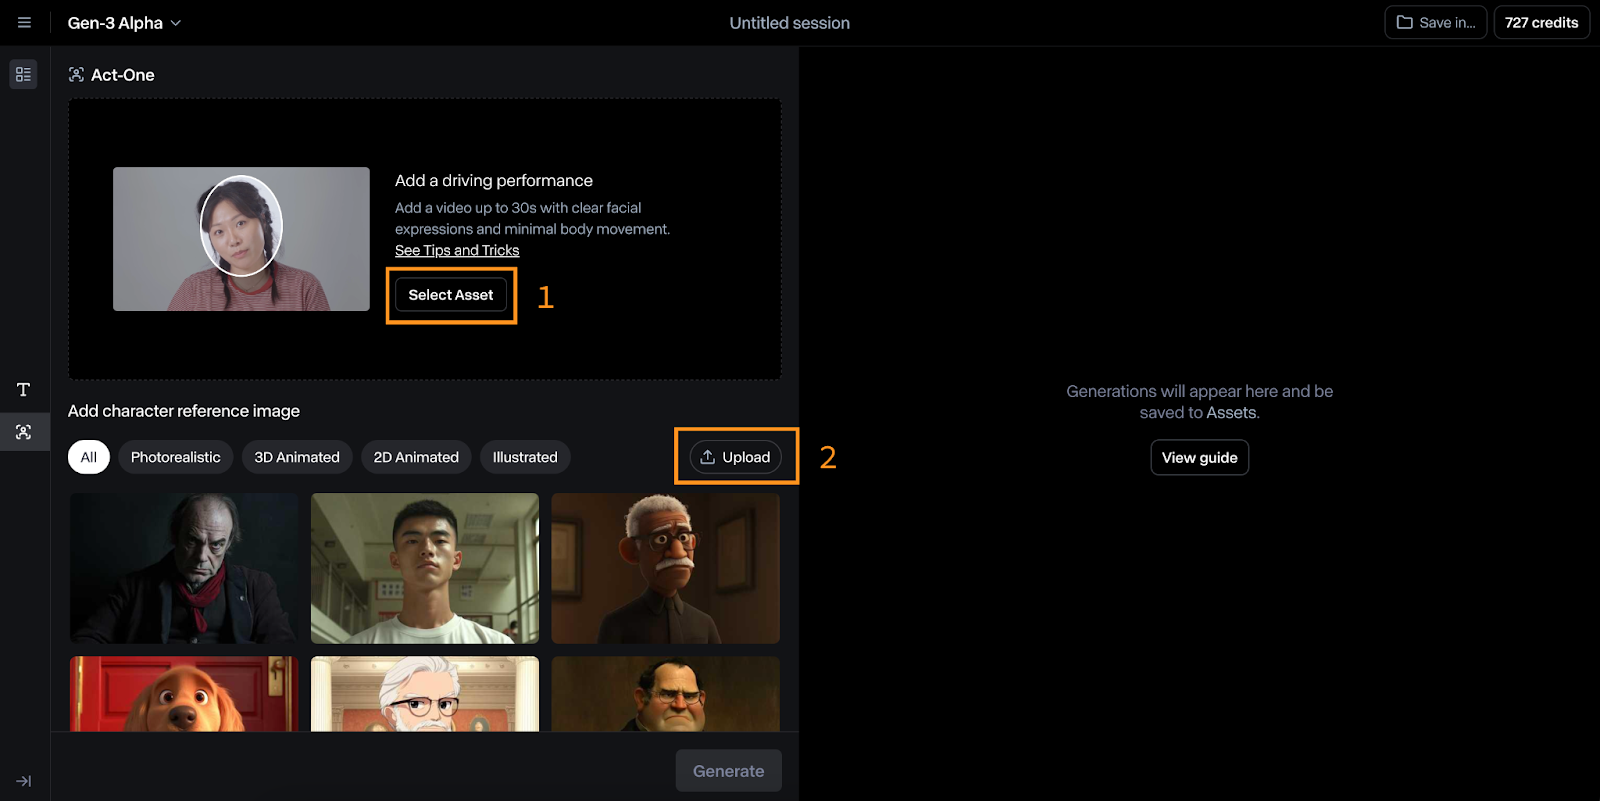
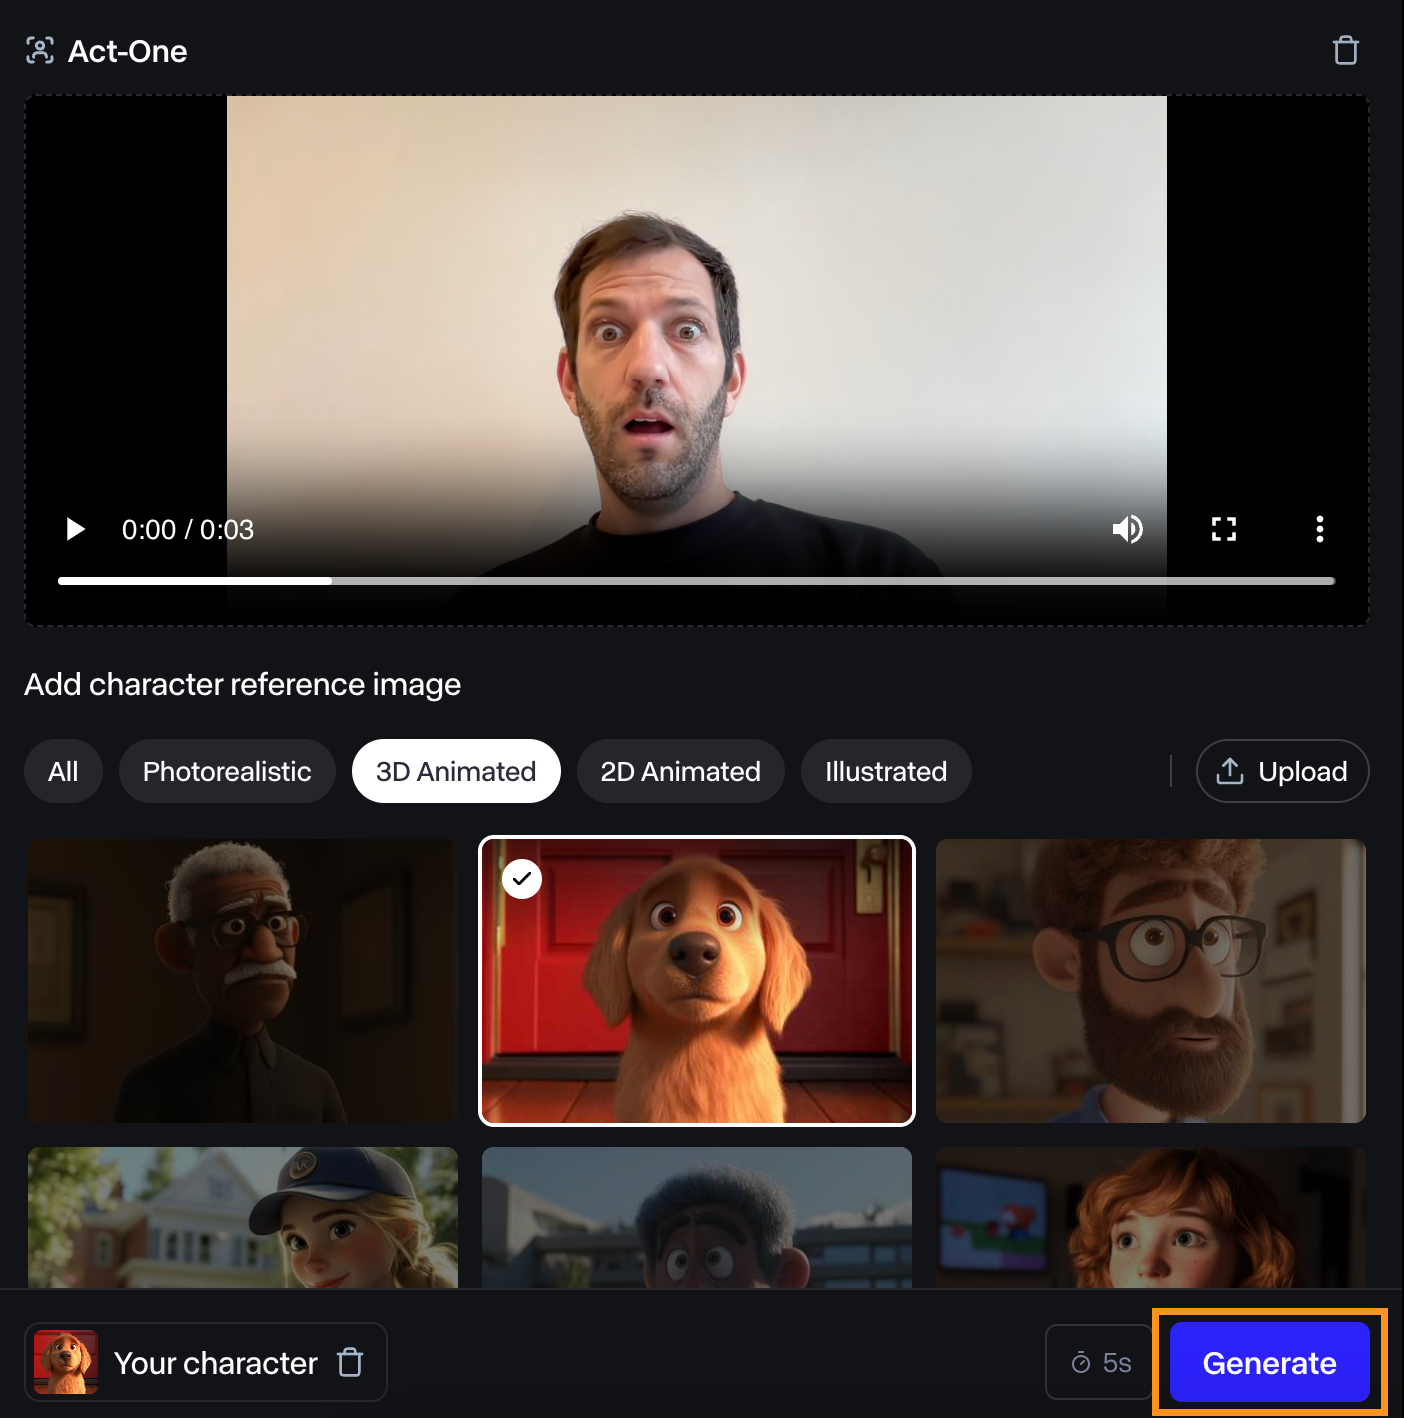
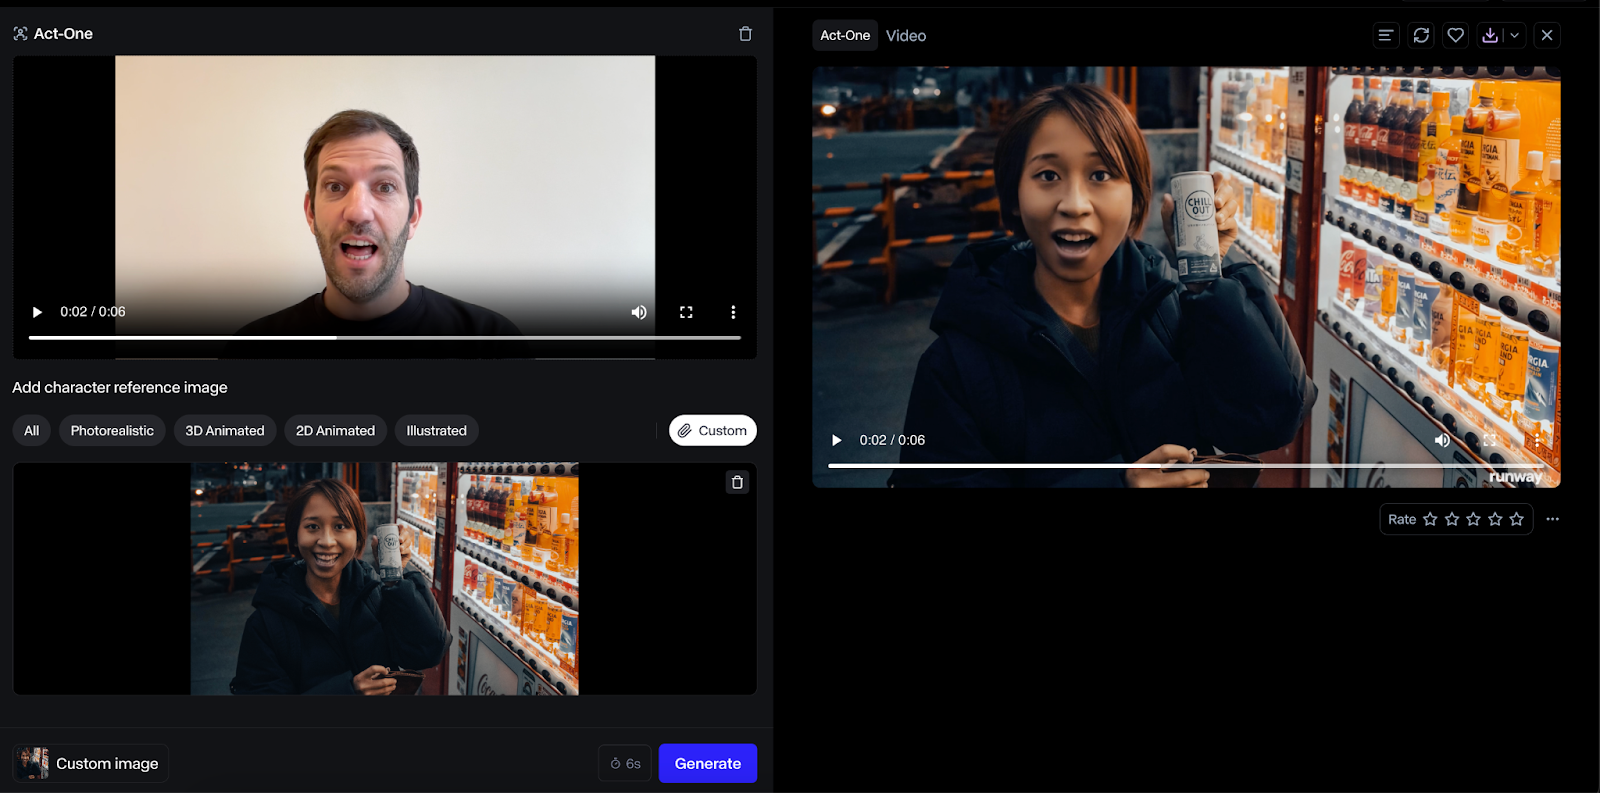
The Act-One interface is relatively straightforward to use. In the image below, you can see that:
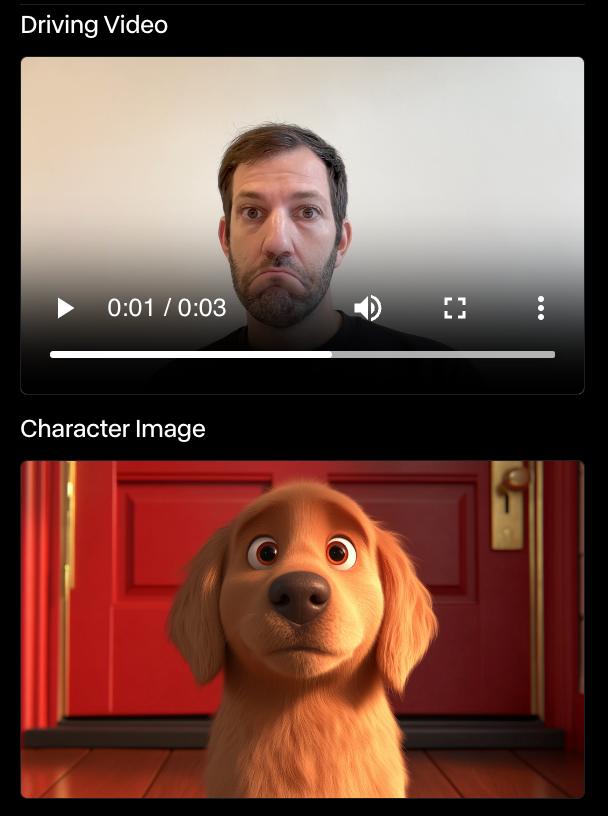
To try it, I filmed myself making a surprised face and tried it using their dog character reference.
I found the resulting video to be just ok. The facial expression isn’t very pronounced, but it still matches mine.
I did other experiments with the same character, and Runway Act-One never impressed me. In some cases, there was not even any expression at all. In the example below, the dog didn’t move at all despite my facial expression.
I’m no actor, so maybe that’s the problem. However, if the purpose of Act-One is to empower anyone to animate characters, it still has a long way to go before it’s really usable by anyone without industry experience.
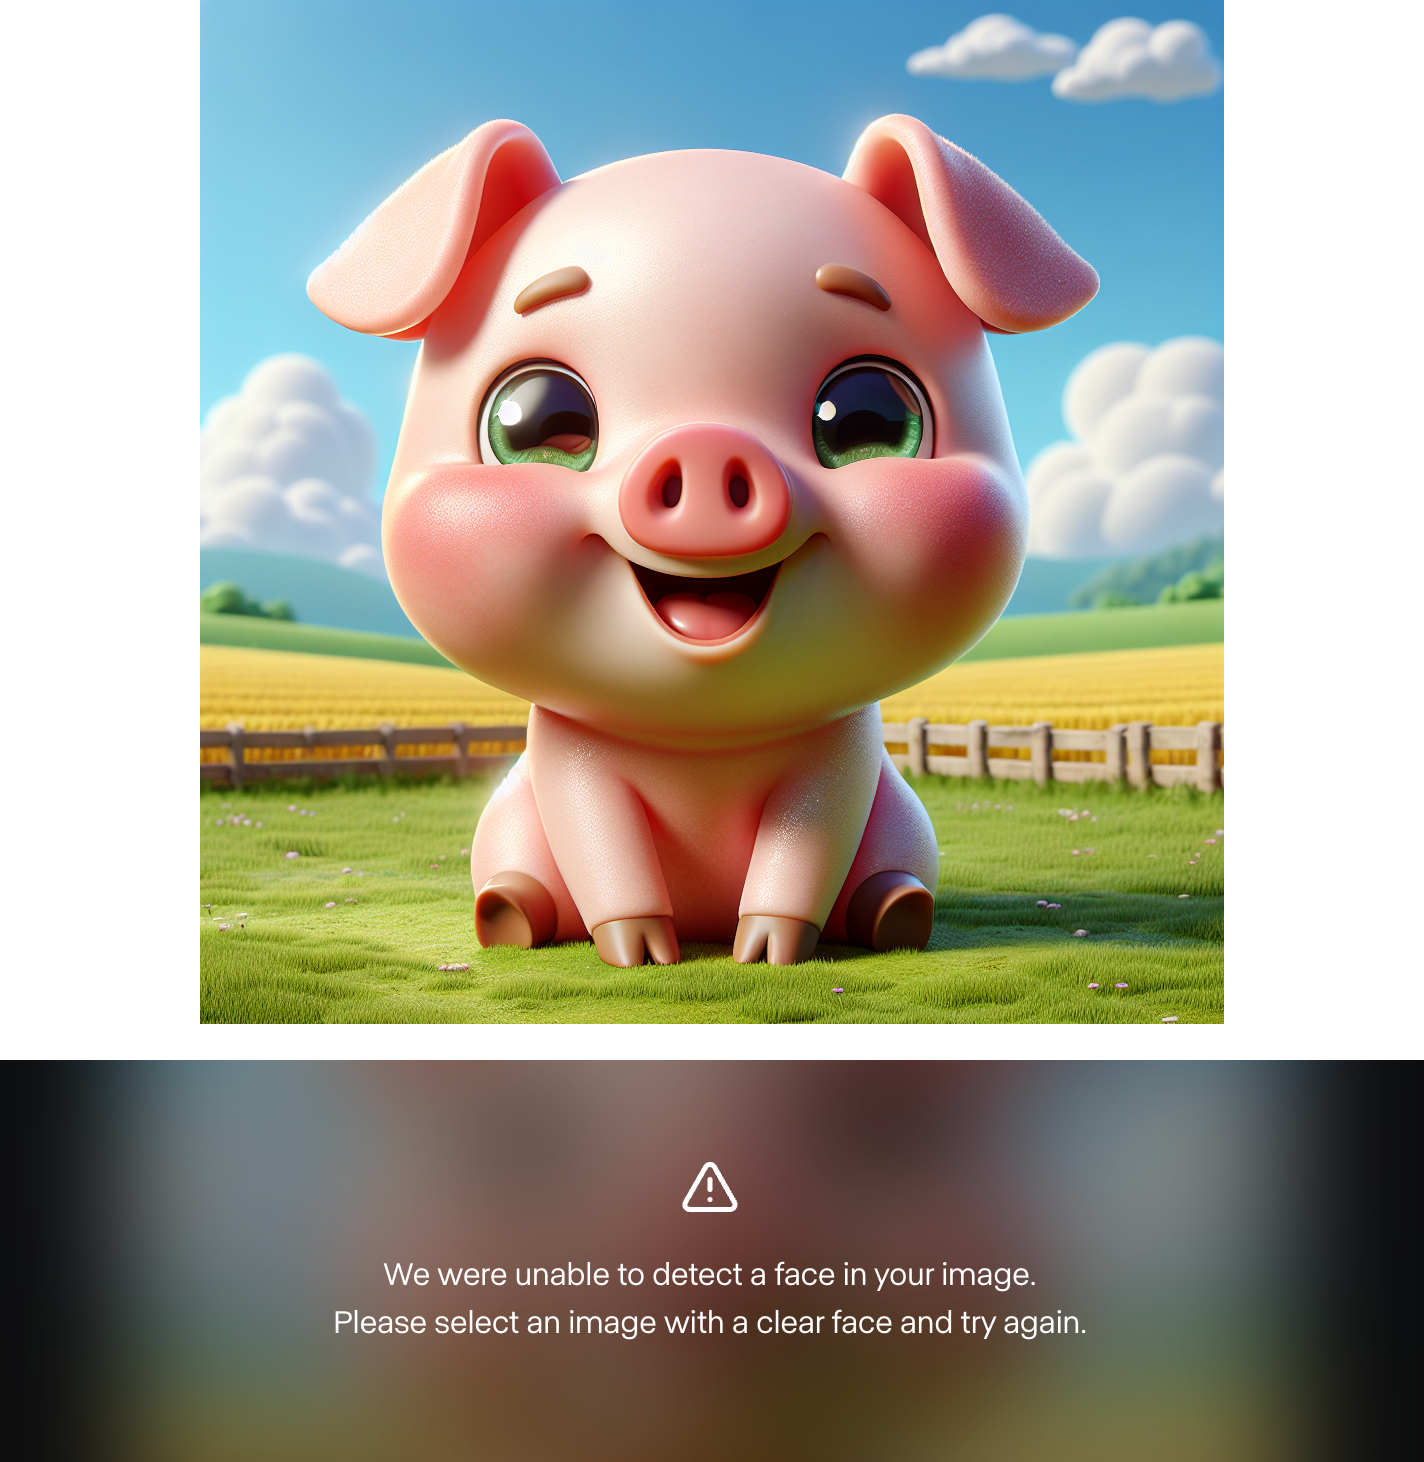
I also found it impossible to use a custom character image. I generated around 10 different characters using Dall-E 3, and Runway failed each time to find a face. Here’s an example:
This indicates to me that the examples showcased are cherry-picked and that the model isn’t ready for the general public. However, I tried it with human characters and it worked. So, it might be the case that the model doesn’t support custom animated characters yet.
Here’s an example with a human character:
The result using a human face was much better, and I thought the output was higher fidelity. However, this use case seems less impactful since we could just have the human act directly instead.
The output video length will match the input video, and credits will be charged depending on how long the video is.
Earlier this year, in June, Runway ML introduced its Gen-3 Alpha model, which creates videos based on a still image and a text prompt.
Because Act-One focuses on face close-ups, these two models complement each other. Act-One can be used to create dialogs, while Gen-3 Alpha can generate the scenes in between dialogs.
To switch to Gen-3 Alpha, click the “T” icon on the left (#1 on the image below).
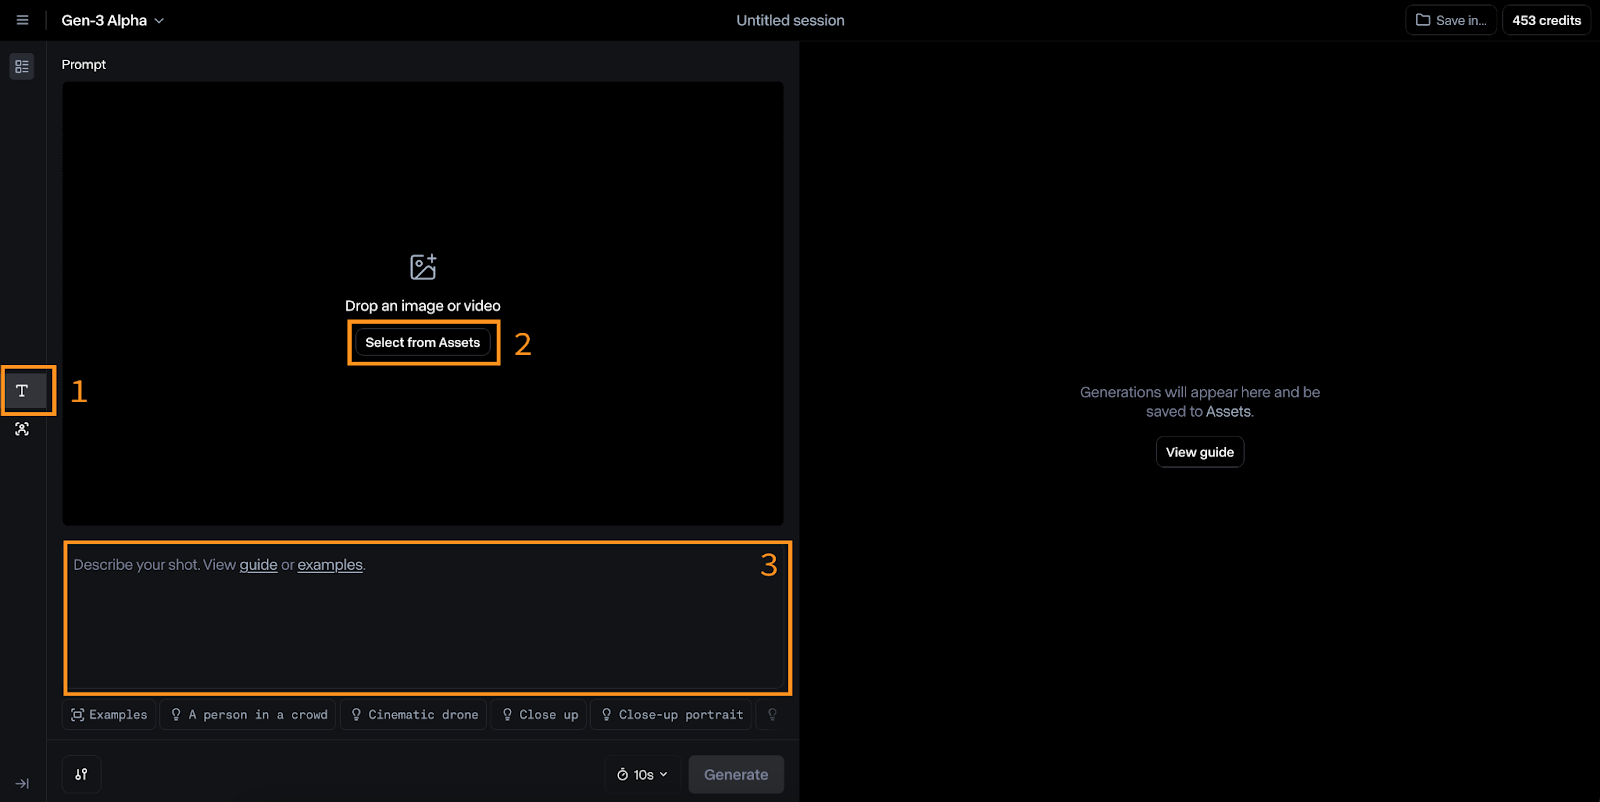
The inputs for this model are an image (#2) and a text prompt (#3). Runway suggests that the text prompt follow this format:
[camera movement]: [establishing scene]. [additional details].For example:
Low-angle static shot: The camera is angled up at a woman wearing all orange as she stands in a tropical rainforest with colorful flora. The dramatic sky is overcast and gray.I tried it to animate a photo that I took recently. Here are the inputs I used:
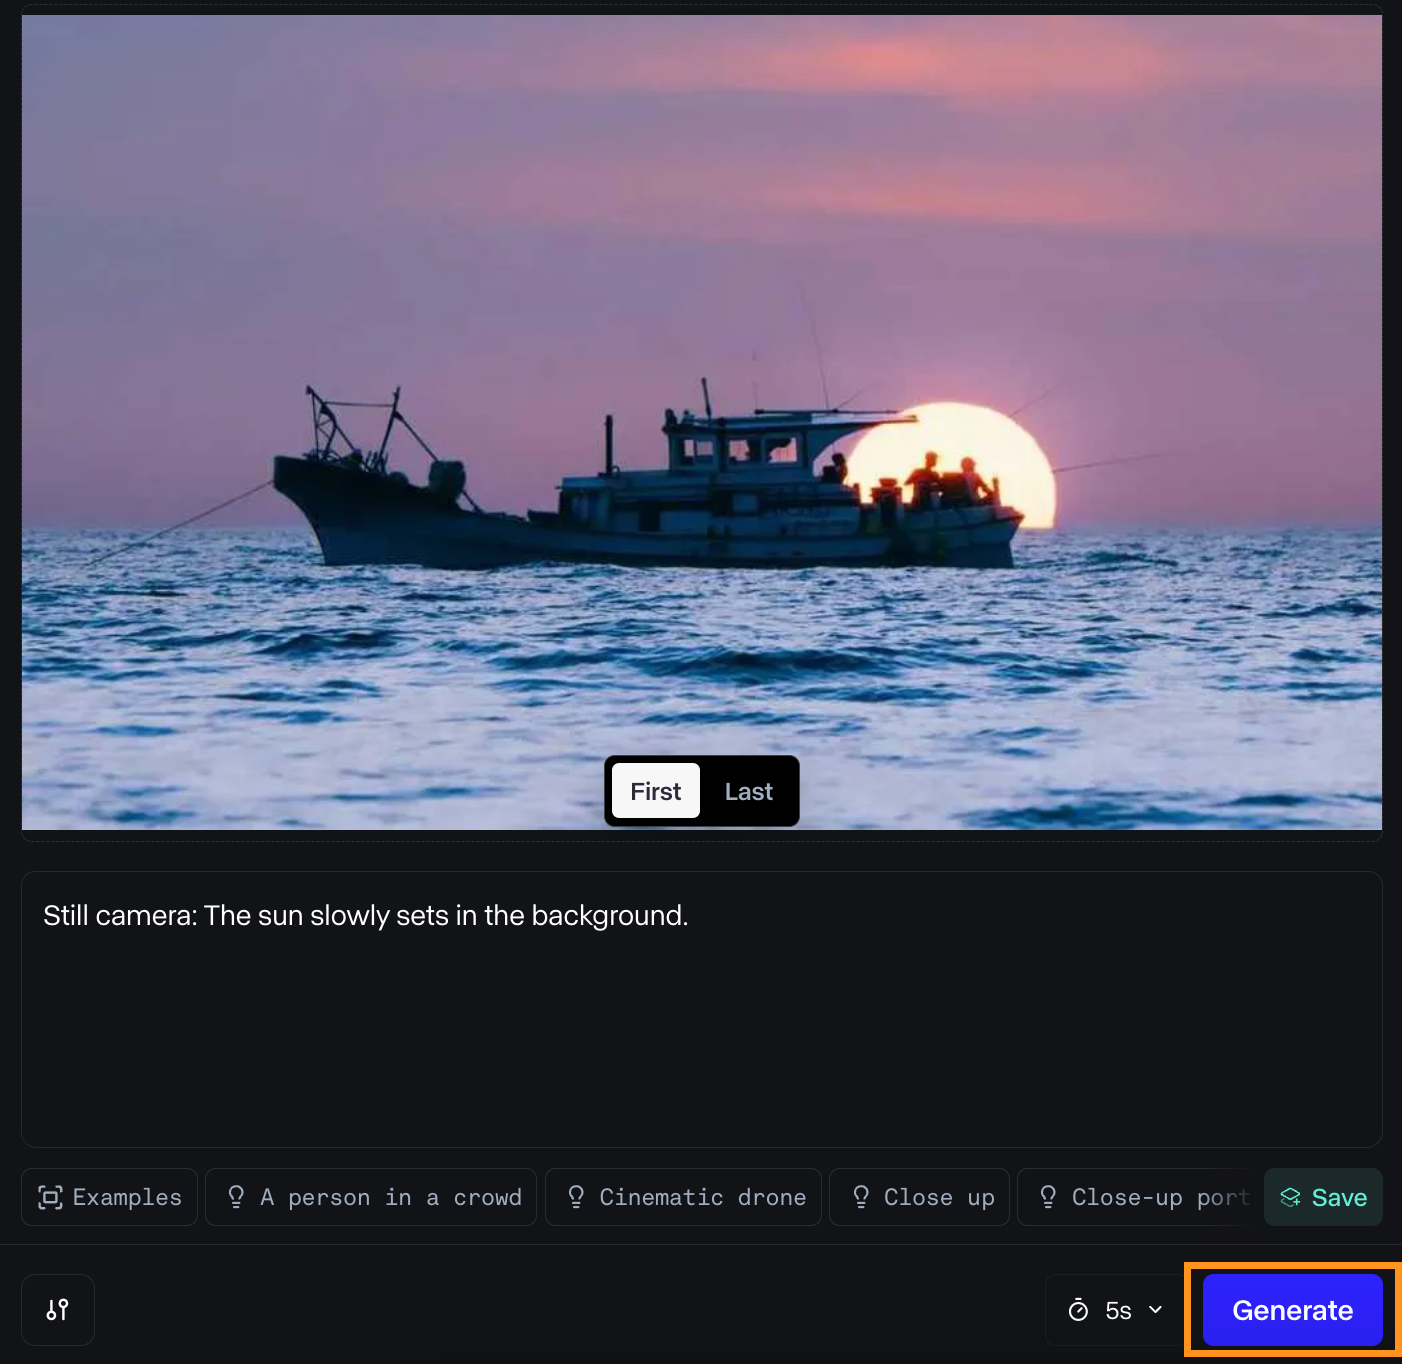
And here’s the result:
I liked the result. The light looks nice as the boat moves away from the sun, and the water movement is smooth.
However, the result is quite different from what I originally imagined. This is definitely one of the main problems for video creators: the inability to control every detail in a scene, which is possible with traditional movie creation methods. If this limitation persists, future directors using AI might find themselves constrained to scenes generated by AI rather than being able to realize their original vision.
In this instance, we can creatively combine three distinct video clips.
Firstly, we have a video of a boat moving across the water. This clip establishes the setting and provides context for the subsequent actions.
Next, we could have a close-up shot of a character standing on the shore, his gaze fixed upon the boat and expressing a feeling of longing.
Finally, we have a video of the boat getting away from the shore, as seen from the character's viewpoint. This third clip provides a sense of movement and progression.
Runway ML also offers an API for using its models outside the web interface. While it supports Gen-3 Alpha Turbo, it appears that Act-One is not yet available. This guide will cover the basics of using the API, which will remain the same once Act-One becomes available.
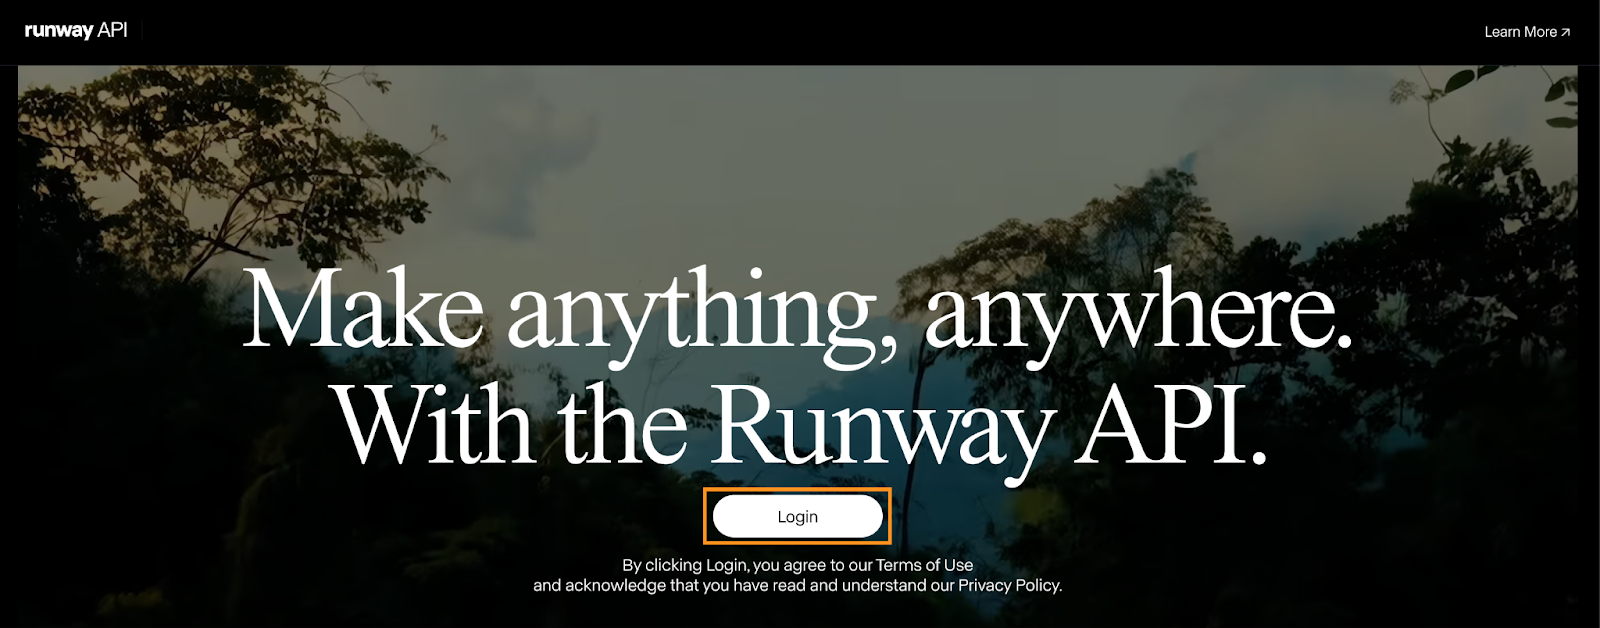
To get started, we need to create a developer account and generate an API key.
Navigate to the developer page and click the login button. If you don’t have an account, you’ll be able to create one there.
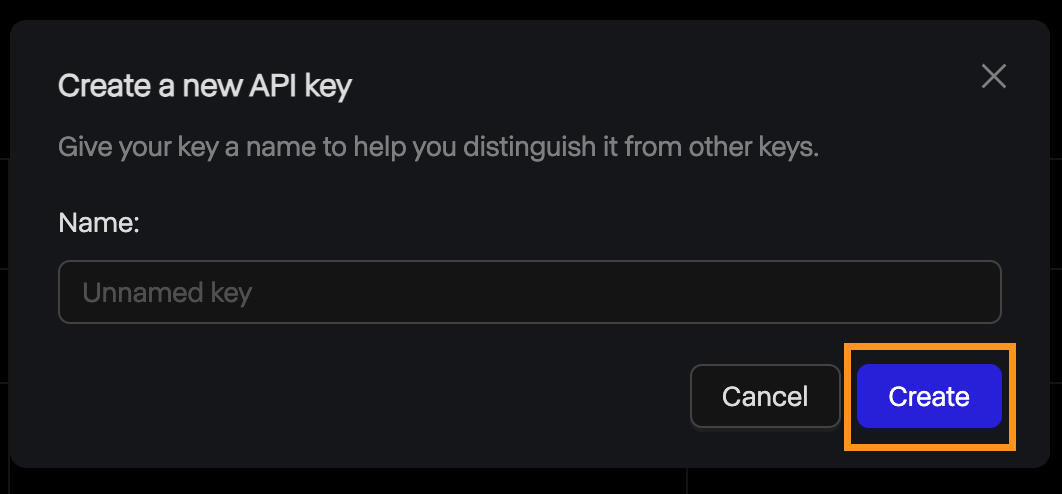
Once the account is created, navigate to the “API Keys” page and click “New API key”:

This will open a pop-up asking for the name of the key. We can leave it empty and click “Create”.
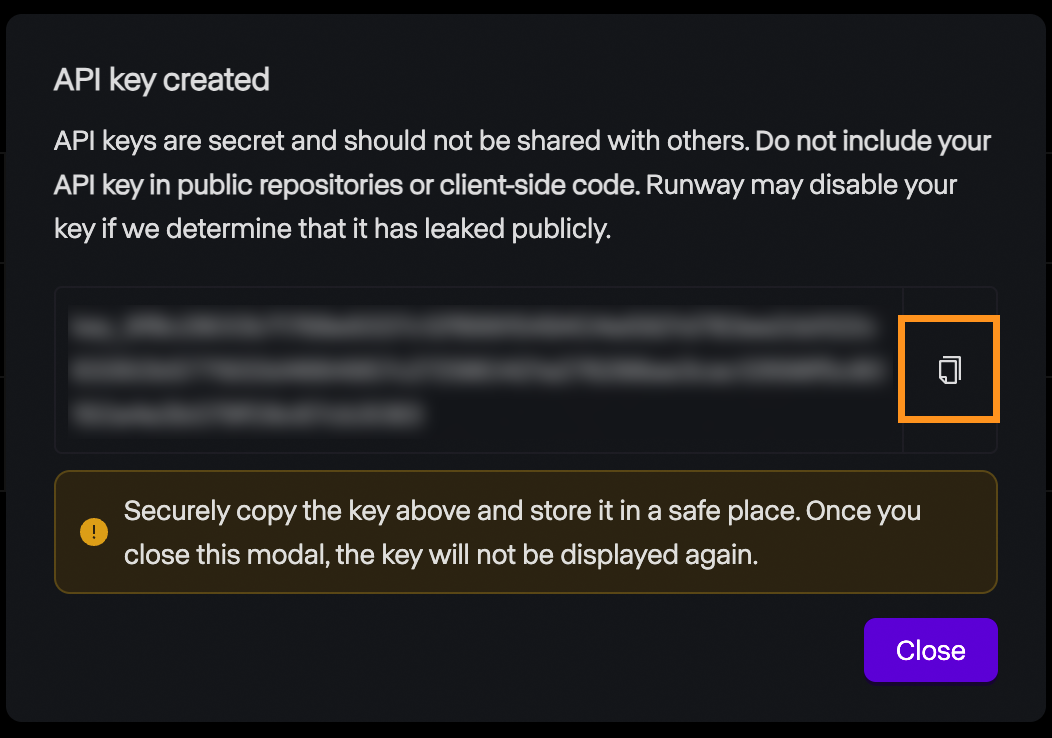
After that, the key is displayed, and we can copy it. Keep in mind that, for safety reasons, this is the only time the key will ever be displayed, so make sure to copy it. If it gets lost for some reason, we can always delete it and create a new one.
The Runway ML API does not offer a free tier. To experiment with it, we must add credits to our account. The pricing is identical to that of the web interface: $0.25 for a 5-second video and $0.50 for a 10-second video.
It's important to note that API credits are distinct from those of a subscription account, thus these credits cannot be used to generate videos via the web interface and vice-versa.
Runway ML provides a Python library called runwayml that we need to install to interact with the API. To install it, use the command:
pip install runwaymlTo access the API, the API key should be set as an environment variable named RUNWAYML_API_SECRET. We can do this using the following command:
export RUNWAYML_API_SECRET=api_key
```Replacing api_key with the key created above.
Generating a videoRecently, I took this photo of the night sky:

Source: Instagram @fran.a.photo
I wanted to try out runwayml to see if it could generate a time-lapse video from the photo. To generate a video from an image using the API, we:
Import and initialize RunwayML client. Note that we don’t need to provide the API key as it is automatically loaded from the environment variable we set up before.Call the image_to_video.create() method from the client, providing the name of the model, the image URL, and the prompt.Store the task into a variable and print its identifier so that we can retrieve the video later. This is important as it seems that their API doesn’t have any way to list the past tasks. Without it, we’ll pay the generation credits but won’t have a way to get our video.```python
from runwayml import RunwayML
url = "https://i.ibb.co/LC7Kfrq/Z72-5415.jpg"
client = RunwayML()
task = client.image_to_video.create(
  model="gen3a_turbo",
  prompt_image=url,
  prompt_text="Camera slowly zooms out: Astrophotography time-lapse featuring shooting stars.",
)
print(task.id)
To see the result, we need to wait for the task to complete. We can access the status of the task using task.status. The status will be equal to the string ”SUCCEEDED” once the video is successfully generated.
We can access the video URL using task.output. Note that this field is a list of outputs. By default, a single video is generated, so the video URL will be task.output[0].
Here’s a simple script that prints the video URL given the task identifier:
from runwayml import RunwayML
task_id = "af0a95ed-b0ff-4120-aecd-2473d7a42891"
client = RunwayML()
task = client.tasks.retrieve(id=task_id)
if task.status == "SUCCEEDED":
  print(task.output[0])
else:
  print(f"Video not ready, status={task.status}")
This is the video we generated from the photo:
Learn AI with these courses!
Track
Track
Course
blog
Iva Vrtaric
11 min
blog
François Aubry
8 min
Tutorial
Dr Ana Rojo-Echeburúa
Tutorial
François Aubry
Tutorial
Abid Ali Awan
Tutorial
François Aubry