
Track
AI Fundamentals
10 hr
Lovable is a text-to-app service that allows anyone to create functional applications without any programming skills. We can describe our app ideas through a chat interface, and the platform transforms these descriptions into a real, working application.
In this tutorial, I’ll show you how to use Lovable by building something practical—I’ll guide you step-by-step through building and publishing a simple yet complete to-do list mobile app with data persistence, user authentication, email reminders, and paid subscriptions.
At the end, I will also discuss some of Lovable’s limitations, including security concerns, its potential lack of speed for developers who already have their own tools and libraries, and the challenges non-programmers may face when debugging.
Using AI, Lovable allows us to transform our ideas into fully functional applications by describing them. This means we can easily bypass the complexities of traditional coding, making app creation both accessible and efficient for non-developers as well as for developers seeking a faster way to prototype apps.
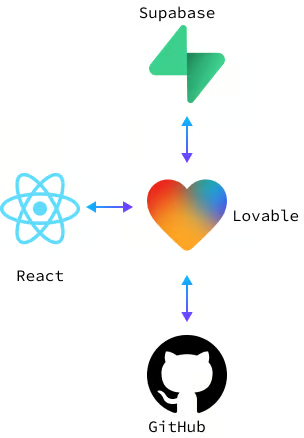
Lovable uses React and Vite for the frontend. React is a popular JavaScript library for building user interfaces, known for its flexibility and efficiency. Vite, on the other hand, is a build tool that offers a faster and leaner development experience. These frameworks facilitate our app creation by handling complex UI logic, ensuring that our applications are not only functional but also responsive and smooth.
For the backend, Lovable uses Supabase, an open-source alternative to traditional backend solutions. Supabase is essentially a collection of tools that create a backend system, including database storage, authentication, and cloud functions. It works in conjunction with our app to manage data and enable real-time functionality.
Lovable doesn't allow us to edit the code it produces directly in its interface. However, we do have the ability to link our app's code to a GitHub repository. This connection means any changes made to the code on GitHub are directly reflected in the app, allowing for collaborative development and version control.
This setup combines the ease of a no-code interface with the flexibility and control that GitHub offers. However, I often found myself wishing I could edit the code directly to make small changes.
To get started with Lovable, we first need to head over to their website and create a free account.
Once we have our free account set up, we'll be able to send five messages a day to the platform's AI assistant. It's a great challenge to see how far we can progress within these limitations.
In the first message, we give a brief description of our project.
Note that my description is quite short. I also tried giving a very detailed description in the first message outlining all of the functionality, but this didn't work very well because most of that functionality requires a backend. When the project is initially created, it's not automatically connected to Supabase, so the prompt will fail.
This is the result we obtained with this prompt:
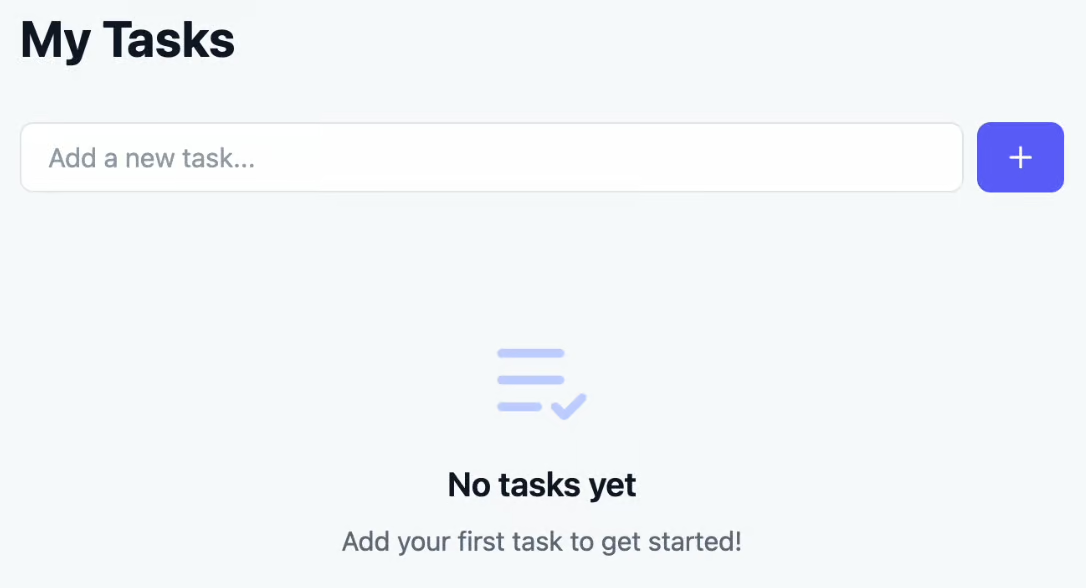
The app was quite functional at this stage. It was able to create, delete, and mark items as completed in the to-do list. To my surprise, the data would persist when the app was refreshed!
Lovable did this using local storage, which stores the data in a local browser database. This method has the advantage of not requiring an internet connection but also has the disadvantage of not sharing data across devices.
Let's see how to replace this with a backend database by connecting our project to Supabase.
Supabase is an open-source platform that provides a backend infrastructure for our applications. It offers a range of services, including database storage, authentication, and APIs, making it a comprehensive solution for managing app data.
When building a to-do list app, for instance, Supabase becomes essential if we want our app's data to persist across multiple devices and users. Unlike local storage, which stores data only within a single device's browser, Supabase allows us to store data in the cloud. This means our users can access their to-do lists from any device and see updates in real time.
Additionally, Supabase's authentication services help us manage user sign-ups and logins, ensuring that each user's data remains secure and private. By connecting our app to Supabase, we unlock the full potential of our application.
One of the advantages of using Supabase to build our applications is its open-source nature. Being open-source means that Supabase does not lock us into using a specific cloud provider, offering more flexibility in how we manage our app's backend. While we have the option to utilize Supabase's hosted services for convenience, we also have the freedom to self-host our applications using Docker if we prefer. This flexibility allows us to choose the hosting environment that best meets our needs, whether it’s for cost efficiency, performance considerations, or compliance requirements.
To connect our project to Supabase, we follow these steps:
1. Click on the Supabase button on the top-right corner.
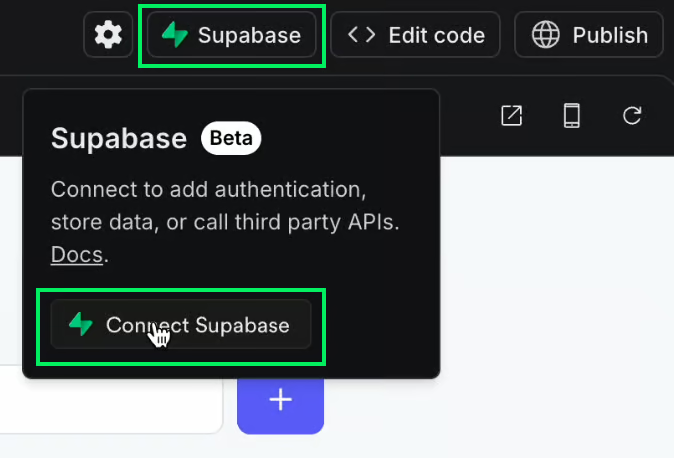
2. A pop-up will appear, prompting us to sign up for Supabase.
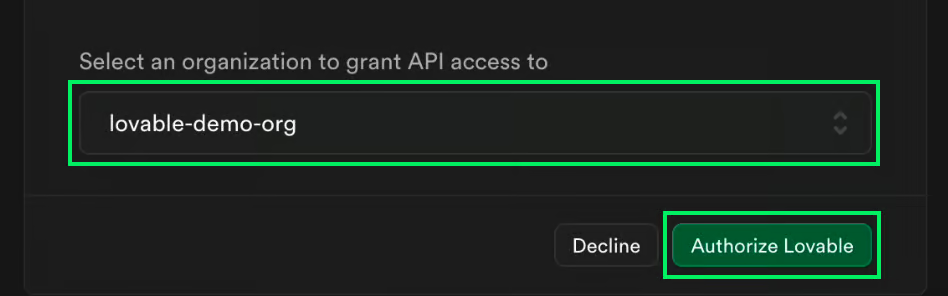
3. After signing up, we click the Supabase button again to authorize Lovable to access our account. We'll be prompted to create an organization.
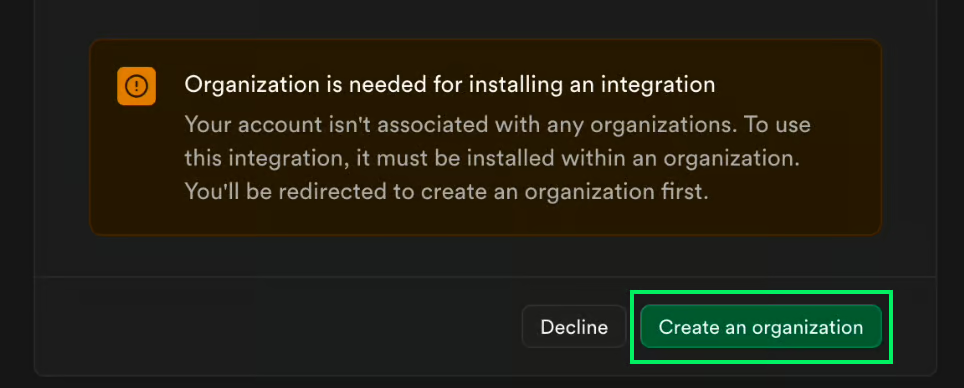
4. Once the organization is created, we can select it and authorize Lovable to access our Supabase account through that organization.
5. Click the Supabase button again and create a project. This will redirect us to the Supabase website, where we can configure the project.
6. Finally, return to the Lovable website and click the Supabase button one last time. Then, select the project we just created. This will prompt the AI to update the code to connect to that project.
That’s it, now our app has a backend!
As mentioned above, it's better to connect to the project Supabase before asking Lovable to implement any functionality that requires a backend because it seems like it doesn't like to write the code before it's connected. Note that this is not really how engineers work—frontend engineers can write the frontend code without the backend being implemented.
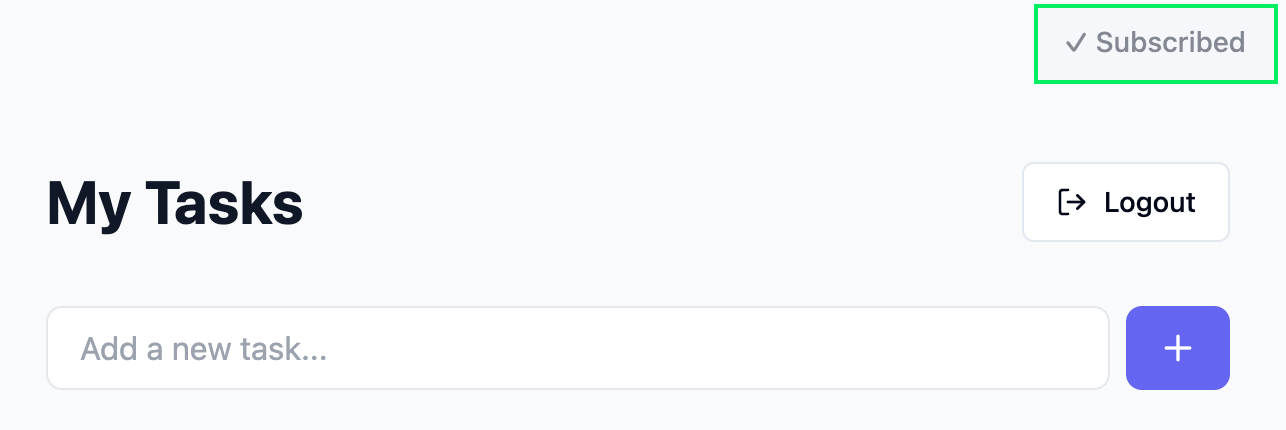
With our app connected to a Supabase project, we can now prompt Lovable to add user authentication.
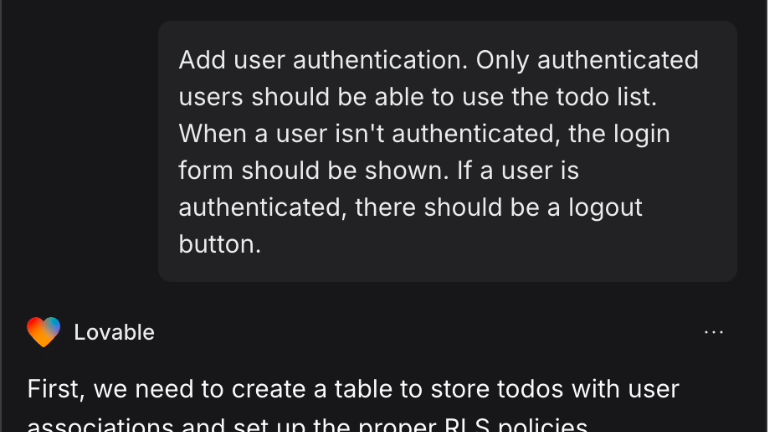
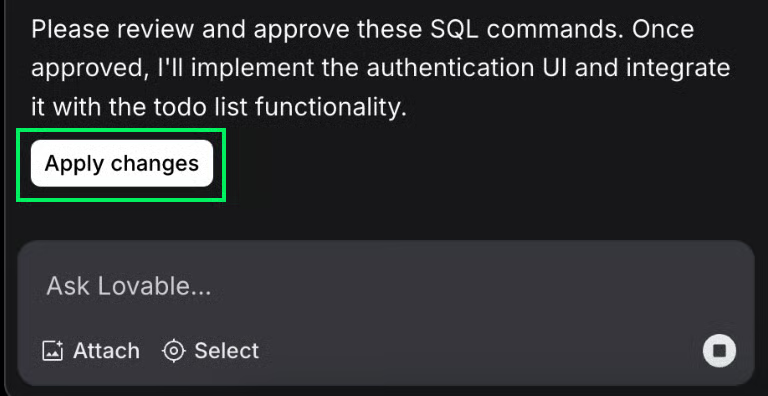
First, the AI will create the database tables for our application. Once it's done, we need to manually approve it by clicking the "Apply Changes" button on the chat window.
We won’t always be prompted to accept the AI's changes, but in some cases, this is necessary because some changes (like database updates) can affect the app in production even without publishing it.
After the database is updated, it will start updating the code to authenticate users and save the to-do updates to the database.
However, this time it runs into an error saying: "Build unsuccessful". When this happens, we can see the error and have the "Try to fix it" button at the top to attempt to automatically fix the problem.
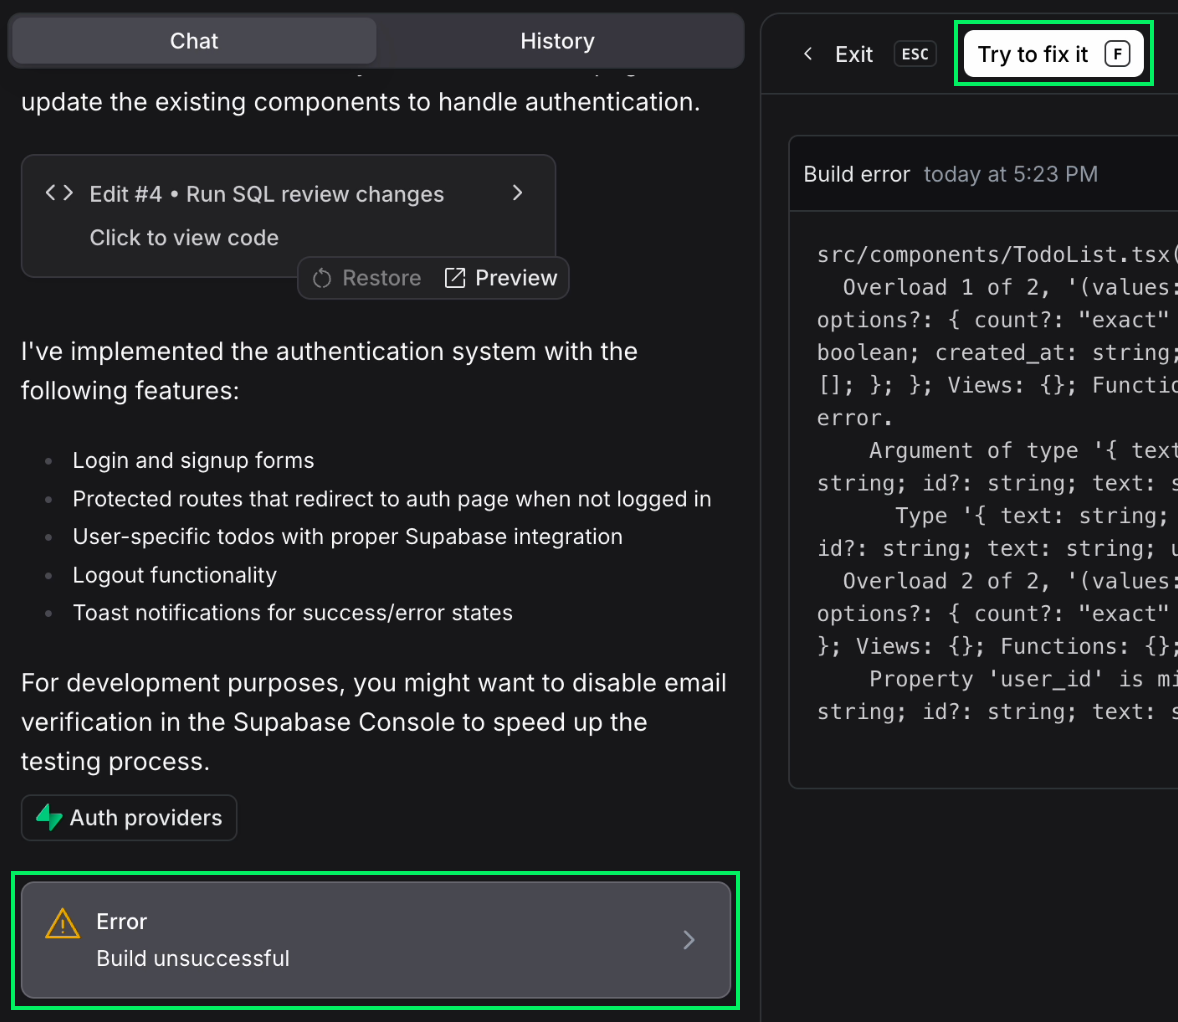
In this case, clicking the button fixed the issue, and the app is now fully functional with user authentication and database data storage, so if we use the app on multiple devices, we can still access our to-do list.
To publish the app, we can use the "Publish" button in the top-right corner.
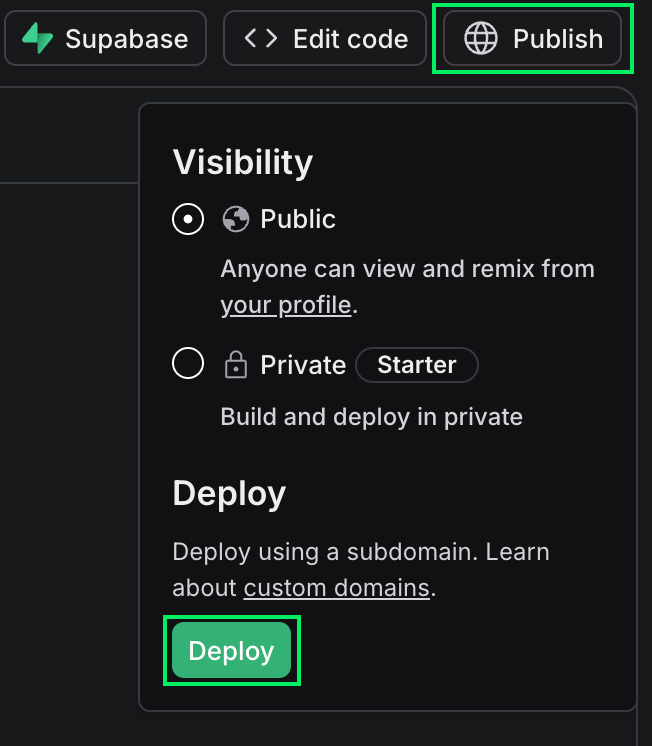
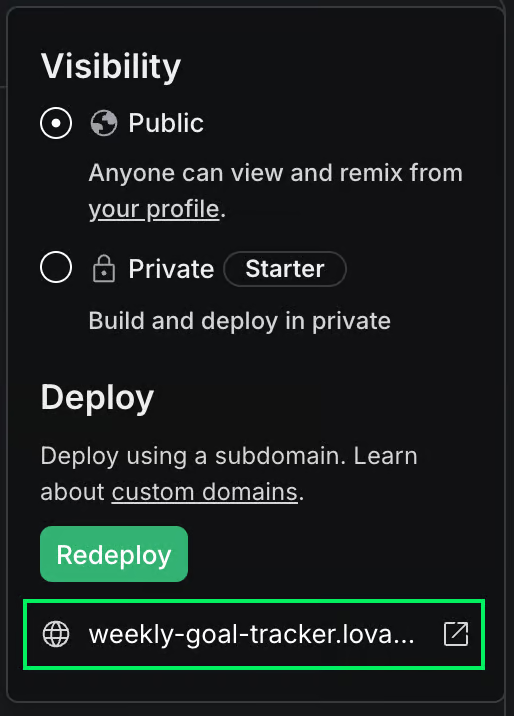
Once published, we can access it using the link provided at the bottom of the menu.
This is publicly accessible online and allows anyone to use the app. We can also set up a custom domain if we have one. We won't cover those details here, but Lovable has a tutorial for it on their documentation.
Note that we need to click the “Redeploy” button whenever we make changes to the app. Otherwise, those changes will only be visible on the Lovable interface and not by the users using the app via the app URL.
Lovable doesn’t allow us to directly make changes to the code, it only allows us to view the code and the changes it makes.
To be able to modify the code, we need to connect the project to GitHub, which is a widely used platform for hosting and collaborating on code projects using version control. This allows multiple users to contribute, review, and manage changes efficiently.
To connect to GitHub:
1. Log in to your GitHub account and create a free organization.
2. In Lovable, click the "Edit Code" button on the top-right corner.
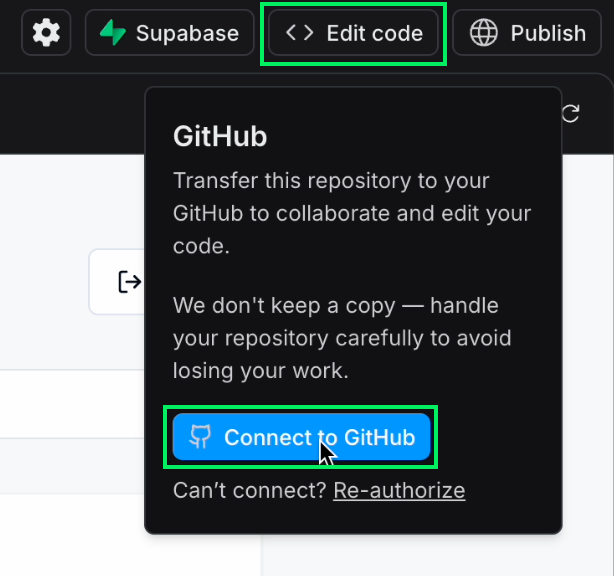
3. Then click "Connect to GitHub".
4. Select the organization we created on the first step.
With GitHub connected, the code will remain synced with the GitHub repository. This means we can use tools like VSCode to work on our project locally. Note that it takes a while for Lovable to fetch the changes after they are pushed to the repository.
Remember that the app itself doesn't redeploy automatically. To see the changes in the app, we need to publish it again.
What we've learned so far allows us to make an app that can maintain an online database and front-end user interface to create, read, update, and delete that data, often known as a CRUD application.
Cloud functions offer a powerful way to add custom logic and complex operations to our applications without the need to manage physical servers. They allow us to run backend code in response to events such as database changes, HTTP requests, or other triggers. This can be particularly useful for tasks like sending email notifications, processing data, or performing scheduled jobs.
By using cloud functions, we gain the flexibility to handle intricate functions efficiently and scale them as needed, all while ensuring a seamless and responsive user experience. In essence, they enable us to extend the capabilities of our apps beyond simple data management, making them more dynamic and useful.
A great example of using a cloud function in a to-do list app is sending email reminders for upcoming tasks. Let's say we want to remind users about their tasks due soon. We could write a cloud function that checks the database for tasks with approaching deadlines and automatically sends an email reminder to the user.
We can ask Lovable to implement this for us:
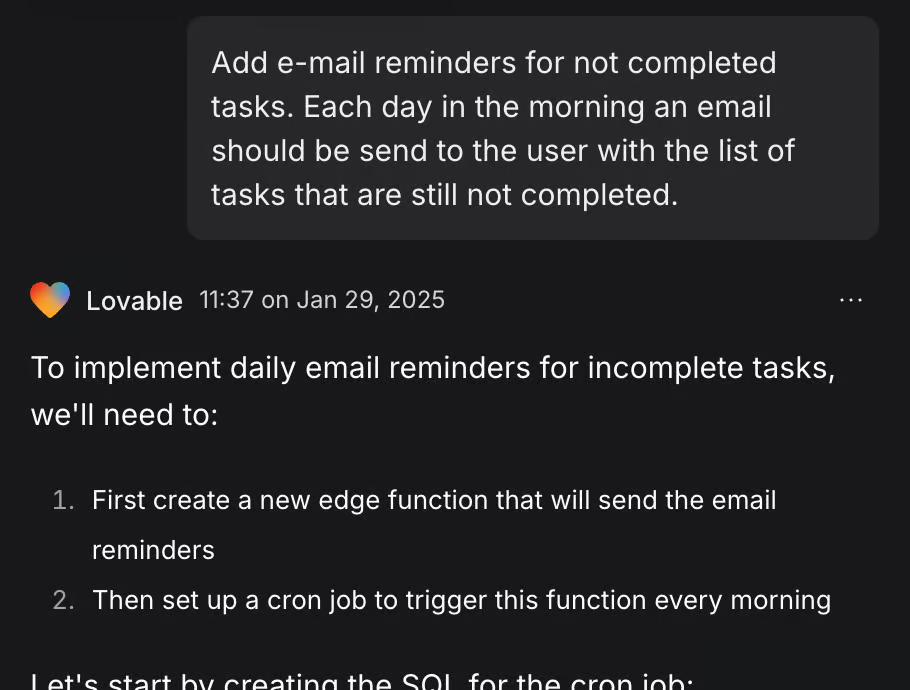
Some functions require access to external APIs which require an API key to work. In this case, the implemented solution uses the Resend API, so Lovable asked for the API key to finish setting up the service.

There's not much point in making an app if users can't subscribe to it. Let’s ask Lovable to implement subscriptions in the app using Stripe.
We can use the following prompt:
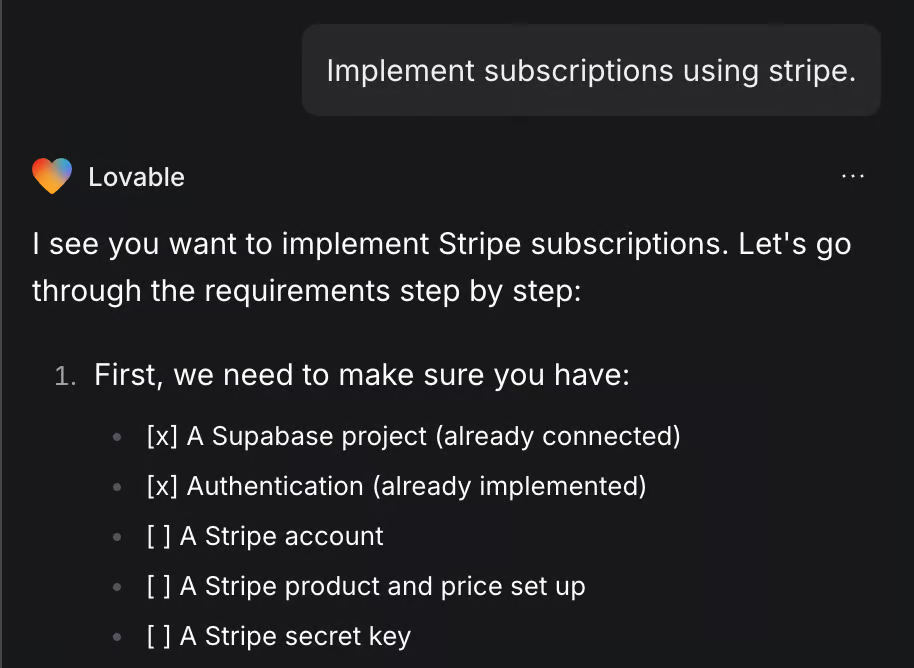
It asked me to provide my Stripe key, similar to the previous example. We can get this key from our Stripe account.
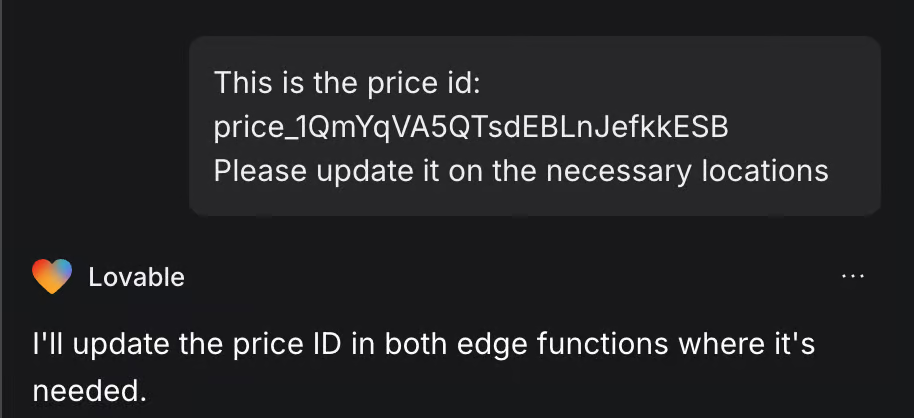
Finally, it said the subscription price ID was missing. For this, we can go back into Stripe, create a subscription product, and copy the price ID. Since Lovable didn't have a button asking for the price ID as it did for the API key, we can provide it in the chat:
To complete the implementation, we can ask it to only allow subscribed users to create to-dos and publish the updated version of the app.
Everything worked on the first attempt!
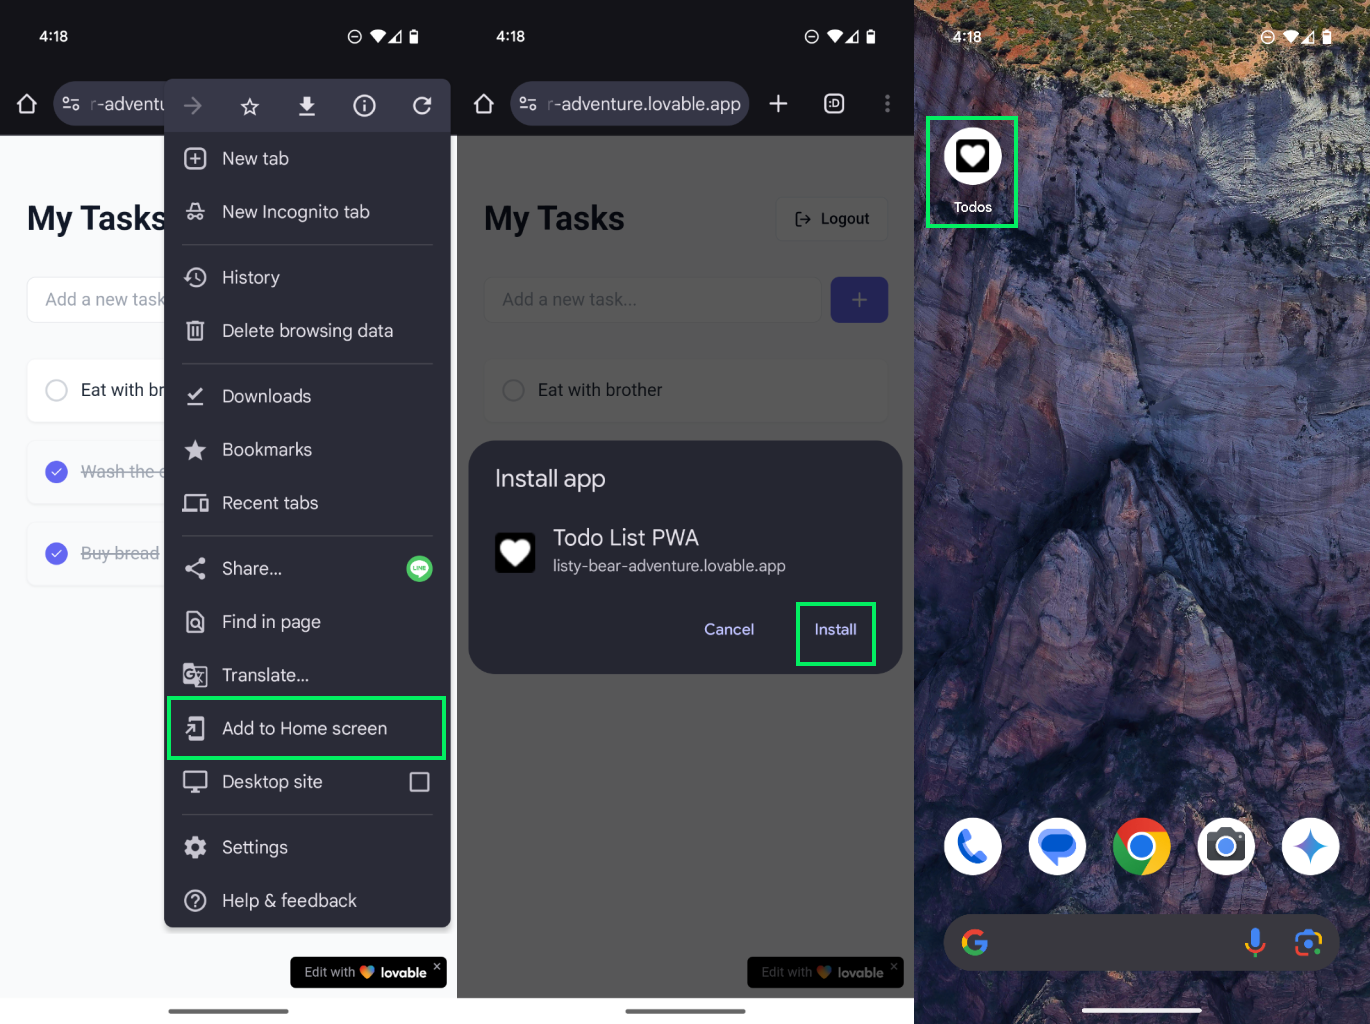
The app Lovable created isn't a progressive web app (PWA) out of the box. It’s just a website and this means that we cannot install it on a mobile device and use it as if it were a proper phone app instead of a website.
However, this is very easy to fix with a single prompt:
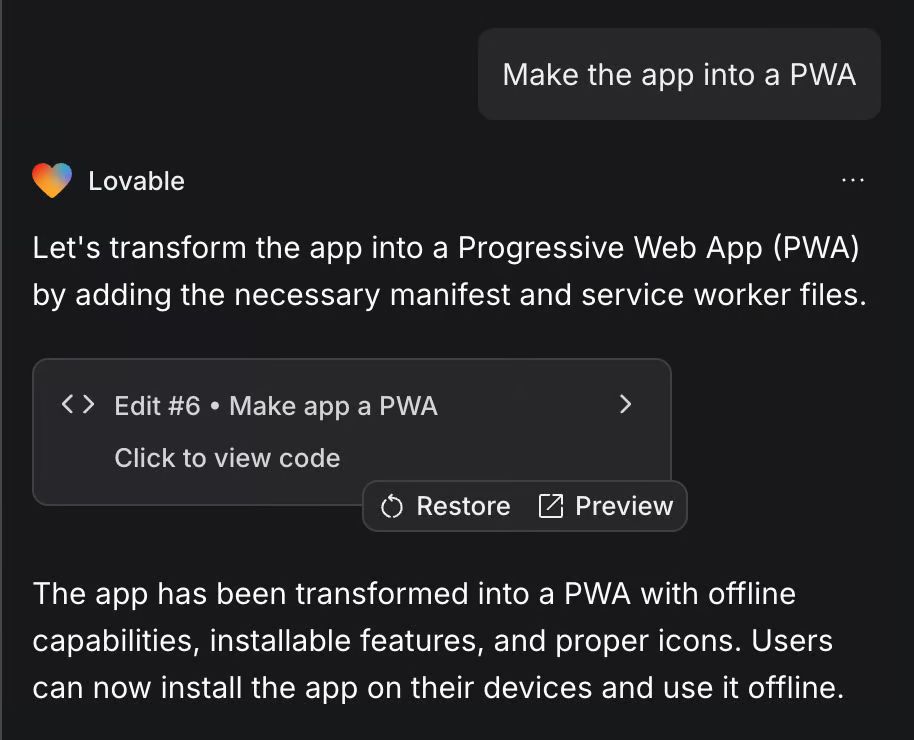
With these changes, if we open the app link on our mobile device, we can install it and use it as if it were a natively installed app.
Despite Lovable's potential, it's important to consider its limitations.
While Lovable offers an inviting way to build apps without coding, it does raise concerns about app security, especially for those without coding experience. How can users be certain that their app's database has the necessary security measures in place to prevent unauthorized access, such as one user adding tasks to another user's list?
This crucial aspect wasn't mentioned in the prompts during the app creation process, leaving potential vulnerabilities unexamined. Users without technical backgrounds might find it difficult to assess and manage these security concerns.
For developers who already have their own set of tools and code libraries, the question becomes: is Lovable truly faster?
Many developers have honed their craft by creating an internal library of code snippets and modules that they trust and are familiar with, often encompassing features like payments, authentication, and CRUD operations. These are tailored to their style and technology preferences.
Lovable may not offer the same level of control over the technologies used, which can be a disadvantage for those accustomed to particular systems and workflows. While the platform provides an easy way to prototype quickly, developers might find it more efficient to stick with their existing tools and methods, especially when considering the seamless integration and the familiarity they offer.
While Lovable brings tremendous ease to building apps without coding, there is a significant concern about how non-programmers are expected to handle situations where automatic solutions fall short and manual intervention is necessary. What happens when the platform encounters an issue it cannot resolve automatically? Who addresses these bottlenecks when the intended users lack coding skills?
Without the ability to dive into the code, a non-coder might feel stuck and unsure of what steps to take next. This dependency could lead to stalled projects and frustration, potentially requiring them to hire a programmer or seek external help, which may involve additional costs and delays.
Ultimately, while Lovable makes app development accessible, its success for non-programmers largely depends on how it supports users when things get complex beyond simple prompting.
I believe Lovable truly delivers on its promise of making app development accessible to everyone. Despite the limitation of sending only five prompts a day, we can still build a functional app effectively.
The platform shows a strong capability to manage more complex workflows, allowing us to perform detailed app customization. This means that even within limited interactions, we can transform creative app ideas into working applications.
Learn AI with these courses!
Track
Track
Course
Tutorial
Dr Ana Rojo-Echeburúa
Tutorial
Abid Ali Awan
Tutorial
Abid Ali Awan
Tutorial
Aashi Dutt
Tutorial
François Aubry
Tutorial
Dr Ana Rojo-Echeburúa