
Track
Git Fundamentals
7 hr
Git is one of the most widely used version control systems in modern software development. It helps developers track changes, collaborate across teams, and manage codebases more reliably. Whether you're working on solo projects or contributing to large-scale applications, Git is a tool you'll use often.
This guide walks you through the process of installing Git on a Windows system. We'll cover multiple approaches, both through a graphical installer and using command-line tools, so you can choose the method that fits your workflow best.
By the end, you’ll have Git fully set up and ready to go, no matter your level of experience with the terminal or system configuration.
Before installing Git, it’s a good idea to see if it’s already on your system. Many development tools include Git by default, so you might not need to install anything at all. To check if Git is already installed, open either Command Prompt or PowerShell on your Windows machine. Then run the following command:
git --versionIf Git is installed, this command will return the installed version for example:
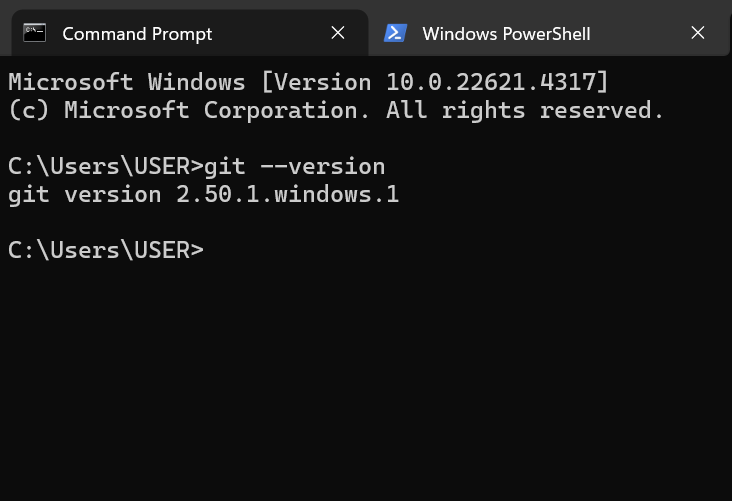
If you see a message saying the command isn’t recognized, that means Git isn’t installed or isn’t in your system’s PATH. In that case, you’re ready to move on to the installation steps. If it is installed but you’re not sure whether it’s the latest version, the Git Cheat Sheet can help you review commonly used commands and features.
There are several ways to install Git on Windows, depending on your preference for graphical interfaces or command-line tools. We'll start with the most common method: using the official Git installer.
The official Git installer is one of the most widely used and reliable methods for setting up Git on Windows. It’s maintained by the Git project itself and provides a straightforward installation process that works well for most users.
To get started, head over to the official Git downloads page and choose the Windows version. The site should automatically detect your operating system and offer the appropriate installer.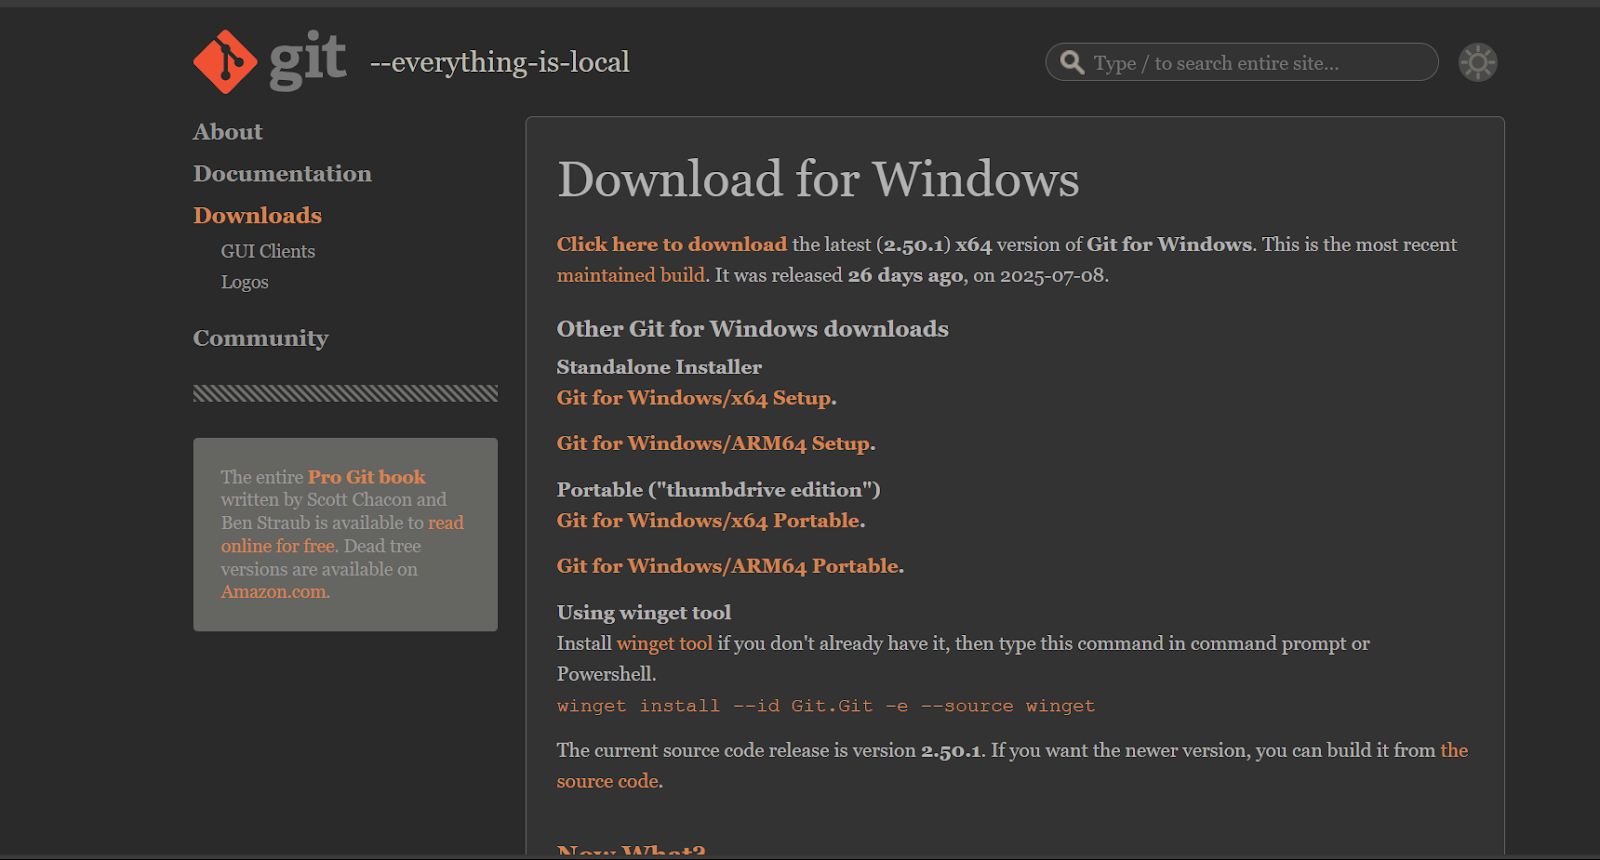
Once downloaded, run the installer to begin setup. During installation, you’ll go through several screens where you can customize preferences. Here are a few key steps and options you’ll encounter:
Winget is a command-line tool built into Windows for managing software installations. It's included by default in Windows 10 (2004 and later) and Windows 11, and offers a quick way to install Git without downloading a separate installer.
To install Git using Winget, open PowerShell or Command Prompt with administrator privileges and run:
winget install --id Git.Git -e --source wingetTo update Git later on with Winget, just run:
winget upgrade --id Git.GitThis makes keeping your setup current much easier over time.
For a more detailed setup, especially if you're combining Git with CI/CD pipelines, you might also want to look at CI/CD for Machine Learning.
Chocolatey is a popular package manager that simplifies software installation through the command line. It's especially useful for scripting and setting up development environments.
Before using Chocolatey, make sure you have administrative access and PowerShell v3+ enabled with .NET Framework 4+. You can install Chocolatey by running this command in PowerShell (Admin):
Set-ExecutionPolicy Bypass -Scope Process -Force;
[System.Net.ServicePointManager]::SecurityProtocol =
[System.Net.ServicePointManager]::SecurityProtocol -bor 3072; `
iex ((New-Object System.Net.WebClient).DownloadString('https://community.chocolatey.org/install.ps1'))
Once Chocolatey is installed, you can install Git by running:
choco install gitThis method works well for repeatable installs or automation. If you want to brush up on Git’s core concepts, Foundations of Git is a great place to start.
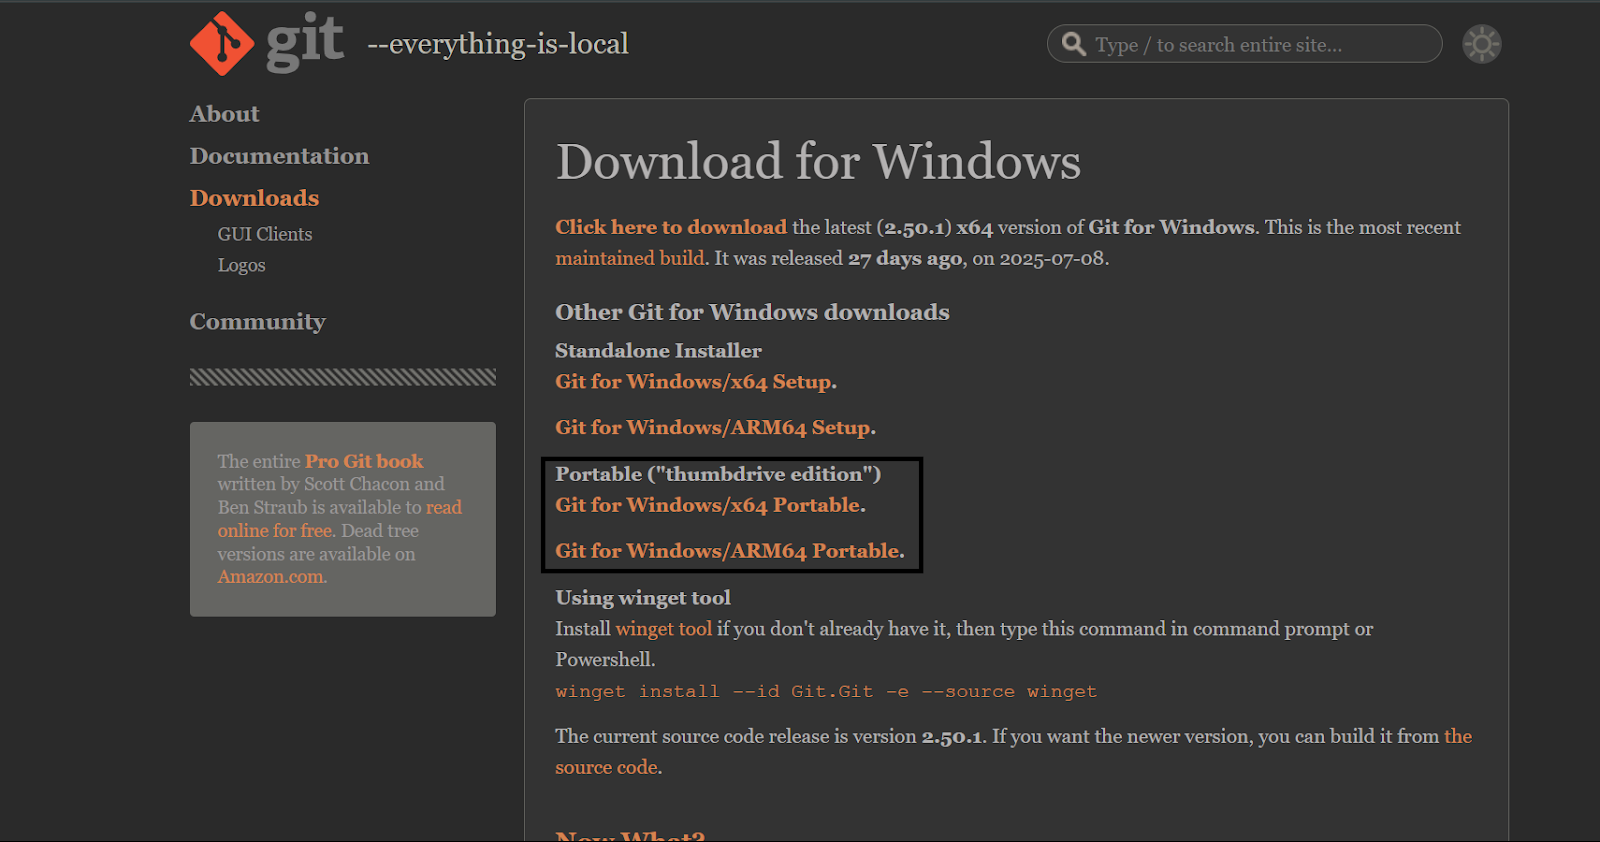
The portable edition of Git is designed for situations where you can’t or don’t want to perform a full installation. It’s especially useful on restricted systems or for keeping a copy on a USB drive.
To get the portable version:
If you want to use Git from the terminal system-wide, add the bin directory from the extracted folder to your PATH environment variable.
Open System Properties > Environment Variables, and add the path under System variables > Path.
This edition gives you full control without modifying system files, which is helpful in constrained environments.
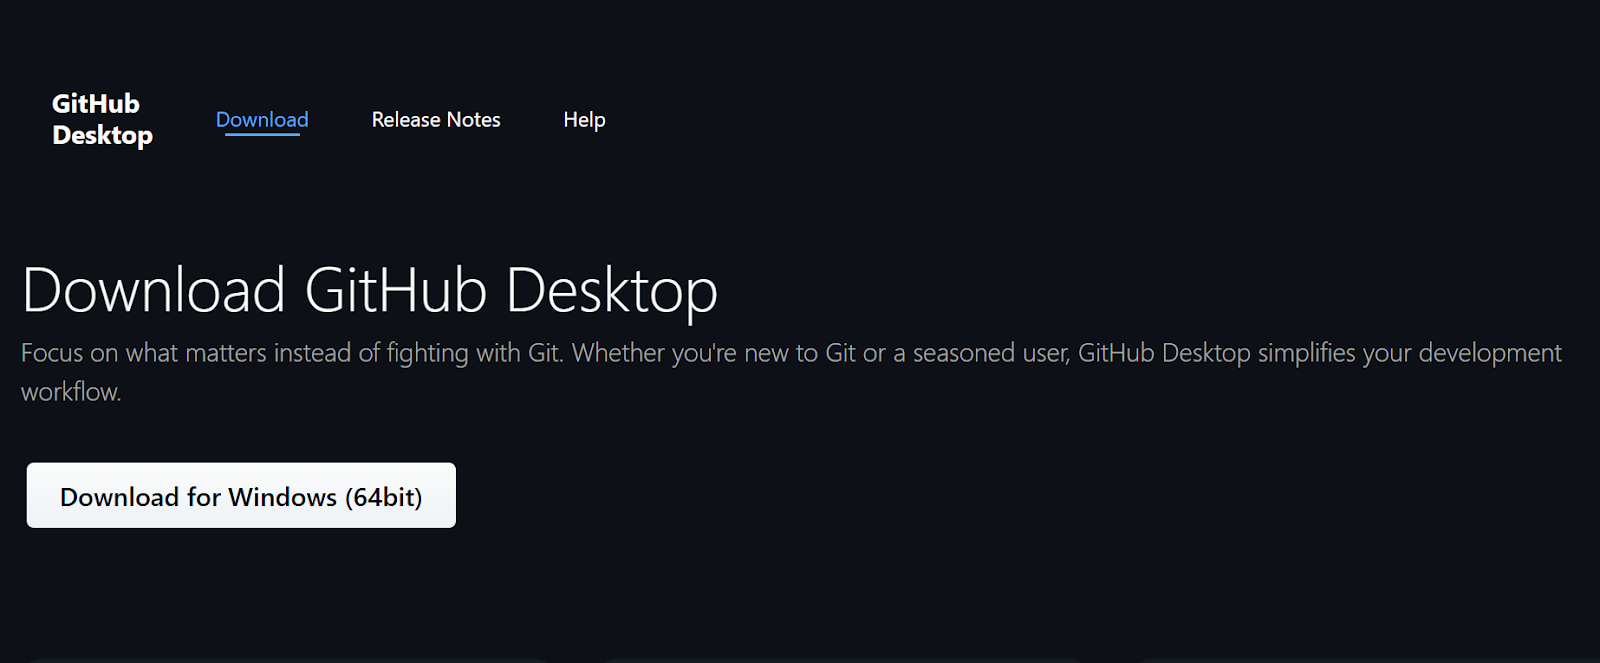
GitHub Desktop is a graphical Git client designed to simplify version control, especially for those new to Git. One advantage is that it installs Git automatically as part of the setup, so there’s no need to install Git separately.
To get started:
GitHub Desktop is especially useful if you're still getting comfortable with Git concepts or prefer a GUI. If you're just beginning, check out GitHub Foundations or GitHub Concepts to build up your skills alongside the tool.
Visual Studio Code (VS Code) is a popular editor that often detects whether Git is installed. If it doesn’t find Git, VS Code will prompt you to install it and provide a download link.
If you're prompted:
If you’ve already installed Git but VS Code isn’t detecting it, make sure Git’s location is included in your PATH. You can also manually set the Git path in the VS Code settings under git.path.
VS Code offers solid Git integration, including features like commit history, diffs, and merge support all from within the editor. For those looking to go further, Intermediate Git and Intermediate GitHub Concepts are great ways to level up while staying in a familiar environment.
Once Git is installed, a few initial setup steps will help ensure everything runs smoothly. These configurations personalize your Git environment and improve security and consistency across your projects.
Before you start using Git, it's important to set your name and email. These are attached to every commit you make, so collaborators can see who made what changes.
To configure your global identity, run these commands in PowerShell, Command Prompt, or Git Bash:
git config --global user.name "Your Name"
git config --global user.email "your.email@example.com"
These settings are stored in your global Git config file and apply to all repositories on your system. If you ever need different identities for specific repositories (like personal vs. work), you can override them locally using the same commands without the --global flag.
For more about how Git tracks contributions, the Git Reset and Revert Tutorial is a helpful next read.
When working with remote repositories—especially private ones—you’ll need to authenticate securely. Manually entering your username and password each time isn't practical or secure, which is where the Git Credential Manager comes in.
The Git Credential Manager (GCM) stores your credentials securely and handles authentication automatically. If you installed Git using the official installer, GCM is likely enabled by default.
To double-check, you can run:
git config --global credential.helper managerFor accounts with multi-factor authentication (like GitHub or Azure DevOps), GCM supports personal access tokens (PATs), OAuth flows, and device code login methods. If you're using GitHub, you can read more in GitHub Concepts, which covers authentication and collaboration basics.
To confirm that Git is working properly, open a terminal and run:
git --versionThis should return the installed Git version. Next, try initializing a repository:
mkdir test-repo
cd test-repo
git init
This creates a new Git repository and confirms everything is running correctly.
You might also want to review a few settings before you begin working with code:
Line endings (Windows vs. Unix-style):
 git config --global core.autocrlf true

 git config --global init.defaultBranch main
This setting helps prevent line-ending issues when collaborating across platforms.These initial tweaks help create a clean, modern setup and avoid common pitfalls when syncing across environments. If you want a quick refresher on command-line usage, the Azure CLI Cheat Sheet and Data Processing in Shell can be good additions to your toolkit.
Beyond basic setup, Git for Windows comes with additional tools that can make working with repositories more efficient. These include shell environments, graphical interfaces, and Windows-specific integrations that streamline your workflow.
Git Bash is a terminal emulator for Windows that provides a Unix-style command-line environment. It comes bundled with the official Git installer and is especially useful if you're comfortable using Linux commands or need to run shell scripts.
To open Git Bash, right-click anywhere on your desktop or in a folder and choose Git Bash Here, or launch it from the Start menu.
Once inside, you can use common Unix commands like:
ls       # List files
pwd      # Show current directory
grep     # Search through text
touch    # Create new files
This shell is handy for running Git commands and working in environments that expect a POSIX-style interface. If you're learning command-line tools in parallel, the Data Processing in Shell course is a great companion.
Git for Windows also includes Git GUI, a lightweight graphical interface for handling basic Git operations. It’s useful if you prefer visual tools for tasks like staging files, making commits, and viewing project history.
To launch Git GUI, search for it in the Start menu or right-click in a repository folder and choose Git GUI Here.
From the interface, you can:
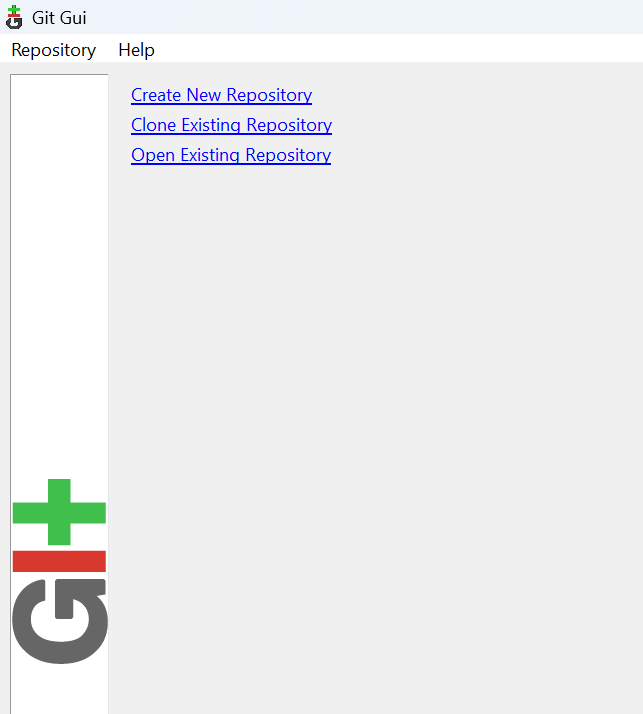
While it doesn’t have all the advanced features of dedicated Git clients, it’s a helpful tool for users who want to perform Git tasks without using the terminal. You might also explore GUI-focused options like GitHub Desktop or review visual workflows through GitHub Foundations.
During installation, Git gives you the option to integrate with the Windows shell. This adds context menu entries that let you launch Git Bash or Git GUI directly from any folder.
For example, right-clicking inside a project folder gives you access to:
These shortcuts save time and keep you in context without needing to navigate directories manually.
You can choose to enable or disable these options during installation. If you skipped them initially, reinstalling Git and updating your preferences will re-add them.
For help managing and troubleshooting different Git configurations or remote connections, Git Remote: A Complete Guide with Examples is a helpful resource.
Sometimes, Git installation doesn’t go as planned. Errors can pop up due to system settings, missing dependencies, or incorrect configurations. Here are some common issues you might encounter—and how to fix them.
|
Issue |
Cause |
Solution |
|
'git' is not recognized |
Git isn’t added to the system PATH |
Reinstall Git and choose the option to add Git to PATH during setup. Or manually add the Git bin folder to your system environment variables. |
|
libssh2.dll missing |
Corrupted or incomplete installation |
Reinstall Git using the official installer to restore missing files. |
|
Git Bash won’t open |
Shell integration issue or shortcut error |
Launch Git Bash from the Start menu. If it works there, recreate or fix the context menu shortcut. |
|
Wrong version of Git showing |
Multiple Git versions installed |
Check PATH settings and remove older Git paths. Keep only the correct one (usually in C:\Program Files\Git\bin). |
|
Can’t authenticate with remote repo |
Credential helper not set or token required for MFA |
Set up the Git Credential Manager and use a personal access token. |
|
Git GUI or Git Bash missing |
Components deselected during installation |
Reinstall Git and make sure both Git Bash and Git GUI are selected as components during setup. |
To view more detailed error messages or logs:
If you're setting up Git for the first time and running into configuration issues, reviewing the Git Setup: The Definitive Guide can help clarify each step.
Once Git is up and running, a few simple habits can make your experience smoother and more reliable. These practices help keep your setup current, consistent, and tailored to your projects.
New versions of Git often include security patches, performance improvements, and better integration with other tools. Keeping Git up to date is a good habit—especially if you're using features like credential helpers or newer Git commands.
How to check for updates:
Winget:
winget upgrade --id Git.Git

Or

winget update git
Chocolatey:
choco upgrade gitManual install: Visit the Git for Windows site to download the latest version. For more on what's included in newer versions or best setup approaches, see the How to Learn Git in 2025 guide.
If you’ve set global preferences like your user identity, default branch name, editor, or credential helper—it’s a good idea to back them up. Your global Git config is usually stored at:
C:\Users\YourUsername\.gitconfigYou can copy this file to another location or even version-control it for reuse across machines.To view your settings at any time, run:
git config --list --globalThis helps when setting up a new development environment or troubleshooting unexpected behavior.
Sometimes it makes sense to tailor Git settings to a specific project. For example, you might want a different username, commit template, or merge tool for one repo.
To apply a config only to the current repository, omit the --global flag:
git config user.name "Work Name"
git config user.email "work@example.com"
You can check local settings with:
git config --list --localExperimenting with local config is useful when working on collaborative or open source projects where conventions vary. As you grow more comfortable with Git, you'll also find guides like the Complete Git Cheat Sheet and Git vs. GitHub helpful in deepening your understanding.
Setting up Git on Windows can be done through several reliable methods, from using the official installer to command-line tools like Winget and Chocolatey. Whether you prefer a graphical interface or a more hands-on approach, this guide covered all major options including portable editions and integrations with tools like Visual Studio Code and GitHub Desktop.
Once installed, configuring Git with your name, email, credential manager, and default settings ensures smoother collaboration and clearer commit history. Verifying the setup and applying project-specific settings when needed helps tailor Git to your workflow.
Staying current with updates, backing up configuration files, and following consistent practices all contribute to effective version control. With Git properly set up and maintained, you'll be well-equipped to manage code across teams and projects.
Top Git Courses
Track
Course
Course
Tutorial
Olivia Smith
Tutorial
Abid Ali Awan
Tutorial
Khalid Abdelaty
Tutorial
Olivia Smith
Tutorial
Mark Pedigo
Tutorial
Patrick Brus