Inserting multiple rows in Excel is a common thing, and if you don't know how to do it, it can show up as as frustrating problem. Luckily, there is more than one easy solution. In this article, I'll show a quick answer at the top, but then I'll also be comprehensive and show the few different method. All these methods work work well, so you can choose whichever method you like the best.
Quick Answer
To insert multiple rows in Excel, follow these steps:
- Select the number of rows you want to insert.
- Right-click and choose Insert.
- Select Entire row to insert blank rows.
Excel then shifts the existing data down and adds new rows. This is a quick way to get the job done, whether you're on Windows or Mac.
Full List of Ways to Insert Multiple Rows in Excel
Let's now look more comprehensively at all the different methods:
Insert multiple rows using the insert option
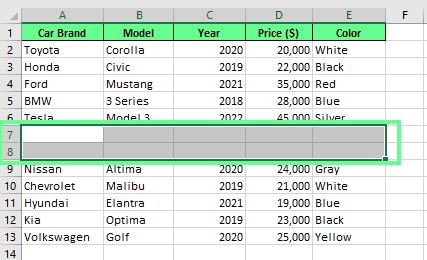
The quickest and easiest method of inserting rows at once is the Insert option, which I mentioned above. I'll show that method again, and this time with some screenshots and more detail. All you have to do is select the number of rows you want to add. For example, if I need 3 new rows, I will highlight 3 existing rows where I want them to appear. Then, I right-click the selected area and click Insert. A pop-up window appears. From here, select Entire row.
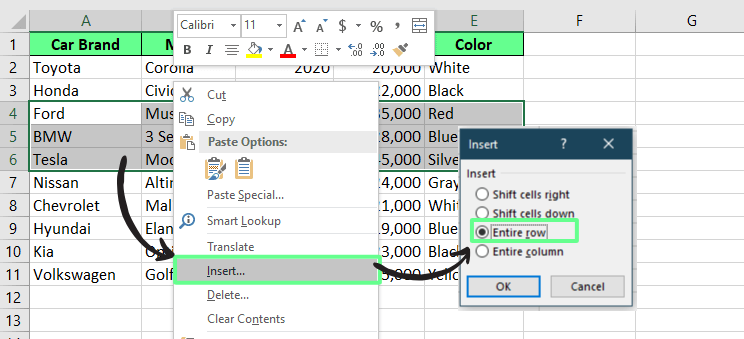
Insert rows using the insert option. Image by Author.
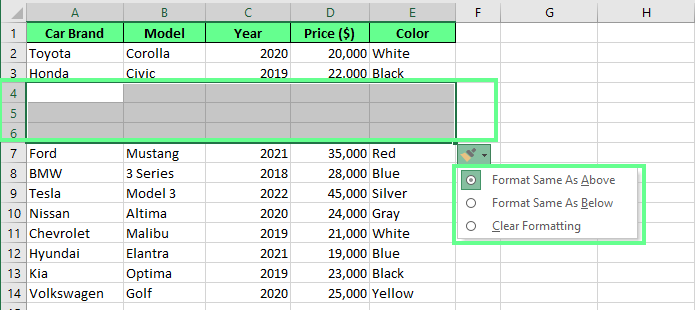
This way, Excel automatically shifts the existing rows down and adds new blank ones. After adding new rows, you’ll see a small Insert Options button next to them. It shows the following three options to adjust the formatting so the new rows blend in with the rest of your data:
- Format Same As Above – Copies the style from the row above, including text, borders, and colors.
- Format Same As Below – Uses the formatting from the row beneath the inserted rows instead.
- Clear Formatting – Clears all styles and keeps the new rows in Excel’s default look.
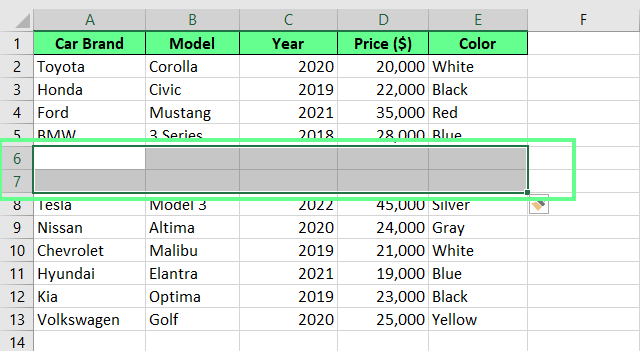
New rows added with the insert option. Image by Author.
Insert multiple rows using a keyboard shortcut
Instead of clicking through menus, you can add rows instantly using the keyboard shortcut keys. This is helpful if you work with large datasets or if you are moving quickly.
First select the number of rows you want to add. For example, if I need 2 new rows, I highlight 2 existing rows. Then, I press Ctrl + Shift + "+" on Windows or Cmd + Shift + "+" on Mac. Next, a pop-up window will appear, choose the Entire row option from here.
New rows added using the keyboard shortcut keys. Image by Author.
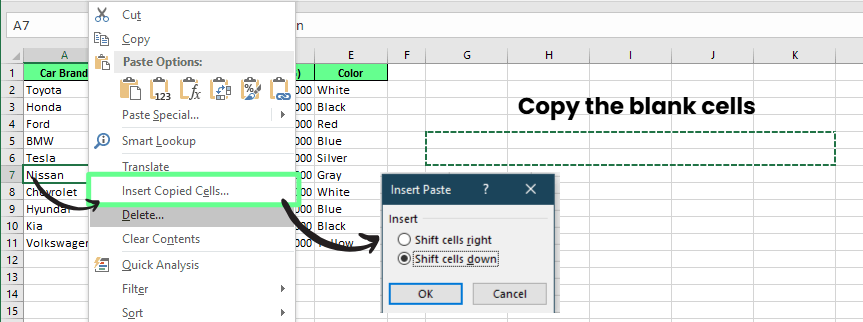
Insert multiple rows using the copy and paste method
Copy-and-paste is another way to add multiple rows without messing up your formatting. To insert multiple rows using this copy-paste method, select some blank rows from the spreadsheet, copy them with Ctrl + C, or right-click and choose Copy. Then, go to the spot where you want the new rows, right-click, and select Insert Copied Cells. After this, when the pop-up window appears, choose the Shift cells down option.
Insert multiple rows using the copy-paste method. Image by Author.
And you can see, Excel moves everything down and places the copied rows exactly where we want them.
New rows added using the copy-paste method. Image by Author.
Insert multiple rows using the name box
The name box can also be used to insert multiple rows in Excel. Instead of selecting rows manually, only type in how many rows you want to insert. To do so, look for what is called the name box, which is the small box next to the formula bar. Click on it and type the row number where you want to start, then add a colon and the row number where you want to end.
For example, if I want to insert 5 rows starting from row 4, I type 4:8 and press Enter. This highlights 5 rows instantly. Next, right-click on the selection and choose Insert (you can use any of the methods I mentioned earlier). Excel then adds the new rows and shifts everything down, making this a quick and precise way to insert multiple rows.
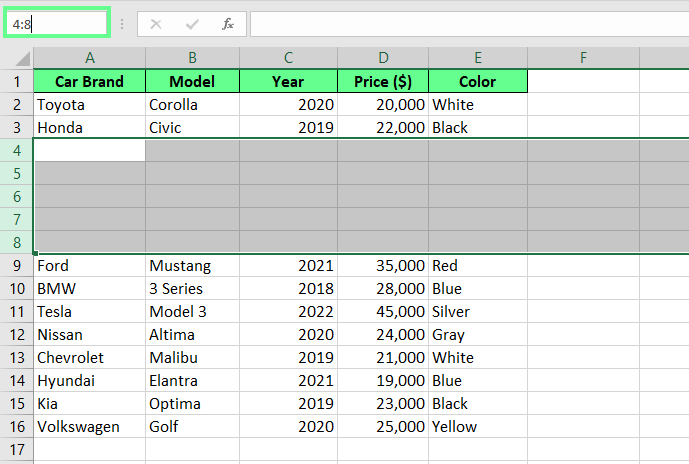
New rows added using the Name box technique. Image by Author.
Common Issues and How to Fix Them
Sometimes, inserting multiple rows in Excel doesn’t go as planned. Here are two common problems you may encounter and how to fix them.
- Inserted rows overwrite existing data: When you copy a block of cells and paste them into a new location, Excel may overwrite the existing data instead of shifting it down. This way, you may lose important information. So, instead of using the regular Paste option, right-click and select Insert Copied Cells. Then select the shift cells down option. This will keep your existing data in place and allow space for new data. If you make a mistake, just press Ctrl + Z to undo it and try again.
- Excel shows an error when inserting multiple rows: This usually happens when there aren’t enough blank rows to accommodate the insertion. So, before adding new rows, make sure there is enough space by shifting data down or removing unnecessary rows.
Final Thoughts
Excel provides many methods to insert multiple rows. The right-click option and keyboard shortcuts are great for quick edits, while the copy-paste method or the name box method gives a different sense of control. Each method works well, so try them out and see which fits your workflow best.
If you're new to Excel, check out our Excel Fundamentals skill track. It covers all the basics to get you comfortable. But if you want to get better at working with data, check out the Data Analysis in Excel course. And if you're ready to take things to the next level, the Data Analysis with Excel Power Tools skill track will show you how to use advanced Excel features.