Course
Data Preparation in Excel
3 hr
85.3K
If you have a column where all names follow the same pattern (like first and last name or first, middle, and last name), the simplest method to divide them into individual columns is to use the Text to Columns feature.
Let’s first separate names using a space delimiter. Follow these steps:
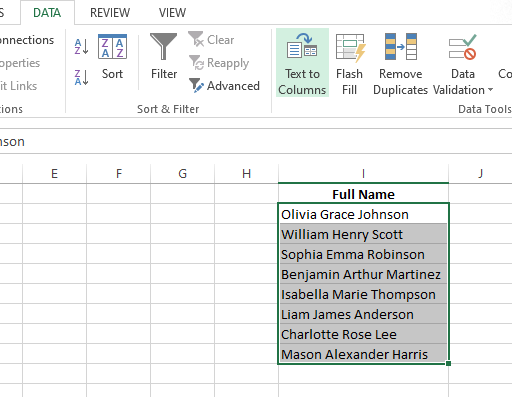
Selecting the Text to Columns option. Image by Author
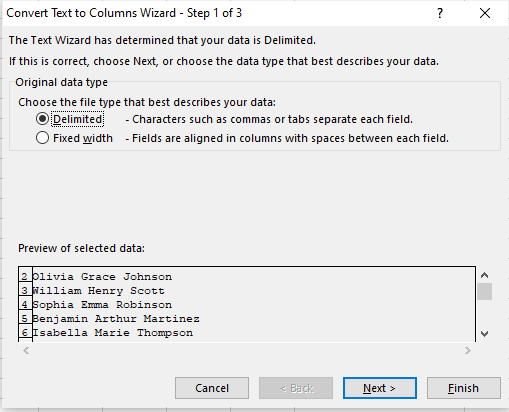
Choosing the Delimited option. Image by Author.
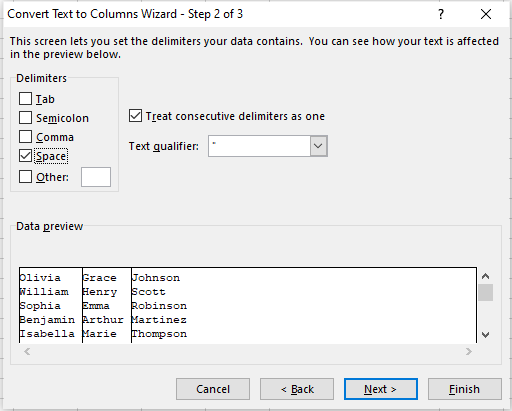
Selecting Space as a delimiter. Image by Author.
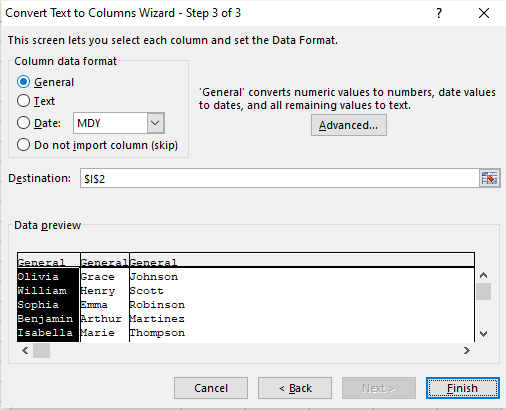
Selecting General as a data format. Image by Author.
Here you can see the full name is divided into three columns—First Name, Middle Name, and Last Name.
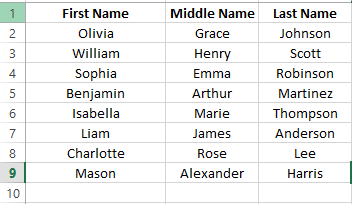
Data after splitting using the Text to Column feature. Image by Author.
You can also use the Text to Columns feature if names are separated by commas, as in this example. It could also be semicolons, tabs, or any other delimiter instead of commas, but the splitting method will remain the same.
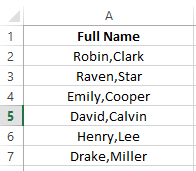
An Excel table with names. Image by Author.
You’ve to follow the same steps:
Note: If you have anything else as an unavailable delimiter in the window, then choose the other option and specify your delimiter in the box.
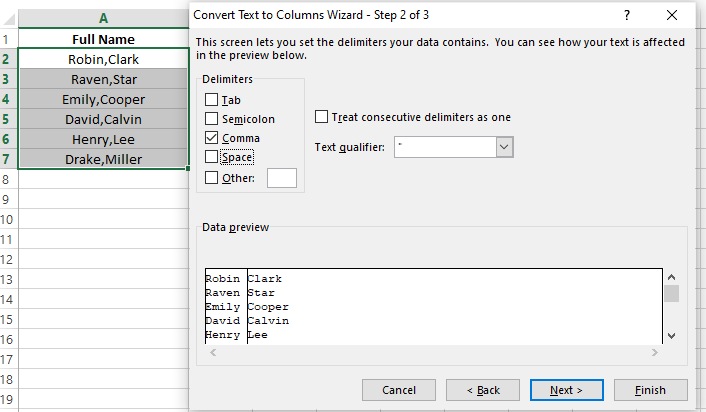
Choosing Comma as a delimiter. Image by Author.
And it’s done. Excel successfully split my comma-delimited names into individual columns. They now look much cleaner and are easier to handle.

Data after splitting names. Image by Author.
Let’s look at another example: I have a list of email addresses, and I want to separate the names from the domains. To do that, the Text to Columns feature is my go-to tool—it's the simplest and easiest.
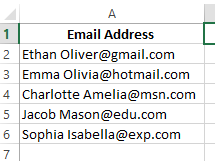
A table containing the email addresses. Image by Author.
To do this, just follow the same steps above but select the Other option in the and specify the delimiter @. Hit Next and Finish.
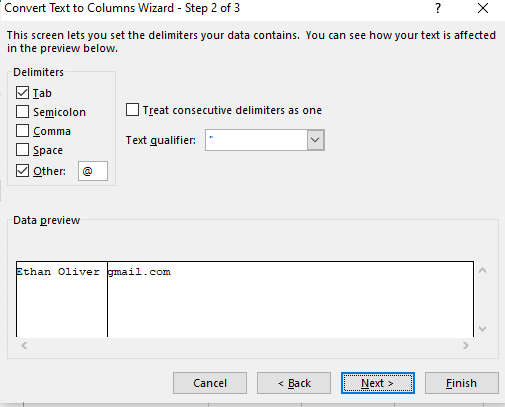
Selecting the Other option and specifying the delimiter. Image by Author.
Now you can see that Excel separates the names and domain namesDomain Names from email addressesEmail Addresses.
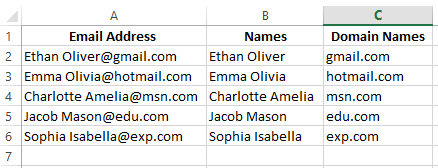
Separating names and email domains. Image by Author.
Text to Columns is excellent for a one-time split, but if you want to keep your data flexible and up-to-date, consider using formulas to divide the names. Once you understand how these formulas work, you'll wonder how you ever managed without them.
You can combine the LEFT() and SEARCH() functions to extract the first name from a full name within a cell. To demonstrate this, I use the following formula on the names dataset:
=LEFT(A2,SEARCH(" ",A2)-1)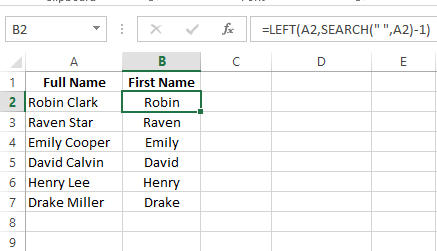
Using LEFT() and SEARCH() formulas to split full names. Image by Author.
The formula identifies the position of the first space in the cell using the SEARCH() function. It then subtracts 1 from this position to determine the length of the first name. After this, the LEFT() function extracts the specified number of characters from the beginning of the cell, extracting the first name.
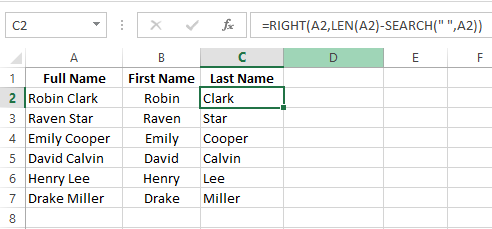
If you want to extract the last name from a full name, you can combine the LEN() function along with the RIGHT() and SEARCH() functions. To do so, I use the following formula on the same dataset:
=RIGHT(A2,LEN(A2)-SEARCH(" ",A2))In this formula, LEN() calculates the total length of the Full Name. Then, SEARCH() determines the position of the first space within the name. Finally, the RIGHT() function extracts this number of characters from the end of the text string and extracts the last name.
Using LEN() to extract the first name from the full name. Image by Author.
Now, if you want to split a full name into a first name, middle, and last name, you can’t do it with a simple LEN() or SEARCH() formula. You have to make three columns and use different formulas to extract each part of the name.
For example, I have a column of names and want to split the names into three columns: First, Middle, and Last. I can do this by applying a formula in three different columns.
Extract the first name: =LEFT(A2,SEARCH(" ",A2)-1)
Extract the middle name: =MID(A2, SEARCH(" ", A2) + 1, SEARCH(" ", A2, SEARCH(" ", A2)+1) - SEARCH(" ", A2)-1)
Extract the last name: =RIGHT(A2,LEN(A2) - SEARCH(" ", A2, SEARCH(" ", A2,1)+1))
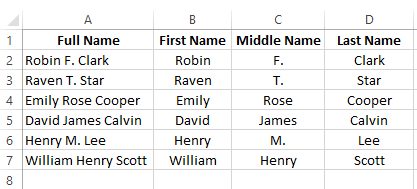
Split names into first, middle, and last names. Image by Author.
You can apply a similar method to names with suffixes like this:
Extract the first name: =LEFT(A2,SEARCH(" ",A2)-1)
Extract the last name: =MID(A2, SEARCH(" ",A2) + 1, SEARCH(",",A2) - SEARCH(" ",A2)-1)
Extract the suffix: =RIGHT(A2, LEN(A2) - SEARCH(" ", A2, SEARCH(" ",A2)+1))
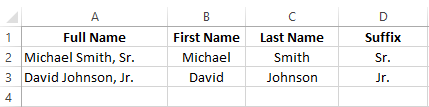
Getting First Name, Last Name, and Suffix. Image by Author.
And that’s it. You only need a bit of practice to master these formulas, and you’ll be good to go.
Flash Fill is another feature in Excel that automatically recognizes patterns in data and fills in the rest based on those patterns. You can use this to split names into separate columns.
Since Flash Fill is enabled by default, you only have to do the following:
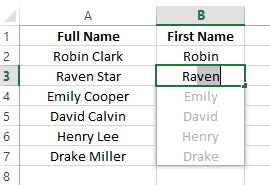
Getting First Name using the Flash Fill. Image by Author.
If Flash Fill doesn’t automatically fill in the data, you can manually activate it by clicking Flash Fill under the Data Tab. If this doesn't work, go to File > Options > Advanced and check Automatically Flash Fill.
You now know several ways (Text to Columns, formulas, and Flash Fill) to separate names in Excel. Each method has advantages, but use the one that aligns with your dataset's complexity and specific needs.
But there's so much more to explore in Excel. If you want to build a solid foundation, start with an Introduction to Excel course. If you're ready to go into technical data manipulation, the Data Analysis in Excel course and the Excel Fundamentals skill track are excellent next steps.
If you are using Excel for more specialized tasks, the Financial Modeling in Excel course can help you master complex calculations and financial projections. If you're focused on getting your data ready for analysis, the Data Preparation in Excel course is what you need to ensure your data is clean and structured correctly.
So, go ahead and continue your learning journey. Excel is a helpful tool, and with these skills, you can tackle any data challenge that comes your way.
Gain the skills to maximize Excel—no experience required.
Learn Excel with DataCamp
Course
Course
Course
Tutorial
Khalid Abdelaty
Tutorial
Laiba Siddiqui
Tutorial
Javier Canales Luna
Tutorial
Laiba Siddiqui
Tutorial
Amole Oluwaferanmi
Tutorial
Allan Ouko