Course
Developing LLM Applications with LangChain
3 hr
46.2K
LangChain is an open-source framework for building agentic AI applications that combine LLMs with tools. Version 1.0 marks a shift to a production-grade core with a simplified API, clearer boundaries, and standardized message handling across providers.
In this tutorial, we’ll build a Streamlit Auto Meeting Recap Assistant that takes in raw notes, produces a concise recap along with action items, and after human approval, appends the recap to a Google Doc. Along the way, you’ll see the new create_agent flow, standard content blocks, and the leaner v1 namespace in action.
LangChain v1 is a restructured, production-oriented release focused on a small, stable surface for building agents. It introduces:
create_agent as the standard way to spin up agents (cleaner than legacy prebuilt agents).
Standardized content via content_blocks so messages are consistent across providers.
Structured output and middleware for typed responses and safe, human-approved actions.
The langchain package focuses on agent building blocks such that the legacy modules move to langchain-classic, easing discoverability and upgrades.
Compared to v0.x, v1 reduces cognitive load and provider quirks by standardizing message content and agent orchestration. You get the same mental model regardless of whether you’re on OpenAI, Anthropic, or others.
The original Langchain v0.x version offered many patterns for building agents, however the v1 consolidates them into one clear path using create_agent block so your agents are easier to reason about,lan test, and ship. It comes with cleaner tool, easier debugging via standardized content and predictable agent loop.
Here are some key technical enhancements that became a part of this latest release:
create_agent workflow: This production-ready agent loop lets the model decide when to call tools and when to finish. So, we are no longer juggling multiple patterns which leads to easy customization.
Standard content blocks: A provider-agnostic way to read messages is by reasoning traces, tool calls, citations, even multimodal bits, all via a unified content_blocks API. Tooling and logs look the same across providers.
Structured output: Latest release comes with first-class support for typed schemas so you can depend on predictable JSON without hard regex. This cuts parsing errors and extra calls.
Middleware: These hook into the agent loop to approve risky actions, summarize history when long, and redact PII before calls.
Simplified namespace: The langchain package now focuses on essential agent building blocks, while LangGraph powers reliability features such as persistence and time-travel under the hood.
In this section, we will implement a Streamlit application that automates meeting recaps end to end. The app accepts raw meeting notes along with optional metadata (title, date, and attendees). It then generates a typed RecapDoc, including the title, summary, decisions, and action items, into a structured output. With a single click, the approved recap (prefixed with the meeting date) is appended to a designated Google Doc.
Before we build the Auto Meeting Recap Assistant, we need a minimal toolkit for the UI, the LLM, typed validation, and Google Docs access. The commands below install everything required and set the model key so your app can talk to the provider.
pip install -U streamlit langchain langchain-openai pydantic python-dotenv
pip install -U google-api-python-client google-auth google-auth-oauthlib google-auth-httplib2
export OPENAI_API_KEY=...
Here is what each prerequisite does:
Streamlit: It runs the web app locally with a simple, Pythonic UI.
langchain and langchain-openai: These Provides LangChain v1’s simplified surface (init_chat_model, structured output) and the OpenAI provider bridge.
pydantic: This library defines the strict RecapDoc schema so the model returns typed fields.
Python-dotenv: This loads environment variables from a .env file during development.
google-auth: This is used to handle OAuth and the Google Docs API so we can append the recap to a document.
OPENAI_API_KEY: OpenAI API Key authenticates our LLM calls and set it as an environment variable (or use a secrets manager).
Note: If you are using another provider (Anthropic, Google, or a local model), install the matching langchain-* integration and set that provider’s API key instead.
With these dependencies installed and OPENAI_API_KEY set, the environment is ready. In the next steps, we will set up the Google Docs API via Google Cloud.
To save each meeting recap into a living document, the app needs permission to write to Google Docs. This step sets up that access end-to-end. First, we:
Obtain an OAuth client file (credentials.json) from Google Cloud
Then, identify the Google Doc ID you want to append to
Finally, let the app create a reusable token.json on the first run after you approve access in your browser.
Once these three pieces are in place, the app can append recaps to your chosen Google Doc with a single click. You can revoke or renew access at any time by deleting token.json and running the app again.
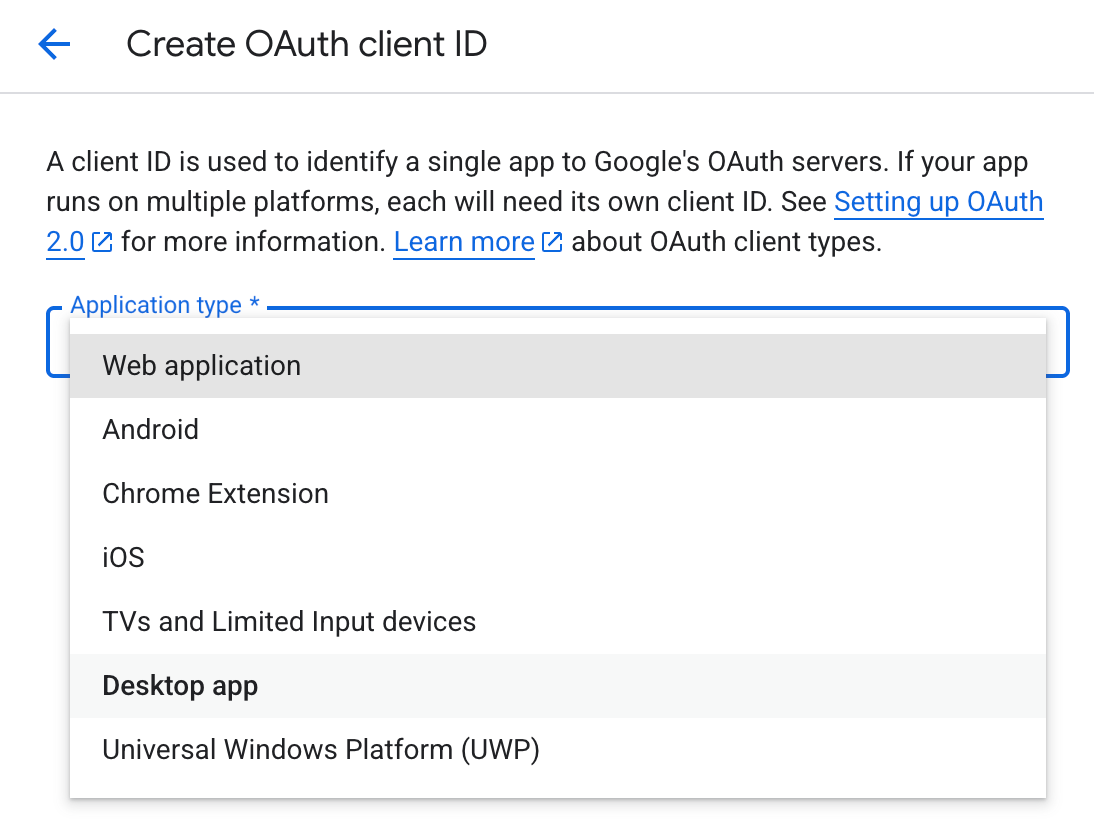
The credentials.jsonfile is your app’s key to the Google Docs API. You generate it once in Google Cloud Console as a Desktop App OAuth client. To get started:
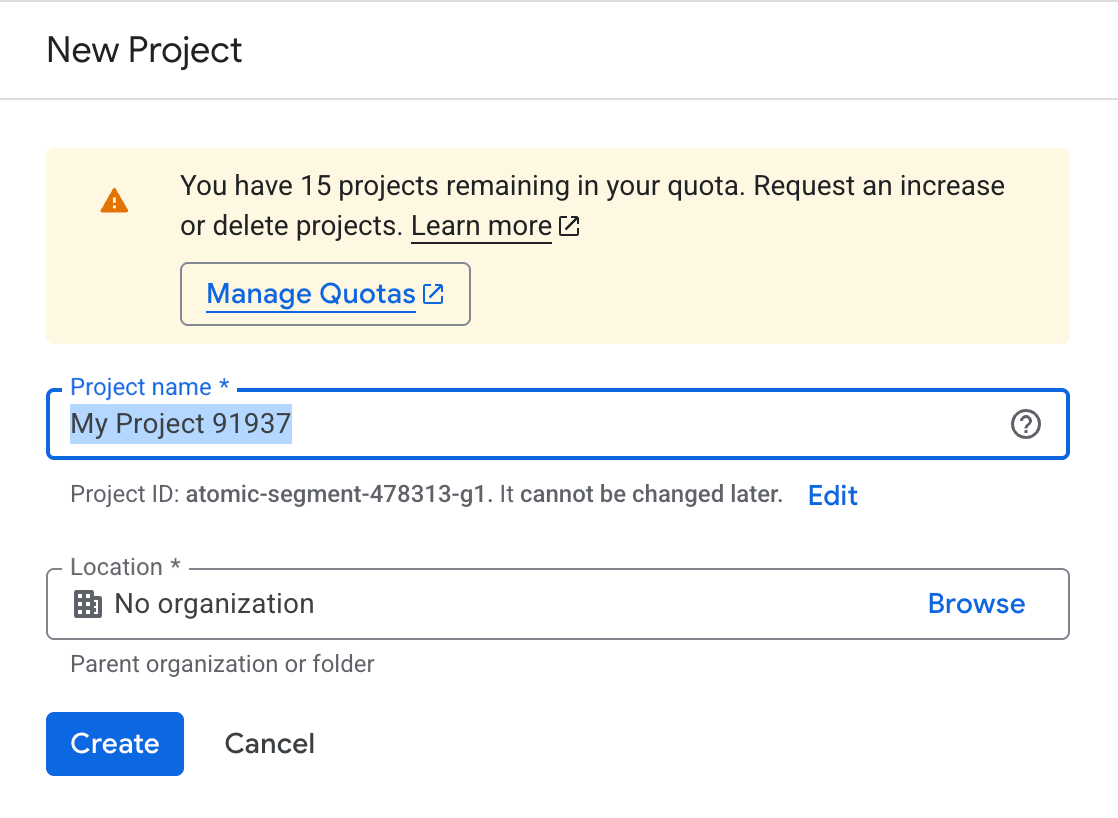
Now that our project is created. Let’s enable API required to write into Google Docs.
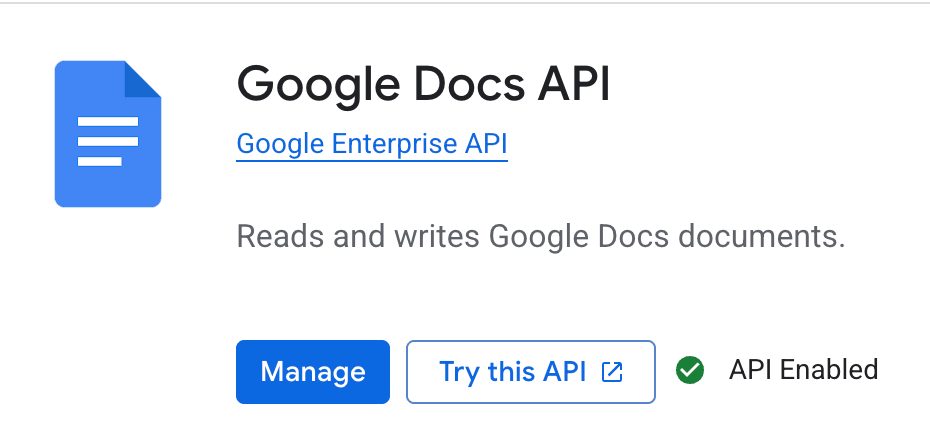
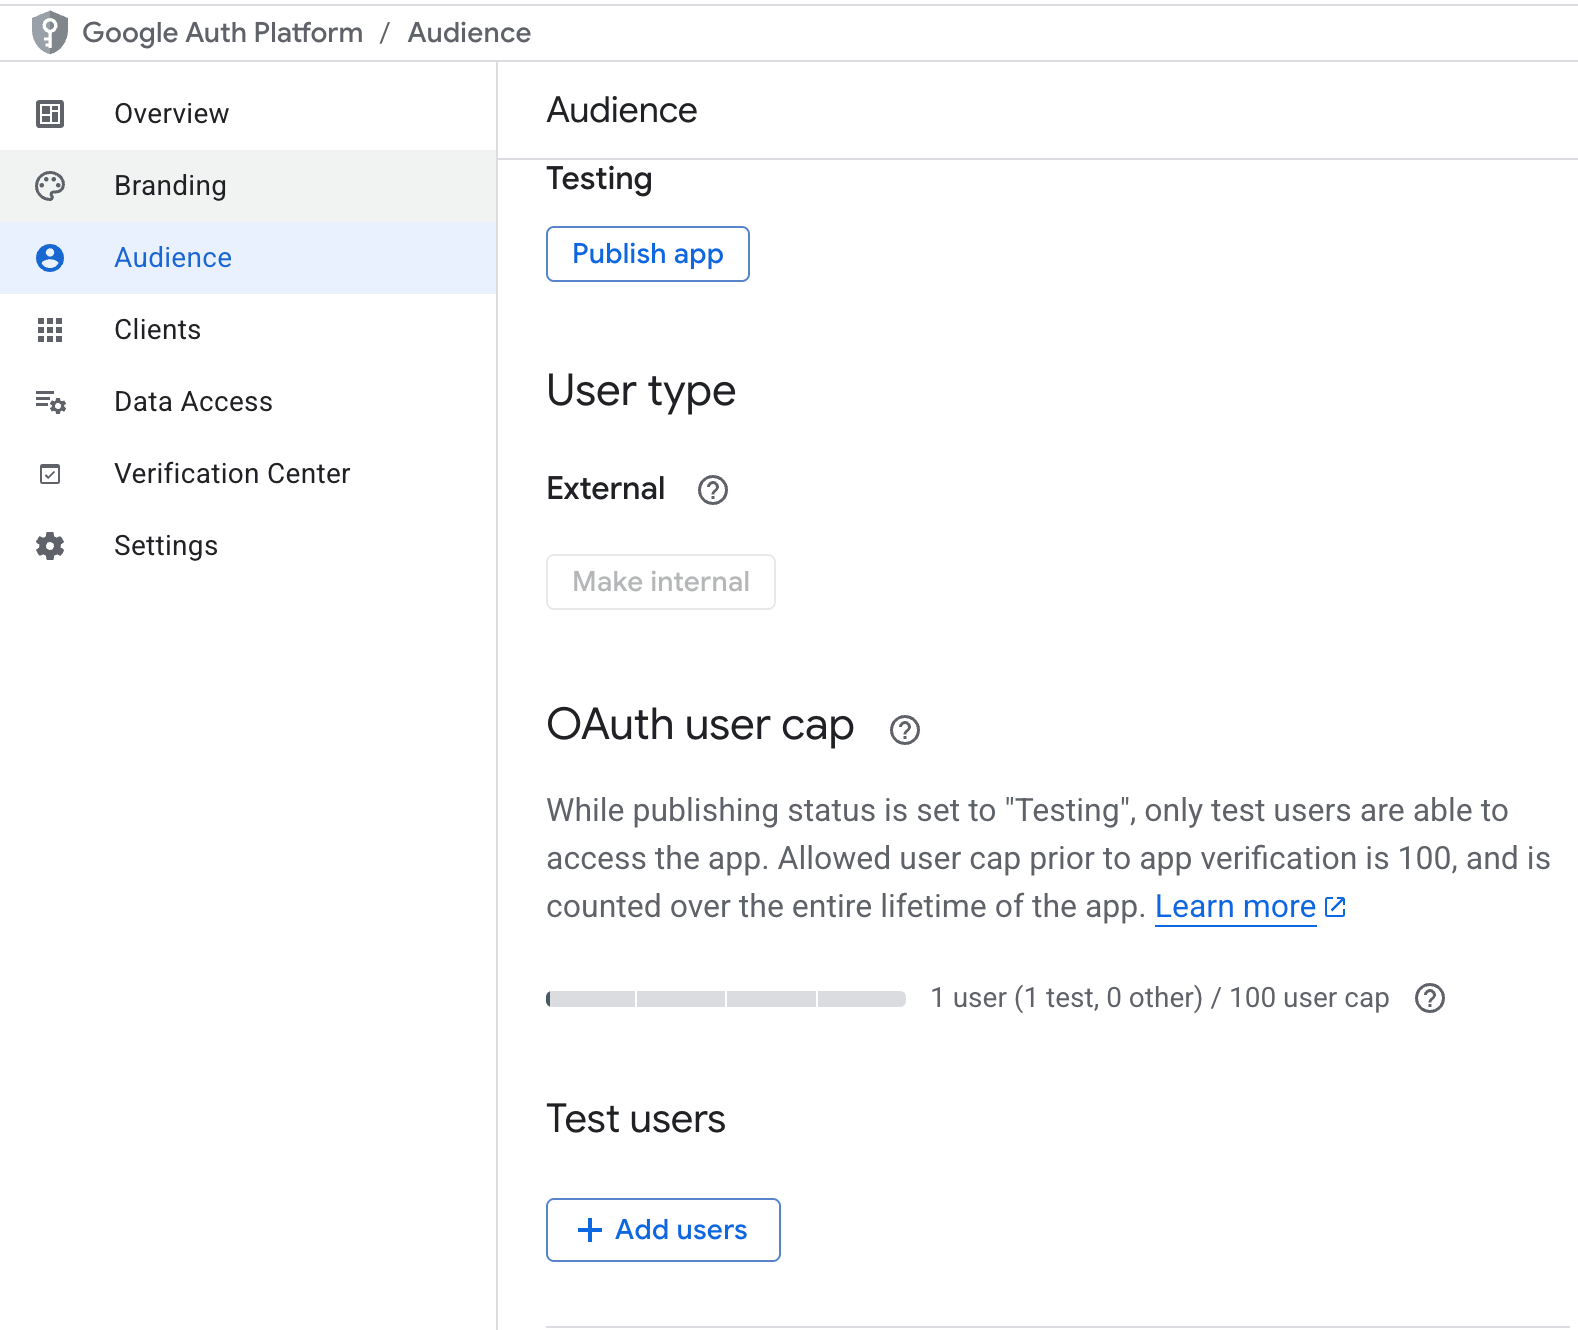
Once the API is enabled, next we need to set authentication for our preferred email.
The final step is to generate and download the credentials.json file. For this:
Go to APIs & Services and click on Credentials.
Click on the + CREATE CREDENTIALS which will lead you to OAuth client ID.
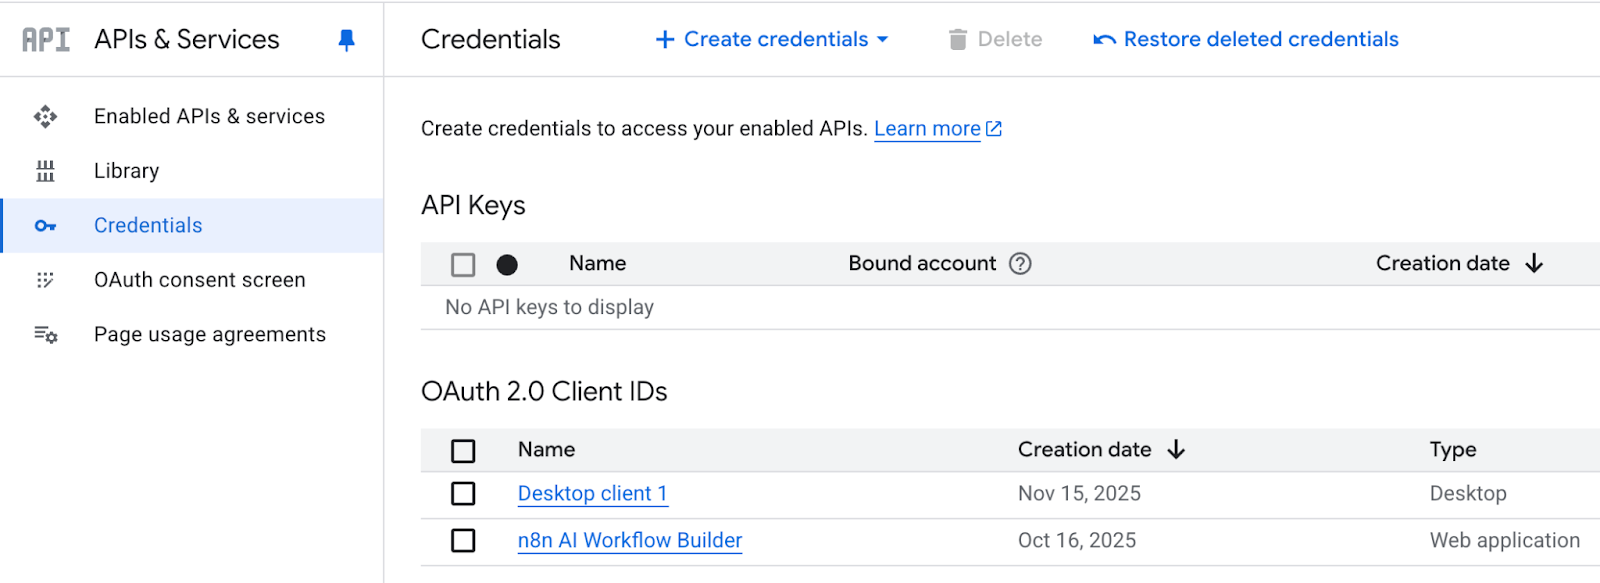
It may take up to 5 minutes to generate the client ID and secret, along with a downloadable JSON file.
Save the JSON file as credentials.json in the same folder as your app.py (or provide its path in your app settings).
You now have a Desktop OAuth client that the app can use to initiate a browser-based sign-in and request permission to access Google Docs on your behalf.
The app needs to know which document to append to. That document is identified by a unique ID embedded in the URL. For this step,
Open your target Google Doc in a browser.
Copy the string in the URL between /d/ and /edit, for example: https://docs.google.com/document/d/<THIS_IS_THE_ID>/edit
Paste this Doc ID into the app’s “Google Doc ID” field (or the appropriate config variable).
With the correct Doc ID, the app will write recaps to the exact document you selected.
On the first append, the app needs your explicit approval to access the document. After you approve, Google returns a token that the app stores locally as token.json. Here is how this file is generated:
Run the app and click Append to Google Doc.
A browser window opens asking you to sign in with one of the test users you added in the previous step and to approve the scope.
After you confirm, the app writes token.json next to your code. This file contains your reusable access/refresh tokens.
Note: If you ever need to switch accounts or re-run consent, simply delete token.json and click Append to Google Doc again.
Before we write any logic, we import the modules that power the UI, typed data contracts, model calls, and Google Docs integration. Grouping imports by purpose keeps the codebase readable and makes it obvious which layer to troubleshoot when something breaks.
import os
import io
import json
from datetime import date
from typing import List, Optional
import streamlit as st
from pydantic import BaseModel, Field
from dotenv import load_dotenv
# ---- LangChain v1 surface ----
from langchain.agents import create_agent
from langchain.messages import SystemMessage, HumanMessage
from langchain.chat_models import init_chat_model
# ---- Google Docs API ----
from google.oauth2.credentials import Credentials
from google_auth_oauthlib.flow import InstalledAppFlow
from googleapiclient.discovery import build
For this step, we import only what the app needs, i.e, standard utilities like os, io, json, date, and typing hints for paths, buffers, and lightweight serialization. Then we import Streamlit for the UI, Pydantic for the typed RecapDoc schemas, and dotenv to load environment variables. The LangChain v1 surface init_chat_model and create_agent to initialize a provider-agnostic chat model and structure prompts, and finally, the Google Docs API pieces that handle OAuth and give us an authenticated client to append recaps to the chosen document.
To make the model’s response reliable and easy to use, we define a typed contract for the recap. Using Pydantic models ensures that the LLM returns predictable fields that our UI can render, API can store, and automations can validate.
class ActionItem(BaseModel):
    owner: str = Field(..., description="Person responsible")
    task: str = Field(..., description="Short, specific task")
    due_date: str = Field(..., description="ISO date (YYYY-MM-DD) or natural language like 'next Friday'")
class RecapDoc(BaseModel):
    title: str
    date: str
    attendees: List[str]
    summary: str
    decisions: List[str]
    action_items: List[ActionItem]
Here are the key components of the above code block:
ActionItem class: It captures the essentials of a follow-up task like owner, task, and due_date with short, explicit descriptions so the model fills them cleanly. Allowing ISO dates or natural phrases keeps input flexible while still being parsable downstream.
RecapDoc class: This class represents the entire recap as a single object, including title, date, attendees, a concise summary, explicit decisions, and a list of action_items.
With LangChain v1, you can request this schema directly via with_structured_output(RecapDoc), which reduces brittle string parsing, improves validation, and lets you fail fast when fields are missing.
The system prompt sets the ground rules for your assistant. It tells the model exactly what to produce, what to avoid, and how to structure its output so downstream steps work reliably every time.
SYSTEM_PROMPT = """You are a precise assistant that produces concise, high-signal meeting recaps.
Return a structured RecapDoc with:
- title, date, attendees
- a brief summary (3–6 sentences)
- explicit decisions (bullet-style)
- action_items (each has owner, task, due_date)
Rules:
- Only include info supported by the notes or explicit user inputs.
- Keep action items specific with clear owners and due dates.
- If something is unknown, say "Unknown" rather than inventing details.
"""
The system prompt makes the assistant precise and concise, targeting high-signal recaps instead of transcripts. It prints out a crisp schema including a title, date, attendees, summary, decisions, action_items with rules like, 3–6 sentence summary, bullet decisions, and action items with owner, task, and due date.
With a clear system prompt, the model consistently produces usable, structured recaps on the first try.
In this step, we define a helper function that establishes a trusted, reusable connection to Google Docs so the app can append recaps to your chosen document. It requests only the Docs scope and handles first-time consent, token refresh, and service construction.
SCOPES = ["https://www.googleapis.com/auth/documents"]
def get_google_docs_service(
    credentials_path: Optional[str],
    token_path: str = "token.json",
    use_secrets: bool = False
):
    creds = None
    if use_secrets:
        try:
            if "google_credentials_json" in st.secrets:
                with open("credentials_temp.json", "w") as f:
                    f.write(st.secrets["google_credentials_json"])
                credentials_path = "credentials_temp.json"
        except Exception:
            pass
    if os.path.exists(token_path):
        creds = Credentials.from_authorized_user_file(token_path, SCOPES)
    if not creds or not creds.valid:
        if creds and creds.expired and creds.refresh_token:
            try:
                creds.refresh(Request())
            except Exception:
                pass
        if not creds or not creds.valid:
            if not credentials_path or not os.path.exists(credentials_path):
                raise RuntimeError(
                    "Missing Google OAuth credentials. Provide 'credentials.json' "
                    "or set st.secrets['google_credentials_json']."
                )
            flow = InstalledAppFlow.from_client_secrets_file(credentials_path, SCOPES)
            creds = flow.run_local_server(port=0)
            with open(token_path, "w") as token:
                token.write(creds.to_json())
    return build("docs", "v1", credentials=creds)
The get_google_docs_service()function handles OAuth and service creation by:
Scoping access: The above function uses predefined SCOPESto limit permissions to Google Docs.
Loading credentials: It reads from a local credentials.json or from st.secrets["google_credentials_json"] which is streamlit’s secret holder when use_secrets=True.
Reusing tokens: If token.json exists, the code loads it and, if the token has expired, it silently refreshes it.
First-time consent: If no valid token is found, then we launch the Desktop InstalledAppFlow, which prompts the user in the browser to authenticate, then saves token.json for future runs.
Returning a client: Finally, we build and return an authenticated Docs client via build()function.
Once configured, you can reuse the same token.json for authentication or refresh the token automatically. To reset access, just delete token.json and run the app again.
Next, we turn a typed RecapDoc into clean Markdown that appends into the target Google Doc. One function renders the recap while the other performs the authenticated write at the end of the document.
def append_plaintext_to_doc(docs_service, document_id: str, text: str):
    doc = docs_service.documents().get(documentId=document_id).execute()
    end_index = doc.get("body", {}).get("content", [])[-1]["endIndex"]
    requests = [
        {
            "insertText": {
                "location": {"index": end_index - 1},
                "text": text + "\n"
            }
        }
    ]
    return docs_service.documents().batchUpdate(
        documentId=document_id,
        body={"requests": requests}
    ).execute()
def recap_to_markdown(recap: RecapDoc) -> str:
    lines = [
        f"# {recap.title} — {recap.date}",
        "",
        f"**Attendees:** {', '.join(recap.attendees) if recap.attendees else 'Unknown'}",
        "",
        "## Summary",
        recap.summary.strip(),
        "",
        "## Decisions",
    ]
    if recap.decisions:
        for d in recap.decisions:
            lines.append(f"- {d}")
    else:
        lines.append("- None recorded")
    lines.append("")
    lines.append("## Action Items")
    if recap.action_items:
        for ai in recap.action_items:
            lines.append(f"- **{ai.owner}** — {ai.task} _(Due: {ai.due_date})_")
    else:
        lines.append("- None recorded")
    return "\n".join(lines)
The above two helpers work together as follows:
The recap_to_markdown() function builds a readable summary. It includes a title with date, attendees, a concise summary, and action items with owner, task, and due date. It also falls back to “Unknown” or “None recorded” when fields are missing.
While the append_plaintext_to_doc() function fetches the document, finds the current end index, and issues a single insertText request via documents(). The text is appended with a trailing newline so subsequent entries start on a new line.
Note: For empty documents, consider defaulting the insertion index to 1 if endIndex is unavailable.
With Markdown rendering and append in place, next we set up our recap generator.
This function is the heart of the app. It takes raw notes and optional metadata, calls a chat model, and returns a typed RecapDoc so everything downstream stays predictable.
def generate_recap(model_name: str, notes: str, title: str, date_str: str, attendees_csv: str) -> RecapDoc:
    model = init_chat_model(model=model_name)
    structured_llm = model.with_structured_output(RecapDoc)
    attendees_hint = [a.strip() for a in attendees_csv.split(",")] if attendees_csv.strip() else []
    user_prompt = (
        "You will receive meeting notes and metadata.\n\n"
        f"Title: {title or 'Unknown'}\n"
        f"Date: {date_str or 'Unknown'}\n"
        f"Attendees: {attendees_hint if attendees_hint else 'Unknown'}\n\n"
        "Notes:\n"
        f"{notes.strip()}\n"
    )
    messages = [
        SystemMessage(content=SYSTEM_PROMPT),
        HumanMessage(content=user_prompt)
    ]
    try:
        recap = structured_llm.invoke(messages)
    except Exception as e:
        st.error(f"Error generating recap: {e}")
        recap = RecapDoc(
            title=title or "Unknown",
            date=date_str or "Unknown",
            attendees=attendees_hint or [],
            summary=f"Error generating summary: {str(e)}",
            decisions=[],
            action_items=[]
        )
    return recap
The recap generator includes three key components:
Model initialization: The init_chat_model() function creates a chat model for your chosen provider. We then call the with_structured_output() function to tell the model exactly what shape to return. It outputs a Python object that matches the RecapDoc fields.
Prompt assembly: We normalize inputs and send out two messages, including a SystemMessage with strict rules (the system prompt) and a HumanMessage carrying title, date, attendees, and raw notes.
Structured generation: The structured_llm.invoke() function returns a validated RecapDoc, avoiding parsing and reducing hallucinations.
By routing your GPT model through LangChain’s structured-output wrapper, the recap step becomes reliable and ready for Markdown rendering without changing any downstream logic.
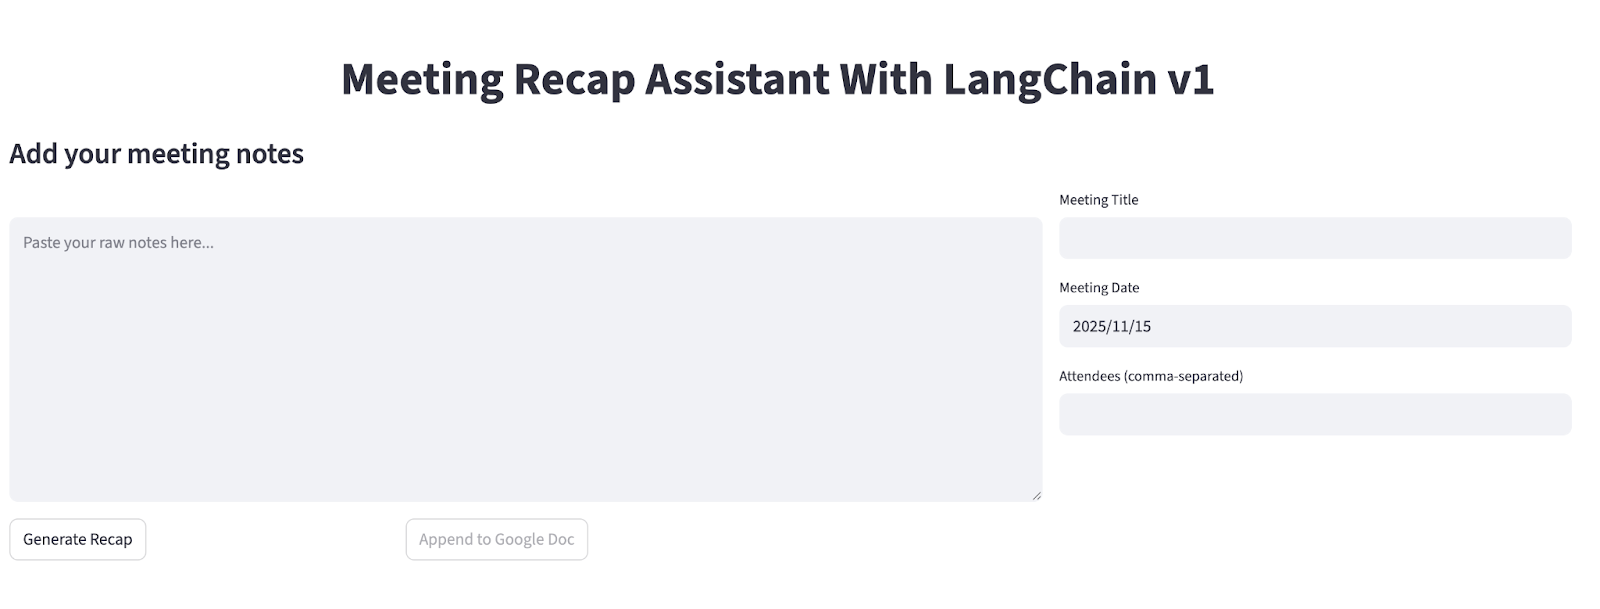
This step wires the whole demo into a one-page Streamlit app. The user pastes notes, adds optional metadata, generates a structured recap, previews it as Markdown, and appends it to a Google Doc with a click.
def main():
    load_dotenv()
    st.set_page_config(page_title="Meeting Recap Assistant (LangChain v1)", page_icon=" ", layout="wide")
    st.markdown("<h1 style='text-align: center;'>Meeting Recap Assistant With LangChain v1</h1>", unsafe_allow_html=True)
    model_name = os.getenv("LC_MODEL", "gpt-4o-mini")
    document_id = "10G1k8-2JG_phkpjWM3xZEy2wNg5trUO0SJ2WN7kR3po"
    cred_mode = "credentials.json file"
    credentials_path = os.getenv("GOOGLE_CREDENTIALS_JSON", "credentials.json")
    st.subheader(" Add your meeting notes")
    colL, colR = st.columns([2, 1])
    with colL:
        notes = st.text_area(" ", height=300, placeholder="Paste your raw notes here...")
    with colR:
        title = st.text_input("Meeting Title", value="")
        date_str = st.date_input("Meeting Date", value=date.today())
        attendees_csv = st.text_input("Attendees (comma-separated)", value="")
    if "recap" not in st.session_state:
        st.session_state.recap = None
    if "markdown_text" not in st.session_state:
        st.session_state.markdown_text = None
    col1, col2, col3 = st.columns([1, 1, 2])
    with col1:
        generate_btn = st.button("Generate Recap")
    with col2:
        append_btn = st.button("Append to Google Doc", disabled=(st.session_state.recap is None))
    if generate_btn:
        if not notes.strip():
            st.error("Please paste some notes.")
            st.stop()
        try:
            recap = generate_recap(
                model_name=model_name,
                notes=notes,
                title=title,
                date_str=str(date_str),
                attendees_csv=attendees_csv,
            )
            st.session_state.recap = recap
            st.session_state.markdown_text = recap_to_markdown(recap)
            st.rerun()
        except Exception as e:
            st.exception(e)
            st.stop()
    if append_btn and st.session_state.recap is not None:
        try:
            use_secrets = (cred_mode == "Streamlit secrets")
            service = get_google_docs_service(
                credentials_path=credentials_path if cred_mode == "credentials.json file" else None,
                use_secrets=use_secrets
            )
            final_text = f"\n\n===== {st.session_state.recap.title} — {st.session_state.recap.date} =====\n\n" + st.session_state.markdown_text
            append_plaintext_to_doc(service, document_id, final_text)
            st.success("Recap appended to the Google Doc")
        except Exception as e:
            st.exception(e)

    if st.session_state.recap is not None:
        st.markdown("---")
        st.markdown(st.session_state.markdown_text)
if __name__ == "__main__":
    main()
The Streamlit app wires a single “Generate Recap” action to the model and exposes it to a local web UI, by using:
Inputs (left/right columns): The left pane is a large st.text_area for raw notes. While the right pane captures title, date, and attendees.
Outputs (preview area): When a recap exists, the app shows a divider and a Markdown preview of the structured recap for quick review.
Interface wiring (actions): These actions form the core component of our app. It includes:
Generate recap: It validates notes, calls generate_recap() function which converts to Markdown, and st.rerun() to refresh.
Append to Google Doc: Next, we create an authenticated client with get_google_docs_service() which adds a dated header, and appends to the destination doc.
State: The st.session_state method stores the latest RecapDoc and markdown_text so the UI remains stable across reruns.
App setup: Finally, load_dotenv() method reads env vars while st.set_page_config() sets the layout and credential paths come from env or defaults.
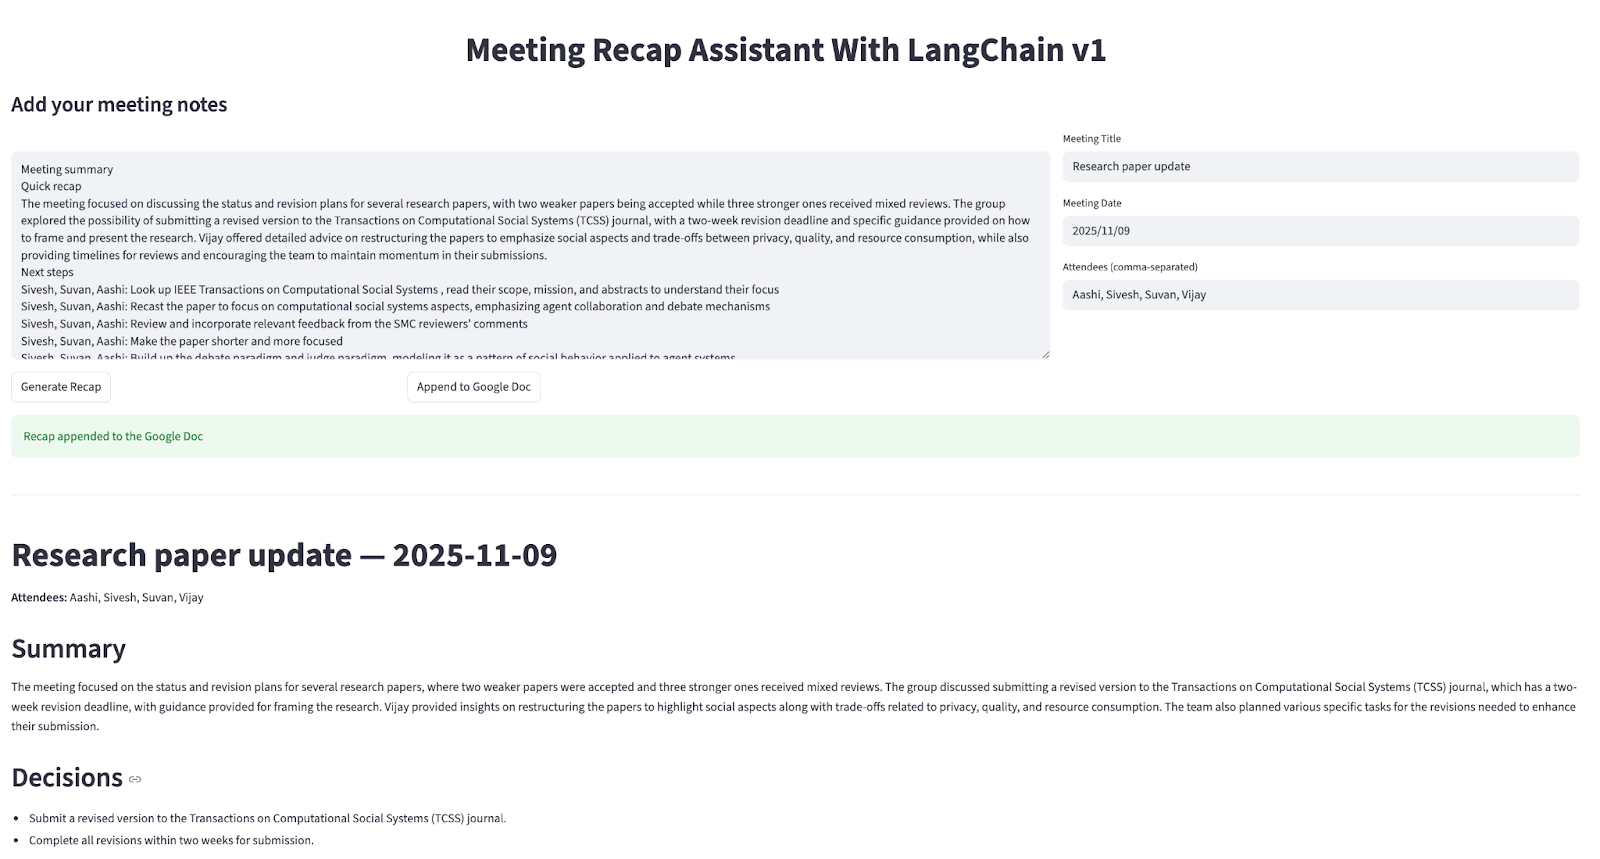
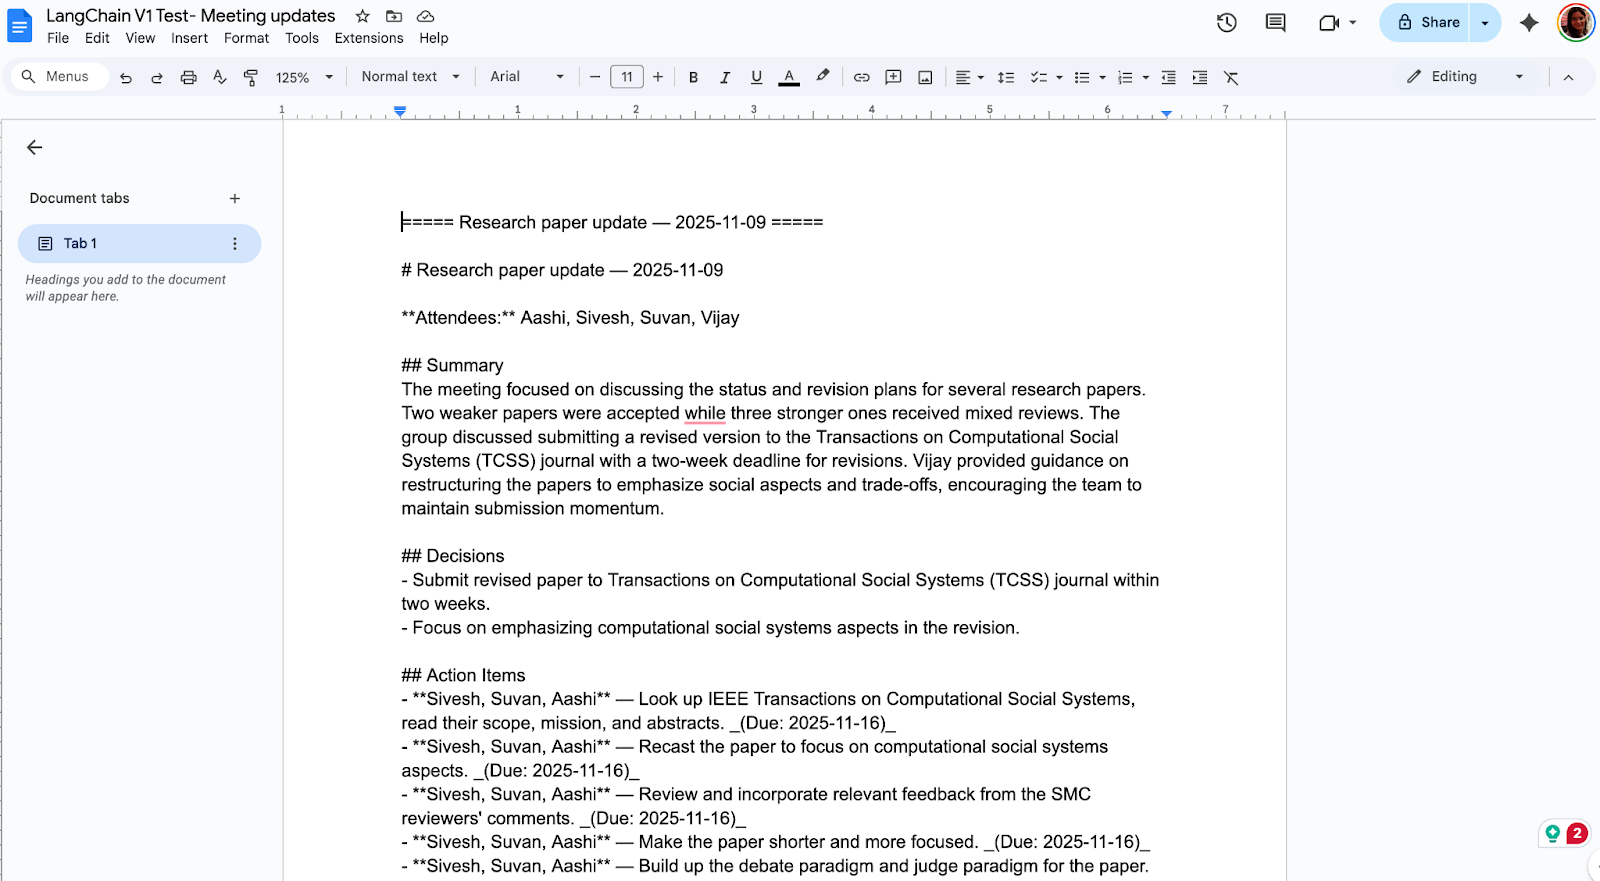
Save as app.py and run the following command in the terminal.
streamlit run app.pyYou now have an end-to-end meeting recap tool that looks like this:
LangChain v1 streamlines building agents with simpler imports and more reliable results thanks to its structured output and standard content blocks. If you’re coming from v0, handle the upgrade like any production change with pin versions, refactor imports, and new primitives.
Some considerations to keep in mind are:
LangChain v1 uses create_agent instead of the old prebuilt agents which relied on standard content blocks and structured output, and note that some older pieces moved to langchain-classic.
When you upgrade, pin langchain>=1.0 and use Python 3.10+. Prefer Pydantic models for outputs, add middleware only where it helps (approvals, PII redaction, summaries), and keep langchain-classic if you still need legacy retrievers.
Finally, send in a small input first and watch traces and errors while keeping the dependencies pinned.
LangChain v1 gives you cleaner primitives for real apps, structured output you can trust, standard content blocks across providers, and a unified way to build agents. Below are practical ways to put it to work, along with some bumps you can expect during adoption.
Some high-impact use use cases of this version include:
With high-impact use cases come a few challenges:
Looking ahead, we can expect continued persistence, time-travel, and observability (via LangGraph and LangSmith), along with broader provider support for standard content blocks and clearer controls for production teams.
LangChain v1 is a solid foundation for building reliable and maintainable agents. This Auto Meeting Recap Assistant shows how create_agent, standard content blocks, and structured output combine to handle a real workflow with human approval in the loop and a seamless handoff to Google Docs. Use the official migration guides to modernize legacy code, and start small with a tutorial app like this to build confidence.
If you’re keen to get more hands-on with creating AI-powered applications, I recommend our Developing Applications with LangChain course.
Learn with DataCamp
Course
Course
Course
Tutorial
Bex Tuychiev
Tutorial
Aashi Dutt
Tutorial
Richie Cotton
Tutorial
Aashi Dutt
Tutorial
Andrea Valenzuela
code-along
Emmanuel Pire