Track
Power BI Fundamentals
17 hr
Power BI Drill Through is a powerful interactive feature that allows users to navigate from a high-level summary view to a more detailed report page filtered by a specific data point.
This tutorial covers everything you need to know about Power BI Drill Through: what it is, why it matters, how to set it up step-by-step, advanced techniques for dynamic filtering, and more.
If you’re keen to get started with some hands-on Power BI examples, make sure to check out our Power BI Fundamentals track.
Drill Through in Power BI lets users investigate deeper into a data point of interest on one report page. It enables data consumers to go from a high-level summary to detailed insights tailored to a selected category, item, or dimension.
Drill Through functionality is useful when reports in Power BI involve many different levels of detail. Rather than crowding a single page with all available visuals, Drill Through lets you guide the user through layers of insight progressively.
Drill Through provides a more interactive, self-service analytics experience. It enables report users to take control of their own explorations and answer their unique questions without modifying the core report structure.
There are several key benefits of using Power BI Drill Through:
By empowering end-users to drill into their specific area of interest, Drill Through bridges the gap between static dashboards and dynamic analysis.
Creating a Drill Through experience in Power BI involves setting up both source and target pages, configuring the necessary fields, and integrating navigation tools like back buttons and tooltips.
For this tutorial, we'll use a mock finance dataset throughout to demonstrate Drill Through concepts.

Here’s a Python script using pandas to generate a sample dataset you can export to CSV or load into Power BI:
import pandas as pd
from datetime import datetime

# Sample data
data = [
    ['TXN001', 'Asia Pacific', 'Singapore', 'Finance', 'Travel', 'Airfare', 1200.00, '2024-05-12', 'Alice Tan'],
    ['TXN002', 'Asia Pacific', 'Singapore', 'Marketing', 'Events', 'Venue Rental', 3500.00, '2024-05-14', 'Ben Lee'],
    ['TXN003', 'Europe', 'Germany', 'Operations', 'Logistics', 'Freight', 2600.00, '2024-06-01', 'Clara Müller'],
    ['TXN004', 'North America', 'USA', 'Finance', 'Training', 'Workshops', 800.00, '2024-05-18', 'Daniel Smith'],
    ['TXN005', 'Europe', 'France', 'IT', 'Software', 'Licensing', 4500.00, '2024-06-04', 'Emma Dubois']
]

# Define column names
columns = [
    'TransactionID', 'Region', 'Country', 'Department', 'ExpenseCategory',
    'SubCategory', 'Amount', 'TransactionDate', 'ManagerName'
]

# Create DataFrame
df = pd.DataFrame(data, columns=columns)

# Convert date column to datetime
df['TransactionDate'] = pd.to_datetime(df['TransactionDate'])

# Save to CSV (optional)
df.to_csv('FinanceTransactions.csv', index=False)

# Display the DataFrame
print(df)
You can run this script in a Python environment (e.g., Jupyter Notebook or VS Code) and import the resulting CSV into Power BI for use in your reports.
You can expand this dataset using tools like Python, or generate it in Power BI directly using Power Query with Enter Data. Once created, this dataset will form the foundation for the visuals and drill-through examples throughout the tutorial.
We’ll use a fictional dataset named FinanceTransactions to walk through each drill-through concept. This dataset simulates financial transaction records for a multinational company.
Sample Fields in FinanceTransactions:
TransactionID (Text)Region (Text)Country (Text)Department (Text)ExpenseCategory (Text)SubCategory (Text)Amount (Decimal)TransactionDate (Date)ManagerName (Text)We'll create:
Region and Department.ManagerName or SubCategory.Next, to ensure our Drill Through works properly, we’ll need to set up a source page and a target page.
To create the source page, rename the current page as “Overview” and press Enter.
To create the target page, have a look at the bottom of the screen, and click on the green “+” button to add a new page. Double click on the new page and rename it as “Manager Info”
This target page will be used to show more information about which managers are in charge of the transactions.
Here’s what your pages will look like:
Next, we’ll add some relevant charts to our source and target pages.
For our example, using the FinanceTransactions dataset:
In the source page, we’ll create a simple stacked bar chart that we will be using to drill through the data. For this chart, use the following fields: Amount and ManagerName.
Your chart should look something like this:
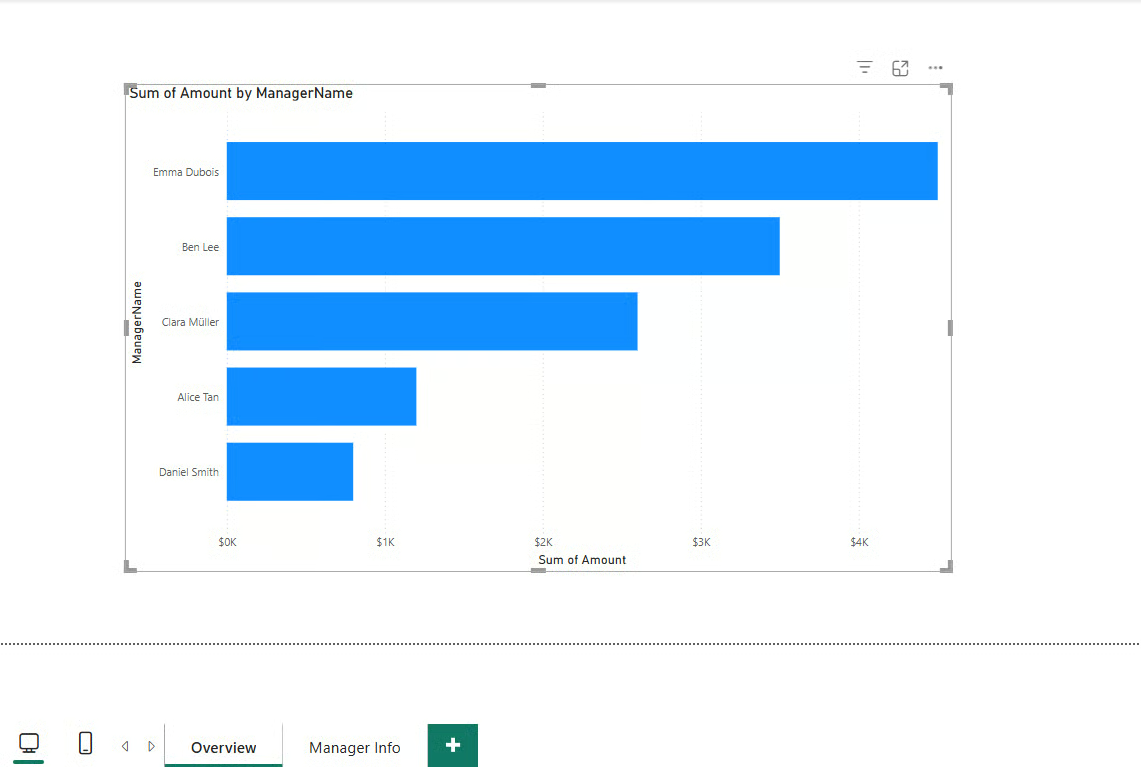
As you can see, the source page displays a stacked bar chart of total expenses by Department.
In the target page, create a matrix with the following fields: Amount, ManagerName, and TransactionDate.
Here’s how it should look:

Now, our target page displays a matrix of detailed rows of expenses and dates.
ManagerName) into the Drill Through section.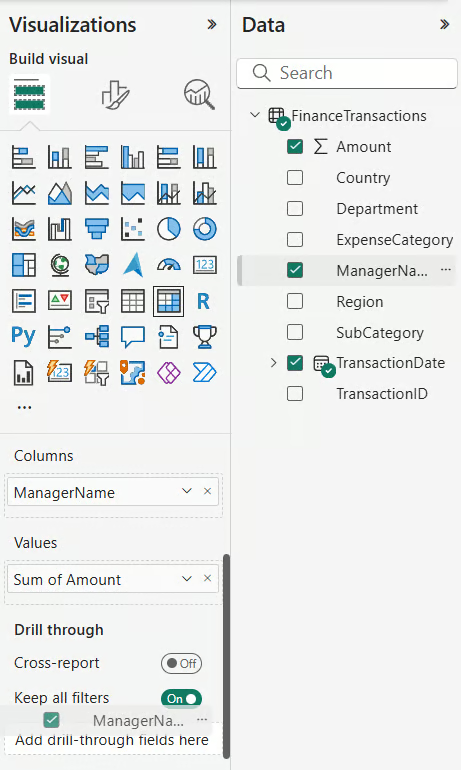
As you can see in the screenshot above, the ManagerName field should be dragged into the Drill through section.
Here’s what you should see:
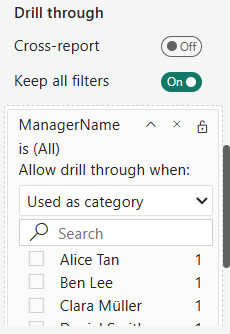
Region or ExpenseCategory).Be aware that Drill Through only works when the selected data point matches the field placed in the Drill Through well. It’s also case-sensitive for text-based columns.
In this case, it’s the ManagerName field that is consistent in both charts in the source and target pages.
Choose visuals for the target page that are:
For example, you can use KPI charts like this:
You can improve responsiveness by:
Drill Through pages should always include a way to return to the main report.
By default, Power BI will create a back arrow button to return to the source page upon creation of a Drill Through. This button will only appear once you’ve drilled through, and it looks like this:

Additionally, tooltips can be set by:
This ensures that users understand the purpose of the Drill Through and can navigate intuitively.
Lastly, before we’re done, we need to test out our Drill Through function to see if it works.
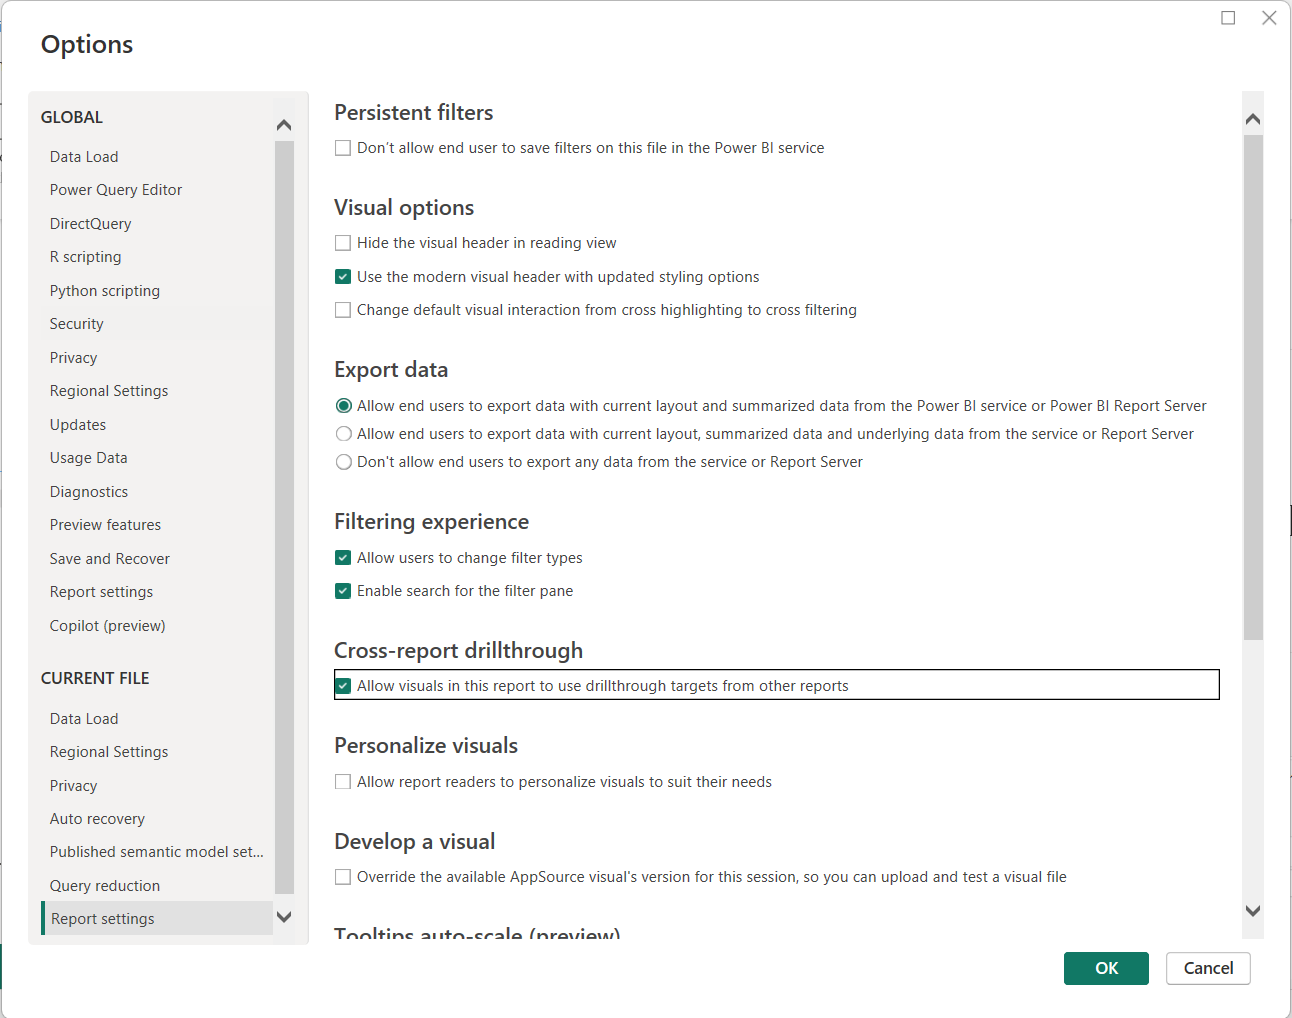
Before we start, I would like to recommend using Modern Tool Tips in Power BI. To turn on modern tooltips in Power BI, you need to navigate to File > Options and settings > Options > Preview features and select the Modern visual tooltips checkbox. After that, restart Power BI Desktop for the changes to take effect.
To begin testing:
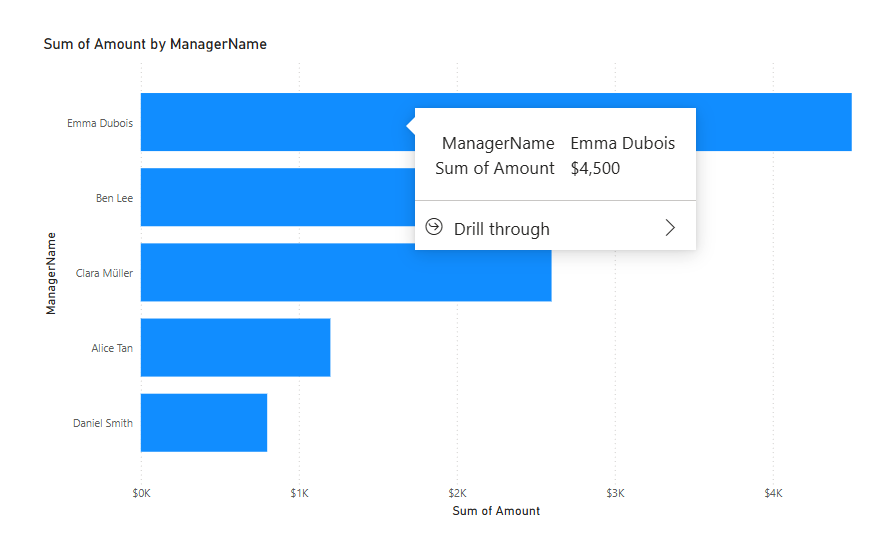
Manager Info will appear.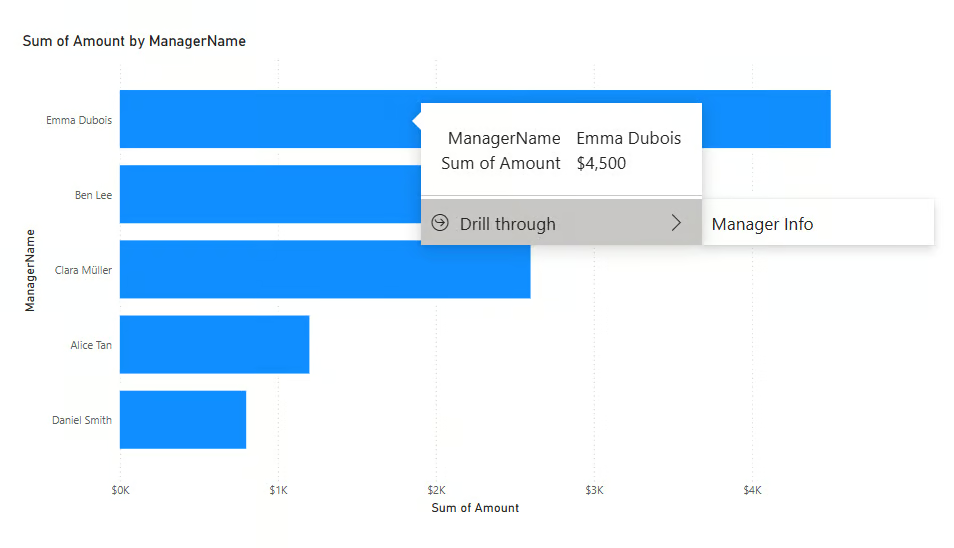
Manager Info option and this will take you to the target page will filters applied.You should see the following result:
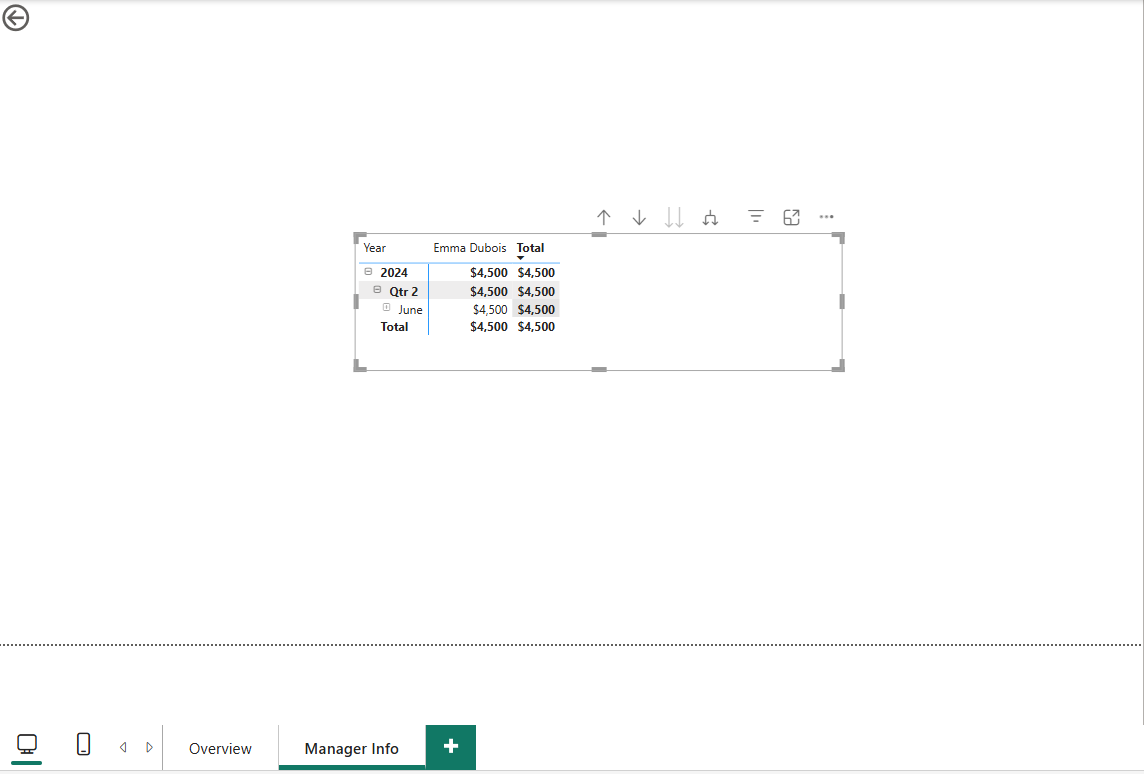
This means that the Drill Through has successfully been created.
Cross-report Drill Through allows users to navigate between separate Power BI reports while preserving filter context. This is useful when breaking down Power BI dashboards into modular parts by function or department.
ManagerName).Drill Through becomes even more powerful with DAX, conditional logic, and custom behavior.
You can create a DAX measure to pass dynamic filters based on user selection. Example:
SelectedManager = SELECTEDVALUE(FinanceTransactions[ManagerName])This can be used to:
For more information on DAX measures, here’s a cheat sheet you can follow:
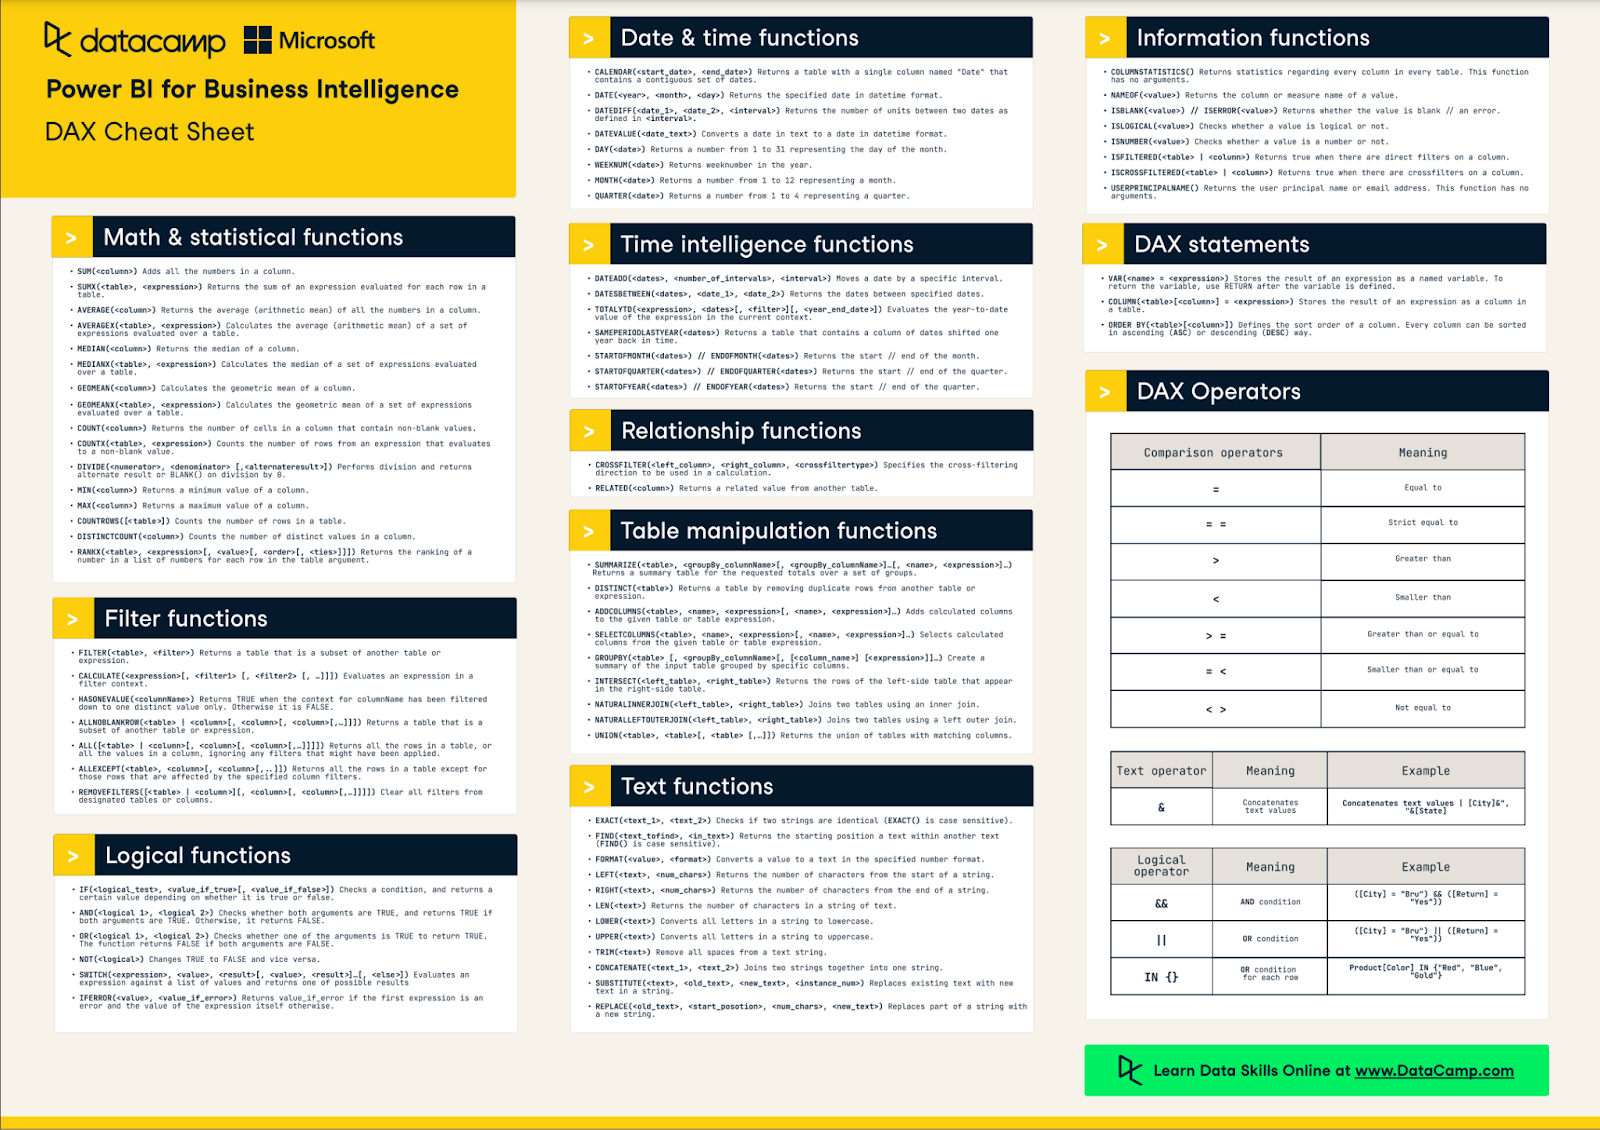
Source: DAX Cheat Sheet
Power BI Drill Through does not support multiple selections by default. If a user selects more than one data point, the Drill Through option will only show the result of one selection.
Workarounds:
Performance issues can arise if target pages are overloaded.
Here are some tips to optimize performance:
Drill through is a simple technique that works well most of the time. However, there are some tips to make things faster and more understandable.
Let’s look at them below:
Since Drill Through requires action from your users, some design aspects need to be considered.
Some tips for design are:
Here’s a summary of how to troubleshoot problems for Drill Through.
|
Problem |
Solution |
|
Drill Through is not available |
Ensure only one data point is selected and a valid field is in the Drill Through well. |
|
Filters not applied |
Check data type compatibility and relationships between tables. |
|
Slow performance |
Reduce visual complexity; aggregate or pre-filter data. |
Drill Through is powerful in driving deeper business insight since it lets you dive deeper into the actual numbers to take action based on the data.
This applies to several sectors:
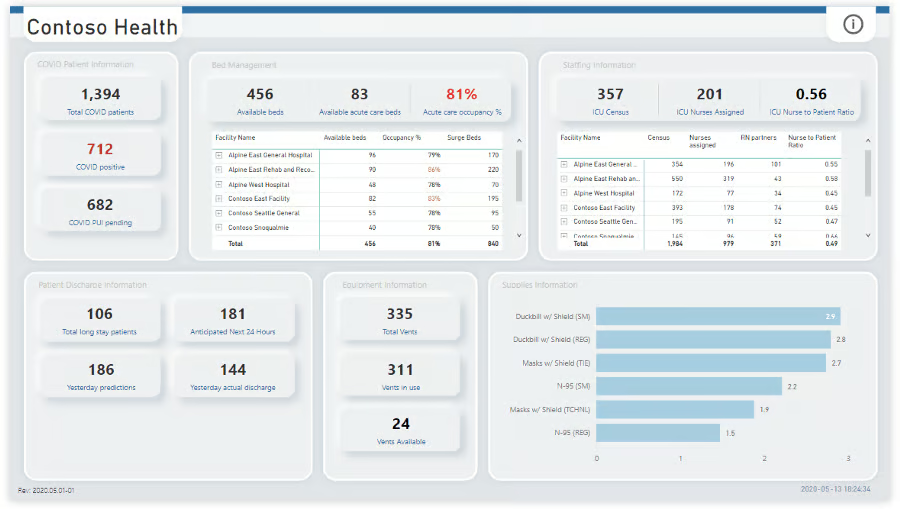
Hospital emergency room decision dashboard. Source: Microsoft Fabric
Power BI Drill Through transforms static dashboards into dynamic, interactive reports that empower users to explore data independently and make informed decisions.
To learn more about the various features within Power BI, check out our Power BI Fundamentals skill track.
For further reading, our tutorials on Power BI Dashboards, Power BI Matrix, and Power BI Calculate are good places to start.
Top Power BI Courses
Track
Course
Course
Tutorial
DataCamp Team
Tutorial
Joleen Bothma
Tutorial
Kafaru Simileoluwa
Tutorial
Joleen Bothma
Tutorial
Joleen Bothma
Tutorial
Joleen Bothma