Cursus
Ingénieur IA associé pour les scientifiques de données
40 h
GLM-5 est le nouveau modèle d’open‑reasoning de Z.ai, rapidement remarqué pour ses excellentes performances en programmation, workflows d’agents et conversations à long contexte.
De nombreux développeurs l’utilisent déjà pour créer des sites en un seul prompt, bâtir de petites applications et expérimenter des agents d’IA locaux.
Le défi, c’est que GLM-5 est un modèle très volumineux et son exécution en local reste irréaliste sur du matériel grand public. Même quantifiés, il leur faut des centaines de gigaoctets de mémoire et un GPU bien dimensionné.
Dans ce tutoriel, nous vous montrons une méthode pratique pour exécuter GLM-5 en local avec une quantification GGUF 2 bits sur un pod NVIDIA H200, le servir via llama.cpp et le connecter à Aider afin d’utiliser GLM-5 comme un véritable agent de codage au cœur de vos projets.
Je vous recommande aussi notre guide sur l’exécution locale de GLM 4.7 Flash.
Avant d’exécuter GLM-5 en local, il vous faut la bonne variante du modèle, suffisamment de mémoire pour le charger et une pile logicielle GPU opérationnelle.
Les exigences matérielles dépendent de la taille de la quantification :
Pour de meilleures performances, la somme VRAM + RAM système doit approcher la taille de la quantification. Sinon, llama.cpp peut déporter vers le SSD, mais l’inférence sera plus lente. Utilisez --fit dans llama.cpp pour maximiser l’usage du GPU.
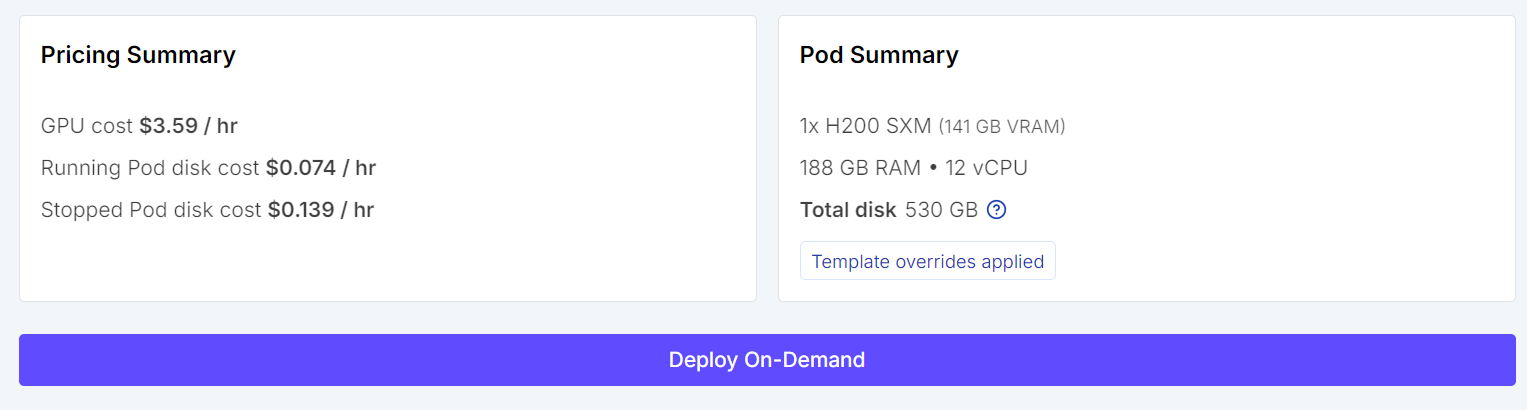
Dans notre configuration, nous exécutons GLM-5-UD-Q2_K_XL sur un NVIDIA H200, avec suffisamment de VRAM et de RAM système pour accueillir le modèle efficacement.
Prérequis logiciels :
Ci‑dessous, vous trouverez les étapes pas à pas pour exécuter GLM‑5 en local :
Même en 1 bit, GLM-5 est trop grand pour la plupart des ordinateurs portables grand public. Pour ce tutoriel, j’utiliserai donc Runpod avec un GPU NVIDIA H200.
Commencez par créer un nouveau pod et sélectionnez le dernier modèle PyTorch.
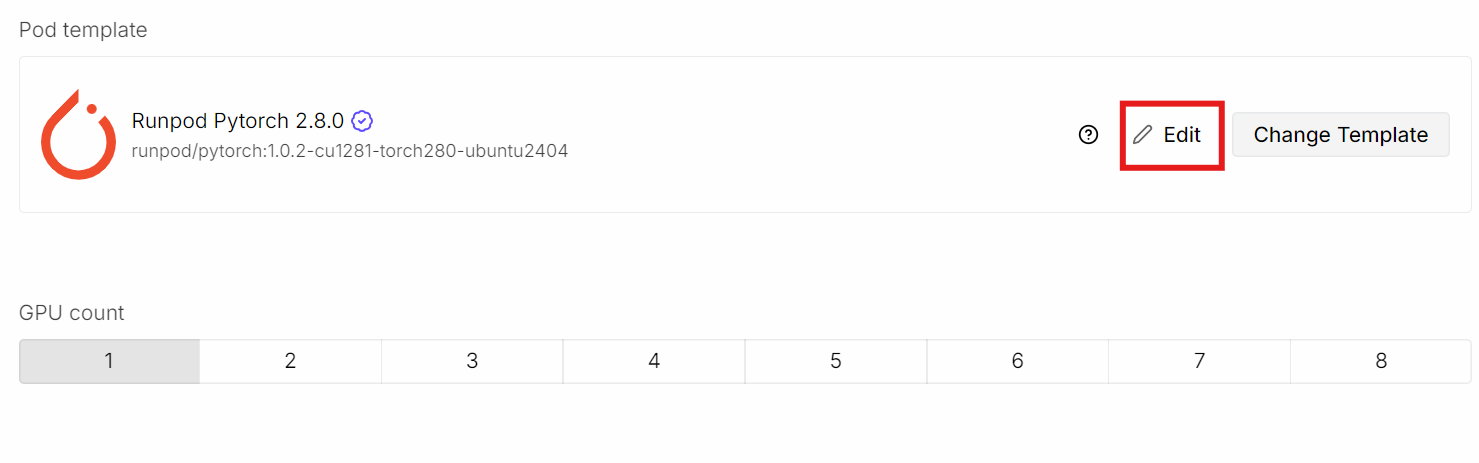
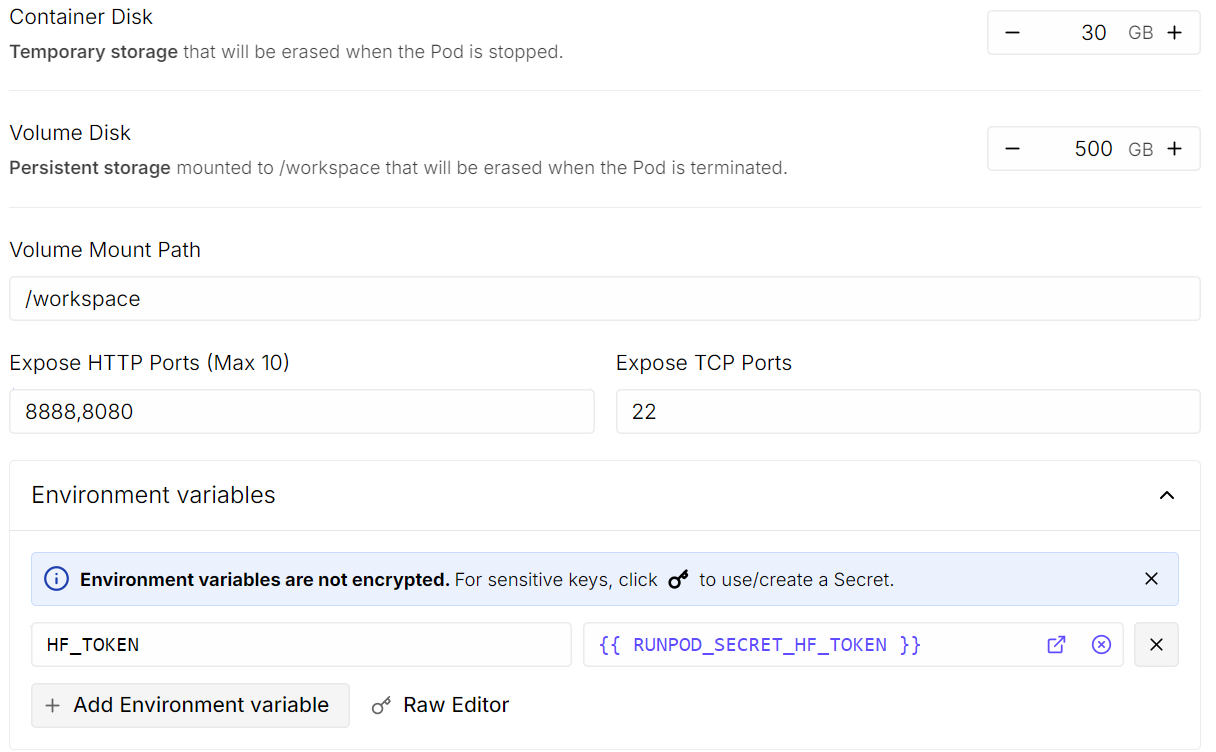
Cliquez ensuite sur Edit pour ajuster les paramètres du pod :
Une fois que tout est correct, relisez le récapitulatif du pod et cliquez sur Deploy On-Demand.
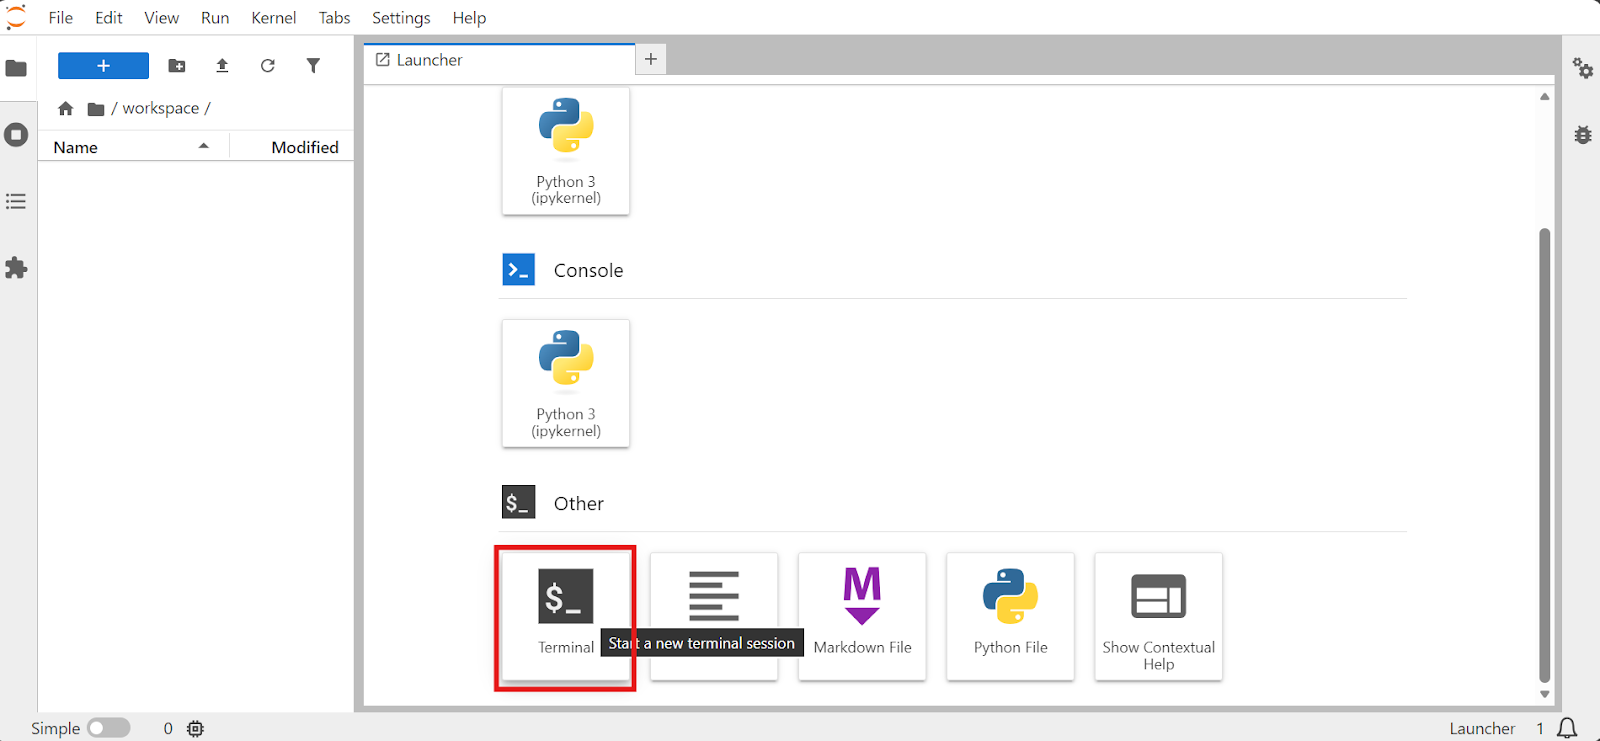
Quand le pod est prêt, ouvrez JupyterLab, lancez un Terminal et travaillez depuis celui‑ci. Le terminal Jupyter est pratique car vous pouvez ouvrir plusieurs sessions en douceur sans dépendre de SSH.
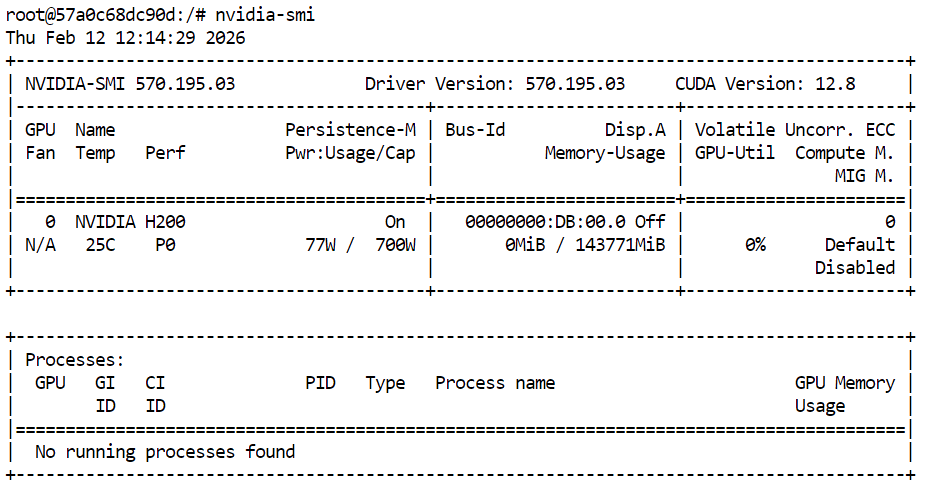
Commencez par vérifier que le GPU est disponible :
nvidia-smi Vous devriez voir le H200 dans la sortie.
Ensuite, installez les paquets Linux nécessaires pour cloner et compiler llama.cpp :
sudo apt update
sudo apt install -y git cmake build-essential curl jqMaintenant que l’environnement Runpod est prêt et que le GPU fonctionne, l’étape suivante consiste à installer et compiler llama.cpp avec l’accélération CUDA afin que GLM‑5 tourne efficacement sur le H200.
Commencez par vous placer dans le répertoire workspace et cloner le dépôt officiel llama.cpp :
cd /workspace
git clone https://github.com/ggml-org/llama.cpp
cd llama.cpp
À ce stade, notez que la dernière version stable de llama.cpp ne prend pas encore entièrement en charge GLM‑5 nativement. Il faut récupérer une pull request amont spécifique qui contient les changements récents nécessaires pour la compatibilité.
Récupérez et basculez sur la branche mise à jour :
git fetch origin pull/19460/head:MASTER && git checkout MASTER && cd ..Configurez ensuite le système de build pour compiler llama.cpp avec CUDA activé, afin d’utiliser le GPU plutôt que le CPU seul.
Lancez CMake avec le flag CUDA :
cmake llama.cpp -B llama.cpp/build \
   -DBUILD_SHARED_LIBS=OFF -DGGML_CUDA=ON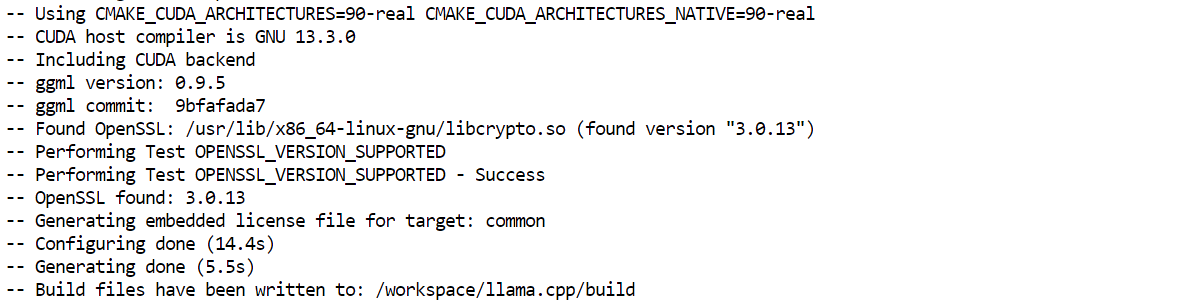
Cela crée un répertoire build/ dédié et garantit que les binaires serveur de llama.cpp prennent en charge l’exécution sur GPU NVIDIA.
Une fois la configuration terminée, compilez la cible llama-server :
cmake --build llama.cpp/build --config Release -j --clean-first --target llama-server
Cette étape peut prendre quelques minutes selon le pod, mais à l’issue vous aurez un binaire serveur compatible CUDA prêt à exécuter GLM‑5.
Enfin, copiez les exécutables compilés dans le dossier principal pour y accéder plus facilement :
cp llama.cpp/build/bin/llama-* llama.cppAvec llama.cpp prêt, l’étape suivante consiste à télécharger les fichiers du modèle GLM-5 GGUF depuis Hugging Face.
Étant donné la taille très importante des checkpoints, il est crucial d’activer les méthodes de téléchargement les plus rapides.
Hugging Face propose des outils facultatifs comme hf_xet et hf_transfer, qui améliorent nettement la vitesse, notamment sur des machines cloud comme Runpod.
Commencez par installer les utilitaires de téléchargement Hugging Face requis :
pip -q install -U "huggingface_hub[hf_xet]" hf-xet
pip -q install -U hf_transfer
Ces paquets permettent des téléchargements parallèles plus rapides et de meilleures performances pour récupérer des centaines de gigaoctets de shards.
Téléchargez maintenant la variante quantifiée utilisée dans ce tutoriel. Nous ne voulons que les fichiers UD-Q2_K_XL, pas l’ensemble complet :
hf download unsloth/GLM-5-GGUF \
   --local-dir models/GLM-5-GGUF \
   --include "*UD-Q2_K_XL*"
Cela enregistre le modèle directement dans le répertoire models/GLM-5-GGUF.
Dans notre configuration, nous atteignons environ 1,2 Go/s grâce à hf_xet et au token Hugging Face fourni. Les téléchargements anonymes sont généralement bien plus lents : l’authentification et l’accélération des transferts font une vraie différence à cette échelle.
Maintenant que le modèle est téléchargé et que llama.cpp est compilé avec CUDA, nous pouvons démarrer GLM‑5 via le llama-server intégré.
Lancez le serveur avec la commande suivante :
./llama.cpp/llama-server \
  --model models/GLM-5-GGUF/UD-Q2_K_XL/GLM-5-UD-Q2_K_XL-00001-of-00007.gguf \
  --alias "GLM-5" \
  --host 0.0.0.0 \
  --port 8080 \
  --jinja \
  --fit on \
  --threads 32 \
  --ctx-size 16384 \
  --batch-size 512 \
  --ubatch-size 128 \
  --flash-attn auto \
  --temp 0.7 \
  --top-p 0.95
Quelques arguments importants à connaître :
--host 0.0.0.0 expose le serveur pour y accéder depuis votre navigateur--port 8080 correspond au port ouvert précédemment dans Runpod--fit on maximise l’utilisation du GPU avant de déborder en RAM--ctx-size 16384 définit la fenêtre de contexte pour l’inférence--flash-attn auto active des kernels d’attention plus rapides quand disponiblesAu démarrage, vous verrez que llama.cpp utilise quasiment toute la mémoire GPU disponible, le reste des couches étant déporté en RAM système. C’est attendu et fonctionne bien avec des H200.
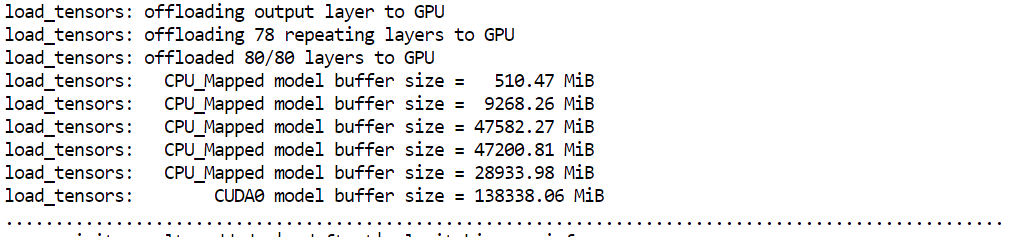
Le modèle doit se charger et commencer à servir en moins d’une minute. Si votre pod met nettement plus longtemps, il peut y avoir un problème : dans ce cas, il est souvent plus rapide de le terminer et d’en relancer un nouveau.

Une fois le serveur lancé, vérifiez la disponibilité de GLM‑5 en interrogeant l’endpoint compatible OpenAI :
curl -s http://127.0.0.1:8080/v1/models | jqVous devriez voir "GLM-5" dans la réponse, confirmant que le modèle est chargé et prêt.
{
  "models": [
    {
      "name": "GLM-5",
      "model": "GLM-5",
      "modified_at": "",
      "size": "",
      "digest": "",
      "type": "model",
      "description": "",
      "tags": [
        ""
      ],
      "capabilities": [
        "completion"
      ],
      "parameters": "",
      "details": {
        "parent_model": "",
        "format": "gguf",
        "family": "",
        "families": [
          ""
        ],
        "parameter_size": "",
        "quantization_level": ""
      }
    }
  ],
  "object": "list",
  "data": [
    {
      "id": "GLM-5",
      "object": "model",
      "created": 1770900487,
      "owned_by": "llamacpp",
      "meta": {
        "vocab_type": 2,
        "n_vocab": 154880,
        "n_ctx_train": 202752,
        "n_embd": 6144,
        "n_params": 753864139008,
        "size": 281373251584
      }
    }
  ]
}Une fois le serveur lancé, vous pouvez tester GLM‑5 directement via l’interface de chat intégrée de llama.cpp.
Normalement, le WebUI est disponible en local à : http://127.0.0.1:8080
Cependant, comme nous exécutons sur Runpod dans le cloud, ce lien localhost ne fonctionnera pas depuis votre machine.
Allez plutôt sur votre dashboard Runpod et cliquez sur le lien HTTP Service pour le port 8080. Il s’agit de l’URL publique qui redirige vers votre llama‑server en cours d’exécution.
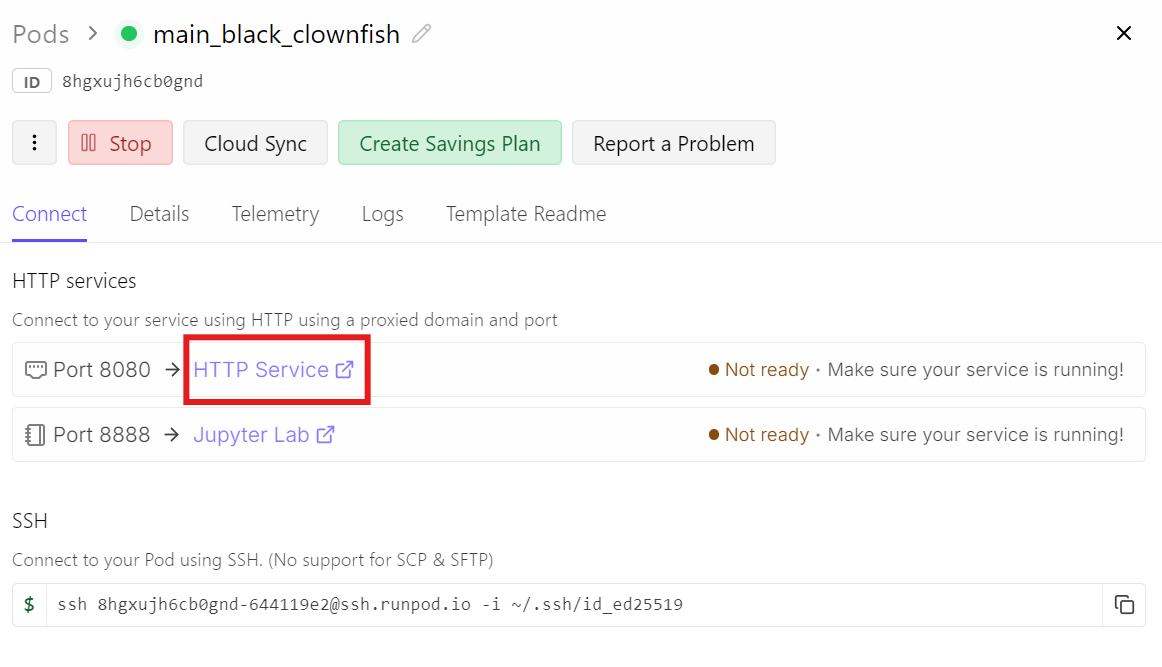 Ouvrir ce lien vous mènera à l’interface de chat, avec le modèle GLM-5 déjà chargé et prêt.
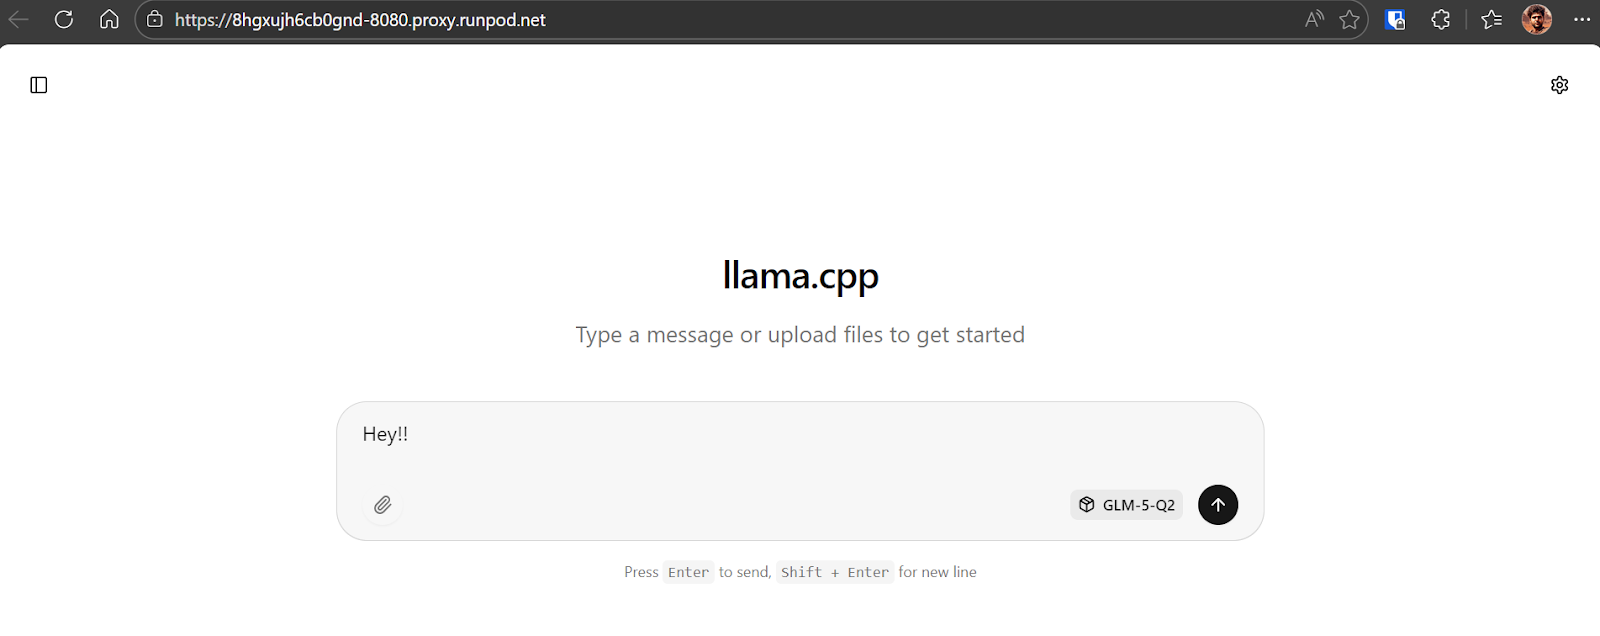
Pour confirmer que tout fonctionne, envoyez un message simple comme « Hey !! ». Le modèle doit répondre immédiatement.
Dans notre cas, l’inférence tourne autour de 8,7 tokens par seconde, ce qui est excellent au vu de la taille de GLM‑5 et du checkpoint quantifié de 281 Go.

Aider est un outil de pair programming IA en ligne de commande qui opère directement dans le dossier de votre projet.
Vous discutez avec lui comme avec un binôme de code : il peut créer, modifier et refactorer des fichiers dans tout votre dépôt, en restant ancré dans votre base de code réelle et votre workflow git.
Il peut aussi se connecter à n’importe quel endpoint d’API compatible OpenAI, ce qui en fait un excellent candidat pour notre serveur llama.cpp local.
Commencez par installer Aider :
pip install -U aider-chatPointez ensuite Aider vers votre serveur local llama.cpp compatible OpenAI. Nous définissons une clé factice, car llama.cpp n’a pas besoin d’une clé OpenAI réelle :
export OPENAI_API_BASE=http://127.0.0.1:8080/v1
export OPENAI_API_KEY=local
export OPENAI_BASE_URL=$OPENAI_API_BASE
Créez maintenant un dossier de démo vierge (afin qu’Aider ait un dépôt propre où travailler) :
mkdir -p glm5-demo-app
cd glm5-demo-app
Enfin, démarrez Aider et reliez‑le à GLM‑5 via l’alias de modèle exposé plus tôt :
aider --model openai/GLM-5 --no-show-model-warningsÀ ce stade, tout ce que vous demanderez dans Aider transitera par votre serveur GLM‑5 local, et Aider appliquera les modifications directement aux fichiers de glm5-demo-app.
 Utilisez GLM-5 comme agent de codage
Une fois Aider connecté à GLM‑5, utilisez‑le comme un agent de codage dans votre dépôt. Commencez par une salutation simple pour vérifier sa réactivité.

Donnez‑lui ensuite une consigne claire, par exemple :
Create a simple Python FastAPI project with one /health endpoint, a README, and instructions to run it locally.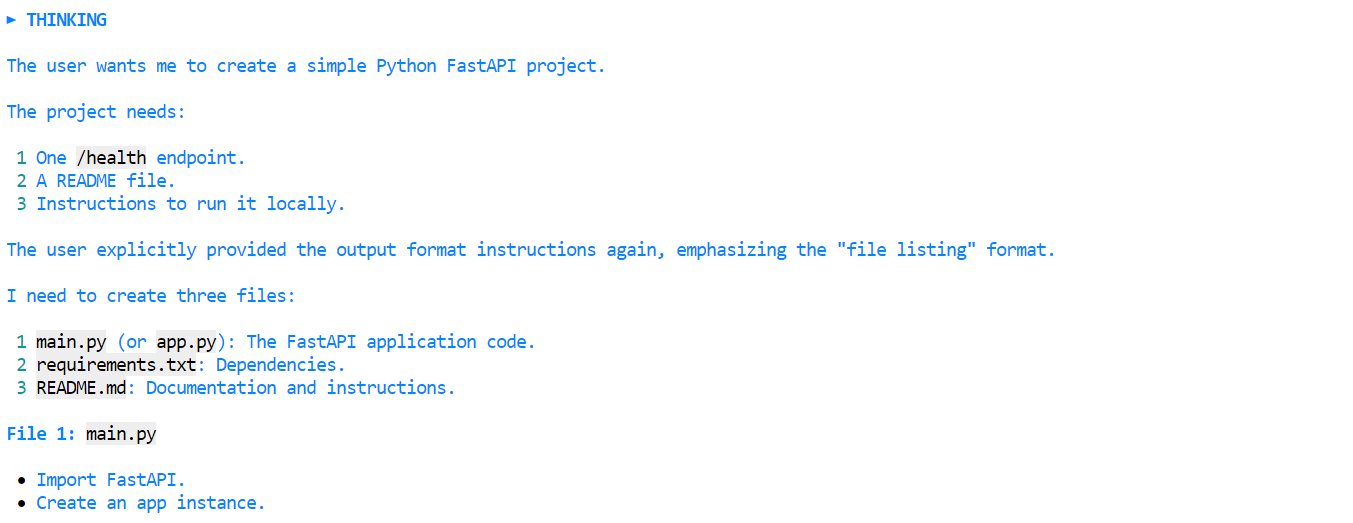
Aider propose d’abord un plan, puis demande l’autorisation d’appliquer les modifications.
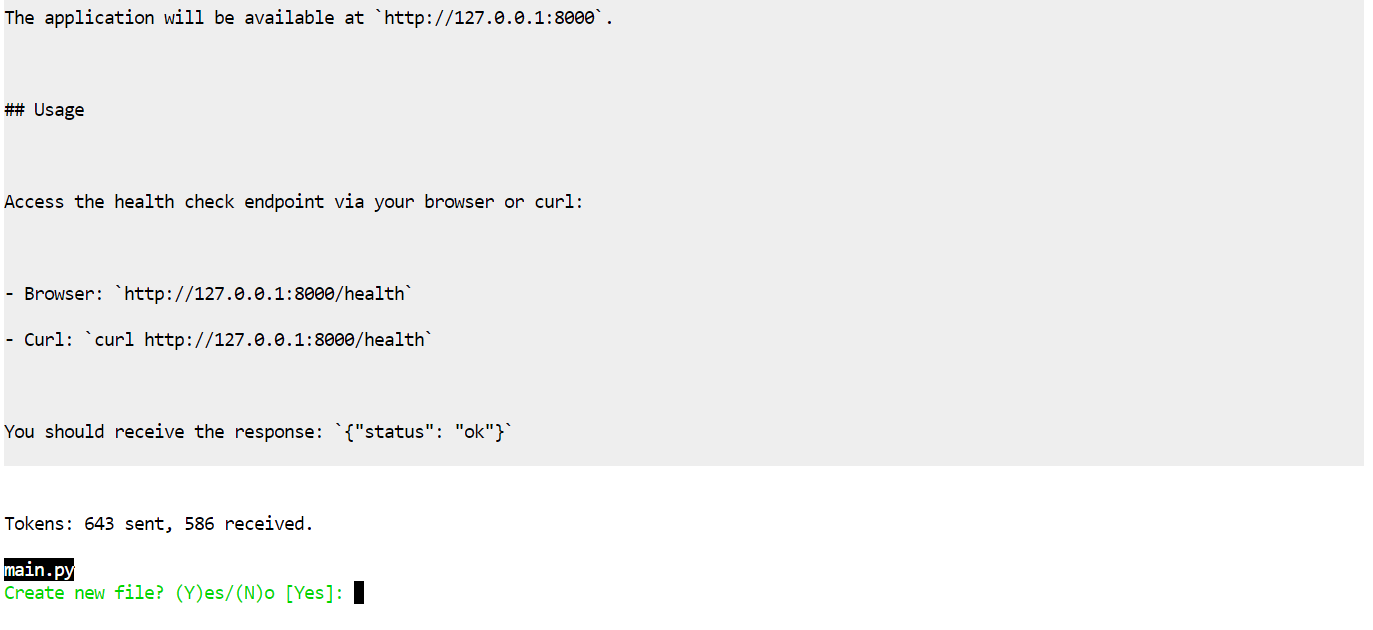
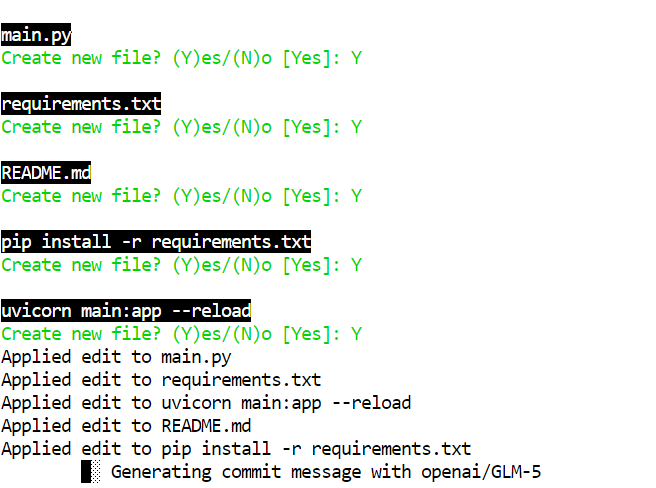
Acceptez les modifications : les fichiers seront générés automatiquement.
Avec une quantification 2 bits comme GLM-5-UD-Q2_K_XL, vous pouvez observer de petites erreurs, par exemple la création d’un fichier nommé pip install -r requirements.txt, ce qui est une maladresse. Le modèle complet est moins sujet à ces écarts, mais la version 2 bits reste très exploitable avec une rapide relecture humaine.
Quand Aider a fini d’écrire le projet, placez‑vous dans le dossier, installez les dépendances et lancez le serveur :
cd glm5-demo-app/pip install -r requirements.txtDémarrez l’application FastAPI avec Uvicorn :
uvicorn main:app --reloadLe serveur tourne sur le port 8000.

Testez l’endpoint de santé :
curl -s http://127.0.0.1:8000/healthVous devriez obtenir :
{"status":"ok"}GLM‑5 s’impose rapidement comme l’un des modèles open‑weight les plus commentés dans la communauté IA, car il rapproche les performances open source de celles des modèles propriétaires, tout en étant conçu pour le raisonnement poussé, les workflows d’agents et les tâches de programmation.
Malgré l’engouement, faire tourner des modèles à l’échelle complète en local reste un défi pour le grand public.
Même quantifiés, des modèles comme GLM‑5 requièrent des centaines de gigaoctets de mémoire et des GPU rapides, que beaucoup n’ont pas chez eux.
Ainsi, la plupart des utilisateurs s’appuient soit sur des pods GPU cloud (comme la configuration H200 de ce tutoriel), soit sur des API hébergées.
Le caractère open‑weight de GLM‑5 est puissant car il vous permet d’héberger et contrôler votre propre instance sans dépendre de fournisseurs propriétaires. Mais cela rappelle aussi que l’open source en IA ne signifie pas « tourne sur un laptop » pour tout le monde.
Dans ce tutoriel, nous avons vu comment contourner ces contraintes matérielles avec une version quantifiée 2 bits de GLM‑5 sur un GPU H200 Runpod. Nous avons parcouru la préparation de l’environnement, la compilation de llama.cpp avec CUDA, le téléchargement efficace du modèle, le lancement du serveur d’inférence, son test via l’interface navigateur, puis la connexion d’un outil de développement comme Aider pour utiliser GLM‑5 comme agent sur de vraies tâches de développement.
Meilleures formations en IA
Cursus
blog
Kurtis Pykes
9 min
blog
blog
Lynn Heidmann
Tutoriel
Tutoriel
Mark Pedigo
Tutoriel
DataCamp Team