Course
Building AI Agents with Google ADK
1 hr
6.5K
GLM 4.7 Flash is a newly released open-weight large language model that has gained significant attention because it can be run locally while still delivering strong performance for coding, reasoning, and agent-style workflows.
Unlike many modern models that depend on paid APIs or cloud-hosted infrastructure, GLM 4.7 Flash can be executed entirely on local hardware using lightweight inference frameworks. This makes it an attractive option for developers who want full control over their models, offline usage, predictable costs, and fast iteration during development.
With the right setup and quantization, the model can achieve high token generation speeds on consumer GPUs while maintaining useful reasoning quality.
In this tutorial, I will walk you through how to set up the system environment required to run GLM 4.7 Flash locally using llama.cpp. The focus is on keeping the setup simple, clean, and reproducible. We will download the model, build and configure llama.cpp, and then test the model using both a web application and an API based inference server.
Later in the tutorial, we will integrate the local llama.cpp server with an AI coding agent, enabling automated code generation, execution, and testing workflows. You can also check out our guide on how to run GLM-4.7 locally.
Before running GLM 4.7 Flash locally, ensure that your system meets the following requirements.
For full precision or higher bit quantization:
For 4 4-bit quantized model
The Q4_K_XL quantization significantly reduces memory usage while preserving strong reasoning and coding performance, making it suitable for GPUs such as RTX 3090, RTX 4080, and RTX 4090. This variant is ideal for users who want high token throughput without running full precision weights.
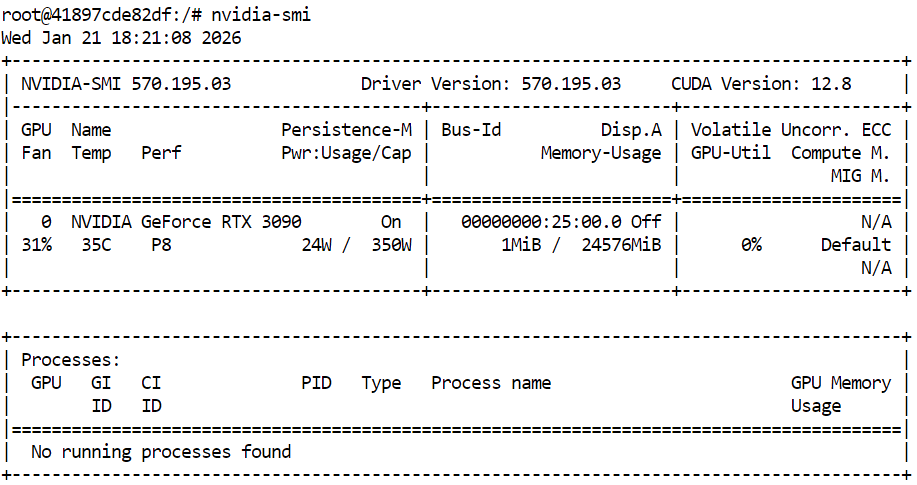
Before building llama.cpp and running GLM 4.7 Flash, first confirm that your NVIDIA GPU and drivers are correctly installed. This ensures that CUDA is available and the system can run GPU-accelerated inference.
nvidia-smiThe output shows an RTX 3090 with CUDA version 12.8 and the 24GB GPU memory available, which is sufficient for running GLM 4.7 Flash and its quantized variants.
Next, open a terminal and define a clean workspace and directory structure. This keeps source code, model files, and cache data organized, helps avoid permission issues, and makes the setup easy to reproduce.
export WORKDIR="/workspace"
export LLAMA_DIR="$WORKDIR/llama.cpp"
export MODEL_DIR="$WORKDIR/models/unsloth/GLM-4.7-Flash-GGUF"
Create the directory where the model files will be stored, and configure Hugging Face cache locations inside the workspace instead of the home directory. This improves download performance and avoids unnecessary warnings.
mkdir -p "$MODEL_DIR"
export HF_HOME="$WORKDIR/.cache/huggingface"
export HUGGINGFACE_HUB_CACHE="$WORKDIR/.cache/huggingface/hub"
export HF_HUB_CACHE="$WORKDIR/.cache/huggingface/hub"
Set additional environment variables to suppress symlink warnings and enable high-performance downloads.
export HF_HUB_DISABLE_SYMLINKS_WARNING=1
export HF_XET_HIGH_PERFORMANCE=1
Finally, install the required system dependencies for building llama.cpp and managing downloads.
sudo apt-get update
sudo apt-get install -y \
  build-essential cmake git curl libcurl4-openssl-dev
At this point, the system environment is ready. The next section will focus on cloning and building llama.cpp with CUDA support enabled.
With the environment prepared, the next step is to install llama.cpp and build it with CUDA support enabled. This allows GLM 4.7 Flash to run efficiently on the GPU.
In the terminal, navigate to your workspace. Then run the following command to clone the official llama.cpp repository.
git clone https://github.com/ggml-org/llama.cpp "$LLAMA_DIR"After the repository is cloned, the source files will be downloaded into the workspace directory.
Cloning into '/workspace/llama.cpp'...
remote: Enumerating objects: 76714, done.
remote: Counting objects: 100% (238/238), done.
remote: Compressing objects: 100% (157/157), done.
remote: Total 76714 (delta 172), reused 81 (delta 81), pack-reused 76476 (from 3)
Receiving objects: 100% (76714/76714), 282.23 MiB | 13.11 MiB/s, done.
Resolving deltas: 100% (55422/55422), done.
Updating files: 100% (2145/2145), done.
Next, configure the build using CMake and explicitly enable CUDA support. This step prepares the build system to compile GPU-accelerated binaries.
cmake "$LLAMA_DIR" -B "$LLAMA_DIR/build" \
  -DBUILD_SHARED_LIBS=OFF \
  -DGGML_CUDA=ON
Once the configuration is complete, build the required llama.cpp binaries. This command compiles the core inference tools, including the command line interface and the inference server.
cmake --build "$LLAMA_DIR/build" --config Release -j --clean-first \
  --target llama-cli llama-mtmd-cli llama-server llama-gguf-split
After the build finishes, copy the compiled binaries into the main llama.cpp directory for easier access.
cp "$LLAMA_DIR/build/bin/llama-"* "$LLAMA_DIR/"Finally, verify that llama.cpp was built correctly and that CUDA is detected by running the inference server help command.
"$LLAMA_DIR/llama-server" --help >/dev/null && echo "✔ llama.cpp built"If CUDA support is correctly enabled, the output will confirm that a CUDA device was detected, including the GPU model and compute capability.
ggml_cuda_init: found 1 CUDA devices:
  Device 0: NVIDIA GeForce RTX 3090, compute capability 8.6, VMM: yes
✔ llama.cpp builtWith llama.cpp built and CUDA support verified, the next step is to download the GLM 4.7 Flash model. In this tutorial, we use the Hugging Face Hub with Xet support to enable fast and reliable downloads of large model files.
In the same terminal, type the following commands to install the required Python packages for high-performance model downloads.
pip -q install -U "huggingface_hub[hf_xet]" hf-xet
pip -q install -U hf_transfer
Next, run the following Python script in the terminal to download the 4-bit quantized model variant. This script uses the workspace paths defined earlier and downloads only the required GGUF file.
python - <<'PY'
import os
from huggingface_hub import snapshot_download

model_dir = os.environ["MODEL_DIR"]

snapshot_download(
    repo_id="unsloth/GLM-4.7-Flash-GGUF",
    local_dir=model_dir,
    allow_patterns=["*UD-Q4_K_XL*"],
)

print("✔ Download complete:", model_dir)
PY
Once the download completes, you should see output confirming that the model file was fetched successfully, with a total size of approximately 17.5 GB.
Fetching 1 files: 100%|███████████████████████████████████████████████████████████████████████████████████| 1/1 [00:52<00:00, 52.80s/it]
Download complete: 100%|████████████████████████████████████████████████████████████████████████████| 17.5G/17.5G [00:52<00:00, 480MB/s]✔ Download complete: /workspace/models/unsloth/GLM-4.7-Flash-GGUF
Finally, verify that the model file is present in the target directory.
ls -lh "$MODEL_DIR"You should see the GLM-4.7-Flash-UD-Q4_K_XL.gguf file listed, confirming that the model is ready for inference.
total 17G
-rw-rw-rw- 1 root root 17G Jan 21 18:46 GLM-4.7-Flash-UD-Q4_K_XL.ggufWith the model downloaded and llama.cpp built with CUDA support, the next step is to launch the inference server. This will expose GLM 4.7 Flash as a local API that can be used by user interfaces, scripts, and AI coding agents.
Please use the same terminal session and workspace that you configured in the previous sections.
First, locate the downloaded GGUF model file and store its path in an environment variable.
export MODEL_FILE="$(ls "$MODEL_DIR"/*.gguf | grep -i UD-Q4_K_XL | head -n 1)"Next, start the llama.cpp inference server using the following command. This configuration is optimized for an RTX 3090 and balances throughput, latency, and context length.
$LLAMA_DIR/llama-server \
  --model "$MODEL_FILE" \
  --alias "GLM-4.7-Flash" \
  --threads 32 \
  --host 0.0.0.0 \
  --ctx-size 16384 \
  --temp 0.7 \
  --top-p 1 \
  --port 8080 \
  --fit on \
  --prio 3 \
  --jinja \
  --flash-attn auto \
  --batch-size 1024 \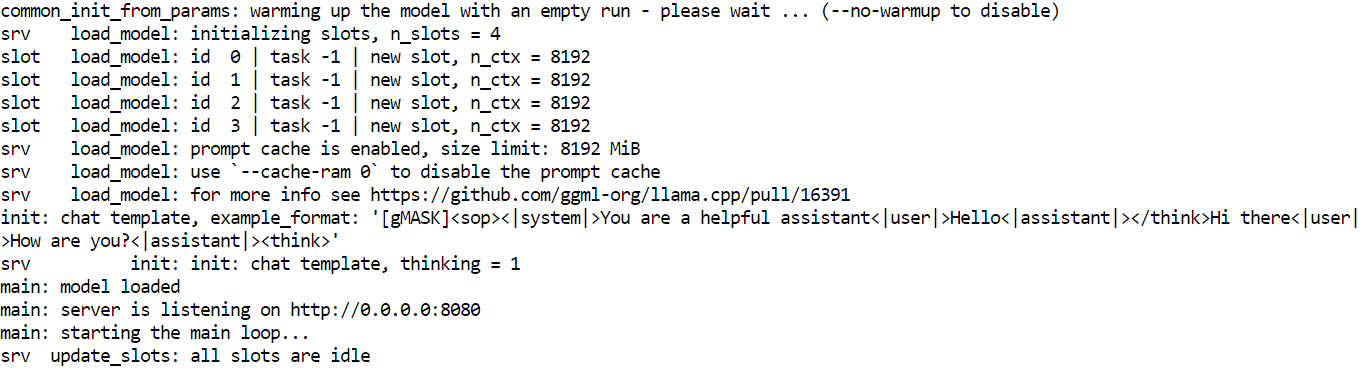
--ubatch-size 256--model loads the selected GLM 4.7 Flash GGUF model file for inference.--alias assigns a readable model name that appears in API responses and logs.--threads uses 32 CPU threads to support tokenization, scheduling, and request handling on a high core system.--host binds the server to all network interfaces so it can be accessed locally or from other machines on the network.--ctx-size sets a large context window that balances long prompt support with GPU memory usage.--temp applies moderate randomness to improve response quality without harming reasoning stability.--top-p disables nucleus filtering to allow the full token distribution during generation.--port 8080 exposes the inference server on a standard local development port.--fit enables automatic memory fitting to maximize GPU utilization without exceeding VRAM limits.--prio sets a balanced priority level for inference workloads under concurrent requests.--jinja enables Jinja templating support for structured prompts and agent style workflows.--flash-attn automatically enables Flash Attention when supported by the GPU to increase throughput.--batch-size allows large batch processing to improve token throughput on the RTX 3090.--ubatch-size splits large batches into smaller micro batches to control memory pressure and latency.Once the server starts, it will load the model into GPU memory and begin listening for requests on port 8080. At this point, GLM 4.7 Flash is running locally and can be accessed via HTTP endpoints for chat, completion, and agent-based workflows.
With the inference server running, you can now test GLM 4.7 Flash using multiple interfaces, including the built-in web UI, direct HTTP requests, and the OpenAI-compatible Python SDK.
The llama.cpp web interface is available at: http://0.0.0.0:8080
Copy this URL and open it in your web browser to access a simple chat interface similar to ChatGPT.
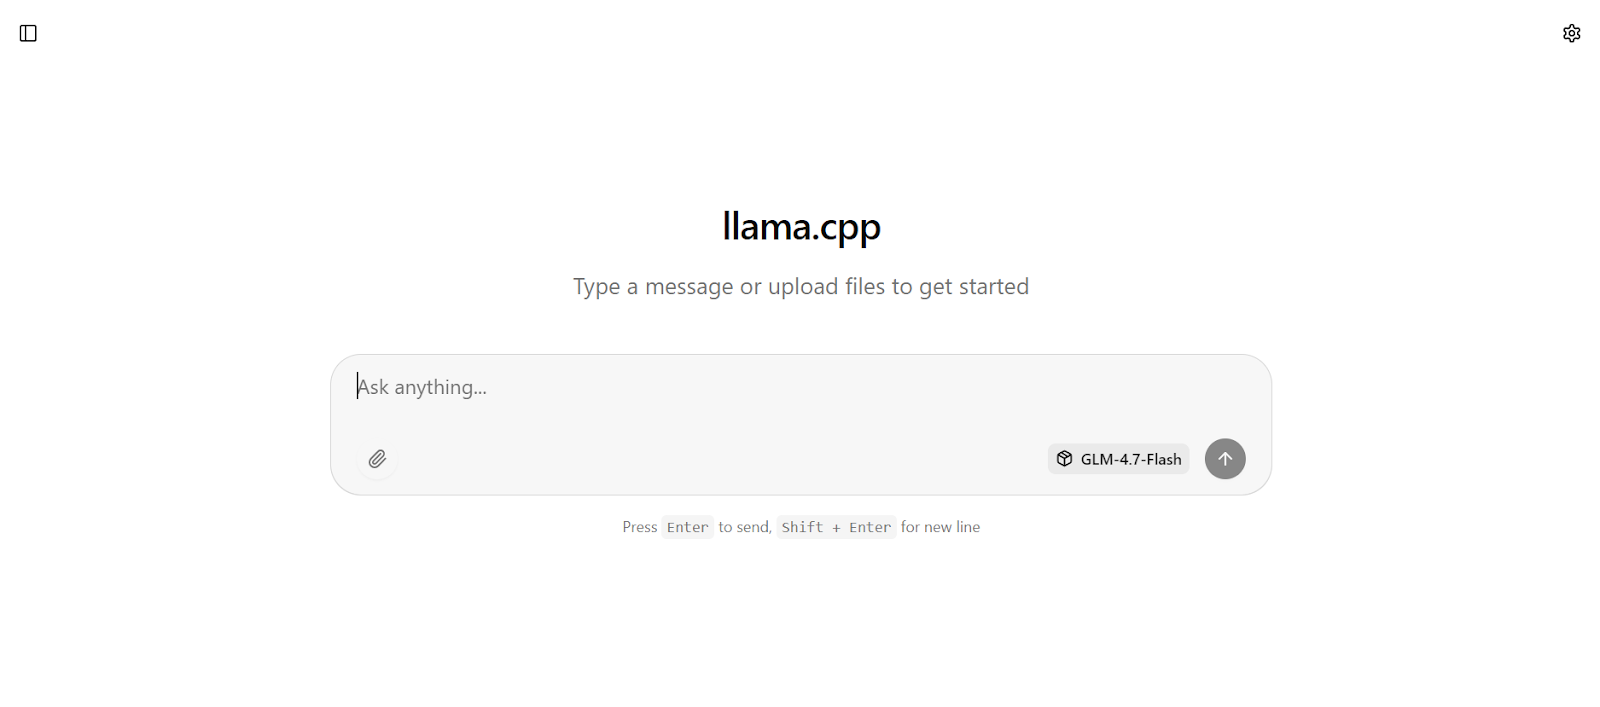
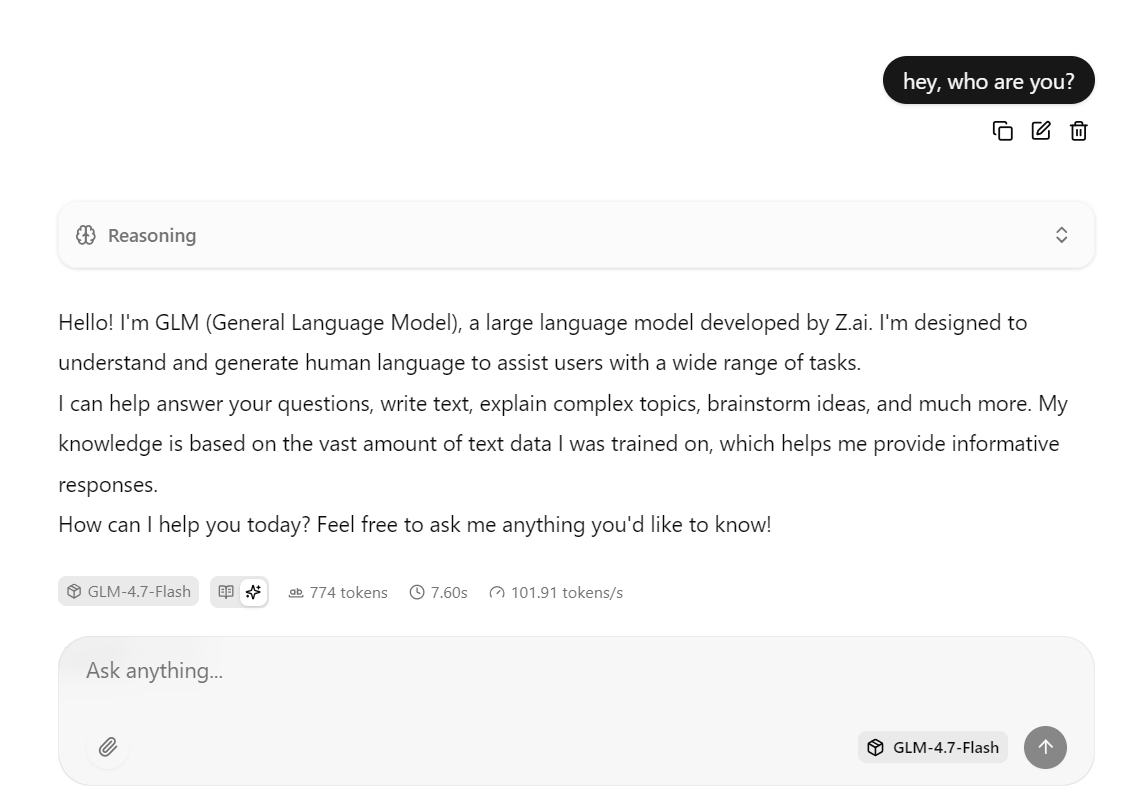
Enter a prompt, and the model will begin generating a response immediately.
This setup is optimized for speed by running the model on the RTX 3090 with CUDA enabled, using Flash Attention when available, and using batching settings tuned for high throughput.
In practice, this configuration can reach around 100 tokens per second for short to medium responses.
You can also interact with the same server using a curl command. Open a new terminal window and run the following request to send a chat completion prompt.
curl -N http://127.0.0.1:8080/v1/chat/completions \
  -H "Content-Type: application/json" \
  -H "Authorization: Bearer local" \
  -d '{
    "model": "GLM-4.7-Flash",
    "messages": [
      { "role": "user", "content": "Write a short bash script that prints numbers 1 to 5." }
    ]
  }'
You can also test the model using Python by installing the OpenAI Python SDK.
pip -q install openaiIn this Python example, the OpenAI client is configured to send requests to the locally running llama.cpp inference server.
The base_url points to the local API endpoint, and the API key field is required by the SDK but can be set to any placeholder value since authentication is handled locally.
from openai import OpenAI

client = OpenAI(
    base_url="http://127.0.0.1:8080/v1",
    api_key="local"
)
The client then sends a chat completion request to GLM 4.7 Flash using the model alias defined when the inference server was launched. The prompt is provided in standard chat format, and the response is returned as a structured object.
r = client.chat.completions.create(
model="GLM-4.7-Flash",
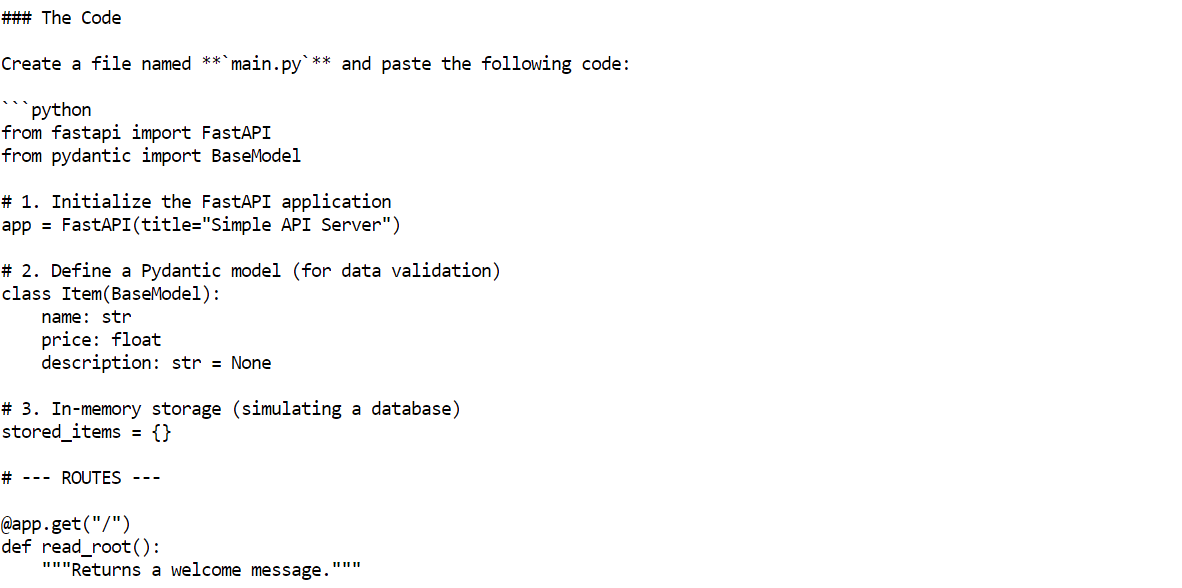
messages=[{"role": "user", "content": "Build me a Simple API server using FastAPI"}]
)
print(r.choices[0].message.content)Within a few seconds, the model will return a complete response, including example code and explanations.
OpenCode is an open source AI coding agent designed to run locally while supporting agentic workflows such as code generation, file editing, command execution, and iterative problem solving.
Unlike cloud-based coding assistants, OpenCode can be connected to self-hosted inference servers, allowing you to build a fully local and free AI coding setup.
In this tutorial, OpenCode is configured to use the local llama.cpp server running GLM 4.7 Flash through an OpenAI-compatible API.
To begin, use the same terminal session and install OpenCode using the official installation script.
curl -fsSL https://opencode.ai/install | bash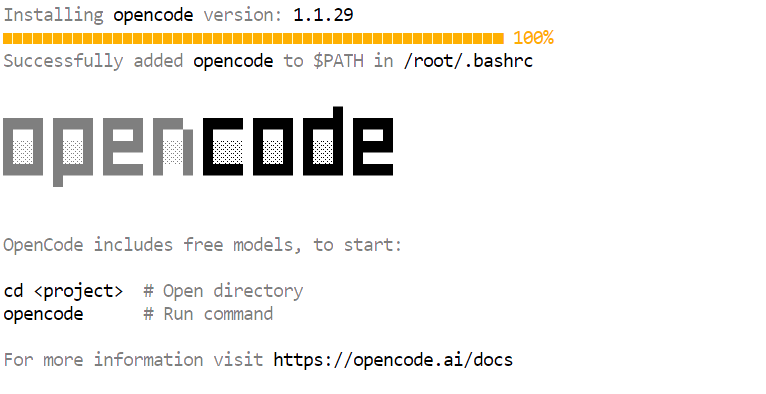 After installation, update your PATH so the opencode command is available in the terminal.
export PATH="$HOME/.local/bin:$PATH"Open a new terminal window and verify that OpenCode is installed correctly.
opencode --versionYou should see a version number similar to the following.
1.1.29Next, create the OpenCode configuration directory. Then, create the OpenCode configuration file and define llama.cpp as the provider. This configuration tells OpenCode to send all requests to the locally running inference server and use the GLM 4.7 Flash model.
mkdir -p ~/.config/opencode


cat > ~/.config/opencode/opencode.json <<'EOF'
{
  "$schema": "https://opencode.ai/config.json",
  "provider": {
    "llamacpp": {
      "npm": "@ai-sdk/openai-compatible",
      "name": "llama.cpp (local)",
      "options": {
        "baseURL": "http://127.0.0.1:8080/v1"
      },
      "models": {
        "GLM-4.7-Flash": {
          "name": "GLM-4.7-Flash (UD-Q4_K_XL)"
        }
      }
    }
  },
  "model": "GLM-4.7-Flash"
}
EOF
Finally, authenticate OpenCode. This step is required by the tool, but since the inference server is local, the API key can be any placeholder value.
opencode auth loginWhen prompted, use the following values.
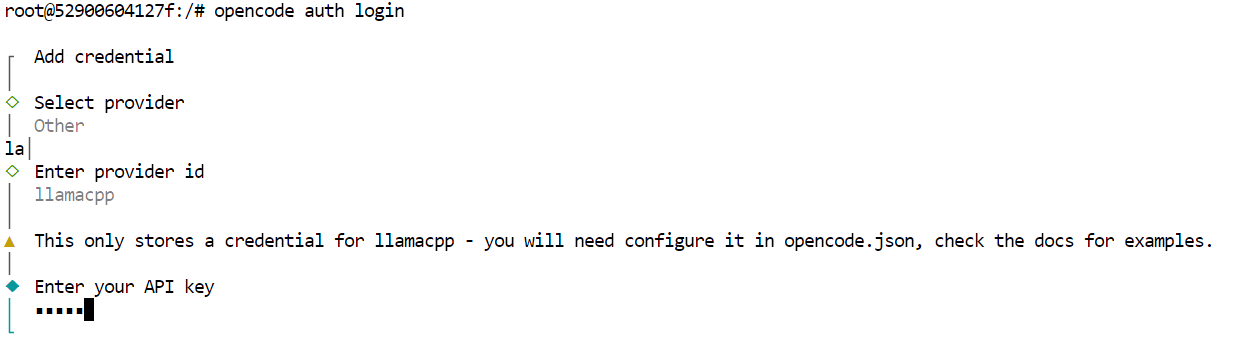
At this point, OpenCode is fully configured to use GLM 4.7 Flash through the local llama.cpp server.
With OpenCode configured and connected to the local llama.cpp server, you can now use GLM 4.7 Flash as a fully automated AI coding agent.
Start by creating a new project directory and navigating into it.
mkdir -p /workspace/project
cd /workspace/project
Next, launch OpenCode from the same terminal.
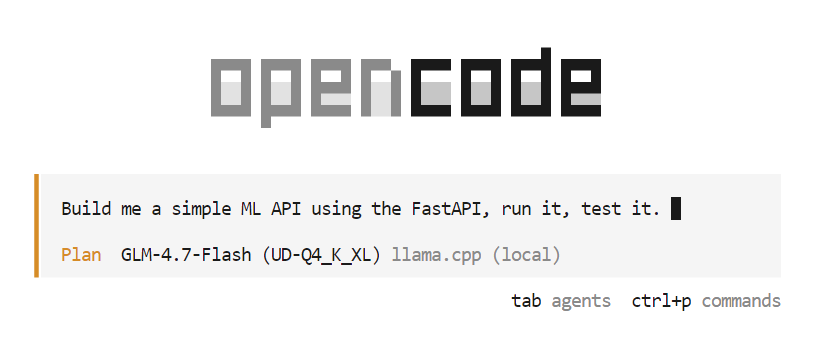
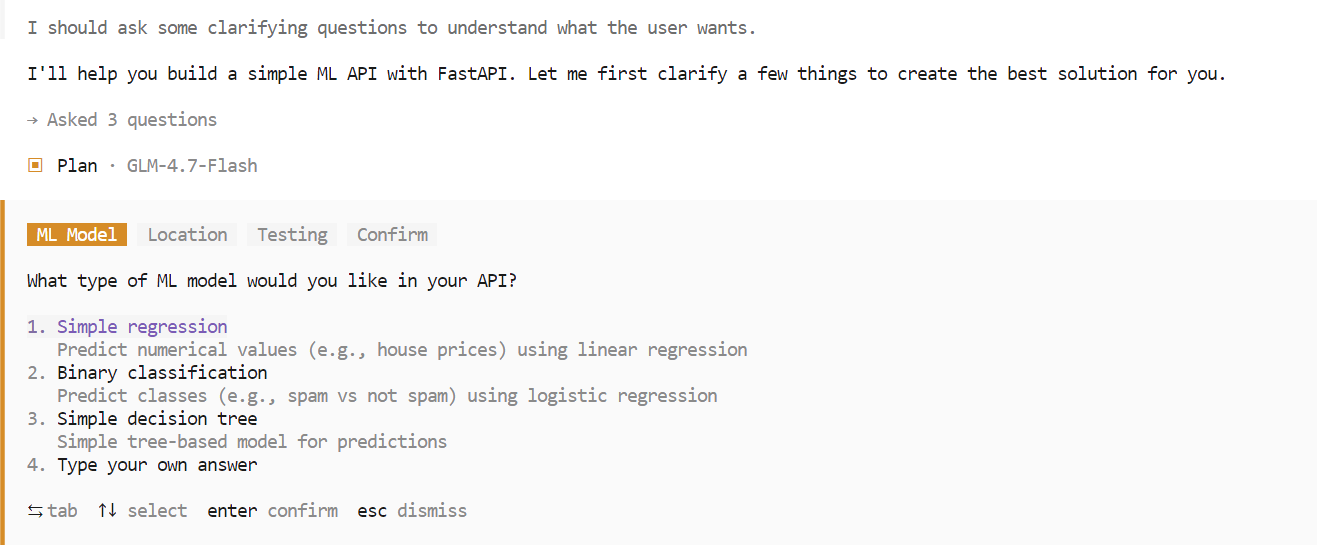
opencodeOnce OpenCode starts, press the Tab key to switch to Plan mode. In this mode, describe what you want to build.
For example, enter a prompt asking OpenCode to create a simple machine learning powered API using FastAPI. OpenCode will automatically plan the project, generate the code, run the API server, and test the implementation.
During the planning phase, OpenCode may ask follow-up questions to clarify requirements such as framework choices, endpoints, or project structure. Select the options you prefer and confirm to proceed.
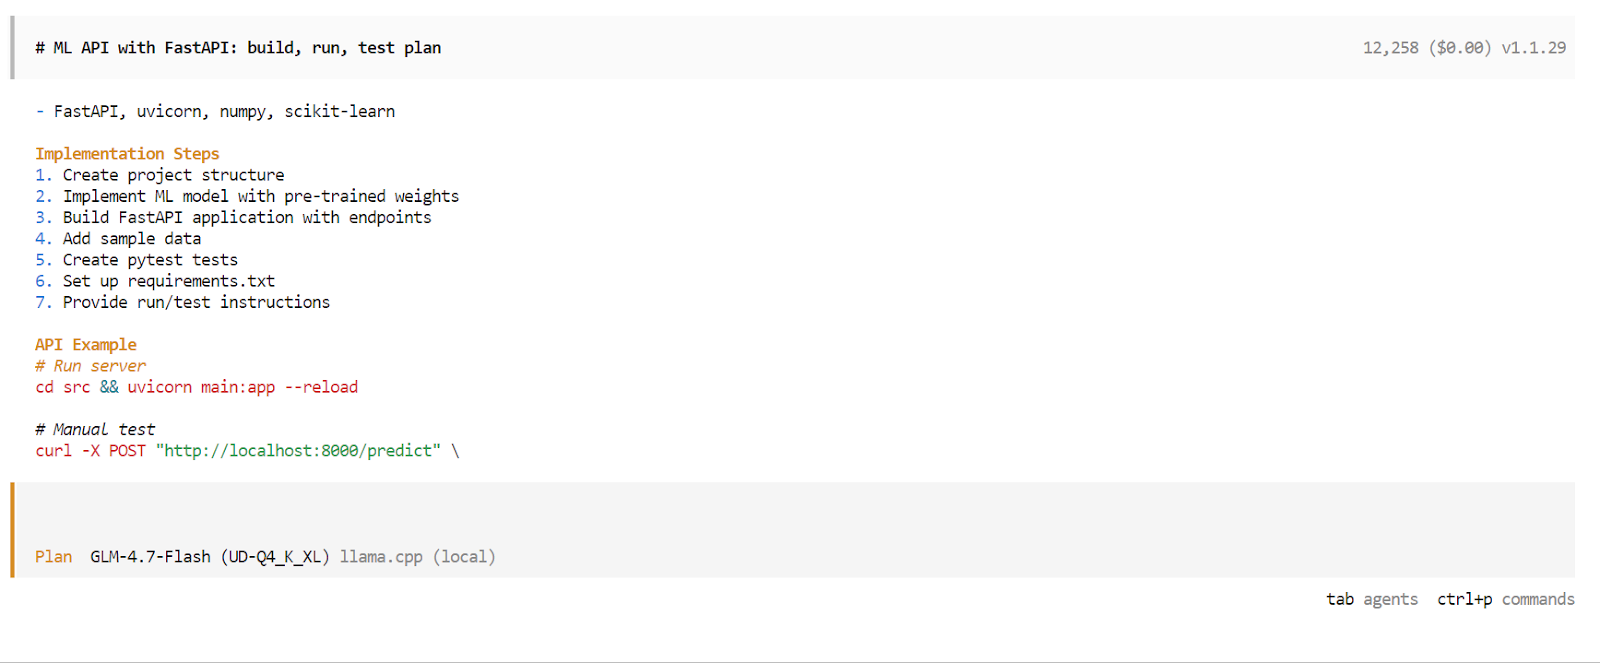
After the planning phase is complete, OpenCode will present a detailed execution plan. Review the plan and approve it if it matches your expectations. Then press Tab again to switch from Plan mode to Build mode.
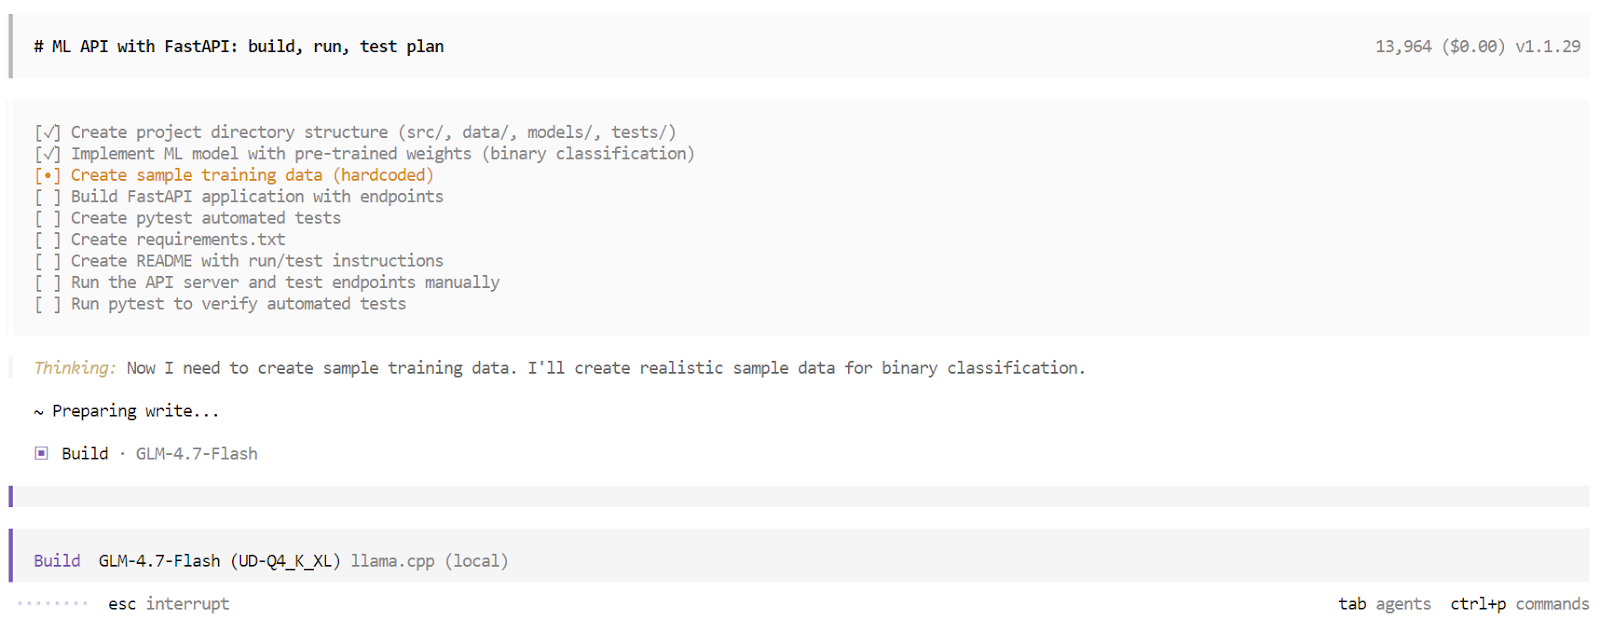
In Build mode, OpenCode creates a structured task list and executes each step sequentially. This includes generating files, writing code, installing dependencies, running the server, and executing tests. You can observe each task being completed in real time.
Once the build process finishes, OpenCode provides a complete overview of the application. This includes usage instructions, example requests, and the results of automated tests. At this point, you have a fully working application built and validated by a local AI coding agent running entirely on your machine.
GLM 4.7 Flash represents a strong step toward fully local AI coding agents. The ability to run a fast, capable reasoning model entirely on local hardware and integrate it with tools like OpenCode is a meaningful shift away from cloud-dependent workflows.
That said, GLM 4.7 Flash still has limitations. While it performs well for small to medium-sized tasks, it can struggle with more complex, multi-step coding workflows. Context can fill up quickly, tool execution may occasionally fail, and in some cases, the agent may stop mid-process, requiring a new session to continue.
These issues are expected for a lightweight MoE model optimized for speed rather than maximum reasoning depth.
In terms of raw capability, GLM 4.7 Flash is not on the same level as the full GLM 4.7 model, which is closer in performance to models such as Claude 4.5 Sonnet. The trade-off is clear. GLM 4.7 Flash prioritizes speed, efficiency, and local usability over peak reasoning strength.
Working through this tutorial and tuning the inference server was a valuable experience. Running higher precision variants and increasing the context window may improve coding reliability, but achieving the best results requires careful experimentation with parameters such as temperature, top p, batch sizes, and context length. Reaching an optimal setup is an iterative process.
Overall, GLM 4.7 Flash is a practical and exciting option for developers who want fast, local, and free AI coding agents today, with clear room for improvement as tooling and models continue to evolve.
Top DataCamp Courses
Course
Course
Course
Tutorial
Abid Ali Awan
Tutorial
Abid Ali Awan
Tutorial
Abid Ali Awan
Tutorial
Abid Ali Awan
Tutorial
François Aubry
Tutorial
François Aubry