Track
AWS Cloud Practitioner (CLF-C02)
10 hr
Generative AI has become the disruptor in all sectors, driving progress in natural language processing, computer vision, and many other areas. However, using its potential has often been accompanied by challenges of costs, complex infrastructure, and steep learning curves. That’s where AWS Bedrock comes in – this solution helps unblock by allowing you to use foundation models without the need to manage infrastructure.
This tutorial aims to be your complete guide to Amazon Bedrock, describing what it is, how it works, and how you can use it. By the end of this guide, you’ll have the information and skills you need to develop your own generative AI applications—scalable, flexible, and aligned to your goals.
Amazon Bedrock is a managed AWS service for accessing and managing foundation models (FMs), the basic building blocks of generative AI by Amazon Web Services (AWS). Bedrock makes things so simple that you don’t need to worry about provisioning GPUs, configuring model pipelines, or managing any other infrastructure.
AWS Bedrock is a gateway to innovation. It is a unified platform enabling developers to explore, test, and deploy cutting-edge AI models from leading providers such as Anthropic, Stability AI, and Amazon’s Titan.
For instance, imagine you are developing a customer support chatbot. With AWS Bedrock, you can select a sophisticated language model, tune it for your application’s needs, and embed it in your application without ever having to write server configuration in code.
AWS Bedrock’s features are designed to simplify and accelerate the journey from AI concept to production. Let’s break them down in detail.
One of the most significant benefits of AWS Bedrock is the variety of foundation models available. Whether you are working on text applications, visual content, or safe and interpretable AI, Bedrock has you covered. Here are some of the models available:
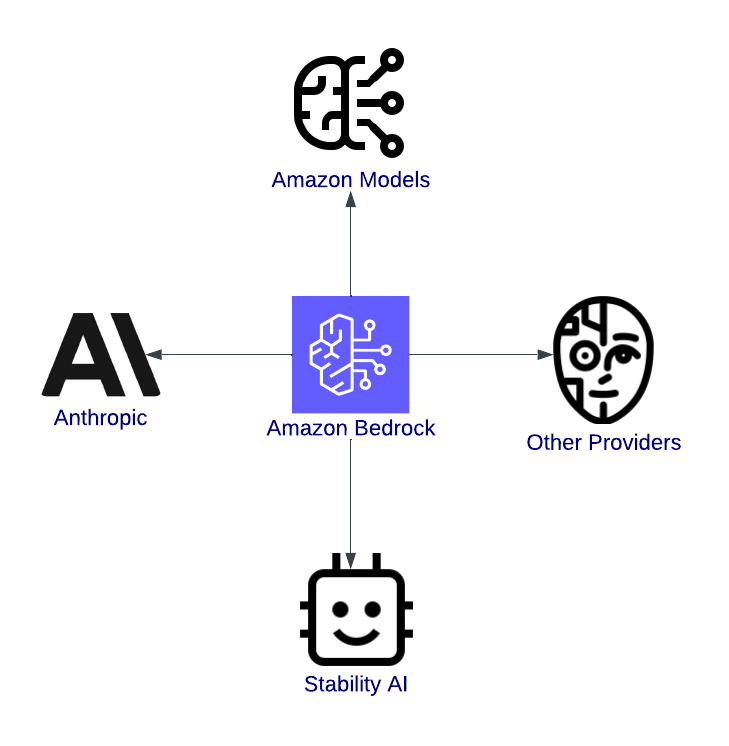
Overview of Amazon Bedrock, highlighting its integration with models.
AWS Bedrock abstracts infrastructure management, which means:
AI generative applications typically have an unpredictable demand. A chatbot may respond to hundreds of users during peak hours and only a few at night. But AWS Bedrock solves this with its built-in scalability:
AWS Bedrock goes beyond providing powerful models—it integrates with other AWS services to support end-to-end AI workflows. Some integrations include:
This section will guide you through setting up the necessary permissions, creating an AWS account, and getting started with AWS Bedrock.
If you don’t already have one, head to AWS’s sign-up page and create an account. For existing users, ensure your IAM user has administrator privileges.
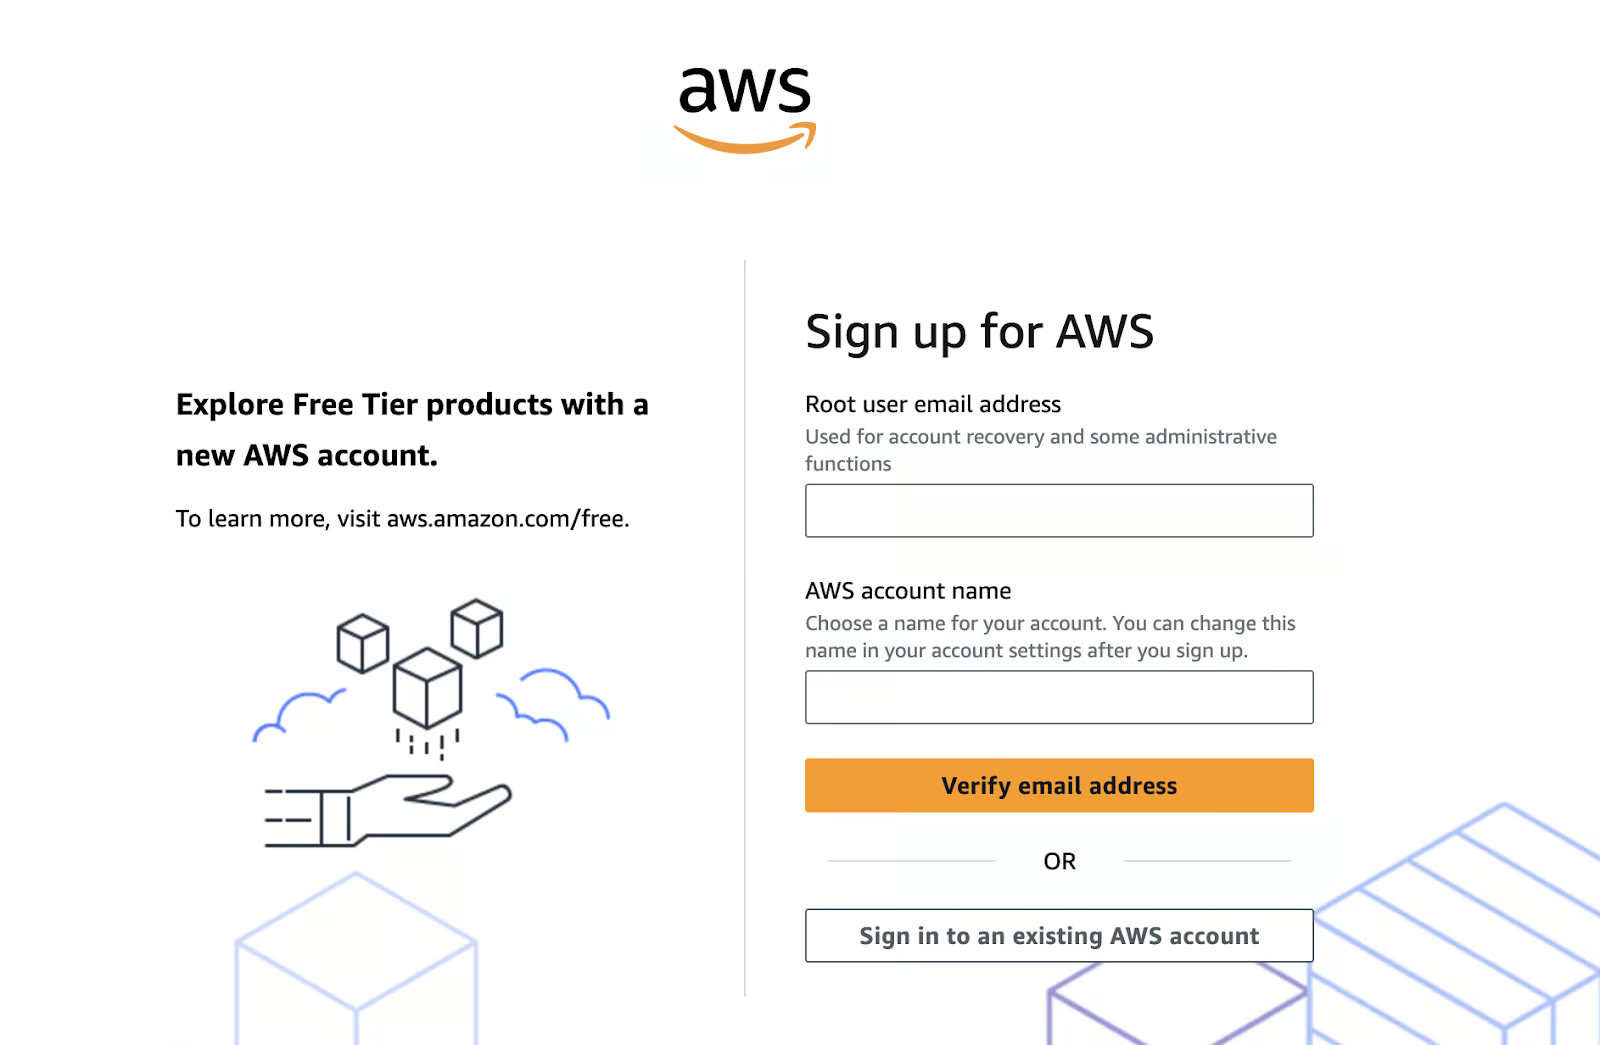
The AWS sign-up page, showcasing Free Tier product exploration for new accounts.
If you are looking for detailed steps, please visit AWS's official guide.
Amazon Bedrock is accessible through the AWS Management Console. Follow these steps to locate and start using it:
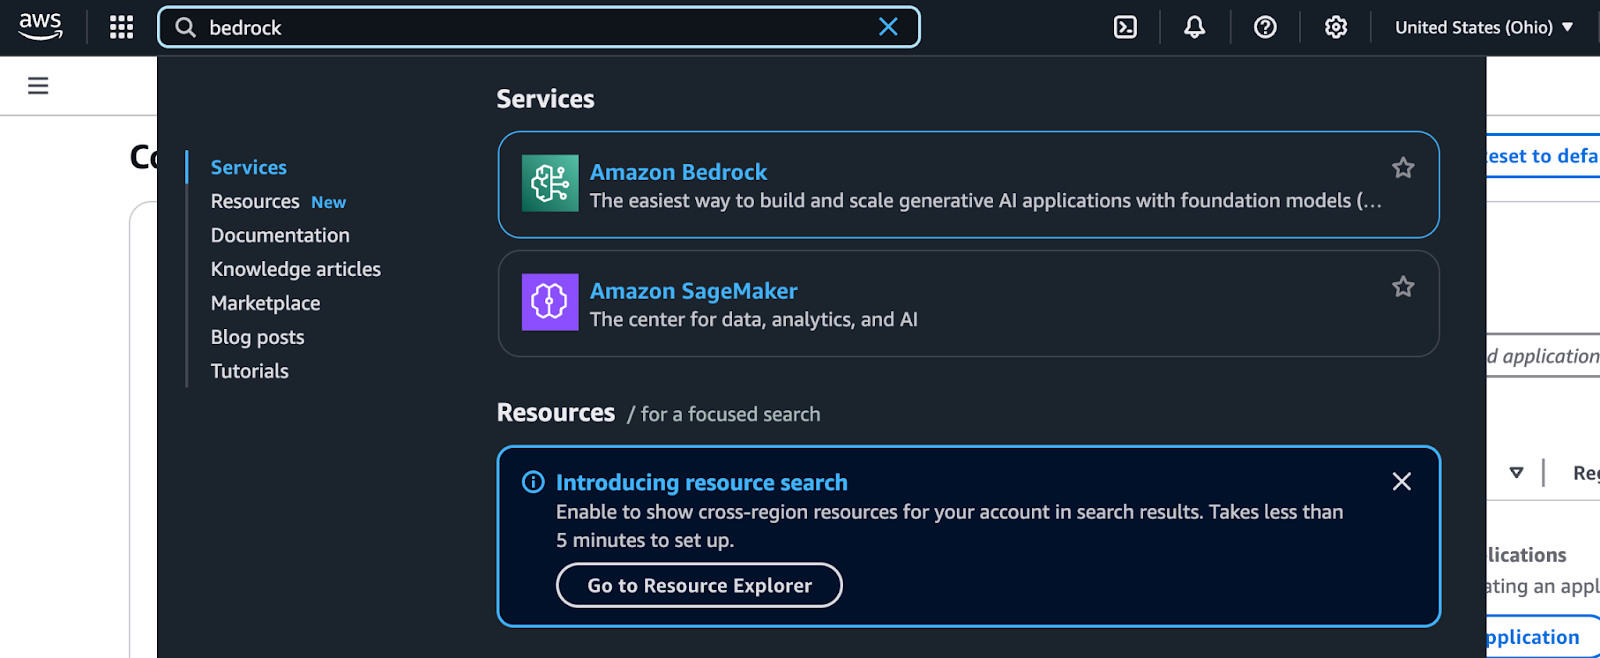
AWS Management Console search results for Bedrock.
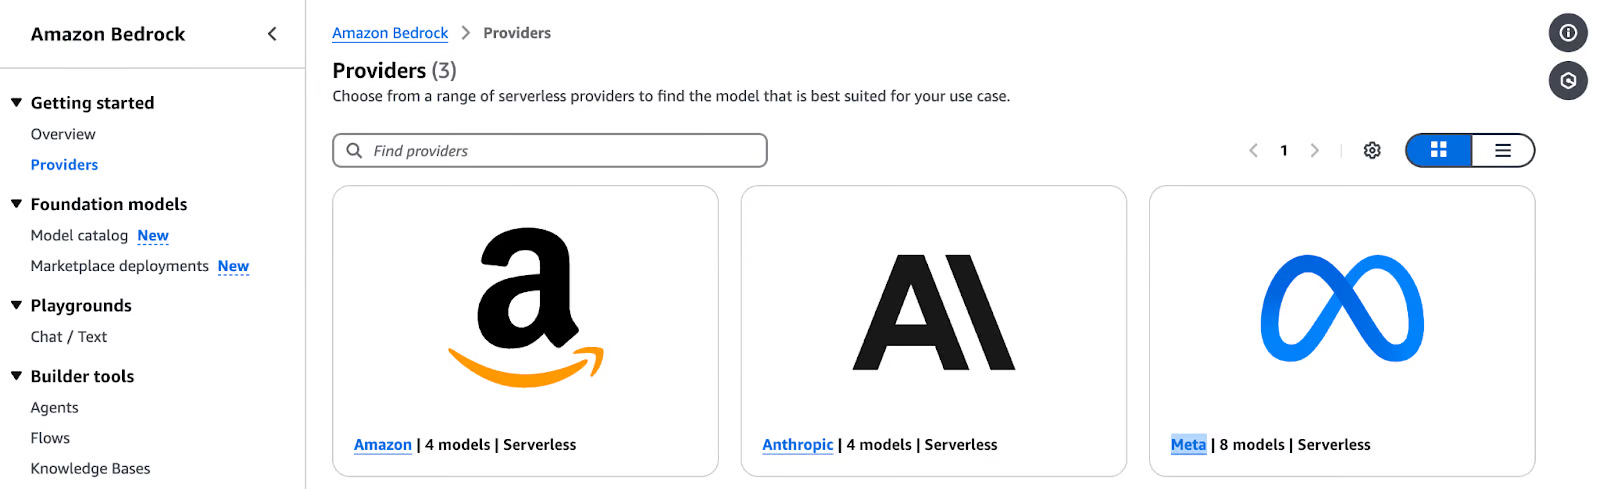
Amazon Bedrock Providers page showcasing serverless model options from Amazon.
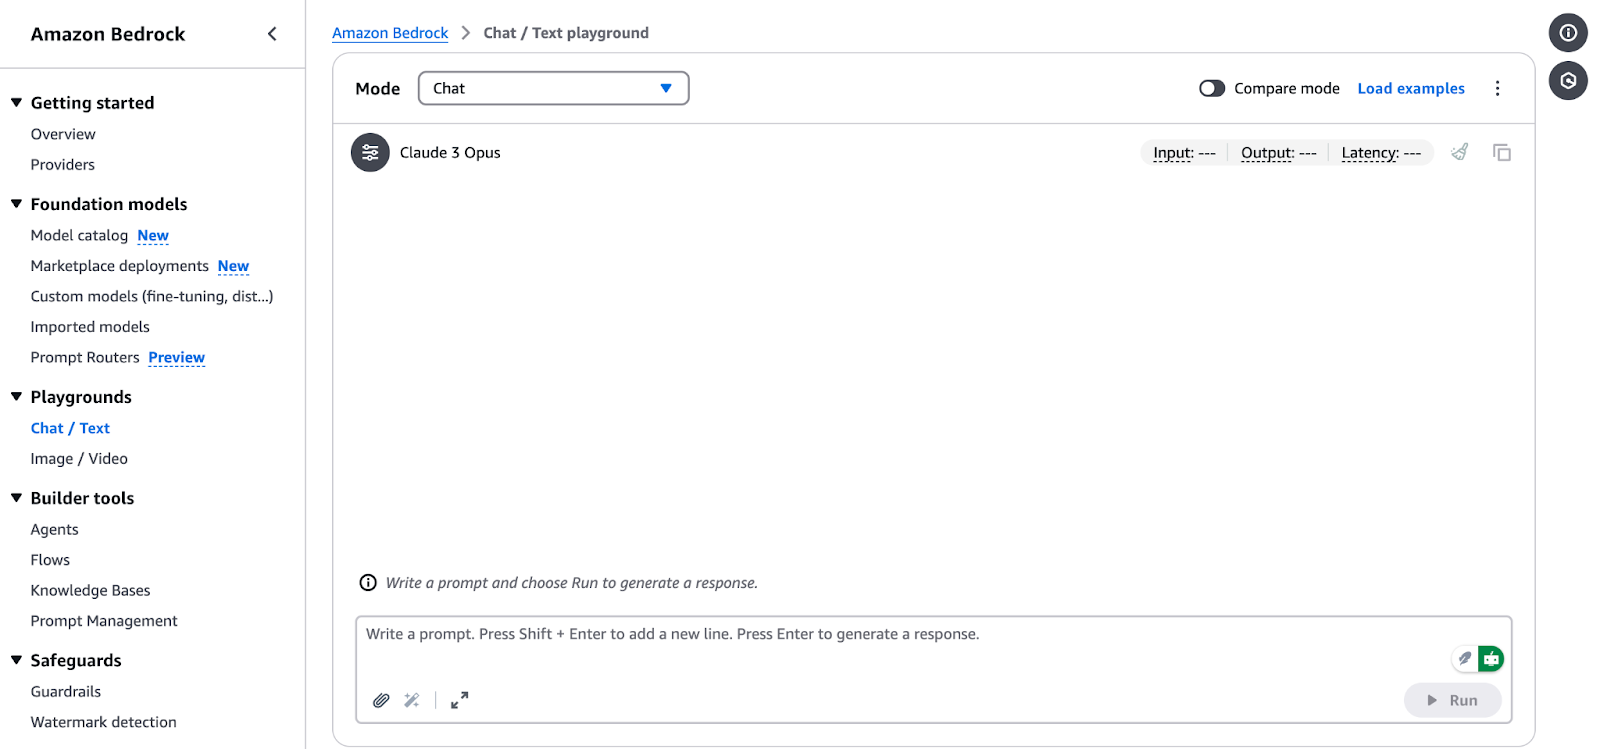
Amazon Bedrock Chat/Text Playground interface.
AWS Identity and Access Management (IAM) is critical for securely accessing AWS Bedrock. Follow these steps to configure permissions:
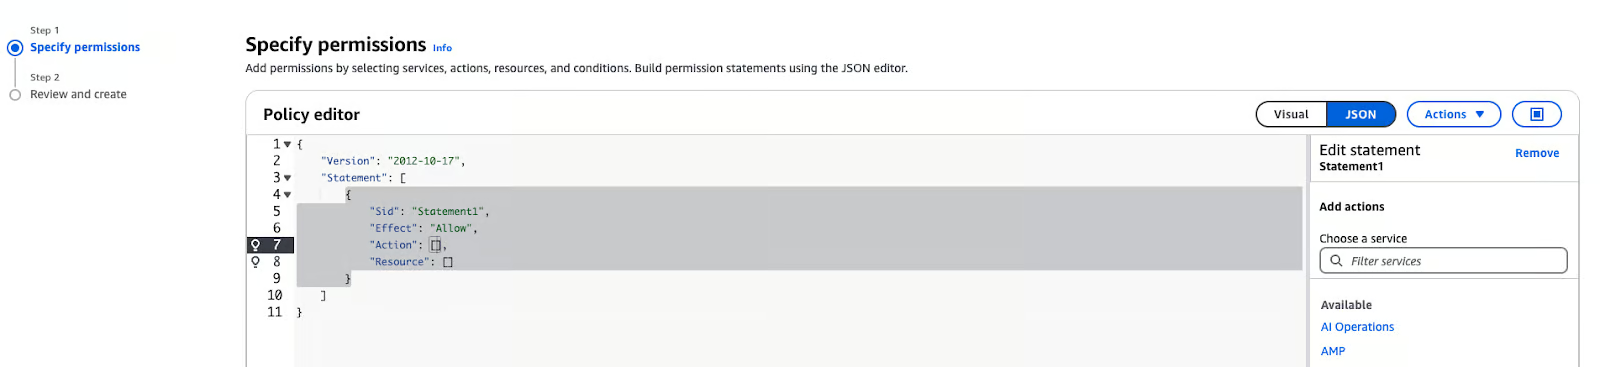
AWS IAM Policy Editor in JSON mode
{
    "Version": "2012-10-17",
    "Statement": [        {
            "Sid": "BedrockFullAccess",
            "Effect": "Allow",
            "Action": ["bedrock:*"],
            "Resource": "*"
        }
    ]
}
Note: The policy above can be attached to any role that needs to access the Amazon Bedrock service. It can be SageMaker or a user. When using Amazon SageMaker, the execution role for your notebook is typically a different user or role than the one you use to log in to the AWS Management Console. To find out how to explore Amazon Bedrock service using the AWS Console, ensure you authorize your Console user or role. You can run the notebooks from any environment with access to the AWS Bedrock service and valid credentials.
Generative AI applications are built upon foundation models that are fine-tuned for a particular task, such as text generation, image creation, or data transformation. Following is a step-by-step guide on choosing a foundation model, using basic inference jobs, and modifying model responses to suit your needs.
Picking the right foundation model is important because it depends on what your project needs. Here’s how to make a selection:
1. Identify your use case:
2. Evaluate model capabilities:
Before using these models, you need to enable model access within your AWS account. Here are the steps to set it up:
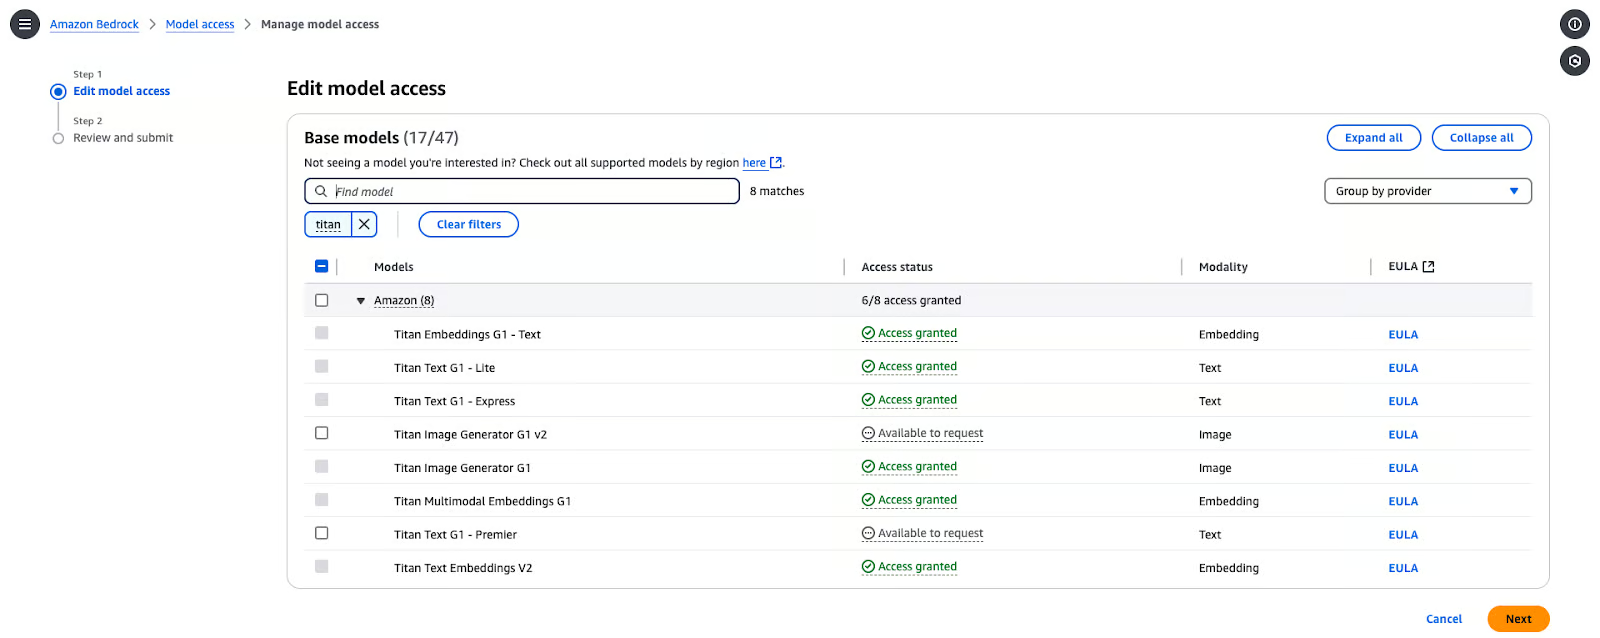
Amazon Bedrock model access management page.
To perform inference using a selected foundation model in AWS Bedrock, follow these steps:
pip install boto3import boto3
import json
from botocore.exceptions import ClientError
# Set the AWS Region
region = "us-east-1"
# Initialize the Bedrock Runtime client
client = boto3.client("bedrock-runtime", region_name=region)# Define the model ID for Amazon Titan Express v1
model_id = "amazon.titan-text-express-v1"
# Define the input prompt
prompt = """
Command: Compose an email from Tom, Customer Service Manager, to the customer "Nancy"
who provided negative feedback on the service provided by our customer support
Engineer"""# Configure inference parameters
inference_parameters = {
"inputText": prompt,
"textGenerationConfig": {
"maxTokenCount": 512, # Limit the response length
"temperature": 0.5, # Control the randomness of the output
},
}
# Convert the request payload to JSON
request_payload = json.dumps(inference_parameters)try:
# Invoke the model
response = client.invoke_model(
modelId=model_id,
body=request_payload,
contentType="application/json",
accept="application/json"
)
# Decode the response body
response_body = json.loads(response["body"].read())
# Extract and print the generated text
generated_text = response_body["results"][0]["outputText"]
print("Generated Text:\n", generated_text)
except ClientError as e:
print(f"ClientError: {e.response['Error']['Message']}")
except Exception as e:
print(f"An error occurred: {e}")Note: You can access and copy the complete code directly from the GitHub Gist.
You can expect the below output:
% python3 main.py

Generated Text:

Tom:
Nancy,

I am writing to express my sincere apologies for the negative experience you had with our customer support engineer. It is unacceptable that we did not meet your expectations, and I want to assure you that we are taking steps to prevent this from happening in the future.

Sincerely,
Tom
Customer Service ManagerTo fine-tune the behavior of the model output, you can adjust parameters like temperature and maxTokenCount:
temperature: This parameter controls the randomness of the output. Lower values increase the determination of the output, and higher values increase the variability.MaxTokenCount: Sets the maximum length of the generated output.For example:
inference_parameters = {
   "inputText": prompt,
   "textGenerationConfig": {
       "maxTokenCount": 256,  # Limit the response length
       "temperature": 0.7,    # Control the randomness of the output
   },
}
By adjusting these parameters, you can better tailor the creativity and length of the generated content to your application's needs.
Let’s switch gears and focus on two advanced approaches: enhancing AI using Retrieval-Augmented Generation (RAG) and managing and deploying models at scale.
RAG requires us to have a knowledge base. Before setting up the knowledge base in Amazon Bedrock, you need to create an S3 bucket and upload the required files. Follow these steps:
Step 2: Upload files to the S3 bucket
octank_financial_10K.pdf.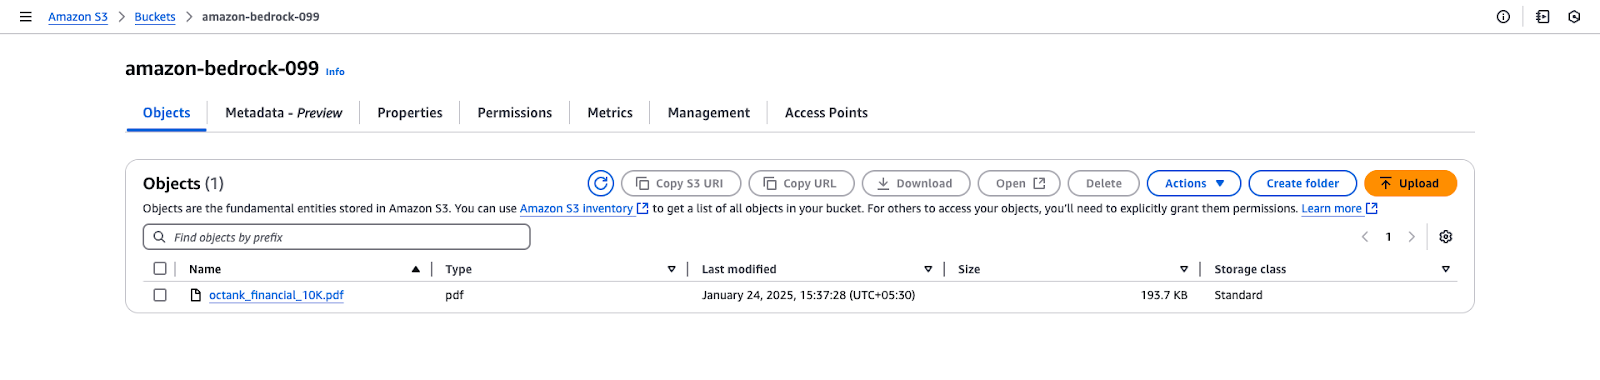
Amazon S3 bucket view for "amazon-bedrock-099".
Amazon Bedrock allows you to create a knowledge base powered by vector databases. The following steps will walk you through creating a knowledge base, configuring a data source, and selecting embeddings and vector stores.
knowledge-base-quick-start).AmazonBedrockExecutionRoleForKnowledgeBase.
Amazon Bedrock Knowledge Base creation wizard.
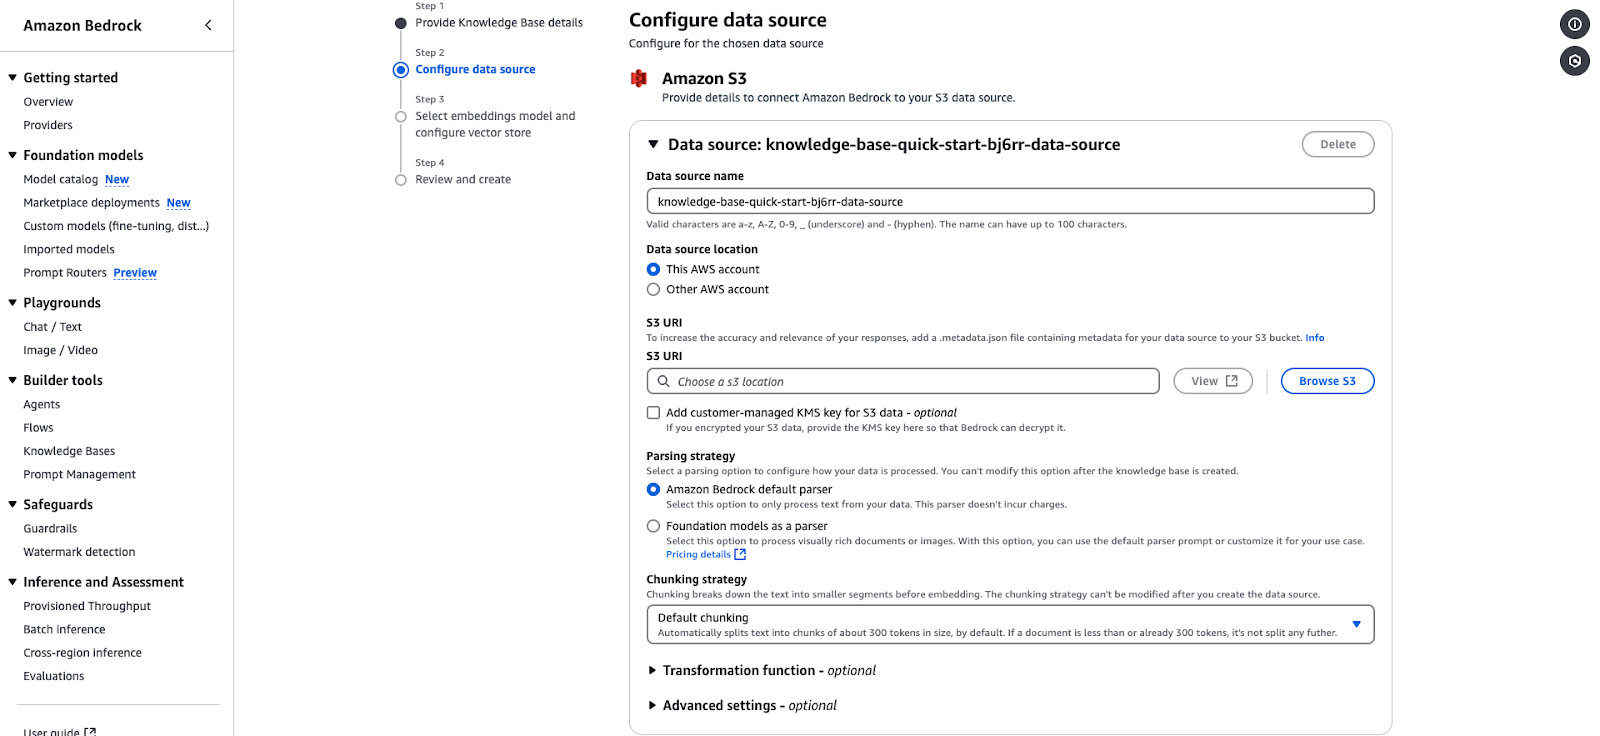
Amazon Bedrock data source configuration page for integrating an S3-based knowledge base.
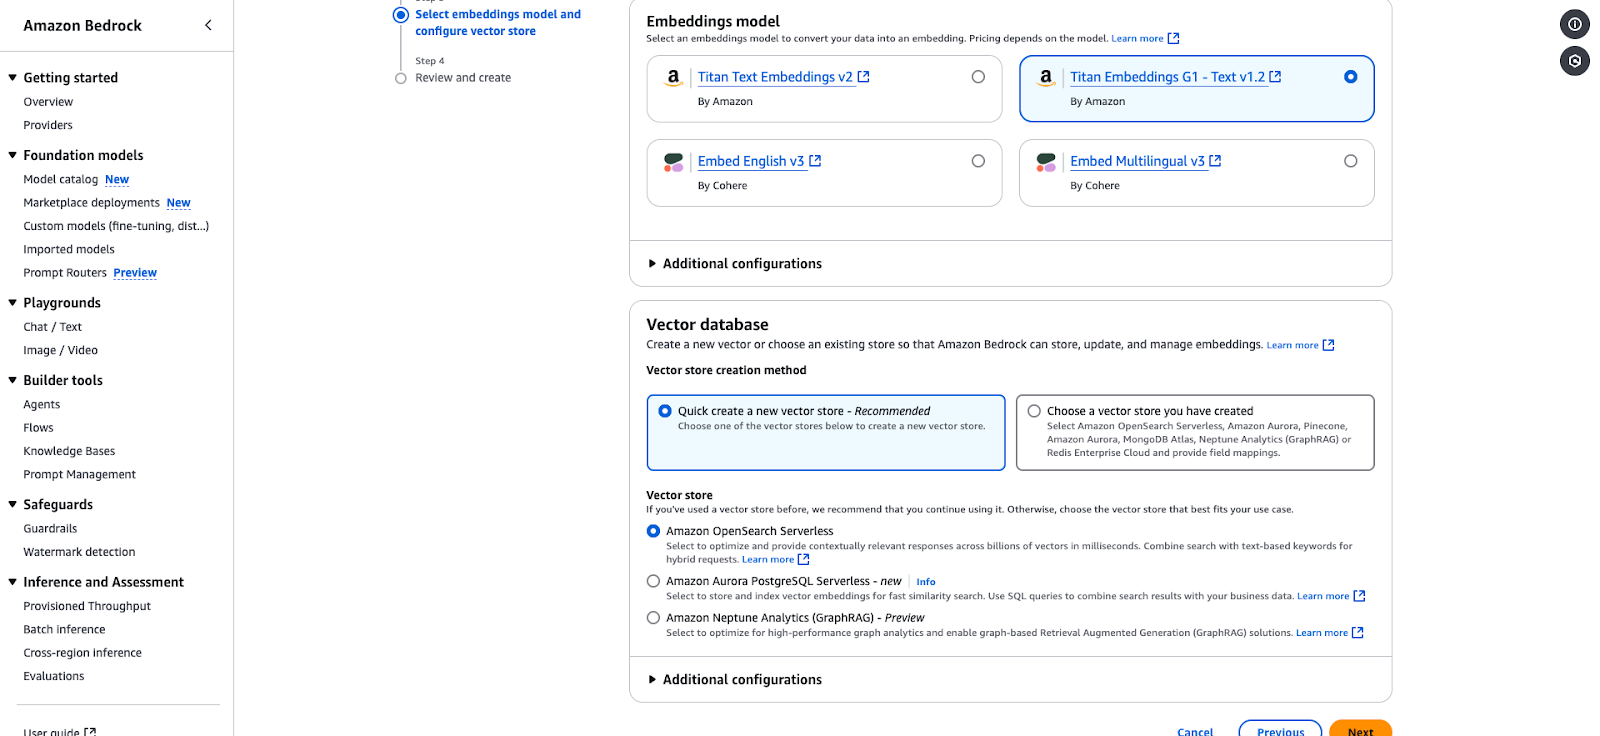
Amazon Bedrock configuration page for selecting an embedding model and vector store.
knowledge-base-quick-start).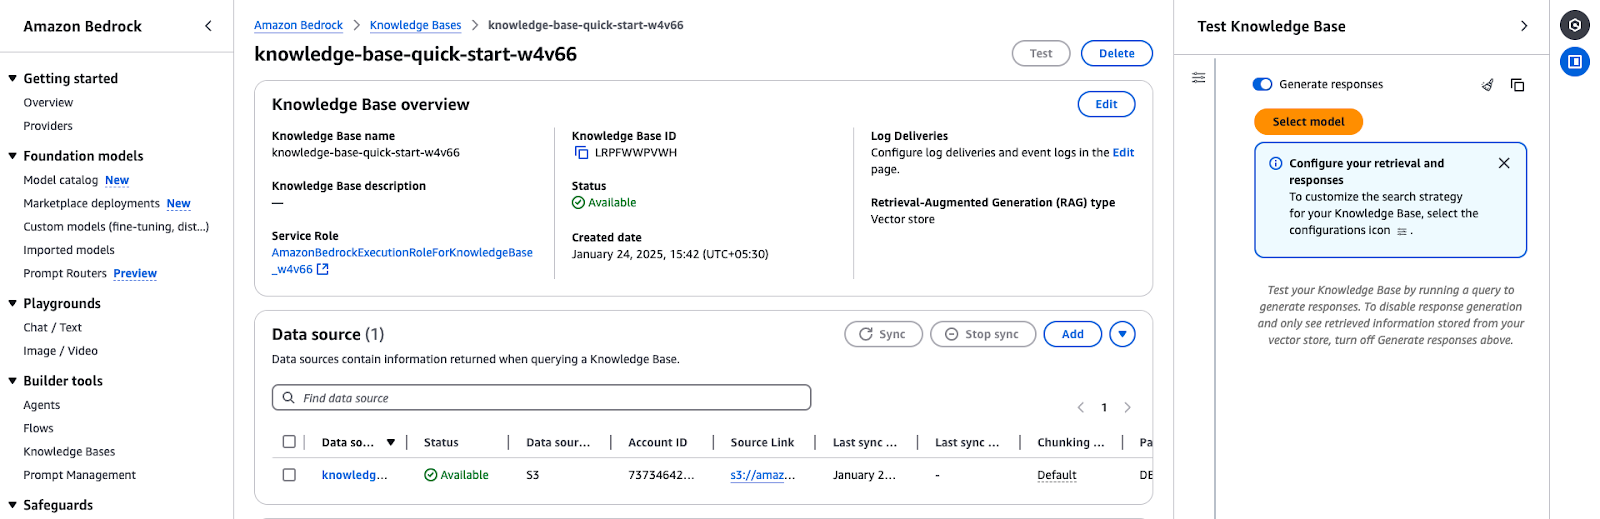
Amazon Bedrock Knowledge Base overview shows configuration details and data source status.
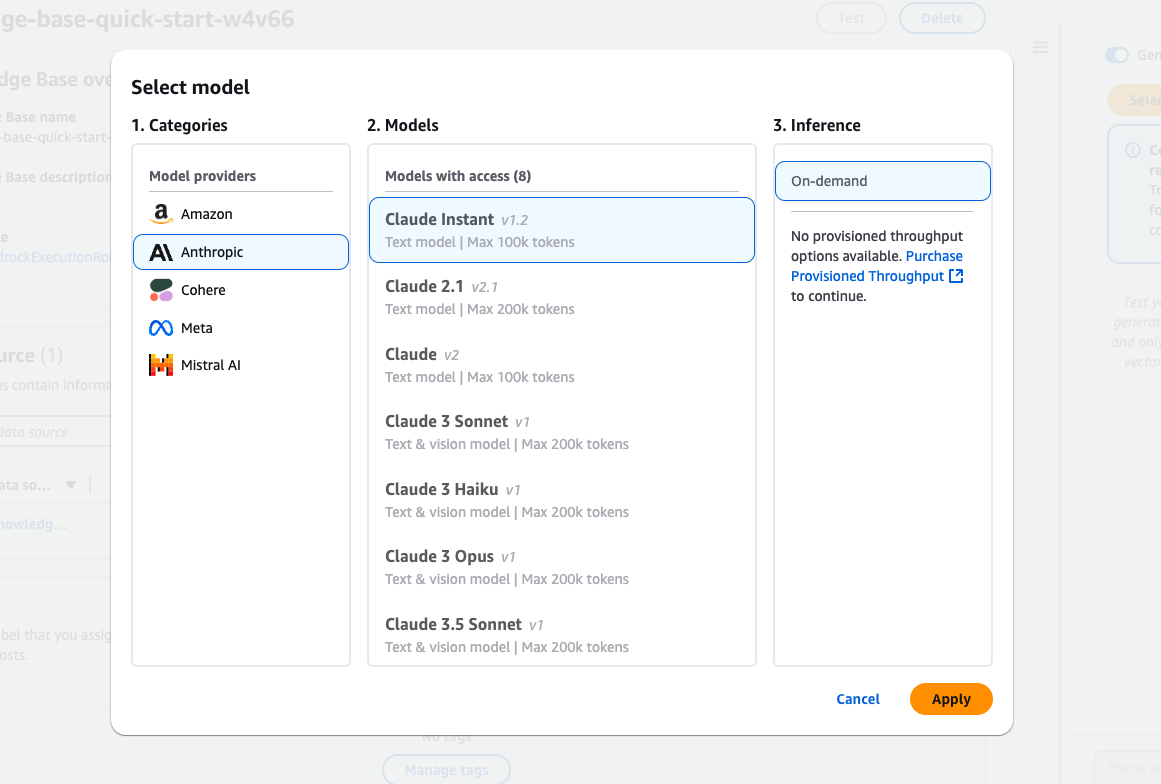
Amazon Bedrock model selection interface features various Claude models from Anthropic.
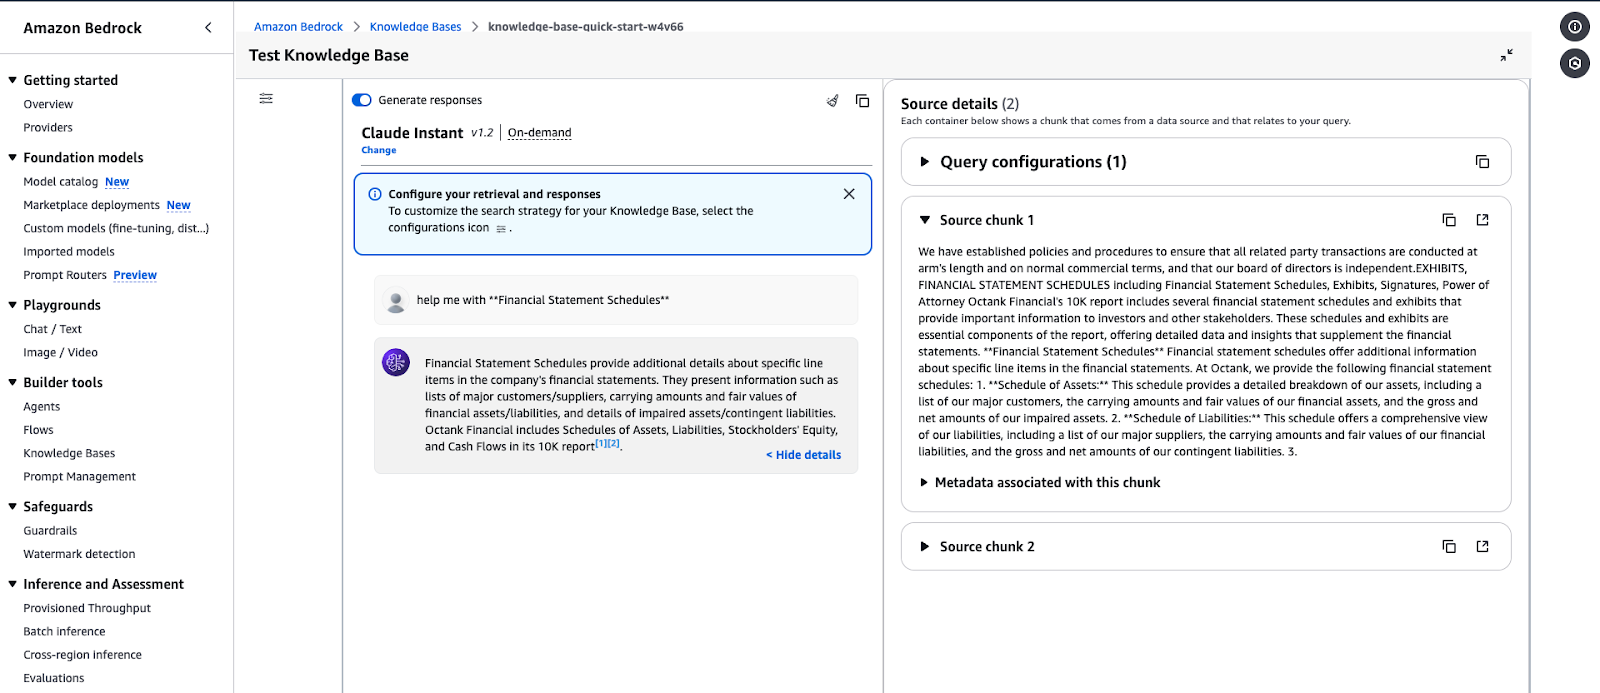
Amazon Bedrock Knowledge Base testing interface displaying a response for a query.
Example query output:
Using AWS services like Lambda, Amazon Bedrock can manage and deploy AI models at scale. This cost-efficient approach ensures high availability and automatically scales for AI-powered applications.
In this section, we will use AWS Lambda to invoke a Bedrock model dynamically so you can process prompts on demand.
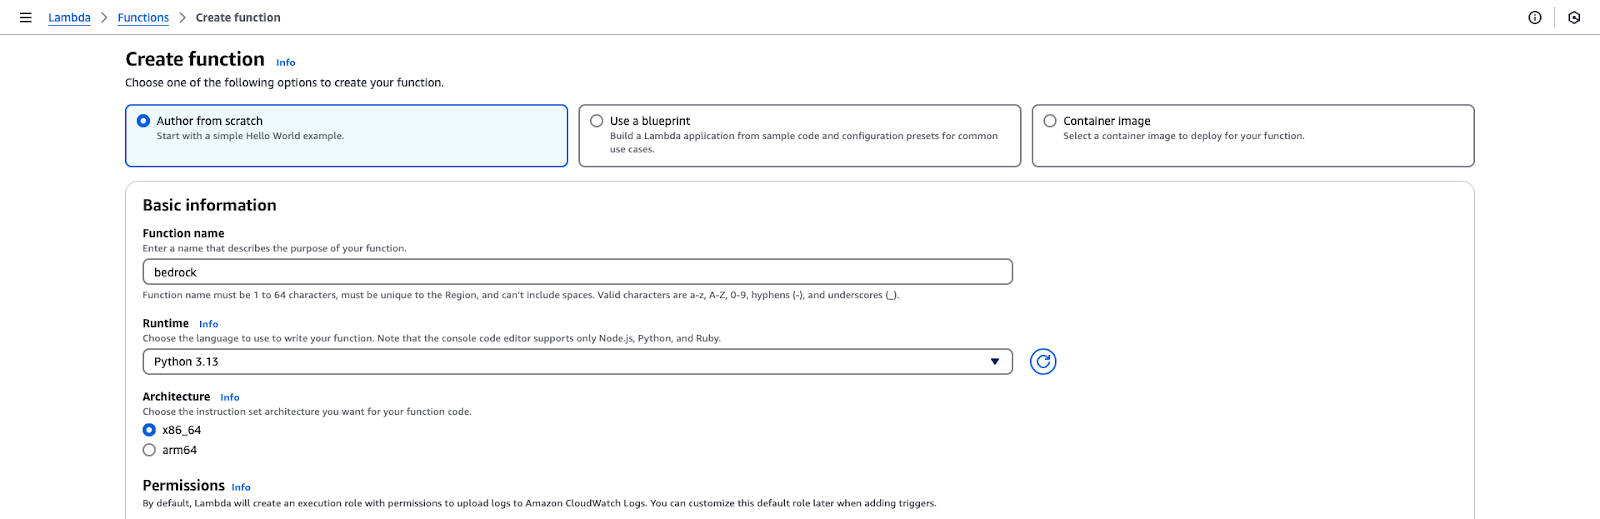
AWS Lambda function creation page.
{
    "prompt": "Write a formal apology letter for a late delivery."
}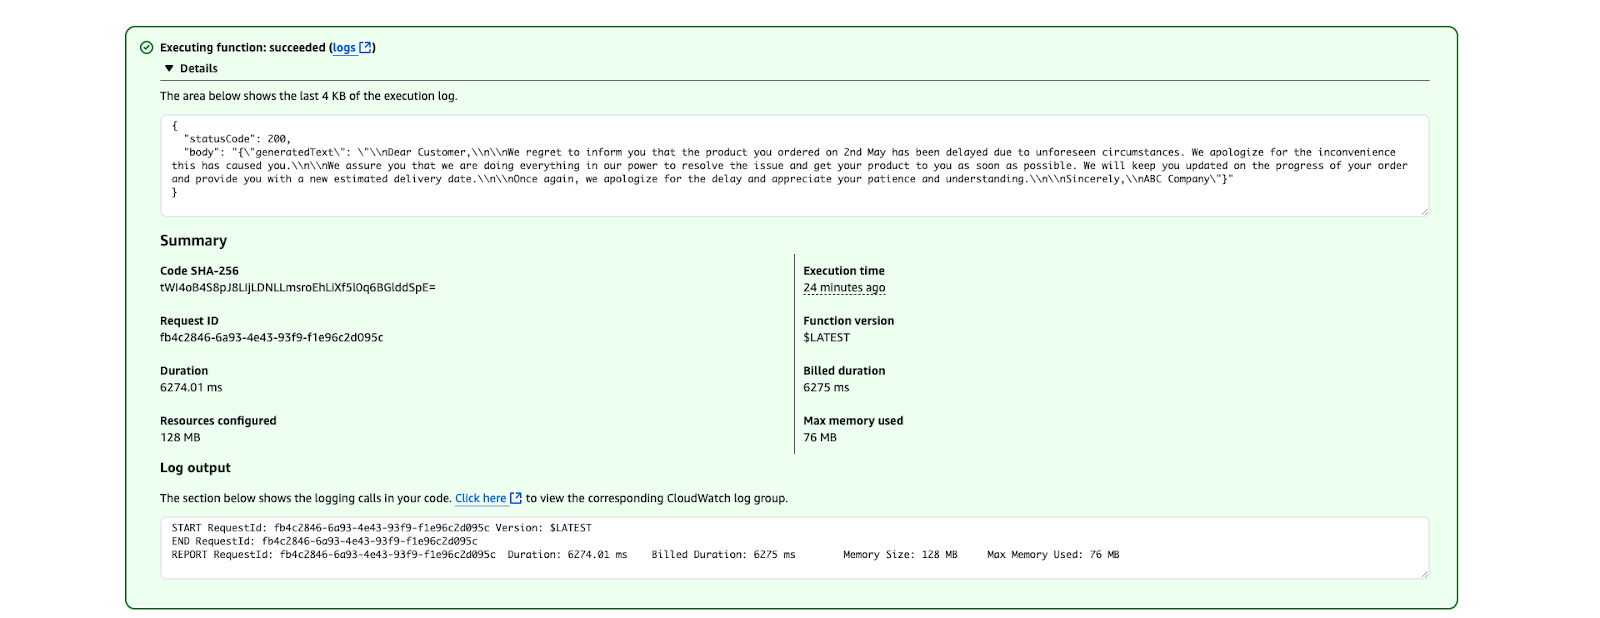
AWS Lambda execution result showing a successful function run.
Optimize cost:
Secure the Lambda function:
Monitor and log:
In this section, I share some best practices when working with Amazon Bedrock, from optimizing costs to keeping things secure and accurate.
Managing costs in AWS Bedrock may involve leveraging Amazon SageMaker to deploy models and utilize Spot instances to save up to 90% on expenses. Here are some of my best practices:
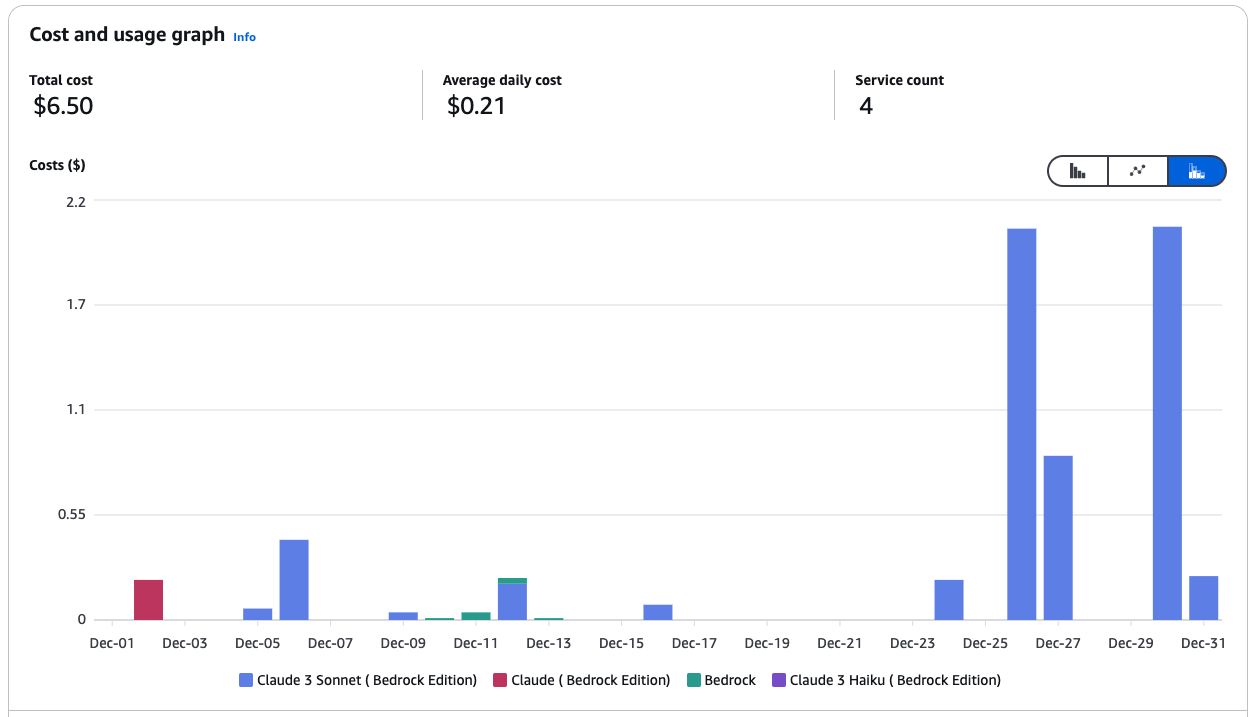
Cost and usage graph for Amazon Bedrock services.
from sagemaker.mxnet import MXNet

# Use spot instances for cost efficiency
use_spot_instances = True

# Maximum runtime for the training job (in seconds)
max_run = 600

# Maximum wait time for Spot instance availability (in seconds); set only if using Spot instances
max_wait = 1200 if use_spot_instances else None

# Define the MXNet estimator for the training job
mnist_estimator = MXNet(
    entry_point='source_dir/mnist.py',  # Path to the script that contains the model training code
    role=role,  # IAM role used for accessing AWS resources (e.g., S3, SageMaker)
    output_path=model_artifacts_location,  # S3 location to save the trained model artifacts
    code_location=custom_code_upload_location,  # S3 location to upload the training script
    instance_count=1,  # Number of instances to use for training
    instance_type='ml.m4.xlarge',  # Instance type for the training job
    framework_version='1.6.0',  # Version of the MXNet framework to use
    py_version='py3',  # Python version for the environment
    distribution={'parameter_server': {'enabled': True}},  # Enable distributed training with a parameter server
    hyperparameters={  # Training hyperparameters
        'learning-rate': 0.1,  # Learning rate for the training job
        'epochs': 5  # Number of training epochs
    },
    use_spot_instances=use_spot_instances,  # Enable Spot instances for cost savings
    max_run=max_run,  # Maximum runtime for the training job
    max_wait=max_wait,  # Maximum wait time for Spot instance availability
    checkpoint_s3_uri=checkpoint_s3_uri  # S3 URI for saving intermediate checkpoints
)

# Start the training job and specify the locations of training and testing datasets
mnist_estimator.fit({
    'train': train_data_location,  # S3 location of the training dataset
    'test': test_data_location  # S3 location of the testing/validation dataset
})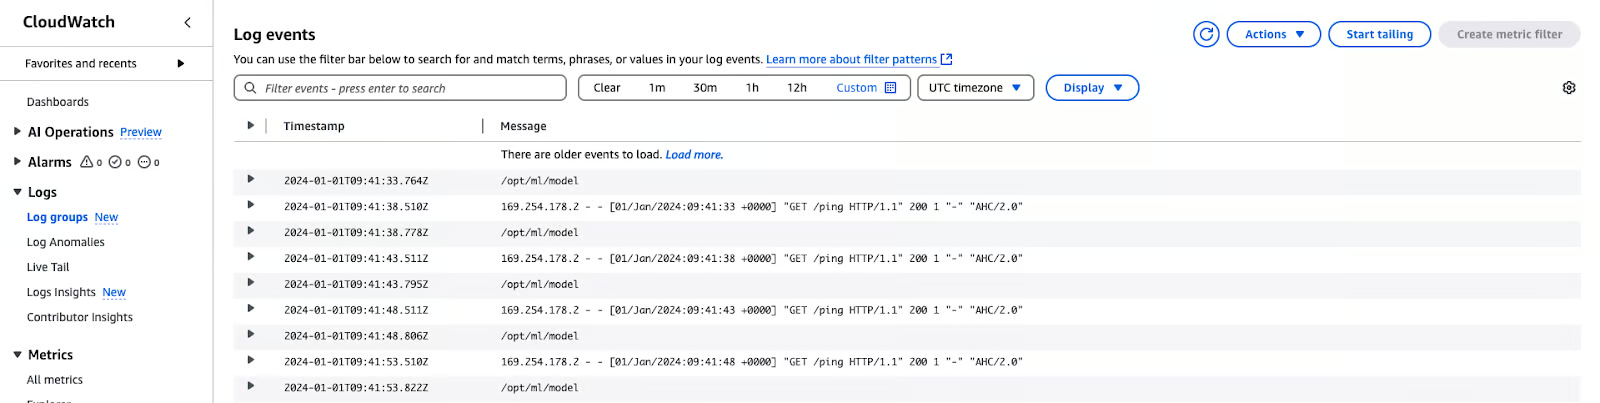
AWS CloudWatch logs
To ensure the security, compliance, and performance of Amazon Bedrock, it is important to follow the best practices. Here are my recommendations:
Ensuring that models are accurate, reliable, and aligned with business objectives is achieved by monitoring and evaluating models. Here are some best practices:
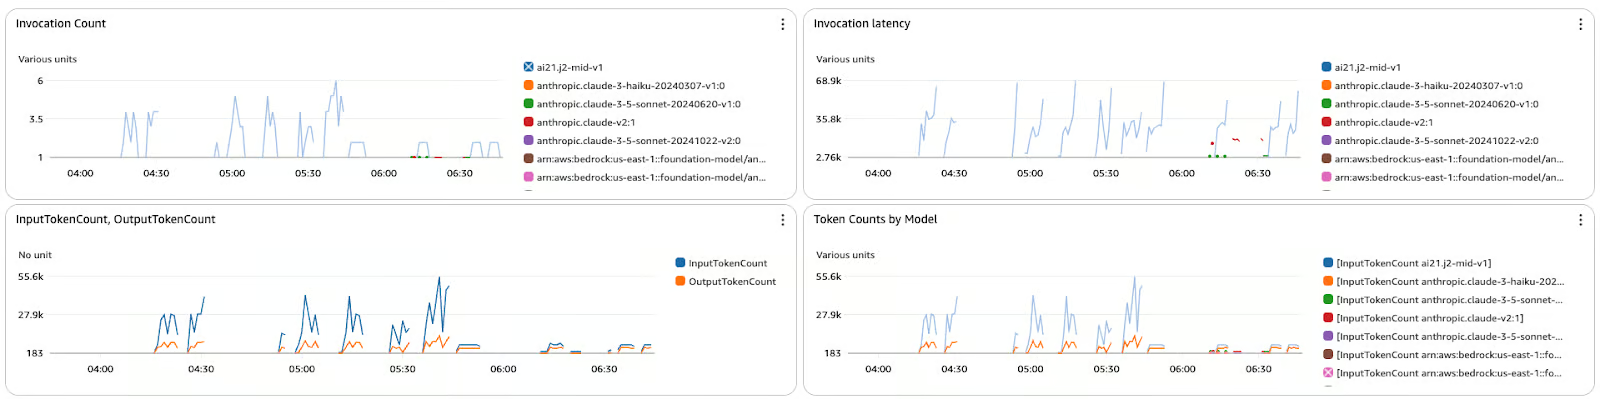
The metrics dashboard displays the invocation count, latency, and token counts for various models in Amazon Bedrock.
AWS Bedrock is a game-changer in how generative AI applications are developed and a centralized platform for using foundation models without worrying about the infrastructure.
From this point forward, this step-by-step tutorial should help you identify the right models, create secure and scalable workflows, and integrate features like retrieval-augmented generation (RAG) for greater customization. With the best practices for cost, security, and monitoring in place, you are ready to develop and manage your AI solutions to meet your objectives.
To further deepen your AWS expertise, explore these courses:
Learn more about AWS with these courses!
Track
Course
Course
blog
Abid Ali Awan
9 min
Tutorial
Arun Nanda
Tutorial
Rahul Sharma
Tutorial
Don Kaluarachchi
Tutorial
Hesam Sheikh Hassani
Tutorial
Bex Tuychiev