Course
Working with the OpenAI API
3 hr
141.6K
In this tutorial, we will learn how to create an end-to-end data engineering pipeline using GPT-5.2 Codex via the VSCode extension. Instead of asking the model to build everything at once, we will build the MVP layer by layer, guiding the agent step by step through design, implementation, and testing.
This approach reflects how GPT-5.2 Codex works best in practice and mirrors real-world data engineering workflows. Make sure to check out our guide on the model's newer version, GPT-5.3 Codex, and OpenAI's new thinking model, GPT-5.4, as well.
If you want to learn more about working with the OpenAI ecosystem, I recommend checking out the Working with the OpenAI API course.
GPT 5.2 Codex is the latest generation of OpenAI’s agentic coding models, built for real-world software engineering workflows. It builds on recent improvements in long context understanding, large refactors and migrations, reliable tool usage, and strong native Windows support.
These improvements make it especially effective for long-running, end-to-end development work inside IDEs such as VSCode. Over the past few months, the OpenAI Codex VSCode extension has improved significantly and is now directly competing with Claude Code for complex, agent-driven development.
We will start by creating a new GitHub repository for our data engineering MVP.
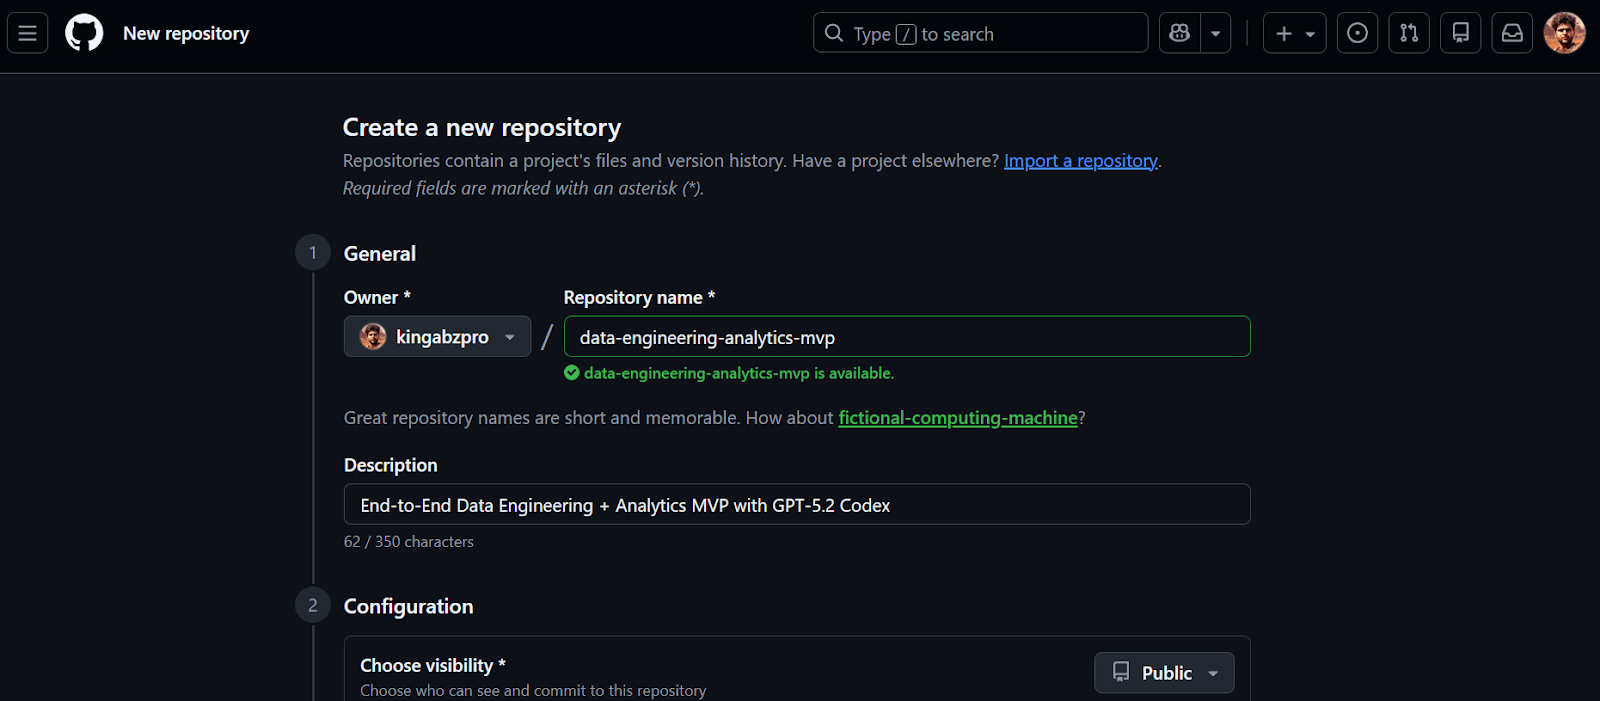
Once the repository is created, copy the repository URL. We will use this URL in the next step to clone the project locally.
Before starting, make sure you have Visual Studio Code installed and an active ChatGPT Plus account. The free and Go plans do not provide access to Codex models in the VSCode extension.
1. Clone the repository using the URL you copied earlier.
2. Change directory to the repository and launch VSCode.
git clone https://github.com/kingabzpro/data-engineering-analytics-mvp.git
cd data-engineering-analytics-mvp
code .
3. Go to Extensions (Ctrl + Shift + X), search for OpenAI Codex, and install it. This should only take a few seconds.
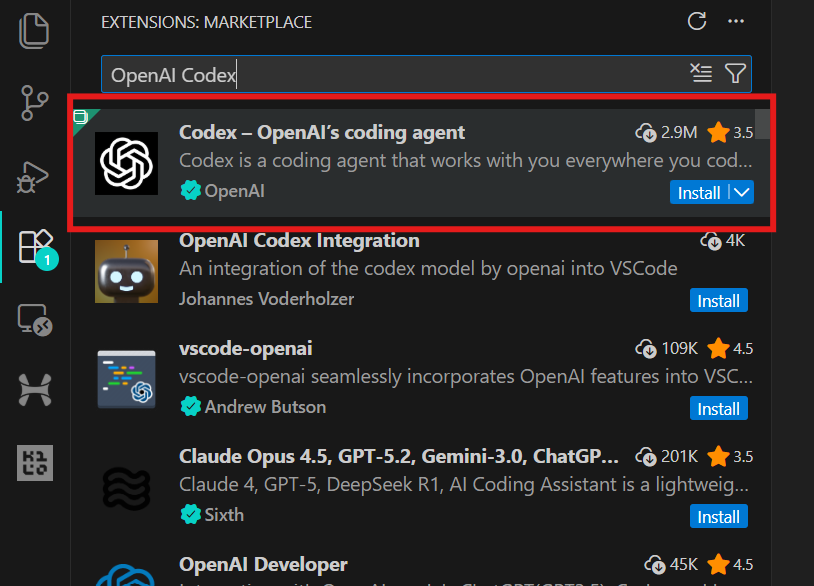
4. Click the OpenAI icon in the left panel to launch the Codex extension. You will be prompted to sign in using your ChatGPT account or an API account. Select the ChatGPT account, which will redirect you to the browser to approve access. Once approved, return to VSCode, and Codex will be ready to use.
This project is intentionally scoped as a Minimum Viable Product (MVP). The goal is not to build a production-grade data platform, but to create a complete, end-to-end data engineering slice that demonstrates how real analytics systems are structured.
In this MVP, we build a simple but credible analytics pipeline that:
raw_events)fct_events)The full flow looks like this:
CSV file
  ↓
raw_events        (raw ingestion, 1:1 with source)
  ↓
fct_events        (typed, deduplicated, transformed)
  ↓
metrics           (daily count, 7-day rolling avg, top category)
  ↓
Streamlit UI (local dashboard)In this step, we use GPT-5.2 Codex to generate the initial structure of the project. The goal is not to build features yet, but to create a clean, runnable foundation that we will extend step by step.
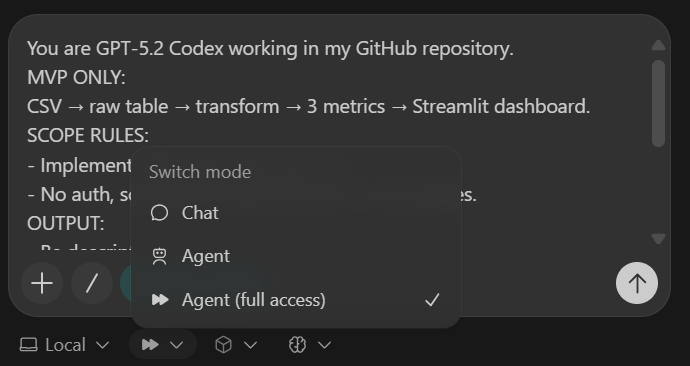
To keep Codex focused, we use a small control block called the Codex Harness. This harness is pasted at the top of every prompt and ensures Codex stays within the MVP scope, produces consistent outputs, and commits clean, reviewable changes.
Codex Harness (paste into every task):
You are GPT-5.2 Codex working in my GitHub repository.

MVP ONLY:
CSV → raw table → transform → 3 metrics → Streamlit dashboard.

SCOPE RULES:
- Implement ONLY what this task asks.
- No auth, schedulers, cloud services, or extra pages.

OUTPUT:
- Be descriptive.
- After changes include:
  1) What changed
  2) Files touched
  3) How to run locally
  4) Quick verification step
- Commit after each major step with a clear message.
Before writing any code, Codex is explicitly instructed to use web search to verify the latest Python 3.11 compatible versions of all dependencies. This avoids installing outdated or incompatible packages.
IMPORTANT: USE WEB SEARCH FIRST
TASK 1 (SCAFFOLD):
Use Python 3.11 + uv + DuckDB + Streamlit + Pydantic + pytest.
Create repo structure:
- backend/
- db.py
- ingest.py
- pipeline.py
- models.py
- sql/
- app/
- app.py
- data/
- sample.csv
- tests/
Add:
1) data/sample.csv (~50 rows) with columns:
event_time, user_id, event_name, category, amount
2) DuckDB schema for raw_events
3) a command to ingest sample.csv and print row count
4) pyproject.toml for uv
5) README with exact local run steps
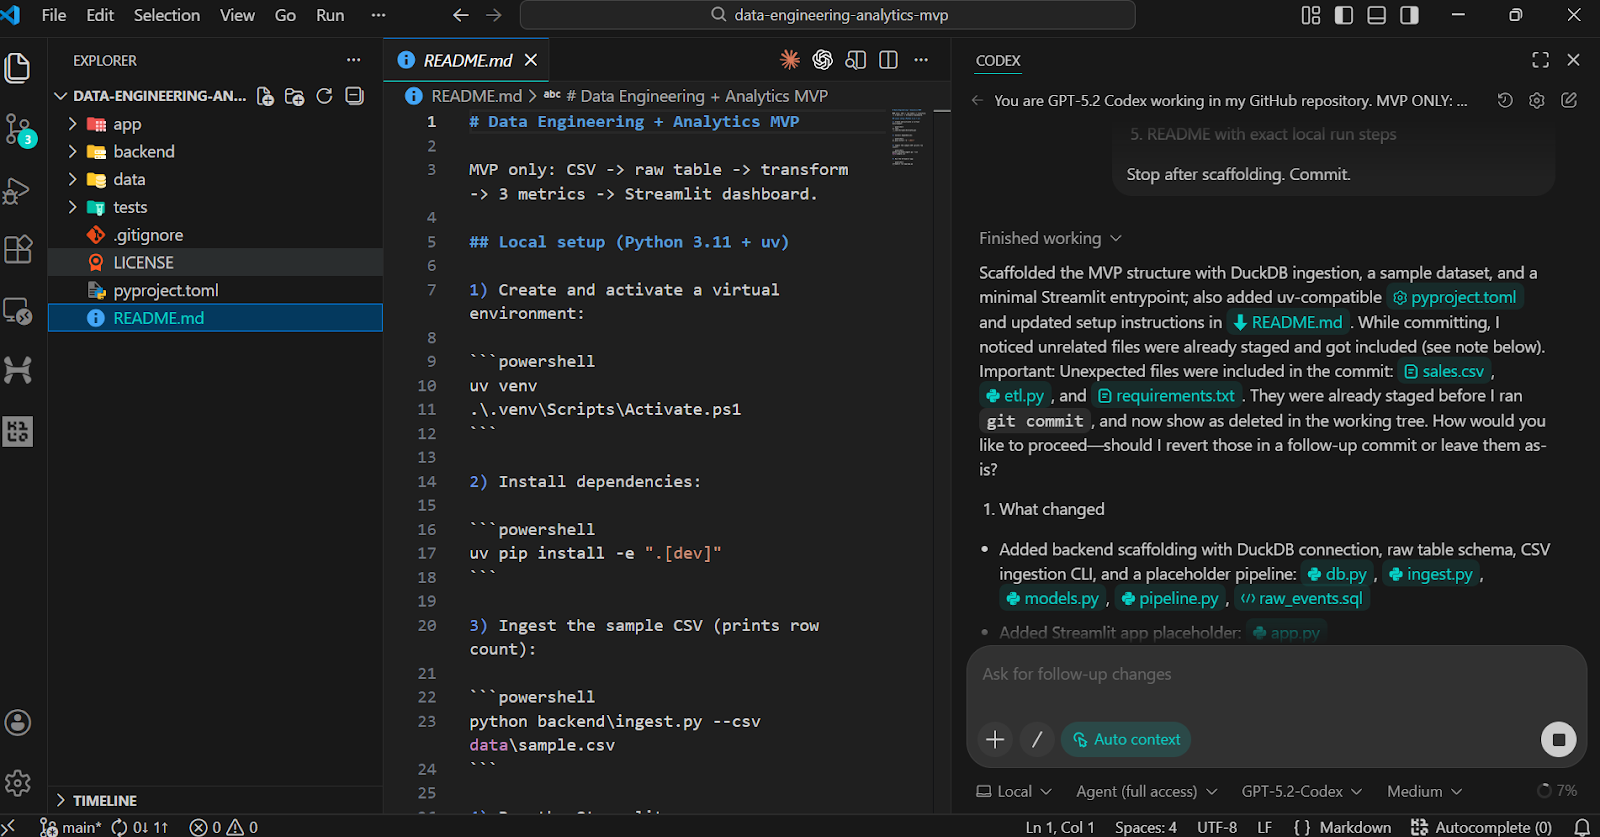
Stop after scaffolding. Commit.The scaffolding task creates:
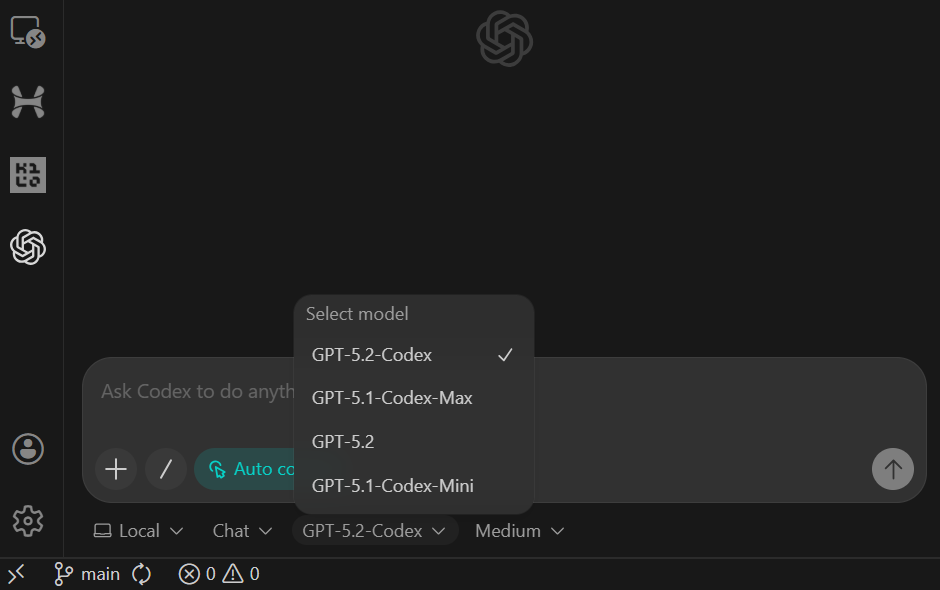
sample.csv datasetraw_events table schemapyproject.toml and READMEAfter pasting the prompt, switch the model to Agent (Full Access) and confirm that GPT-5.2 Codex is selected (this is the default).
Once the task completes, you will see that all folders and files have been created automatically.
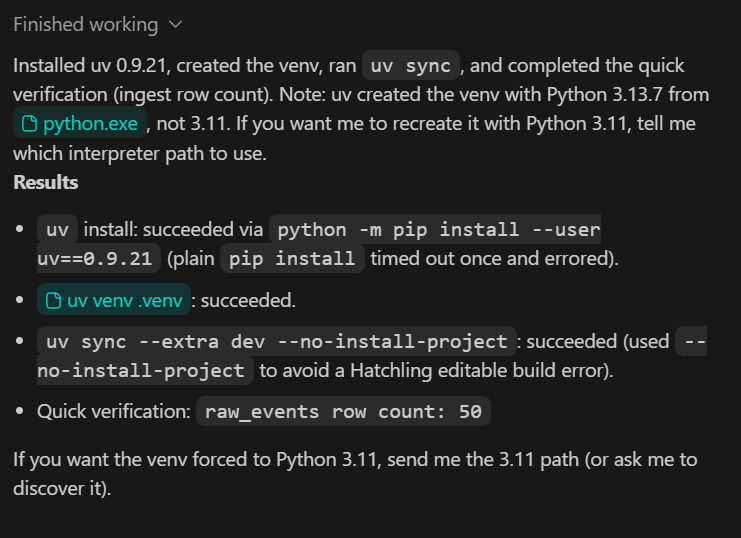
To validate the scaffold, ask Codex to run the installation and verification steps locally.
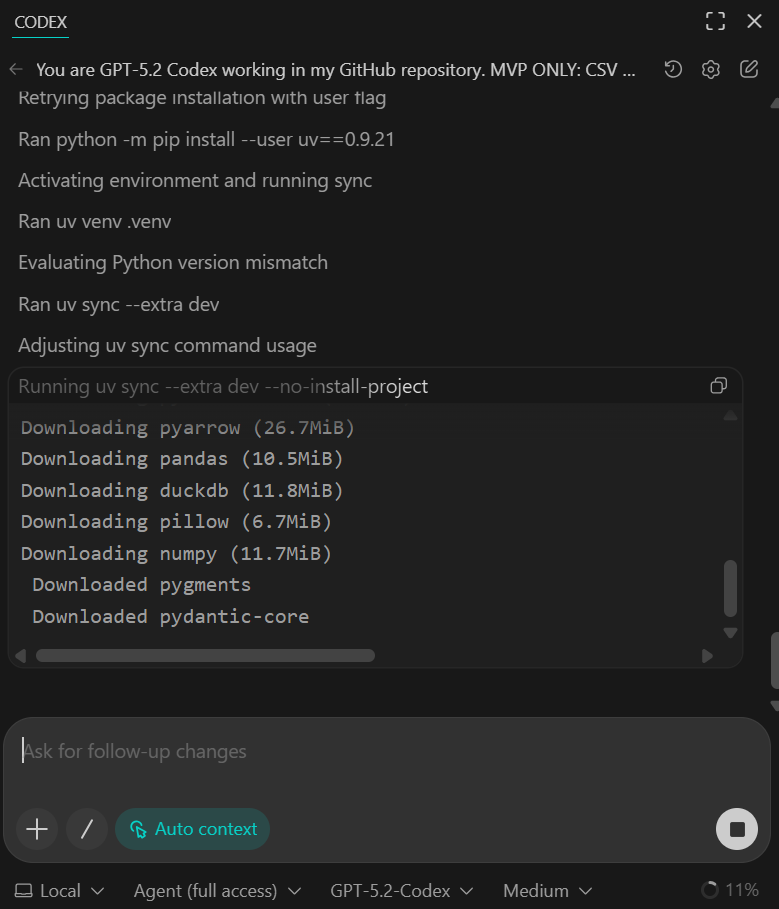
You should see all dependencies installed successfully and the quick verification script confirming that 50 rows were ingested from the sample dataset.
At this stage, the sample data is intentionally small. In later steps, we will replace it with a larger, more realistic dataset.
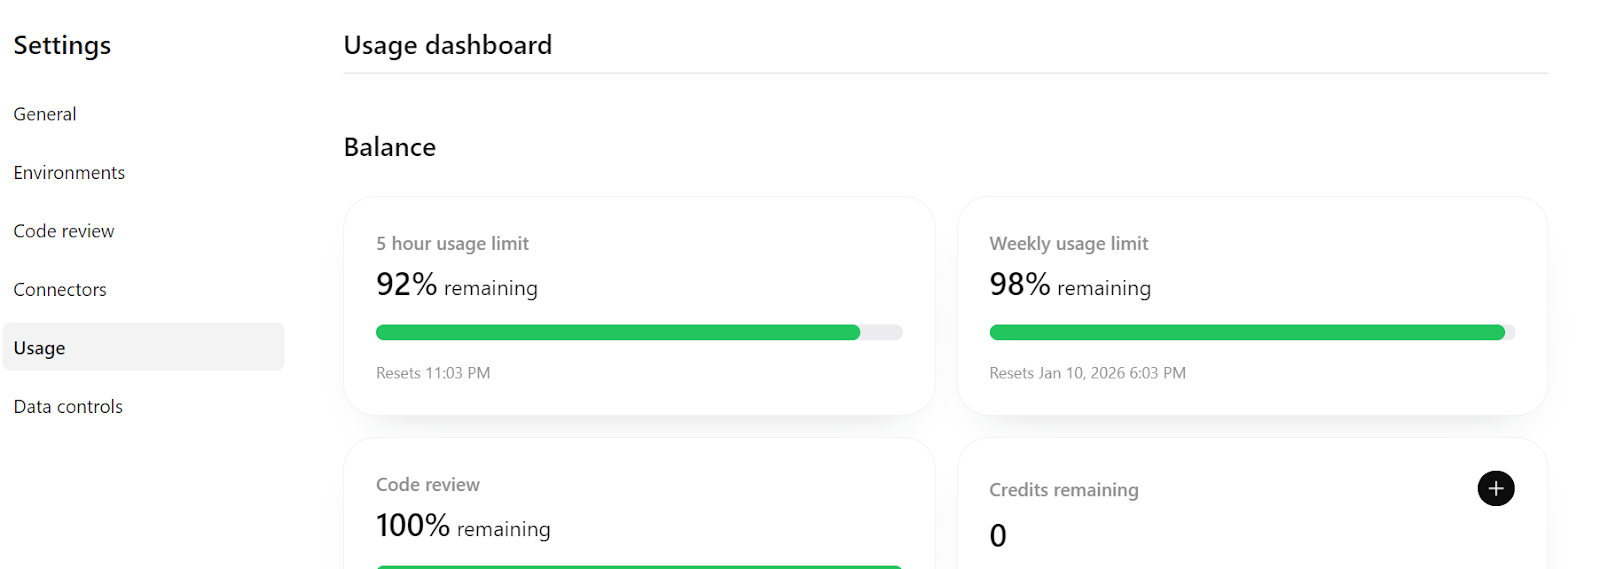
Finally, if you check https://chatgpt.com/codex/settings/usage, you will notice that the majority of your usage quota remains available, meaning you can comfortably continue building and iterating on this project, even extending it toward a more production-ready pipeline if needed.
In this step, we ensure that the ingestion process is idempotent, meaning it can be safely re-run without creating duplicate data. This is a fundamental requirement in data engineering, since ingestion jobs often need to be retried or re-executed.
TASK 2 (IDEMPOTENT INGEST):
Make CSV ingestion idempotent.
- Rerunning ingest must not duplicate rows
- Validate required columns
- Validate event_time parseable and amount numeric

Add pytest:
- ingest twice → row count unchanged

Update README verification section.
Commit.
What this step achieves:
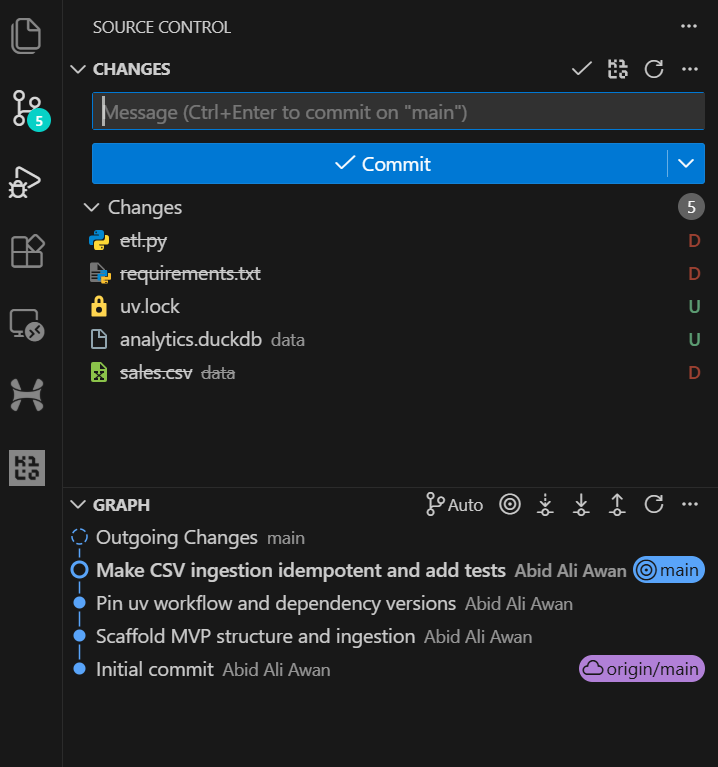
After the task completes, you can review the Git history in VSCode and see that the AI agent commits the changes automatically after the major update. This provides a clean and traceable development history.
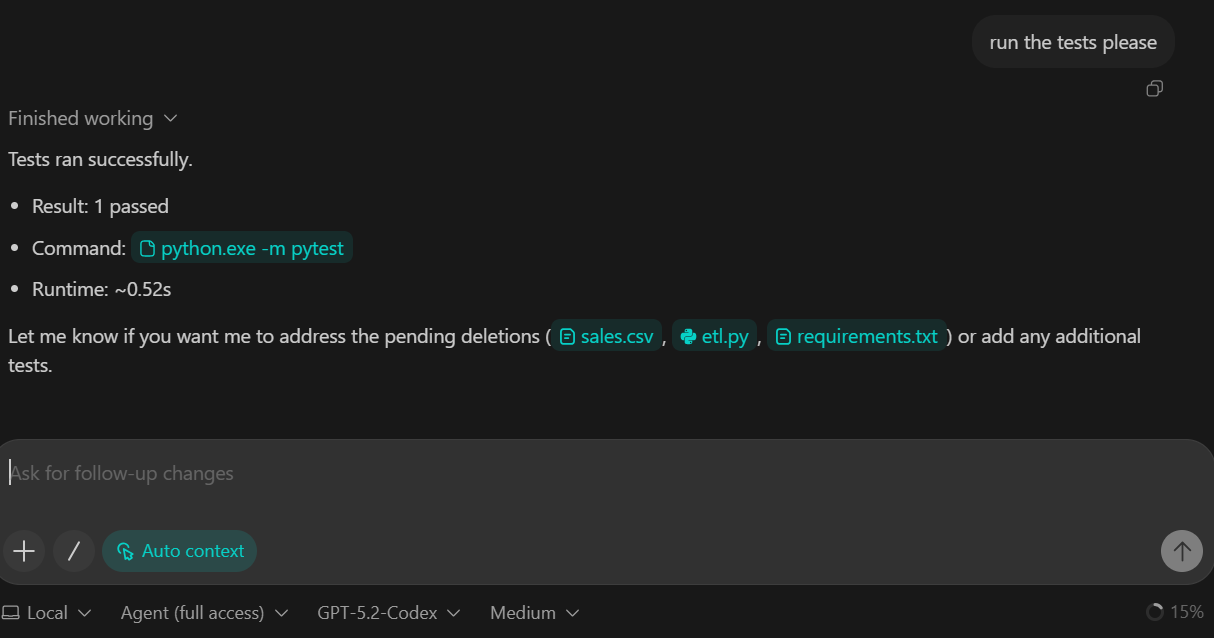
We asked GPT-5.2 Codex to run the test suite as part of this task. As a result, the tests were executed successfully, and all checks passed.
In this step, we introduce the transformation layer of the pipeline. Transformations are implemented using DuckDB SQL, which allows us to convert raw ingested data into a clean, analytics-ready fact table.
TASK 3 (TRANSFORM SQL):
Create backend/sql/010_fct_events.sql:
- typed columns
- deterministic dedupe

Execute transform from backend/pipeline.py.
Add sanity checks to README:
- raw_events count
- fct_events count

Commit.
What this step achieves:
raw_events into fct_events
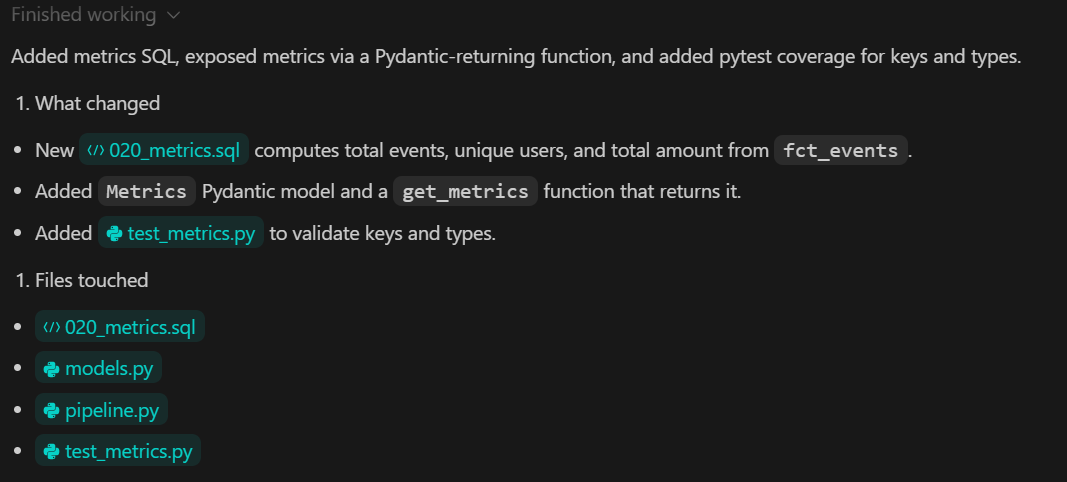
In this step, we add the metrics layer, which is responsible for computing analytical outputs from the transformed data. Metrics are derived using DuckDB SQL and exposed to the rest of the system through a typed Python interface.
TASK 4 (METRICS):
Create backend/sql/020_metrics.sql.
Expose metrics via a Python function returning a Pydantic model.

Add pytest validating:
- keys exist
- types correct

Commit.
What this step achieves:
In this step, we build the local analytics dashboard using Streamlit. The dashboard is responsible only for visualization. It does not compute metrics or transform data. All values are read from the metrics layer created in the previous step.
TASK 5 (STREAMLIT UI):
Build app/app.py:
- 3 KPI cards
- line chart for daily_count
- UI calls backend metrics function

Add a minimal smoke test.
Commit.
After the task is completed, Codex provides instructions to rebuild the DuckDB database and run the full data pipeline. For this step, we use a new database populated with a larger dataset.
python backend\ingest.py --csv data\sample.csv
python backend\pipeline.py
After running ingestion, the output confirms the number of raw events loaded into DuckDB:
raw_events row count: 3738Once the pipeline completes, start the Streamlit application:
streamlit run app\app.pyYou can access the dashboard by opening the http://localhost:8501 URL in your browser.
You can now view your Streamlit app in your browser.

  Local URL: http://localhost:8501
  Network URL: http://192.168.18.10:8501
If an error appears when the dashboard first loads, this is expected during early iterations. Copy the error message and provide it to GPT-5.2 Codex.
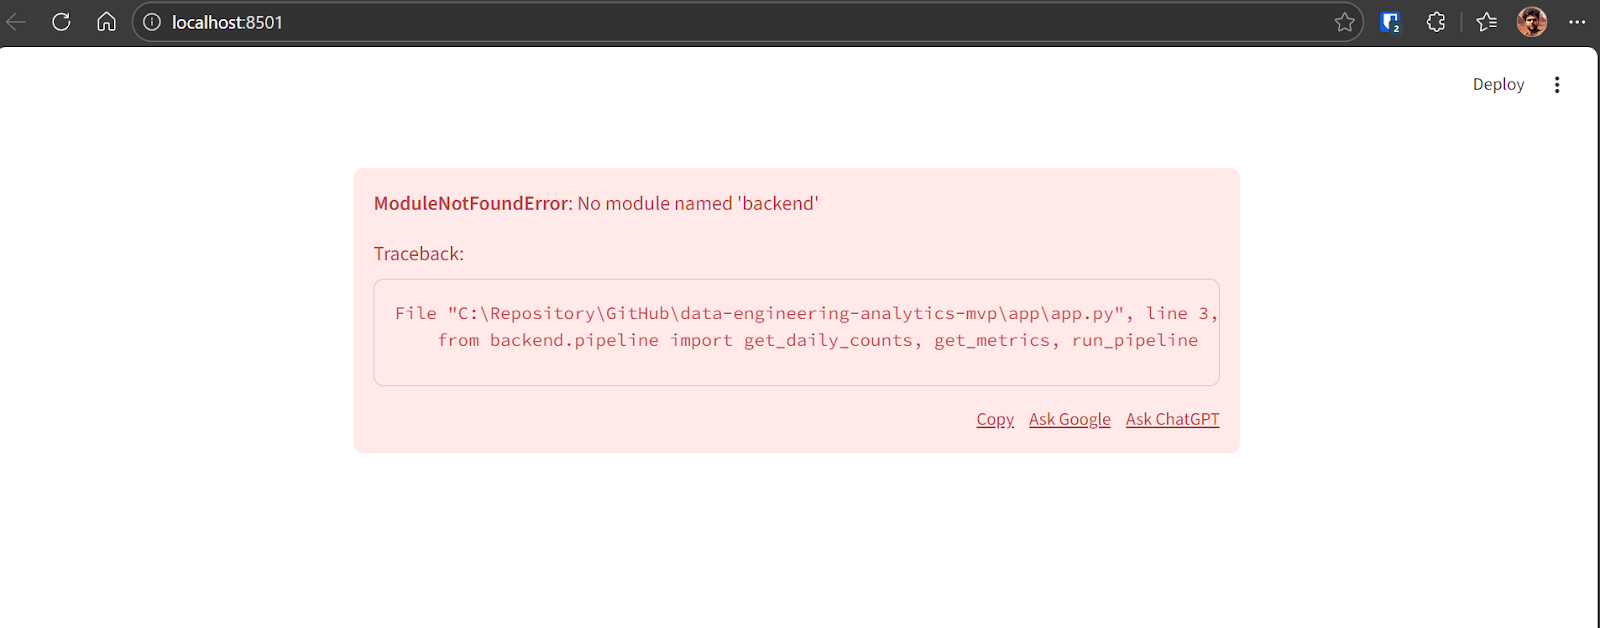
Codex will identify the issue and apply the necessary fix. After the correction, the application runs successfully and displays:
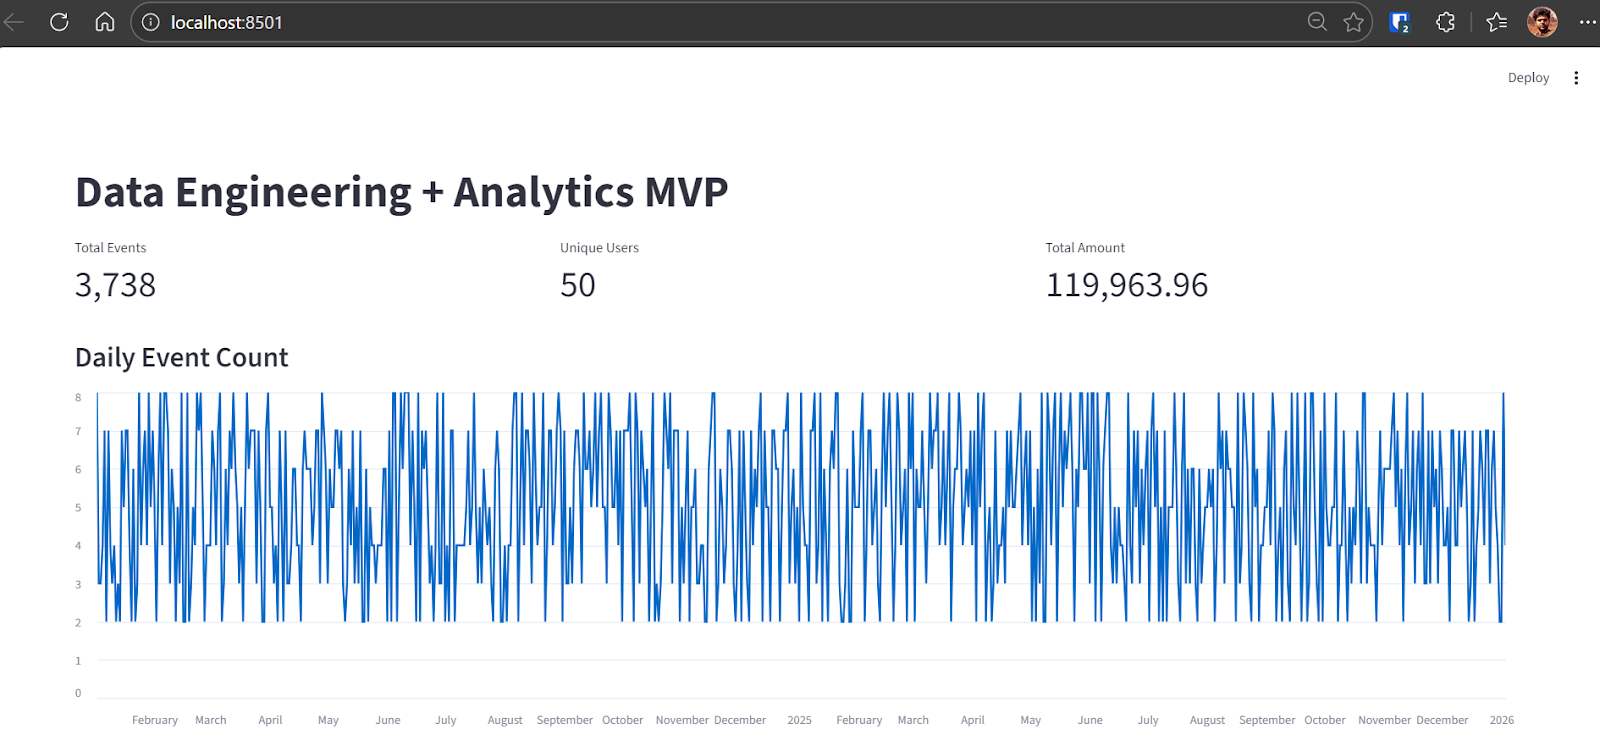
At this point, the end-to-end MVP pipeline is complete and fully functional.
In this final step, we focus on verification and reliability. The objective is to provide a single command that proves the entire pipeline works correctly from ingestion to metrics and testing.
TASK 6 (VERIFY):
Add a verify command that:
- rebuilds DB from scratch
- ingests sample.csv
- runs transforms
- runs pytest

Document as "Local Demo" and "Verify" in README.
Commit.
What this step achieves:
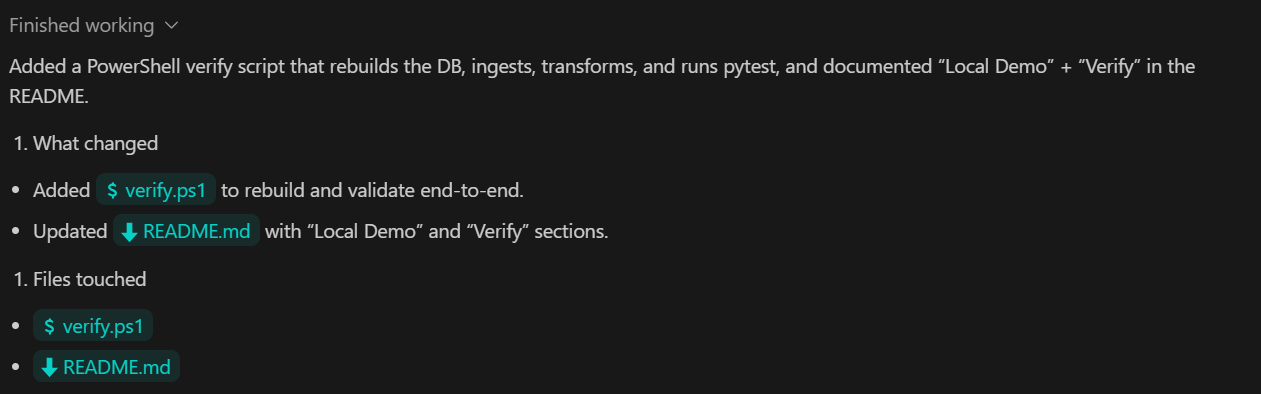
We have asked the Codex to update the README, commit all changes, and push them to the GitHub remote repository.
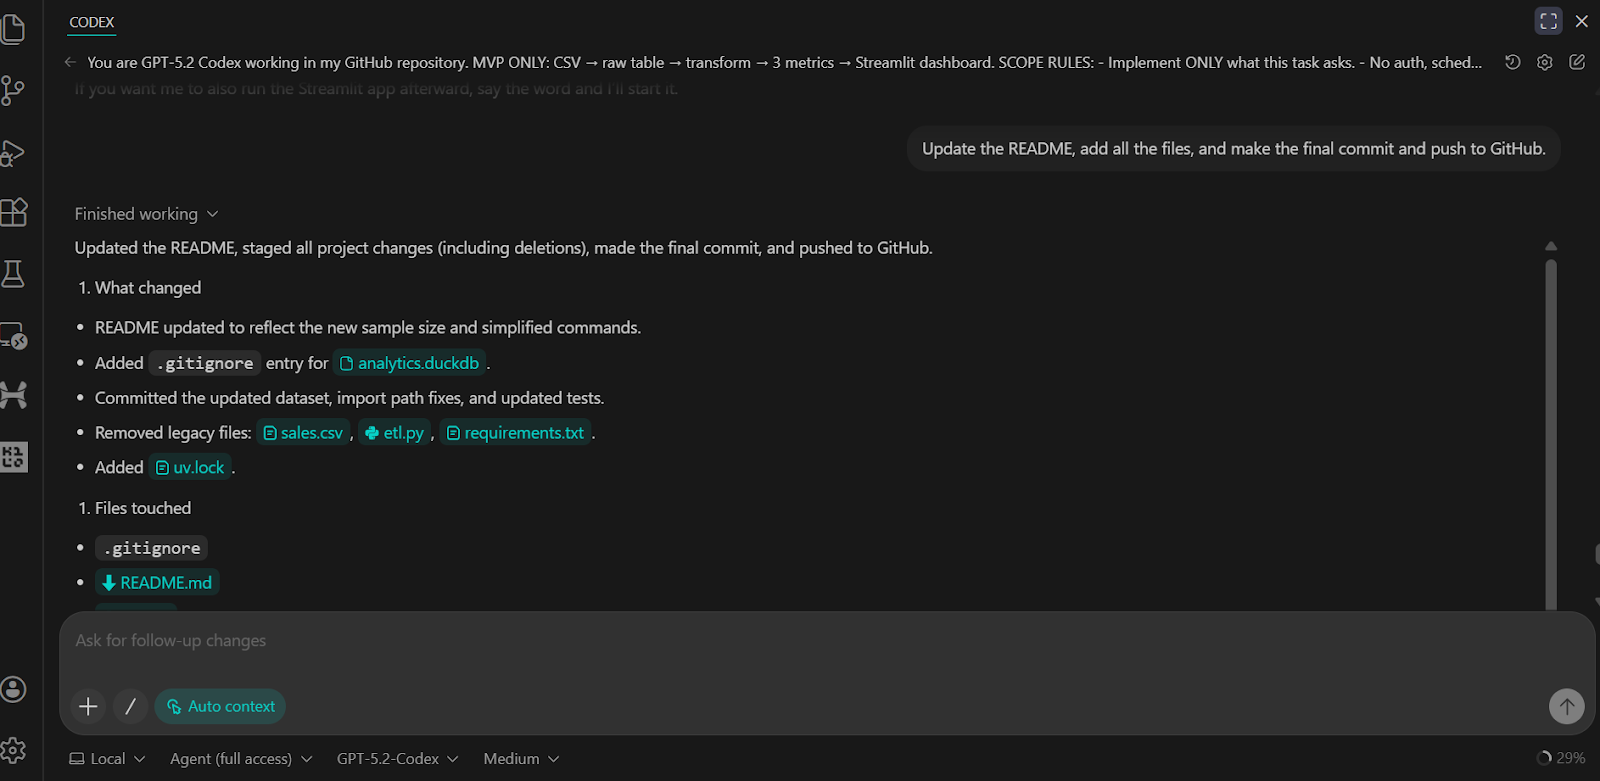
The result is a complete and well-structured GitHub repository that includes all scripts, tests, backend logic, and clear instructions for running and verifying the project.
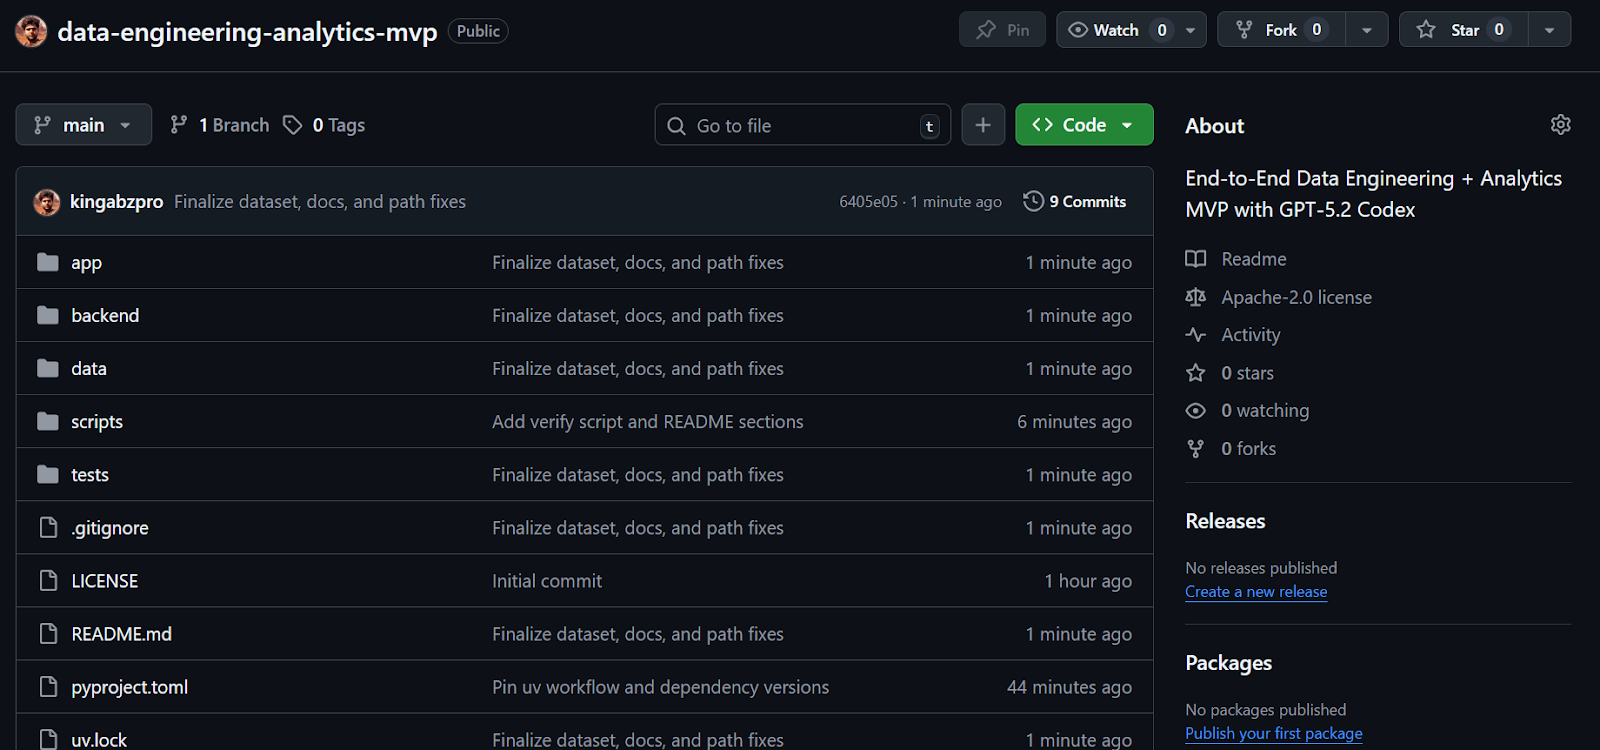
Source: kingabzpro/data-engineering-analytics-mvp
I have used Codex through the CLI and in VSCode from time to time in the past, but the recent updates with GPT-5.2 Codex have made a noticeable difference. The model is significantly better at building complete systems, debugging issues, and working with tools such as MCP and internal tooling. It also shows a much stronger understanding of an existing codebase, which makes iterative development far more efficient.
From start to finish, this entire MVP took me less than thirty minutes to scaffold, debug, and run end-to-end. Codex handled repository setup, dependency management, data ingestion, SQL transformations, testing, and the Streamlit dashboard with very little manual intervention. The development loop felt tight and predictable, which is exactly what you want when building quickly.
This project is intentionally an MVP. It would require additional iteration and hardening to become production-ready. That said, the core structure closely mirrors how real data engineering systems are designed, which makes it a solid foundation to build on.
If you are interested in extending this project toward a more production-oriented data platform, the following components are natural next steps but were intentionally excluded here to keep the scope focused:
These tools are common in production systems, but excluding them here keeps the project simple, local, and easy to reason about, while still reflecting real-world data engineering patterns.
Top DataCamp Courses
Course
Course
Course
blog
Tom Farnschläder
9 min
Tutorial
Abid Ali Awan
Tutorial
Aashi Dutt
Tutorial
Aashi Dutt
Tutorial
Abid Ali Awan
code-along
Andrea Valenzuela