
Track
AWS Cloud Practitioner (CLF-C02)
10 hr
Before transferring data, you need to configure AWS DataSync properly. This section covers the prerequisites and setup steps, including agent installation, IAM roles, and storage configuration.
We will use AWS CloudFormation to automate the provisioning process and focus on data migration. We will create the following resources:

Figure 1 - Selecting AWS Region in the AWS Management Console
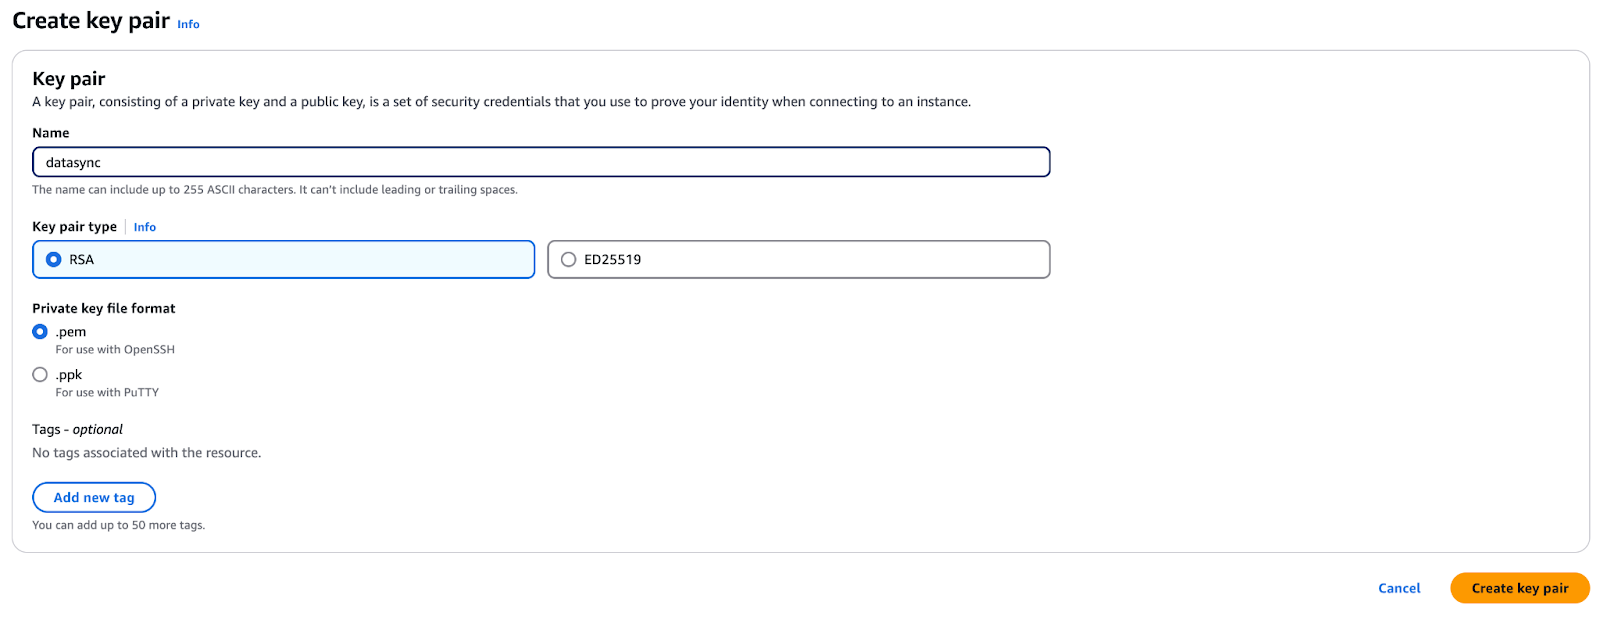
Figure 2 - Creating a key pair for secure access in AWS EC2
datasync.pem file.In this step, you'll use a CloudFormation template to set up the necessary AWS infrastructure for AWS DataSync, which was mentioned before.
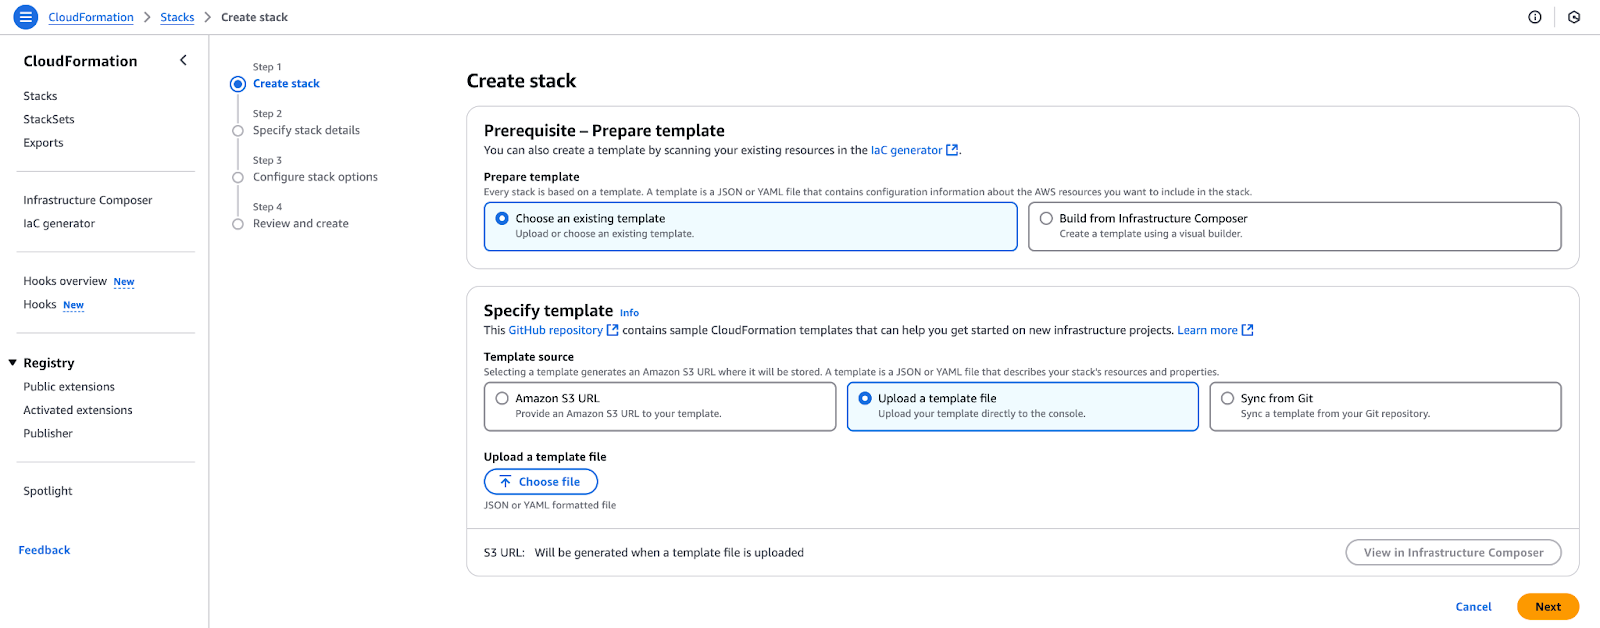
Figure 3 - Uploading a CloudFormation template to create a new stack.
datasync-onprem.yaml, and click Next.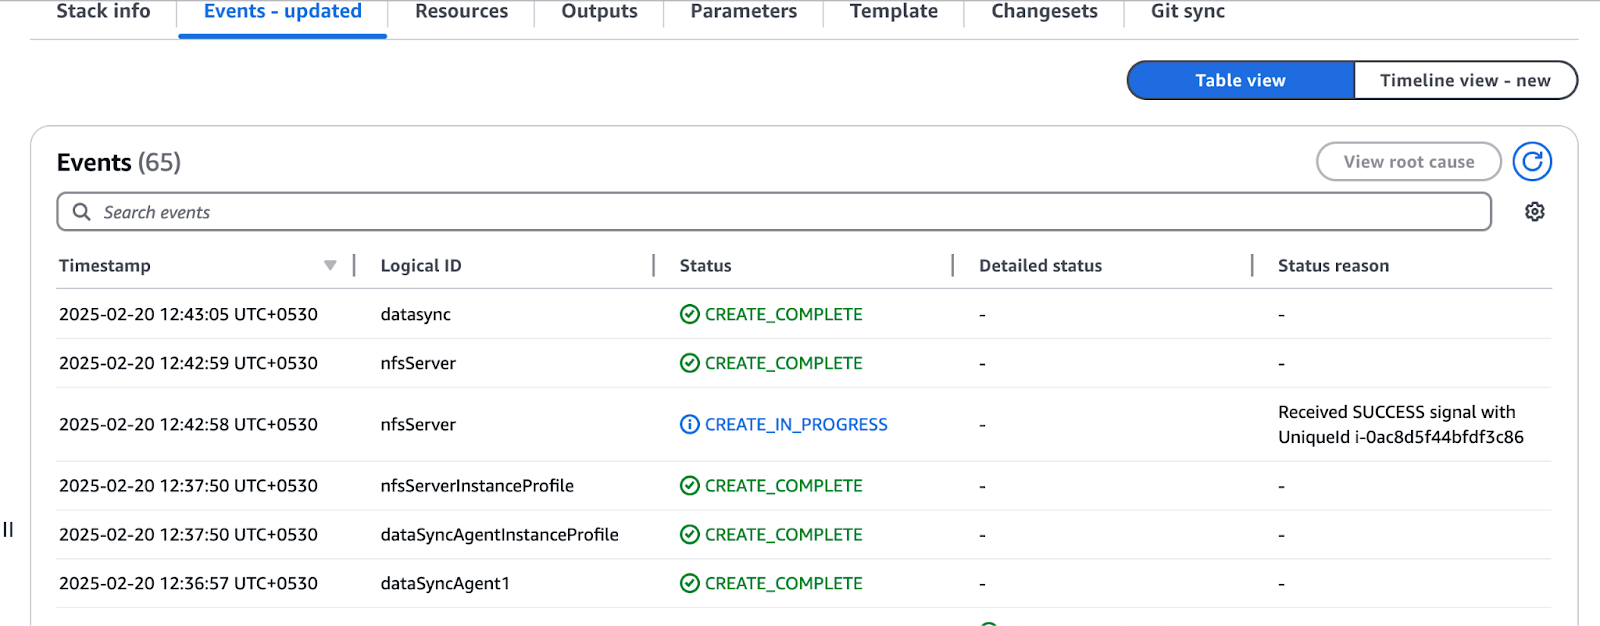
Figure 4 - Reviewing resource creation status in AWS CloudFormation
In this tutorial, we replicate an on-premises environment in AWS to emulate real-world data transfer scenarios using AWS DataSync.
Instead of using an actual on-premises infrastructure, we have launched an NFS server on an Amazon EC2 instance, which will be the source storage system. This allows us to test and configure AWS DataSync as if we were moving data from an on-premises location.
We have launched the AWS DataSync Agents on EC2 instances within the same environment to enable data movement. These agents are responsible for linking the NFS server to AWS DataSync, enabling data transfers to cloud storage services like Amazon S3.
This architecture allows us to mimic, configure, and validate AWS DataSync tasks to achieve a seamless workflow before implementing them in a real on-premises environment. In this tutorial, we will use this environment to register the agent, create the DataSync tasks, and move data around efficiently.
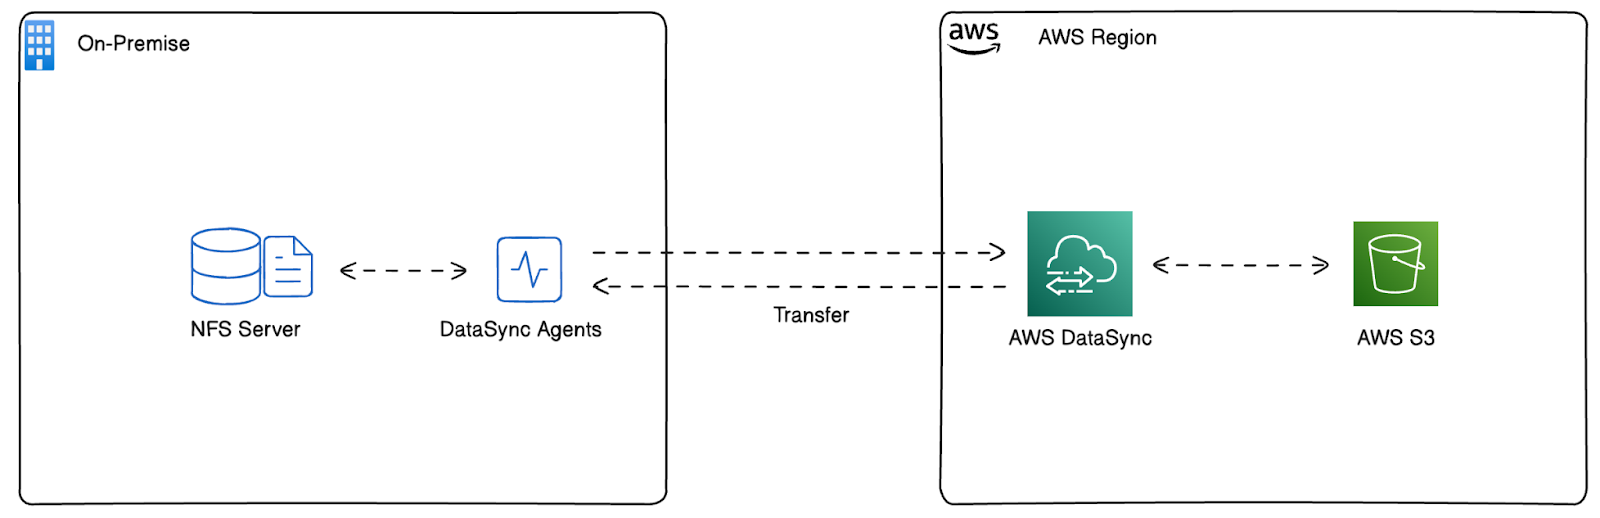
Figure 5 - Architecture deployed by AWS CloudFormation
Before setting up AWS DataSync, it's essential to understand the data you’ll be transferring and how it is organized. In this section, we will configure an NFS server deployed in our AWS environment to act as an on-premises storage system. This setup will allow us to simulate data migration to AWS services.
First, log in to the NFS server:
Then, browse the file systems. The NFS server contains three 200 GiB EBS volumes, each formatted with the XFS file system and pre-populated with sample datasets.
mount | grep /mnt
Figure 6 - Expected output of mount command
df -h | grep /mnt
Figure 7 - Expected output of df command
As you can see, fs1 and fs2 contain 12 GiB of data, and fs3 contains 22 GiB of data.
Now, let’s configure the NFS exports. To allow AWS DataSync agents to access the NFS server, configure the /etc/exports file:
/etc/exports file as root using a text editor:sudo nano /etc/exports/mnt/fs1 10.12.14.243(ro,no_root_squash) 10.12.14.249(ro,no_root_squash)
/mnt/fs2 10.12.14.243(ro,no_root_squash) 10.12.14.249(ro,no_root_squash)
/mnt/fs3 10.12.14.243(ro,no_root_squash) 10.12.14.249(ro,no_root_squash)Replace 10.12.14.243 and 10.12.14.249 with the private IPs of your DataSync agent EC2 instances from the CloudFormation outputs.
sudo systemctl restart nfsshowmount -e
Figure 8 - Expected output of showmount command
With the NFS server configured, the next step is to enable AWS CloudWatch logging for DataSync and activate the DataSync agents in the “N. California” region. This ensures all file transfers are logged, providing visibility into errors or failures.
Before AWS DataSync can send logs to CloudWatch, we need to create a resource policy that grants DataSync the required permissions.
datasync-policy.json on your local machine:{
"Statement": [
{
"Sid": "DataSyncLogsToCloudWatchLogs",
"Effect": "Allow",
"Action": [
"logs:PutLogEvents",
"logs:CreateLogStream"
],
"Principal": {
"Service": "datasync.amazonaws.com"
},
"Resource": "*"
}
],
"Version": "2012-10-17"
}aws logs put-resource-policy --region us-west-1 --policy-name trustDataSync --policy-document file://datasync-policy.jsonThe above command allows AWS DataSync to write logs to CloudWatch, which will help monitor and debug transfer issues.
Now, let’s activate the DataSync agents. Although the DataSync agent EC2 instances were created in the “N. California” region, they must be activated in that region before use.
Note: If you need to install the DataSync agent in VMware or another on-premises environment, refer to the official AWS guide. However, since we are simulating an on-premises setup using EC2 instances, the DataSync agents in this tutorial are deployed following AWS best practices for cloud-based installations.
<Output from Cloudformation><Output from Cloudformation>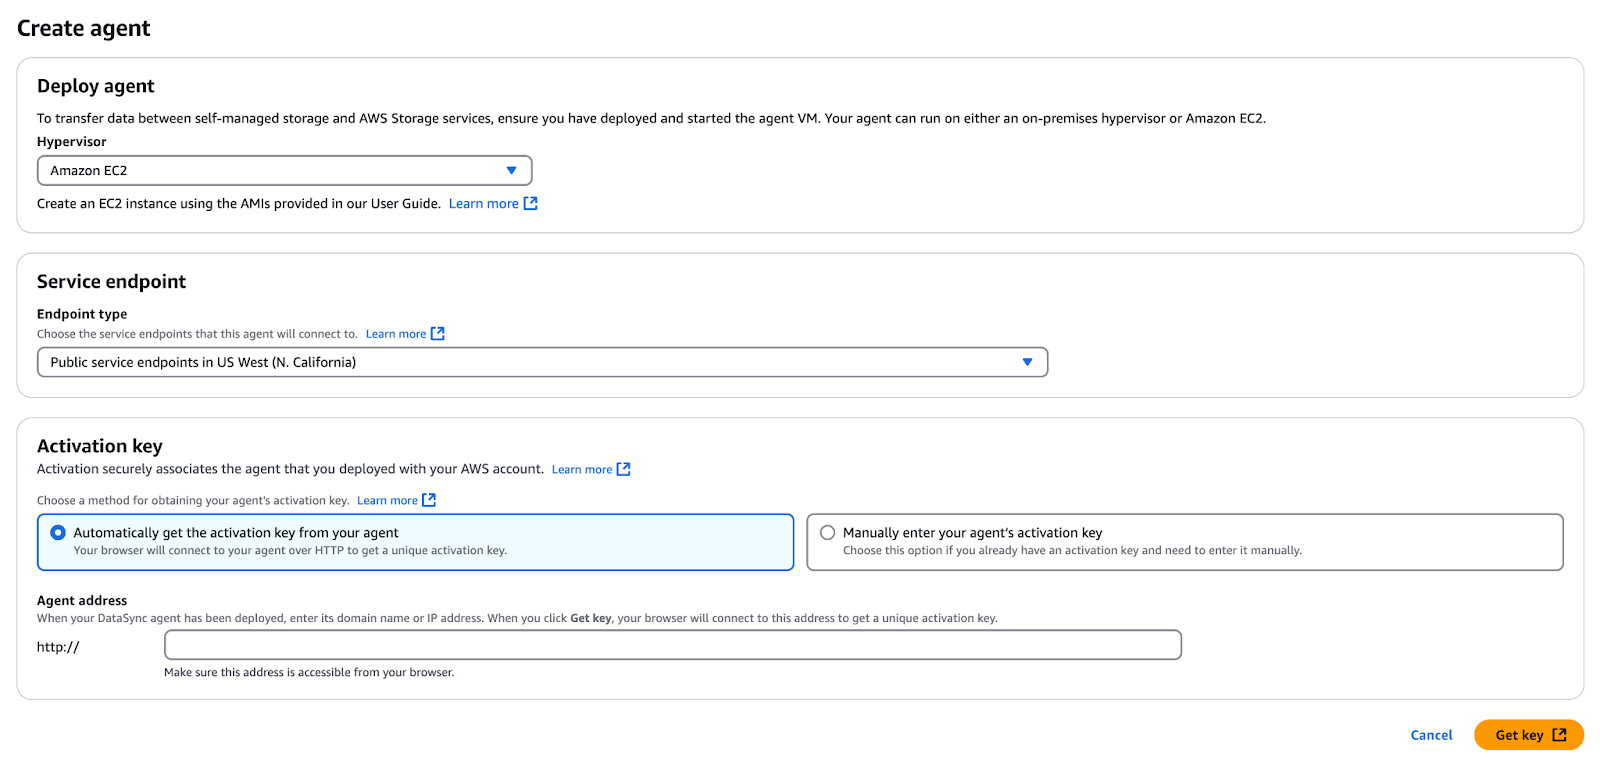
Figure 8 - Create and activate DataSync agent
Now, let’s finally create a DataSync task! Follow these steps:
/mnt/fs1/d0001 (copies only the d0001 directory).
Figure 10 - Configuring the source location for AWS DataSync
Once AWS DataSync is set up, the next step is configuring data transfer tasks. These tasks define how, when, and where data will be transferred. AWS DataSync supports various options for optimizing transfers, including file filtering, scheduling, and monitoring.
*/.htaccess and */index.htmlDataSyncLogs-datasync-incloud.After configuring a DataSync task, you need to execute the transfer and monitor its progress. This section covers how to start a transfer manually or via the CLI, track its status, and troubleshoot common issues.

Figure 11 - AWS DataSync task list showing options to start, edit, or delete the task
Click on the Task history tab and select the execution object to see transfer statistics in the task.
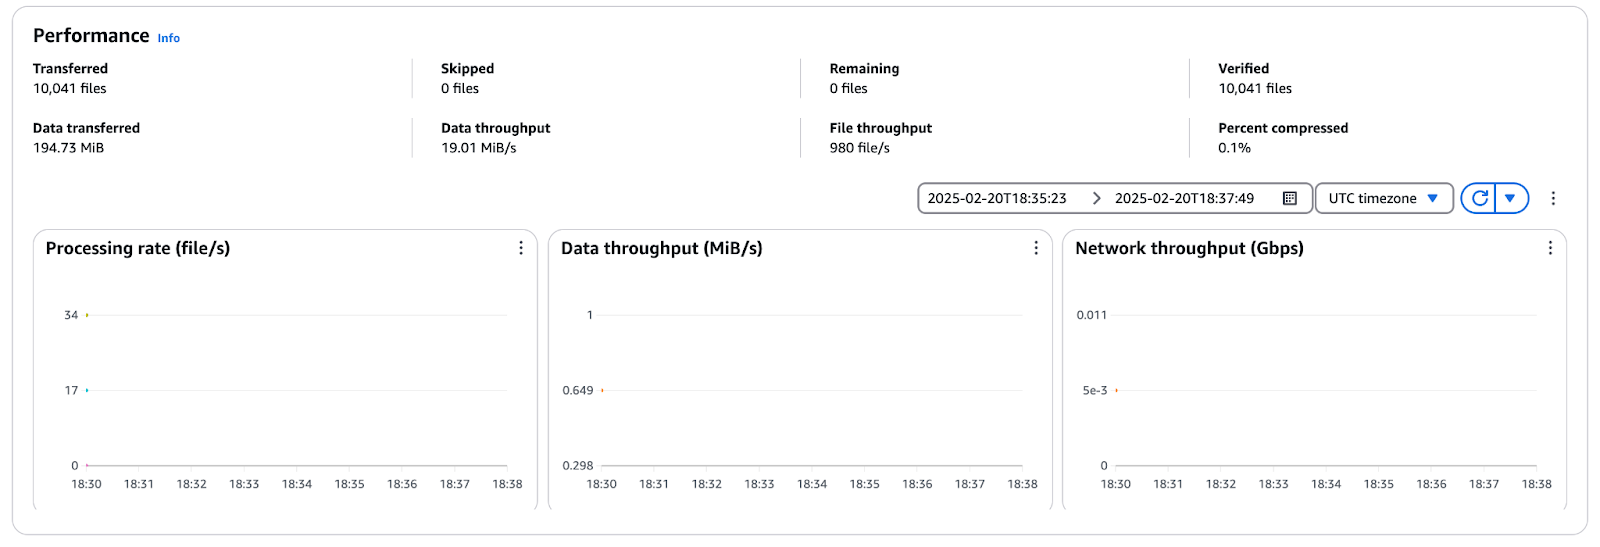
Figure 12 - AWS DataSync performance metrics showing file throughput, data throughput, and network utilization
During AWS DataSync transfers, common issues such as connectivity failures, permission errors, or slow transfer speeds may occur. To troubleshoot:
Once the data transfer is complete, it's important to verify the integrity of the transferred files and set up ongoing synchronization if needed. This section explains how to check data accuracy, schedule incremental syncs, and clean up unused resources to optimize costs.
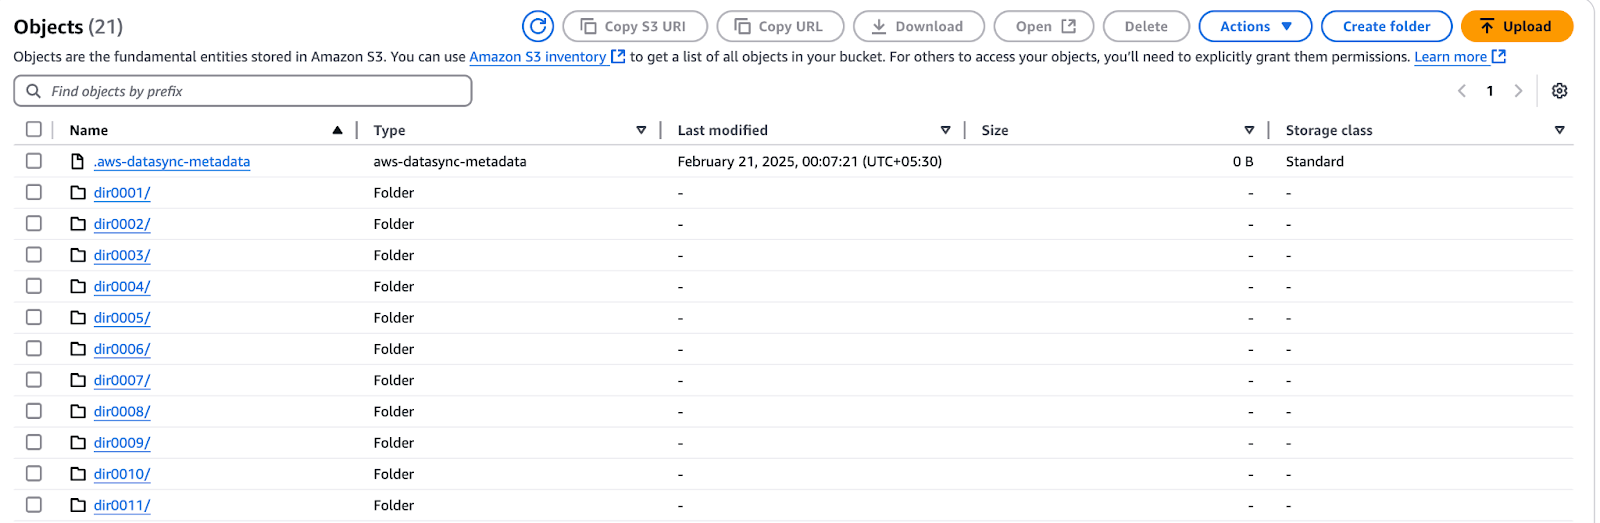
Figure 13 - AWS S3 bucket showing files transferred via AWS DataSync
.htaccess and index.html files were not copied.You can also check the task execution details via the AWS CLI:
aws datasync list-task-executions --region us-west-1 | grep exec-aws datasync describe-task-execution --region us-west-1 --task-execution-arn <task-execution-arn>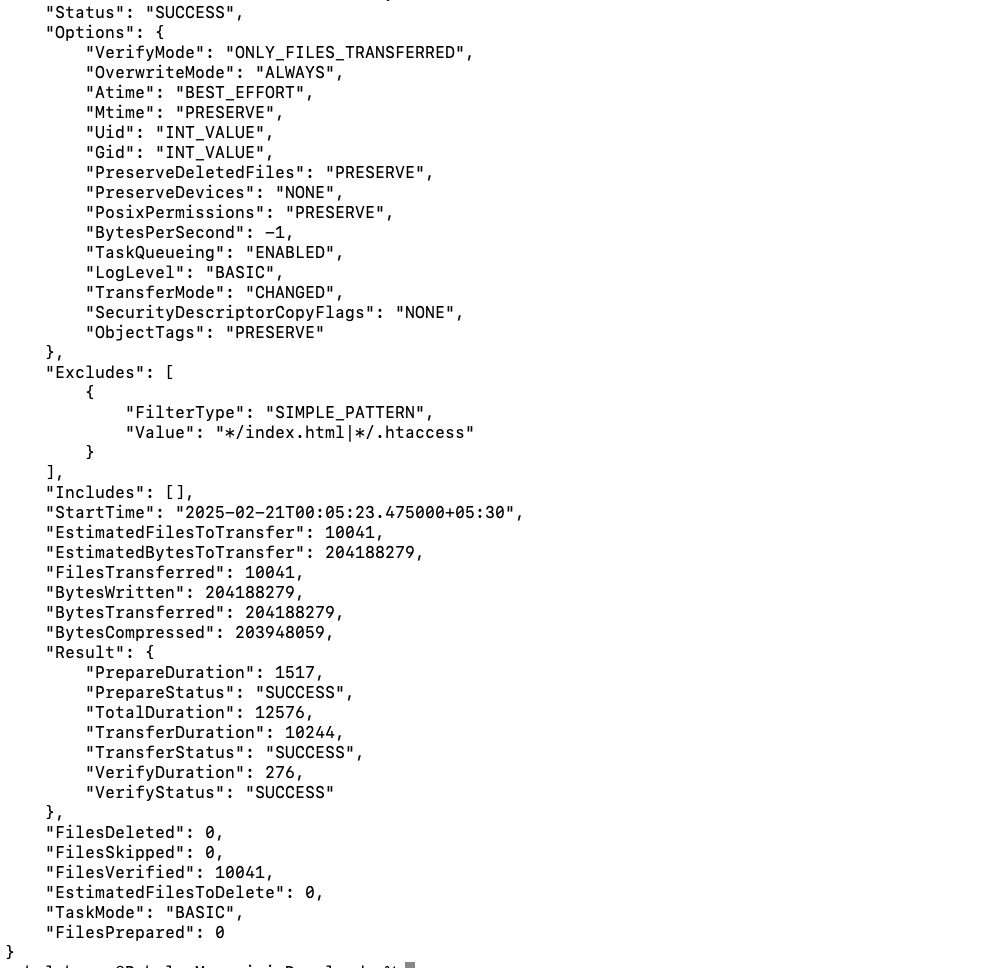
Figure 14 - AWS DataSync task execution details
EstimatedFilesToTransfer, BytesTransferred, transfer speed, and duration.In real-world scenarios, files continue to be added and modified after an initial transfer. AWS DataSync supports incremental transfers, ensuring only new or changed files are copied to the destination. In this section, we will modify data on fs2, run an incremental transfer, and optimize the process using filters.
Let’s start by modifying files on fs2.
ssh ec2-user@<NFS-Server-IP>cd /mnt/fs2/d0001/dir0001
dd if=/dev/urandom of=newfile1 bs=1M count=1
echo "newfile1" >> manifest.lstThis adds one new file (newfile1) and modifies manifest.lst.
Then, re-run the task to sync changes:
newfile1, updated manifest.lst, and folder update).
Figure 15 - AWS DataSync performance metrics showing an incremental transfer
newfile1.manifest.lst for an updated timestamp.For environments where data changes frequently, scheduling periodic syncs ensures that the destination remains up to date with minimal manual intervention. AWS DataSync allows you to configure tasks at regular intervals (e.g., hourly, daily, or weekly), reducing operational overhead.
By setting up a recurring schedule, DataSync will automatically detect and transfer only the new and modified files, optimizing bandwidth usage and transfer efficiency.
To schedule a task:
Once your data transfer is complete, it’s essential to clean up unused resources to avoid unnecessary costs. Follow these steps:

Figure 15 - Confirming Stack Deletion in AWS
To minimize data transfer expenses, consider these best practices:
By properly cleaning up resources and optimizing transfer strategies, you can significantly reduce AWS costs while maintaining efficient data synchronization.
Beyond basic transfers, AWS DataSync offers powerful capabilities that improve performance, cost efficiency, and security. This section explores key advanced use cases, including S3 integration and NFS-to-EFS migration.
AWS DataSync is a powerful tool for moving large amounts of data to and from S3 and is ideal for backup, archive, and cloud migration tasks. It enhances performance through multipart uploads, which divide large files into smaller parts and then transfer them in parallel. Furthermore, DataSync integration with S3 storage classes helps users save money by migrating less active data to S3 Glacier or S3 Intelligent-Tiering.
In this tutorial, we explained how to configure a DataSync task, set up an NFS source, and move files to an S3 bucket, all while excluding unwanted files. You can use these steps to schedule large data moves with little or no operational impact.
For organizations that need to migrate on-premises NFS shares to Amazon EFS, the solution is an automated, secure, and scalable one – AWS DataSync. The problem is that S3 is object storage. At the same time, Amazon EFS (Elastic File System) is a fully managed file storage service with POSIX compliance, making it a good choice for applications that need shared access and low latency performance.
Here’s how DataSync helps with NFS to EFS migration:
Although this tutorial was based on NFS to S3 migration, the same DataSync principles can be used when migrating to Amazon EFS. The main variation is choosing EFS as a target so that data movement is well executed for applications that need a file system with dynamic scaling in AWS.
To get the most out of AWS DataSync, it's essential to follow best practices that enhance speed, security, and cost efficiency. This section covers key strategies to optimize data transfers, ensure data security, and manage monitoring effectively.
For large-scale data migrations, AWS Direct Connect (DX) is a dedicated private network connection that avoids the public internet and allows faster, more secure transfers with lower latency. If DX is unavailable, other alternatives, like VPN connections or VPC peering, can enhance the transfer speeds while maintaining security.
Moreover, AWS DataSync has built-in compression that lessens the amount of data moved across the network, thus increasing the speeds and minimizing the bandwidth costs. However, since compression uses CPU resources, comparing the performance benefits with the possible system overhead is crucial.
Additionally, task scheduling and configuration can be optimized to improve DataSync performance further. Rescheduling the transfers to off-peak hours avoids network traffic and guarantees bandwidth availability, especially when moving large files. Fine-tuning of buffer size and several parallel transfer streams based on network and storage capacity drastically improves the throughput.
For small file workflows, increasing the level of parallelism reduces the time taken to transfer data. In contrast, effective buffer management enhances performance and reliability for large files.
All data that AWS DataSync transfers is encrypted in transit through TLS to ensure secure network transfer. Encryption for destination storage services, including Amazon S3, Amazon EFS, and Amazon FSx, should also be enabled. To increase the level of protection when using S3, enable server-side encryption as well.
When assigning IAM roles for DataSync tasks, follow the principle of least privilege. To minimize security risks, only grant the necessary permissions to DataSync agents and task execution roles. Refrain from using policy keys based on tags and instead employ resource-based policies to avoid unanticipated data alterations.
For intra-VPC data transfers, enable VPC endpoints to attend DataSync traffic within the AWS network without involving the public internet. This helps to reduce security risks and improve performance when moving data between different AWS services.
The DataSync agent should be run securely, following new recommendations for OS security and network segmentation. It should also be up to date, and AWS security group policies should be enforced to deny unauthorized access.
Effective monitoring will help guarantee that data transfers are successful and optimized in AWS DataSync. This tutorial has also shown how to integrate with CloudWatch to provide real-time tracking of task execution, transfer speeds, error rates, and throughput. Reviewing task logs helps identify issues, check file integrity, and troubleshoot failed transfers.
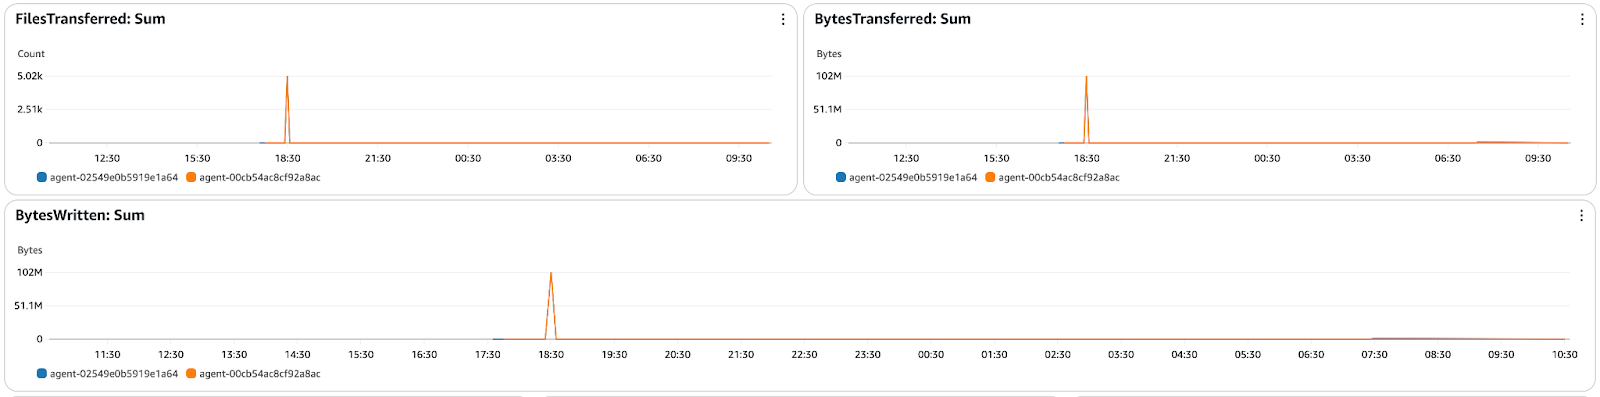
Figure 16 - AWS DataSync CloudWatch monitoring dashboard showing files transferred, bytes transferred
Furthermore, CloudWatch alarms notify when transfers have failed or have performance issues, which can happen before they are supposed to and can be dealt with before they become a bigger problem.
While AWS DataSync automates data transfers, you may encounter connectivity issues, permission errors, or data inconsistencies. This section provides solutions to common problems, explains how to debug using logs, and ensures smooth data synchronization.
AWS DataSync users may encounter timeouts, permission issues, or data integrity errors during transfers. Here are some common problems and their solutions:
To effectively troubleshoot AWS DataSync tasks, logs provide valuable insights into failed transfers, skipped files, and network errors. This tutorial has shown CloudWatch integration for monitoring and debugging DataSync executions.
Here’s how to check DataSync task logs:

Figure 17 - AWS CloudWatch log stream for DataSync task execution
Then, set up CloudWatch Alarms for failures:
AWS DataSync simplifies automated, secure, and efficient data transfers between on-premises environments and AWS storage services like Amazon S3, EFS, and FSx. This tutorial provided a practical, hands-on approach to configuring DataSync, setting up NFS as a source, and transferring data while ensuring security and performance.
We explored incremental transfers, task scheduling, and CloudWatch monitoring to optimize DataSync for cost, speed, and reliability. Additionally, troubleshooting steps and log analysis techniques help diagnose and resolve transfer issues effectively.
If you're new to AWS or want to deepen your understanding of cloud concepts and services, I recommend you check out these related learning resources:
These courses are a great way to build foundational knowledge and prepare for real-world cloud scenarios using AWS!
Learn more about AWS with these courses!
Track
Course
Course
Tutorial
Dario Radečić
Tutorial
Rahul Sharma
Tutorial
Joleen Bothma
Tutorial
Dario Radečić
Tutorial
Aashish Nair
Tutorial
Rahul Sharma