Course
Working with DeepSeek in Python
3 hr
1.3K
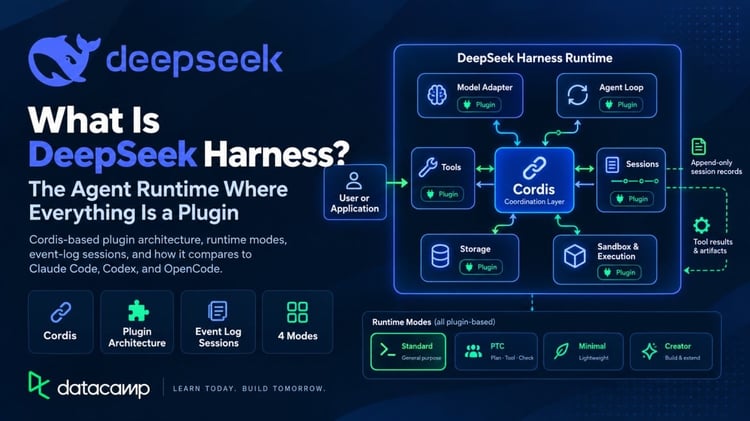
DeepSeek Harness has gained attention very quickly, reaching over 160,000 GitHub stars and 18,000 forks at the time of publishing this article.
A big reason is that developers are finding it capable of getting strong results from different models, not just DeepSeek. Reddit users frequently report successfully using it with models such as Qwen3.8-27b, especially for coding and longer agentic tasks.
Another reason is its autonomy and flexibility. Users report that Harness can keep working through multi-step tasks, recover from errors, manage long contexts, and continue without needing constant intervention. Its plugin-based design also makes it easy to swap models, add tools, and customize the agent workflow instead of being locked into one fixed setup.
If you're weighing Harness against the tools it's meant to rival, our guide to Claude Code alternatives compares seven of the main options side by side.
Here are some of the main features:
Plugin-based architecture: Most parts of the agent can be extended or replaced through plugins, which makes it easier to customize your setup.
Local Web UI: Running dsh web gives you a browser-based interface where you can manage models, sessions, workspaces, settings, and agents.
Python SDK: The deepseek-harness-sdk lets you run Harness agents directly from Python applications, scripts, tests, and automation workflows.
Multiple model providers: You are not limited to DeepSeek models. You can use providers such as OpenAI and Anthropic, or connect your own compatible endpoint.
Tool calling: Agents can call tools to perform actions instead of only generating text.
File and terminal tools: Harness includes tools for reading, searching, and editing files, along with Bash on Linux and macOS and PowerShell on Windows.
Built-in web search: DeepSeek's web search provider is included in the default configuration and uses the same DeepSeek API key as the model.
Code Mode: Harness can expose tools through a code-based execution mode, giving the agent more control over how it combines and runs tool calls.
Trajectory: The Trajectory view lets you inspect what the agent is doing step by step, including model responses, tool calls, nested tool activity, timing, and token usage.
Agent presets: You can create different agent setups with their own tools and prompts, then use them across different sessions.
Session statistics: Harness tracks useful information such as turns, steps, model time, tool time, time to first token, and decoding time.
Subagents: A main agent can delegate parts of a task to child agents, which is useful for more complex workflows.
Community plugins: Third-party plugins can add extra capabilities that are not available in the base model. In this guide, we used ModLens to add vision support.
MIT licensed: DeepSeek Harness is open source and released under the permissive MIT license.
The main advantage is that you are not tied to one model, one toolset, or one type of agent. You can start with the default setup and gradually add or replace components as you experiment with different workflows.
Let us start by getting DeepSeek Harness installed and setting up everything we will need for the rest of the guide. We will install Node.js, DeepSeek Harness, and pnpm, then add our API keys.
DeepSeek Harness runs on Node.js. Since we will also be using ModLens later for vision, I recommend using Node.js 22.19 or newer.
If you are on Ubuntu or Debian, you can install Node.js with:
curl -fsSL https://deb.nodesource.com/setup_22.x | sudo -E bash - && sudo apt-get install -y nodejsOnce it is installed, check that both Node.js and npm are working:
node --version
npm --version
On my setup, I got:
v24.19.0
11.17.0
You do not need to have exactly the same versions. As long as you are running a recent enough version of Node.js, you should be good to go.
Next, let us install DeepSeek Harness itself.
The official quick start uses npx, but I prefer installing it globally so we can simply use the dsh command throughout the guide.
Run:
npm install -g @deepseek-ai/dshThen check that it installed correctly:
dsh --versionAt the time I tested this guide, I was using:
0.1.0-rc.7We also need pnpm. DeepSeek Harness uses it when we add or remove plugins. Install it globally:
npm install -g pnpmFor this tutorial, we only need two API keys:
We will set up the DeepSeek key now, since it is all we need for coding and web search, and add the Gemini key later when we add vision with ModLens.
For DeepSeek, you will need to create a DeepSeek account, generate an API key, and add credit to your account. For this guide, I recommend adding at least $2 of credit, which should be more than enough to test the examples without adding a large amount upfront.
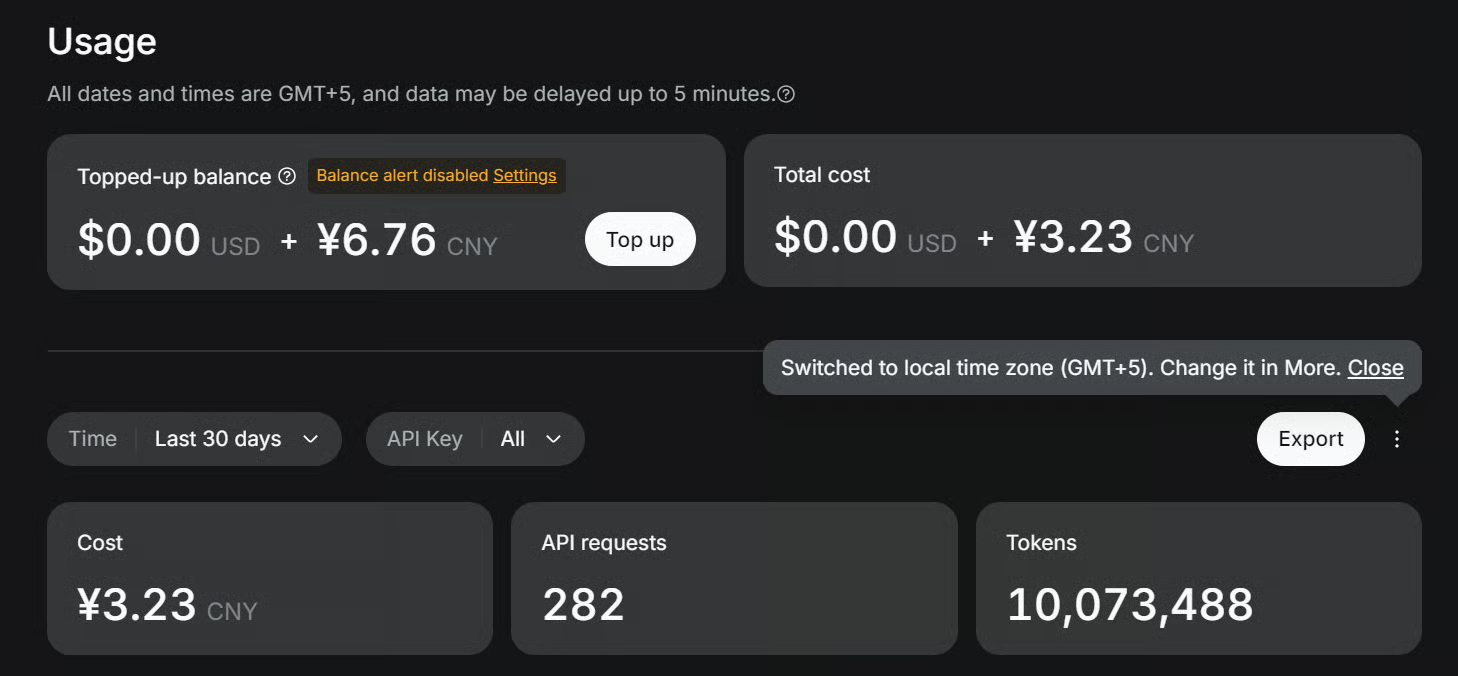
Once you have the API key, add it to your environment.
On Linux or macOS:
export DEEPSEEK_API_KEY="your_deepseek_api_key"On Windows PowerShell:
$env:DEEPSEEK_API_KEY="your_deepseek_api_key"One nice thing about this setup is that we do not need a separate web search API. DeepSeek Harness already includes DeepSeek's web search provider and uses the same DEEPSEEK_API_KEY.
You can also add your DeepSeek API key later from Settings → Models inside the Web UI.
Now that everything is configured, we can start DeepSeek Harness and open the Web UI. Simply run dsh web, which starts the browser interface on port 3080 by default.
You can see the UI once you open the address http://127.0.0.1:3080in your browser.
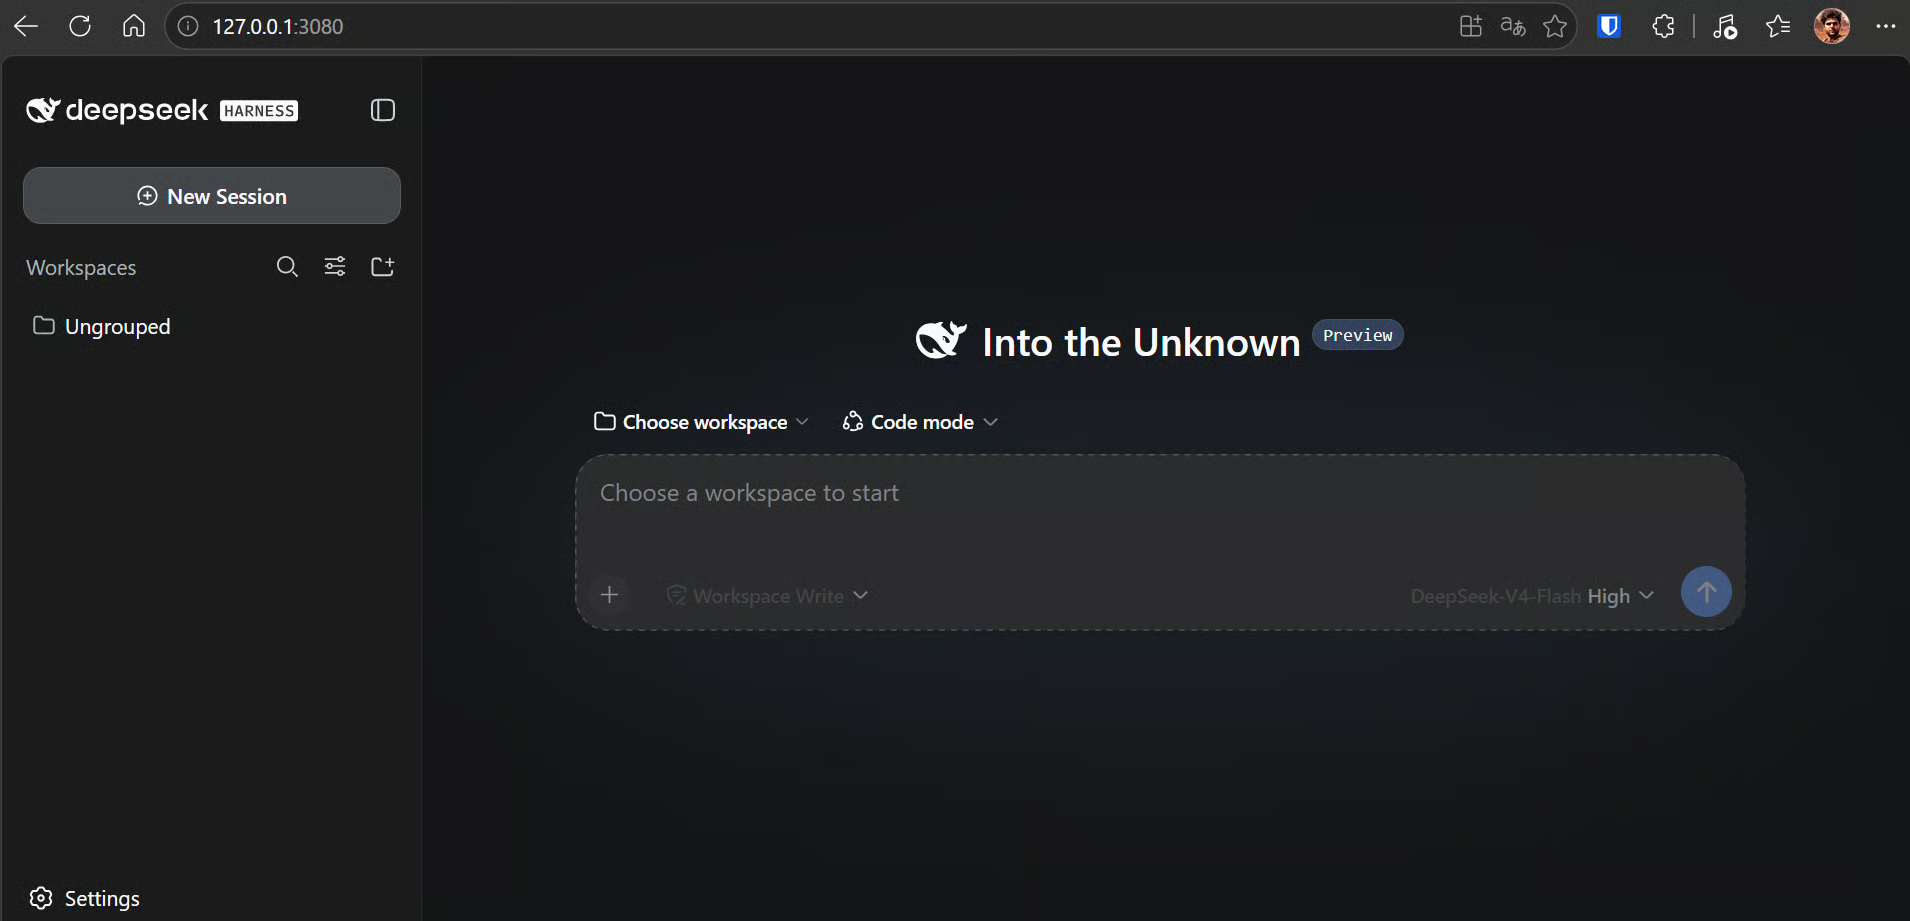
From there, create a new workspace or select an existing one, start a new session, and choose the DeepSeek model you want to use.
Once the session is ready, we can start testing coding, web search, vision, and third-party model support.
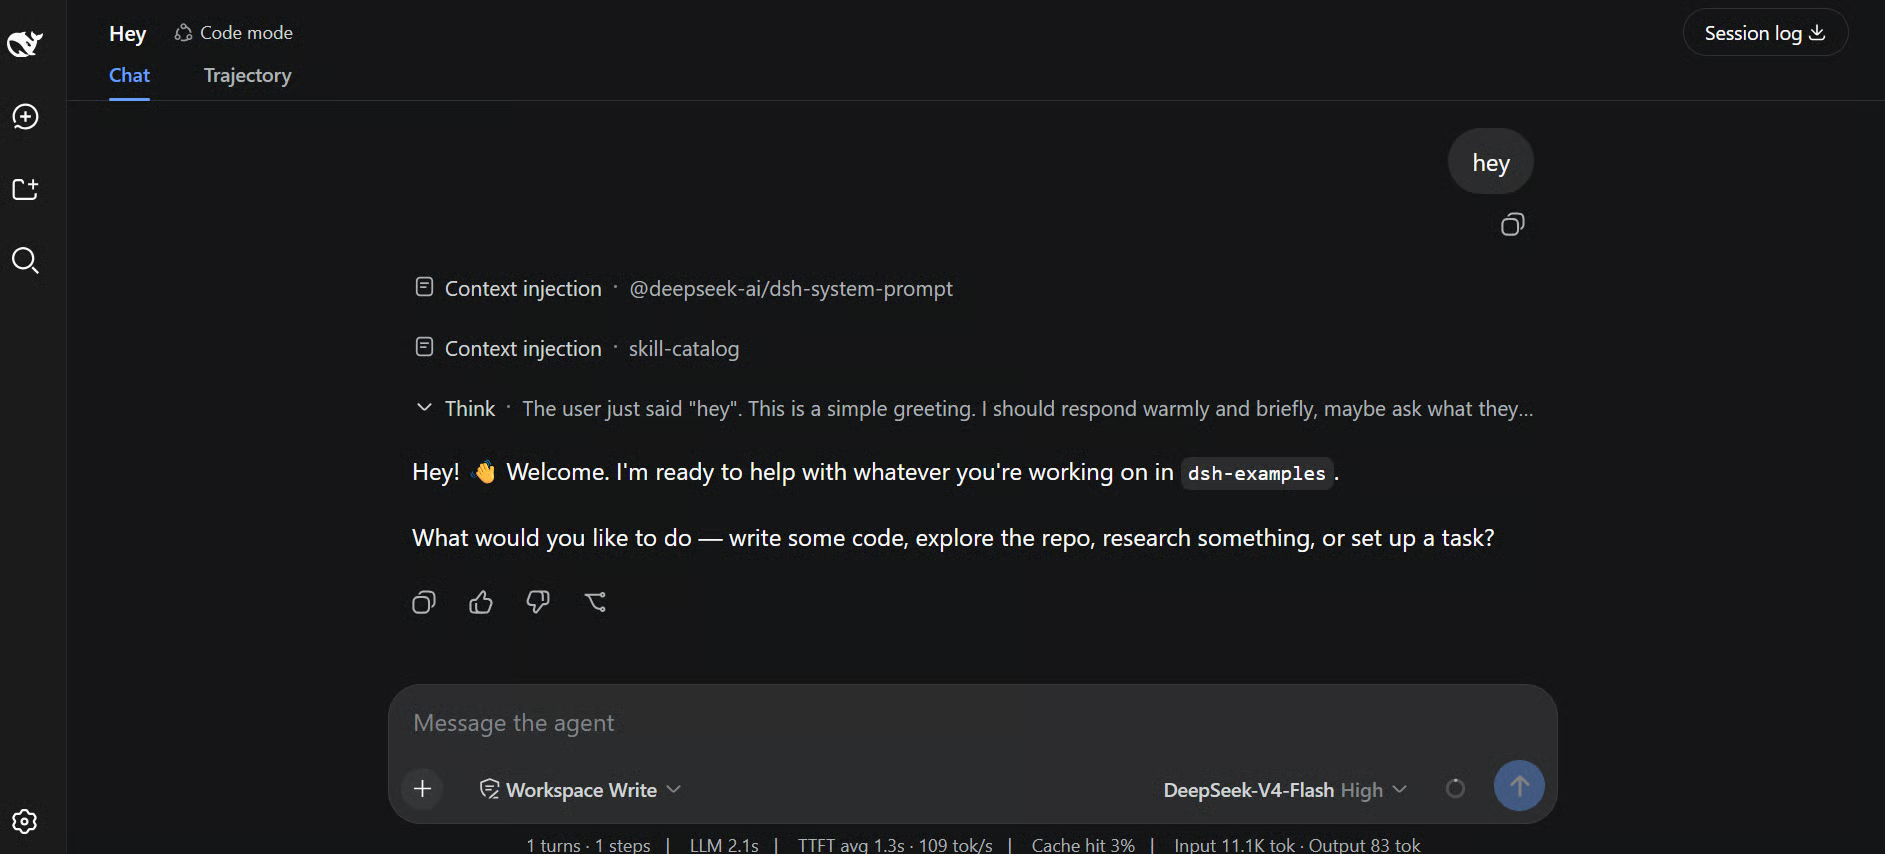
Now that DeepSeek Harness is running, we can test the main capabilities of our setup. Let’s start with a simple coding task:
Create a simple Python calculator with a command-line interface.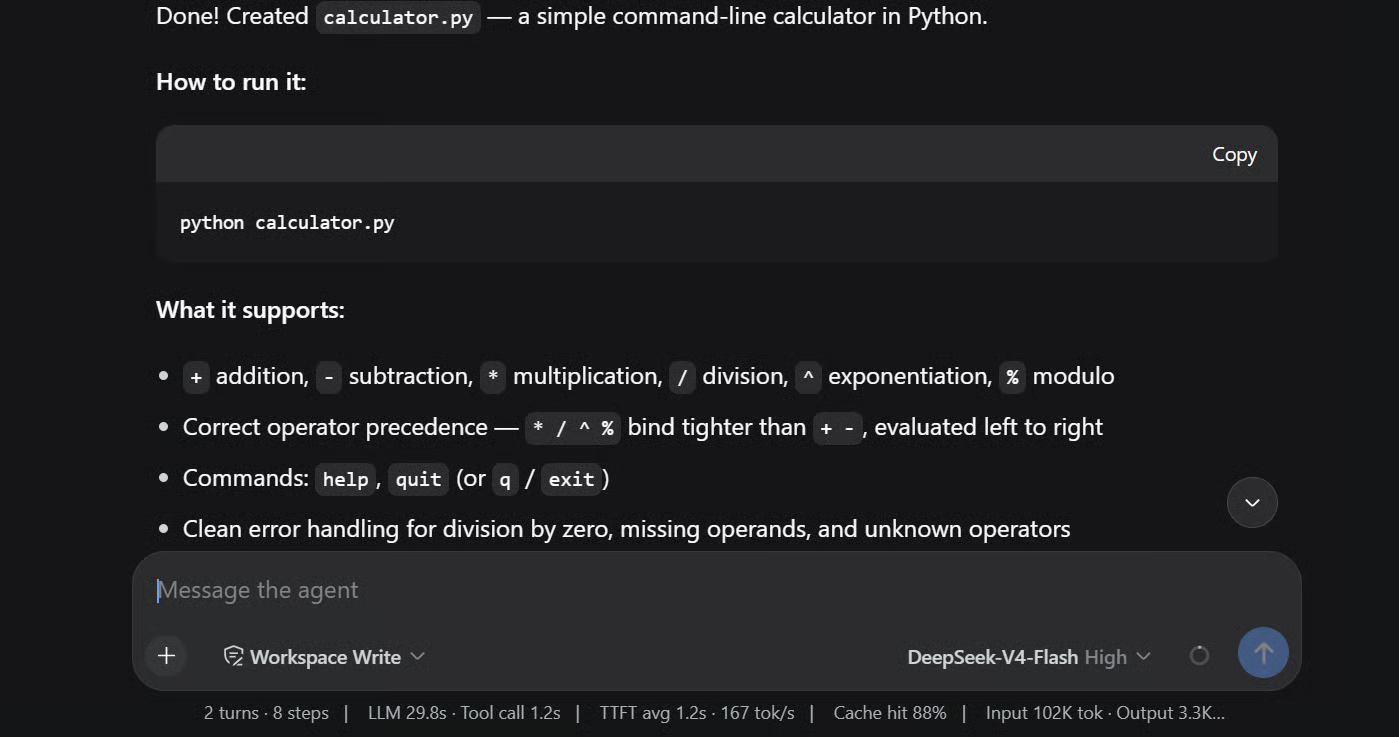
DeepSeek Harness can work directly with files and the terminal, so it can create the Python file, edit the code, and run commands inside the workspace.
After the task is complete, you should see the generated file and instructions for running it.
To get more out of the DeepSeek models powering Harness, our DeepSeek V4 API tutorial walks through the V4 reasoning modes and API parameters in Python.
Next, let us test web search. There is no extra setup required because DeepSeek Harness already includes DeepSeek's web search provider.
Try a prompt like:
Search the web for the latest open-source AI model releases and summarize the top three as of August 18, 2026.The agent should search the web and return a summary with sources.
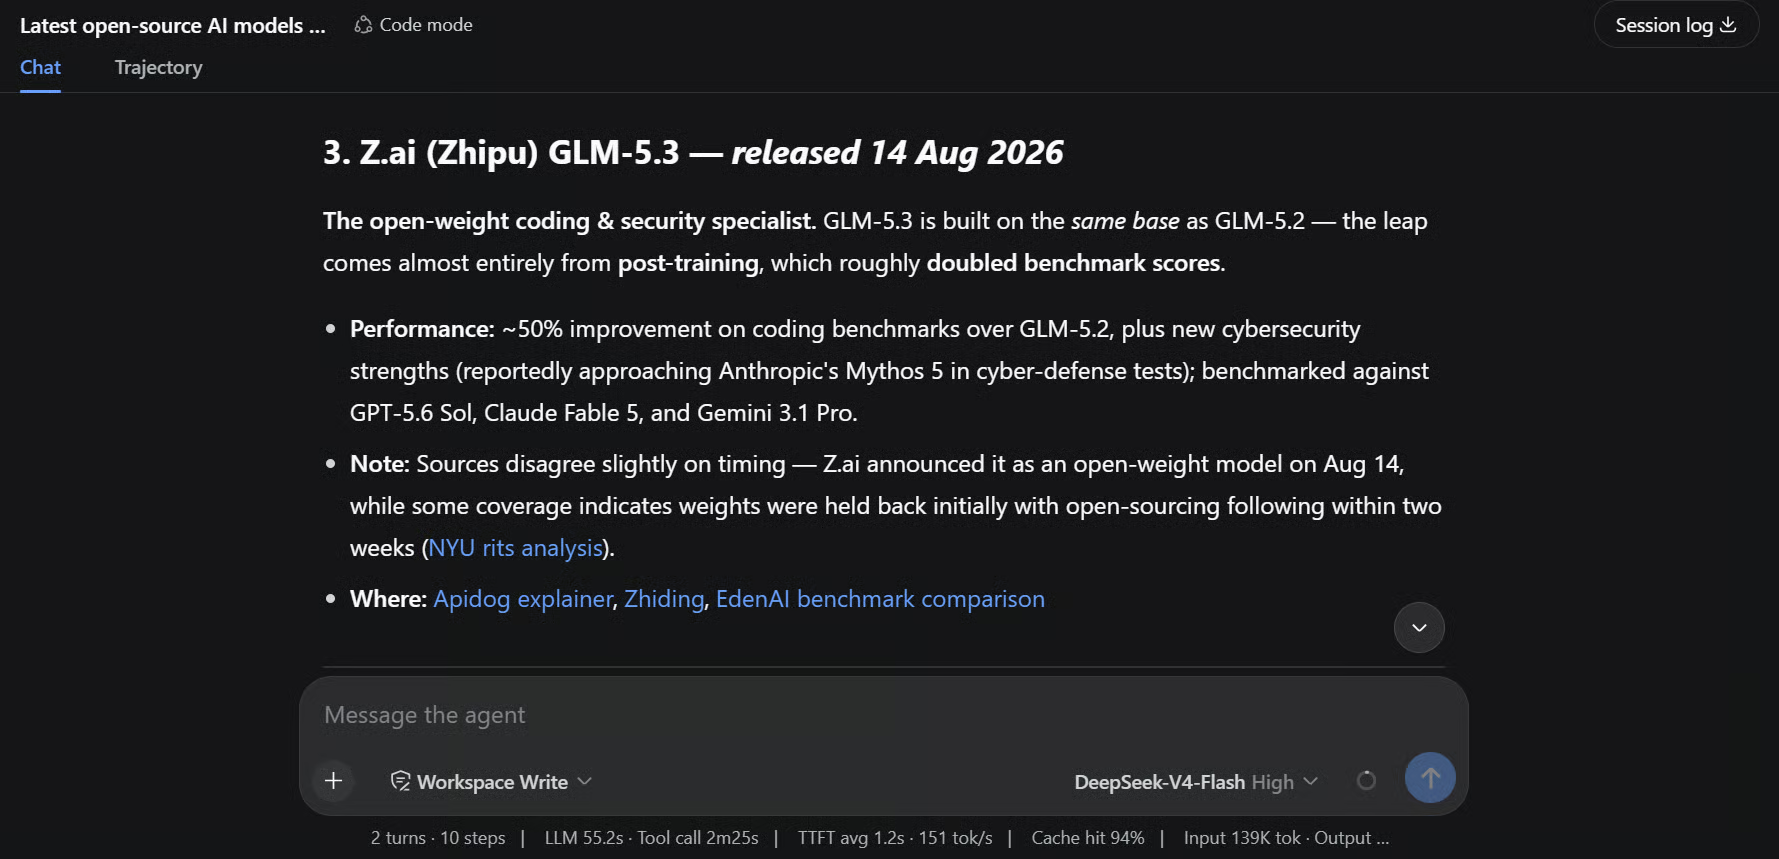
While it is working, open the Trajectory tab. You should see tool calls such as SUBTOOL: web_search.
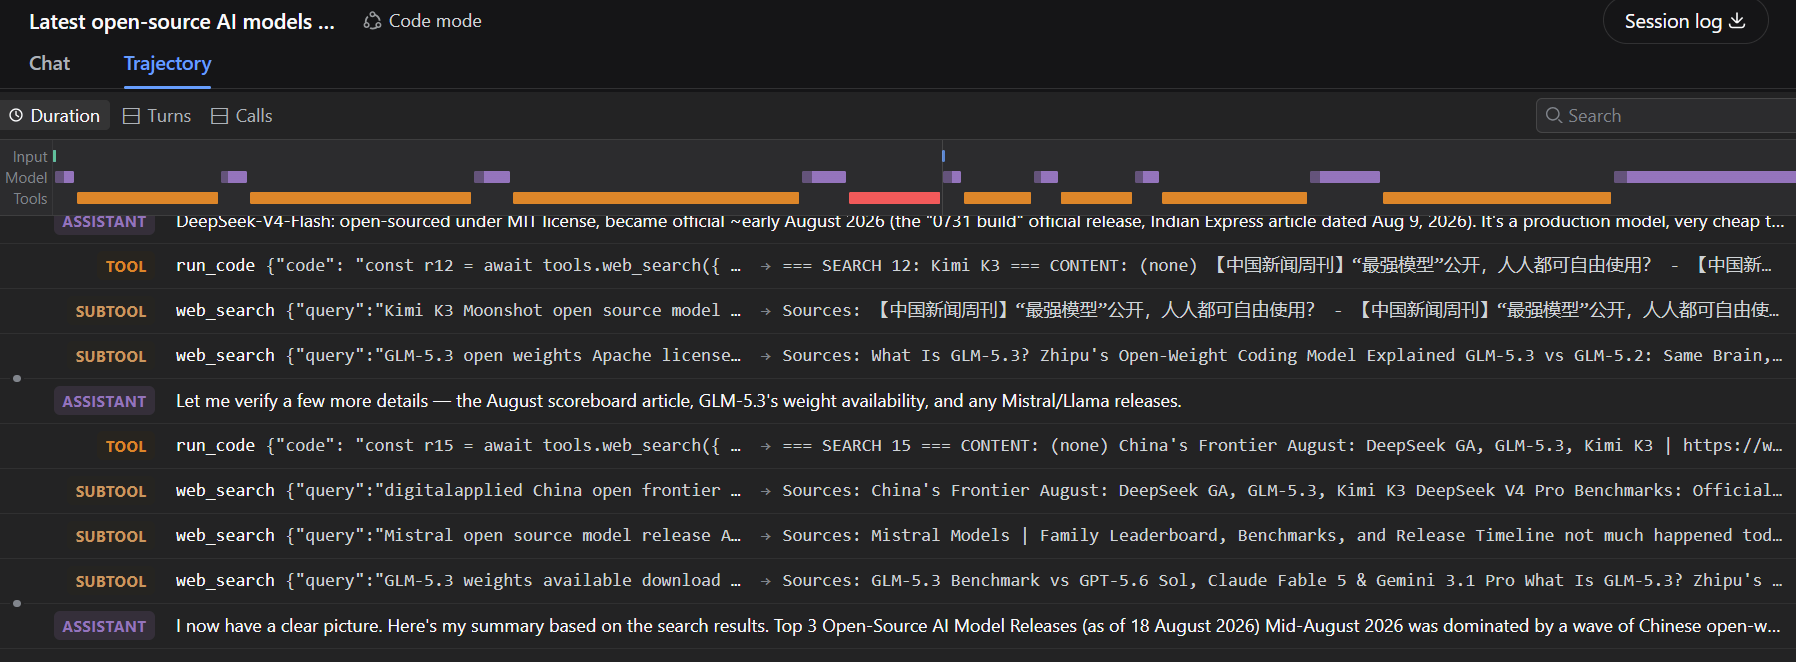
This shows that the agent is actually using the web search tool instead of relying only on the model's existing knowledge. By default, this search is handled by the deepseek-official provider and uses the same DEEPSEEK_API_KEY that we configured earlier.
DeepSeek's chat model in Harness is text-only, so it cannot understand uploaded images on its own. To add vision support, we will use ModLens, which acts as a bridge between DeepSeek and a vision-capable model.
When you upload an image, ModLens processes it using a vision model, extracts the useful visual information, and passes that information back to DeepSeek so it can reason about the image.
Start by installing the ModLens plugin into the web profile:
dsh plugin --profile web add @liustack/modlens@3.20.0Once installed, ModLens adds the modlens_read_image tool and creates model options such as ``DeepSeek-V4-Flash (modlens vision)`.
These model variants let you upload images while still using DeepSeek as the main reasoning model.
For this guide, we will use the Gemini API as the vision backend, so we need a Gemini API key. You can start with the Gemini API Free Tier. Google provides free access to supported Gemini models within the Free Tier rate limits, so you do not need to add payment details just to test the vision setup in this guide.
Once you have your key, add it to your environment.
On Linux or macOS:
export GEMINI_API_KEY="your_gemini_api_key"On Windows PowerShell:
$env:GEMINI_API_KEY="your_gemini_api_key"Next, install the ModLens CLI:
npm install -g @liustack/modlensThen configure it using the Gemini API key.
On Linux or macOS:
modlens config set gemini-api.apiKey "$GEMINI_API_KEY"
modlens config set provider gemini-api
On Windows PowerShell:
modlens config set gemini-api.apiKey "$env:GEMINI_API_KEY"
modlens config set provider gemini-api
Finally, check that everything is working:
modlens doctorYou should see gemini-api selected as the provider and reported as ready.
Now let us test image understanding.
From the model picker, select one of the models with (modlens vision) in its name, for example, DeepSeek-V4-Flash (modlens vision).
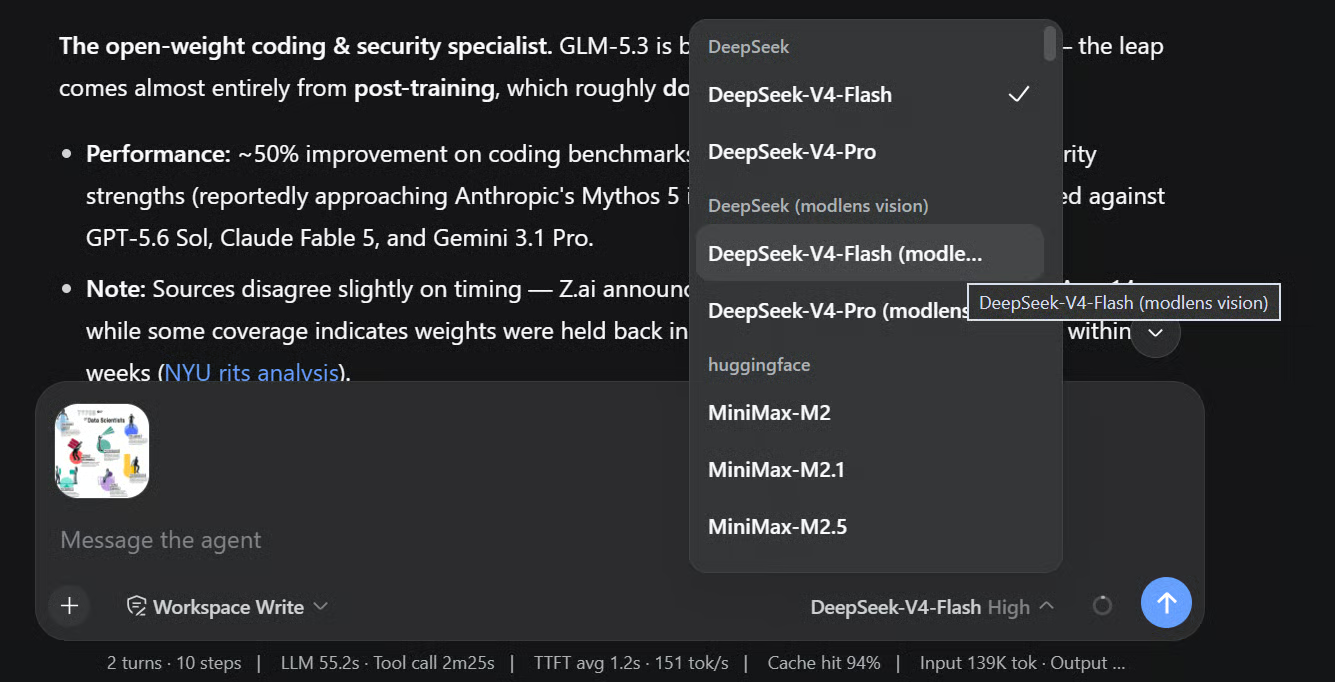
Paste or upload an image, then ask: Explain what is shown in this image.
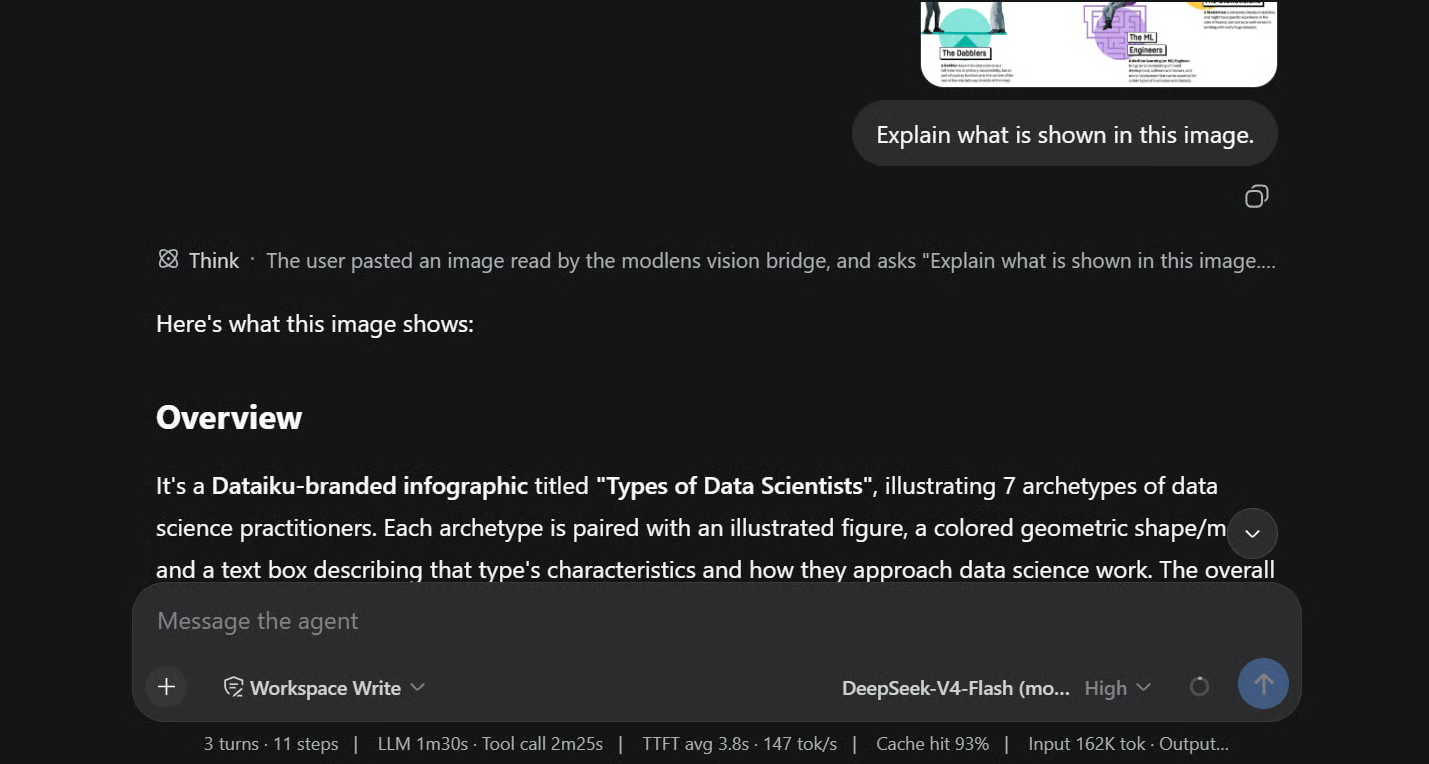
As shown in the example above, DeepSeek can now describe and reason about the uploaded image.
Behind the scenes, ModLens sends the image to Gemini for visual understanding and passes the extracted information back to DeepSeek. This means we can keep DeepSeek as the main reasoning model while using Gemini only for the vision part.
Finally, let us try a model from another provider. Open Settings → Models.
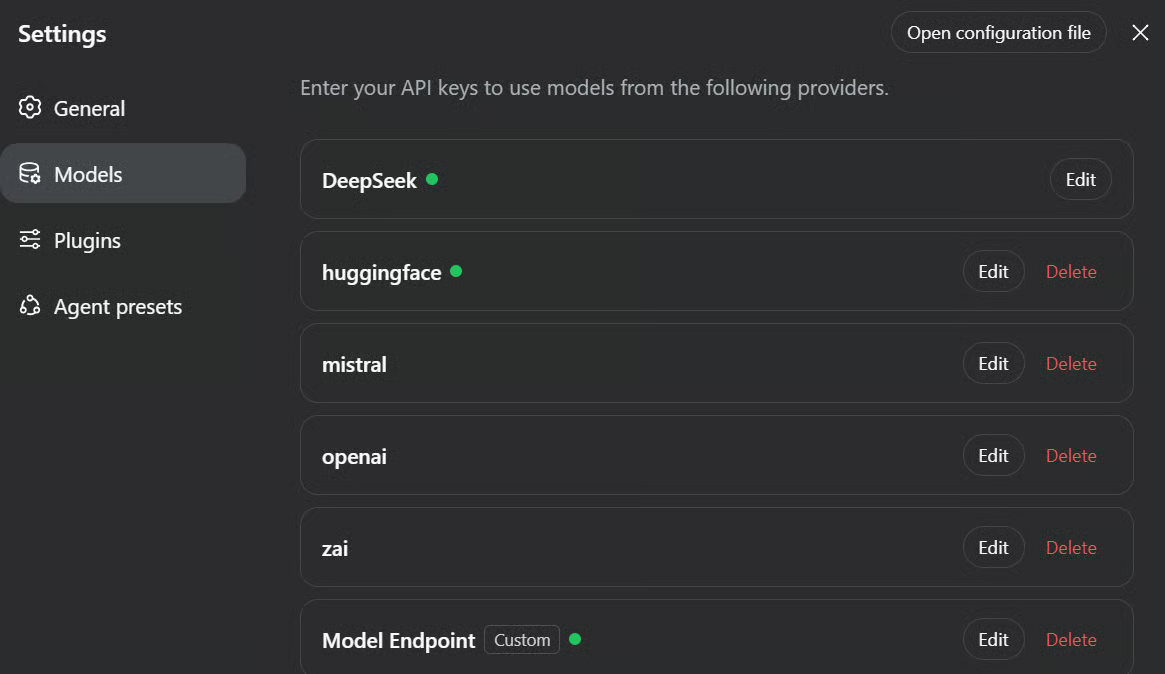
From here, you can add providers such as OpenAI and Anthropic, or configure another supported model provider using your own API credentials.
You can also add a custom provider if you want to connect a self-hosted model or another compatible endpoint. This lets you configure details such as the provider ID, base URL, API type, credentials, and model name.
Once the provider is added, return to your session and select the new model from the model picker.
For example, try the following prompt:
Create a Python command-line to-do app that lets users add, list, complete, and delete tasks, with tasks saved locally in a JSON file.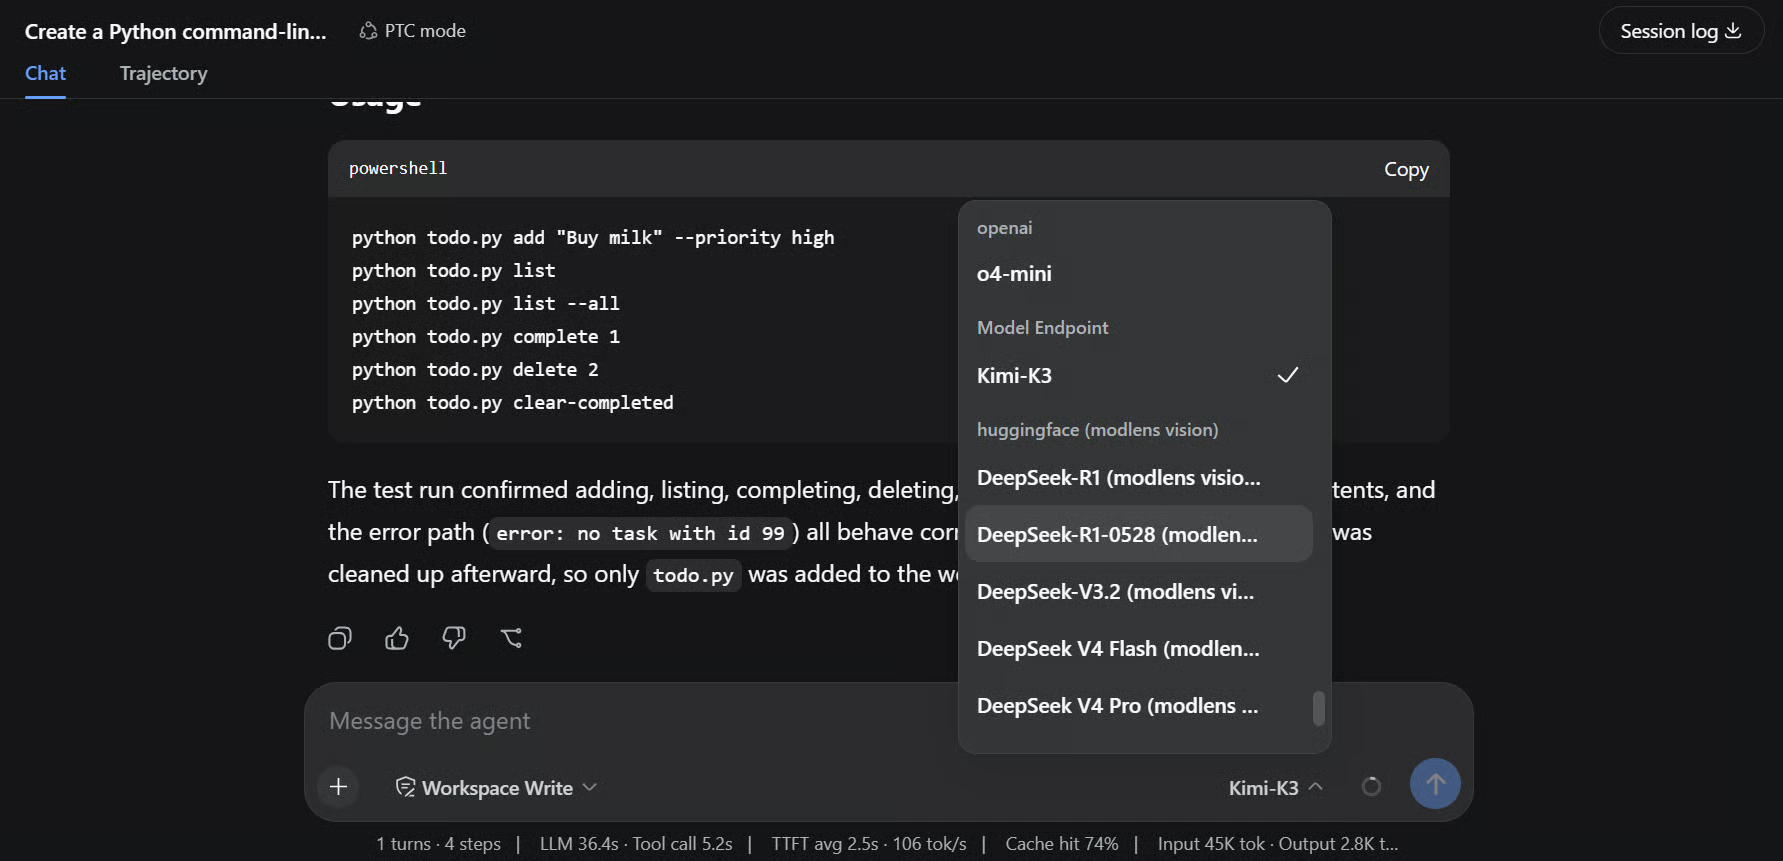
The example above uses a third-party Kimi-K3 model to complete the coding task, showing that DeepSeek Harness is not limited to DeepSeek models.
You can switch between configured models directly from the model picker, and the changes apply to your next request without restarting the Harness server.
After testing DeepSeek Harness, I still prefer Pi Coding Agent and OpenCode for my own workflows.
DeepSeek Harness reminds me a lot of Pi Coding Agent because both are built around a plugin-based ecosystem. You can install different extensions and give your coding agent extra capabilities depending on what you need. That flexibility is useful, but in my testing, I still do not really understand the hype around DeepSeek Harness. The overall experience felt fairly normal compared with other coding agents I have already used.
I also ran into a few frustrating issues. Sometimes the agent would stop in the middle of a task without telling me why, and I had to type continue to get it moving again. Installing and configuring plugins was another pain point. It can be quite difficult unless you already know exactly what you are doing, and the documentation does not help much right now.
That said, DeepSeek Harness is still a very new product, so these issues are understandable. I expect the experience, documentation, and plugin ecosystem to improve quite a lot over time. It is also possible that DeepSeek is building a harness that works especially well with its own models, and that could be part of the reason behind the excitement.
Learn All About AI Agents with DataCamp!
Course
Track
Course
blog
Khalid Abdelaty
13 min
blog
Khalid Abdelaty
12 min
Tutorial
Aashi Dutt
11 min
Tutorial
Aashi Dutt
8 min
Tutorial
Bexruz (Bex) Tuychiev
12 min
Tutorial
Dr Ana Rojo-Echeburúa
12 min