Course
Docker lets you create consistent, portable, and isolated environments, making it essential for LLMOps (Large Language Models Operations). By encapsulating various LLM applications and their dependencies in containers, Docker simplifies deployment, ensures cross-system compatibility, and streamlines testing.
In this tutorial, you will learn how to build a “document Q&A” chatbot application and deploy it to the cloud using Docker. We will use Gradio for the user interface, LlamaIndex for orchestration, LlamaParse for parsing documents, Mixedbread AI for embeddings, Groq for accessing large language models, Docker for packaging the application and its dependencies, and Hugging Face Spaces for deploying the application to the cloud.
This tutorial is designed to be straightforward, allowing anyone with limited knowledge of how AI applications work to build it for free.
Build MLOps Skills Today
Project Description
There are two main approaches to developing and deploying AI applications:
- Fully open source: This approach emphasizes privacy and data protection.
- Fully closed source: This method involves integrating multiple APIs and cloud services.
Both approaches have advantages and disadvantages. In our case, we have chosen the second approach, integrating multiple AI services. This allows us to build a fast AI application that takes only a few seconds to build and deploy. Our main focus is to reduce the Docker image size, which can be effectively achieved by integrating multiple AI services.
Check out the Local AI with Docker, n8n, Qdrant, and Ollama tutorial to build an LLM application using open-source tools and frameworks for enhanced privacy!
We will build a general-purpose Q&A chatbot that allows users to upload documents and chat with them in real time. It is quite similar to Google’s NotebookLM.
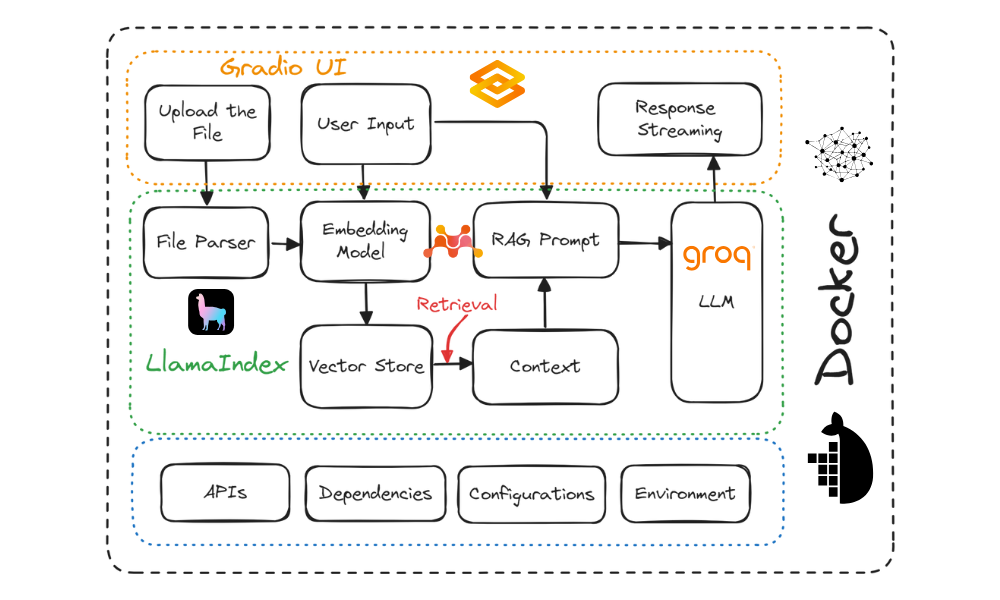
Project diagram. Image by Author
Here are the tools that we will be using in this project:
- Gradio Blocks: For creating a user interface that allows users to upload any text document and chat with the document easily.
- LlamaCloud: This is for parsing files and extracting text data in markdown style.
- MixedBread AI: This is used to convert loaded documents and chat messages into embeddings for context retrieval.
- Groq Cloud: This is for accessing fast LLM responses. In this project, we will be using the llama-3.1-70b model.
- LlamaIndex: To create the RAG (Retrieval Augmented Generation) pipeline that orchestrates all of the AI services. The pipeline will use the uploaded file and user messages to generate context-aware answers.
- Docker: This is used to encapsulate the app, dependencies, environment, and configurations.
- Hugging Face Cloud: We will push all the files to the Spaces repository, and Hugging Face will automatically build the image using the Dockerfile and deploy it to the server.
If you are new to LLMs, consider taking the Master Large Language Models (LLMs) Concepts course to learn the basic terminologies, methodologies, ethical considerations, and latest research.
1. Setting Up the Environment
Before building the LLM app, we need to download and install Docker from the official website.
- Install Docker on your local system using the default options.
- Next, create a project directory using your favorite IDE and add a
.envfile. We will use this file to store the API keys for LlamaCloud, MixedBread AI, and Groq Cloud. - After that, sign up for LlamaCloud and generate your API key. We will use LlamaCloud to parse various text formats, including Excel, txt, Word, and PDFs.
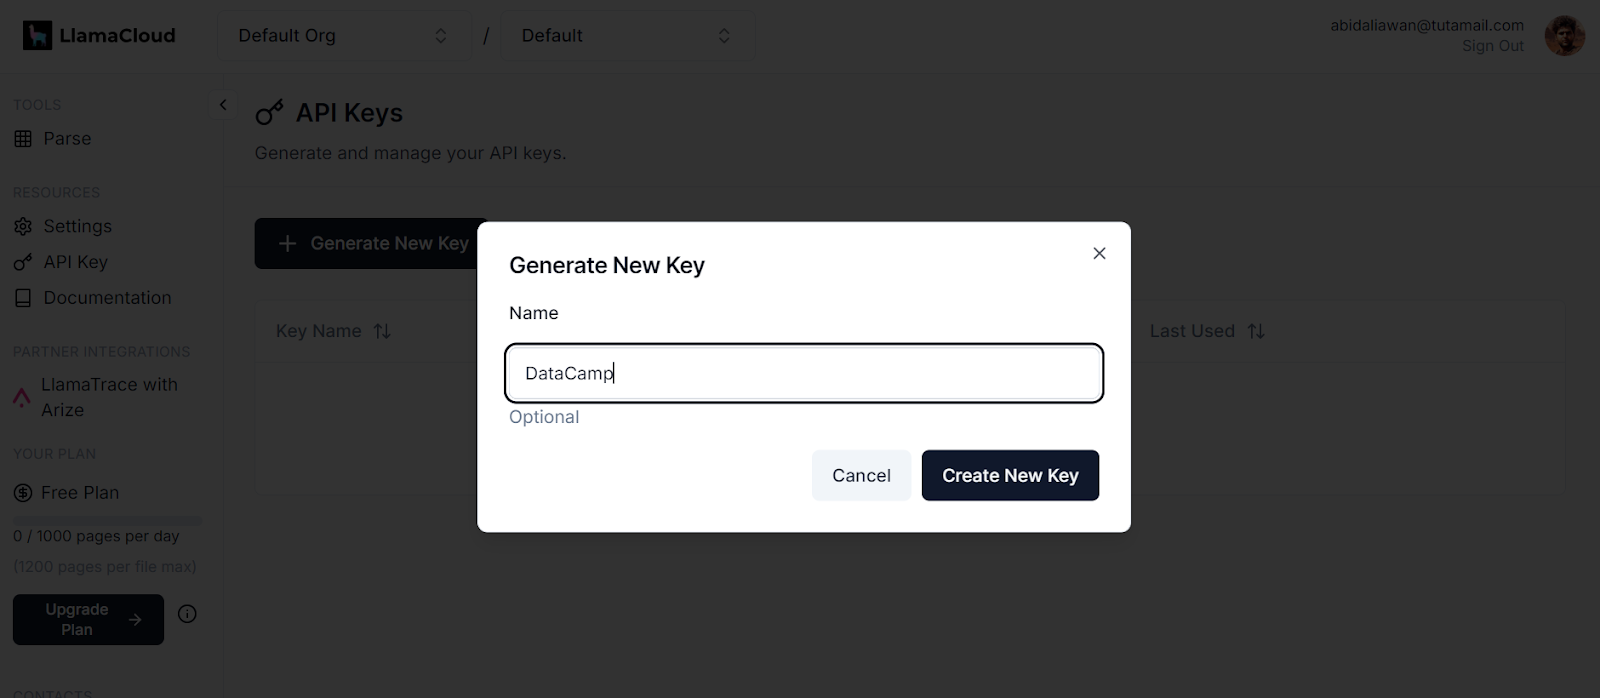
Generating a new key in LlamaCloud. Image source: LlamaCloud
- Next, sign up for MixedBread AI and generate your API key. We will use this key to access their top-of-the-line embedding model for free.
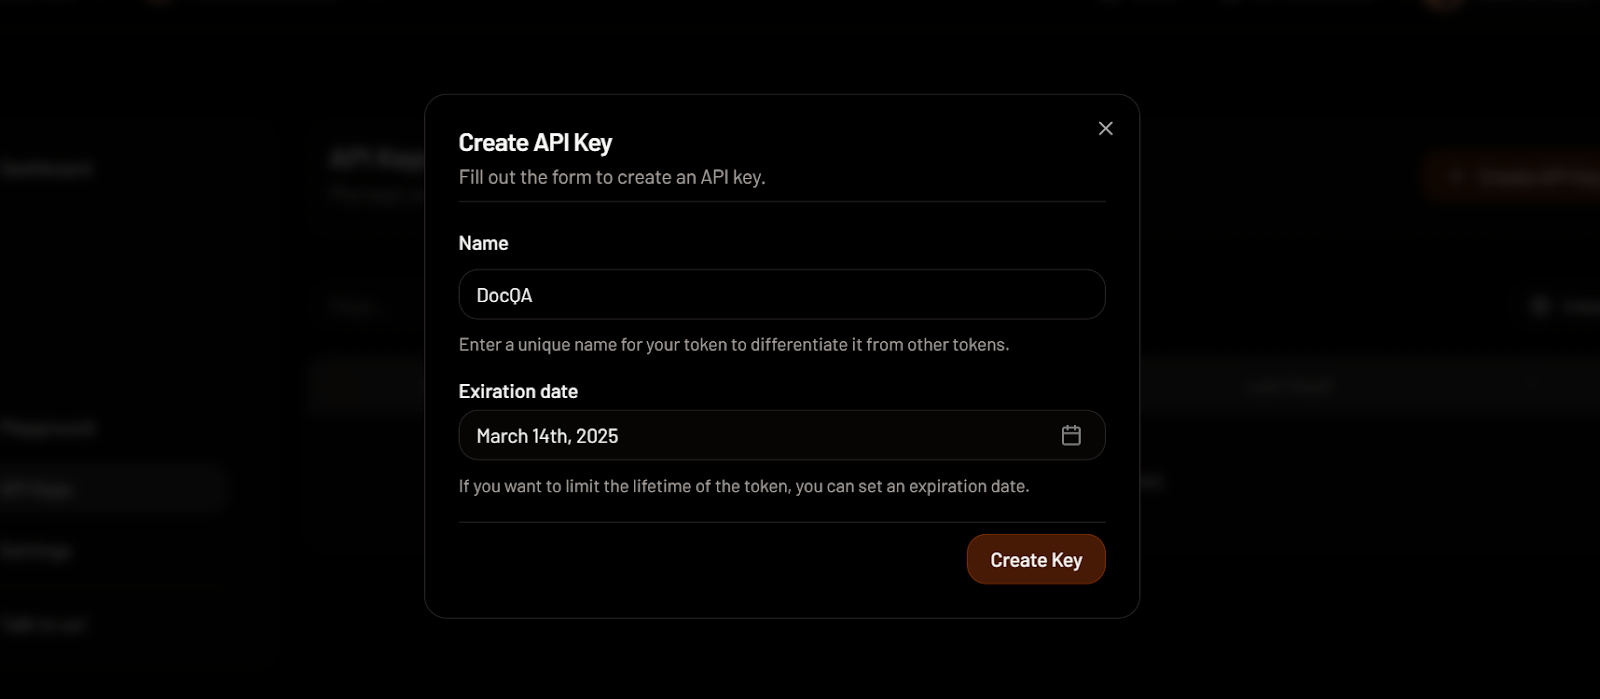
Creating an API key in MixedBread. Image source: MixedBread
- Go to GroqCloud and sign up to generate your API key at no cost. We will use GroqCloud to access high-speed LLMs.
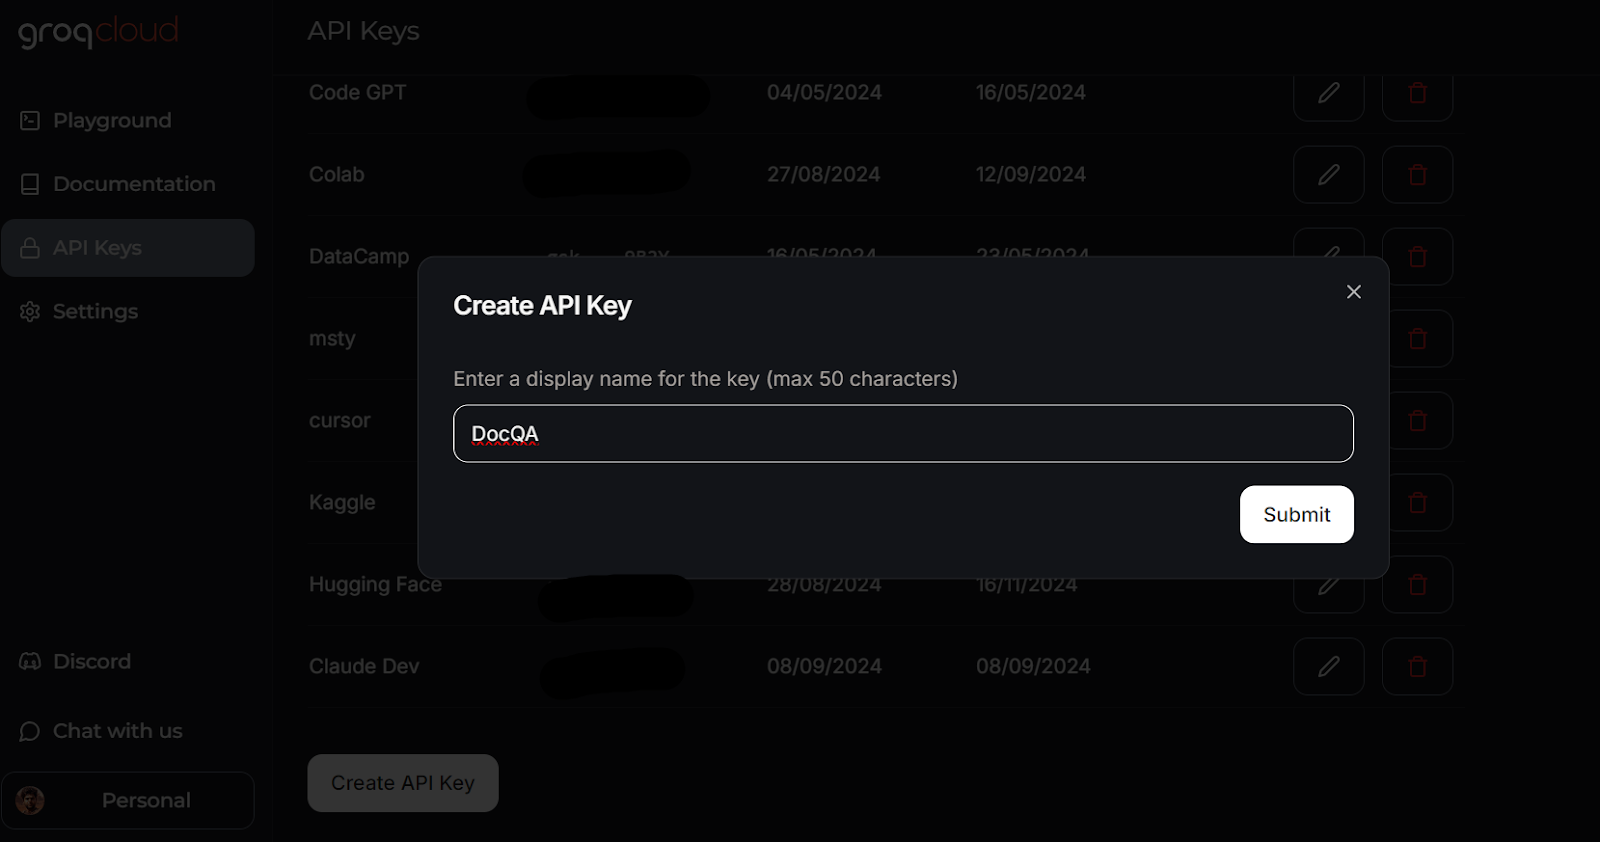
Creating an API key in GroqCloud. Image source: GroqCloud
Learn everything about GroqCloud by reading the article on Groq LPU Inference Engine. You will learn about the Groq API and its features with code examples. Additionally, learn how to build context-aware AI applications using the Groq API and LlamaIndex.
This is how your .env file should look like:
LLAMA_CLOUD_API_KEY=llx-XXXXXX
GROQ_API_KEY=gsk_XXXXXXX
MXBAI_API_KEY=emb_XXXXXX
Remember to add the .env file to your .gitignore file to avoid accidentally exposing your API keys to the public.
2. Building the LLM Application
We will now create a Python script called app.py and add the user interface components while integrating all the AI services using LlamaParser to develop the Retrieval-Augmented Generation (RAG) pipeline with LlamaIndex.
The app.py script will do the following:
- Load all necessary Python packages.
- Securely load all API keys from the
.envfile. - Initialize the LlamaParser using the LlamaCloud API key.
- Define a file extractor that handles various common file extensions.
- Initialize the embedding model using the MixedBread AI API key, specifically the model named
mixedbread-ai/mxbai-embed-large-v1. - Initialize the large language model using the Groq Cloud API key and the model named
llama-3.1-70b-versatile.
Next, it will implement the following Python functions:
load_files(): This function will load the files, parse them using LlamaParser, convert them into embeddings, and store them in the vector store. Exception handling will be included to manage cases where non-files or unsupported file formats are uploaded.respond(): This function will take user input, retrieve content from the vector store, and use it to generate a response utilizing the Groq model. The response generation will be in streaming format, and exception handling will be included if no files have been uploaded.
Finally, it will build the UI components, including a file uploader, buttons, a chat box, and the overall chat interface.
Learn more about the LlamaIndex framework by following the more straightforward LlamaIndex tutorial.
Here’s the app.py script:
import os

import gradio as gr
from llama_index.core import SimpleDirectoryReader, VectorStoreIndex
from llama_index.embeddings.mixedbreadai import MixedbreadAIEmbedding
from llama_index.llms.groq import Groq
from llama_parse import LlamaParse

# API keys
llama_cloud_key = os.environ.get("LLAMA_CLOUD_API_KEY")
groq_key = os.environ.get("GROQ_API_KEY")
mxbai_key = os.environ.get("MXBAI_API_KEY")
if not (llama_cloud_key and groq_key and mxbai_key):
    raise ValueError(
        "API Keys not found! Ensure they are passed to the Docker container."
    )

# models name
llm_model_name = "llama-3.1-70b-versatile"
embed_model_name = "mixedbread-ai/mxbai-embed-large-v1"

# Initialize the parser
parser = LlamaParse(api_key=llama_cloud_key, result_type="markdown")

# Define file extractor with various common extensions
file_extractor = {
    ".pdf": parser,
    ".docx": parser,
    ".doc": parser,
    ".txt": parser,
    ".csv": parser,
    ".xlsx": parser,
    ".pptx": parser,
    ".html": parser,
    ".jpg": parser,
    ".jpeg": parser,
    ".png": parser,
    ".webp": parser,
    ".svg": parser,
}

# Initialize the embedding model
embed_model = MixedbreadAIEmbedding(api_key=mxbai_key, model_name=embed_model_name)

# Initialize the LLM
llm = Groq(model="llama-3.1-70b-versatile", api_key=groq_key)


# File processing function
def load_files(file_path: str):
    global vector_index
    if not file_path:
        return "No file path provided. Please upload a file."

    valid_extensions = ', '.join(file_extractor.keys())
    if not any(file_path.endswith(ext) for ext in file_extractor):
        return f"The parser can only parse the following file types: {valid_extensions}"

    document = SimpleDirectoryReader(input_files=[file_path], file_extractor=file_extractor).load_data()
    vector_index = VectorStoreIndex.from_documents(document, embed_model=embed_model)
    print(f"Parsing completed for: {file_path}")
    filename = os.path.basename(file_path)
    return f"Ready to provide responses based on: {filename}"


# Respond function
def respond(message, history):
    try:
        # Use the preloaded LLM
        query_engine = vector_index.as_query_engine(streaming=True, llm=llm)
        streaming_response = query_engine.query(message)
        partial_text = ""
        for new_text in streaming_response.response_gen:
            partial_text += new_text
            # Yield an empty string to cleanup the message textbox and the updated conversation history
            yield partial_text
    except (AttributeError, NameError):
        print("An error occurred while processing your request.")
        yield "Please upload the file to begin chat."


# Clear function
def clear_state():
    global vector_index
    vector_index = None
    return [None, None, None]


# UI Setup
with gr.Blocks(
    theme=gr.themes.Default(
        primary_hue="green",
        secondary_hue="blue",
        font=[gr.themes.GoogleFont("Poppins")],
    ),
    css="footer {visibility: hidden}",
) as demo:
    gr.Markdown("# DataCamp Doc Q&A 🤖📃")
    with gr.Row():
        with gr.Column(scale=1):
            file_input = gr.File(
                file_count="single", type="filepath", label="Upload Document"
            )
            with gr.Row():
                btn = gr.Button("Submit", variant="primary")
                clear = gr.Button("Clear")
            output = gr.Textbox(label="Status")
        with gr.Column(scale=3):
            chatbot = gr.ChatInterface(
                fn=respond,
                chatbot=gr.Chatbot(height=300),
                theme="soft",
                show_progress="full",
                textbox=gr.Textbox(
                    placeholder="Ask questions about the uploaded document!",
                    container=False,
                ),
            )

    # Set up Gradio interactions
    btn.click(fn=load_files, inputs=file_input, outputs=output)
    clear.click(
        fn=clear_state,  # Use the clear_state function
        outputs=[file_input, output],
    )

# Launch the demo
if __name__ == "__main__":
demo.launch()- Run the above Python file to start the Gradio server using the following command in your terminal:
$ python app.py Output:

- You can access the Grodio UI by copying and pasting the generated URL into the browser. Then, you can upload a file and start asking questions about it.
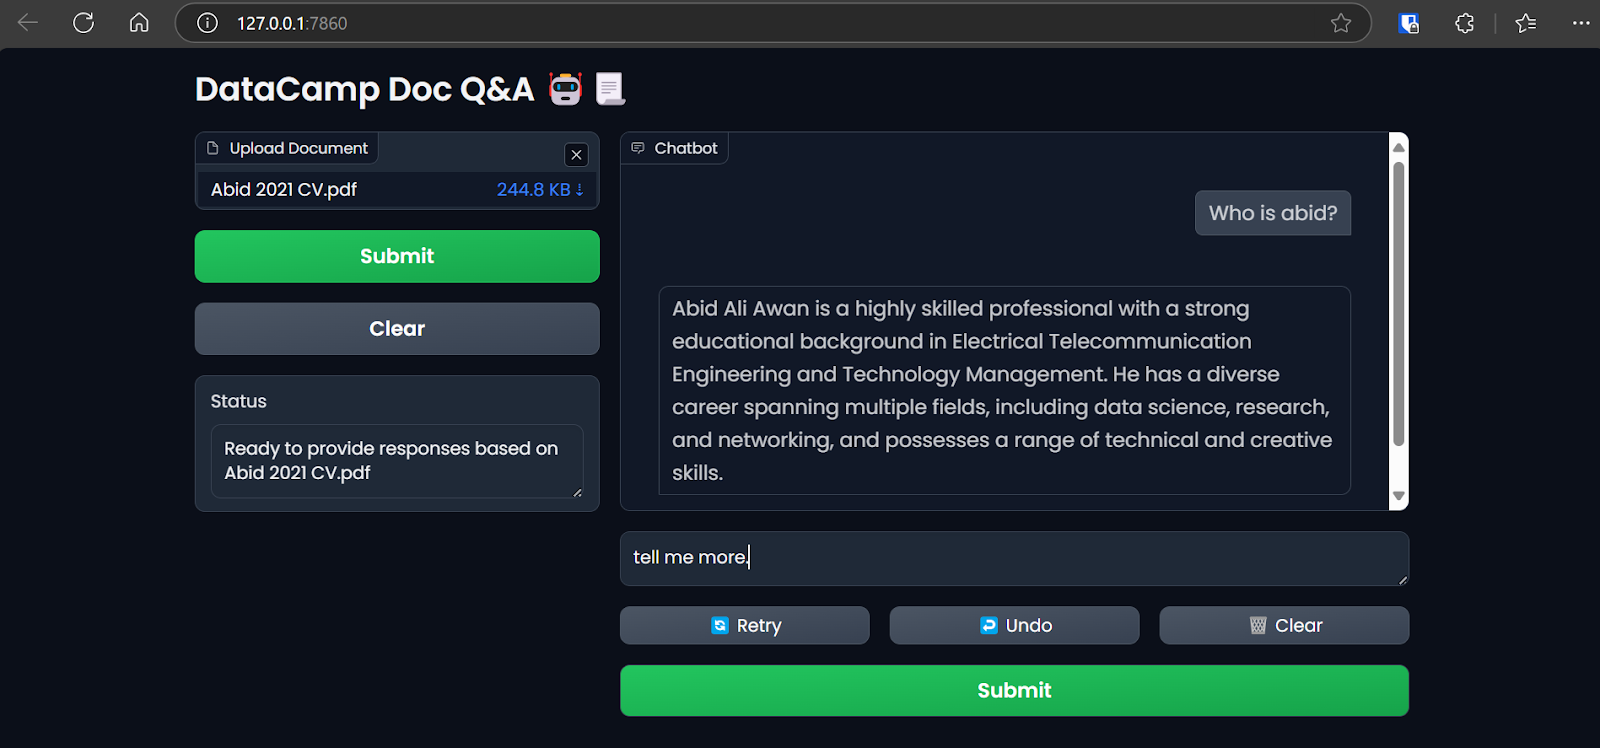
Accessing the Gradio app on the browser. Image by Author
We use LlamaIndex to deploy and build our LLM application for this tutorial. You can build a similar application with LangChain by taking the Developing LLM Applications with LangChain short course.
3. Creating the Dockerfile
- In your project, create a
Dockerfileto package the application script, Python dependencies, and server configurations while initializing the Gradio server.
The Dockerfile will perform the following tasks:
- Set up a Python 3.9 environment.
- Define the working directory.
- Copy the
requirements.txtfile to the/appdirectory. This file contains the names of all the required Python packages. - Install all the dependencies specified in the
requirements.txtfile. - Copy the
app.pyfile to the/appdirectory. - Expose the port and set the Gradio server URL.
- Run the application file to start the server.
Here’s how the Dockerfile should look:
# Dockerfile

# Use the official Python image with the desired version
FROM python:3.9-slim

# Set the working directory inside the container
WORKDIR /app

# Copy the requirements file to the working directory
COPY requirements.txt /app

# Install the dependencies
RUN pip install --no-cache-dir -r requirements.txt

# Copy the rest of the application code to the working directory
COPY app.py /app

# Expose the port that Gradio will run on (default is 7860)
EXPOSE 7860

ENV GRADIO_SERVER_NAME="0.0.0.0"

# Command to run your application
CMD ["python", "app.py"]- And this is how the
requirements.txtfile looks like. Add it to your project as well:
gradio
llama-index-embeddings-mixedbreadai
llama-index-llms-groq
llama-index
4. Building the Docker Image and Running the Container
- Type the following command in the terminal to build the
docqadocker image. It will use theDockerfileto create the Docker image.
$ docker build -t docqa . We can see the logs of the processes taking place while building the Docker image:

Building the LLM Docker image. Image by Author
- Once the image is successfully built, go to the Docker Desktop, click on the Images tab, and click on the Docker image to see the logs and various instructions for running the image.
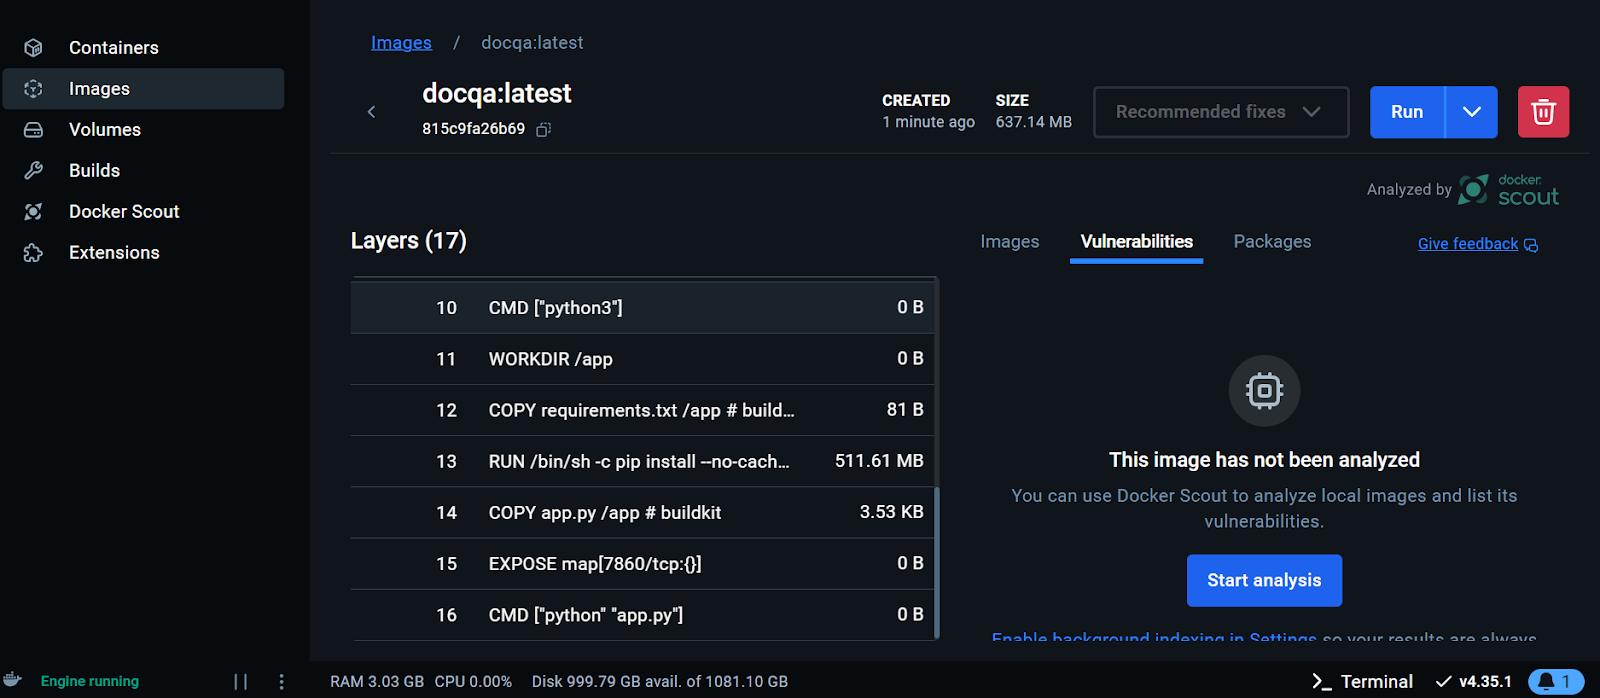
Viewing the Docker image on the Docker Desktop. Image by Author
We will now run the Docker container locally using the image. We will provide it with the port number, a .env file to set up environment variables, the Docker container name, and the Docker image tag.
- Run the following command in your terminal:
$ docker run -p 7860:7860 --env-file .env --name docqa-container docqaOnce the container starts running, you can access the Gradio app by pasting the URL, in this case, http://0.0.0.1:7860/ in the browser.
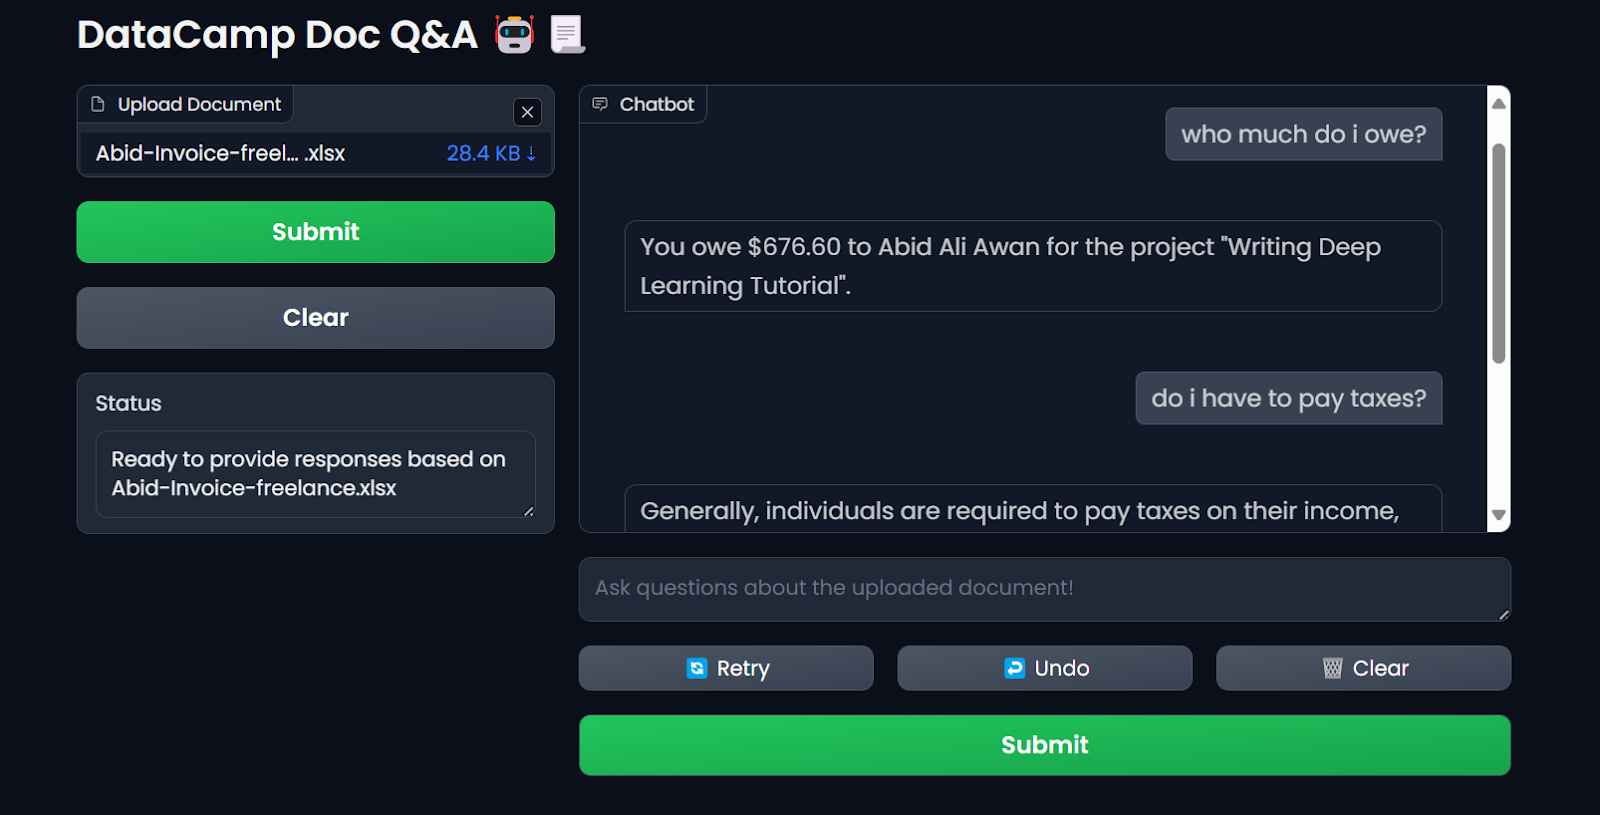
Testing the Docker container LLM application. Image by Author
- To view the information on all the containers running locally, type the following command:
$ docker psOutput:
CONTAINER ID   IMAGE     COMMAND           CREATED          STATUS          PORTS                    NAMES
ff2a11da13d7 docqa "python app.py" 17 seconds ago Up 16 seconds 0.0.0.0:7860->7860/tcp docqa-container- You can stop the Docker container using the
stopcommand:
$ docker stop docqa-container - You can also remove it using the
rmcommand:
$ docker rm docqa-container Once we have a Docker image, we can deploy our LLM application anywhere: GCP, AWS, Azure, or any cloud server that supports Docker deployment.
5. Deploying the LLM Application to Hugging Face Using Docker
To simplify things for beginners, we will deploy the app using Docker on the Hugging Face Cloud (Spaces).
- Go to the Hugging Face dashboard, click on the profile image, and select + New Space.
- Give your Space a name, add the short description, select the license and SDK, and create the Space repository.
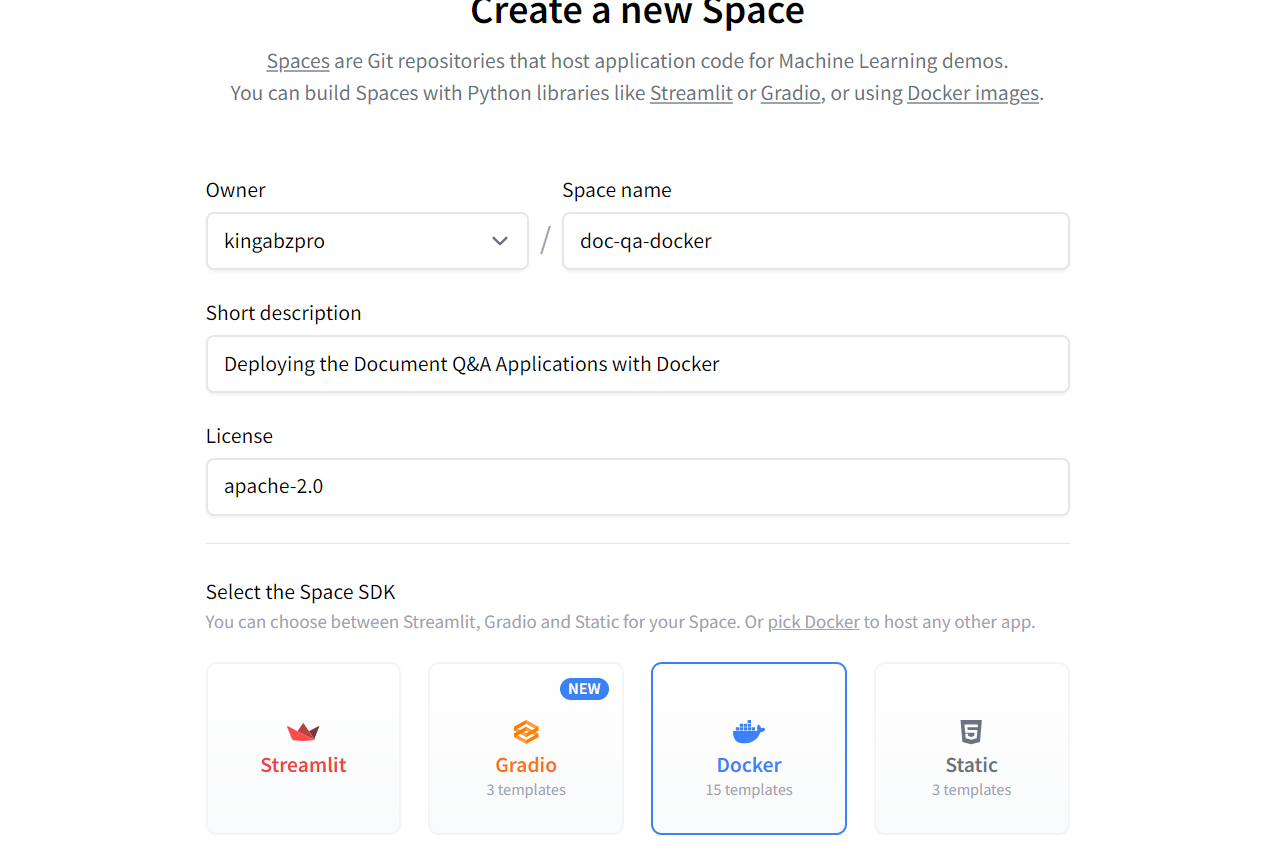
Creating the new Hugging Face Space using Docker. Image source: Hugging Face
Once the Space repository is created, you’ll receive instructions on how to clone it and add the necessary files.
- To clone the repository, use the following command (update the URL to the one pointing to your Space):
$ git clone https://huggingface.co/spaces/kingabzpro/doc-qa-docker- Copy and paste all the files from the project directory to the new repository:
This is how your project directory should look with all the files. Always ensure you do not push the .env file, so add it to the .gitignore.
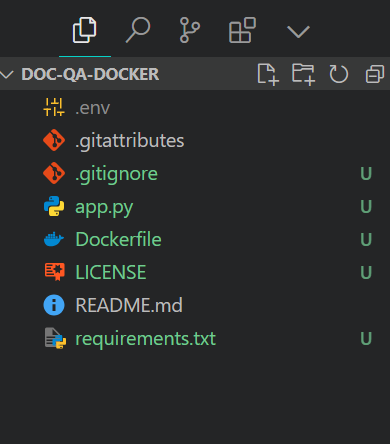
Project file structure. Image by Author
- Stage the files, commit with a message, and then push it to the Hugging Face Space:
$ git add .
$ git commit -m "Deploying the App"
$ git push
Output:
Enumerating objects: 8, done.
Counting objects: 100% (8/8), done.
Delta compression using up to 16 threads
Compressing objects: 100% (7/7), done.
Writing objects: 100% (7/7), 7.60 KiB | 7.60 MiB/s, done.
Total 7 (delta 0), reused 0 (delta 0), pack-reused 0 (from 0)
To https://huggingface.co/spaces/kingabzpro/doc-qa-docker
afb20ad..5ca6388 main -> main- Go to your Hugging Face Space to access the application. It will build the Docker image and then serve the application:
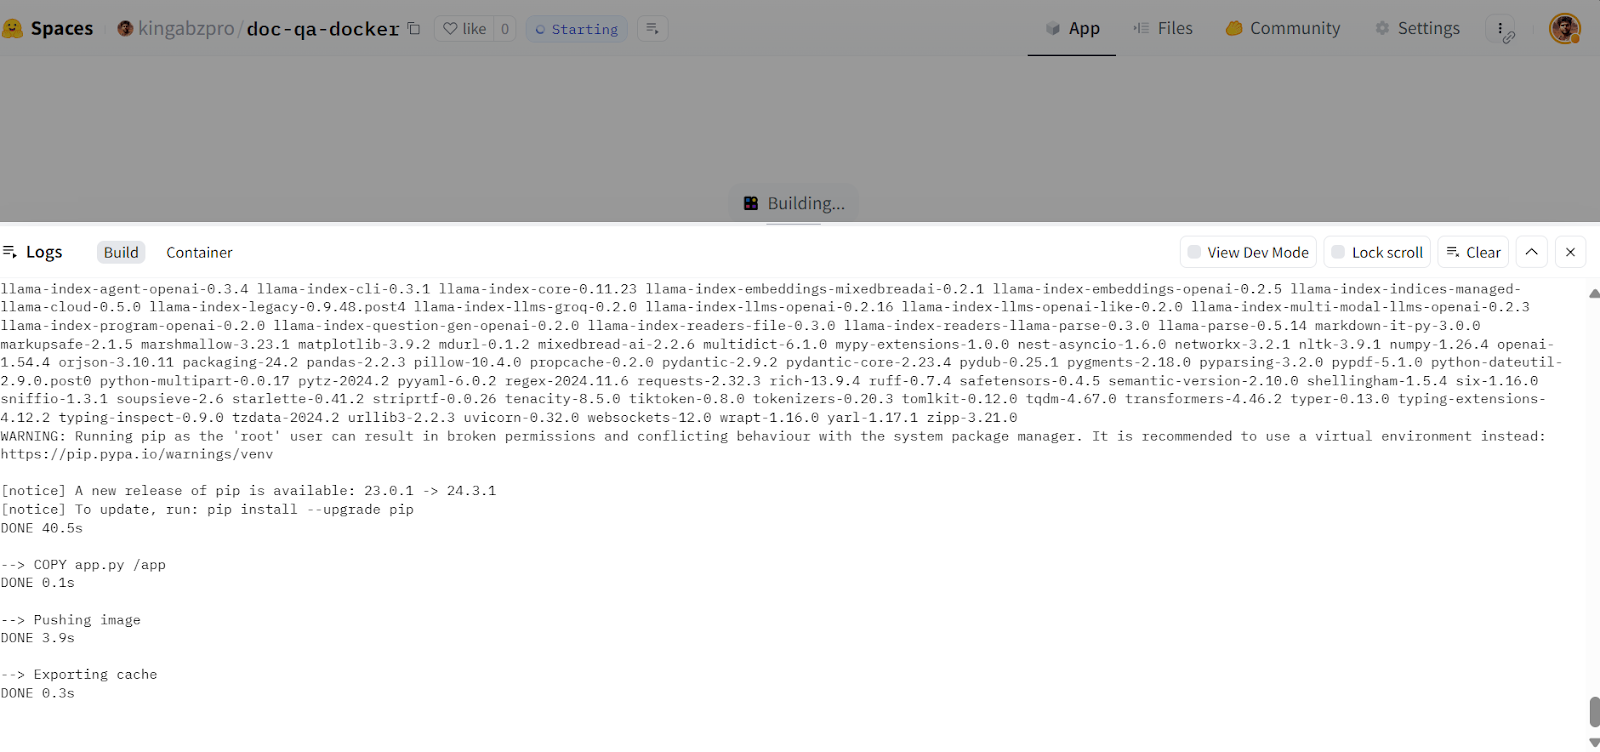
Building the Docker image in the Hugging Face Cloud. Image source: Doc Qa Docker
If you see an error like the one below, don't worry. It is due to missing environment variables. All we have to do is set up those variables in the Hugging Face Space.

Runtime error on the deployed app. Image source: Doc Qa Docker
- To add a new environment variable in your Space, go to Settings, scroll down, and click the New secret button. Then, provide the name and value for the environment value, as shown below. In this case, we are adding the necessary API keys:
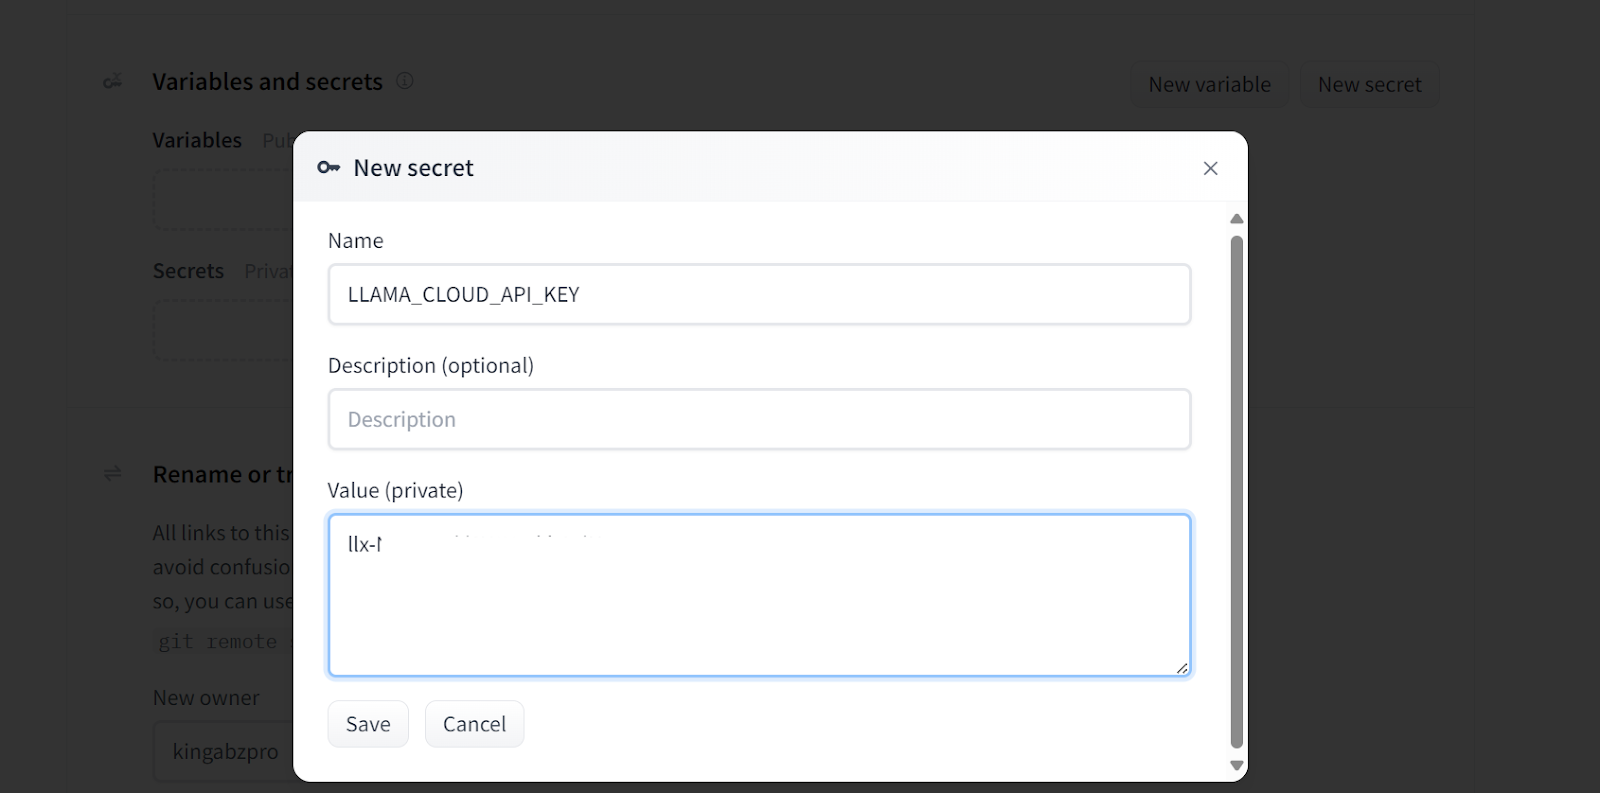
Adding secrets to the deployed app. Image source: Doc Qa Docker settings.
This is how your secrets should look after adding all the necessary API keys as environment variables:
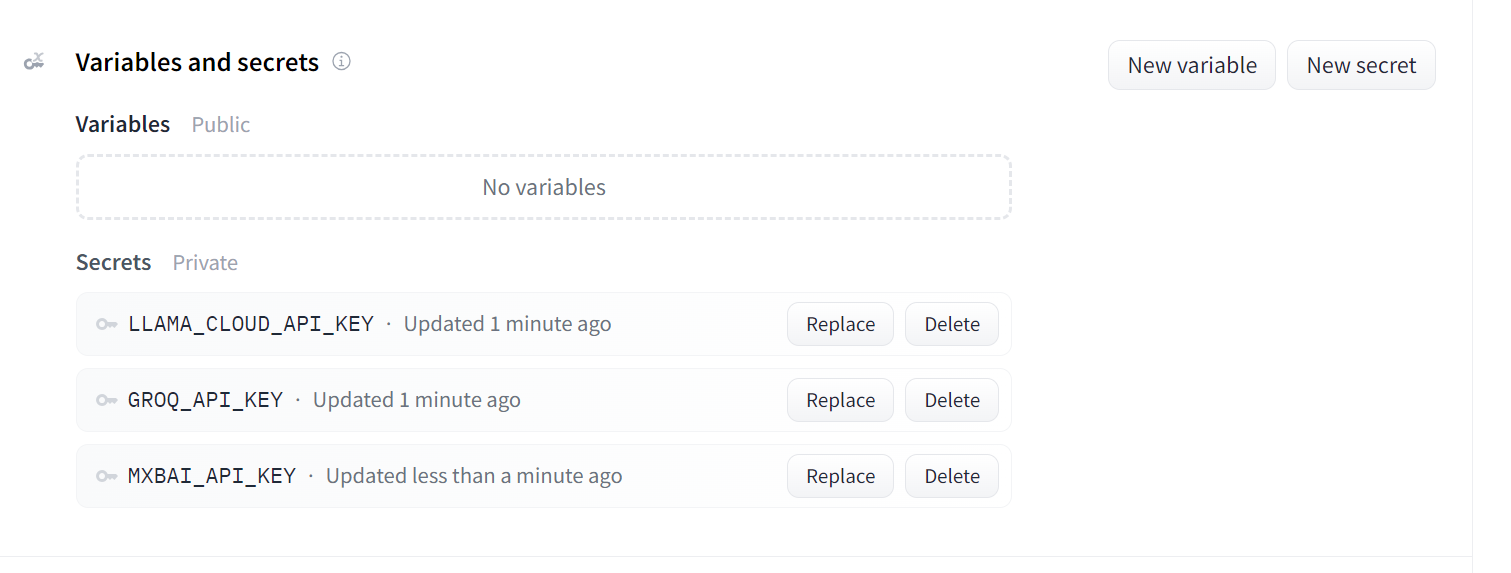
Secrets for the deployed app. Image source: Doc Qa Docker settings.
Once you have set up the secrets, the app will restart automatically, and you should see the app running. Use it and enjoy your document Q&A application on the cloud!
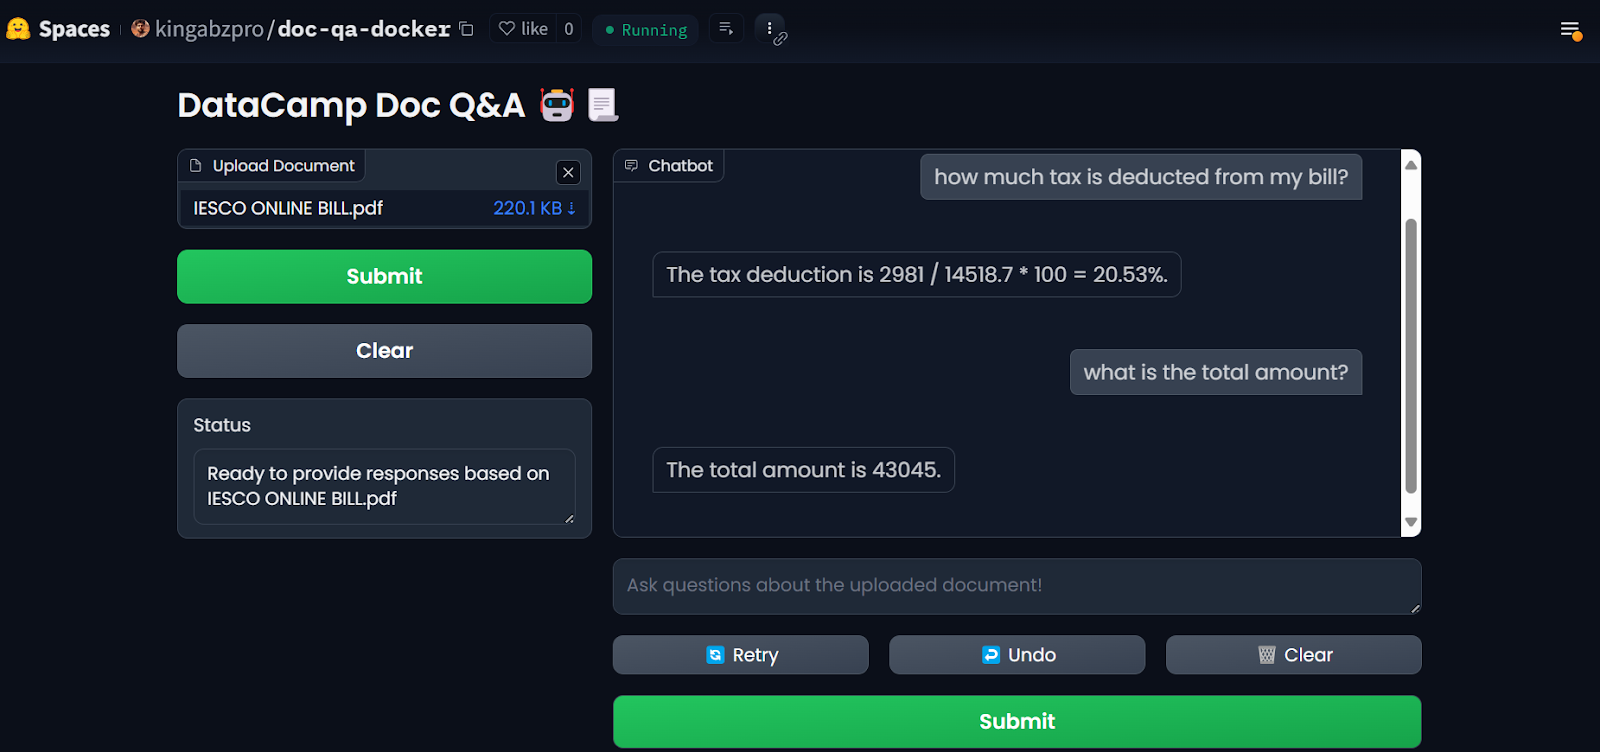
LLM app on the Hugging Face Spaces. Image source: Doc Qa Docker
To reproduce the results, all files and configurations can be found in the GitHub repository: kingabzpro/Deploy-Doc-QA.
6. Monitoring the Deployed Application
Using AI services has advantages: You don't have to deploy or manage any services, you get high throughput, and you get a dashboard with the logs.
Your LlamaCloud dashboard logs all the documents that have been parsed. You can check out the history or request and compare usage.
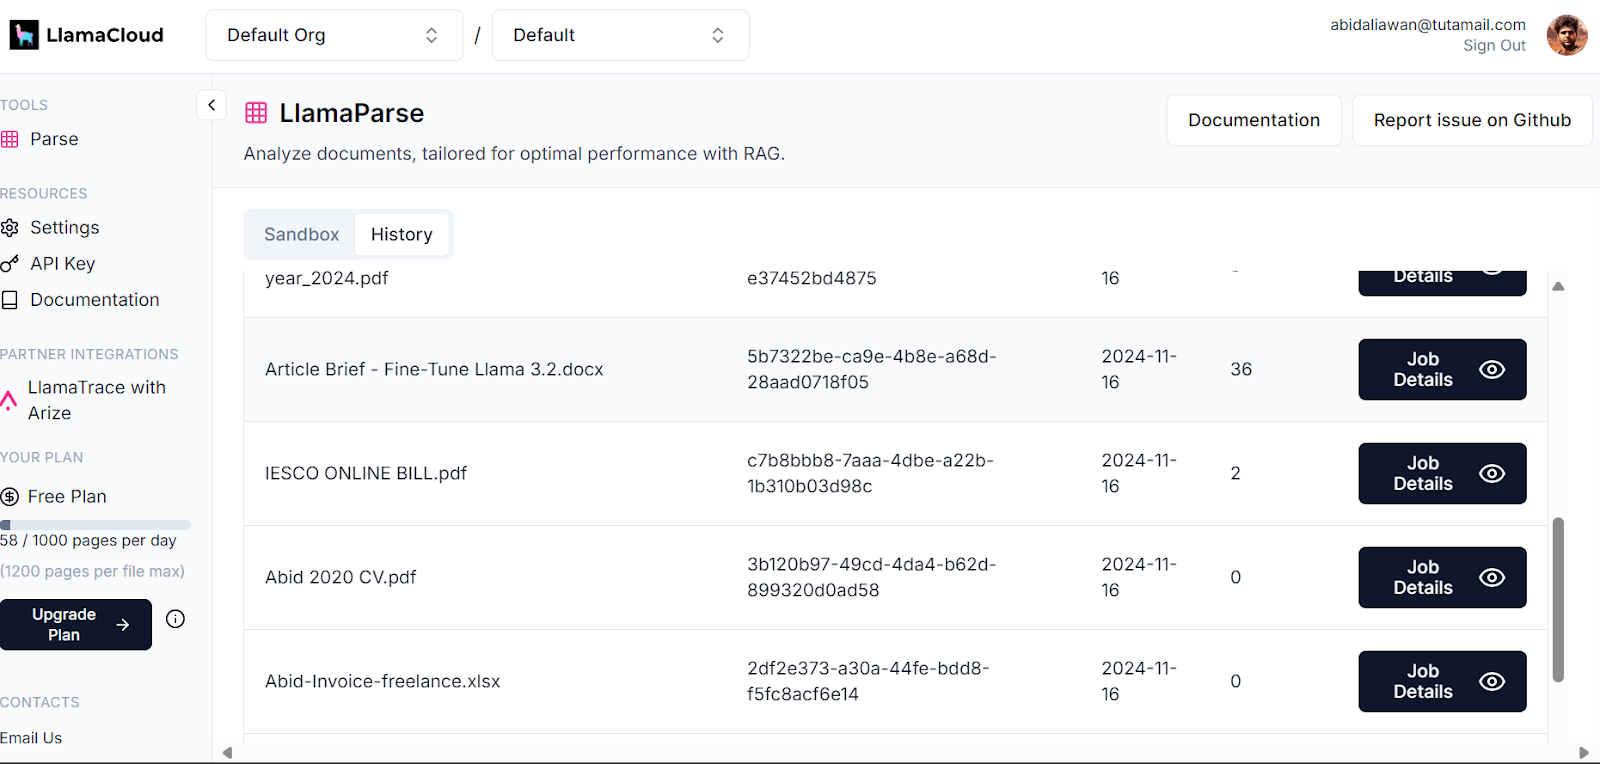
Llama Cloud dashboard. Image source: LlamaCloud
Similarly, you can also check the number of tokens we used for the embedding model and the number of requests generated.
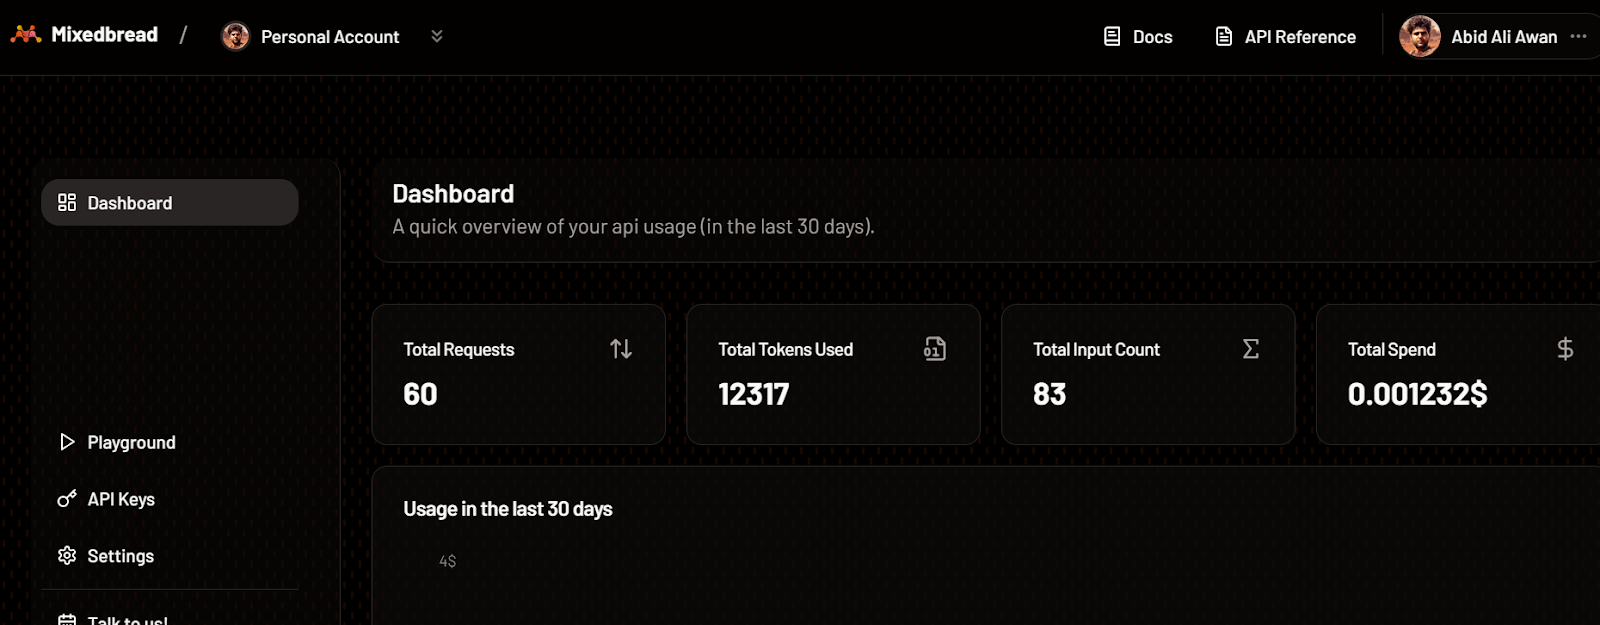
Mixedbread dashboard. Image source: Mixedbread
The most detailed logs of each API can be found on the GroqCloud, with information about the latency, the number of tokens, the AI key, and the request ID for you to debug the system.
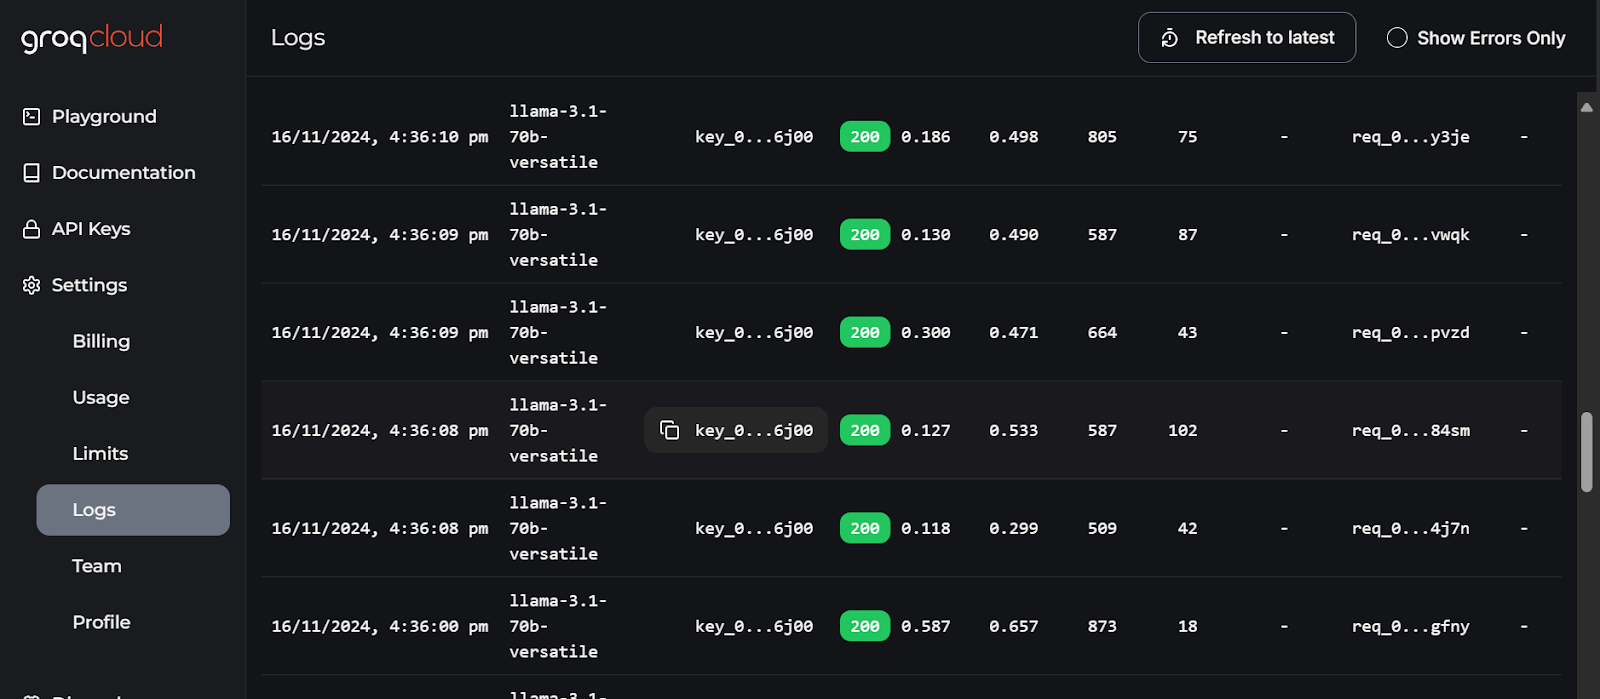
GroqCloud logs. Image source: GroqCloud
Final Thoughts
This guide taught us how to combine multiple services to build an efficient document Q&A application with minimal resource usage and computational overhead. All of the services and tools we have used are freely available for you to test and build your own application.
We have reduced our Docker image size by 600MB by using multiple out-of-the-box AI services. If we had deployed everything on our own, the image size would have been around 20GB or more.
I recommend taking the LLMOps Concepts: From Ideation to Deployment course as the next step in your learning journey. This course will help you gain insights into the LLM development lifecycle and the the challenges of deploying applications. It will also teach you how to apply these concepts effectively.
Develop AI Applications

As a certified data scientist, I am passionate about leveraging cutting-edge technology to create innovative machine learning applications. With a strong background in speech recognition, data analysis and reporting, MLOps, conversational AI, and NLP, I have honed my skills in developing intelligent systems that can make a real impact. In addition to my technical expertise, I am also a skilled communicator with a talent for distilling complex concepts into clear and concise language. As a result, I have become a sought-after blogger on data science, sharing my insights and experiences with a growing community of fellow data professionals. Currently, I am focusing on content creation and editing, working with large language models to develop powerful and engaging content that can help businesses and individuals alike make the most of their data.


