Track
Containerization and Virtualization with Docker and Kubernetes
13 hr
Building containers for multiple platforms sounds intimidating and time-consuming, but you're about to see that it really isn't.
The docker buildx command solves this challenge by extending Docker's build capabilities with advanced features like multi-platform image creation, enhanced caching, and parallel build processing. It integrates the next-generation build engine BuildKit directly into the Docker CLI. With the buildx command, you'll create smaller, faster, and more secure container images without learning an entirely new toolset.
In recent years, Buildx has become more or less essential for best DevOps practices and cloud-native application development. It streamlines CI/CD pipelines and helps you and your team deliver applications consistently across diverse deployment targets, from ARM-based IoT devices to cloud server farms.
> New to Docker? Our practical guide for complete beginners will get you started in no time.
In this article, I'll guide you through beginner and advanced docker buildx techniques.
You probably already use Docker, so you know the standard docker build command. Sooner or later, however, it will start to feel limiting, especially when your projects become more complex.
> Docker Buildx assumes you have Docker installed. If you don't, and are running Linux, follow this guide for easy installation.
Docker Buildx gives you an improved build experience that works with your existing knowledge. It's not a separate tool you need to install — it's already bundled with Docker Desktop and Engine since version 19.03. Buildx uses BuildKit under the hood, which is Docker's next-generation builder that rewrites how images get created. You'll notice faster builds, smaller images, and support for additional features.
The jump from docker build to docker buildx build might seem small - it's just one word after all - but the capabilities you gain are huge.
Let's explore how Buildx actually works and what makes it different from the legacy builder.
The magic of Buildx comes from its smart client-server design.
When you run a Buildx command, you're using the Docker CLI as the client that communicates with the BuildKit daemon—the server component that handles the heavy lifting. This separation lets BuildKit do things the legacy builder can't, like running build stages in parallel rather than sequentially. Your Dockerfile instructions don't have to execute one after another anymore, which cuts build times significantly when you have independent stages.
The client-server model also allows for remote build execution. You can point your local Docker CLI at a remote BuildKit instance running anywhere — on a beefy build server, in the cloud, or even in a Kubernetes cluster. This flexibility means you don't need to tie up your laptop's resources for massive builds or worry about architecture compatibility issues.
BuildKit's modular design also allows you to plug in different frontend parsers. The Dockerfile syntax is the default, but you can use alternative build definition formats if they better suit your workflow.
When you run docker buildx build, the CLI first selects a builder instance, which is either the default one or one you've specified. Your build context and Dockerfile get sent to the BuildKit daemon, which parses the instructions and creates a directed acyclic graph (DAG) of build steps. Unlike the legacy builder that processes each instruction sequentially, BuildKit analyzes this graph to determine which steps can run in parallel.
The builder then executes these steps using efficient caching algorithms that are much smarter than the old layer-based cache. BuildKit tracks the exact inputs and outputs of each step, which avoids unnecessary rebuilds when nothing relevant has changed. It also supports distributing the build across multiple worker nodes for even faster processing.
After building, Buildx can export the results in different formats, not just as Docker images. You can output to OCI formats, local directories, or tarballs, or even skip image creation entirely if you just want to test the build process.
You're right - this section could definitely benefit from more practical examples and visuals to demonstrate how Buildx works in real-world scenarios. Here's how I'd enhance it with more code examples and suggestions for images:
Docker Buildx is not just about building images faster, though it definitely does that. It's about expanding what's possible with your build pipelines.
Let's dive into the standout features that make Buildx worth considering for your next project.
> Looking for Docker project ideas? These 10 will get your DevOps portfolio in line.
For the purposes of this article, I created a simple Python Flask application. To follow along, create 3 files - app.py, requirements.txt, and Dockerfile.
These are the contents for each:
app.py
from flask import Flask, render_template_string
import platform
import socket
import psutil
import datetime

app = Flask(__name__)


@app.route("/")
def home():
    html = """
    <!DOCTYPE html>
    <html>
      <head>
        <title>Docker Buildx Python Demo</title>
        <style>
          body {

            max-width: 800px;


          }
          .container {
            border: 1px solid #ddd;
            border-radius: 5px;

            background-
          }
          .info {

          }
          .platform {
            font-weight: bold;

          }
        </style>
      </head>
      <body>
        <h1>Docker Buildx Multi-Platform Demo (Python)</h1>
        <div class="container">
          <div class="info">Hostname: {{ hostname }}</div>
          <div class="info">Platform: <span class="platform">{{ os_platform }} ({{ architecture }})</span></div>
          <div class="info">CPUs: {{ cpu_count }}</div>
          <div class="info">Total Memory: {{ memory_mb }} MB</div>
          <div class="info">Server Time: {{ server_time }}</div>
        </div>
      </body>
    </html>
    """
    return render_template_string(
        html,
        hostname=socket.gethostname(),
        os_platform=platform.system(),
        architecture=platform.machine(),
        cpu_count=psutil.cpu_count(),
        memory_mb=round(psutil.virtual_memory().total / (1024 * 1024)),
        server_time=datetime.datetime.now().isoformat(),
    )


if __name__ == "__main__":
    app.run(host="0.0.0.0", port=5000)
requirements.txt
flask==3.1.0
psutil==7.0.0
Dockerfile
FROM python:3.13-slim

WORKDIR /app

COPY requirements.txt .
RUN pip install --no-cache-dir -r requirements.txt

COPY app.py .

EXPOSE 5000

CMD ["python", "app.py"]
Once done, open a new Terminal window and navigate to the project folder.
Building images that work across different CPU architectures sounds like a nightmare, but Buildx makes it surprisingly simple.
Take a look at this command:
docker buildx build --platform linux/amd64,linux/arm64 -t myapp:latest .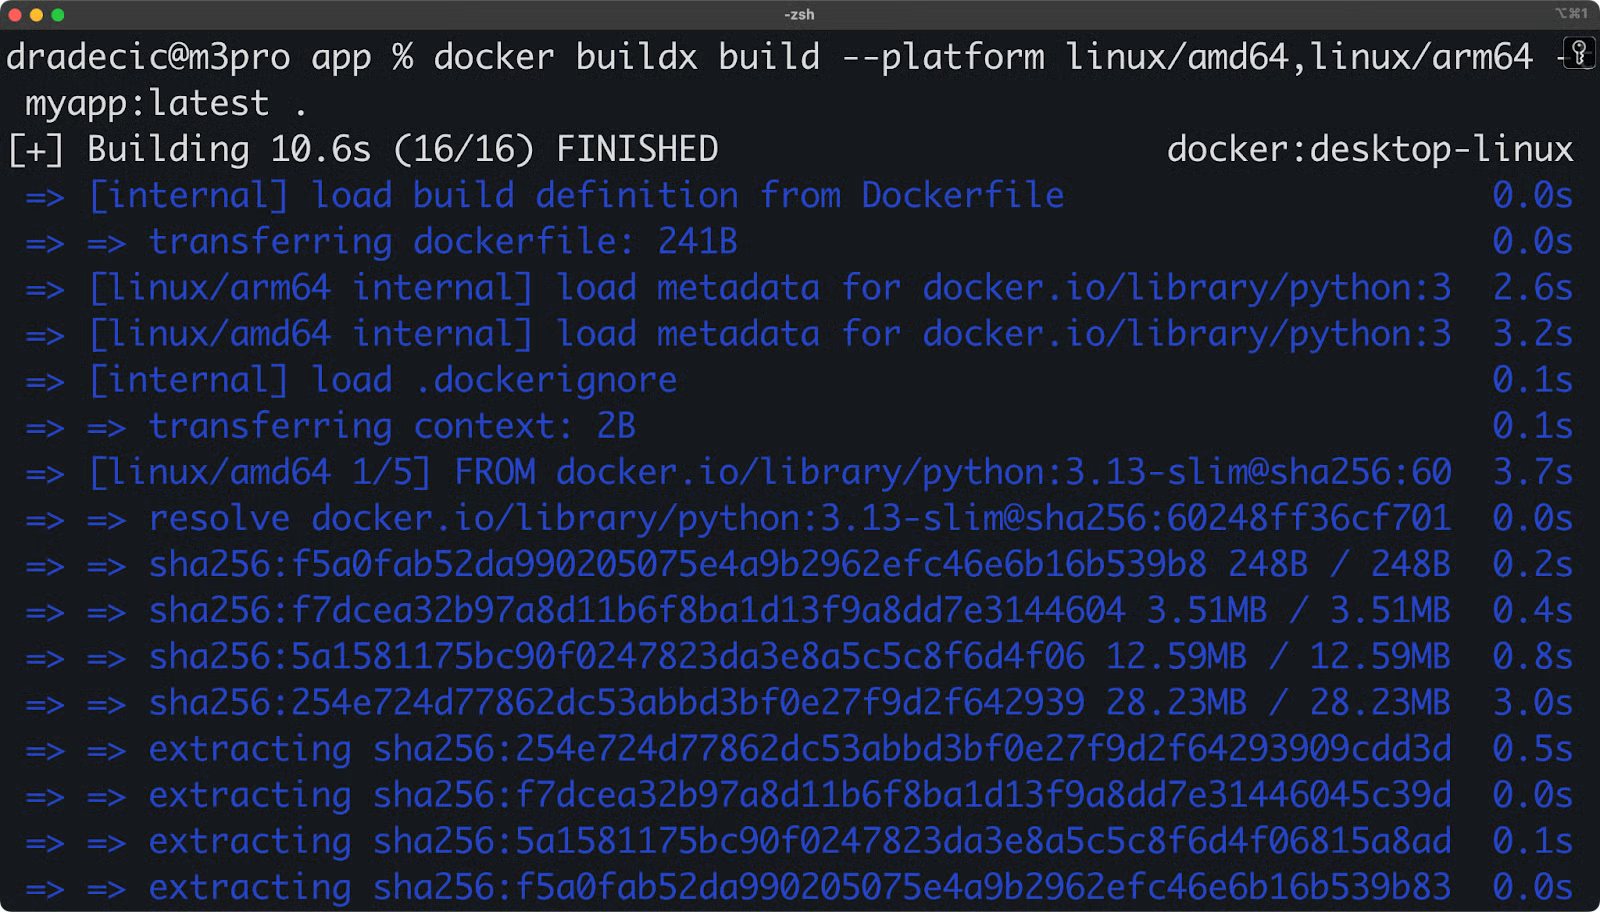
Image 1 - Using Docker Buildx
In short, it lets you create images for multiple architectures simultaneously. Buildx handles this through three clever approaches: it can use QEMU for architecture emulation (letting you build ARM images on an x86 machine), connect to native builder nodes for each target platform, or combine both methods for optimal performance. The result is a multi-architecture manifest list — sometimes called a "fat manifest" — that contains variants of your image for each platform.
If you're deploying to diverse environments like AWS Graviton instances, Raspberry Pi clusters, or mixed infrastructure, this multi-platform support is crucial.
Buildx completely transforms how build caching works and generally makes your builds faster.
The system implements a three-tier caching strategy that goes beyond the simple layer caching of traditional Docker builds:
With our Python app, let's see how we can use local caching strategies:
# Create a directory for local cache
mkdir -p buildx-cache

# First build - export cache to local directory
docker buildx build --cache-to type=local,dest=./buildx-cache -t myapp:latest .

# Make a small change to app.py
echo "# Small comment change" >> app.py

# Second build - use the local cache
docker buildx build --cache-from type=local,src=./buildx-cache -t myapp:latest .
The second build will be much faster because it reuses the cached layers from the first build.
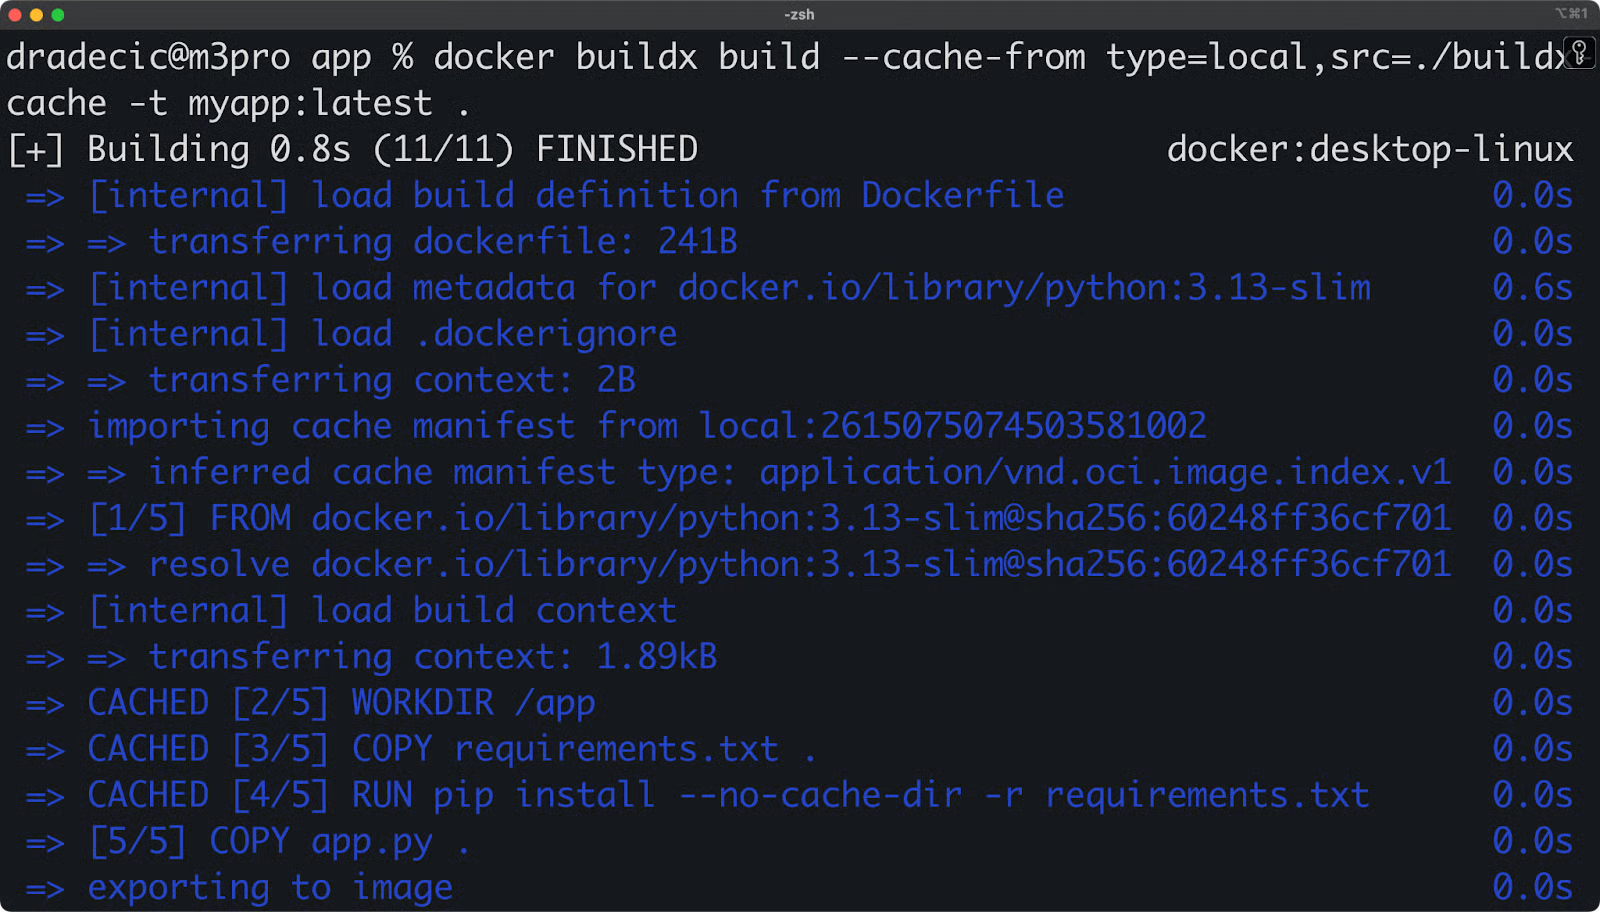
Image 2 - Local caching strategies
You can also use inline caching, which embeds cache metadata in the image itself:
docker buildx build --cache-to type=inline -t myapp:latest .You can configure these cache backends with simple flags like --cache-to and --cache-from, pointing to local directories, registry repositories, or even specialized cache services. This flexibility means your builds stay fast across different environments without sacrificing reproducibility.
Buildx includes tools that will remove security concerns from your thoughts.
Let's say your Python app needs to access a weather API during the build process. Instead of hardcoding your API key in the Dockerfile, you can use build secrets:
# Store your API key in a local file
echo "abc123yourweatherapikey" > ./api_key.txt

# Build with the secret
docker buildx build --secret id=weather_api_key,src=./api_key.txt -t myapp:latest .
Then in your Dockerfile, you can access the secret only when needed:
FROM python:3.13-slim
WORKDIR /app
COPY requirements.txt .
RUN pip install --no-cache-dir -r requirements.txt
COPY app.py .
# Create a config file using the secret at build time
RUN --mount=type=secret,id=weather_api_key \
    echo "WEATHER_API_KEY=$(cat /run/secrets/weather_api_key)" > .env
EXPOSE 5000
CMD ["python", "app.py"]
You can verify the API key isn't in the final image by checking the image history or by running:
docker run --rm myapp:latest cat .env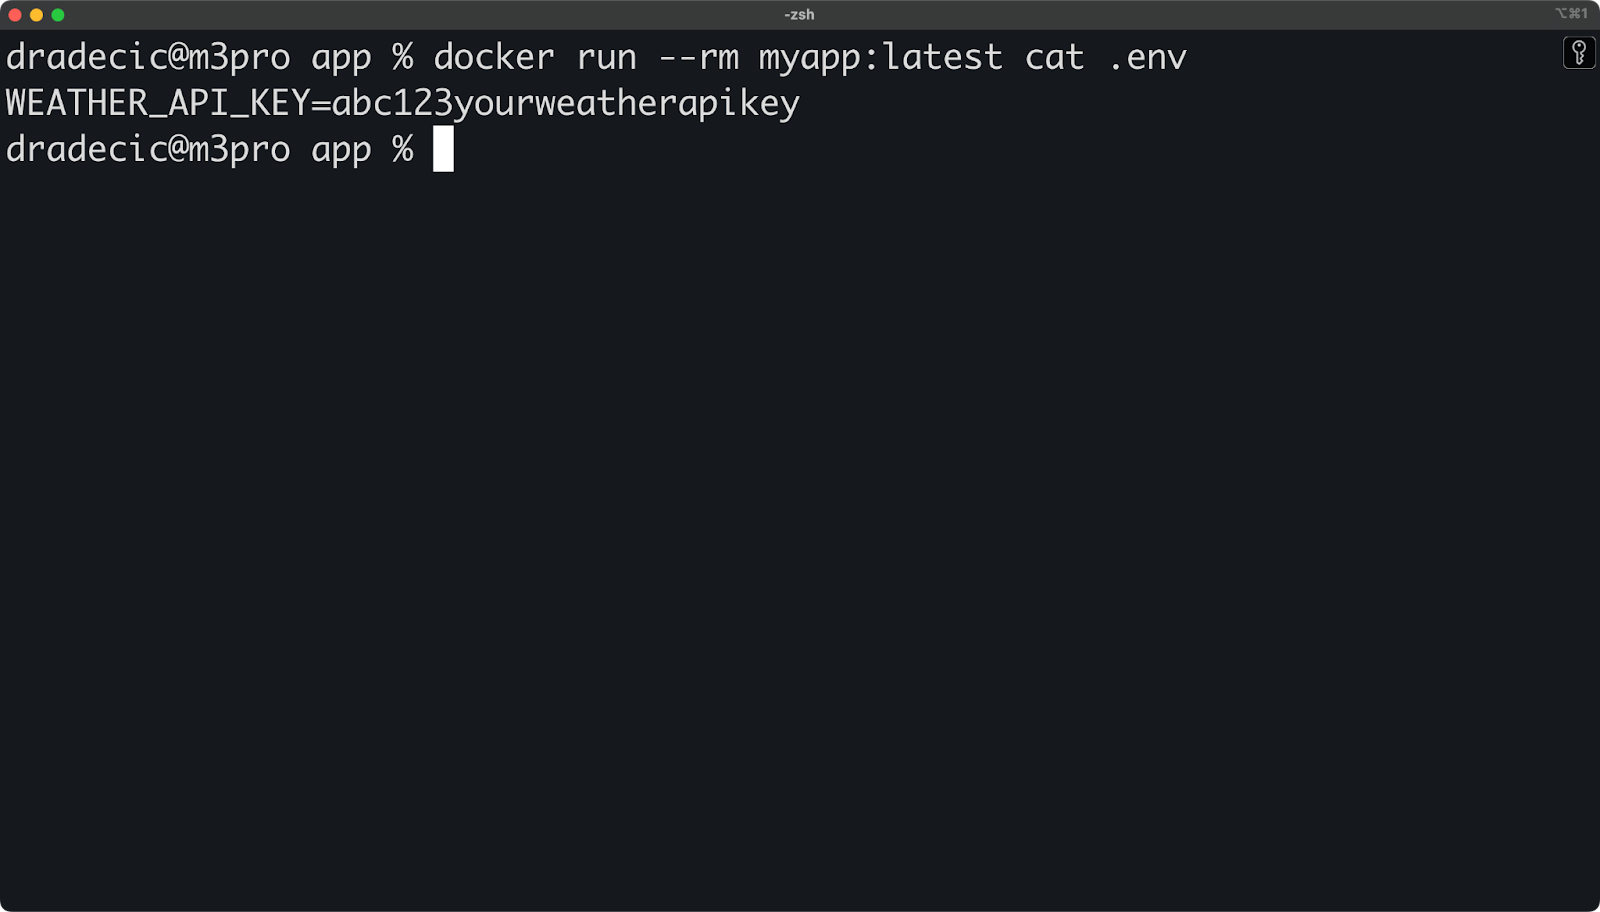
Image 3 - Managing environment variables
In your app.py, you could load the API key like this:
import os
from dotenv import load_dotenv

load_dotenv()  # Load variables from .env file
api_key = os.getenv("WEATHER_API_KEY", "")
# ...
This approach means your sensitive API key is only available during the specific build step where it's needed, but it doesn't get saved in any of the image layers. Anyone who pulls your image won't be able to extract your API key, even if they inspect the image layers.
For added security, you can also use temporary build containers that are automatically removed after the build:
docker buildx build --secret id=weather_api_key,src=./api_key.txt --rm -t myapp:latest .The --rm flag makes sure that any intermediate containers created during the build process are removed, further reducing the risk of leaked credentials.
Setting up Buildx for your workflow takes just a few commands, but understanding the options helps you get the most from it.
Let's dive into how you can configure and manage Buildx in a local environment to suit your specific needs.
Docker Buildx uses the concept of "builders"—separate BuildKit instances with different capabilities and configurations. You can create multiple builders for different purposes.
First, let's see what builders you already have:
docker buildx lsYou'll see output similar to this:
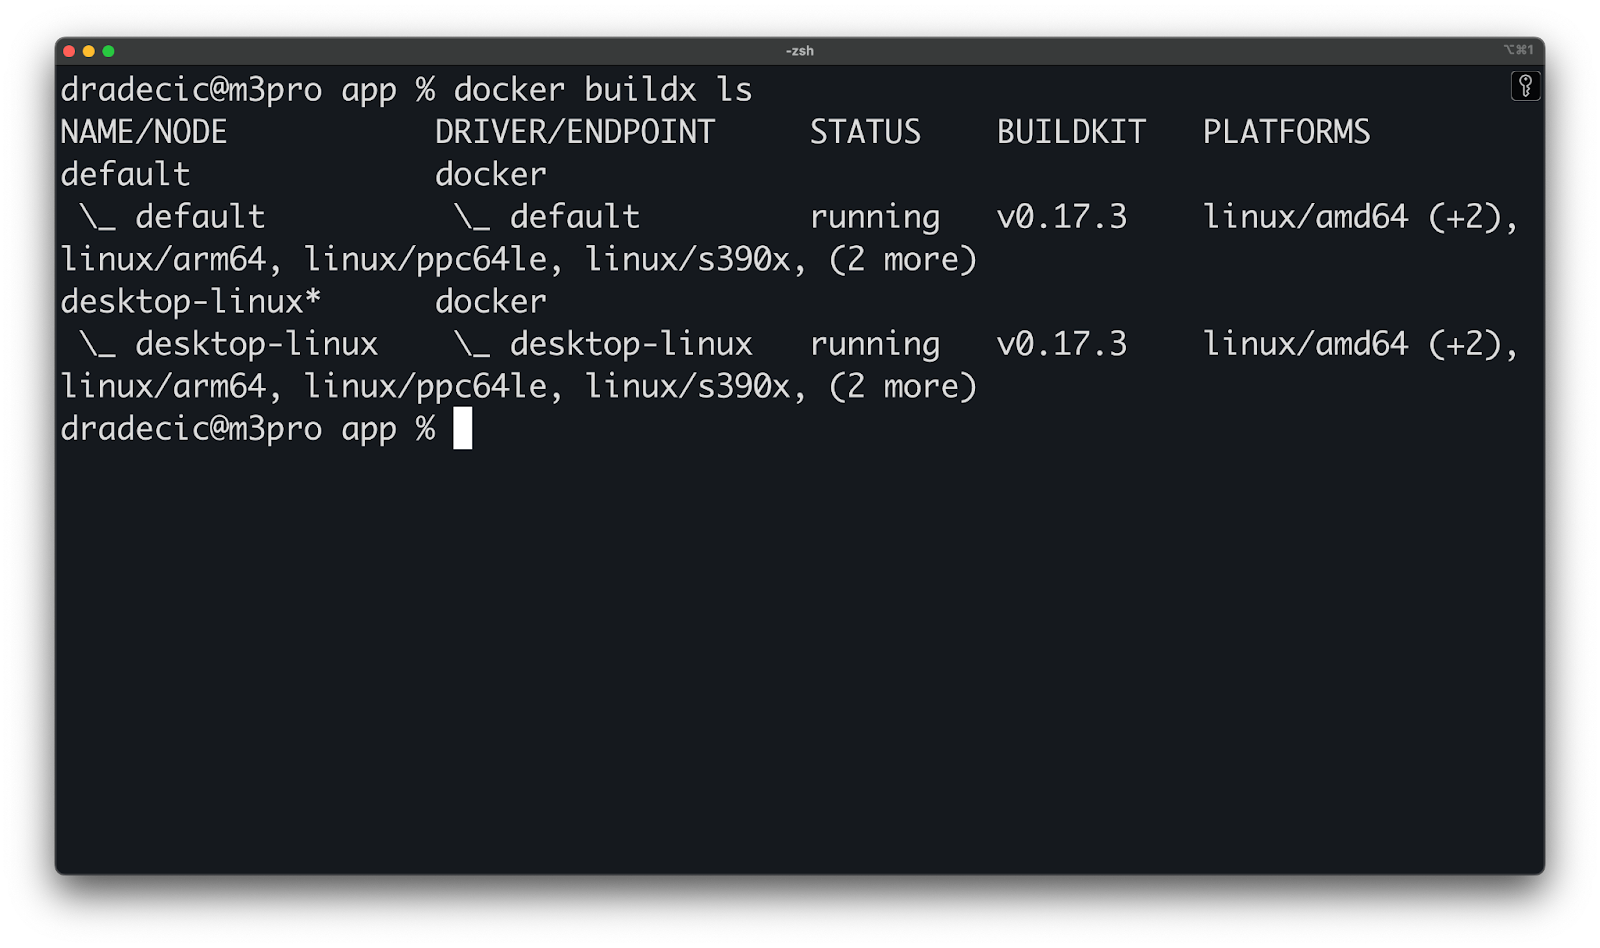
Image 4 - Available builders
To create a new builder instance, run the following commands:
# Create a new builder
docker buildx create --name mybuilder

# Switch to using that builder
docker buildx use mybuilder

# Bootstrap the builder (start it)
docker buildx inspect --bootstrap
You can verify it's working with:
# Check the status
docker buildx ls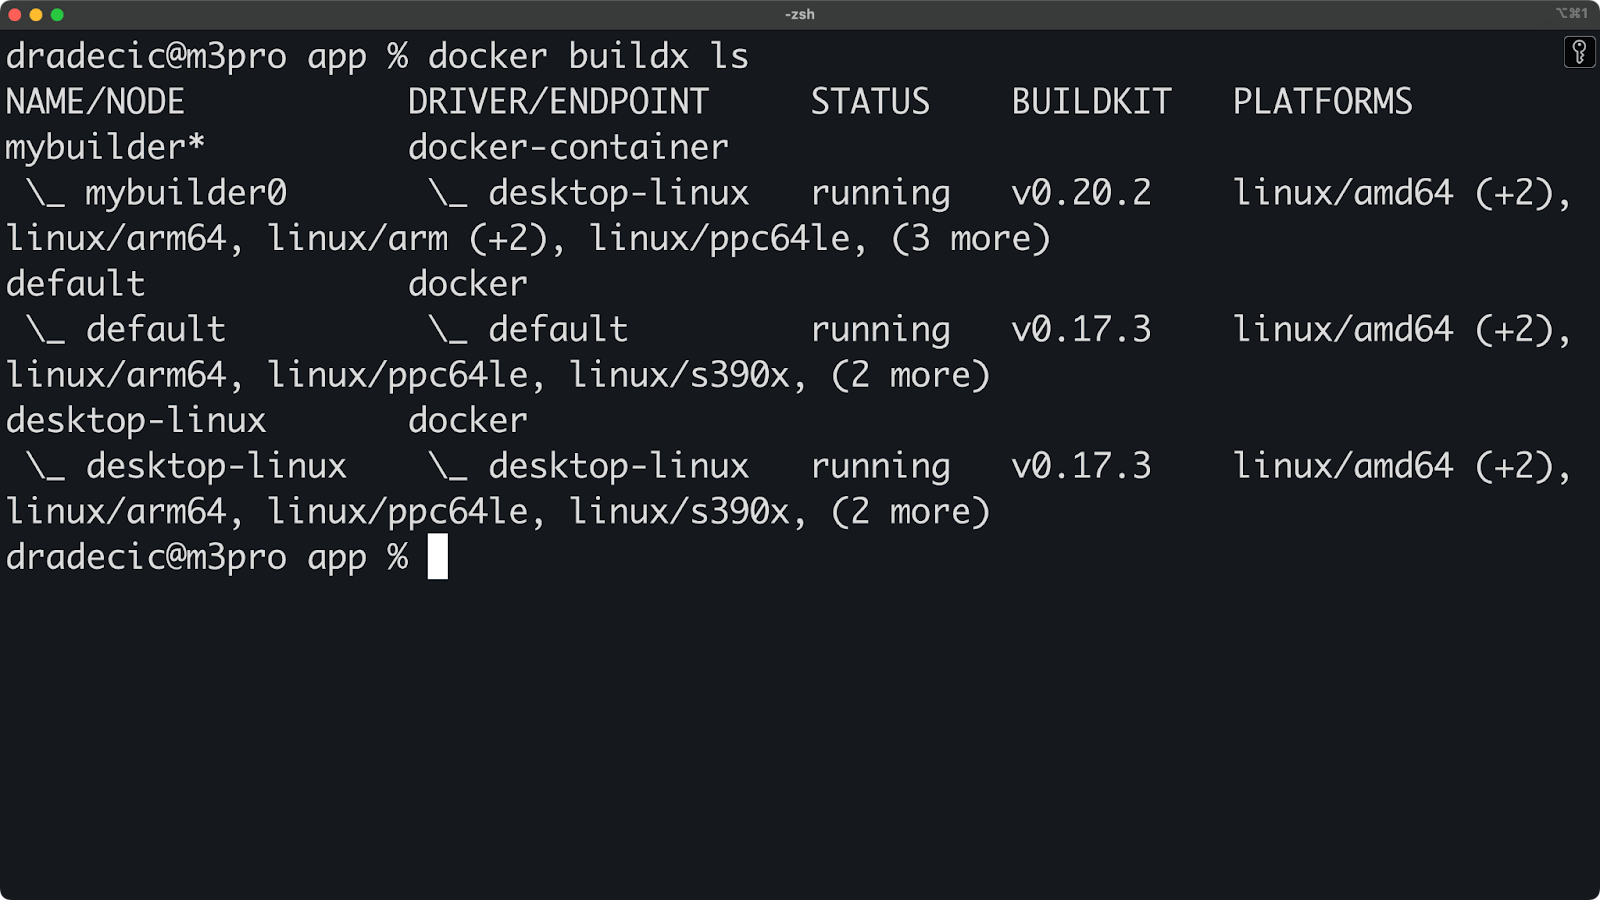
Image 5 - Switching to a custom builder
If you need to remove a builder, just run the following:
docker buildx rm mybuilderBuildx gives you flexible options for what to do with the images you build. You can load them directly into your local Docker daemon, export them as tarballs, or save them to a local directory.
Let's see how to use these options with our Python app:
# Load the image directly into Docker (default behavior)
docker buildx build --load -t myapp:latest .

# Export the image as a tarball
docker buildx build --output type=docker,dest=myapp.tar -t myapp:latest .

# Save the image contents to a local directory
docker buildx build --output type=local,dest=./image-output -t myapp:latest .
After using the tarball export, you can load it into Docker with:
docker load < myapp.tar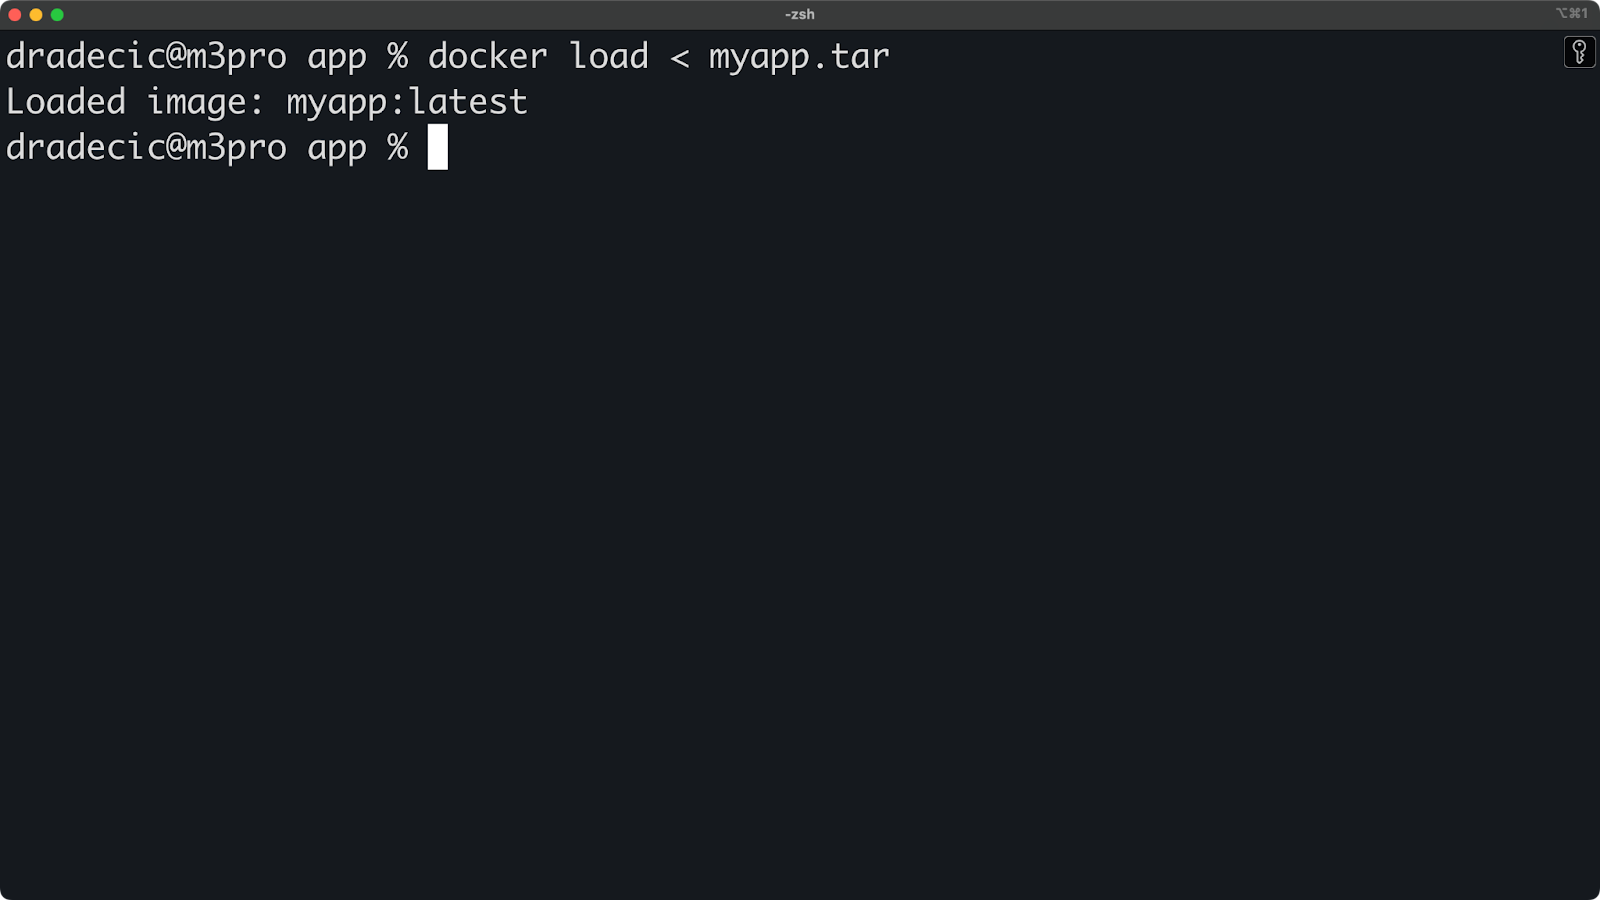
Image 6 - Loading an image from a tarball export
The local directory output is particularly useful for inspection. Let's look at what gets created:
ls -la ./image-outputYou'll see the raw image filesystem:
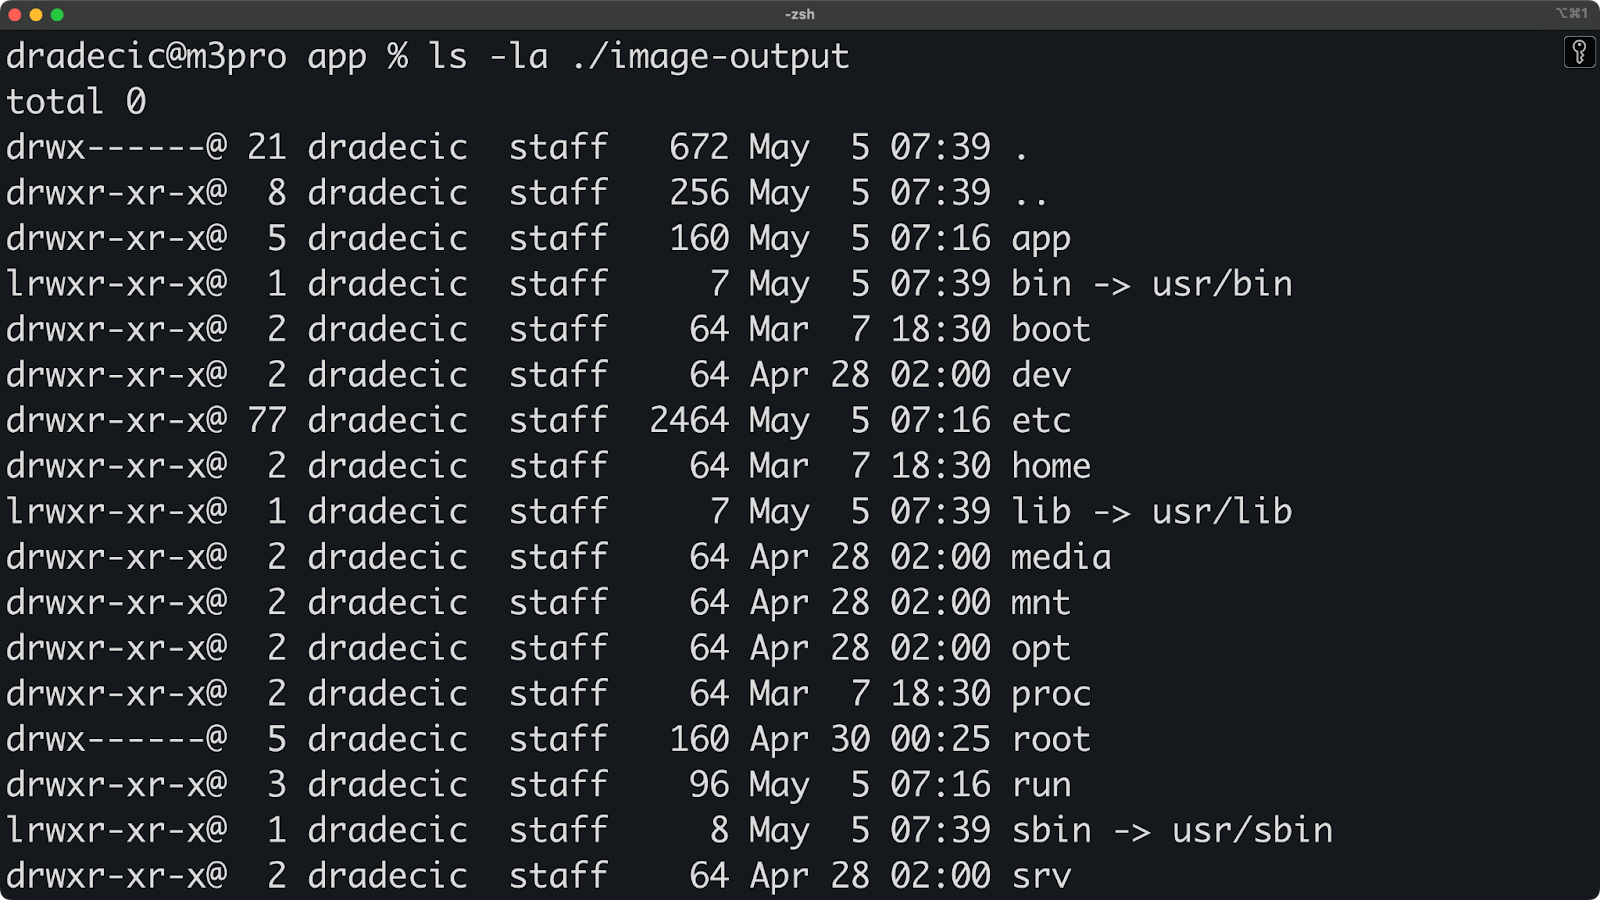
Image 7 - Local directory export contents
You can even run specific build stages without creating a final image. This is handy for debugging or testing build steps:
# Create a multi-stage Dockerfile
cat > Dockerfile.multi << 'EOF'
FROM python:3.13-slim AS base
WORKDIR /app
COPY requirements.txt .

FROM base AS dev-deps
RUN pip install --no-cache-dir -r requirements.txt
RUN pip install pytest

FROM base AS prod-deps
RUN pip install --no-cache-dir -r requirements.txt

FROM prod-deps AS final
COPY app.py .
EXPOSE 5000
CMD ["python", "app.py"]
EOF

# Build only the dev-deps stage and export its filesystem
docker buildx build --file Dockerfile.multi --target dev-deps --output type=local,dest=./dev-deps-output .
Now you can inspect what packages were installed in the dev environment:
cat ./dev-deps-output/usr/local/lib/python3.13/site-packages/pytest/__init__.py
Image 8 - File contents from dev-deps stage
To summarize, these output options give you complete control over where your built images go, whether you're debugging locally or preparing images to be shared with your team.
So far, I showed you basic Buildx commands and use cases. There's a lot more Buildx can do, with some of the features being impossible to implement with the classic builder.
Let's explore some advanced techniques to take your containerization workflow to the next level.
Multi-stage builds are one of Docker's most powerful features for creating efficient images, and Buildx makes them even better.
To demonstrate, let's create an optimized Python application with multiple stages:
# Dockerfile.optimized
FROM python:3.13-slim AS base
WORKDIR /app
COPY requirements.txt .

FROM base AS builder
RUN pip install --no-cache-dir --target=/install -r requirements.txt

FROM base AS linter
COPY --from=builder /install /usr/local/lib/python3.13/site-packages
COPY app.py .
RUN pip install pylint && pylint app.py || exit 0

FROM base AS tester
COPY --from=builder /install /usr/local/lib/python3.9/site-packages
COPY app.py .
RUN pip install pytest && python -m pytest app.py -v || exit 0

FROM python:3.13-alpine AS final
WORKDIR /app
COPY --from=builder /install /usr/local/lib/python3.13/site-packages
COPY app.py .
EXPOSE 5000
CMD ["python", "app.py"]
With Buildx, you can build this more efficiently:
docker buildx build --file Dockerfile.optimized -t myapp:optimized --load .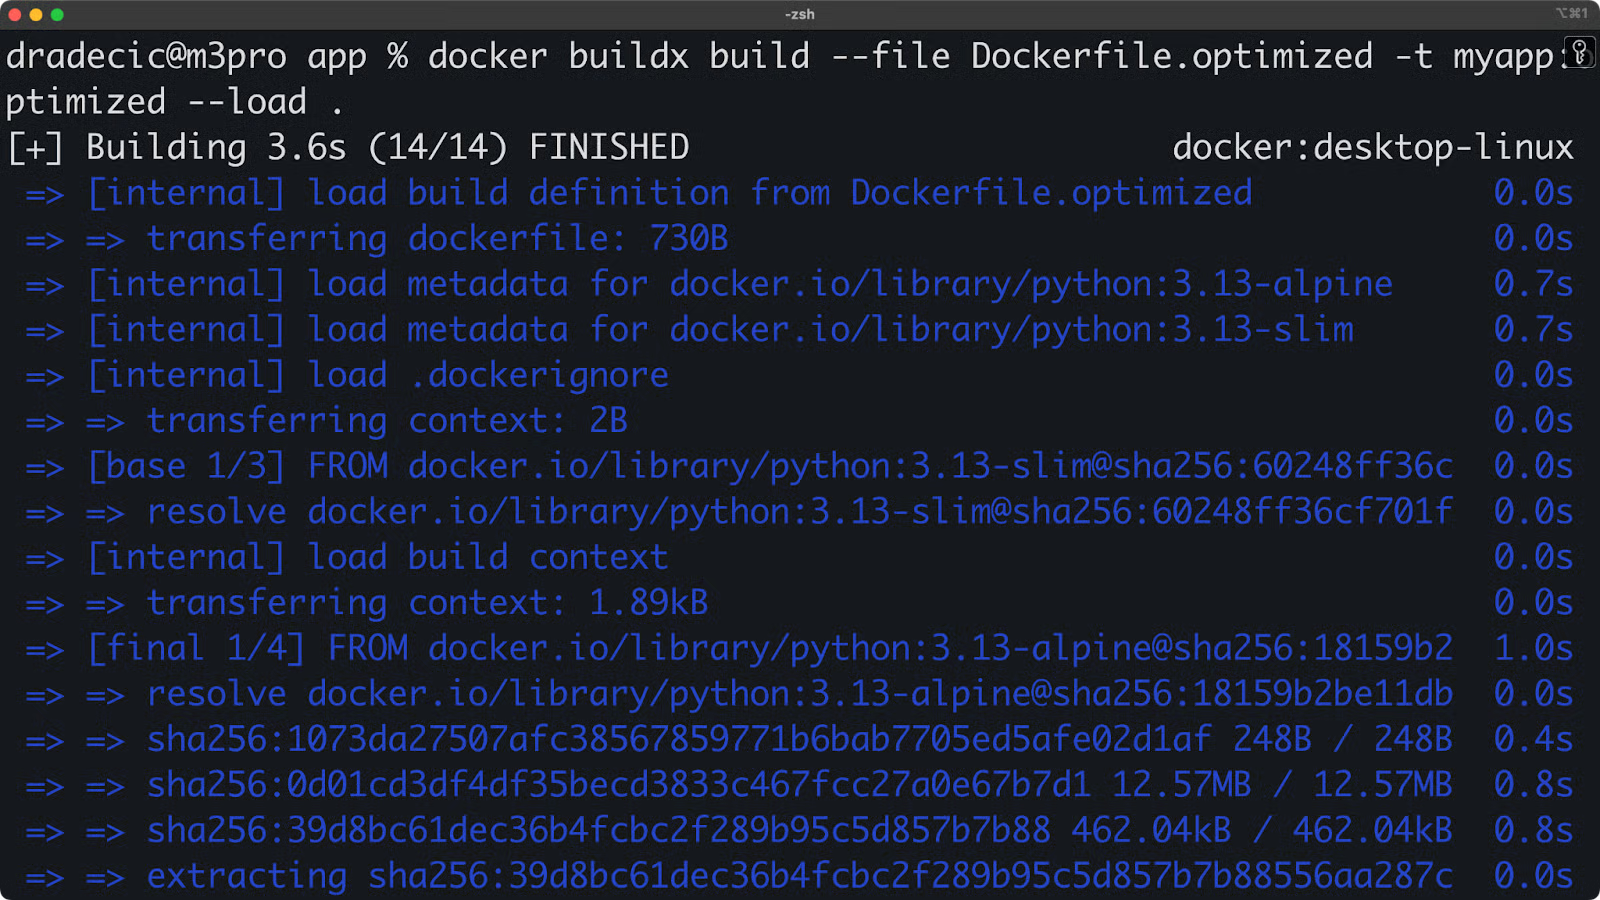
Image 9 - Multi-stage builds
So, what makes this special? Buildx processes independent stages in parallel. While the legacy builder would execute each stage sequentially, Buildx identifies that the linter and tester stages don't depend on each other and builds them simultaneously.
One more added benefit of this build optimization is reduction in file size. You can verify the image size by running the following:
docker images myappYou'll see something like this:
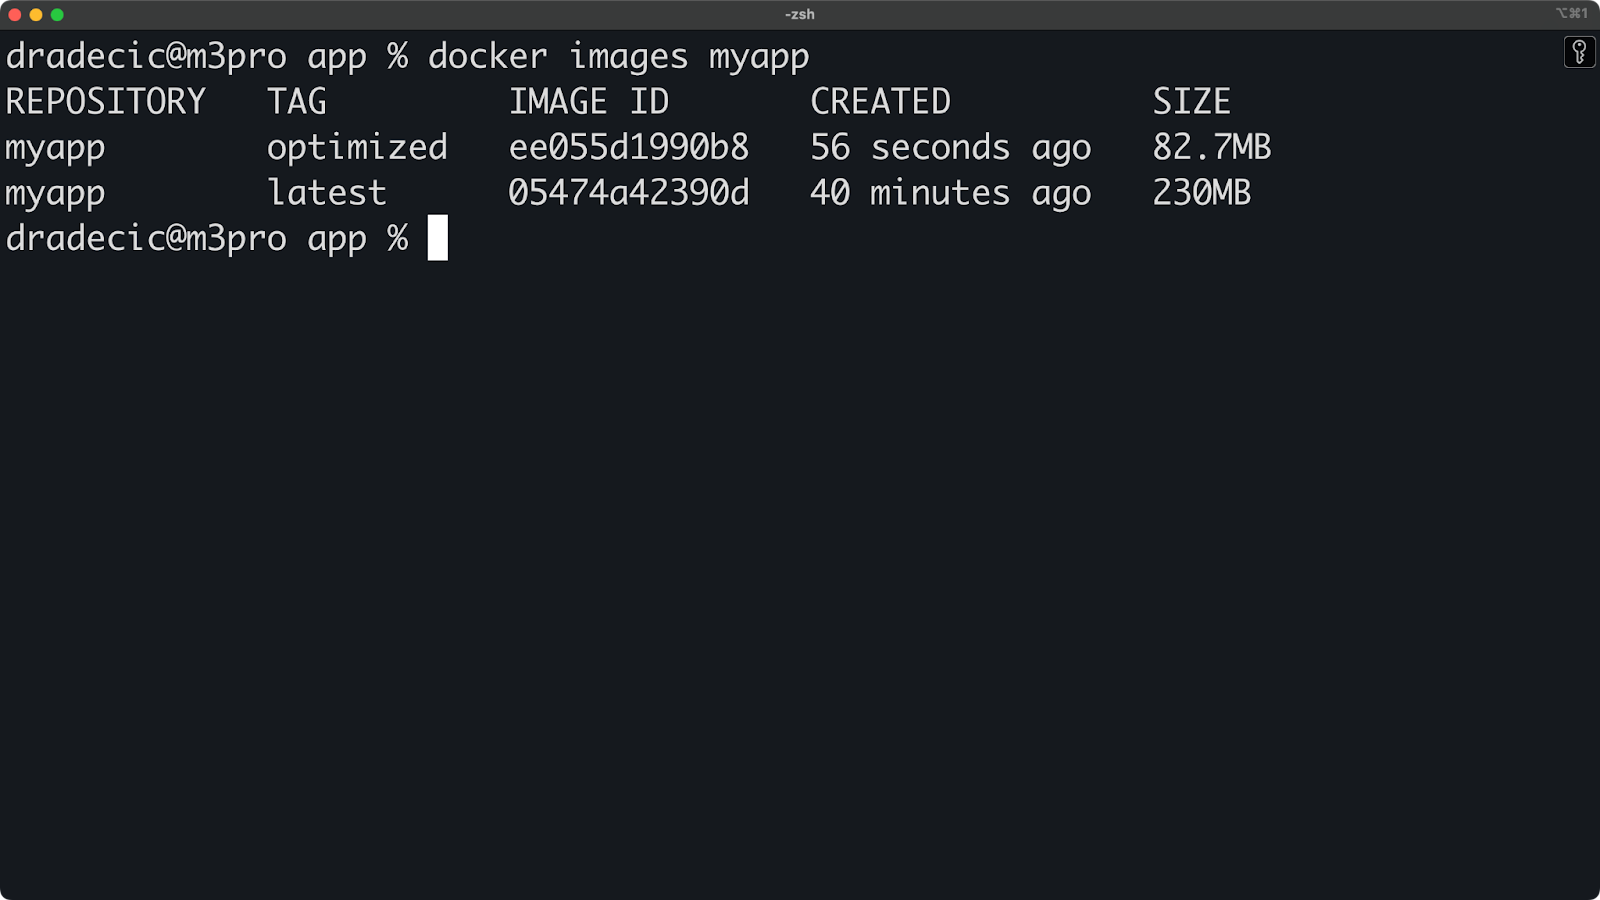
Image 10 - Docker image sizes
The alpine-based final image is much smaller.
While you're working locally, you can still set up Buildx configurations that mirror your CI/CD environment.
To start, create a .dockerignore file to keep builds clean:
.git
__pycache__
*.pyc
*.pyo
*.pyd
.Python
env
venv
*.so
.coverage
htmlcov
Then create a build script that mimics what your CI pipeline might do:
#!/bin/bash
# build.sh - Local CI/CD simulation

echo "Starting CI/CD build process..."

# Setup builder with emulation support
echo "Setting up builder..."
docker buildx create --name cibuilder --use || true
docker buildx inspect --bootstrap

# Run linting
echo "Running lint stage..."
docker buildx build --file Dockerfile.optimized --target linter .

# Run tests
echo "Running test stage..."
docker buildx build --file Dockerfile.optimized --target tester .

# Build for multiple platforms
echo "Building multi-platform image..."
docker buildx build --file Dockerfile.optimized \
  --platform linux/amd64,linux/arm64 \
  --tag myapp:$(date +%Y%m%d) \
  --tag myapp:latest \
  --load \
  --progress=plain \
  .

echo "Build process complete!"
In plain English, this script does the following:
Now for the fun part - make the script executable and run it:
chmod +x build.sh
./build.shA common pain point when working with Docker is that every time you change the source file, you need to rebuild the image and run the container. It just takes too much time.
Here is the good news: for local development with faster iterations, you can create a development version:
# Dockerfile.dev
FROM python:3.13-slim
WORKDIR /app

RUN pip install flask psutil python-dotenv

# Install development tools
RUN pip install pytest pylint watchdog

# Mount app code at runtime instead of copying
CMD ["python", "app.py"]
Run it with a volume mount for live code reloading:
docker buildx build -f Dockerfile.dev -t myapp:dev --load .
docker run -it --rm -p 5000:5000 -v $(pwd):/app myapp:dev
Now you can edit your app.py file locally, and the changes will be immediately reflected in the running container!
Up next, let's discuss performance.
Nobody likes a slow development workflow, and the power of parallelization with Docker Buildx can help.
Let's explore how to optimize your builds and take advantage of Buildx's performance features to create images faster.
One of Buildx's biggest advantages is its ability to build stages in parallel. The traditional Docker builder executes each step sequentially, but Buildx analyzes your Dockerfile and identifies which steps can run at the same time.
To demonstrate, I'll use two files - Dockerfile.standard and Dockerfile.parallel. Here are the contents for both:
Dockerfile.standard
FROM python:3.13-slim
WORKDIR /app

# System dependencies
RUN apt-get update && apt-get install -y --no-install-recommends \
    gcc \
    g++ \
    && rm -rf /var/lib/apt/lists/*

# Python dependencies
COPY requirements.txt .
RUN pip install --no-cache-dir -r requirements.txt

# Application code
COPY app.py .

# Linting
RUN pip install pylint && pylint app.py || true

EXPOSE 5000
CMD ["python", "app.py"]
Dockerfile.parallel
FROM python:3.13-slim AS python-base
WORKDIR /app

# Independent stage for installing system dependencies
FROM python-base AS system-deps
RUN apt-get update && apt-get install -y --no-install-recommends \
    gcc \
    g++ \
    && rm -rf /var/lib/apt/lists/*

# Independent stage for installing Python dependencies
FROM python-base AS python-deps
COPY requirements.txt .
RUN pip install --no-cache-dir -r requirements.txt

# Independent stage for static code analysis
FROM python-deps AS linting
COPY app.py .
RUN pip install pylint && pylint app.py || true

# Final stage that combines dependencies
FROM python-base AS final
# Copy from system deps stage
COPY --from=system-deps /usr/bin/gcc /usr/bin/gcc
# Copy from Python deps stage
COPY --from=python-deps /usr/local/lib/python3.13/site-packages /usr/local/lib/python3.13/site-packages
COPY app.py .
EXPOSE 5000
CMD ["python", "app.py"]
Let's measure how this parallel structure improves build times:
# Time the standard sequential build
time docker build -t myapp:standard -f Dockerfile.standard .

# Time the parallel-optimized build with Buildx
time docker buildx build --load -t myapp:parallel -f Dockerfile.parallel .
For reference, the standard build took 18.48 seconds while the parallel build took only 1.17 seconds!
For even better performance, you can try using the --cache-from and --cache-to flags to leverage local disk caching:
# First build - create cache
docker buildx build --load -t myapp:latest --cache-to type=local,dest=./buildcache .

# Subsequent builds - use cache
docker buildx build --load -t myapp:latest --cache-from type=local,src=./buildcache .
You can also limit context size with careful .dockerignore files:
# Create a comprehensive .dockerignore
cat > .dockerignore << 'EOF'
.git
.github
.dockerignore
.pytest_cache
__pycache__
*.pyc
*.pyo
*.pyd
.Python
venv
env
node_modules
.coverage
htmlcov
.DS_Store
EOF
Long story short, by structuring your Dockerfiles with parallelization in mind and leveraging Buildx's advanced caching, you'll spend less time waiting for builds and more time developing features.
Docker Buildx doesn't exist in isolation. It's built to integrate seamlessly with other tools in your development environment.
Let's explore how Buildx works with local developer tools and makes your container workflow more efficient.
Kubernetes offers powerful capabilities for running distributed Docker Buildx operations across a cluster. When integrating Buildx with Kubernetes, you can get faster and more resilient builds that scale with your project needs.
> Are you new to Kubernetes? The Kubernetes vs Docker: Differences Every Developer Should Know post is your next stop.
Using Kubernetes for your build infrastructure offers a couple of advantages:
Consider this a more "theoretical" section, as diving deeper into Kubernetes is an advanced topic in itself.
To get started, create a file named buildkit-deployment.yaml with the following contents:
apiVersion: apps/v1
kind: Deployment
metadata:
  name: buildkit
  namespace: buildkit
spec:
  replicas: 3
  selector:
    matchLabels:
      app: buildkit
  template:
    metadata:
      labels:
        app: buildkit
    spec:
      containers:
      - name: buildkit
        image: moby/buildkit:latest
        args:
        - --addr
        - tcp://0.0.0.0:1234
        ports:
        - containerPort: 1234
        securityContext:
          privileged: true
---
apiVersion: v1
kind: Service
metadata:
  name: buildkit
  namespace: buildkit
spec:
  type: ClusterIP
  ports:
  - port: 1234
    targetPort: 1234
  selector:
    app: buildkit
The next step is to apply this file to your Kubernetes cluster:
kubectl create namespace buildkit
kubectl apply -f buildkit-deployment.yaml
Finally, connect to this deployment from your local machine:
docker buildx create --name k8s-builder \
  --driver remote \
  --driver-opt endpoint=tcp://<cluster-ip>:1234 \
  --use
And that's it, you're good to go!
IDEs like Visual Studio Code offer excellent integration with Docker Buildx through its Docker extension. This integration makes it easier to manage your Buildx workflows directly from your development environment.
To get started with Docker Buildx in VS Code, install the "Docker" extension from the VS Code marketplace.
Once installed, you'll gain several Buildx-specific features:
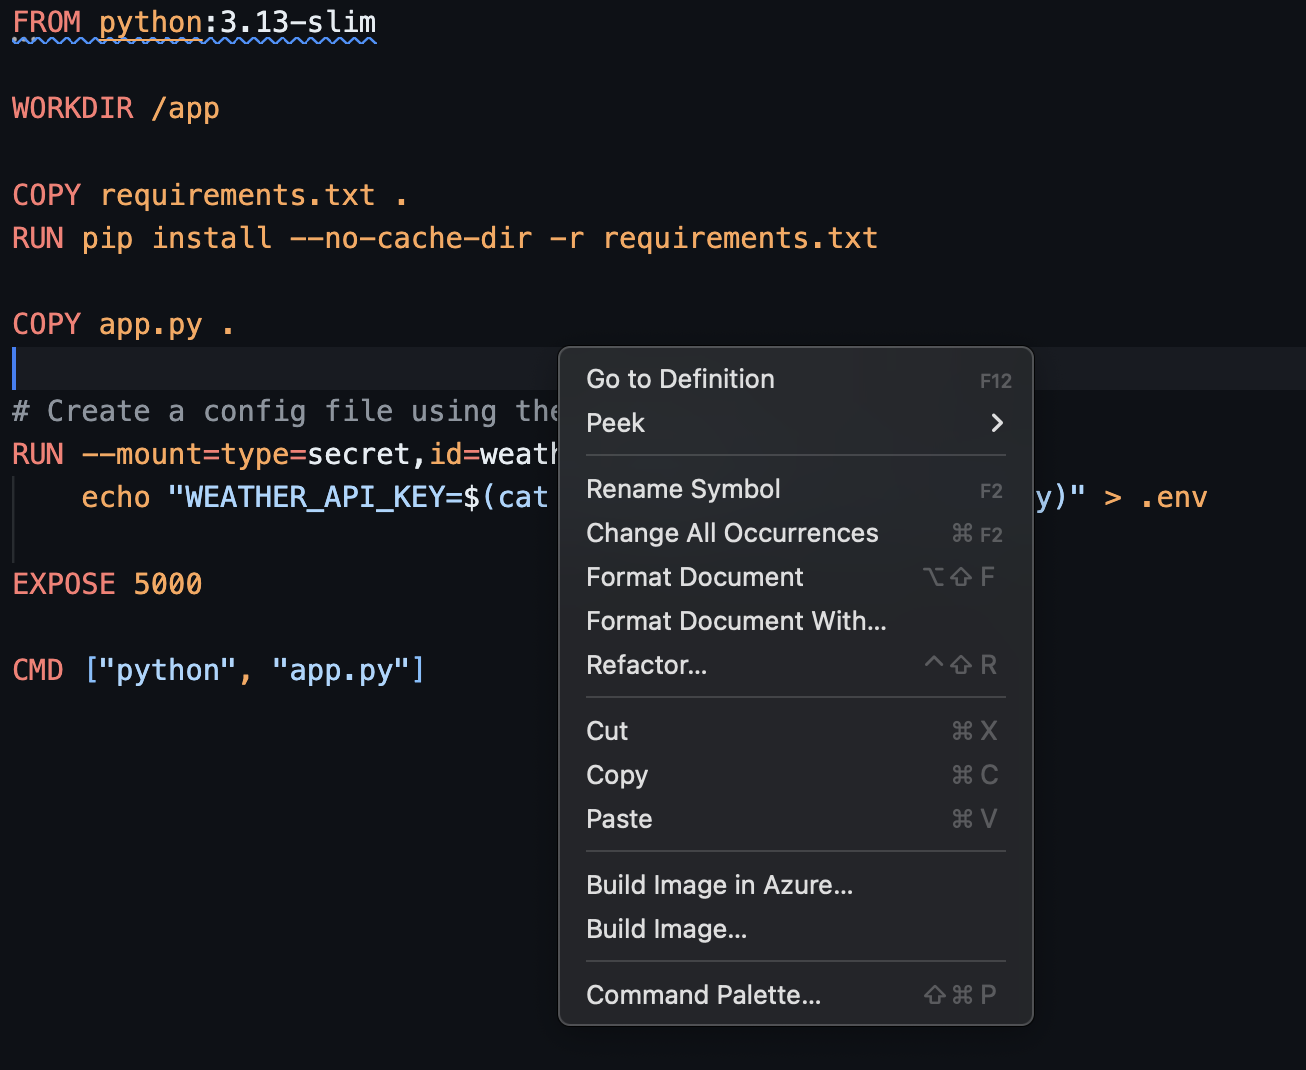
Image 11 - Docker extension for VSCode
Here's an example of customizing VS Code tasks to use Buildx by creating a .vscode/tasks.json file:
{
  "version": "2.0.0",
  "tasks": [
    {
      "label": "Docker: Buildx Build",
      "type": "shell",
      "command": "docker buildx build --load -t ${input:imageName} .",
      "group": {
        "kind": "build",
        "isDefault": true
      }
    },
    {
      "label": "Docker: Buildx Multi-Platform",
      "type": "shell",
      "command": "docker buildx build --platform linux/amd64,linux/arm64 -t ${input:imageName} ."
    }
  ],
  "inputs": [
    {
      "id": "imageName",
      "description": "Image name (with tag):",
      "default": "myapp:latest",
      "type": "promptString"
    }
  ]
}
With this configuration, you can quickly access common Buildx commands from the VS Code Tasks menu (Terminal > Run Task). The extension also provides helpful syntax highlighting for Dockerfiles and autocompletion for common Docker commands, all of which make your Buildx workflow more productive.
Every development tool will sometimes (too often) need troubleshooting, and Docker Buildx is no exception. In this section, I'll walk you through a couple of common issues so you can diagnose them yourself quickly and get back on track.
When working with Buildx, you might encounter a couple of common challenges. Here are the most frequent issues and their solutions:
docker buildx create, check your Docker version:docker versionBuildx requires Docker 19.03 or newer. If you're using an older version, upgrade Docker to access Buildx features.
For "no such plugin" errors, make sure Buildx is properly installed by running:
docker buildx versiondocker buildx inspect --bootstrapIf necessary, install platform emulators:
docker run --privileged --rm tonistiigi/binfmt --install all# Remove specific builder's cache
docker buildx prune -b mybuilder
# Remove all build cache
docker buildx prune --all> What exactly is the Docker prune command? Learn with a ton of hands-on examples.
docker buildx rm mybuilder
docker buildx create --name mybuilder --use
docker buildx inspect --bootstrapdocker buildx build --progress=plain --no-cache .This verbose output helps pinpoint which build stages are taking the most time, allowing you to optimize your Dockerfile accordingly.
--load with multi-platform builds, remember that loading multiple platforms into the Docker daemon simultaneously isn't supported. Instead:# Build for your current platform and load it
docker buildx build --platform linux/amd64 --load -t myapp:latest .# Enable BuildKit debug logs
BUILDKIT_DEBUG=1 docker buildx build .
# Inspect the builder's internal state
docker buildx inspect
# Check system requirements
docker info
# For specific stage failures, build only up to that stage
docker buildx build --target problem-stage .
# Verify your Docker context
docker context lsBy systematically working through these troubleshooting steps, you can resolve most Buildx issues and maintain an efficient container build workflow.
We've covered a lot of ground in this Docker Buildx article! You've seen how this powerful tool can make your container builds faster and more flexible.
Remember the key benefits: You can build images for multiple platforms with a single command, speed up your builds with advanced caching, and keep your images secure with proper secret management. The performance improvements are real, especially when you structure your Dockerfiles to take advantage of parallel building.
I use it all the time on my M-chip Macbook, since not all images are available for ARM.
Whether you're a solo developer or part of a large team, Buildx gives you tools that fit your workflow. You can run builds locally, distribute them across containers, or even scale up to Kubernetes clusters as your needs grow.
To learn more about Docker and Docker Buildx, I recommend enrolling in the following DataCamp courses:
Learn more about Docker with these courses!
Track
Course
Course
blog
Laiba Siddiqui
15 min
blog
Joel Wembo
14 min
Tutorial
Derrick Mwiti
Tutorial
Moez Ali
Tutorial
Rajesh Kumar
Tutorial
Dario Radečić