Track
Containerization and Virtualization with Docker and Kubernetes
13 hr
As machine learning applications become more complex, getting our machine learning models from development to production isn't just about writing good code. It's about ensuring our application runs consistently across different environments. This is where containerization comes into play. But what exactly is containerization, and why is it a game-changer for machine learning workflows?
Containerization is a lightweight, portable way to package an application along with all its dependencies, libraries, and configurations into a single unit called a container. Unlike traditional virtual machines (VMs), containers share the host system’s operating system, making them faster, more efficient, and easier to scale.
For data scientists and ML engineers, this means you can build a model on your local machine and deploy it anywhere, whether on a cloud platform, a server, or even a colleague’s laptop, without worrying about compatibility issues.
In this tutorial, we’ll look at containerizing a machine learning application using Docker and Kubernetes. By the end, you’ll know how to:
If you’re new to Docker, check out our guide on How to Learn Docker from Scratch. You can also take our course, Containerization and Virtualization with Docker and Kubernetes.
Before diving in, you should have a basic understanding of Python, machine learning workflows, and working with the command line. Familiarity with Docker concepts (e.g., images, containers, basic commands) is recommended, and basic knowledge of Kubernetes is optional but helpful for deployment and scaling.
A containerized application is a software application packaged with all its dependencies, libraries, and configurations into a single, lightweight unit called a container. For machine learning applications, this means packaging everything from your trained model to the Python libraries it depends on, ensuring your application runs the same way everywhere.
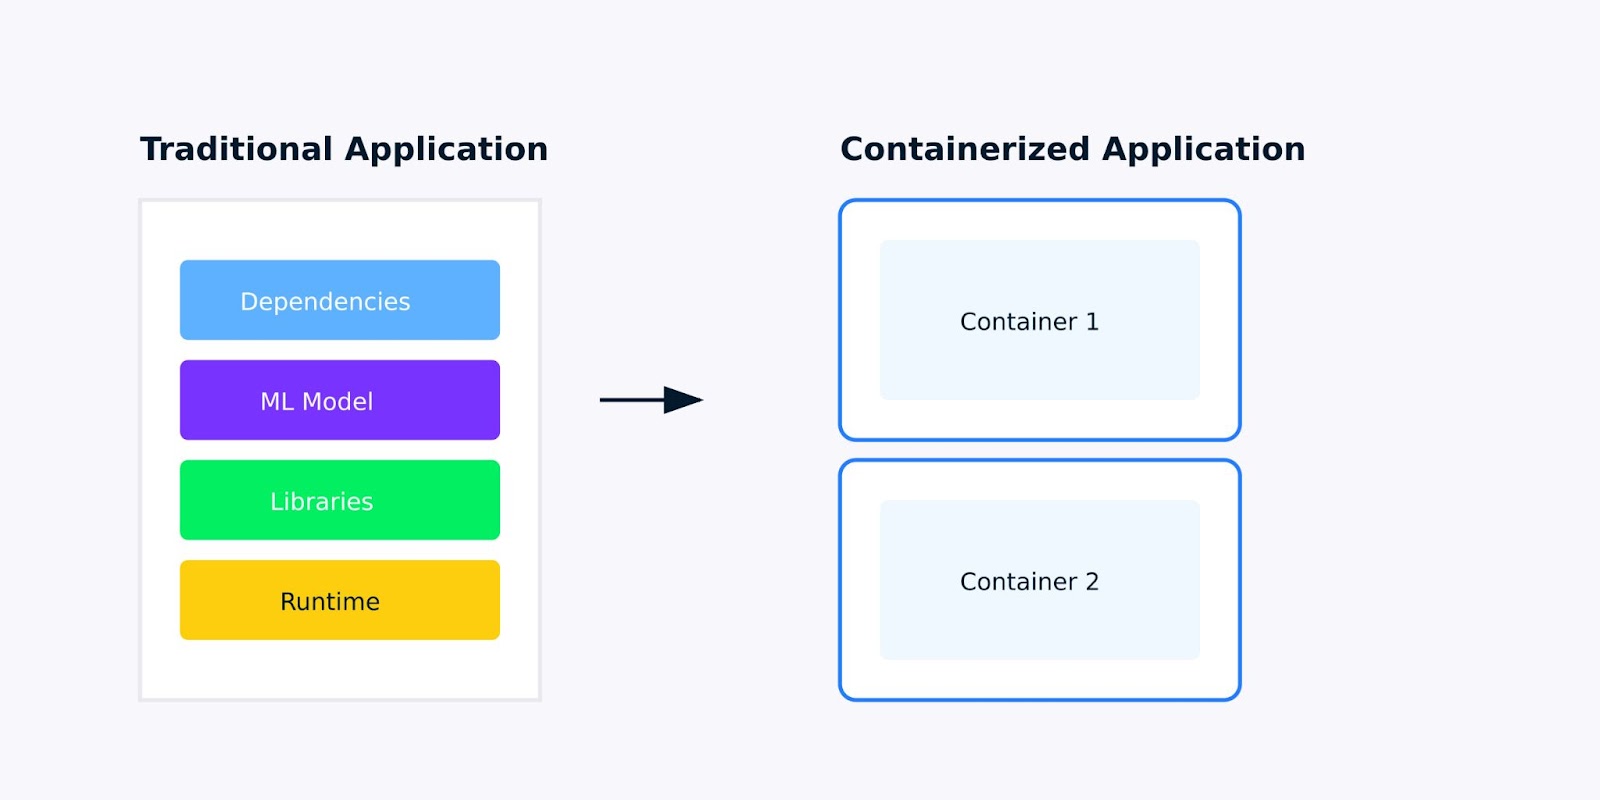
Traditional application versus Containerized application
When you're developing machine learning applications, you've probably encountered the "it works on my machine" problem. Maybe your model runs perfectly on your laptop but fails when deployed to the cloud, or a colleague can't reproduce your results because they have different versions of scikit-learn or TensorFlow installed.
Containerization solves these problems by creating a consistent, isolated environment for your application. Here's what makes containerized applications better for machine learning:
While both containers and virtual machines (VMs) are used to isolate applications, they differ significantly in how they operate and their use cases. Here’s a breakdown of the key differences and advantages:
|
Aspect |
Containers |
Virtual Machines(VM) |
|
Architecture |
Share the host OS kernel; lightweight and isolated. |
Include a full OS; run on a hypervisor. |
|
Performance |
Lightweight, fast startup, and low resource overhead. |
Heavier, slower startup, and higher resource usage due to full OS overhead. |
|
Portability |
Highly portable; runs consistently across environments. |
Less portable due to OS dependencies; may face compatibility issues. |
|
Scalability |
Easily scalable using orchestration tools like Kubernetes. |
Scalable but requires more resources and management effort. |
|
Security |
Relies on host OS security; less isolation than VMs. |
Strong isolation due to separate OS instances; more secure for sensitive apps. |
For machine learning applications, these differences matter. When you need to scale your model to handle more predictions, or when you want to deploy multiple versions of your model for A/B testing, containers provide the agility and resource efficiency you need.
To learn more about containerization and virtualization, check out this learning track: Containerization and Virtualization with Docker and Kubernetes.
In the sections below, we’ve outlined a step-by-step guide on how to containerize an application:
Before we start containerizing our machine learning application, we need to set up the necessary tools and prepare our environment. This section will guide you through installing Docker and preparing a simple machine learning application for containerization.
To containerize a machine learning application, you’ll need the following tools:
Let’s start by installing Docker.
Docker is available for Windows, macOS, and Linux. Below are the steps to install Docker on your system.
For Windows/macOS:
For Linux (Ubuntu/Debian):
Open your terminal and run the following commands to install Docker:
# Update your package list
sudo apt-get update

# Install required packages to allow apt to use a repository over HTTPS
sudo apt-get install -y apt-transport-https ca-certificates curl software-properties-common

# Add Docker’s official GPG key
curl -fsSL https://download.docker.com/linux/ubuntu/gpg | sudo gpg --dearmor -o /usr/share/keyrings/docker-archive-keyring.gpg

# Add the Docker repository to your system
echo "deb [arch=$(dpkg --print-architecture) signed-by=/usr/share/keyrings/docker-archive-keyring.gpg] https://download.docker.com/linux/ubuntu $(lsb_release -cs) stable" | sudo tee /etc/apt/sources.list.d/docker.list > /dev/null

# Update your package list again
sudo apt-get update

# Install Docker
sudo apt-get install -y docker-ce docker-ce-cli containerd.io

# Verify Docker installation
sudo docker --version
This installation process adds the Docker repository to your system, verifies its authenticity with the GPG key, and installs the Docker engine along with its command-line tools.
Once Docker is installed, verify that it's working correctly by running the following command in the command prompt:
# Check Docker version
docker --version

# Run hello-world container
docker run hello-world
This pulls a lightweight test image and runs it as a container. If successful, you'll see a welcome message confirming your installation is working properly, as shown below:
Hello from Docker!Now that Docker is installed, let’s prepare a simple machine learning application for containerization. For this tutorial, we’ll use a basic Python script that loads a pre-trained model and serves predictions via a Flask API.
Create a new directory for your project and add the following files:
Here’s the code for app.py:
# Import required libraries
from sklearn.datasets import load_iris
from sklearn.ensemble import RandomForestClassifier
from sklearn.model_selection import train_test_split
from flask import Flask, request, jsonify
import numpy as np

# Initialize Flask app
app = Flask(__name__)

# Load and prepare the model
iris = load_iris()
X, y = iris.data, iris.target
X_train, X_test, y_train, y_test = train_test_split(X, y, test_size=0.2, random_state=42)
model = RandomForestClassifier(random_state=42)
model.fit(X_train, y_train)

@app.route('/predict', methods=['POST'])
def predict():
    # Get features from request
    features = request.json['features']

    # Make prediction
    prediction = model.predict([features])

    return jsonify({'prediction': int(prediction[0]),
                   'class_name': iris.target_names[prediction[0]]})

if __name__ == '__main__':
    app.run(host='0.0.0.0', port=5000)
The code loads the Iris dataset, trains a Random Forest classifier, and sets up a Flask API endpoint that accepts feature values and returns predictions. We're building this as a web service to make it suitable for containerization.
Step 2: Create requirements.txt
The requirements.txt file lists the Python libraries required to run the script. Create this file in the same directory as app.py:
# requirements.txt
scikit-learn==1.3.0
numpy==1.24.3
flask==2.0.1
This specifies the exact versions of Python packages our application needs. Having fixed versions ensures our containerized application will be consistent and reproducible.
Now that our environment is set up and our ML application is ready, we can move on to building our first Docker container. In the next section, we’ll write a Dockerfile and build a Docker image for our Flask-based ML application.
Now that our machine learning application is ready, the next step is to containerize it using Docker. This involves creating a Dockerfile, which is a script that contains instructions for building a Docker image. Once the image is built, we can run it as a container.
A Dockerfile is a text document that contains all the commands to assemble an image. Here’s how to create one for our Flask-based ML application.
app.py and requirements.txt, create a new file named Dockerfile (no file extension).Dockerfile:# Use an official Python runtime as the base image
FROM python:3.9-slim
# Set the working directory in the container
WORKDIR /app
# Copy the requirements file into the container
COPY requirements.txt .
# Install the Python dependencies
RUN pip install --no-cache-dir -r requirements.txt
# Copy the rest of the application code into the container
COPY . .
# Expose port 5000 for the Flask app
EXPOSE 5000
# Define the command to run the Flask app
CMD ["python", "app.py"]Explanation:
FROM python:3.9-slim: We’re using the official Python 3.9 slim image as the base image. The slim version is lightweight and ideal for containerized applications.WORKDIR /app: This sets the working directory inside the container to /app. All subsequent commands will run from this directory.COPY requirements.txt .: Copies the requirements.txt file from your local machine to the container.RUN pip install --no-cache-dir -r requirements.txt: Installs the Python dependencies listed in requirements.txt. The --no-cache-dir flag reduces the image size by not storing the cache.COPY . .: Copies all files from the current directory on your local machine to the /app directory in the container.EXPOSE 5000: Exposes port 5000, which is the port our Flask app listens on.CMD ["python", "app.py"]: Defines the command to run the Flask app when the container starts.With the Dockerfile in place, we can now build the Docker image and run it as a container.
Run the following command in the terminal to build the Docker image:
docker build -t ml-flask-app .This command builds a Docker image from the Dockerfile in the current directory. The -t ml-flask-app flag tags the image with the name ml-flask-app, making it easier to reference later.
Once the image is built, run it as a container using the following command:
docker run -p 5000:5000 ml-flask-appThis command starts a container from the ml-flask-app image. The -p 5000:5000 flag maps port 5000 on your local machine to port 5000 in the container, allowing you to access the Flask app from your browser or a tool like curl.
Open a new terminal window and send a test request to the Flask app running inside the container:
curl -X POST -H "Content-Type: application/json" -d '{"input": [5.1, 3.5, 1.4, 0.2]}' http://localhost:5000/predictYou should see a response like this:
{
  "prediction": 0
}
This means the containerized Flask app is running successfully and is ready to serve predictions.
If you run into issues while building or running the container, here are some tips to help you troubleshoot:
Check Docker logs:Use the following command to view the logs of a running container:
docker logs <container_id>Verify Dockerfile syntax:Double-check the Dockerfile for typos or syntax errors.
Check port conflicts:Ensure port 5000 is not already in use on your local machine. If it is, you can map the container to a different port, like this:
docker run -p 5001:5000 ml-flask-appRebuild the image:
If you make changes to the Dockerfile or application code, rebuild the image using:
docker build -t ml-flask-app .Now that we’ve successfully built and tested our Docker container, the next step is to learn how to manage and scale the containerized application. In the next section, we’ll explore how to use Kubernetes to deploy and scale our ML application.
Check out more Docker projects in our guide to 10 Docker Project Ideas: From Beginner to Advanced.
Now that we’ve built our Docker container, let’s look at how to manage it effectively. This section will walk you through essential Docker commands for starting, stopping, and inspecting containers, as well as working with logs and ports.
Docker provides a set of powerful commands to manage containers. Let’s go through the most commonly used ones.
To start a container from an image, use the docker run command. For example:
docker run -p 5000:5000 ml-flask-appThis command starts a container from the ml-flask-app image and maps port 5000 on your local machine to port 5000 in the container.
If you want to run the container in the background (detached mode), add the -d flag:
docker run -d -p 5000:5000 ml-flask-appThis allows the container to run in the background, freeing up your terminal.
To stop a running container, first find its container ID using:
docker psThis lists all running containers along with their IDs, names, and other details. Once you have the container ID, stop the container with:
docker stop <container_id>For example:
docker stop a1b2c3d4e5f6To view detailed information about a container, use the docker inspect command:
docker inspect <container_id>This provides a JSON output with details like the container’s network settings, mounted volumes, and environment variables.
To see all containers (both running and stopped), use:
docker ps -aThis is useful for checking the status of your containers and finding container IDs.
Logs and ports are critical for debugging and accessing our containerized application. Let’s explore how to work with them.
To view the logs of a running container, use:
docker logs <container_id>For example:
docker logs a1b2c3d4e5f6This displays the output of your application, including any errors or messages printed to the console. If you want to follow the logs in real-time (like tail -f), add the -f flag:
docker logs -f <container_id>When running a container, you can map container ports to your local machine using the -p flag. For example:
docker run -p 5000:5000 ml-flask-appThis maps port 5000 in the container to port 5000 on your local machine. If port 5000 is already in use, you can map it to a different port, like this:
docker run -p 5001:5000 ml-flask-appNow, your Flask app will be accessible at http://localhost:5001.
To see which ports are mapped to a running container, use:
docker port <container_id>This lists the port mappings for the container, which is helpful for debugging connectivity issues. In the next section, we’ll look at how to deploy our containerized ML application on Kubernetes and manage it at scale.
Once our application is containerized, we can deploy it using Kubernetes. Kubernetes automates the deployment, scaling, and management of containerized applications, making it easier to handle large-scale workloads. In this section, we’ll look at how to deploy our ML application on a Kubernetes cluster.
Kubernetes uses YAML files to define the desired state of your application. These files describe how your containers should be deployed, scaled, and managed. Let’s start by creating a Kubernetes deployment for our Flask-based ML application.
Create a file named ml-flask-app-deployment.yaml with the following content:
apiVersion: apps/v1
kind: Deployment
metadata:
  name: ml-flask-app
spec:
  replicas: 3
  selector:
    matchLabels:
      app: ml-flask-app
  template:
    metadata:
      labels:
        app: ml-flask-app
    spec:
      containers:
      - name: ml-flask-app
        image: ml-flask-app
        ports:
        - containerPort: 5000
This YAML file defines:
ml-flask-app.ml-flask-app image we built earlier.To deploy the application on Kubernetes, use the kubectl apply command:
kubectl apply -f ml-flask-app-deployment.yamlThis command tells Kubernetes to create the resources defined in the YAML file. You can check the status of the deployment using:
kubectl get deploymentsThis shows the status of your deployment, including the number of replicas running.
To make the application accessible outside the Kubernetes cluster, create a Service. Create a file named ml-flask-app-service.yaml with the following content:
apiVersion: v1
kind: Service
metadata:
  name: ml-flask-app-service
spec:
  type: LoadBalancer
  ports:
  - port: 80
    targetPort: 5000
  selector:
    app: ml-flask-app
This YAML file defines:
ml-flask-app-service.Apply the Service using:
kubectl apply -f ml-flask-app-service.yamlYou can check the status of the Service using:
kubectl get servicesThis shows the external IP address where your application is accessible.
Kubernetes makes it easy to scale your application and monitor its performance. Let’s explore how to do this.
To scale your application, update the number of replicas in the deployment. For example, to scale to 5 replicas, run:
kubectl scale deployment ml-flask-app --replicas=5You can also update the replicas field in the YAML file and reapply it:
spec:
  replicas: 5
Then run:
kubectl apply -f ml-flask-app-deployment.yamlKubernetes provides several tools for monitoring our application. Let’s look at some of the tools to monitor our application.
Use kubectl logs to view the logs of a specific pod:
kubectl logs <pod_name>
Use kubectl get pods to check the status of your pods:
kubectl get podsUse kubectl top to view CPU and memory usage:
kubectl top podsKubernetes also supports Horizontal Pod Autoscaler (HPA), which automatically scales the number of pods based on CPU or memory usage. To enable autoscaling, run:
kubectl autoscale deployment ml-flask-app --cpu-percent=50 --min=3 --max=10This ensures the deployment scales between 3 and 10 replicas based on CPU usage.
Here are some best practices to follow when deploying applications on Kubernetes.
Define CPU and memory limits for your containers to prevent resource exhaustion:
resources:
   limits:
     cpu: "1"
memory: "512Mi"Add health checks to ensure your application is running correctly:
livenessProbe:
  httpGet:
    path: /health
    port: 5000
  initialDelaySeconds: 5
  periodSeconds: 10
readinessProbe:
  httpGet:
    path: /ready
    port: 5000
  initialDelaySeconds: 5
  periodSeconds: 10
Organize your resources using namespaces to avoid conflicts:
kubectl create namespace ml-app
kubectl apply -f ml-flask-app-deployment.yaml -n ml-app
In the next section, we’ll cover tips for optimizing Dockerfiles, managing dependencies, and ensuring security.
Containerizing machine learning applications comes with its own set of challenges, such as managing large dependencies, ensuring reproducibility, and maintaining security. Here are some best practices to help you overcome these challenges and build robust containerized ML applications.
A well-optimized Dockerfile can significantly reduce build times and image sizes. Here are some tips for optimizing your Dockerfiles:
Multi-stage builds allow us to use multiple FROM statements in a single Dockerfile. This helps reduce the final image size by discarding unnecessary files and dependencies from intermediate stages. For example:
# Stage 1: Build the application
FROM python:3.9-slim as builder

WORKDIR /app
COPY requirements.txt .
RUN pip install --user -r requirements.txt

COPY . .

# Stage 2: Create the final image
FROM python:3.9-slim

WORKDIR /app
COPY --from=builder /root/.local /root/.local
COPY --from=builder /app .

ENV PATH=/root/.local/bin:$PATH
EXPOSE 5000
CMD ["python", "app.py"]
This Dockerfile:
builder stage to install dependencies and build the application.Each instruction in a Dockerfile creates a new layer. To minimize the number of layers and reduce image size:
RUN commands into a single command using &&.COPY instead of ADD unless you need the additional functionality of ADD.For example:
RUN apt-get update && \
    apt-get install -y --no-install-recommends build-essential && \
rm -rf /var/lib/apt/lists/*Choose lightweight base images like python:3.9-slim instead of larger ones like python:3.9. Slim images contain only the essential packages, reducing the overall image size.
Reproducibility is critical in machine learning workflows. Here’s how to manage dependencies and ensure reproducibility in your containerized applications.
List all your Python dependencies in a requirements.txt file or use pipenv to manage them. For example:
# requirements.txt
scikit-learn==1.3.0
numpy==1.24.3
Flask==2.3.2
Install the dependencies in your Dockerfile:
COPY requirements.txt .
RUN pip install --no-cache-dir -r requirements.txtAlways pin the versions of your dependencies to avoid unexpected changes. For example:
scikit-learn==1.3.0
numpy==1.24.3
Flask==2.3.2
Use environment variables to configure the application instead of hardcoding values. This makes your container more flexible and easier to configure in different environments. For example:
ENV MODEL_PATH=/app/models/model.pklThen, access the environment variable in your application:
import os
model_path = os.getenv('MODEL_PATH')
Security is a critical aspect of containerized applications. Here are some best practices to secure your ML applications:
Running containers as the root user can expose your system to security risks. Instead, create a non-root user and run the container as that user. For example:
# Create a non-root user
RUN useradd -m myuser

# Switch to the non-root user
USER myuser

# Set the working directory
WORKDIR /home/myuser/app

# Copy the application code
COPY --chown=myuser:myuser . .

# Run the application
CMD ["python", "app.py"]Use tools like Trivy or Clair to scan your Docker images for vulnerabilities. For example, to scan an image with Trivy:
trivy image ml-flask-appNever hardcode sensitive information like API keys or database credentials in your Dockerfile or application code. Instead, use Kubernetes Secrets or Docker Secrets to manage sensitive data. For example, in Kubernetes:
apiVersion: v1
kind: Secret
metadata:
  name: my-secret
type: Opaque
data:
  api_key: <base64-encoded-api-key>
Then, mount the secret as an environment variable in your deployment:
env:
- name: API_KEY
  valueFrom:
    secretKeyRef:
      name: my-secret
      key: api_key
Testing and debugging are essential for ensuring your containerized application works as expected. Here are some tips:
Before deploying to Kubernetes, test your container locally using Docker. For example:
docker run -p 5000:5000 ml-flask-appUse docker logs or kubectl logs to debug issues in your containerized application. For example:
docker logs <container_id>
kubectl logs <pod_name>Use CI/CD pipelines to automate the testing and deployment of your containerized applications. Tools like GitHub Actions, GitLab CI, or Jenkins can help us set up automated workflows.
By following these best practices, we can build efficient, reproducible, and secure containerized machine learning applications. From optimizing Dockerfiles to managing dependencies and ensuring security, these strategies will help us streamline our ML workflows and deploy models with confidence.
Containerizing machine learning applications with Docker and Kubernetes streamlines deployment, ensures reproducibility, and enhances scalability. By following best practices like optimizing Dockerfiles, managing dependencies, and prioritizing security, we can build robust, efficient, and secure ML workflows.
To continue learning about containerization and enhance your machine learning workflows, check out these courses:
Top DataCamp Courses
Track
Course
Course
blog
Joel Wembo
14 min
blog
Joel Wembo
9 min
Tutorial
Arunn Thevapalan
Tutorial
Moez Ali
Tutorial
Patrick Brus
Tutorial
Abid Ali Awan