Track
Developing AI Applications
21 hr
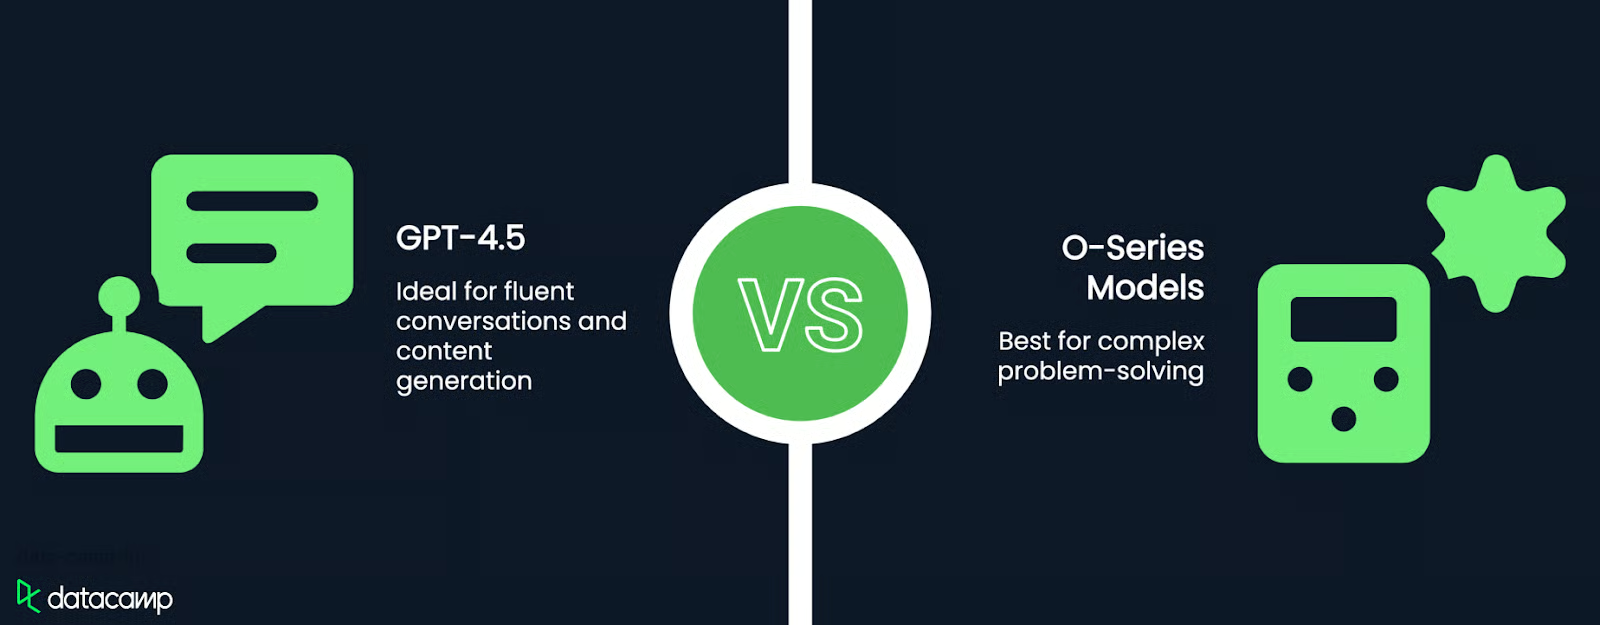
GPT-4.5 is OpenAI’s latest language model, designed to improve conversation fluency, contextual awareness, and factual accuracy. It builds on previous models by offering more natural responses, better tone adaptation, and fewer hallucinations, making it well-suited for applications like chatbots, content generation, and task automation.
However, unlike OpenAI’s o-series models, GPT-4.5 does not rely on step-by-step reasoning, so it’s not the best choice for complex problem-solving in areas like math or programming. If you need a reasoning model for your application, you can read this tutorial on OpenAI O1 API.
For a deeper look at GPT-4.5’s strengths, limitations, and benchmark comparisons, check out our full breakdown of GPT-4.5.
In this section, we will walk through the steps to connect to the OpenAI API, including creating an API key and setting up your Python environment.
To use the OpenAI API, we need to create an API key. This key is used to authenticate our Python client with the API.
1. Navigate to the OpenAI API key page.
2. You'll need to sign in or create an OpenAI account if you don't have one already.
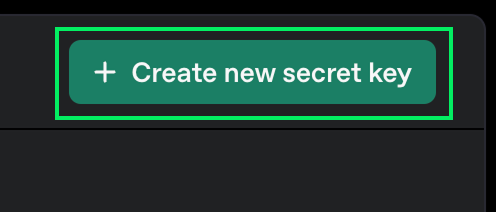
3. Click the "Create new secret key" button.
4. You can choose a name for it, but it's fine to leave the default options.
5. Click the "Create secret key" button.
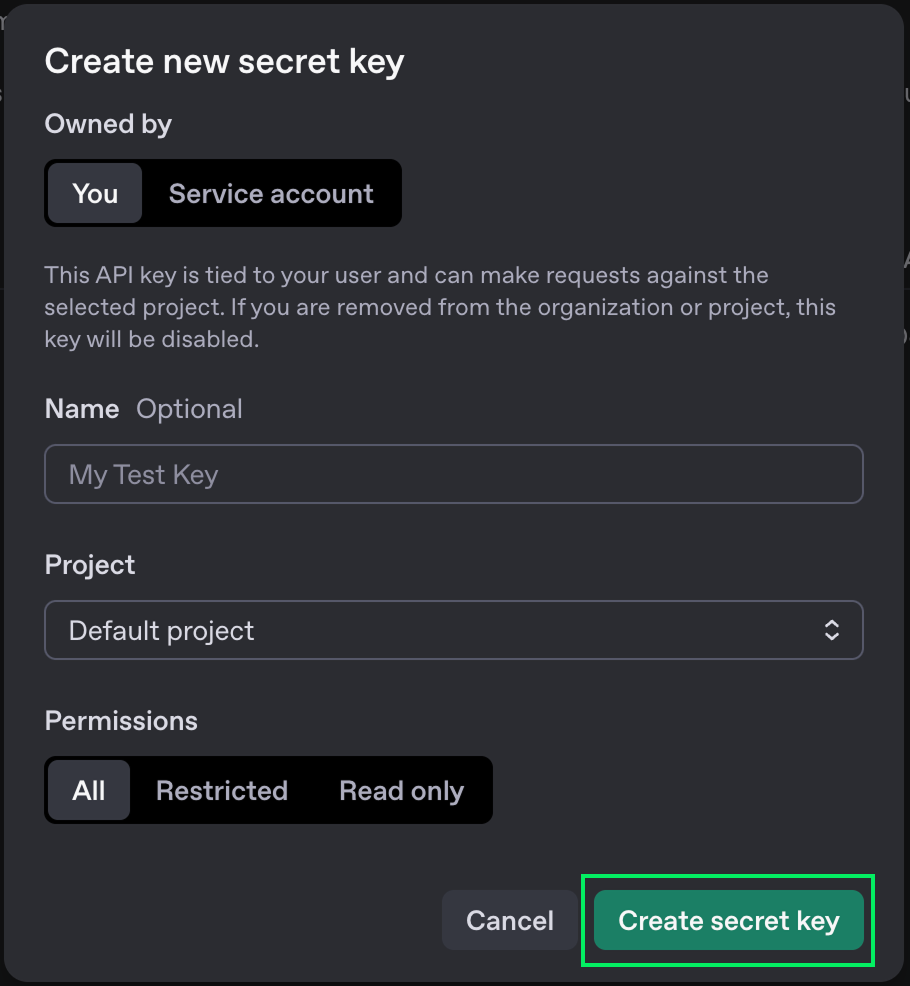
6. When the key will be shown, copy it. You won't be able to see it again later. If you lose it, you can always delete it and create a new one.

7. Create a file named .env in the same folder where you'll write the Python code and paste the key there with the following format:
OPENAI_API_KEY=<paste_your_key_here>The OpenAI API isn't free. Depending on the model you use, you will incur different fees. All the details about pricing can be found on their pricing page.
These fees are different from the subscriptions for using ChatGPT on its online interface. When using the API, we pay per message instead of paying a fixed amount each month. For regular usage, this can be a much cheaper way of accessing their models.
In this tutorial, we are going to use their latest model, GPT-4.5. This is the most advanced generalist model.
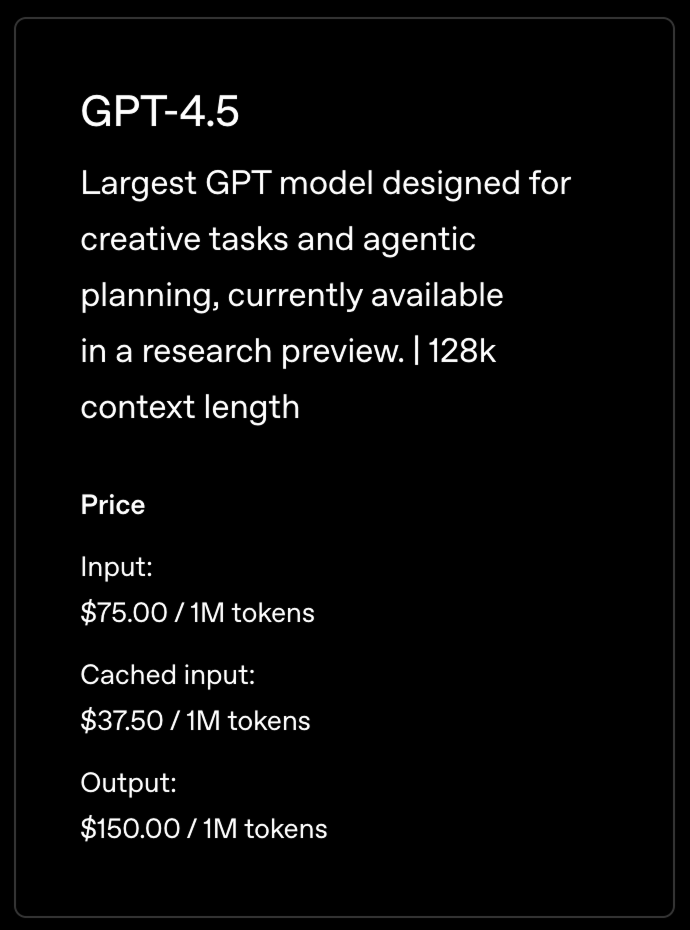
The prices aren't set per message but rather per token. When we send a message to an LLM, it is broken down into tokens. There is no reliable formula for converting words into tokens, but to get an idea, one can estimate that one token is more or less 3/4 of a word.
This means that the pricing above roughly corresponds to 750,000 words.
To use the API, we need to add credits to our account. This can be done on OpenAI’s billing page.
OpenAI provides a Python client that makes it easy to interact with their API. To use it, we need to install it, as well as a few other packages to help us load the key we created previously.
We'll use Anaconda to create a Python environment to install the necessary dependencies. This is a cleaner way to do it as it avoids potential conflicts with other Python packages we might have.
After installing Anaconda, we can create the environment using the terminal command:
conda create -n gpt45 -y python=3.9This command creates an environment named gpt45 that uses version 3.9 of Python. The -y option is used to automatically answer yes to all questions in the creation process.
Next, we activate the environment using:
conda activate gpt45Finally, we installed the necessary dependencies.
pip install openai: Install the OpenAI Python library.pip install python-dovenv: Install a package to load the API key from the .env file we created before.We're ready to start writing Python code to make requests to the OpenAI API.
Start by creating a file named script.py. This is where we'll write the code.
Next, we import the packages:
from openai import OpenAI
from dotenv import load_dotenv
import os
Then, we load the API key and initialize the client:
load_dotenv()
api_key = os.getenv("OPENAI_API_KEY")
client = OpenAI(api_key=api_key)
Finally, we send a message. To start, we'll just send "Hello":
completion = client.chat.completions.create(
    model="gpt-4.5-preview",
    messages=[
        {
            "role": "user",
            "content": "Hello"
        }
    ]
)
print(completion.choices[0].message.content)
The model parameter is used to specify the model we want to use. To try other models, replace it with another one.
We can run the script using:
python script.pyHere's the result:
Hello! How can I help you today?In this section, we'll build on our previous script to create an interactive chatbot that allows us to talk with GPT-4.5 in the terminal.
To do this, we need to change our script to:
To read user input on the terminal, we use the input() function. When it's called, it will wait for the user to input text and then return that text.
prompt = input("> ")
print(prompt)
Here's how it looks when we run this in the terminal:
> Hello
HelloTo implement the chat, we'll use a loop that runs until the prompt is equal to "exit". This will be the main loop logic:
while True:
  prompt = input("> ")
  if prompt == "exit":
    exit()
# Prompt processing goes hereThe model doesn't keep a history of the messages we sent previously. It treats each message as a new one. Therefore, to get a chat behavior, we need to provide all messages that were sent so far together with the new prompt. We achieve this by keeping track of the chat history.
The messages from the users should have the following format:
{
  "role": "user",
  "content": <user prompt>
}
The model's answer should have the "assistant" role.
{
  "role": "assistant",
  "content": <model answer>
}
With this in mind, here's the complete chat implementation:
from openai import OpenAI
from dotenv import load_dotenv
import os

load_dotenv()
api_key = os.getenv("OPENAI_API_KEY")

client = OpenAI(api_key=api_key)

# Initialize the chat history
chat_history = []
while True:
    prompt = input("> ")
    if prompt == "exit":
        exit()
    # Add the user message to the chat history
    chat_history.append({
        "role": "user",
        "content": prompt,
    })
    # Send the full chat history
    completion = client.chat.completions.create(
        model="gpt-4.5-preview", messages=chat_history
    )
    # Display the answer
    answer = completion.choices[0].message.content
    print(answer)
    # Add the answer to the chat history
    chat_history.append({
        "role": "assistant",
        "content": answer,
})To try the chat, we can run it using the command:
python script.pyThen, we can start chatting by inputting our prompt into the terminal. Here’s a chat example:

The example shows two prompts. First, we ask the model to show us an example of doing a for loop in Python. Then, to test that the chat history is sent properly, we ask it to do the same in Javascript.
Because we provide the chat history, the mode can understand what we mean by “do the same” and gives us an example of a for loop in Javascript.
In this tutorial, we explored how to set up and chat with OpenAI's GPT-4.5 model using Python. We learned how to create an OpenAI API key and utilize it in our Python environment, enabling us to interact with GPT-4.5 outside of OpenAI's subscription-based platform.
We covered setting up a Python environment using Anaconda, installing necessary packages, and making our first request to the OpenAI API.
Finally, we built a simple interactive terminal-based chatbot by maintaining a conversation history.
Learn AI with these courses!
Track
Course
Course
cheat-sheet
Richie Cotton
Tutorial
Ryan Ong
Tutorial
Richie Cotton
Tutorial
Moez Ali
code-along
Richie Cotton
code-along
Zoumana Keita