
Course
Data Analysis in Excel
3 hr
140.7K
Excel supports several ways to add signatures, and choosing the right one matters. Image and drawn signatures are quick and work everywhere, but they're purely visual. Typed signatures are even faster for internal sign-offs, while digital signatures and signature lines add cryptographic verification and stricter change tracking in supported desktop versions.
I'll walk you through adding images, drawn, typed, and digital signatures in Excel. We'll cover using signature lines on Windows, anchoring and protecting signature objects, and troubleshooting common problems like shifting, disappearing, or invalid signatures.
Before we dive in, let me explain what each signature type does.

Scan or photograph your handwritten signature, save it as a PNG file, and insert it as a picture. This method works on all platforms (Windows, Mac, Web, and mobile). Keep in mind that anyone with edit access can move or delete the image, so I recommend this when you need professional appearance without security.
The Draw tab lets you sign directly on the screen using a mouse, trackpad, or stylus. I find this useful when you want the handwritten look but don't have a scanner, though it doesn't provide security.
You type your name in a cell and format it with a handwriting font like Segoe Script or Lucida Handwriting. Text signatures are easy to create but also easy to edit. I use them for informal sign-offs.
Digital signatures use certificates to verify who signed the document and that it hasn't changed. This is the only signature type that provides real security. You'll need a digital certificate, and some features are Windows-only.
Here's how I decide which signature type to use:
|
Goal |
Recommended Signature Type |
|
Professional appearance on printable forms |
Image signature |
|
Quick handwritten look without scanning |
Drawn signature |
|
Fast internal approval |
Text signature |
|
Tamper-evidence and change tracking |
Digital signature |
|
Formal approval workflow with visual marker |
Signature line (Windows only) |
Image signatures work across all Excel versions and platforms. Let me show you how.
Note: The Place in Cell option is available in Excel for Microsoft 365 and Excel 2024. Old versions only support Place over Cell.
Sign your name on white paper using a dark pen, then scan or photograph it. Here are a few tips I've learned:
If your signature has a white background, you can remove it using Excel's Set Transparent Color tool.
Here's how to insert your signature:
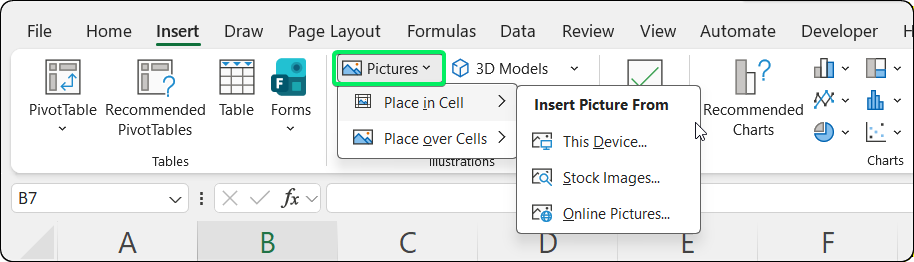
Insert tab showing Pictures options in Excel. Image by Author.
Which option should you use?
Use Place in Cell if your signature needs to stay with specific data rows (e.g., approval signatures in dynamic tables that you sort or filter). The signature becomes part of the cell value and adjusts automatically.
Use Place over Cell if you need precise positioning independent of cell changes (e.g., fixed signature at document bottom). The signature floats above the grid, and you can drag the corners to resize (hold Shift to keep proportions) or drag the center to move it.
If you choose Place over Cell, you'll need to anchor the signature manually. (Skip this section if you used Place in Cell, as those signatures anchor automatically.)
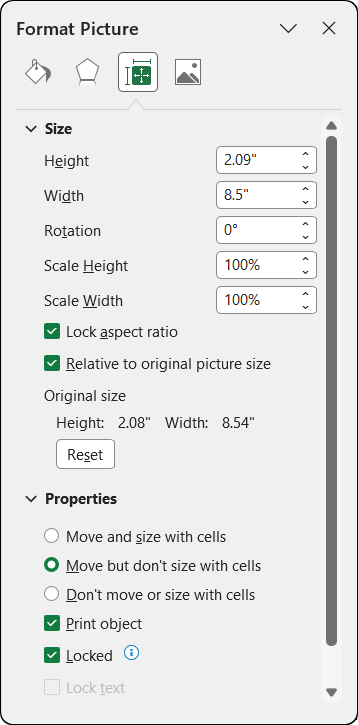
Properties section showing anchoring options. Image by Author.
You'll see three positioning options:
|
Setting |
Behavior |
Best For |
|
Move and size with cells |
Signature moves AND resizes with cells |
Signatures tied to specific data rows |
|
Move but don't size with cells |
Signature moves but keeps original size |
Most signature use cases |
|
Don't move or size with cells |
Signature stays fixed regardless of changes |
Header signatures or fixed locations |
I recommend "Move and size with cells" if your signature should follow data when sorting or filtering. Use "Don't move or size with cells" for signatures in fixed header areas. (Remember, Place in Cell signatures automatically use "Move and size with cells" behavior.)
If your signature image has a white background that looks odd against colored cells:
Excel makes that color transparent.
If you don't have a scanner, you can draw your signature directly in Excel.
The Draw tab may not be visible by default. To enable it:
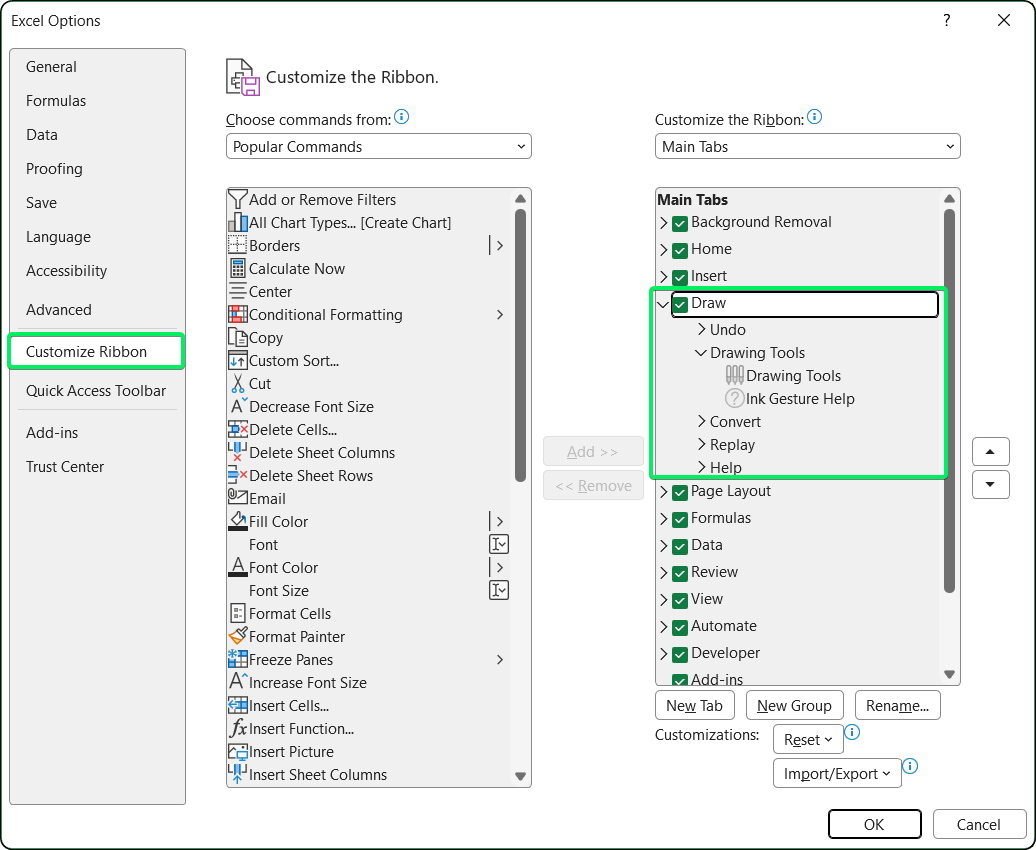
Enabling the Draw tab in Excel Options. Image by Author.
Touch-enabled devices usually show the Draw tab automatically.
Once the Draw tab is visible, here's how to create a signature:
On touch devices with a stylus, varying pen pressure creates thicker and thinner strokes for a more natural look.
After grouping, your drawn signature behaves like any other shape. Drag it to position, drag the corners to resize, and use the Format Shape options to adjust properties.
You can anchor drawn signatures using the same Size & Properties > Properties options you used earlier for image signatures. Right-click the signature, select Format Shape, and choose your preferred anchoring behavior.
This is the fastest option. Just type your name and format it to look like a signature.
Excel includes several fonts that look like handwriting. Here are my favorites:
|
Font |
Style |
Best For |
|
Segoe Script |
Casual modern cursive |
Personal documents |
|
Lucida Handwriting |
Clean elegant cursive |
Formal documents |
|
Brush Script MT |
Brush-style cursive |
Casual signatures |
|
Edwardian Script ITC |
Ornate formal script |
Certificates |
|
Bradley Hand ITC |
Casual friendly |
Personal correspondence |
After choosing a font:
Increase the font size: 14pt to 24pt typically looks appropriate
Consider dark blue (#1F3864) instead of black for a traditional ink appearance
Right-align the cell if the signature should appear on the right side of a document
Adjust row height if the signature text gets cut off
Anyone with access to the workbook can edit typed signatures, so I only use them when I trust everyone and don't need tamper-evidence.
Digital signatures verify that you signed the document and that it hasn't changed. Let me walk you through it.
When you apply a digital signature, Excel creates a hash of the workbook and encrypts it with your certificate. If anyone modifies a cell, Excel marks the signature as invalid. After signing, Excel treats the workbook as read-only for most users. If someone edits the file, Excel warns that the digital signature will be removed or marked as invalid.
Here's how to add a digital signature:

Adding a digital signature from the Info panel. Image by Author.
If you don't have a digital certificate, Excel will prompt you to get one. For personal use, create a self-signed certificate using SelfCert.exe (in your Office installation folder). For external documents, get one from a certificate authority like GlobalSign or DigiCert.
Once signed:
To view signature details, go to File > Info and look in the Signatures section, or click the Signatures button in the status bar.
Digital signatures have platform restrictions:
|
Platform |
Digital Signature Support |
|
Windows Desktop |
Full support |
|
Mac Desktop |
Invisible signatures only (no signature lines) |
|
Excel for the Web |
Does not support adding or verifying signatures |
|
Mobile (iOS/Android) |
Does not support digital signatures without add-ins |
If you need cross-platform compatibility, consider using image or drawn signatures for visual indication. For formal approval tracking, you may need to combine Excel with your organization's broader workflow tools.
Signature lines combine a visual placeholder with digital signature verification. Perfect for formal documents.
A signature line is a visible object that shows:
When signed, it combines both visual representation and cryptographic verification (similar to the invisible digital signature covered earlier).
Signature lines are only available in Excel for Windows. Mac, Web, and mobile users cannot insert or sign signature lines.
To add a signature line (Windows only):
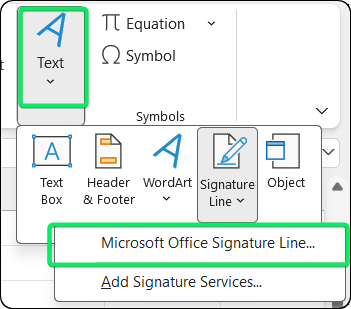
Insert tab showing Signature Line option. Image by Author.
A signature line placeholder appears in the worksheet.
When the designated signer receives the document:
Excel applies both the visual signature and the verification, making the document read-only.
After adding signatures, you can prevent accidental movement or deletion.
To prevent a signature image from being moved or edited:
This setting only takes effect when you protect the worksheet.
To enforce the lock:
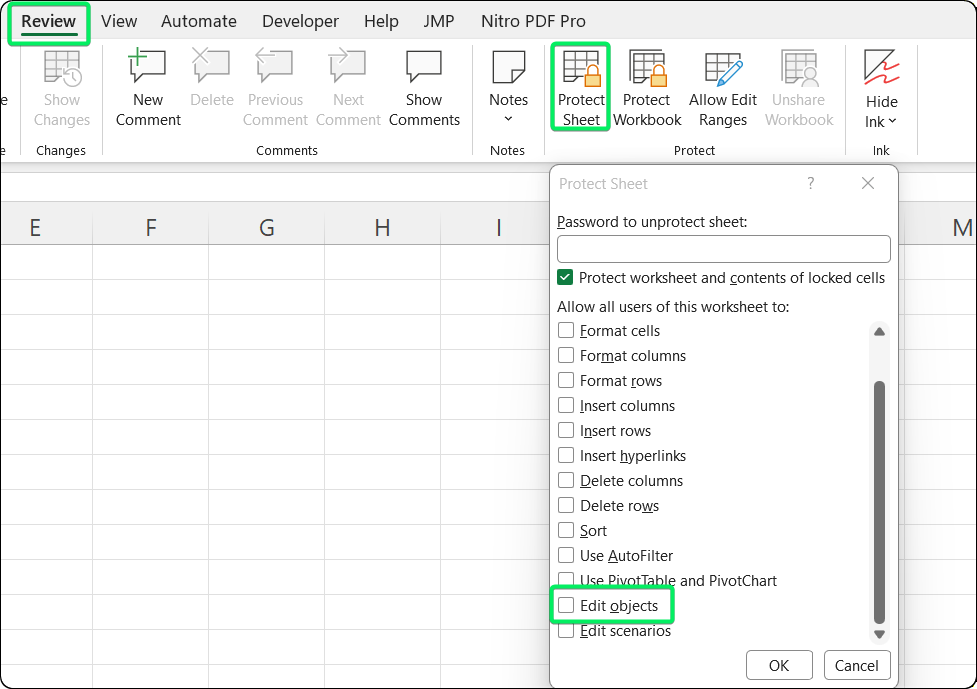
Protect Sheet dialog with object editing disabled. Image by Author.
Users can still view and print the worksheet, but they can't move or delete locked signature objects without the password.
Worksheet protection prevents casual editing but won't stop users with technical knowledge.
For tamper evidence, use digital signatures instead of worksheet protection.
|
Feature |
What It Does |
Security Level |
|
Object locking + sheet protection |
Prevents moving/editing images without password |
Low (password can be removed) |
|
Digital signature |
Verifies document hasn't changed |
High (cryptographic) |
|
Both combined |
Visual objects protected + integrity verified |
Recommended for formal documents |
I've run into these issues more times than I'd like to admit. Here's how to fix them.
If your signature keeps moving around, it's because the image isn't properly anchored to cells.
Note that on Android Excel apps, the "Move and size with cells" option may not be available.
If your signature doesn't show up or gets cut off when you print, it's usually because the "Print object" setting is disabled or the signature falls outside the print area.
First, enable the print object setting:
Then adjust the print area:
If your digital signature keeps becoming invalid, it's because the workbook contains volatile functions like =TODAY(), =NOW(), or =RAND() that automatically recalculate when you open the file.
To prevent this, switch Excel to manual calculation mode before signing. Go to Formulas > Calculation Options > Manual, then sign the document. When others open the signed file, they should also set their Excel to manual calculation in a blank workbook first, then open your signed file.
Blurry signatures happen because Excel automatically compresses images when you save the file. To fix this, turn off image compression before inserting your signature:
If the signature line option is grayed out or missing, it's usually because signature lines only work in Excel for Windows, or because the sheet has restrictions enabled. Here's what to try:
Here are some tips I've learned:
You now know several ways to insert signatures in Excel. The key is picking the right one for your particular case.
For informal documents, I stick with images or drawn signatures. For documents that need tamper-evidence (financial approvals, contracts, audit records), use digital signatures.
One last tip: finalize your content before signing, and set calculation mode to Manual if you have formulas like =TODAY().
For more Excel workflows, read our Excel Macros Tutorial and our Excel Table tutorial.
Gain the skills to maximize Excel—no experience required.
Learn Excel with DataCamp
Course
Course
Course
Tutorial
Javier Canales Luna
Tutorial
Allan Ouko
Tutorial
Laiba Siddiqui
Tutorial
Allan Ouko
Tutorial
Allan Ouko
Tutorial
Laiba Siddiqui