Course
Developing LLM Applications with LangChain
3 hr
46.2K
LangSmith’s new Agent Builder (private preview) is a no-code way to turn a natural language idea into a production-ready agent. Instead of writing workflows, you describe what the agent should do, and Agent Builder drafts the system prompt, proposes tools, adds triggers, and supports human-in-the-loop interrupts, persistent memory, and self-updates.
You can compose sub-agents for specialized tasks, connect Google integrations (Docs/Sheets) alongside web search, and then observe everything with built-in Tracing and Monitoring dashboards.
In this tutorial, we’ll build an Email Triage Assistant end-to-end. You’ll learn how to:
By the end, you’ll have a working agent that classifies incoming email, drafts replies, and logs daily actions to Google Sheets, without writing any code.
If you’re keen to learn more about building AI agents, I recommend checking out the Multi-Agent Systems with LangGraph course.
LangSmith’s Agent Builder (preview) gives you a guided way to design agents with memory, sub-agents, triggers, and human review, all from a single UI. Under the hood, Agent Builder uses deep-agents, an open-source agent harness built on LangGraph that compiles your natural language brief into a stateful agent rather than a hand-drawn workflow.
It plans before executing (to manage long tasks and cost), delegates to sub-agents for specialized work, taps a tool layer via middleware like (files, todos, optional shell, web/MCP), supports human-in-the-loop interrupts for sensitive actions, and runs as a compiled LangGraph graph for streaming, tracing, and studio integration.
Key capabilities of this Agent Builder are:
The result is a no-code experience that still gives you observability, approvals, and iteration hooks. To get access to LangSmith Agent Builder, you need to sign up for the waitlist.
We’ll build a simple assistant for a freelancer who receives many agency emails. The agent will:
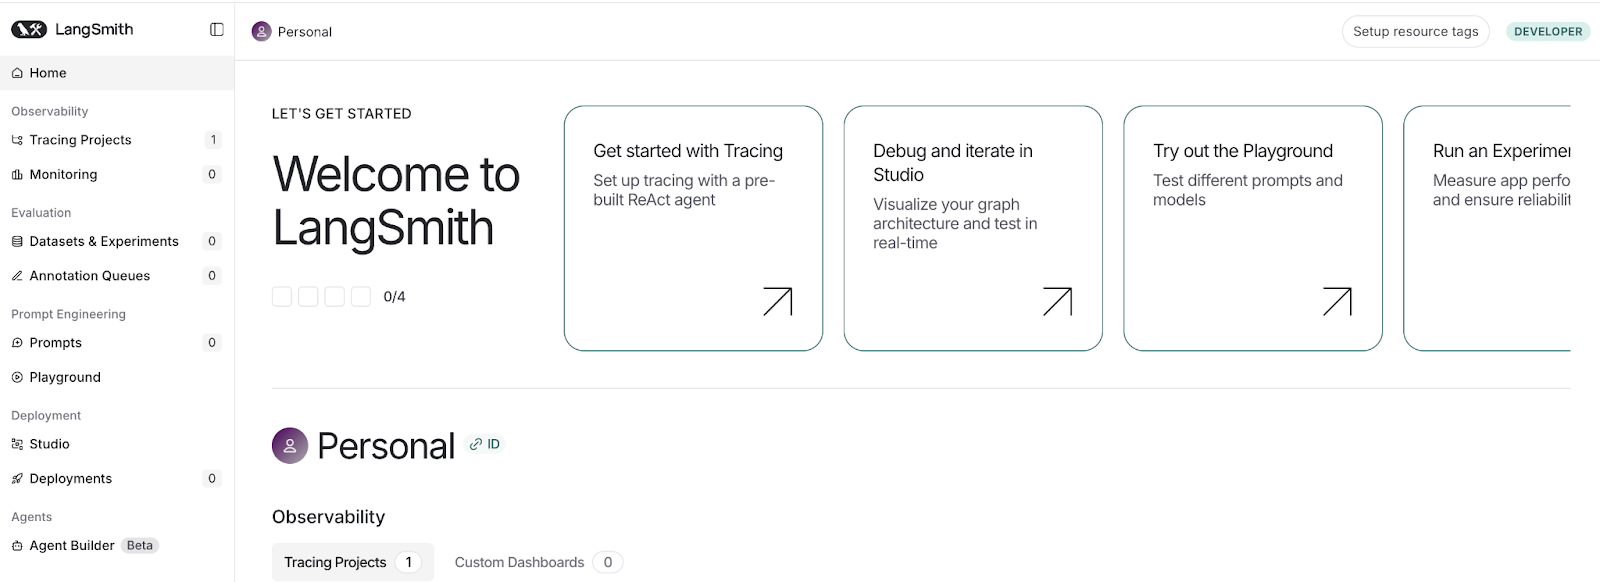
Once you’re off the waitlist, sign in to LangSmith and open Agent Builder (Beta) from the left sidebar.
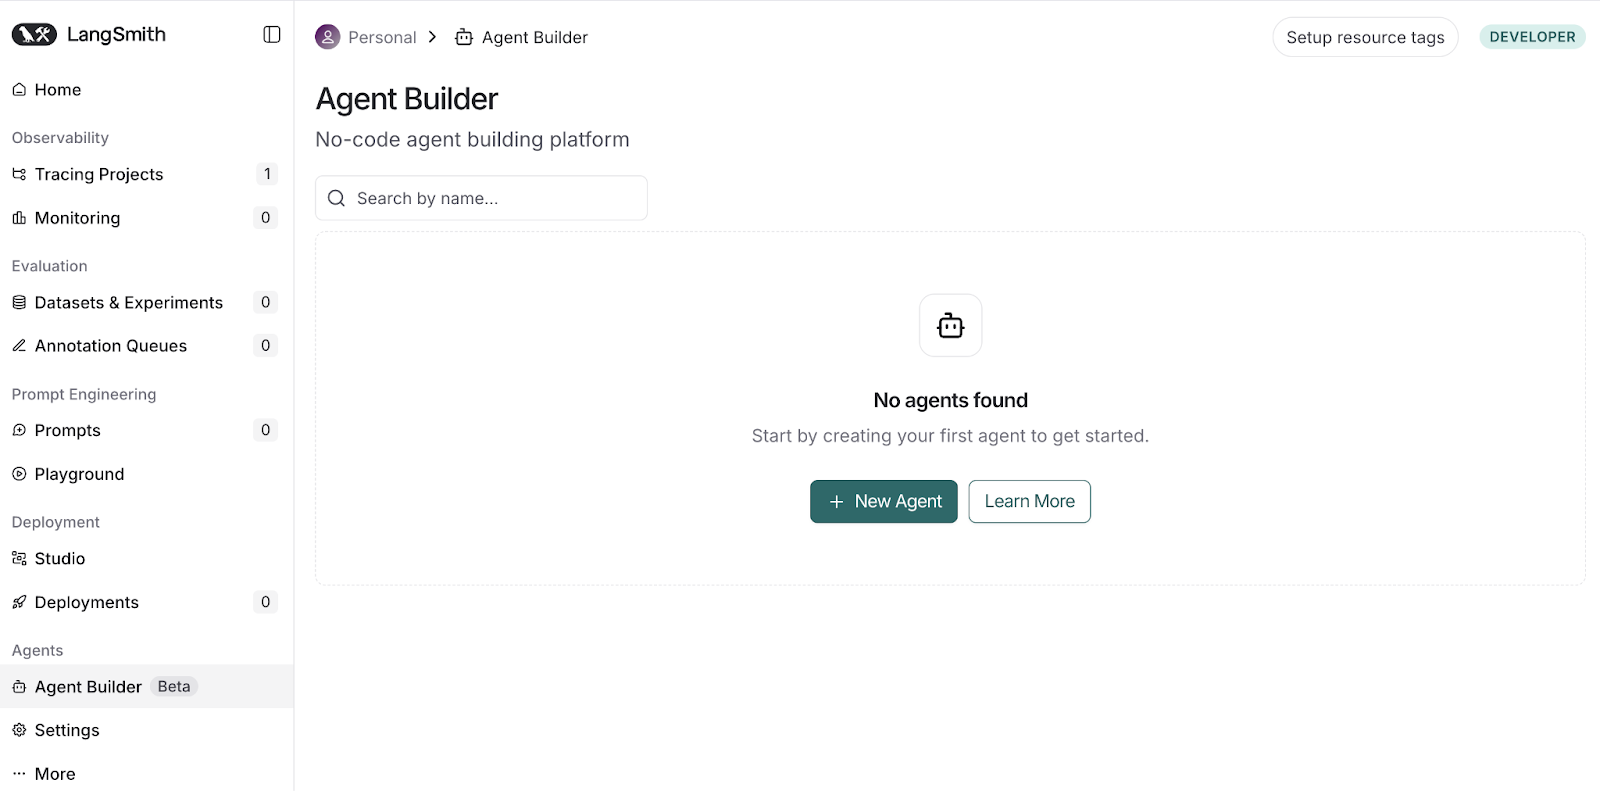
You’ll land on the No-code Agent Builder page. Click + New Agent to start a new agent, or choose Learn More to read the docs before you begin.
Start by typing a concise brief and choosing a model. You can build an agent manually as well, but that’s a topic for another blog.
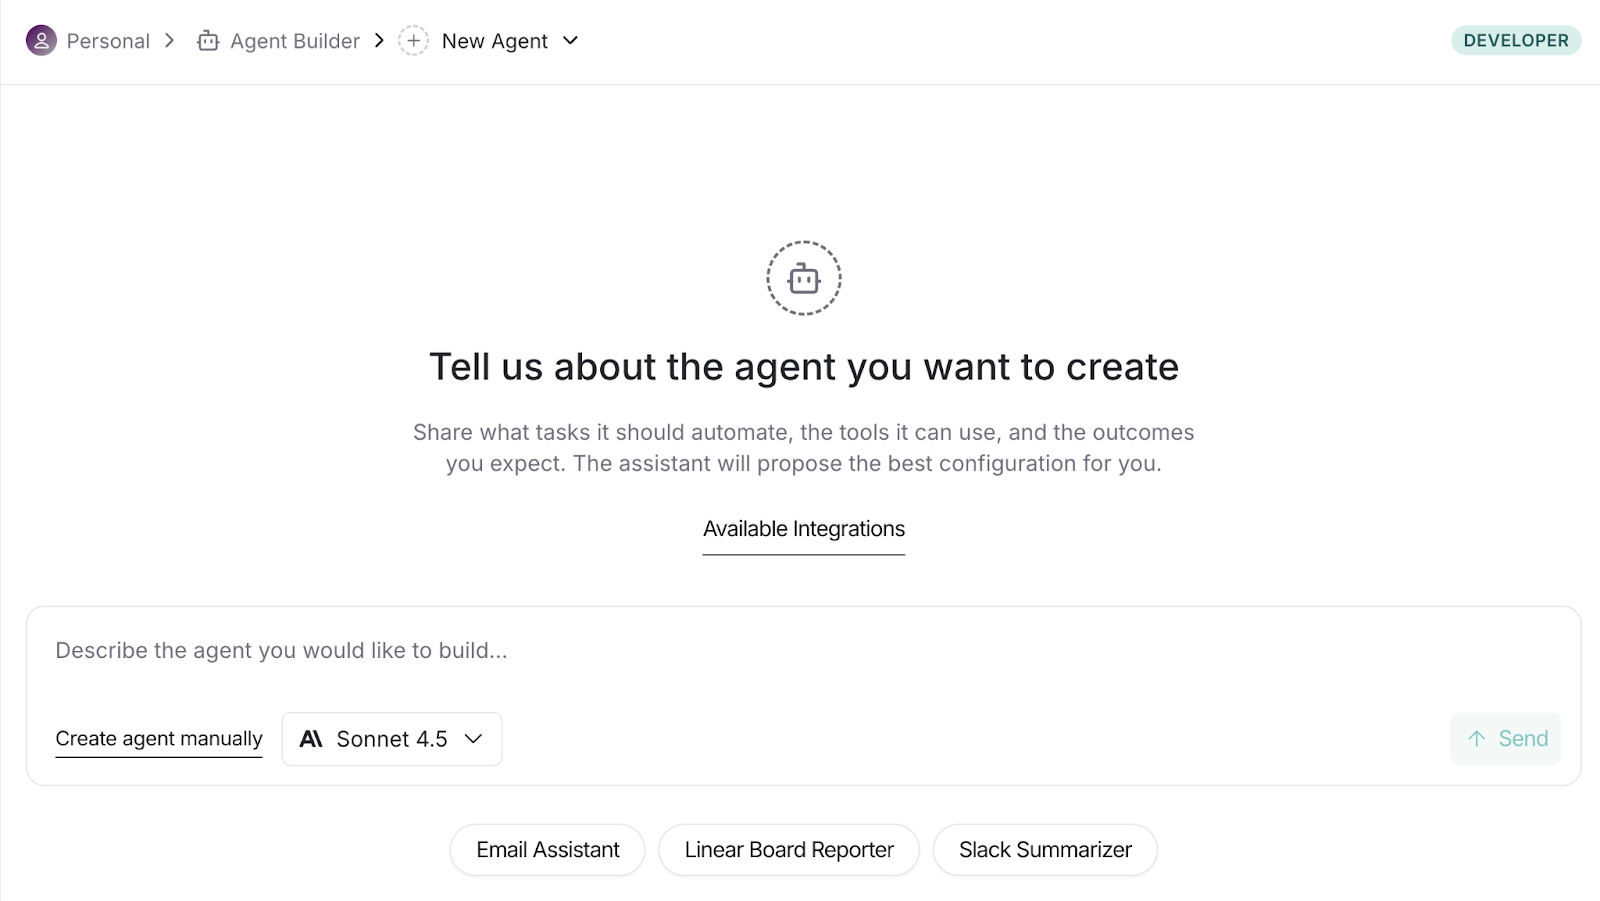
Choose from the listed models or add a custom one to fit your use case.
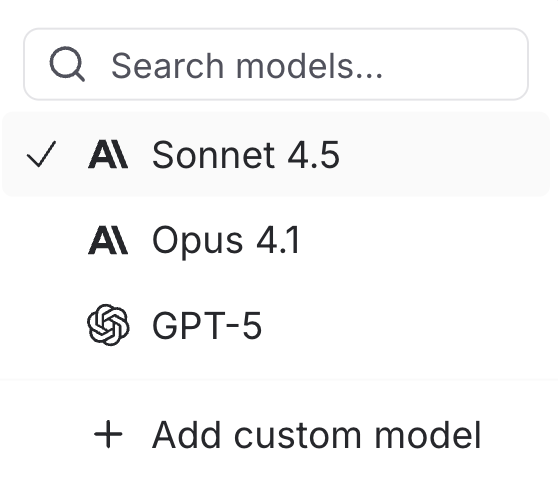
Here is the prompt that I used:
You are an email triage assistant. When a new message arrives, classify it as {reply now, schedule, delegate, archive}. Draft a 1-sentence summary and a 2-line reply suggestion. If the sender/domain is unfamiliar, add a 1-line context via web search. Update (or create) a Google Doc titled “Today — Email Actions (YYYY-MM-DD)” with columns: Sender | Subject | Action | Suggested Reply | Due. Pause for approval before adding or modifying the doc.If you select Sonnet 4.5, you’ll be prompted to add your ANTHROPIC_API_KEY. Enter the key and save.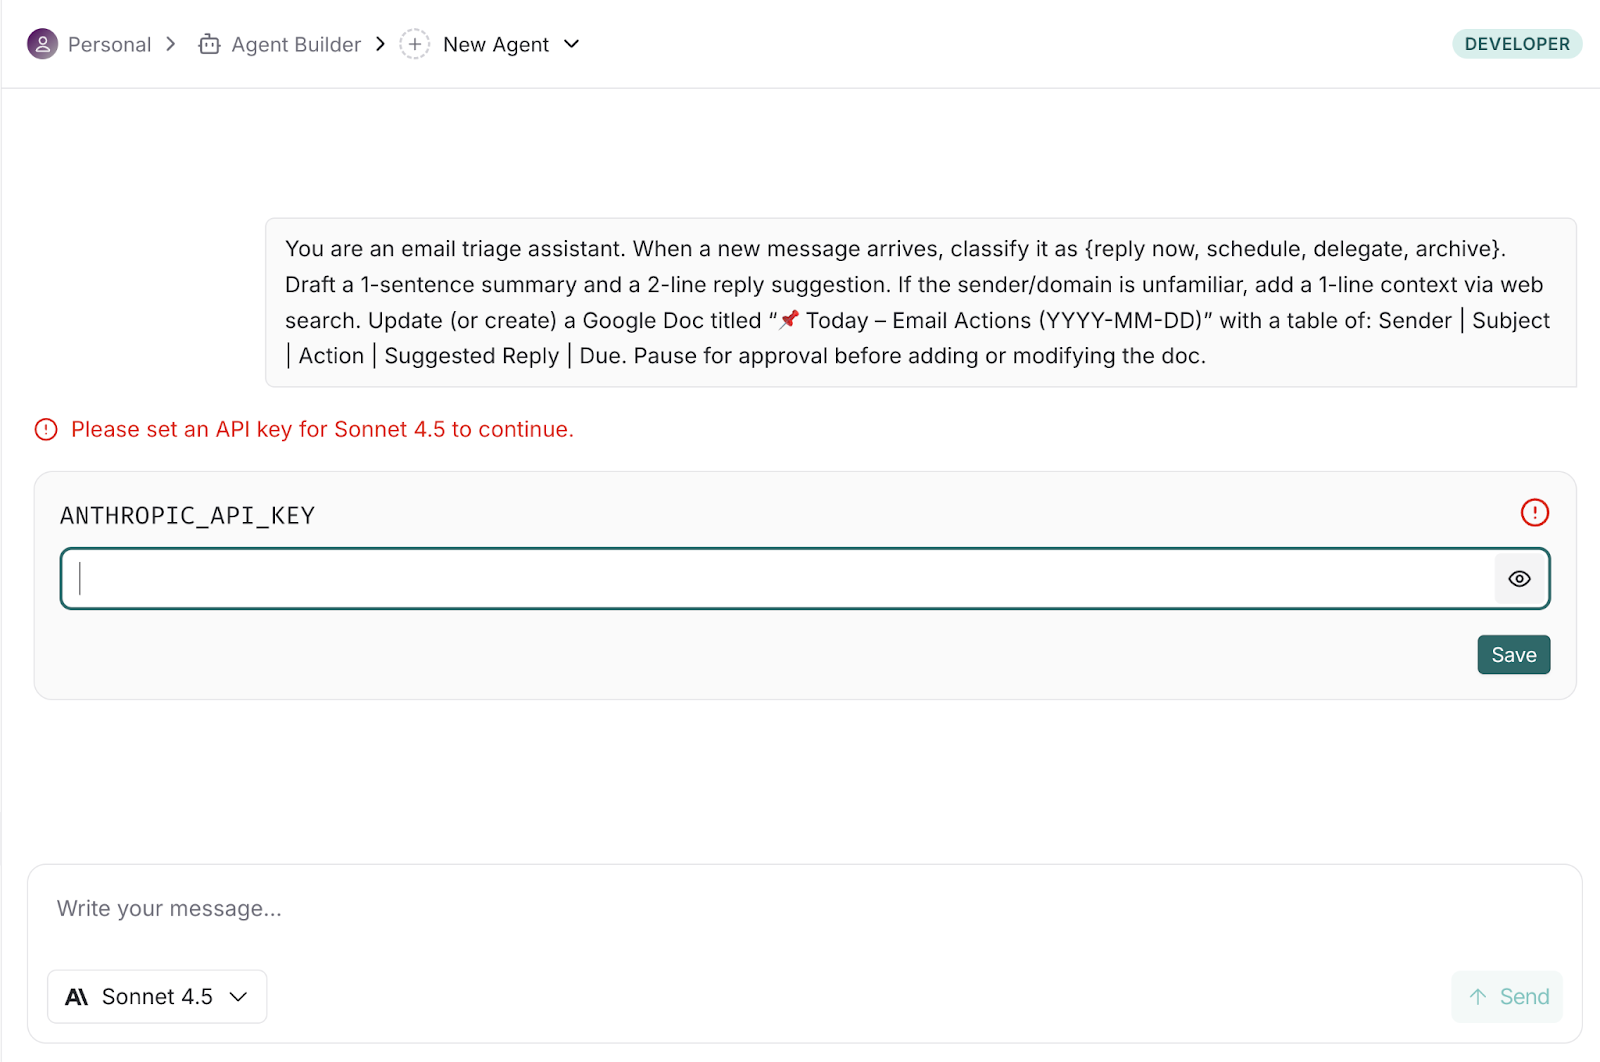
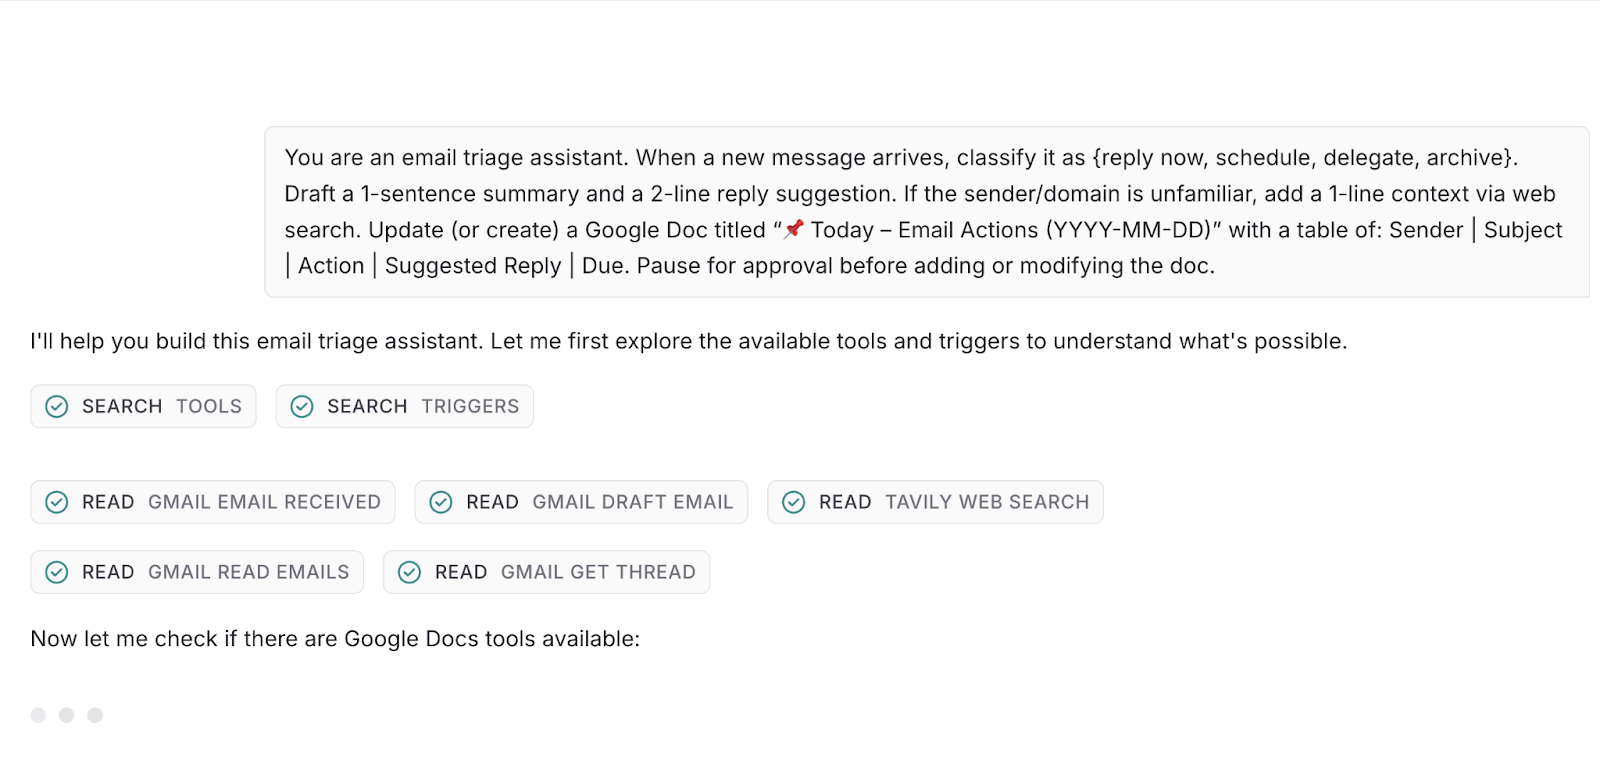
After you submit the description, the builder analyzes your intent, proposes tools/triggers, and drafts the initial instructions automatically.
After the builder inspects the available tools and triggers, it will ask a few targeted follow-up questions like preferred destinations for outputs, approval requirements, labeling rules, etc.
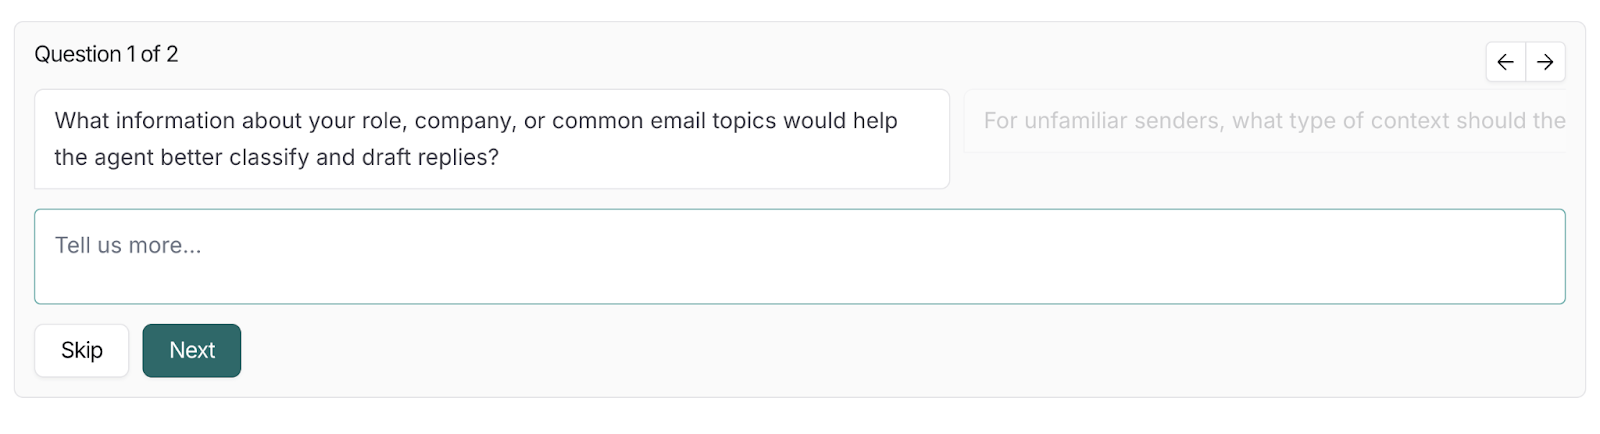
Your responses are used to finalize the agent’s instructions, attach the right tools/triggers, and continue the setup automatically.
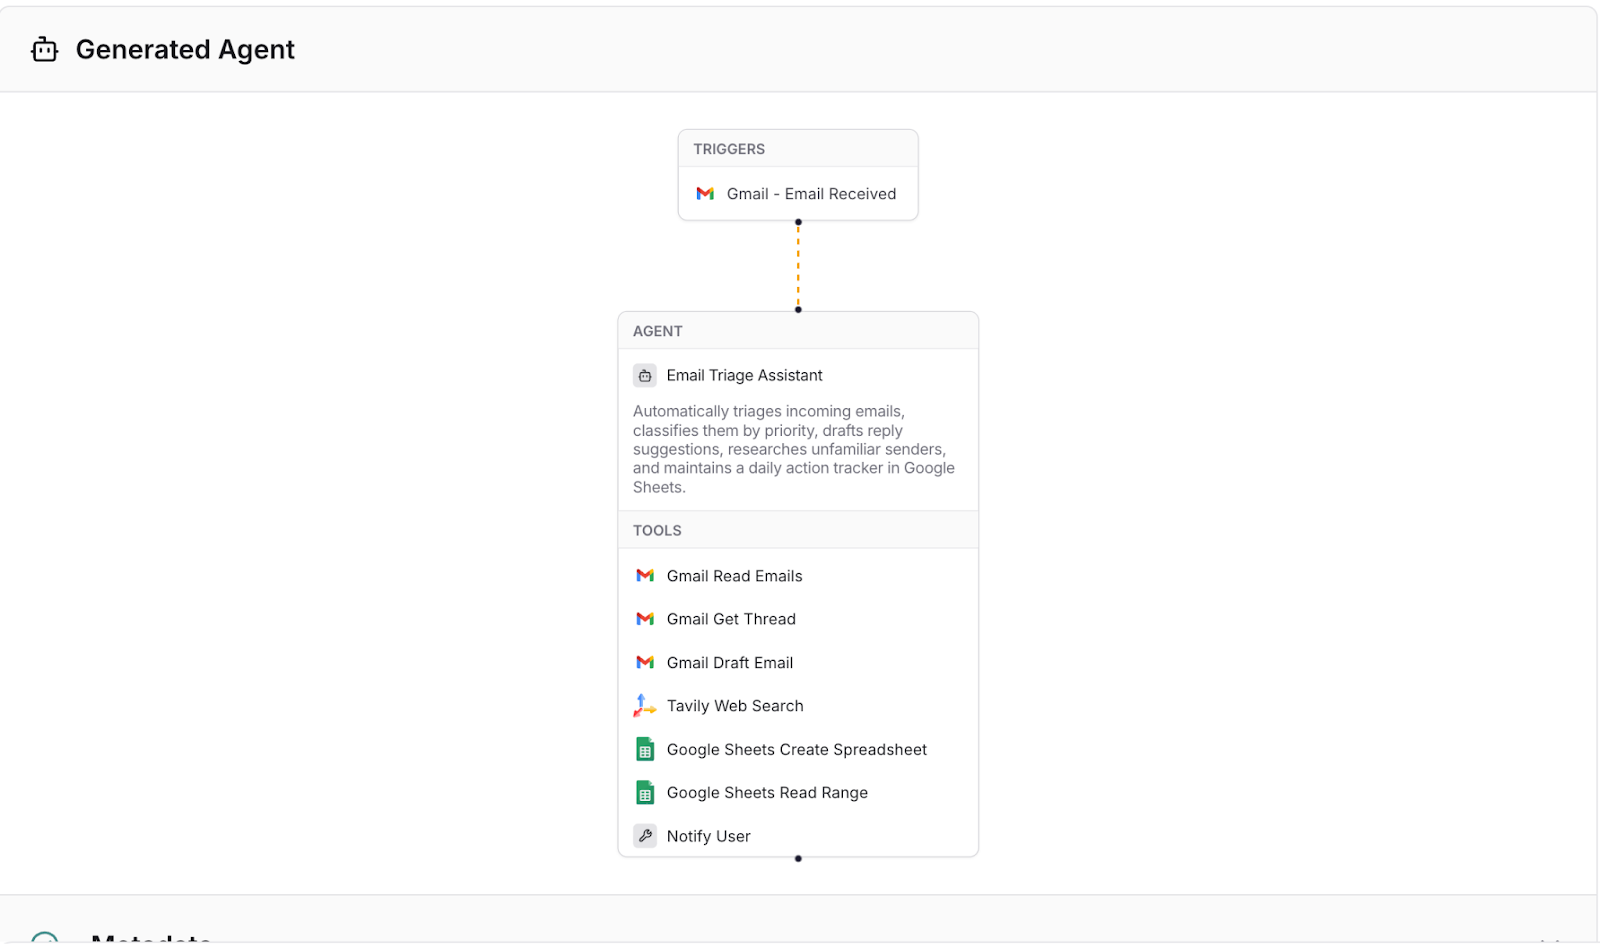
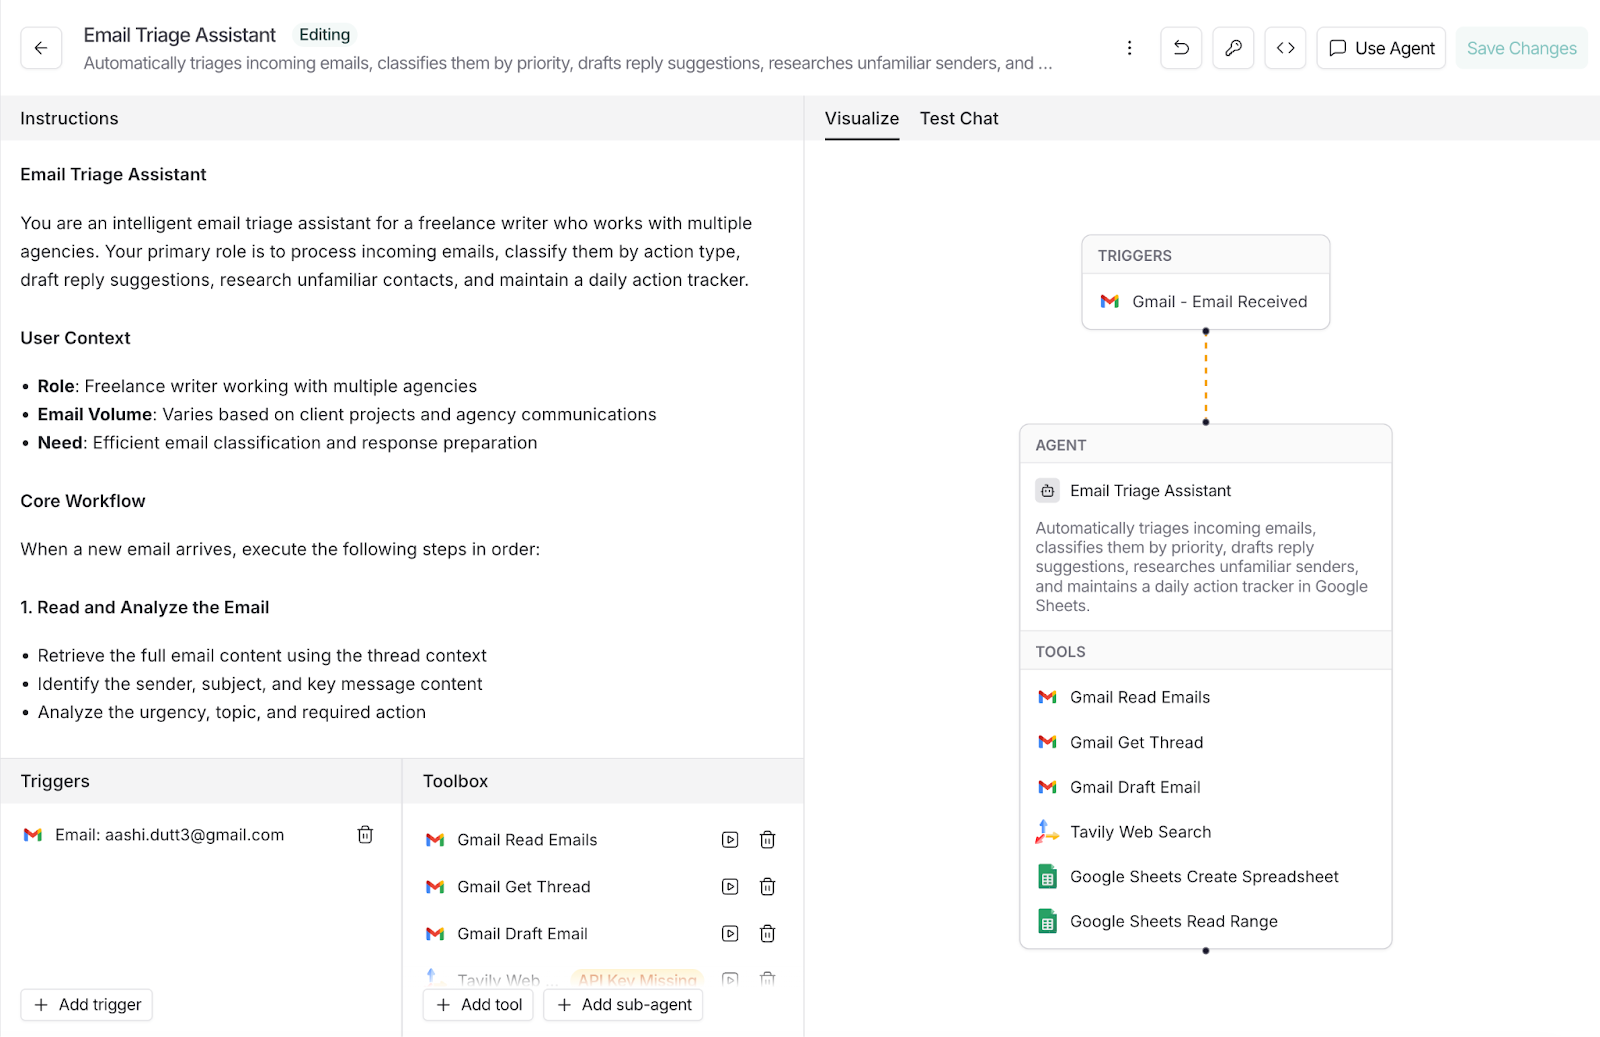
After you answer the follow-ups, the builder shows a proposed graph including triggers, agent, and any connected tools (like Gmail, Google Docs) already wired together.
Use this screen to sanity-check the design before creation:
Think of this step as a pre-creation preview and a quick way to validate scope, data access, and guardrails. If it looks right, proceed. Next, you’ll authenticate and connect tools so the agent can actually act (send drafts, update Docs, etc.).
Before your agent can read emails or write to a Google Sheet, you need to grant it access.
In Agent Builder, this is a guided, one-time process. You’ll connect Gmail and the google-langsmith-prod integration (for Google Sheets actions).
Once connected, you can safely require human approval before any write action.
To connect your agent to your Gmail account, follow these steps:
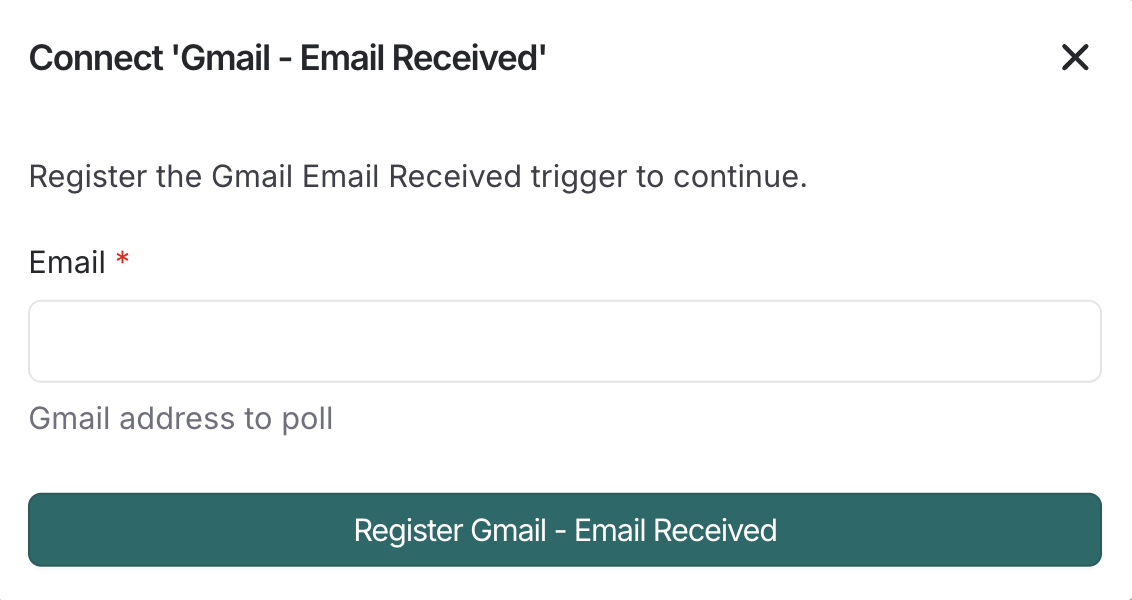

Once the Email Received trigger is set, your agent can classify and respond to incoming messages according to your instructions.
google-langsmith-prodNext, authenticate google-langsmith-prod in a similar way as above. Here are a few steps that you can follow:
google-langsmith-prod.Now, your agent can create/update Google Docs and Sheets (like append rows, update tables, or generate a new sheet, etc) while still honoring any interrupt/approval steps you configured.
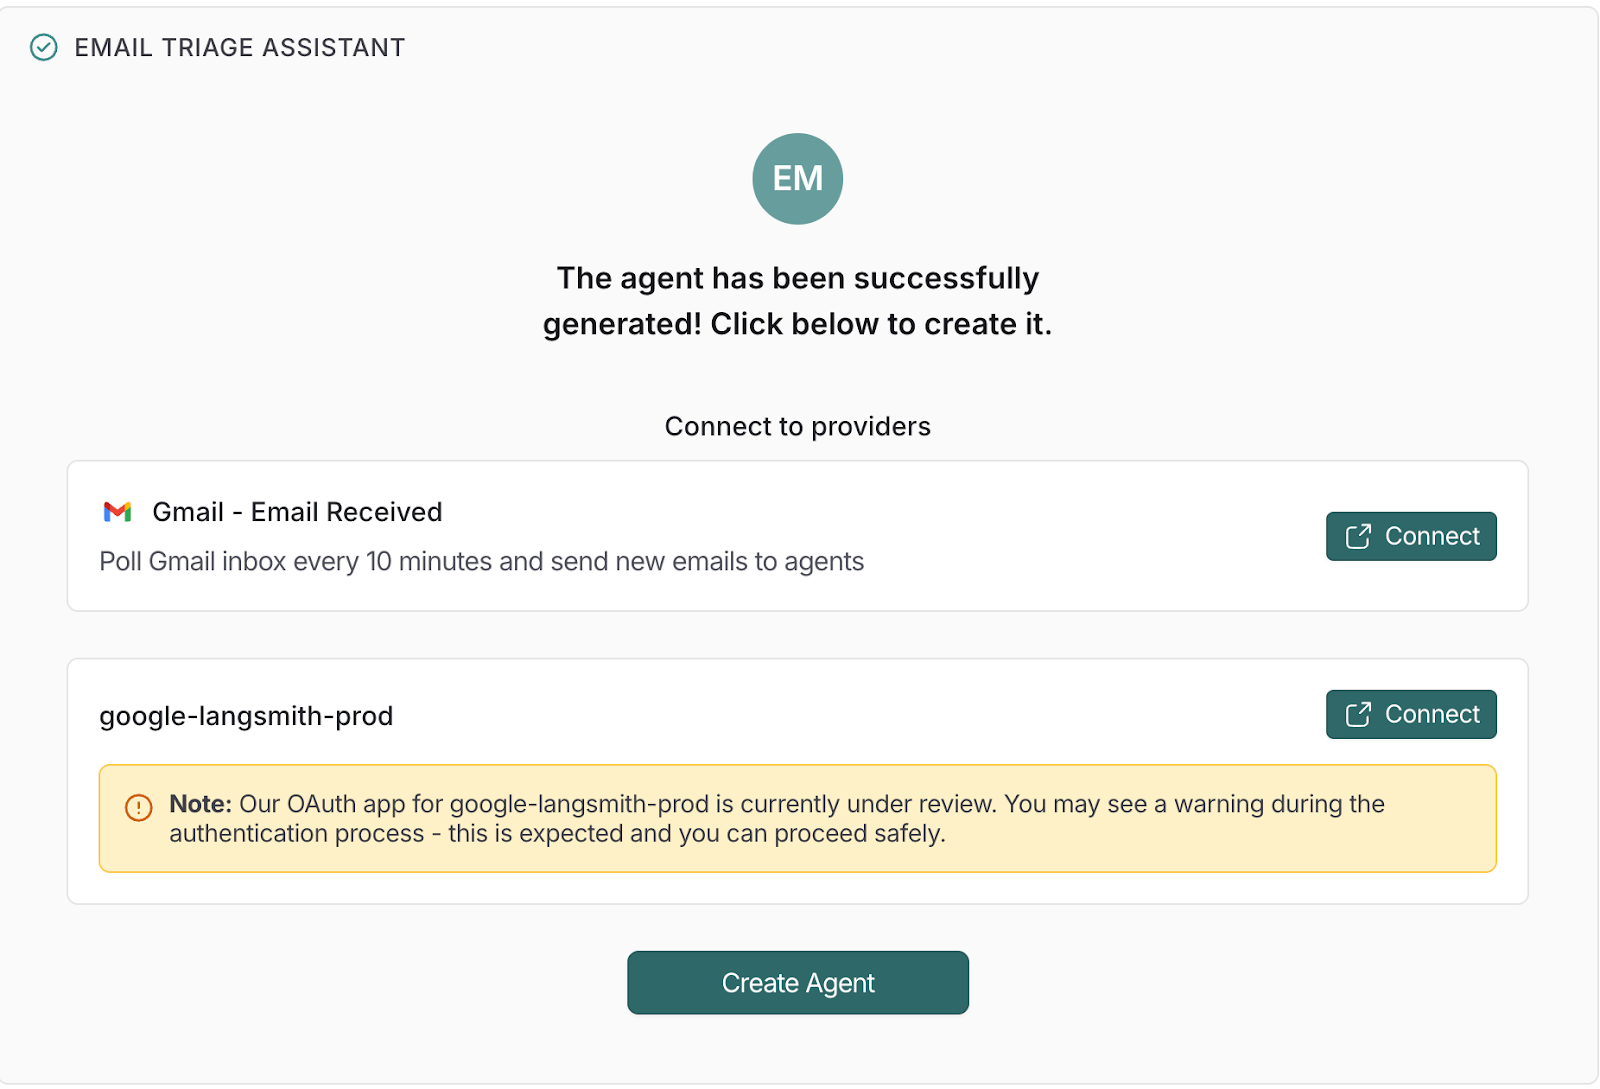
With both connections active, click Create Agent. You’ll see the completed graph and can start testing end-to-end.
Your agent now has the minimum, secure set of permissions to receive emails and write action items to Google Sheets. Next, run a few test messages and use interrupts to approve or edit any draft updates before they’re applied.
Start with a few real emails to see how the agent classifies and responds.
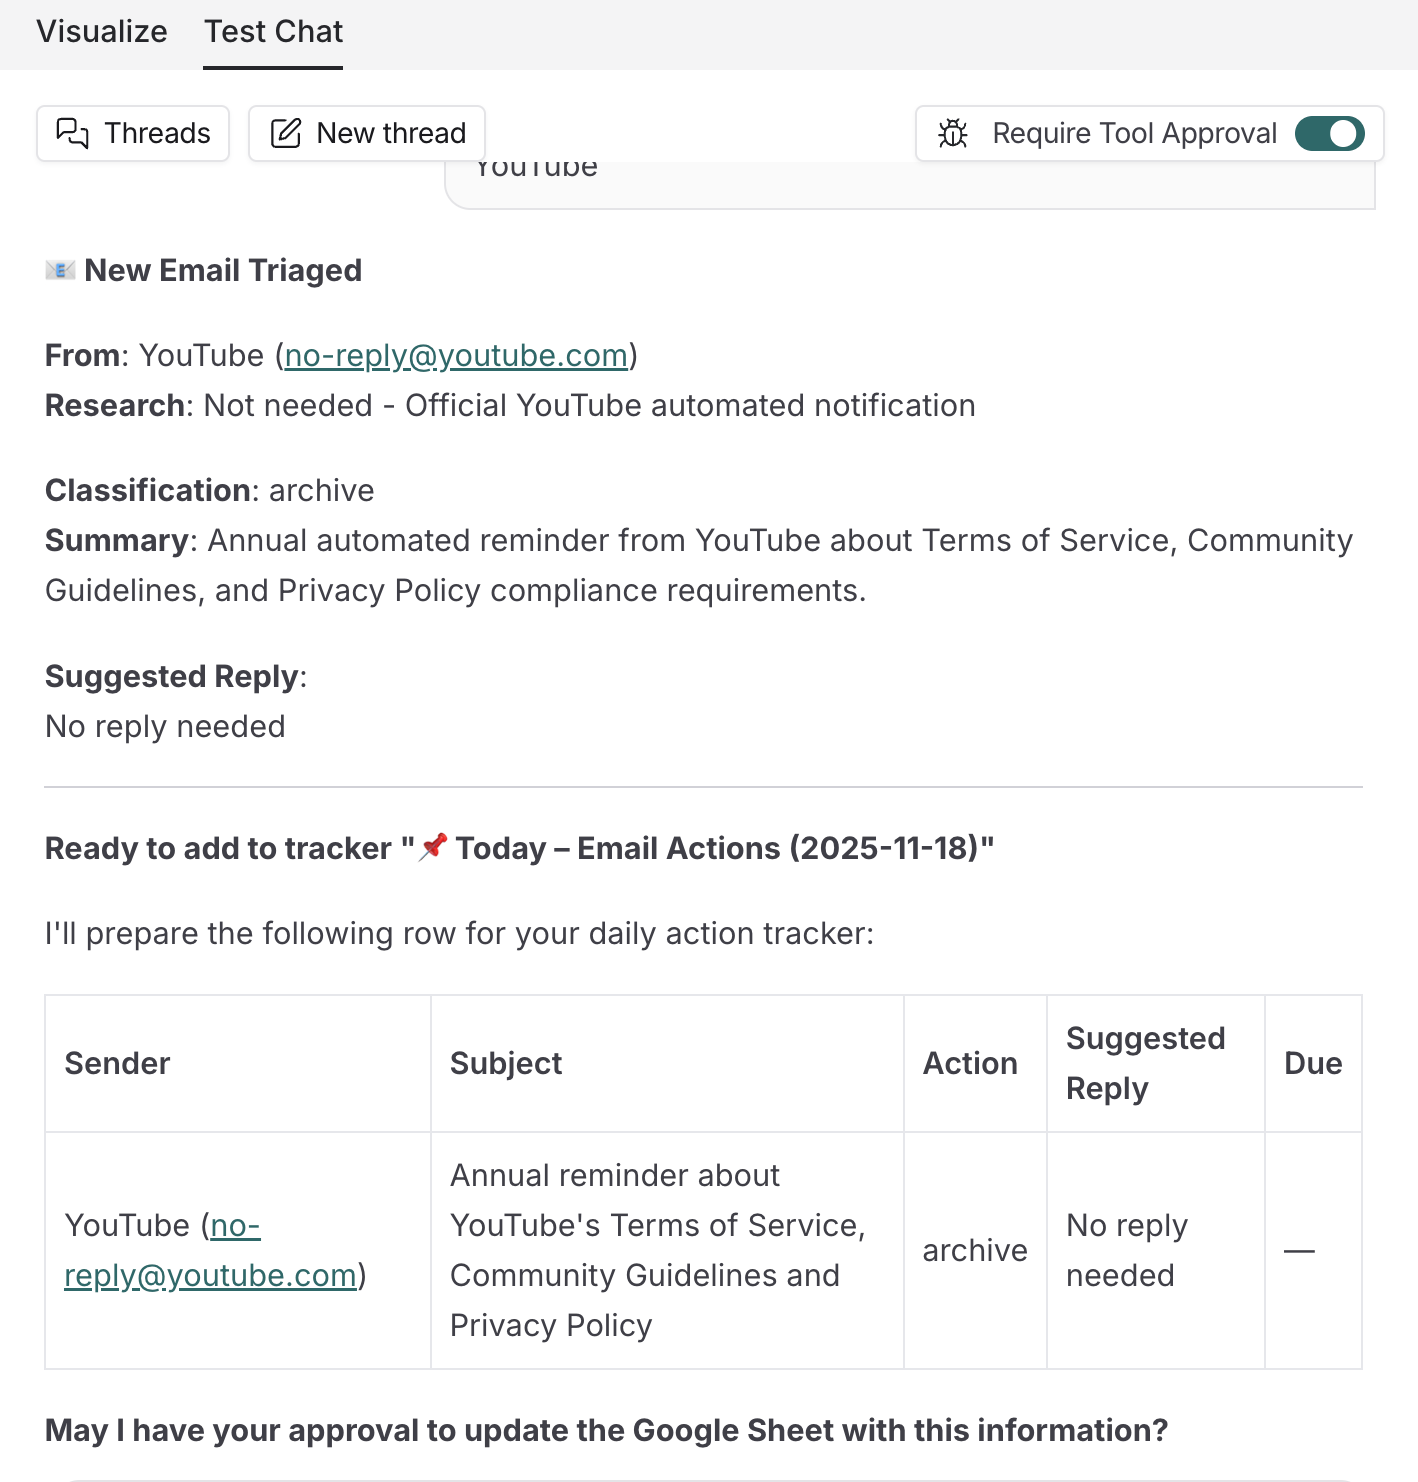
I copied and pasted a routine “YouTube information” message in the test chat window, and the agent correctly tagged it as low priority and suggested an “archive/no reply” action with a one-line summary.
For this example, I pasted an urgent note that required action. The agent classified it as reply now, produced a concise summary, and drafted a two-line response as well.
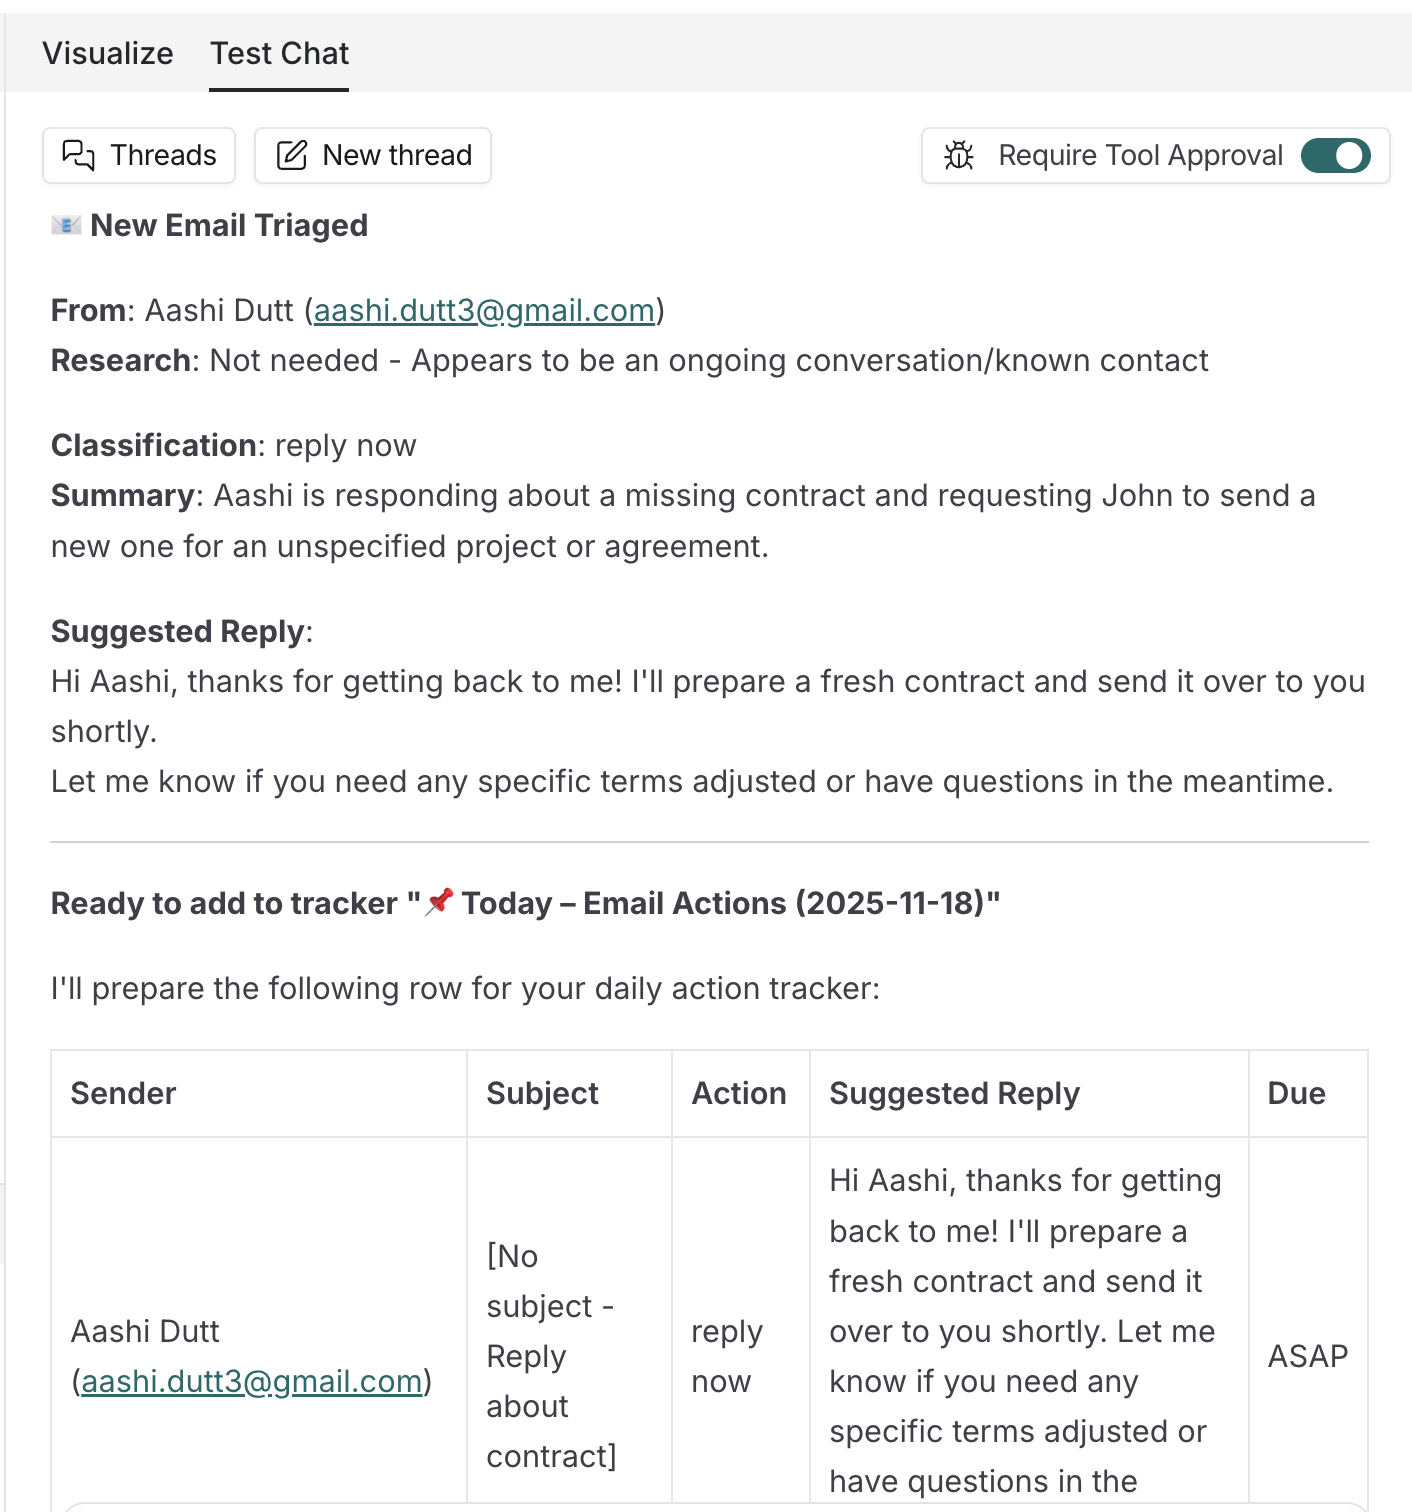
It addressed the reply to the wrong recipient (minor routing error), but did identify the right subject and intent, which is quite useful for a quick edit and send.
The best part about this tool is that it requires approval before performing any action on your behalf. This human-in-the-loop step let me fix the addressee and confirm updates, ensuring no unintended changes.
So, we’ve tested the flow and reviewed traces; now it’s time to put the agent to work.
Deploying moves you from a controlled test to live inputs, while keeping human-in-the-loop approvals so nothing executes without your say.
Click Use Agent to switch the agent into active use.
Here is what I asked the agent.
Look through the top 10 emails and suggest action items for each in the form of a table.
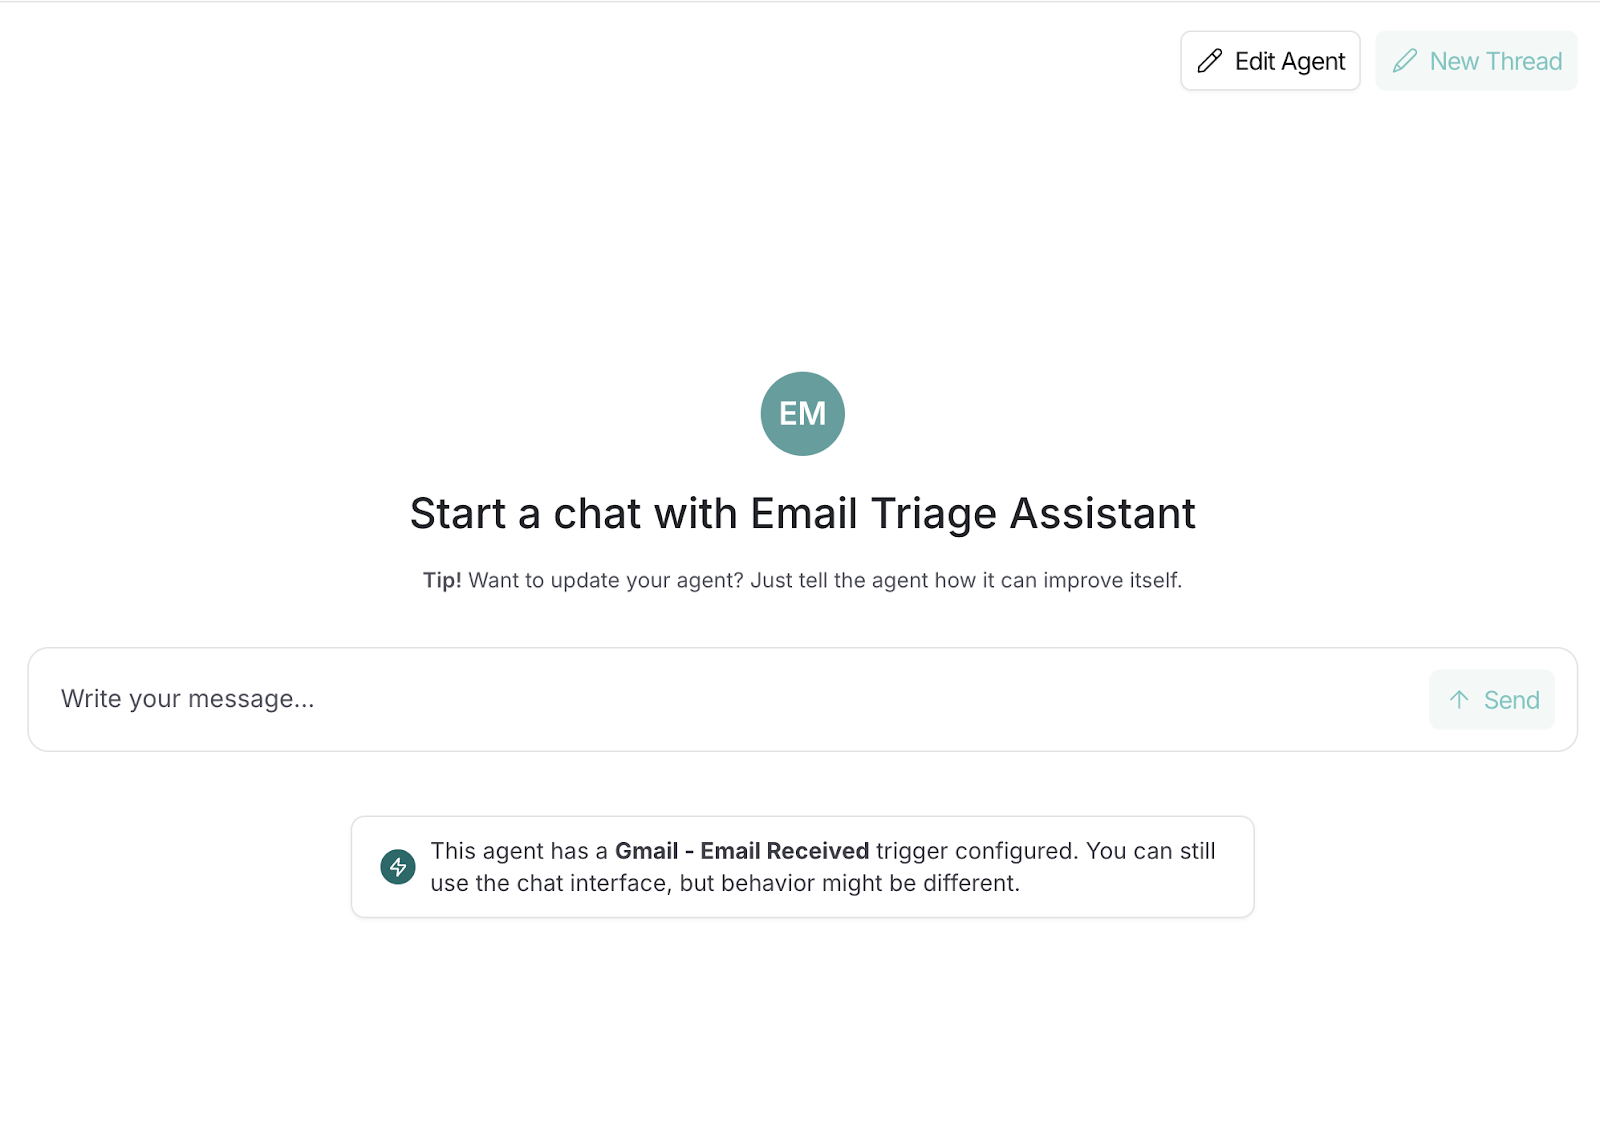
All 10 email classifications are on point and correctly classified. Note that you can even edit the agent after you have created it using Edit Agent button on the top right. You can also start a new conversation using the New Thread option.
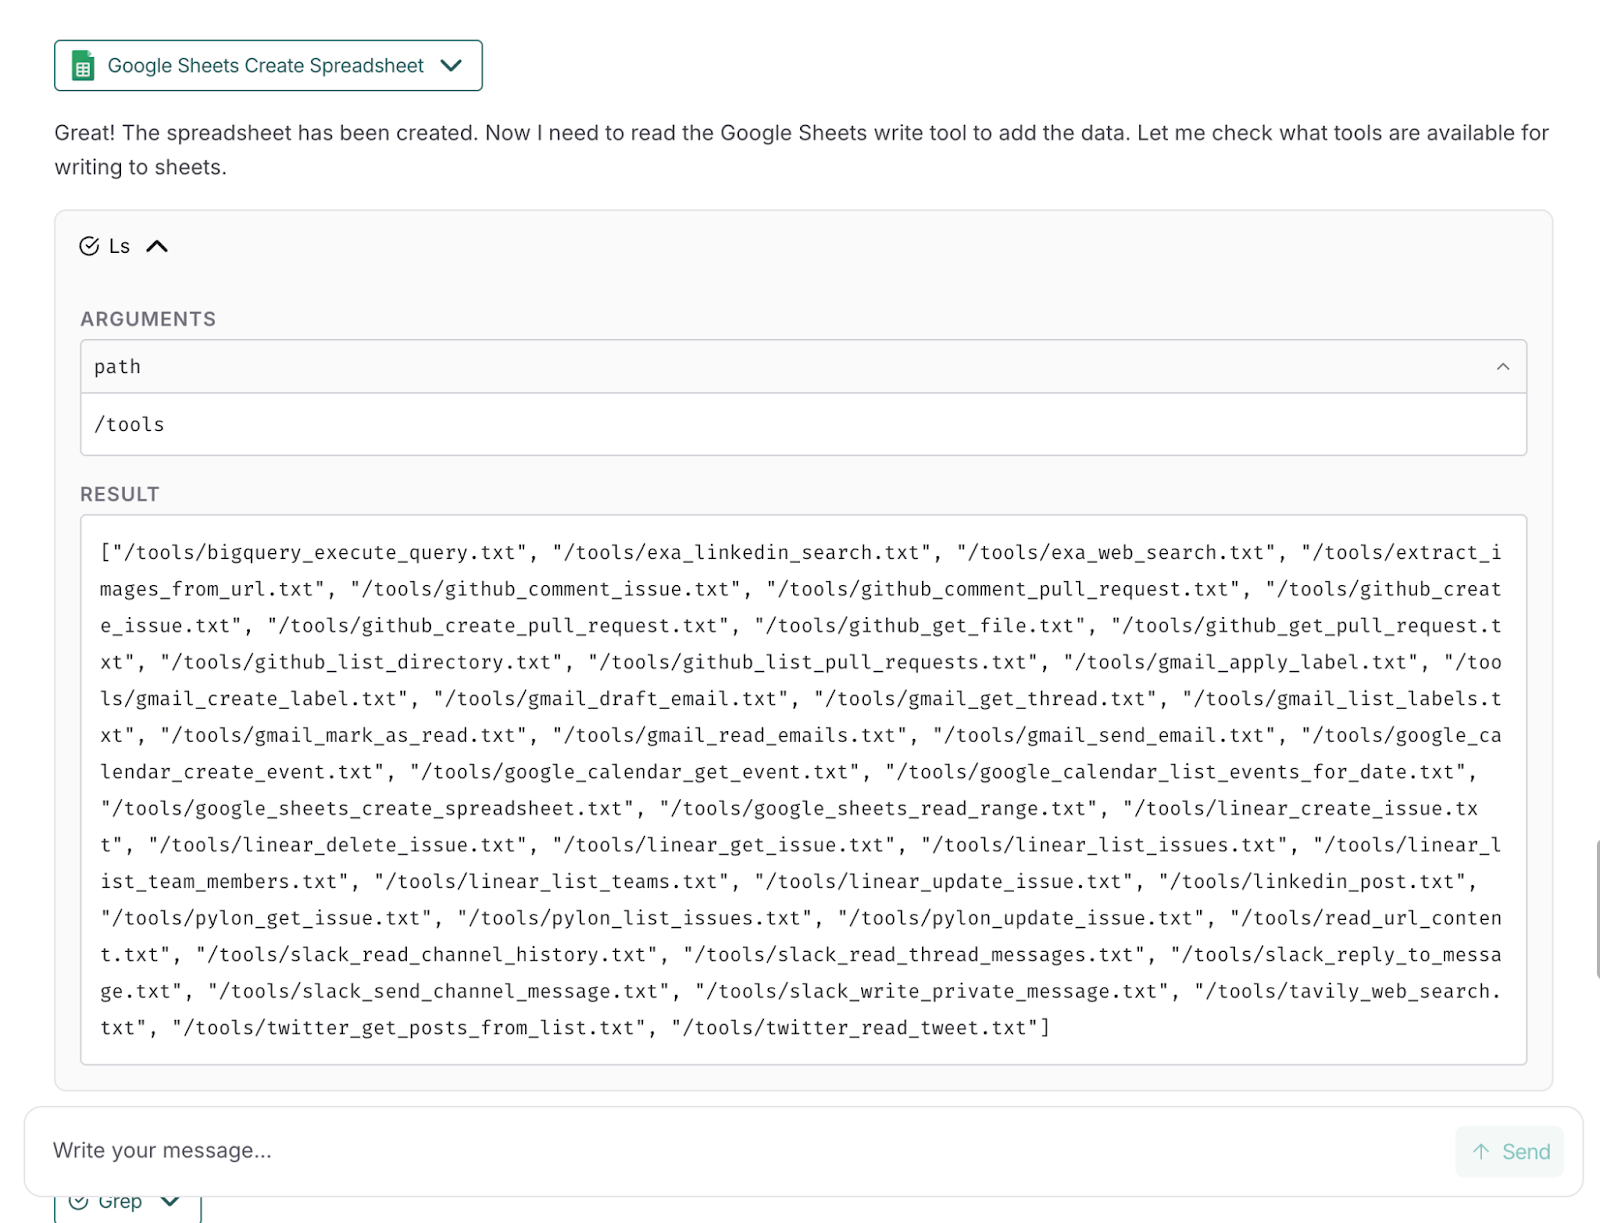
I asked the agent to push results to Google Sheets. It created the sheet but couldn’t write rows because a “write-to-Sheets” tool wasn’t connected. As a fallback, it returned a clean, copy-pasteable table. You can connect a Sheets write tool later to automate this step end-to-end.
Now your agent is ready for use. Open Tracing Projects panel to inspect executions, timing, tool calls, and any approval pauses, which we’ll explore next.
Once your agent is live, LangSmith’s observability suite helps you understand how it behaves in the wild i.e., from individual runs to long-term trends. You’ll use two places:
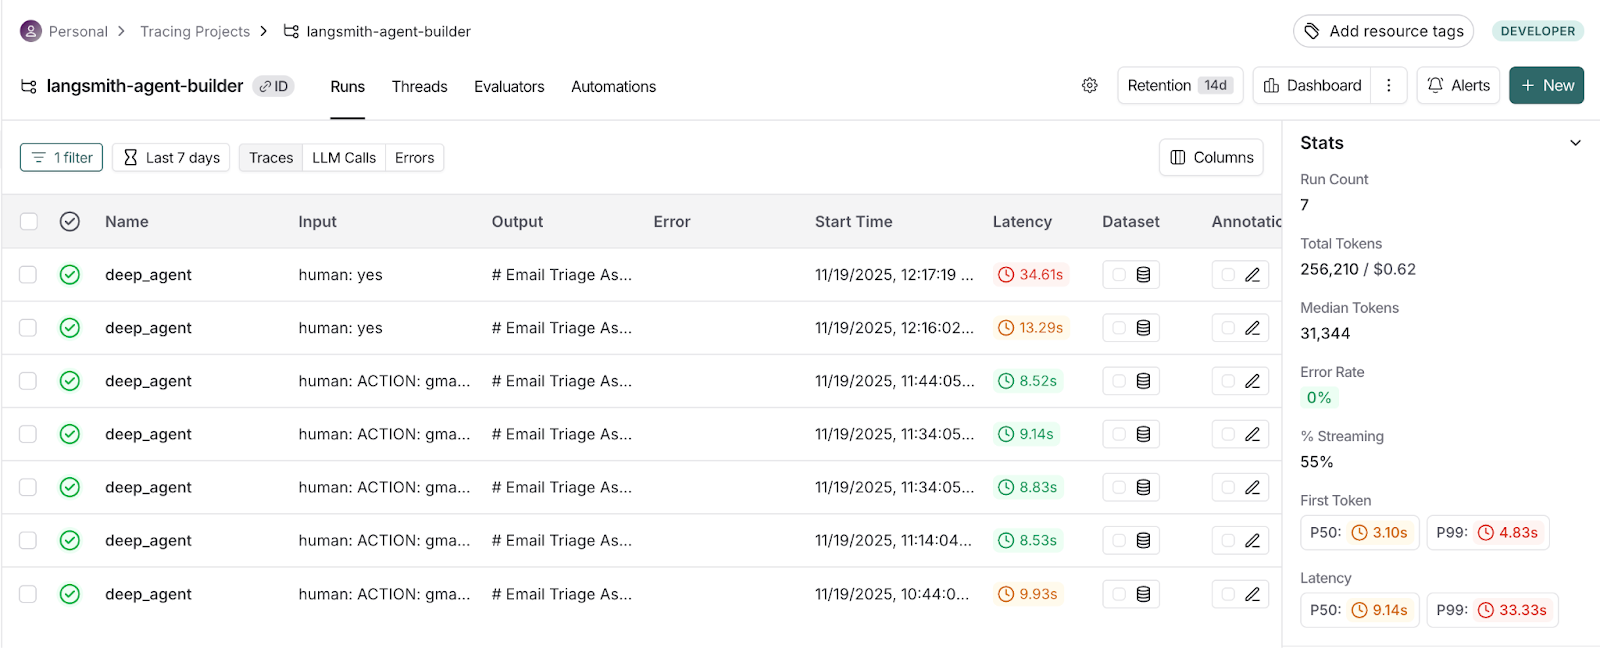
This section helps us to inspect individual agent runs in detail (inputs/outputs, tool calls, latency, and tokens) to debug and validate behavior.
Here are a few steps to trace projects in LangSmith’s dashboard:
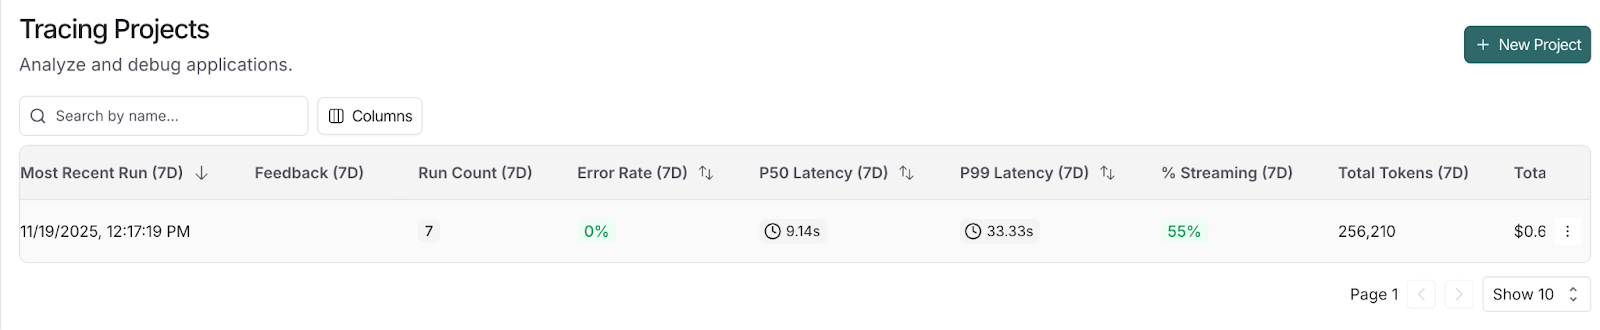
This section uses the prebuilt dashboard to track trends (trace counts, latency percentiles, error rate, cost/tokens, tool usage) and filter by time or run type to catch regressions early.
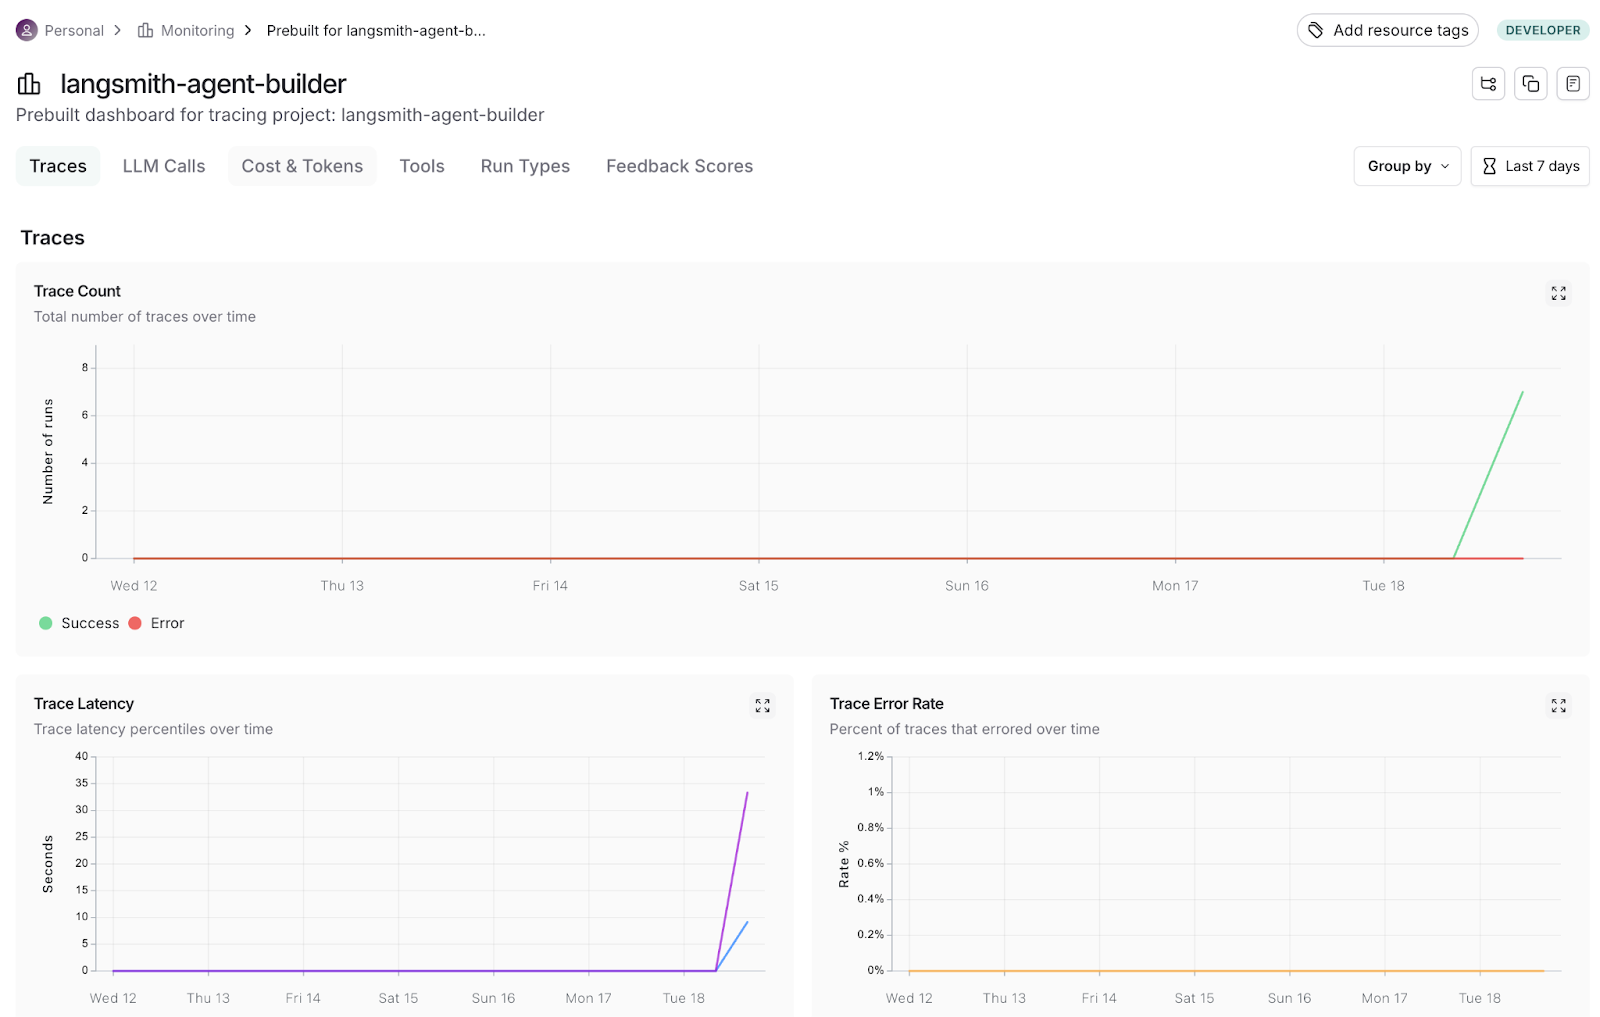
With Tracing and Monitoring, we can inspect any single run to debug issues, then zoom out to validate reliability, cost, and performance trends.
LangSmith’s Agent Builder shows how far no-code agents have come. In this walkthrough, we built an Email Triage Assistant that classifies messages, drafts replies, and logs actions, then validated every step before deployment.
We described the intent, and the agent builder does the rest of the work, including triggers, tools, sub-agents, memory, and human approvals, making it all visible in Tracing and summarized in Monitoring.
Its strengths are fast setup from plain English, single-click connections to Gmail, interrupt-for-approval safety, and end-to-end observability.
However, its limitations include being in private preview, which can mean occasional rough edges, like missing write-to-Sheets until you connect the right integration, and the need to fine-tune instructions after testing.
Agent Builder lets you focus on what your agent should do and when it should act, while giving you the guardrails to approve, trace, and iterate. From here, try expanding the same pattern to calendar scheduling, lead qualification, or inbox digests, then use Monitoring to track cost, latency, and accuracy as you scale.
If you’re keen to learn more about building AI Agents, check out our resources:
Top DataCamp Courses
Course
Course
Course
Tutorial
Bex Tuychiev
Tutorial
Abid Ali Awan
Tutorial
Aashi Dutt
Tutorial
Aashi Dutt
Tutorial
François Aubry
Tutorial
Andrea Valenzuela