
Track
Llama Fundamentals
4 hr
Meta’s latest LLaMA 4 models, Scout and Maverick, are built for long-context reasoning, multi-modal understanding, and efficient inference at scale. When paired with vLLM, a high-throughput inference engine with OpenAI-compatible APIs, these models become practical for real-world applications.
In this blog post, I’ll walk you through how to deploy LLaMA 4 Scout on a multi-GPU RunPod instance using vLLM and serve it via a local or remote OpenAI-compatible API endpoint. We’ll cover model setup, deployment, and API interaction using both text and image inputs.
By the end of this tutorial, you’ll also have two complete demos:
We keep our readers updated on the latest in AI by sending out The Median, our free Friday newsletter that breaks down the week’s key stories. Subscribe and stay sharp in just a few minutes a week:
vLLM (virtual large language model) is an optimized LLM inference framework originally developed at UC Berkeley’s Sky Computing Lab, which introduces PagedAttention, a novel memory management system that minimizes GPU memory fragmentation and allows efficient key-value caching for extremely long sequences. To learn more, check out this tutorial on vLLM.
Here’s why vLLM is the ideal engine to serve LLaMA 4:
In this section, we’ll walk through how to provision a powerful multi-GPU instance on RunPod, deploy Meta’s LLaMA 4 Scout model using vLLM, and expose an OpenAI-compatible API for both local and remote inference.
Before launching the model, make sure your RunPod account is set up:
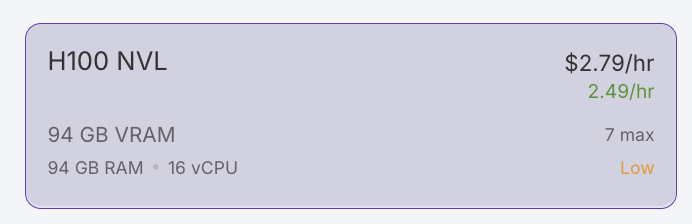
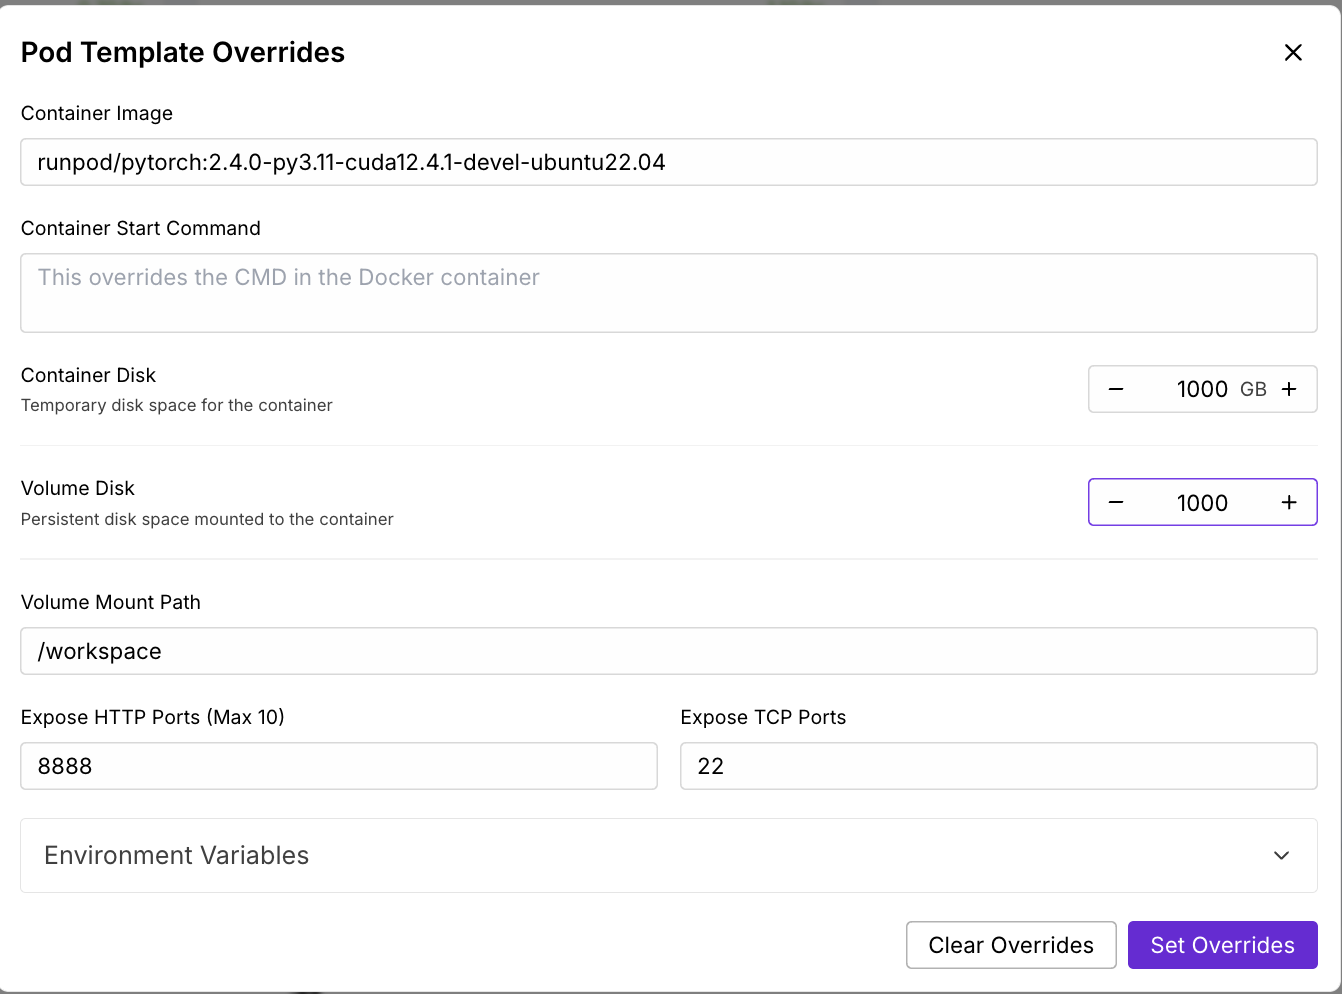
Now, let’s provision a pod capable of hosting the 17B LLaMA 4 Scout model:
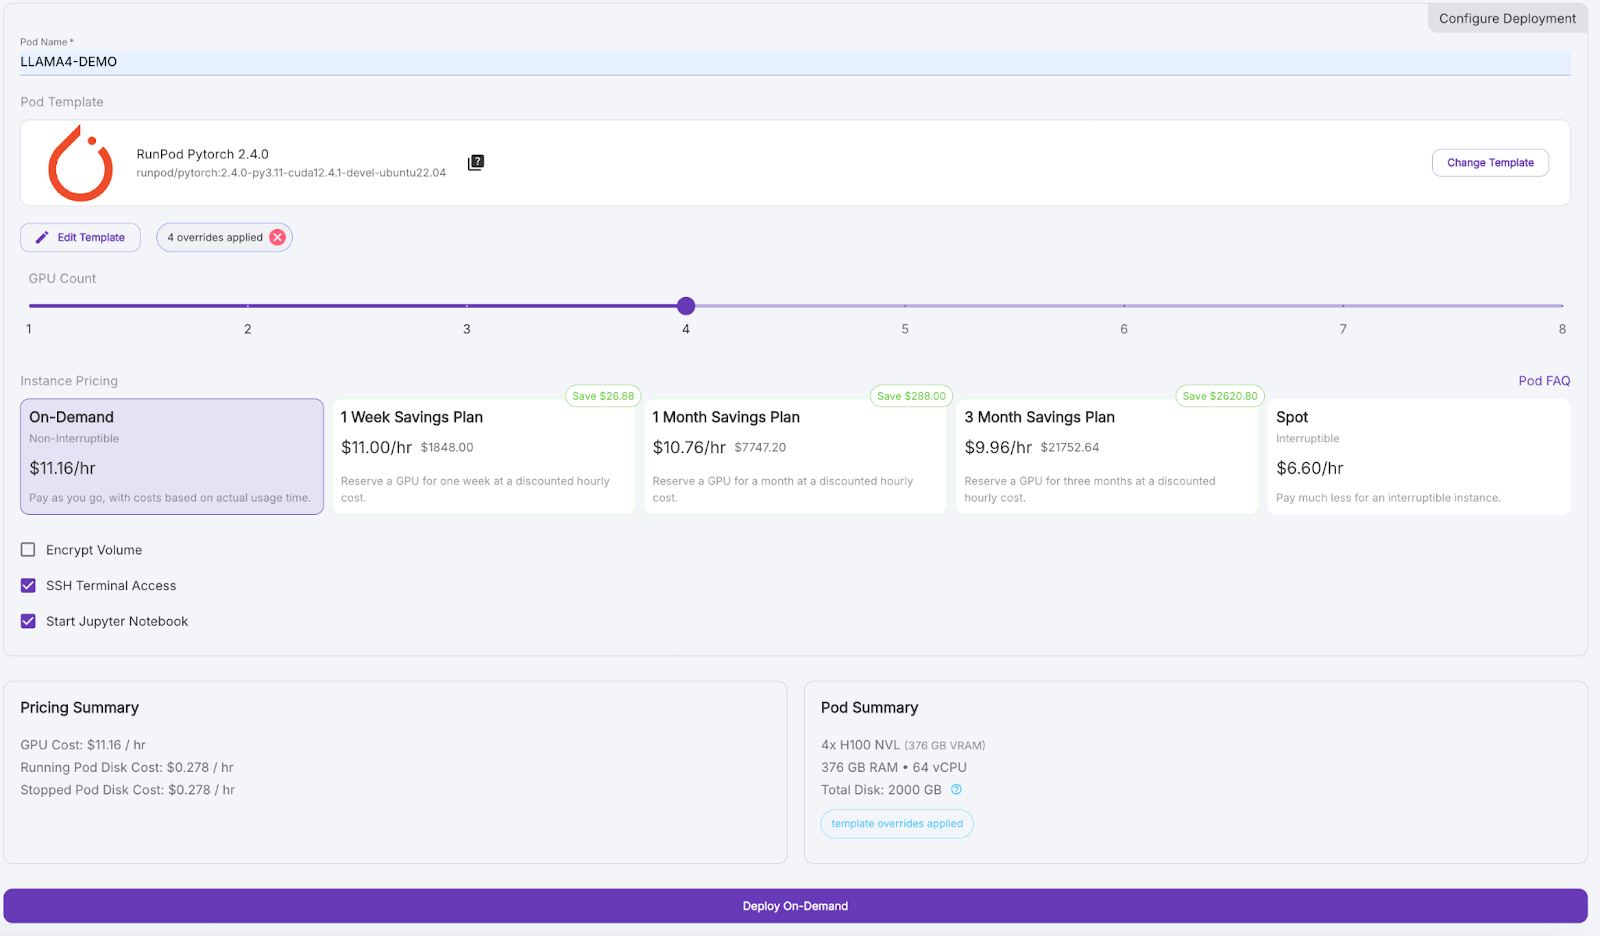
Wait a few minutes for the pod to be provisioned.
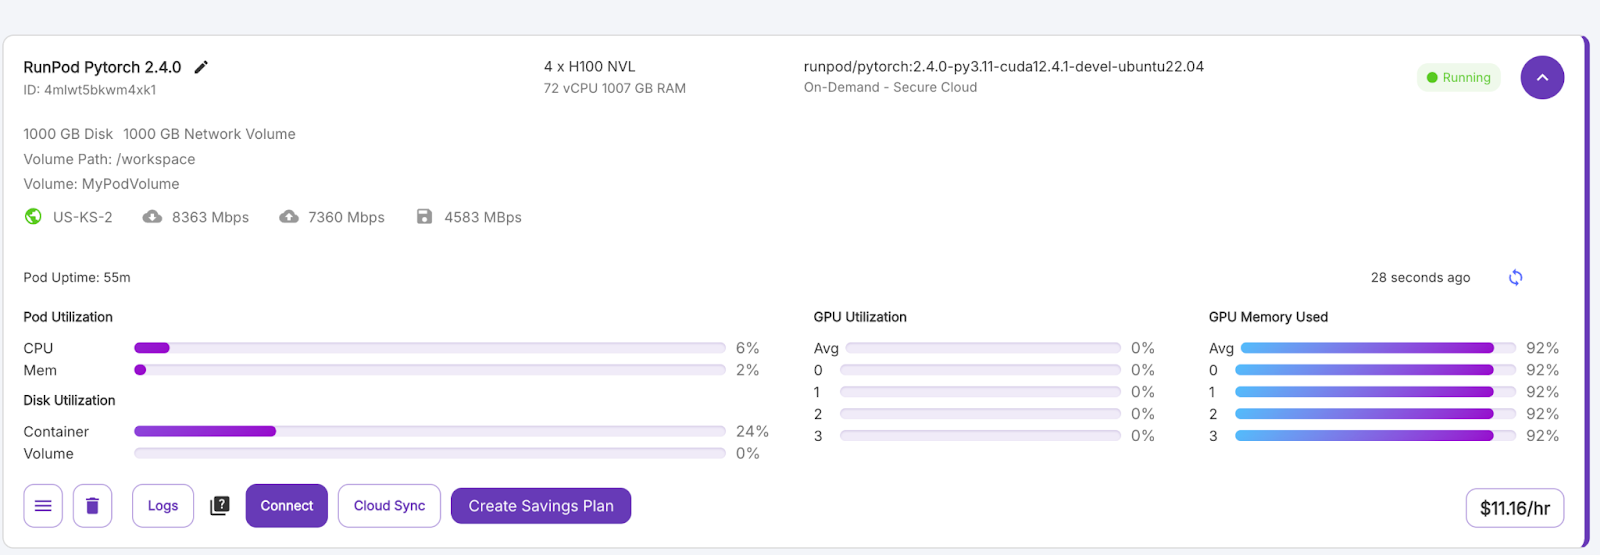
Once the “Connect” button turns purple, click it. You'll see multiple connection options—you can either:
In the terminal inside your pod, install vLLM and its dependencies. Install vLLM and other libraries inside the pod environment.
pip install -U vllm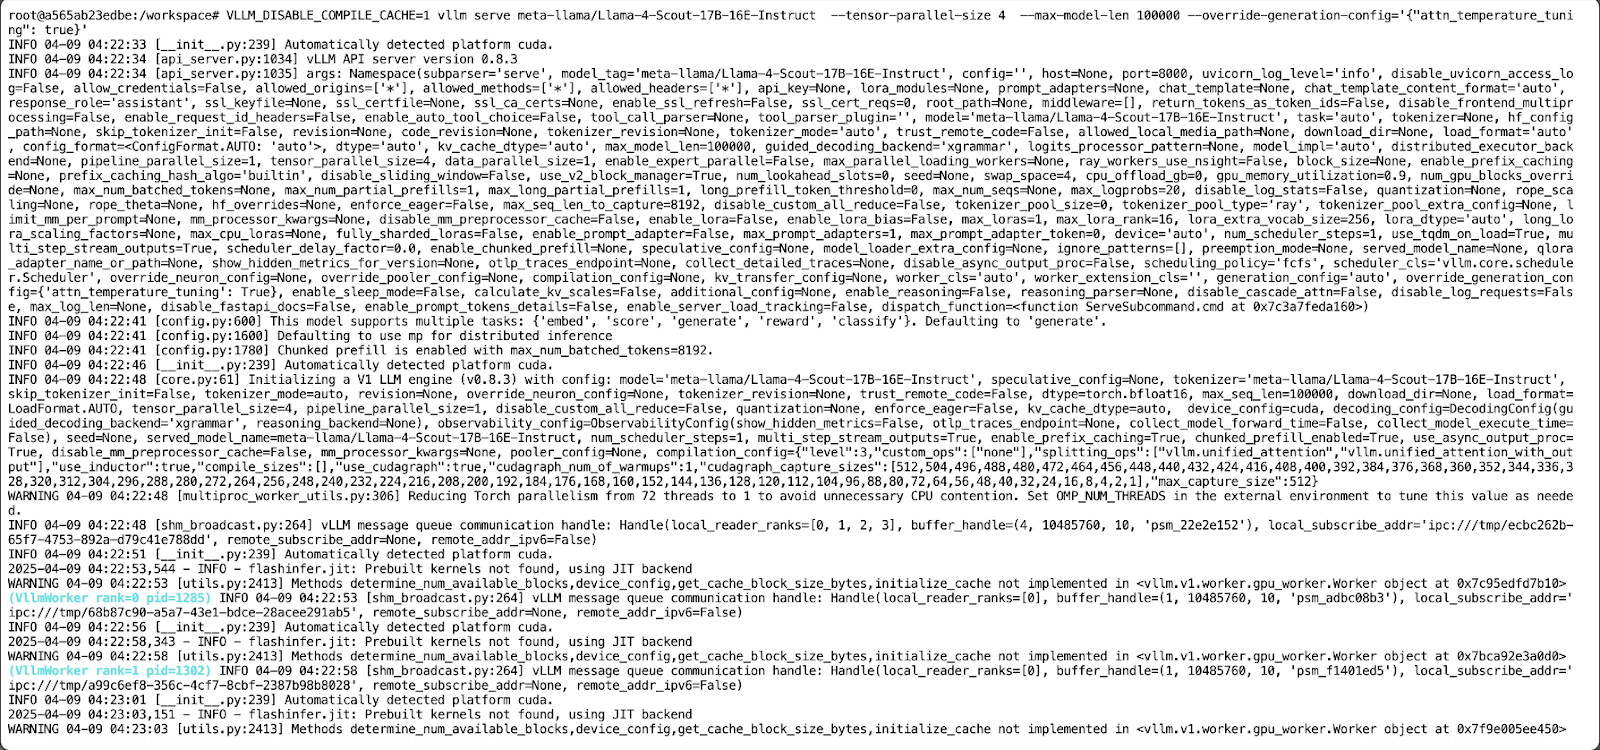
pip install transformers accelerate pillow #optionalNext, we launch the LLaMA 4 Scout model server using the following command:
VLLM_DISABLE_COMPILE_CACHE=1 vllm serve meta-llama/Llama-4-Scout-17B-16E-Instruct \
--tensor-parallel-size 4 \
--max-model-len 100000 --override-generation-config='{"attn_temperature_tuning": true}'
This command does the following:
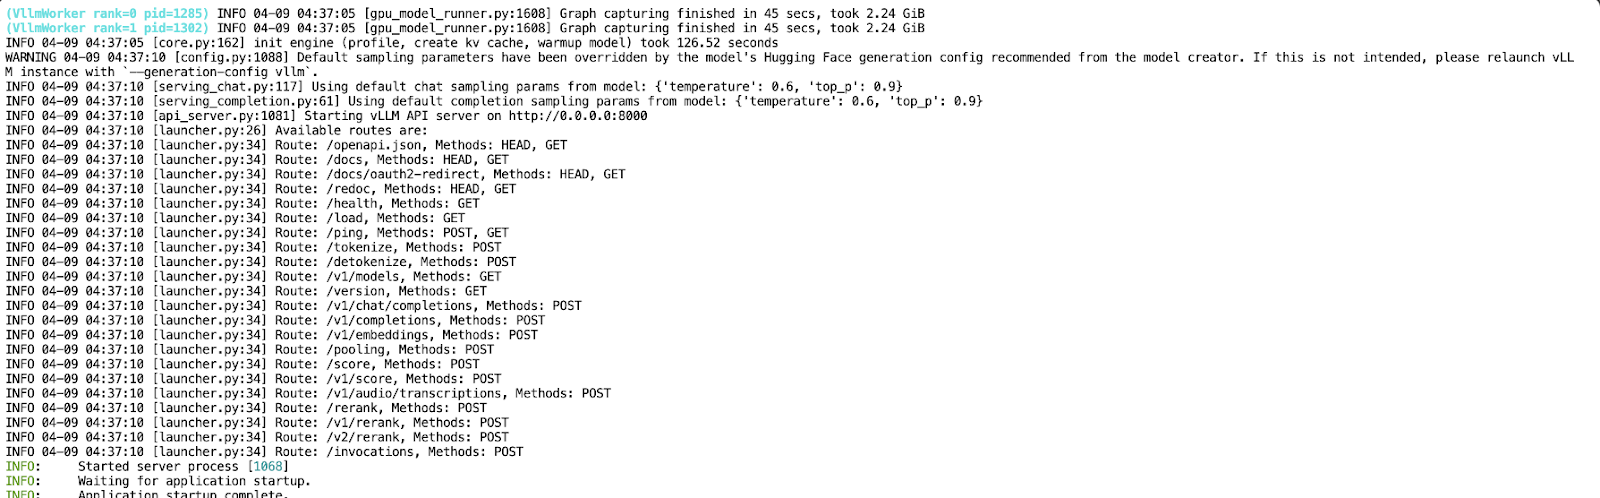
Now that your API is running on port 8000, create a new Jupyter Notebook in the same pod environment.
In this demo, we’ll interact with the locally hosted LLaMA 4 Scout model served via vLLM using a simple Python script. The model is exposed through API, allowing us to build a conversational assistant that supports multi-turn dialogue.
We will use the official OpenAI Python SDK to communicate with the vLLM API and the Colorama library for colored terminal output. You can install both using:
pip install openai coloramaOnce installed, import the necessary modules:
from openai import OpenAI
from colorama import Fore, Style, initWe configure the OpenAI client to point to our locally running vLLM server. If your deployment doesn’t require an API key (the default behavior for local runs), pass "EMPTY" as the key:
# Initialize colorama
init(autoreset=True)
# Set up client
openai_api_key = "EMPTY"
openai_api_base = "http://localhost:8000/v1"
client = OpenAI(
    api_key=openai_api_key,
    base_url=openai_api_base,
)
This code initializes the Colorama library for colored terminal output with an automatic reset after each print. It then sets up an OpenAI-compatible client using the OpenAI class, pointing to a locally hosted vLLM API.
Step 3: Start the chat loop
Next, we implement a simple loop to allow continuous interaction with the model. The conversation history is preserved across turns, enabling multi-turn dialogue behavior.
# Initialize message history
messages = [
{"role": "system", "content": "You are a helpful assistant."}
]
print("Start chatting with the assistant! Type 'exit' or 'quit' to end.\n")
while True:
user_input = input(f"{Fore.BLUE}User: {Style.RESET_ALL}")
if user_input.strip().lower() in ["exit", "quit"]:
print("Exiting chat. Goodbye!")
break
messages.append({"role": "user", "content": user_input})
chat_response = client.chat.completions.create(
model="meta-llama/Llama-4-Scout-17B-16E-Instruct",
messages=messages,
)
assistant_message = chat_response.choices[0].message.content
print(f"{Fore.GREEN}Assistant: {assistant_message}\n{Style.RESET_ALL}")
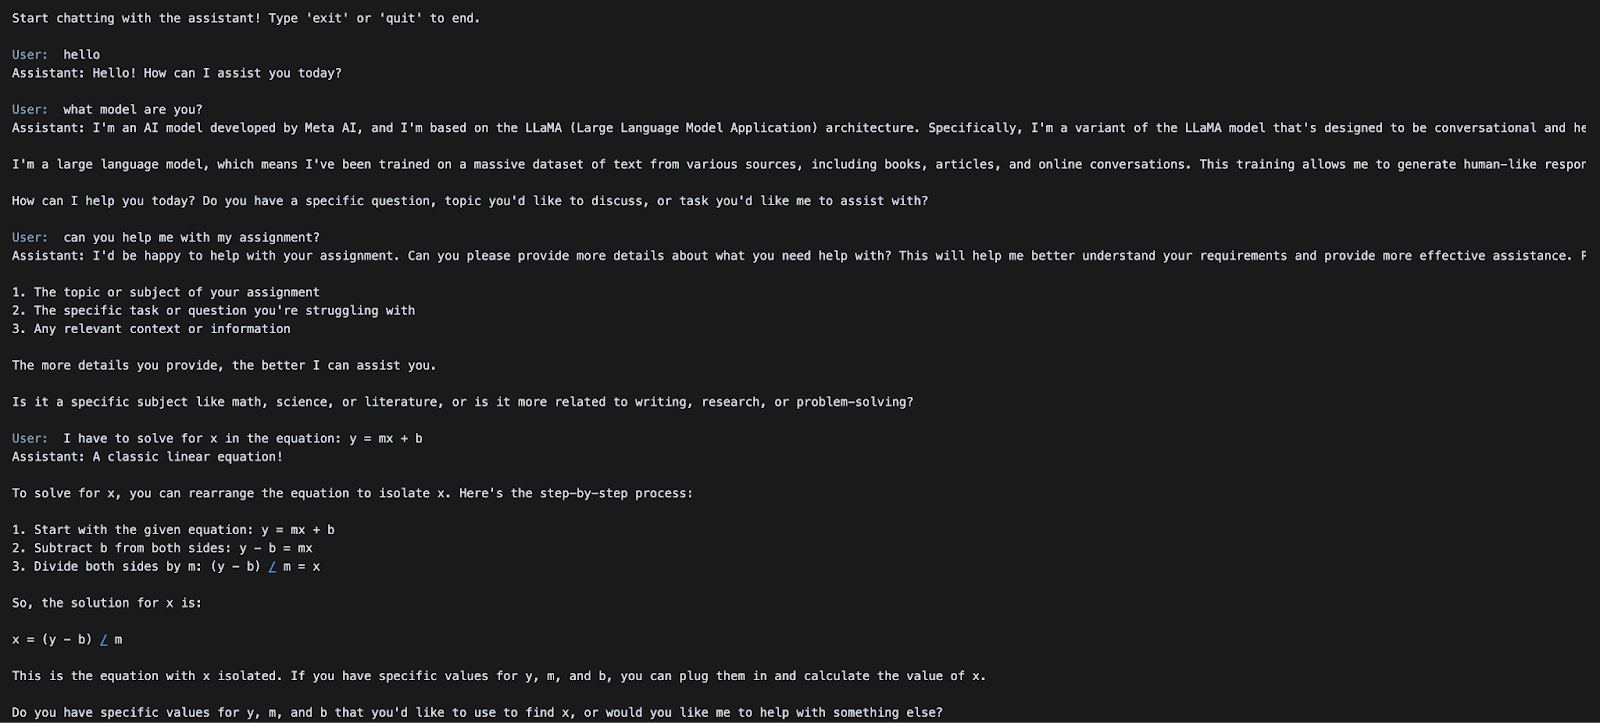
messages.append({"role": "assistant", "content": assistant_message})A simple terminal-based chat interface is initialized with a conversation history and a system prompt that continuously accepts user input in a loop. Each user message is appended to the message history and sent to the Llama-4-Scout-17B-16E-Instruct model via the client.chat.completions.create() API call.
The model’s response is printed in green using Colorama and added back to the message history, allowing for a multi-turn dialogue until the user types "exit" or "quit".
In the next section, we’ll explore how to run multimodal inference with image + text inputs using the same API.
In this demo, we’ll explore how to send both image and text inputs to the LLaMA 4 Scout model hosted via vLLM using its native multimodal capabilities. This allows you to perform visual reasoning, image captioning, or multimodal Q&A—all through a single OpenAI-compatible API.
This example uses the OpenAI SDK to interface with the vLLM server. If not already installed, you can run:
pip install openaiThen import the required module:
from openai import OpenAIConnect to your local vLLM server using the OpenAI-compatible interface. If your server doesn't require authentication, use "EMPTY" as the API key.
openai_api_key = "EMPTY"
openai_api_base = "http://localhost:8000/v1"
client = OpenAI(
    api_key=openai_api_key,
    base_url=openai_api_base,
)
The above code snippet initializes an OpenAI-compatible client for local inference using the vLLM server. The api_key is set to "EMPTY" (no auth required), and base_url points to the local vLLM API endpoint.
We'll now send a chat prompt that includes both an image and a text instruction. LLaMA 4 Scout will process the image alongside the query and return a descriptive response.
messages = [
    {
        "role": "user",
        "content": [
            {"type": "image_url", "image_url": {"url": image_url1}},
            {"type": "text", "text": "Can you describe what's in this image?"}
        ]
    }
]
chat_response = client.chat.completions.create(
    model="meta-llama/Llama-4-Scout-17B-16E-Instruct",
    messages=messages,
)
print("Response:", chat_response.choices[0].message.content)
Once the multimodal inference using the LLaMA 4 Scout model is served, we construct a chat-style input containing both an image URL and a text prompt, formatted according to the OpenAI chat schema. The client.chat.completions.create() method is used to send this multimodal request to the model, which processes the image and accompanying text to generate a contextual response.

In this tutorial, we hosted Meta’s LLaMA 4 Scout model using vLLM on RunPod, making it accessible via OpenAI-compatible endpoints for both text and multimodal inference. By combining vLLM’s high throughput and RunPod’s powerful infrastructure, we created a cost-effective setup for serving state-of-the-art LLMs with long context and vision capabilities.
To learn more about LLaMA 4 and vLLM, check out:
Learn AI with these courses!
Track
Course
Course
blog
Alex Olteanu
8 min
blog
Alex Olteanu
8 min
Tutorial
Hesam Sheikh Hassani
Tutorial
Dr Ana Rojo-Echeburúa
Tutorial
François Aubry
Tutorial
Aashi Dutt