Track
Power BI Fundamentals
17 hr
Row-Level Security (RLS) in Power BI enables you to control which rows of data users can view based on filters. This functionality is especially valuable in scenarios where multiple users require access to a shared report, but with personalized views according to their roles or departments.
In this tutorial, I’ll guide you through a practical and in-depth understanding of RLS, including its static and dynamic configurations, hands-on implementation steps, advanced enterprise techniques, and common pitfalls I’ve learned to avoid. I’ll also share best practices and compare RLS with other security models.
If you’re just starting out with Power BI, I recommend you check out our Power BI Fundamentals skill track, which will help you master all the essential skills you’ll need.
Row-Level Security (RLS) is a security feature in Power BI that restricts access to rows in a table based on the identity of the user viewing the report. Rather than duplicating reports for different user groups, RLS allows you to apply filters at the data level so that each user sees only the data they are permitted to view.
This is crucial for preserving data confidentiality and integrity, especially in scenarios involving sensitive or proprietary information. RLS operates within the Power BI data model and ensures that unauthorized users cannot access restricted data, even through indirect methods such as slicers or drill-downs.
RLS implementation is based on three core elements:
These elements work in tandem to evaluate each query against the access conditions before returning results.
RLS is highly applicable across many industries and scenarios, including:
This security model enables shared datasets to remain secure while minimizing duplication and administrative overhead.
Row-level security can be split into two types: static and dynamic.
I’ve summarized their differences in the table below:
|
Criteria |
Static RLS |
Dynamic RLS |
|
Setup Time |
Quick |
Moderate |
|
Maintenance |
Manual |
Table-driven |
|
Scalability |
Limited |
High |
|
Complexity |
Low |
Moderate to High |
Tip: Use static RLS for small, fixed user groups. Use dynamic RLS for growing or large-scale environments.
I’ll go through some implementations of both static and dynamic examples below.
Static RLS involves creating roles with hardcoded DAX filters. Each role corresponds to a specific group or segment, such as a geographic region or department.
Here are the general steps to implement a static RLS:
[Region] = "East" to that role.Dynamic RLS uses functions like USERNAME() or USERPRINCIPALNAME() combined with mapping tables to dynamically filter data based on user identity.
Here are the general steps to implement a dynamic RLS:
[Region] = RELATED(UserRegion[Region])UserRegion[Email] = USERPRINCIPALNAME()We’ll now look at a quick guide on how to set up static row-level security using a simple sales dataset.
To test RLS, create a sample dataset using Python:
import pandas as pd

data = {
    'Salesperson': ['Alice', 'Bob', 'Charlie', 'Alice', 'Bob', 'Charlie'],
    'Region': ['East', 'West', 'South', 'East', 'West', 'South'],
    'SalesAmount': [15000, 20000, 18000, 17000, 21000, 16000],
    'Email': ['alice@company.com', 'bob@company.com', 'charlie@company.com'] * 2,
    'Date': pd.date_range(start='2025-01-01', periods=6, freq='M')
}

sales_df = pd.DataFrame(data)
sales_df.to_csv('sample_sales_data.csv', index=False)sample_sales_data.csv file.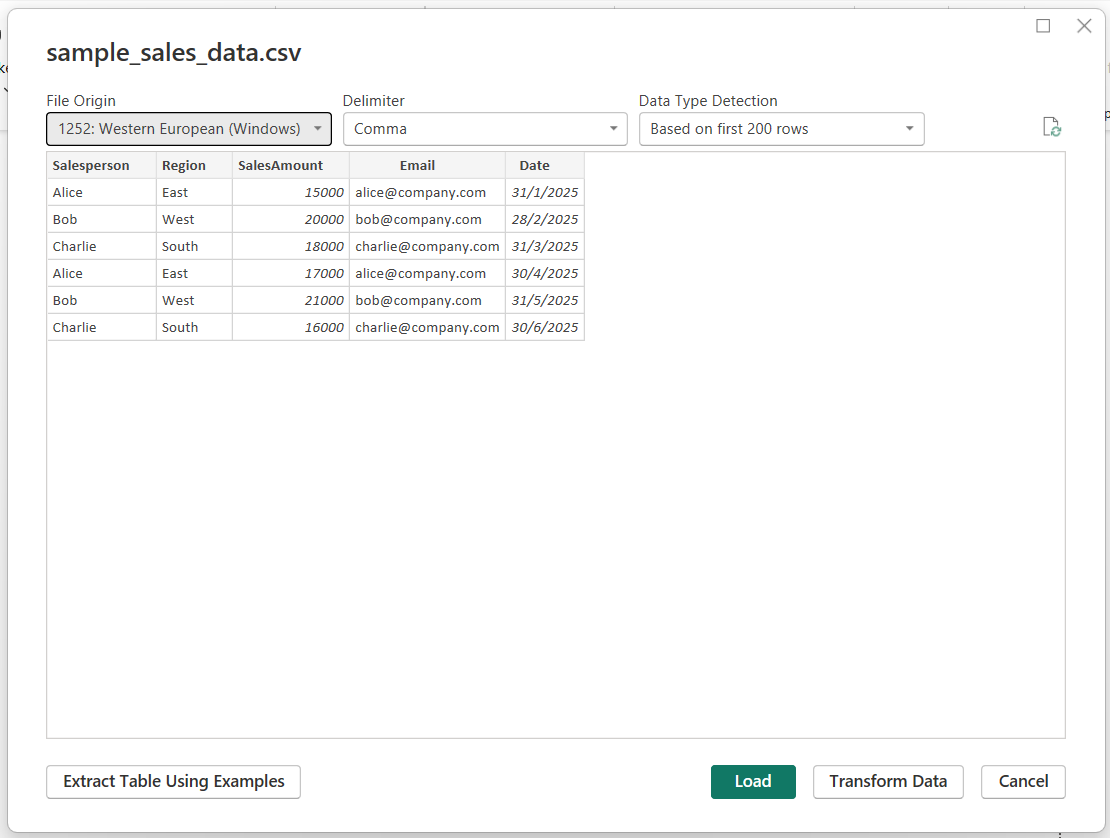
Ensure proper data types and confirm that the Email column matches login identity formats (usually email).
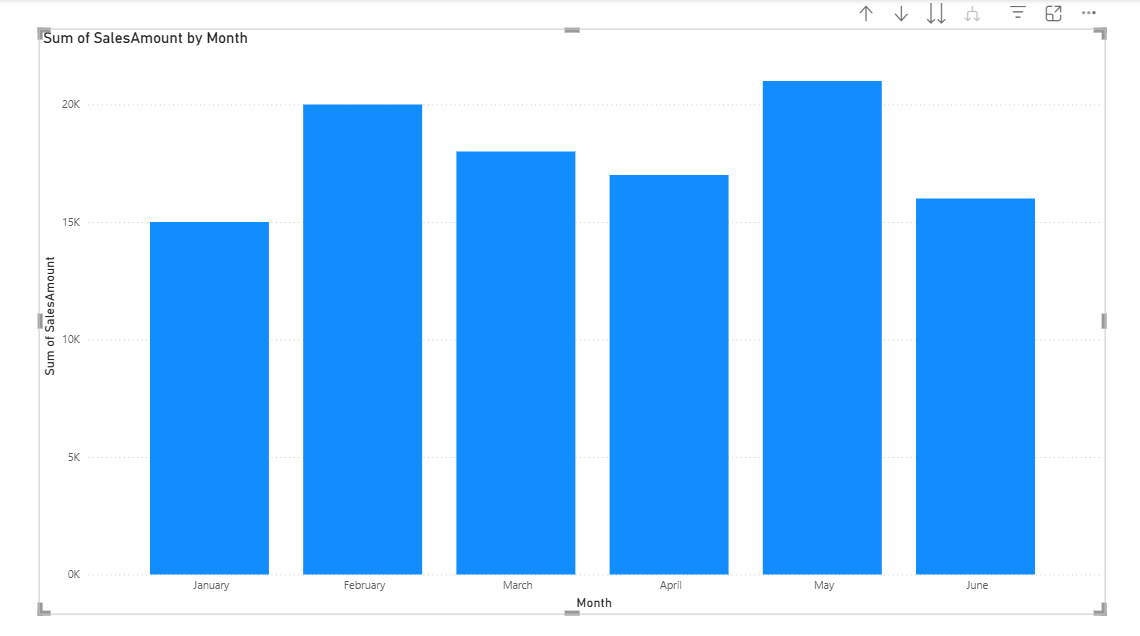
Here’s what your chart should look like:
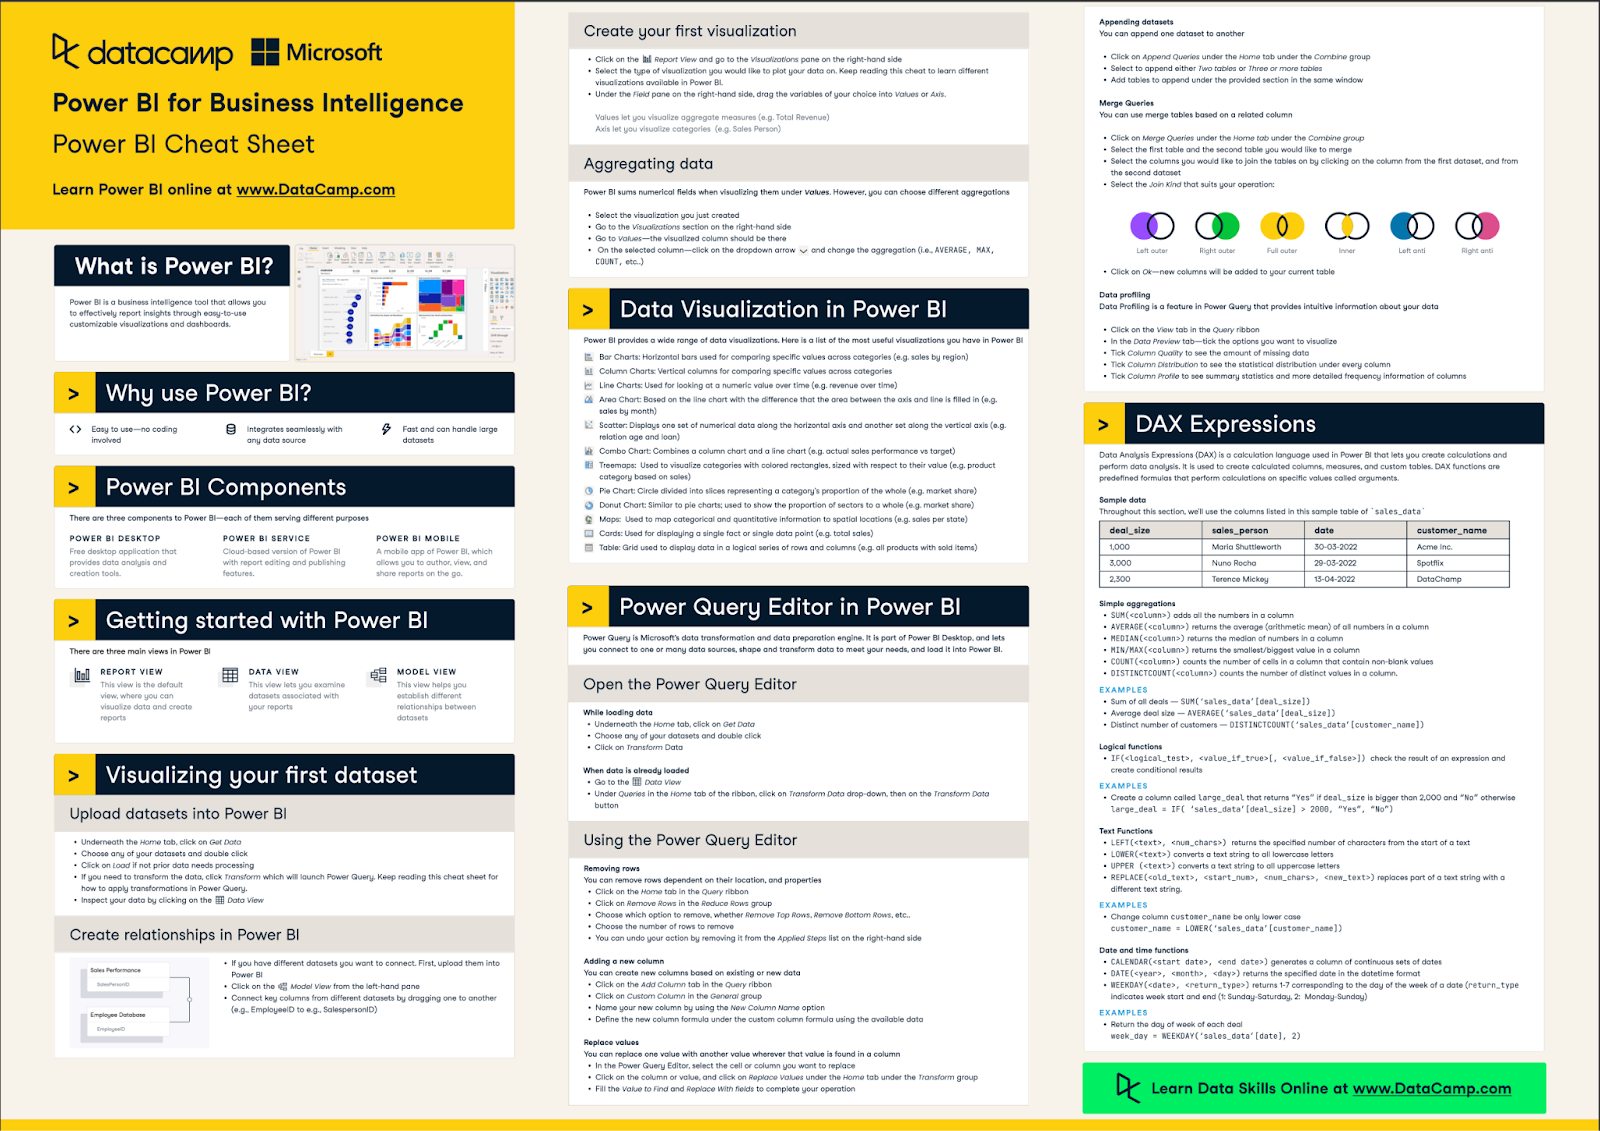
More on using Power BI can be found in our cheat sheet, as shown below.
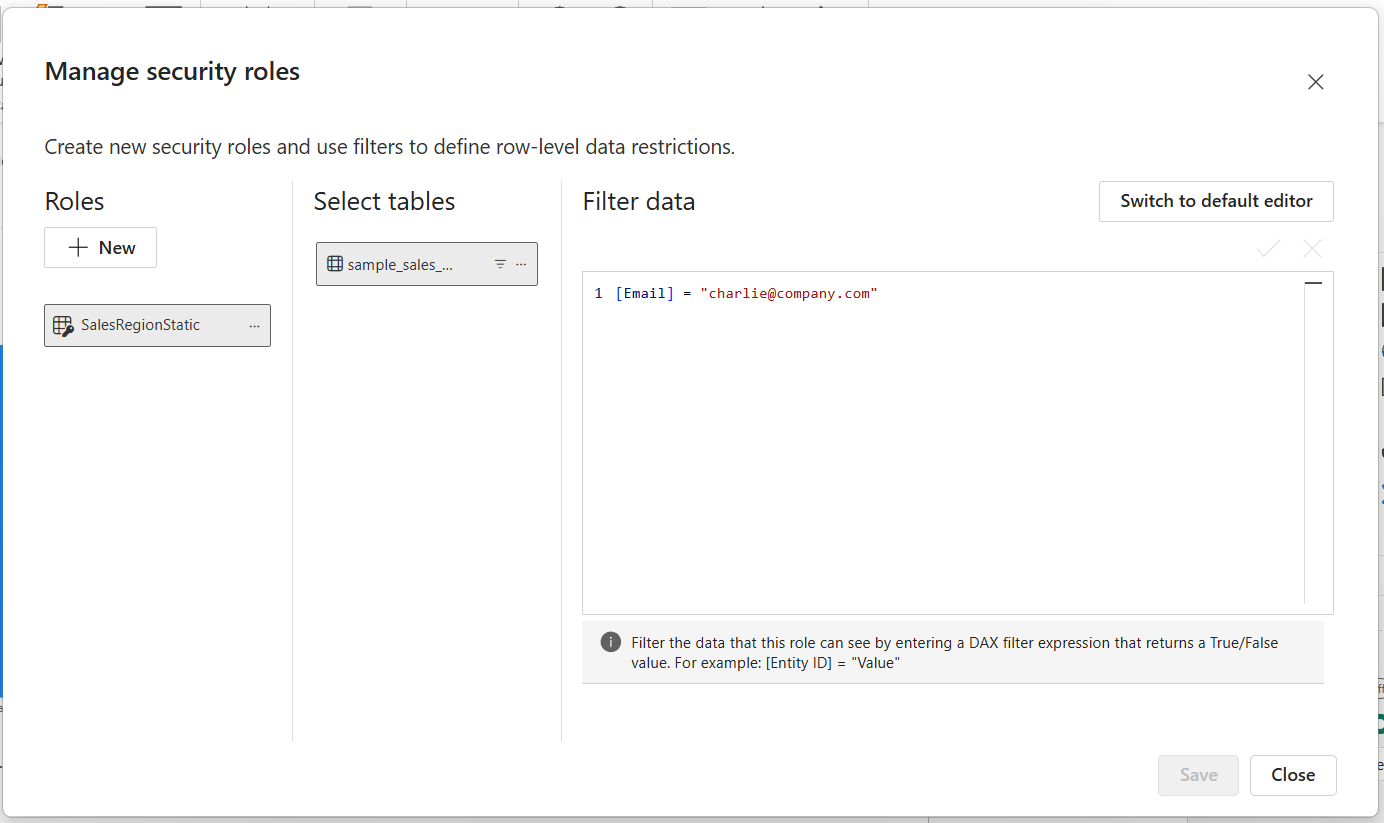
Next, let’s create some roles to define which roles can have what permissions.
SalesRegionStatic.[Email] = “charlie@company.com”This is what your interface should look like:
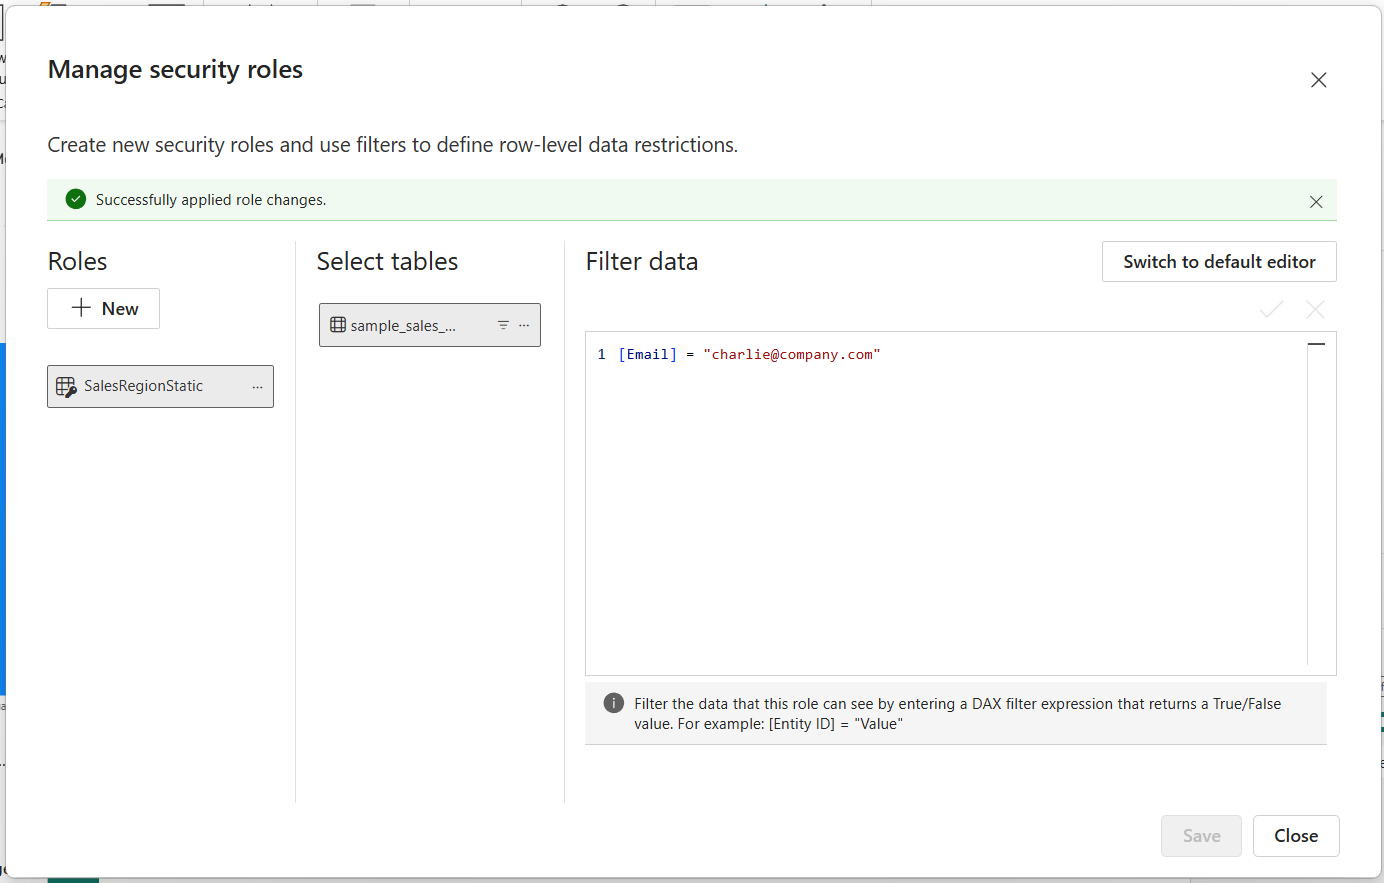
If the changes are saved successfully, a green bar notification will appear as shown below.
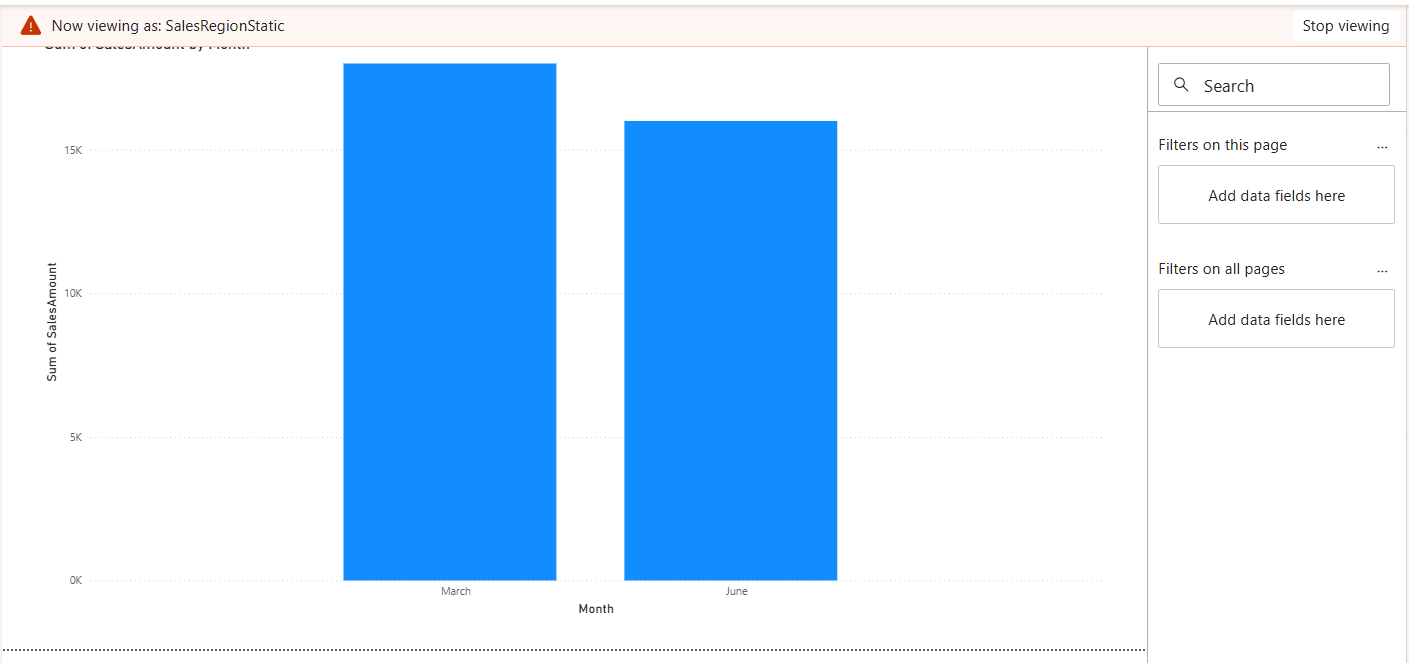
SalesRegionStatic role we created earlier.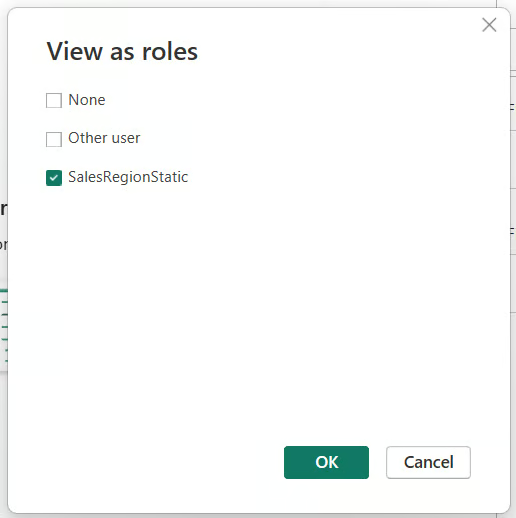
As you can see from the image below, the chart has been filtered to show only data where the email is “charlie@company.com”.
This allows local validation before deployment.
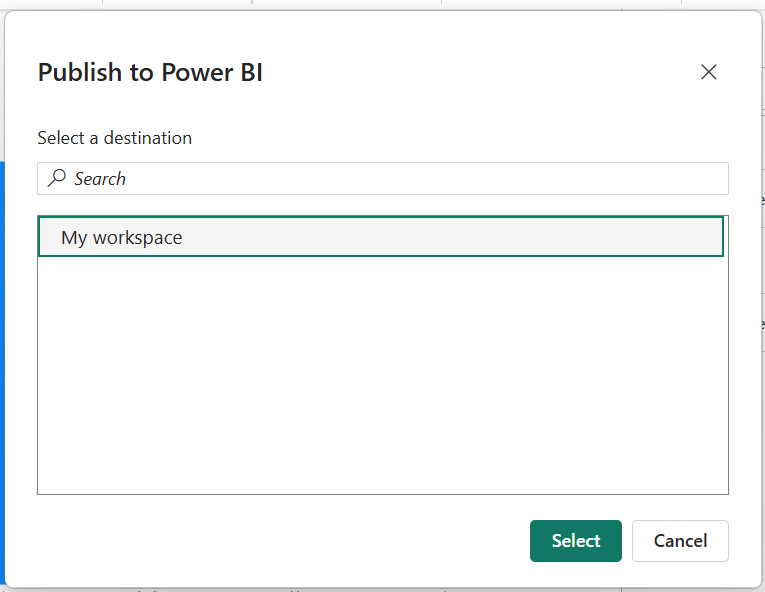
Once your RLS roles are set up and tested in Power BI Desktop, the next step is to publish the report to the Power BI Service. This allows you to assign specific users or security groups to each role, ensuring that access control is enforced when the report is shared.
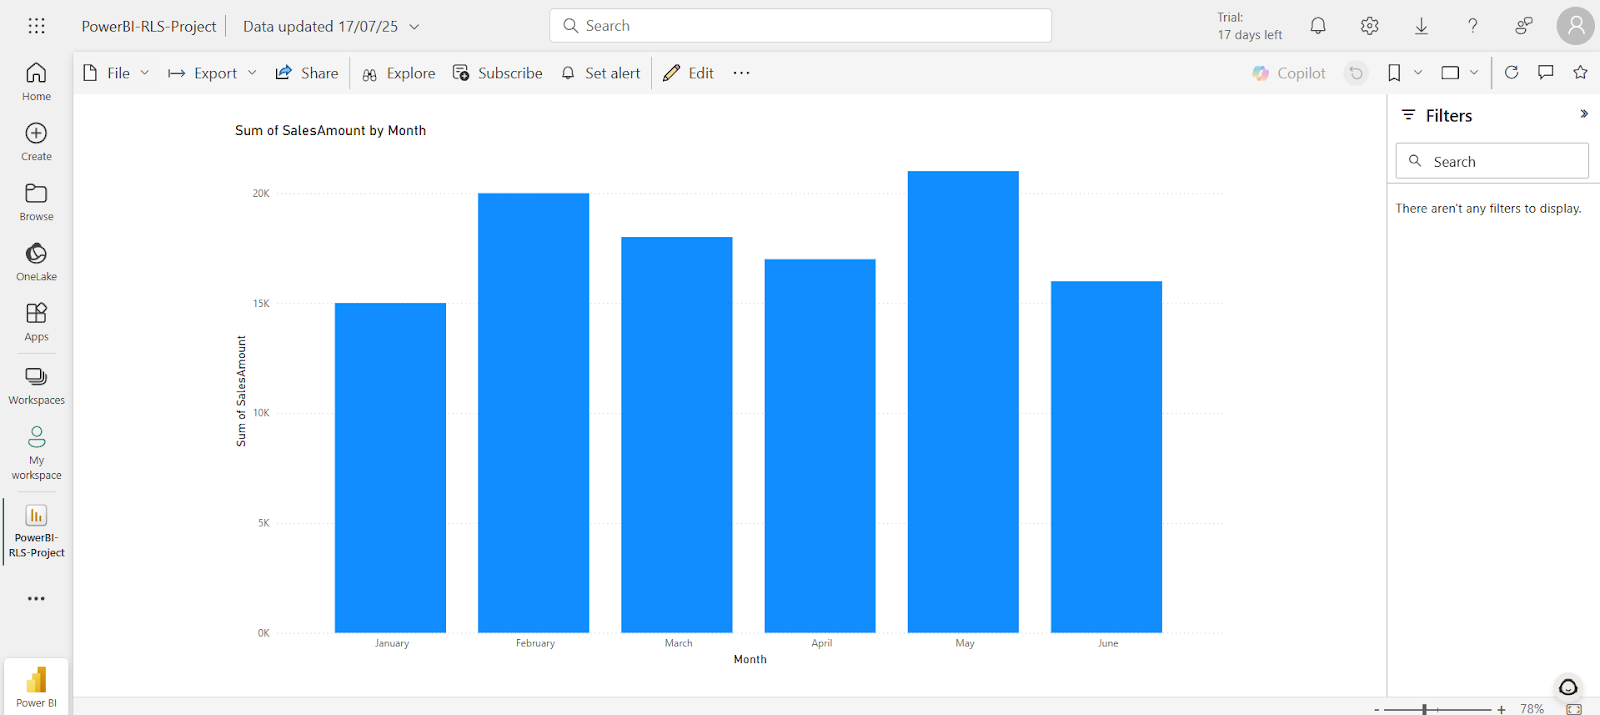
Here’s what mine looks like on the Power BI service on the web.
Publishing is a prerequisite for configuring RLS role assignments, as the roles defined in Power BI Desktop are transferred along with the dataset.
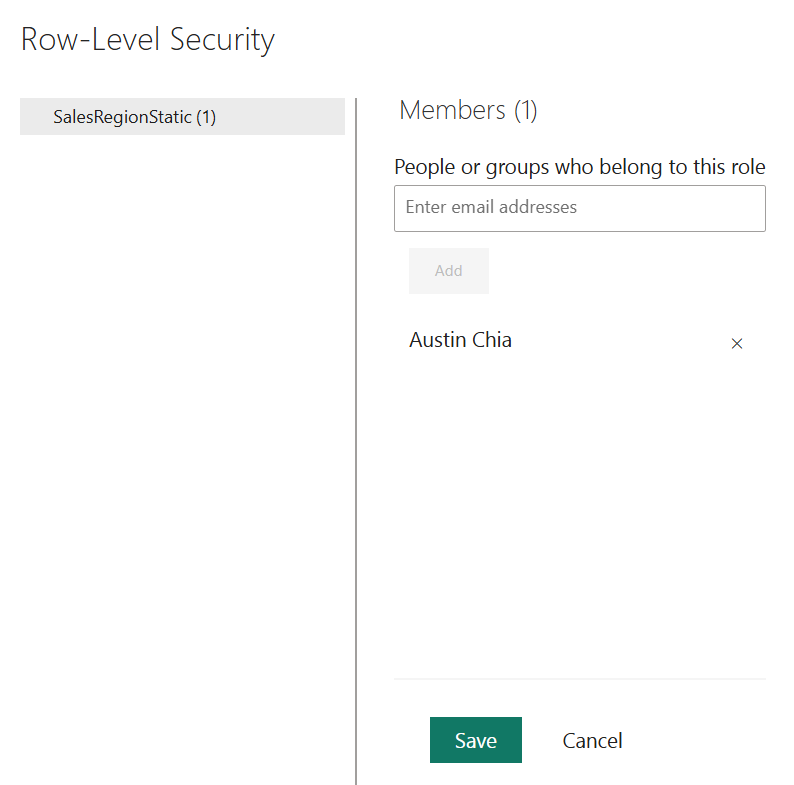
This is where you assign users or Azure Active Directory (AAD) groups to each role.
To assign users, enter their full email addresses in the text box under the desired role, press Enter, and click Add.
To assign AAD groups, use the name of the group (e.g., Sales_Region_East or Finance_Team). Do ensure that the group is already defined and maintained in Azure Active Directory.
After assigning users or groups, take some time to verify that the correct data is presented to the right group.
Each person will only see the data filtered by the DAX expression linked to their role. They will not be notified of role assignment directly, so you may want to communicate any access instructions after you’ve done the verification.
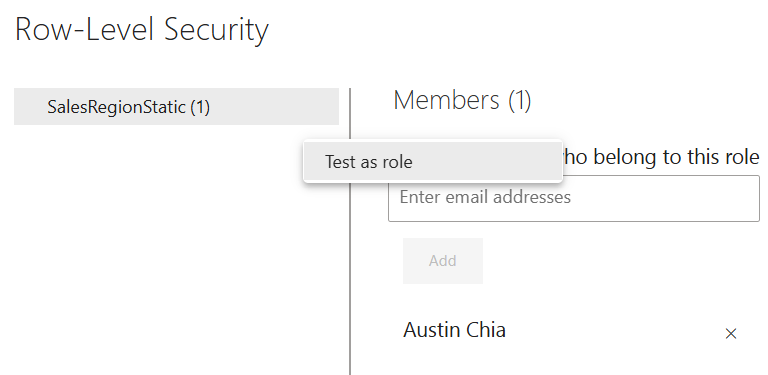
For dynamic RLS, you can also simulate what a specific user will see:
This is useful for ensuring your dynamic filters (e.g., based on USERPRINCIPALNAME()) are functioning correctly.
RLS can be further integrated into your Power BI workflow through some advanced techniques. Here are some that you should take note of:
Using Azure Active Directory (AAD) security groups allows you to assign access permissions to entire groups rather than individual users.
This practice is especially useful in enterprises where employees frequently join or leave teams, as it eliminates the need to manually update access permissions in Power BI.
When building large-scale data models, ensure that RLS does not interfere with relationships and filter propagation.
Here are some tips:
A hybrid approach to RLS is the combination of static and dynamic techniques.
For example, you might define a static role to grant access to a specific business unit and apply dynamic filtering within that role based on individual email addresses or usernames. This method enables layered and flexible security logic.
Object-Level Security allows you to hide entire tables or columns from certain roles. It complements RLS by adding another layer of data protection. OLS can be used for sensitive fields like salary or medical information.
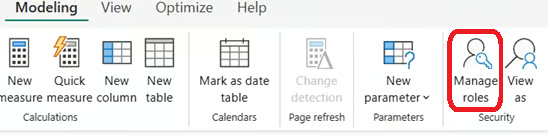
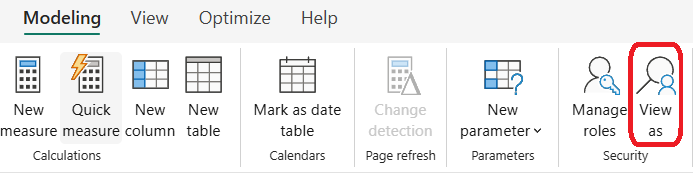
Power BI Desktop provides a helpful way to simulate different user views through the “View as” role feature. This feature helps report developers validate that the Row-Level Security logic is working correctly before publishing the report.
How to test RLS in Power BI Desktop:
This simulates the report as if a user assigned to that role is viewing it. It's especially helpful when testing dynamic RLS filters that depend on DAX functions like USERPRINCIPALNAME().
Once published to Power BI Service, RLS should be tested again in the cloud environment to ensure accuracy.
How to test RLS in Power BI Service:
This ensures the filters behave as expected for actual users.
For validation, you can consider using test accounts or service identities to mimic real usage. All filters on key visuals, like tables and charts, should also be reviewed periodically.
You should also check through slicers, drillthrough, and bookmarks thoroughly to ensure that they’re not leaking unauthorized data.
Implementing RLS may come with some issues, so here are some common ones and how to fix them.
After publishing to Power BI Service, some users find that RLS does not behave as expected, even though it worked in Power BI Desktop.
Solutions:
Users with certain workspace roles (Admin, Member) may inadvertently bypass RLS.
Solutions:
Common pitfalls arise from the misuse of DAX functions like USERNAME() and USERPRINCIPALNAME():
USERNAME() may return a local account name instead of an email when tested in Desktop.USERPRINCIPALNAME() for consistency with cloud identity behavior.Tips:
Dynamic RLS with DirectQuery sources requires extra attention, especially when used with Single Sign-On (SSO).
Common issues:
Solutions:
There may be scenarios where RLS needs to be removed temporarily (e.g., for demos or open dashboards) or permanently (e.g., when sharing data with external stakeholders). In such cases, you’ll have to be careful with visibility settings to prevent unexpected leakages.
To disable RLS:
Once removed, all users will be able to access the full dataset unless other security measures are in place.
If RLS is not feasible or necessary, consider the following practices to maintain data security:
Removing RLS doesn’t mean removing all security. Use other layers of access control and sharing features in Power BI Service to ensure responsible data dissemination.
Successful enterprise-wide deployment of Row-Level Security requires thoughtful planning, scalable architecture, and proper governance. This section outlines proven best practices across different dimensions of RLS implementation.
A well-designed data model supports efficient and maintainable RLS configurations.
Recommendations:
Managing RLS roles centrally and consistently helps reduce errors and improve collaboration.
Recommendations:
RLS can impact report performance, especially when complex filters or large datasets are involved.
Recommendations:
Let’s now compare the differences between Row-Level Security (RLS) and other security features, particularly Object-Level Security (OLS).
RLS allows access control to individual rows of data, which is ideal for filtering data by user identity, geography, department, or business unit. OLS, on the other hand, controls access to entire tables or columns, which is useful for hiding sensitive financial or HR information (e.g., salary column).
RLS can be easily implemented within Power BI Desktop via DAX filters on roles. These rules can be either static (hard-coded filters) or dynamic (user-driven logic). OLS is configured via the Tabular Editor or XMLA endpoint. It also requires a premium workspace or Power BI dataset hosted in Analysis Services.
I’ve put together a comparison summary in the table below:
|
Feature |
RLS |
OLS |
|
Level of Control |
Row-level |
Table/Column-level |
|
User-Specific Views |
Yes |
No |
|
GUI Configuration |
Supported in Power BI Desktop |
Requires external tools |
|
Use Cases |
Sales region access, employee-specific |
Hide salary, sensitive columns |
|
Scalability |
Moderate to High (with dynamic setup) |
High (if integrated with governance tools) |
Wrapping up, row-level security (RLS) in Power BI is a key method for ensuring data governance within the platform. It allows organizations to deliver personalized, secure analytics experiences within a single report or dashboard, without compromising the confidentiality or integrity of underlying data.
Security is an increasingly important factor in data management and governance, which is an important aspect in working with Power BI. For more in-depth information about Power BI, check out our Deploying and Maintaining Assets in Power BI course or our Reports in Power BI course. For further reading, our guides on Power BI Hierarchies and Power BI Dashboards might be helpful.
Top Power BI Courses
Track
Course
Course
Tutorial
DataCamp Team
Tutorial
Joleen Bothma
Tutorial
Joleen Bothma
Tutorial
Parul Pandey
Tutorial
Joleen Bothma
Tutorial
Austin Chia