
Course
Understanding Microsoft Azure
3 hr
47.1K
If you’ve ever found managing cloud storage through the Azure portal a bit clunky or overwhelming, you’re not alone. That’s where Azure Storage Explorer comes in—a user-friendly desktop application that lets you interact with your Azure Storage resources without needing to navigate the full Azure interface.
In this tutorial, I’ll walk you through Microsoft’s Azure Storage Explorer: how to set it up, connect to your storage accounts, and start managing your blobs, queues, tables, and files with ease.
Azure Storage Explorer is a free cross-platform tool by Microsoft. It allows you to access data (like blobs, tables, queues, and files) stored in Azure Storage and provides limited management features to manage the stored data. You can upload, explore, download, and clone data entities.
Being a locally installed application, it provides a simple and familiar user interface without depending on web browsers or CLIs.
To better grasp how Storage Explorer fits into the broader cloud ecosystem, explore the Understanding Microsoft Azure Architecture and Services course.
In this section, I will show you how to set up Azure Storage Explorer and start using the application.
To download and install Storage Explorer:
.exe file. .tar file.In this tutorial, I will install the app via the Linux Snap Store. All the screenshots are based on Ubuntu Linux in dark mode. Since software packages and webpages are frequently updated, what you see may not exactly match my screenshots.
Launch the Storage Explorer like any other app on your operating system:
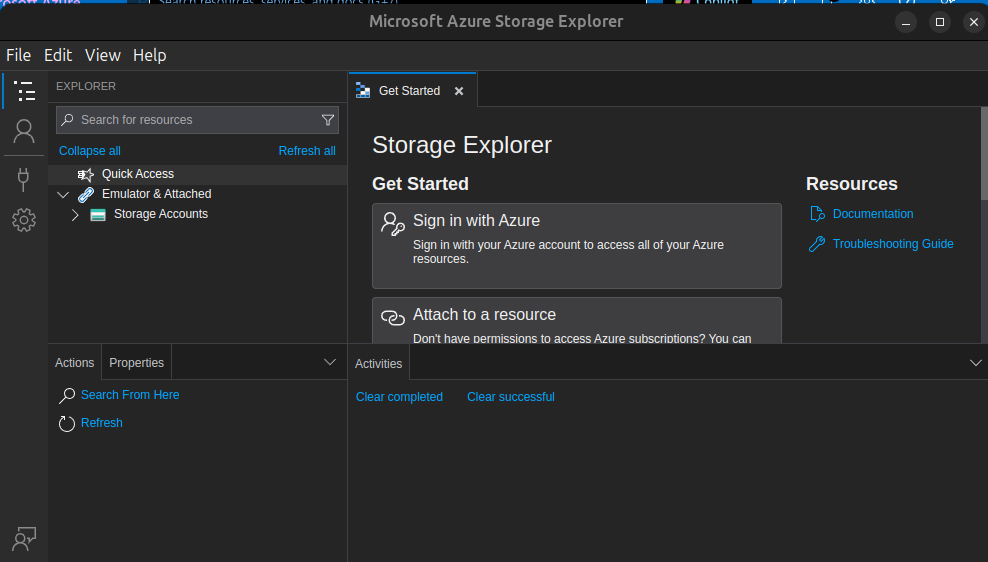
The user interface is similar to that of other Microsoft applications like VSCode. You have a main window that can contain tabs. The left menu is collapsible and contains four options:
Select each option in the left menu to expose the sidebar corresponding to that option. We will use these options and cover them in greater detail in later sections.
At the bottom, you have a panel that shows a log of various actions and their status.
After launching Storage Explorer, we will connect it to your Azure Storage account.
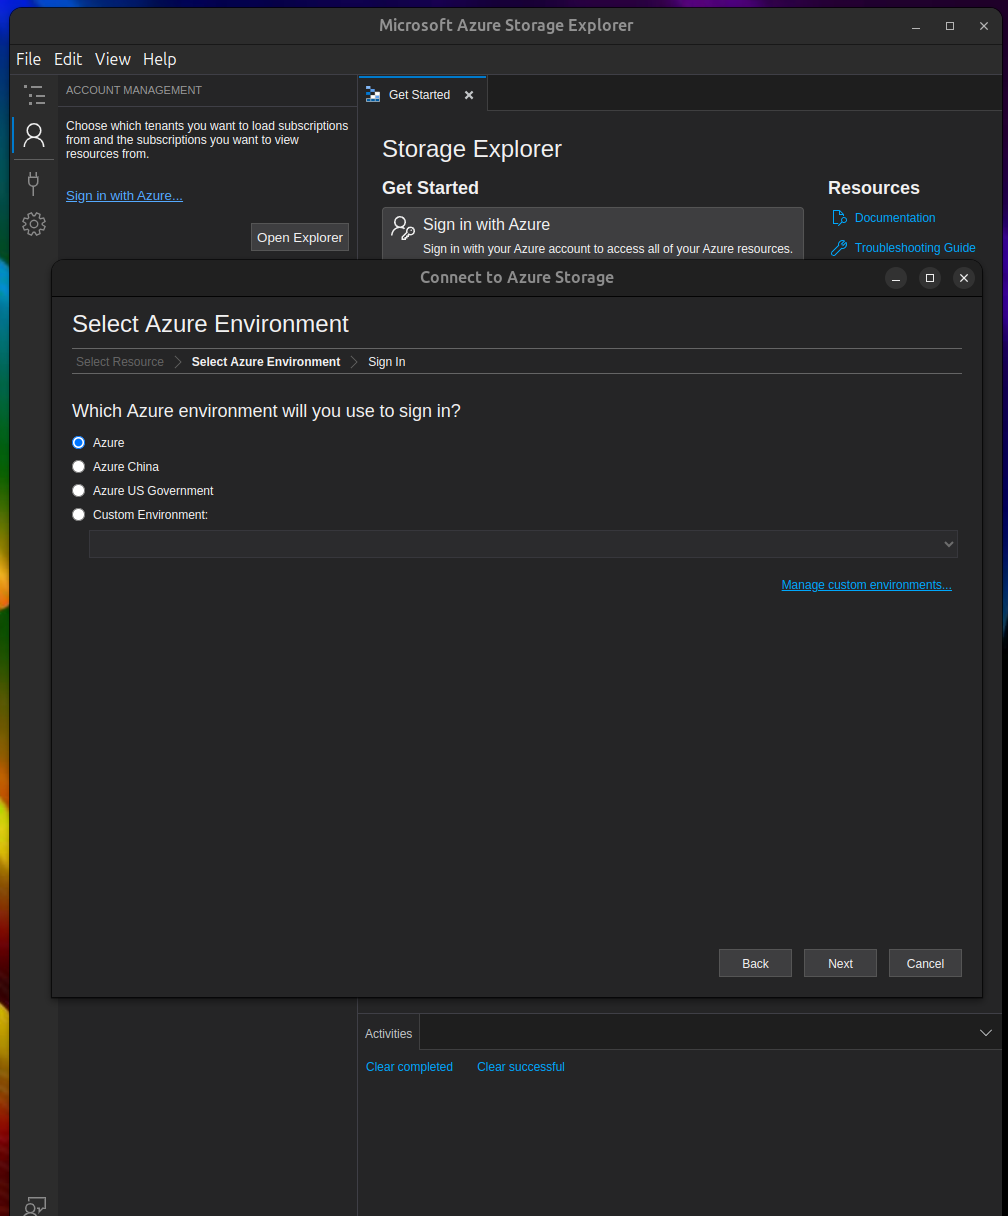
You can use your Azure account to connect Storage Explorer to Azure Storage:
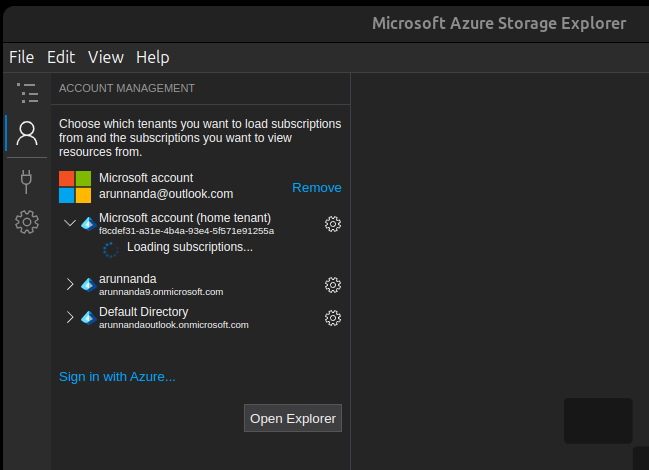
Having logged in to Azure, we will see (in the next section) how to connect to different resources from your Azure account.
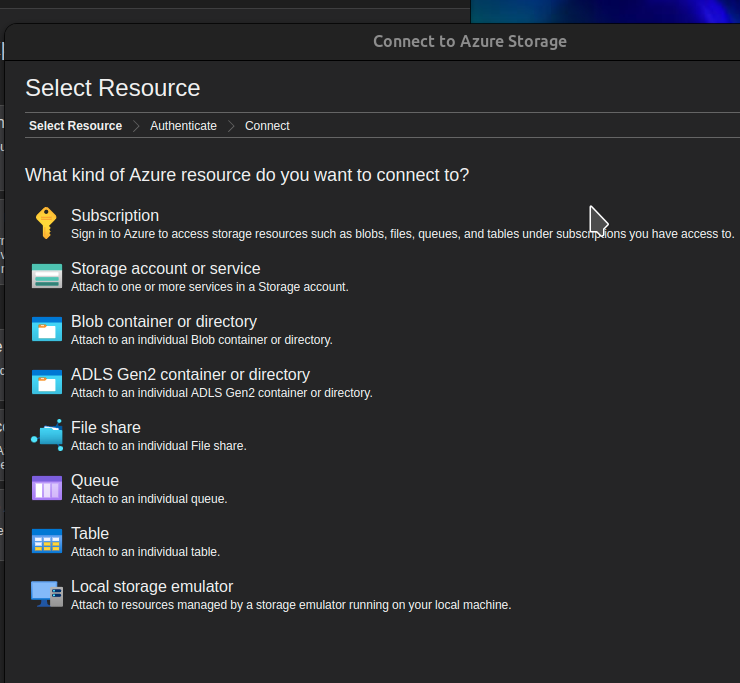
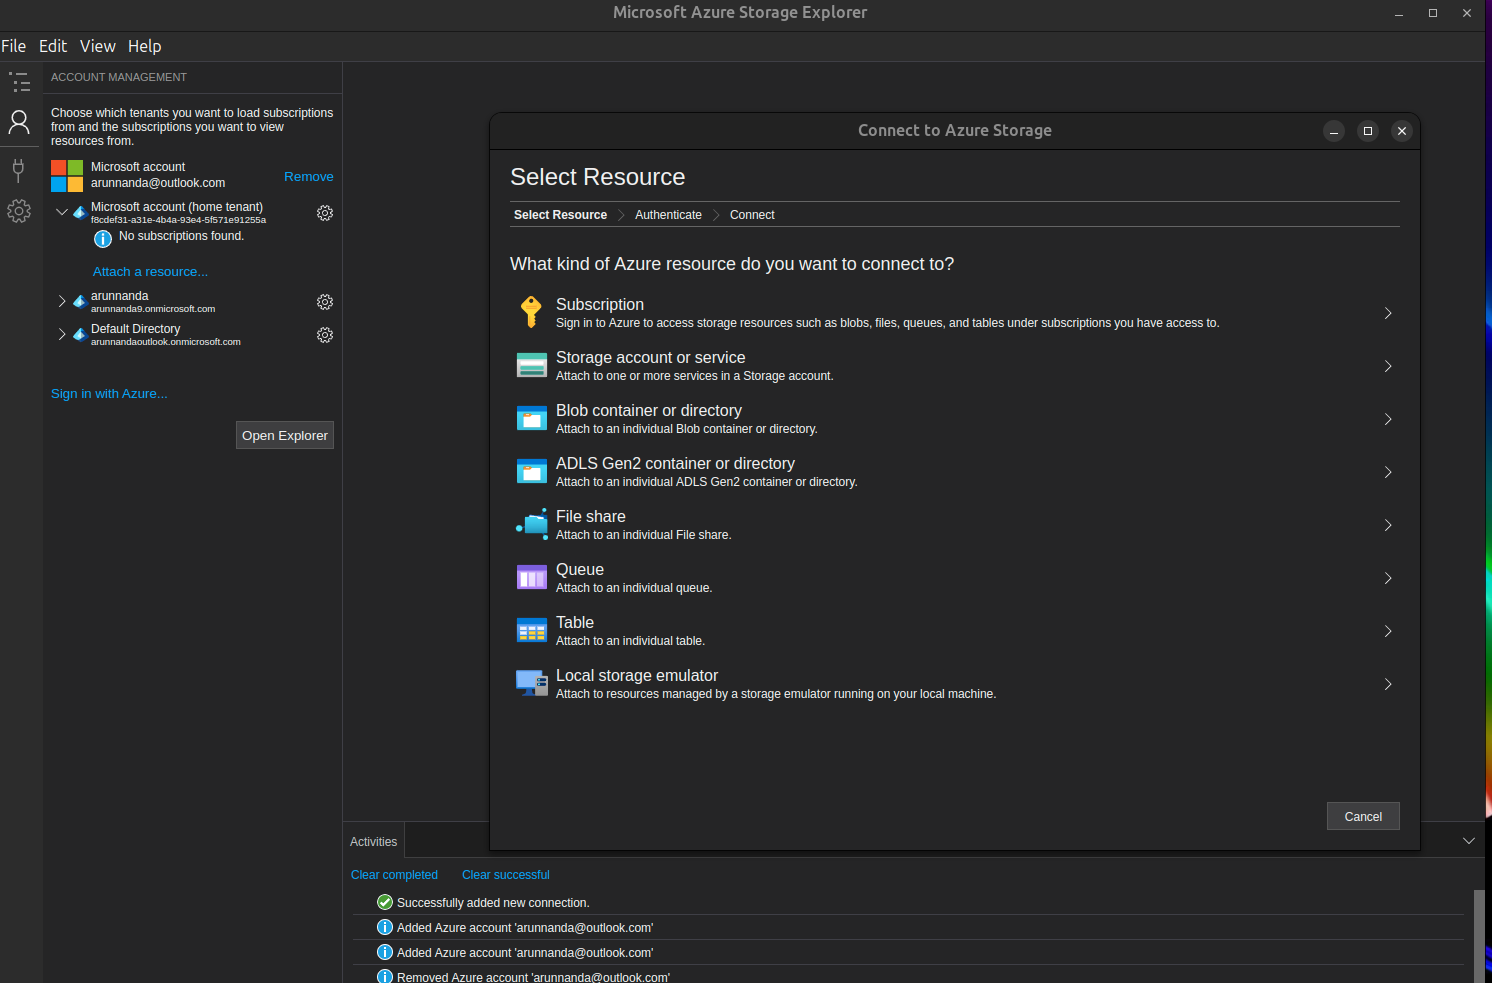
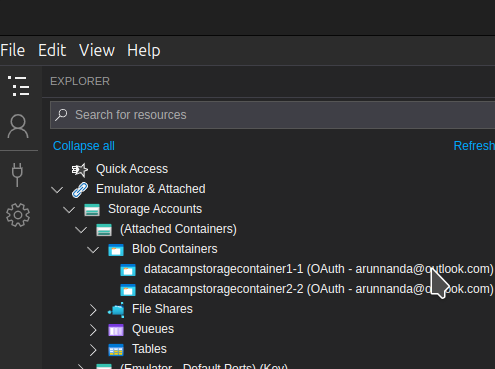
Using Storage Explorer, you can connect to various types of storage resources, such as Blobs, Files, Queues, and Tables. Let’s explore how in this section.
To connect to Blob Storage:
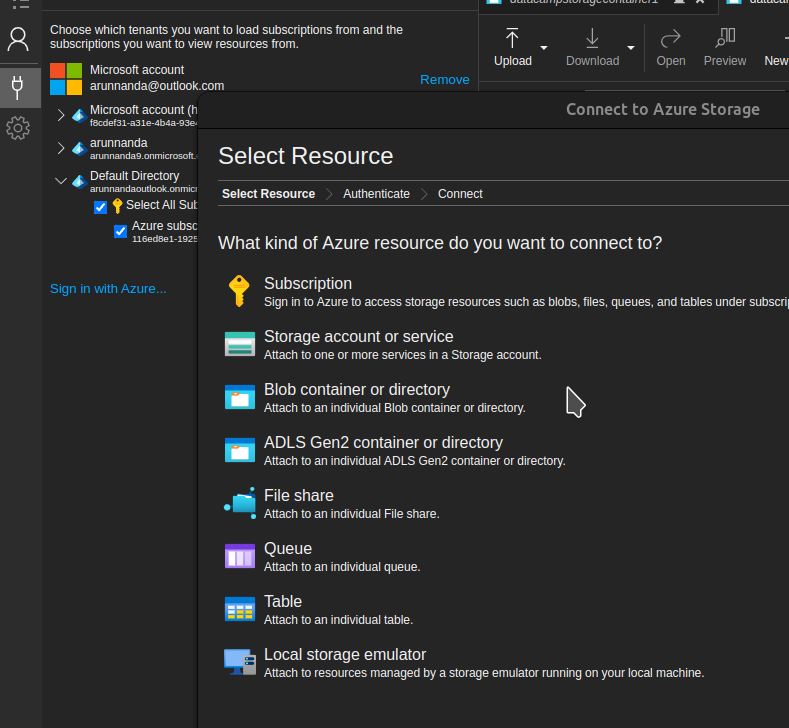
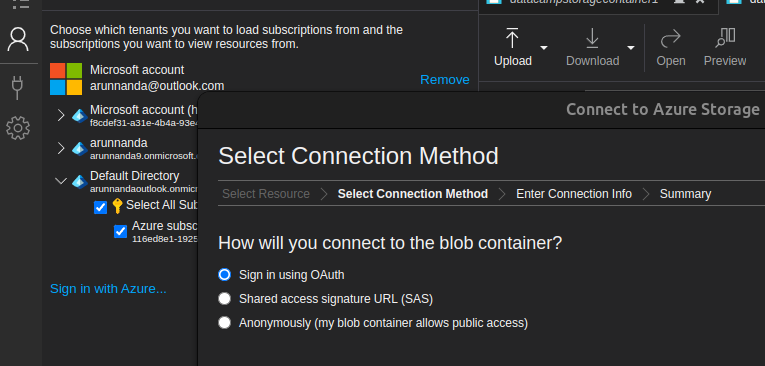

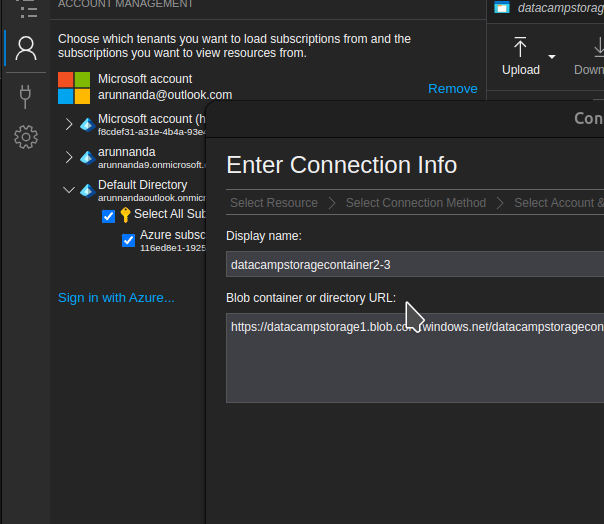
If the Entra ID linked to the Azure account you used to sign in (above) is authorized to access the Blob Container, it connects successfully. You can then open it in Storage Explorer:
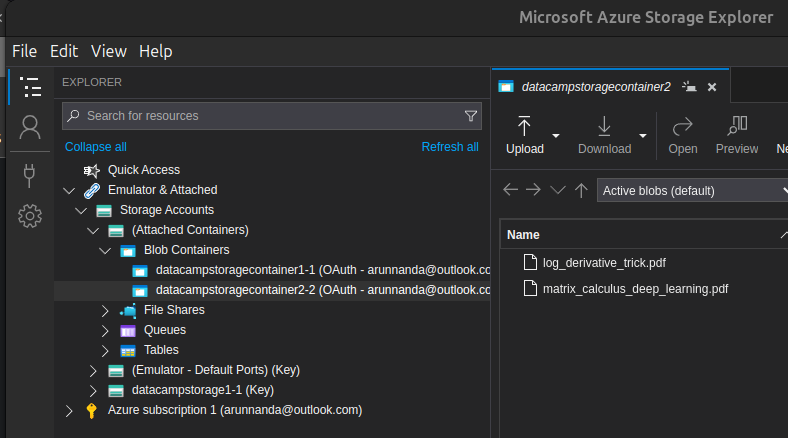
The process of attaching other resources, such as files, queues, and tables, is similar to attaching a storage account, as shown above.
After connecting Storage Explorer to Azure Storage, we will learn how to navigate and manage storage resources using the application.
Browsing containers and blobs in Storage Explorer is similar to using the file explorer on the computer. After connecting to a storage account (as explained earlier):
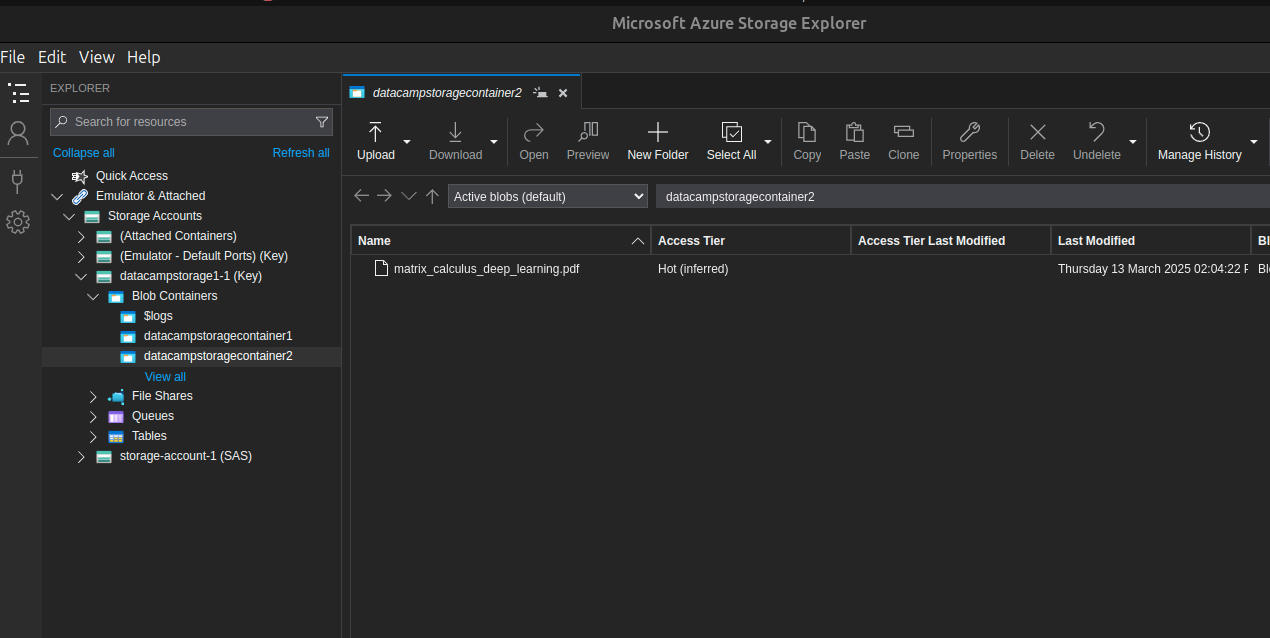
To upload files to Azure Blob Storage:
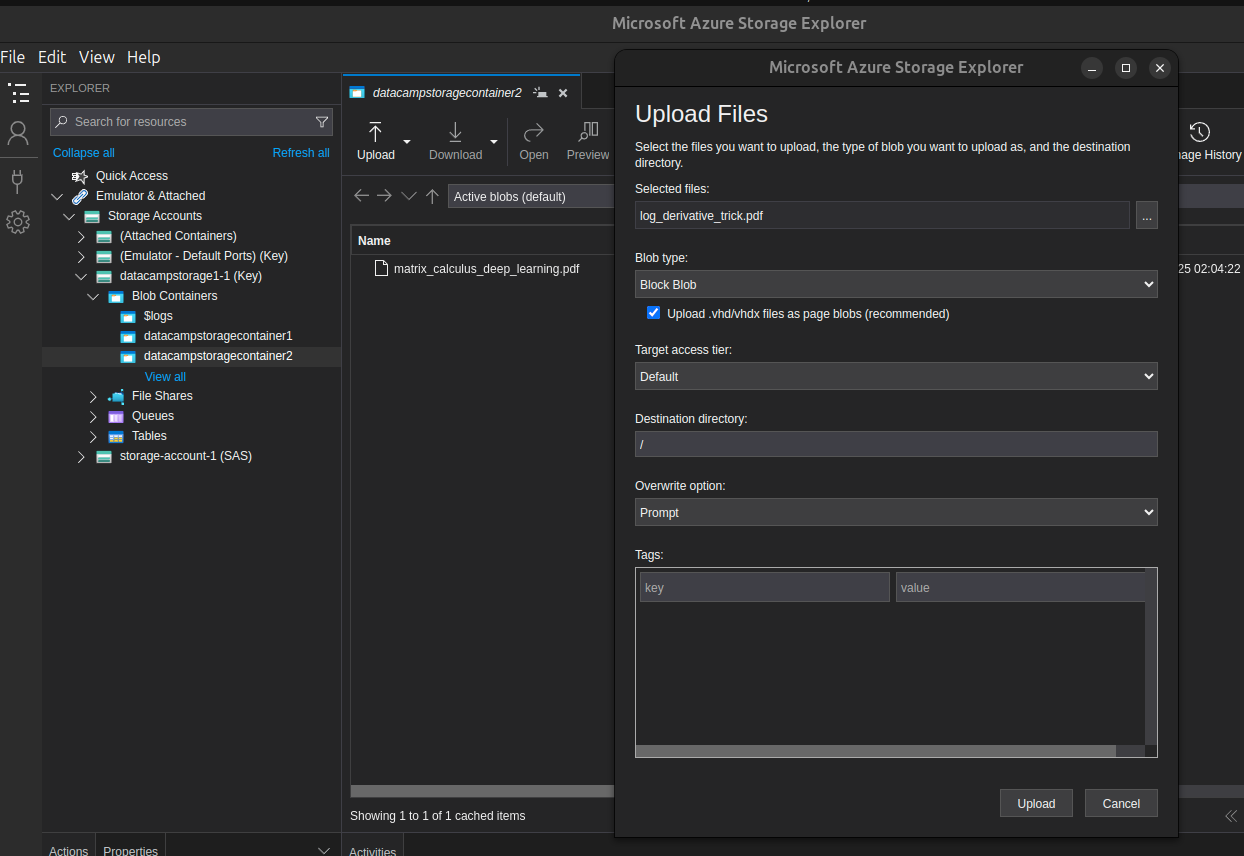
The bottom panel shows the selected file's uploading status. When the upload completes, the Explorer tab automatically updates to show the newly uploaded file.
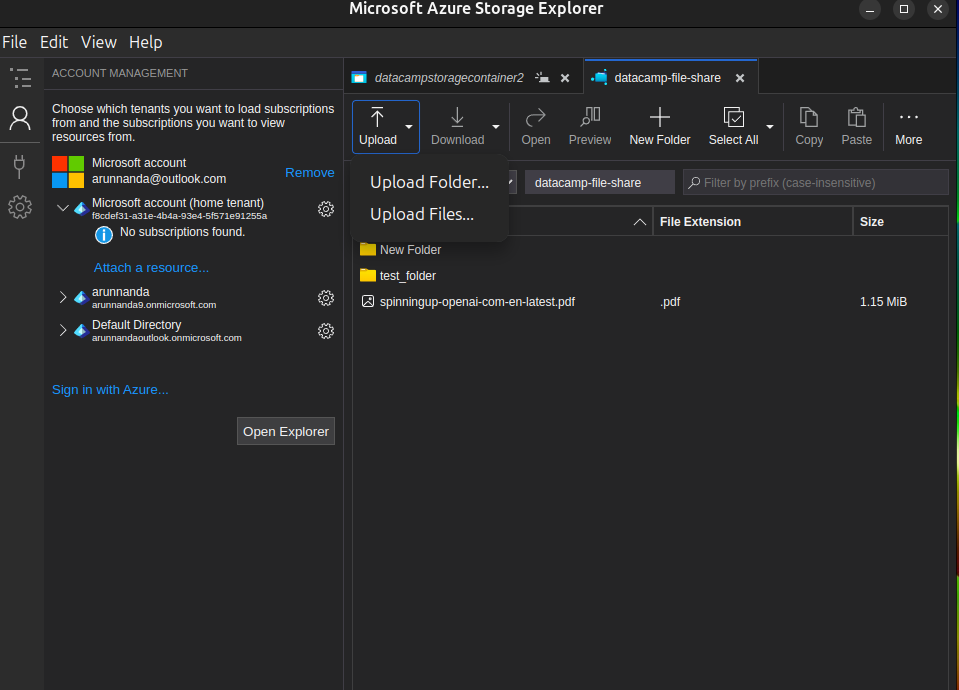
You can also use Azure Storage Explorer to manage file shares and directories. You can upload entire folders from your local computer or directly create a folder within Azure Storage.
To upload a folder:
To create a new folder (without uploading):

The process of uploading a file is similar to uploading a folder:
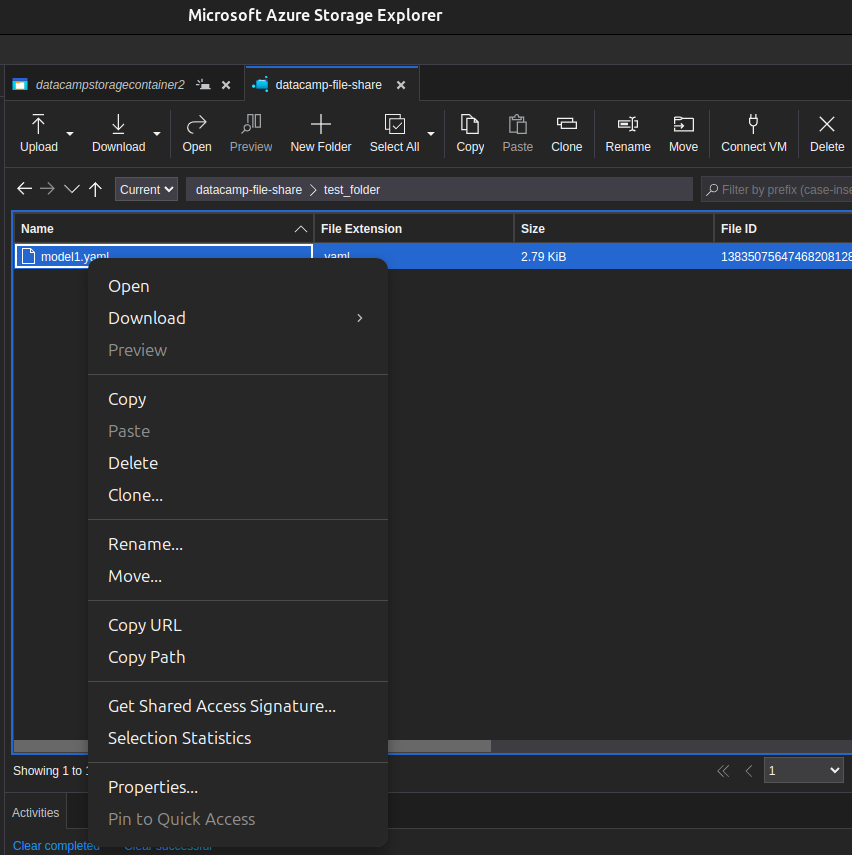
To delete a file:
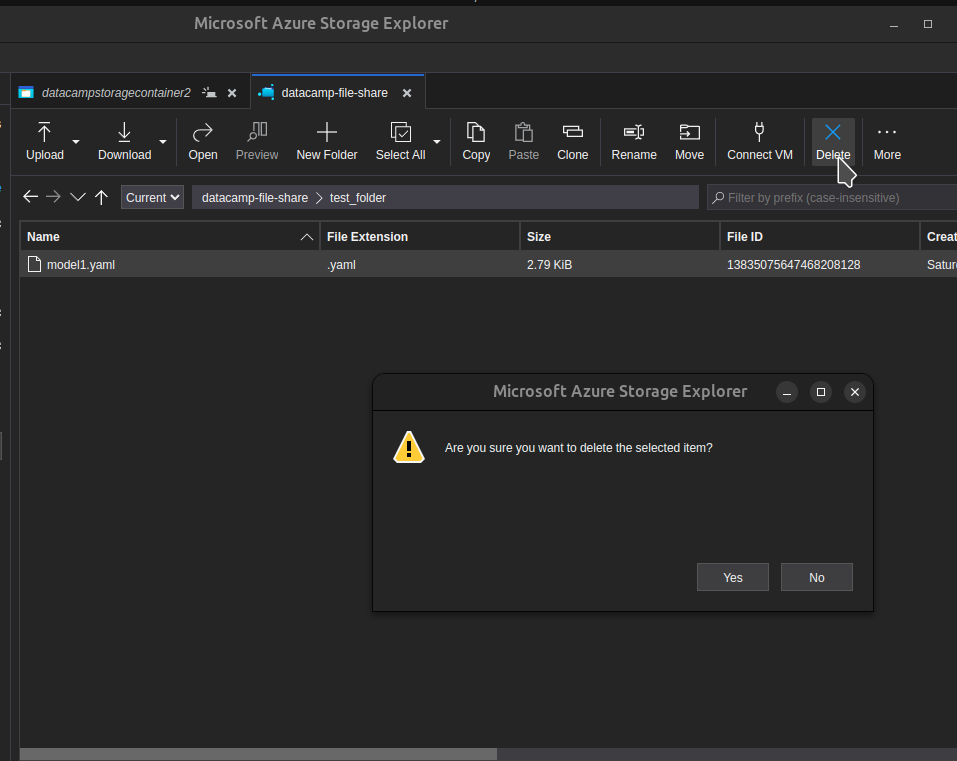
Alternatively, right-click the file name and select Delete from the context menu options.
Having covered the basics, I will show how to work with SAS tokens and access keys.
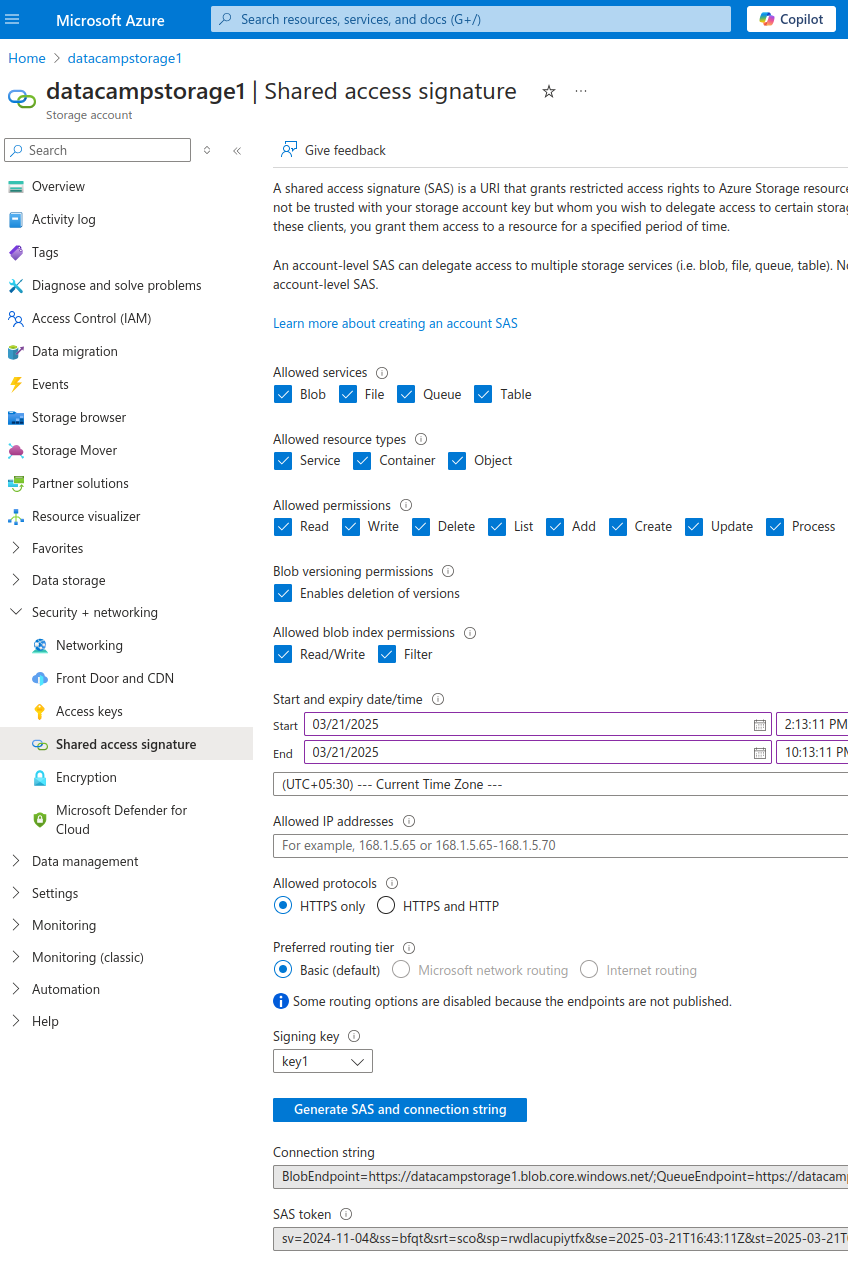
To access storage entities (like blobs, queues, etc.) using SAS, you need a connection string (URL) that contains the SAS token. You get the connection string from the Azure portal:
You can now connect to your Azure Storage account using this SAS token. To attach a Storage Account within Storage Explorer:
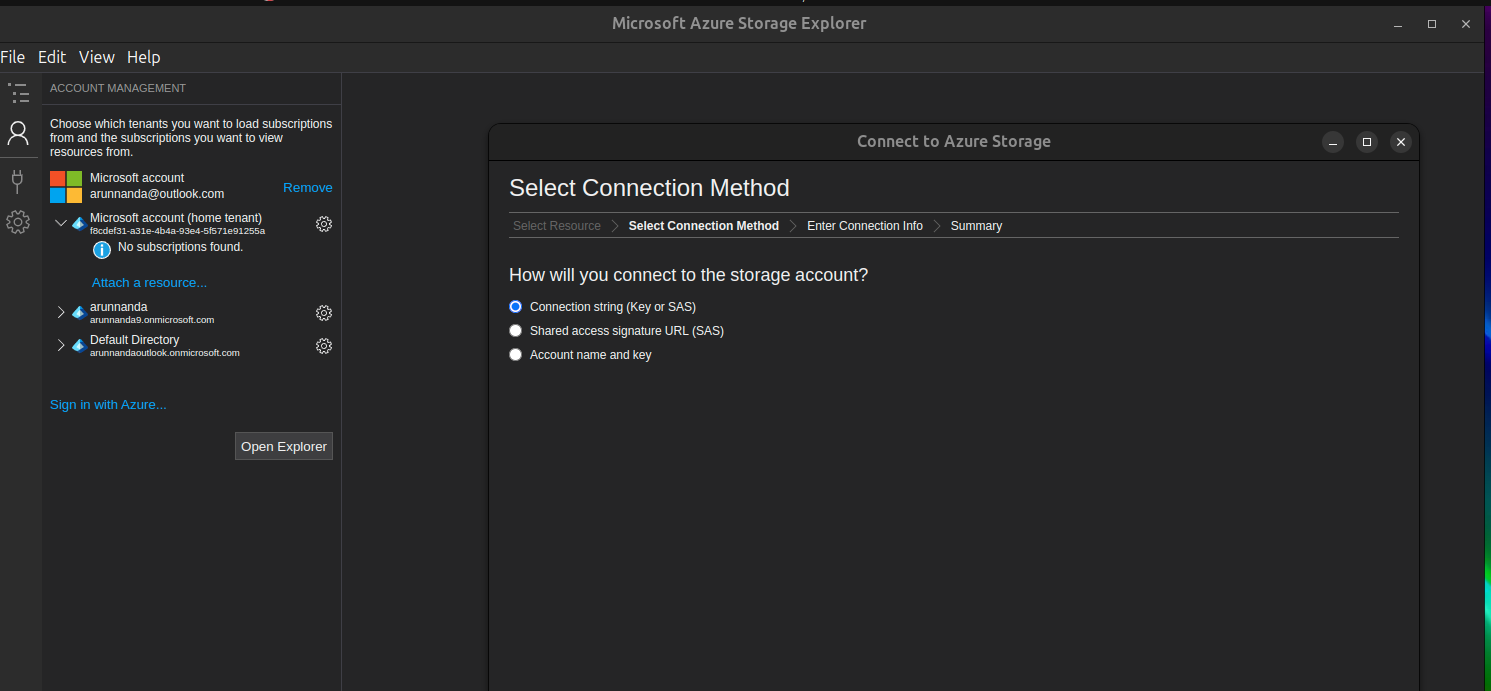
To connect using the SAS token:
After connecting, you can access the contents in Storage Explorer:
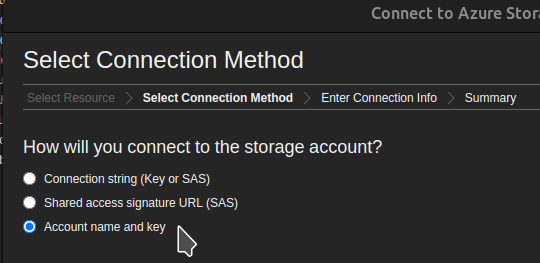
In addition to the methods discussed above, you can use your Azure account’s access keys to connect Storage Explorer to Azure Storage. Share the account name and key with anyone, and they can securely connect to your Storage resources without relying on Microsoft Entra ID.
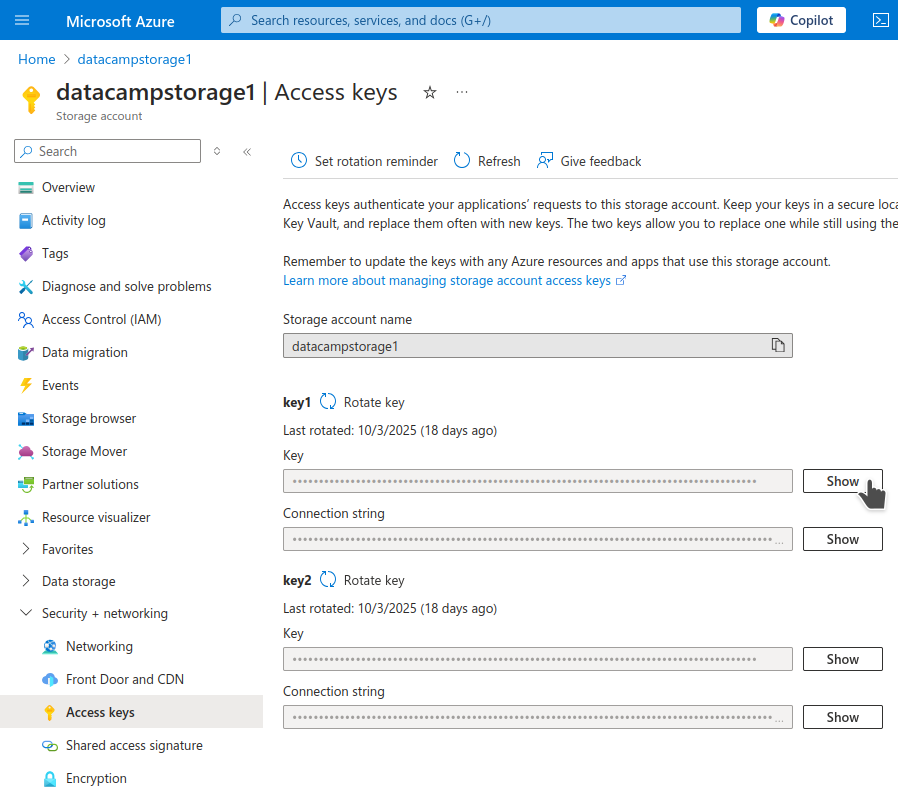
If you choose to connect using the account name and access key, you will need the key from your Azure account. To get the key:
To connect using the
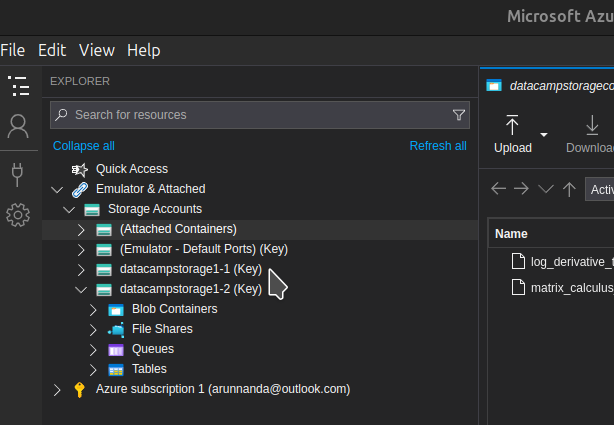
After connecting, you can access the contents in Storage Explorer:
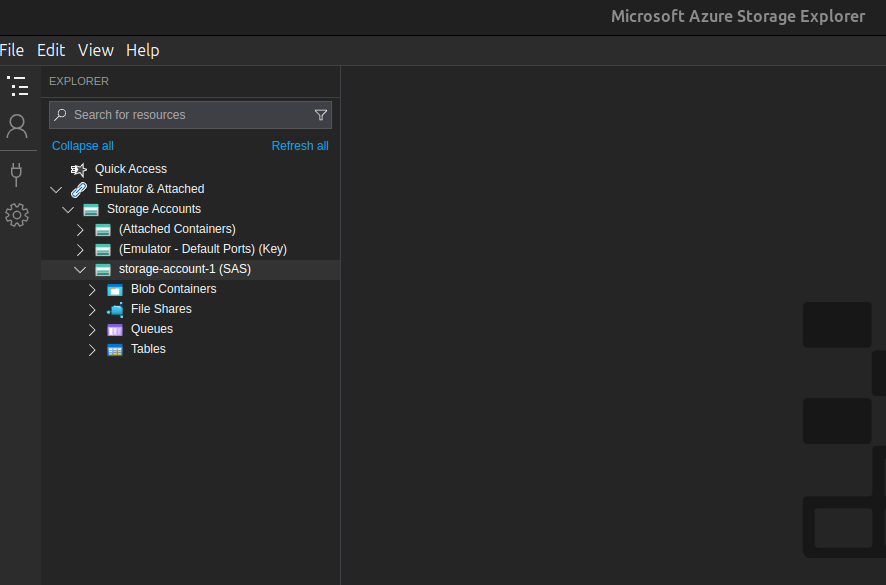
You will find the contents of the storage account in the sidebar. Notice the suffix “(Key)” next to the Storage account name. The contents are organized as an expandable tree structure. Selecting each item in the tree will show its contents.
The above methods (SAS tokens and access keys) require you (as the owner of the storage entity) to use a URL or a key to access the data. While convenient, this method is not the safest. For example, keys and tokens can be intercepted during the sharing process. Using Microsoft Entra (formerly Azure Active Directory) is a better option.
In corporate environments integrated with Microsoft Entra, you can use your Microsoft Entra account to access and manage data stored in Azure Storage. Note that Microsoft Entra can be used only with blob, queue, and table data.
When using Entra ID, you can also take advantage of Role-Based Access Control (RBAC). RBAC allows you to manage access to Azure resources by assigning permissions to users, groups, and applications based on their roles. The Azure Blob Storage tutorial describes in greater detail how to set permissions for storage entities using the Azure portal.
After you sign in to Storage Explorer using your Azure account, you can access Storage entities your Entra ID is authorized to access. Earlier in this article, you signed in to Blob Storage using OAuth. That method authenticated you based on the Entra ID tied to the account you used to log in via OAuth. Notice the suffix “OAuth” is beside the name of the Blob Container in the sidebar.
If you're also working with Azure SQL, our step-by-step guide helps you manage database storage.
In this section, I will show you how to manage storage resources. We will cover how to rename, delete, and refresh files and containers and monitor user activity.
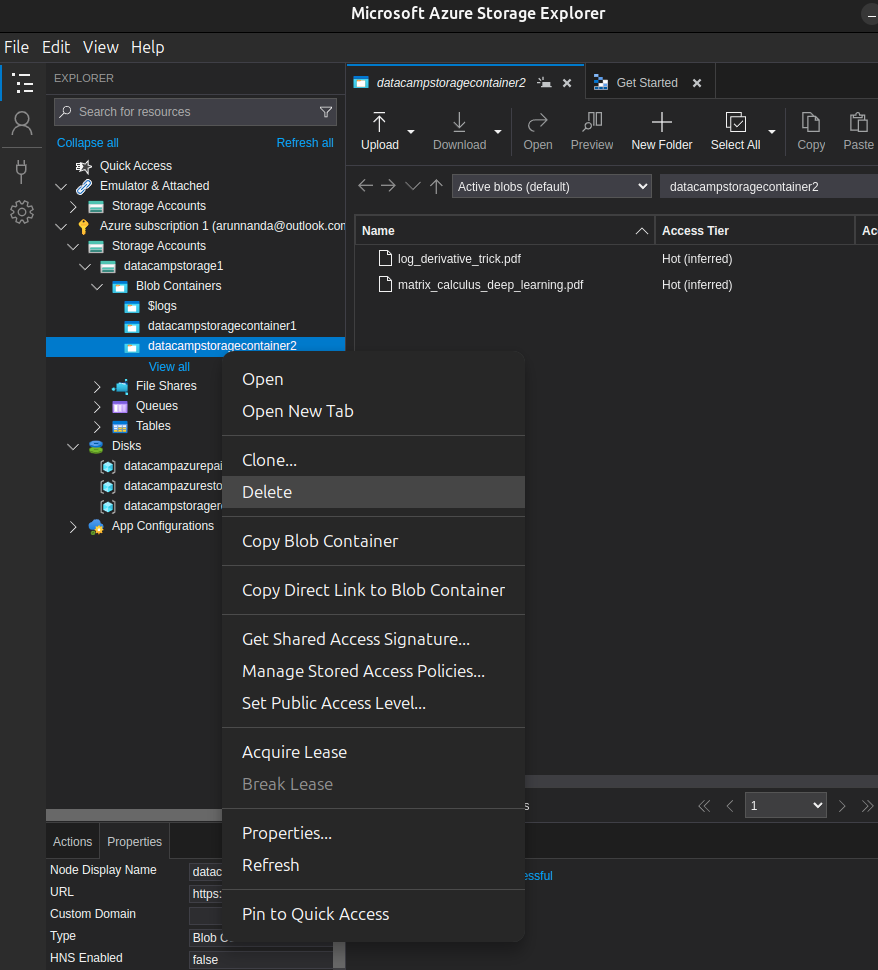
You can use Storage Explorer to perform management tasks directly, such as deleting and renaming containers and files.
To delete a container:
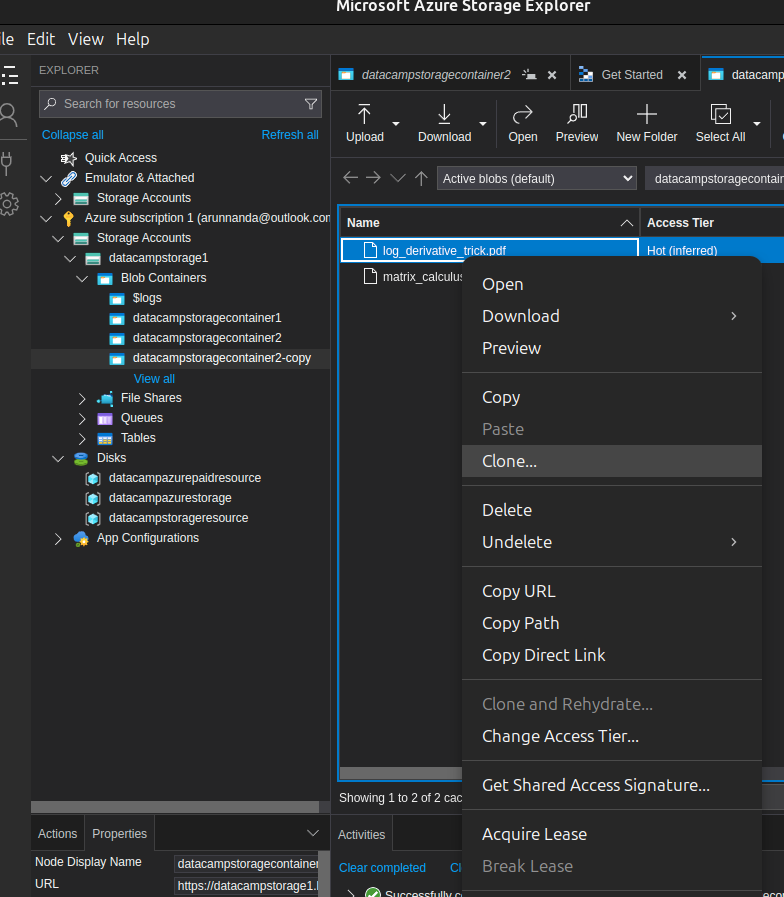
To rename a container:
Note that it is not possible to directly rename a container, either using Storage Explorer or the portal.
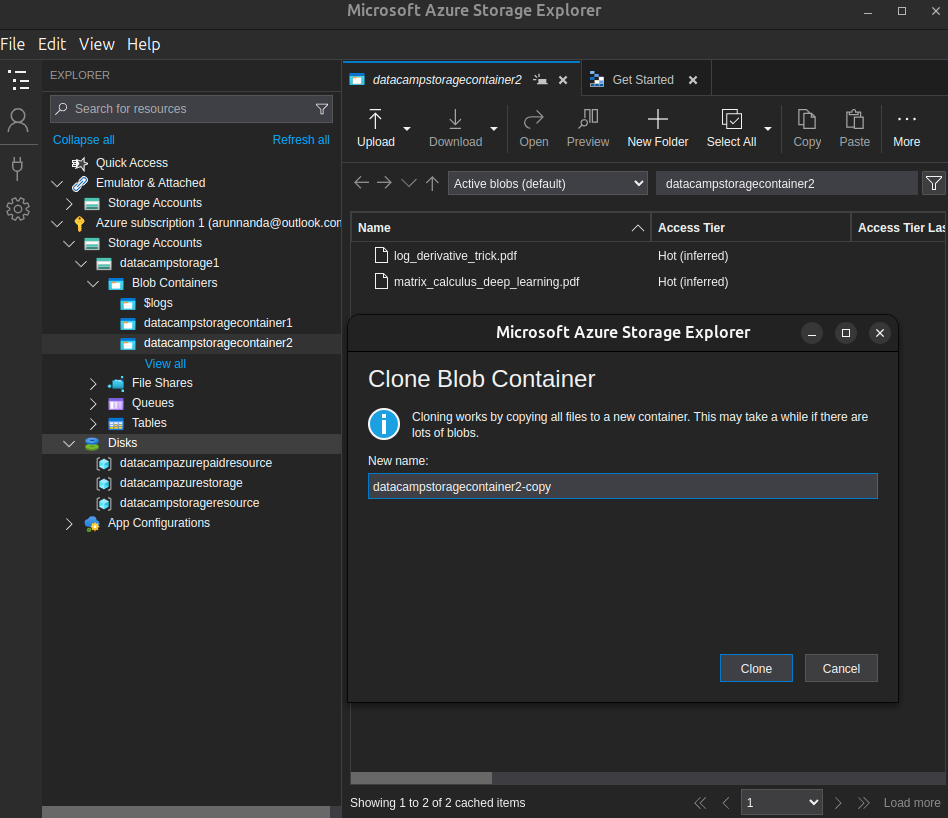
Similarly, to rename a file, clone it using a new name:
You can delete a file in two ways:
For those integrating storage with deployment pipelines, check out our Azure DevOps Tutorial to learn how to build, test, and deploy efficiently.
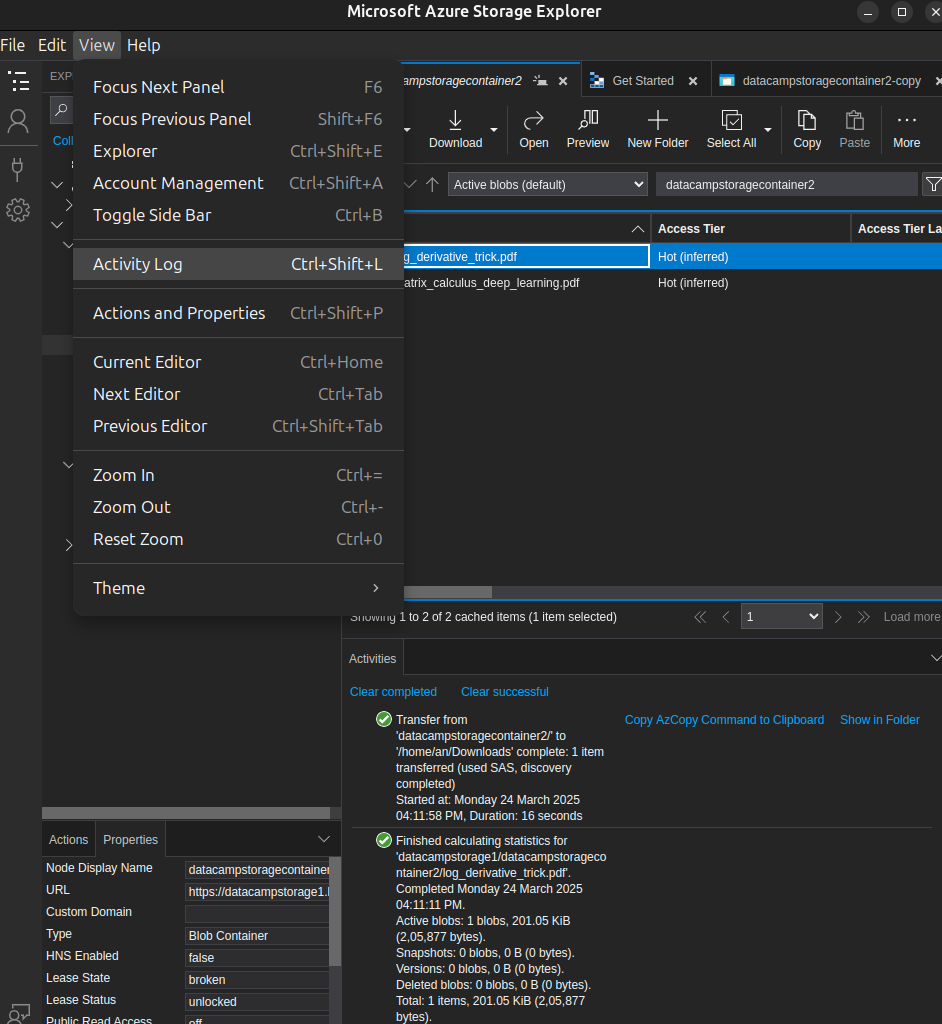
The Activity Log feature shows the activity history (such as uploads, downloads, changes, deletions, etc.) of the selected storage entity. The activity log is shown in the bottom panel. To show the log for a particular file:
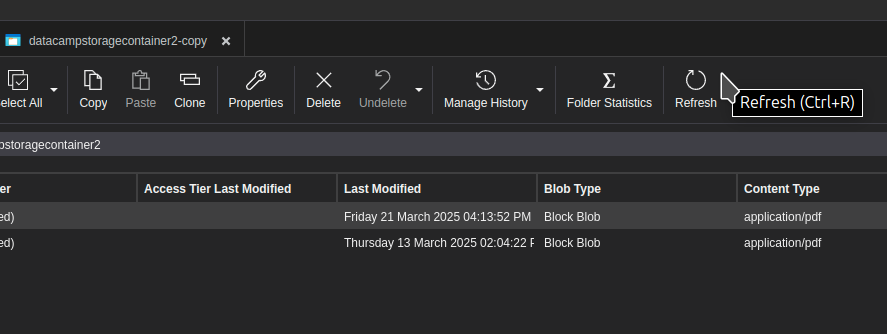
In many cases, various people access the same container or resource simultaneously. Accessing the latest version of the files is essential to avoid confusion and stay updated with the latest changes and data. To do this:
Even though it is a widely used and regularly updated product, you can still run into issues while using Azure Storage Explorer. Let’s review common issues you can encounter and how to fix them in this section.
Several common issues can prevent you from accessing Azure Storage resources through Storage Explorer:
Wrongly configured access methods are a common source of errors. If users are not careful, many security features also end up catching legitimate users.
In this section, I share some of my best practices to make the most of Azure Storage Explorer.
Managing access to Azure Storage resources securely is critical. Here's a breakdown of common methods and their pros and cons:
While convenient, SAS keys are not ideal for robust access control due to several limitations:
Despite these issues, SAS keys are often preferred for short-term use because they’re easy to generate and distribute.
For longer-term access and more secure management, RBAC is the recommended approach:
Proper organization of your Azure Storage resources helps you manage complexity and maintain clarity across environments. Here are some best practices:
Prod-Media-Asia as a container name → stores media files for the production app in the Asia region.Prod-Media as a storage account name → hosts large media files used in production apps.This structure improves navigation and aligns storage configurations with each account’s intended use.
Ensuring your Azure Storage setup is reliable and cost-efficient requires regular backups and active monitoring. Here’s how to stay on top of both:
Azure Storage Explorer simplifies how you interact with your Azure Storage resources—offering a clean, intuitive interface to manage blobs, files, queues, and tables without diving into the full Azure portal. In this tutorial, you learned how to install the application, connect to your storage accounts, and securely manage your data with ease.
Preparing for an Azure-related job interview? Don’t miss these 30 Azure Interview Questions that range from basic to advanced.
Learn more about Azure with these courses!
Course
Course
Course
blog
Laiba Siddiqui
15 min
blog
Josep Ferrer
14 min
Tutorial
Arun Nanda
Tutorial
Anneleen Rummens
Tutorial
Anneleen Rummens
Tutorial
Florin Angelescu