Track
Developing AI Applications
21 hr
Many data scientists and machine learning engineers face challenges with tools like Docker, Kubernetes, and Terraform, as well as building secure infrastructure for AI models.
BentoML simplifies this process, allowing you to build, serve, and deploy AI applications with just a few lines of Python code.
This tutorial is a step-by-step guide for individuals looking to deploy their own AI app, accessible anywhere via a simple CURL command. You will learn about the BentoML framework, creating a question-answering AI app locally, and deploying the Phi 3 mini model on the BentoCloud.
BentoML is a machine learning serving and deployment framework that streamlines deploying and scaling AI models. It automates tasks like Docker image creation, instance setup, infrastructure and security management, and essential features required for a production-ready server.
With BentoML, you can develop and deploy custom AI models, pre-trained models, or fine-tuned solutions in a few minutes with simple Python code. It provides the flexibility to scale efficiently within your cloud environment while ensuring you maintain complete control over security and compliance.
BentoML is part of the MLOps toolset. Discover other top-tier MLOps tools for training, tracking, deploying, orchestrating, testing, monitoring, and managing infrastructure by reading the blog Top 15 LLMOps Tools for Building AI Applications in 2024.
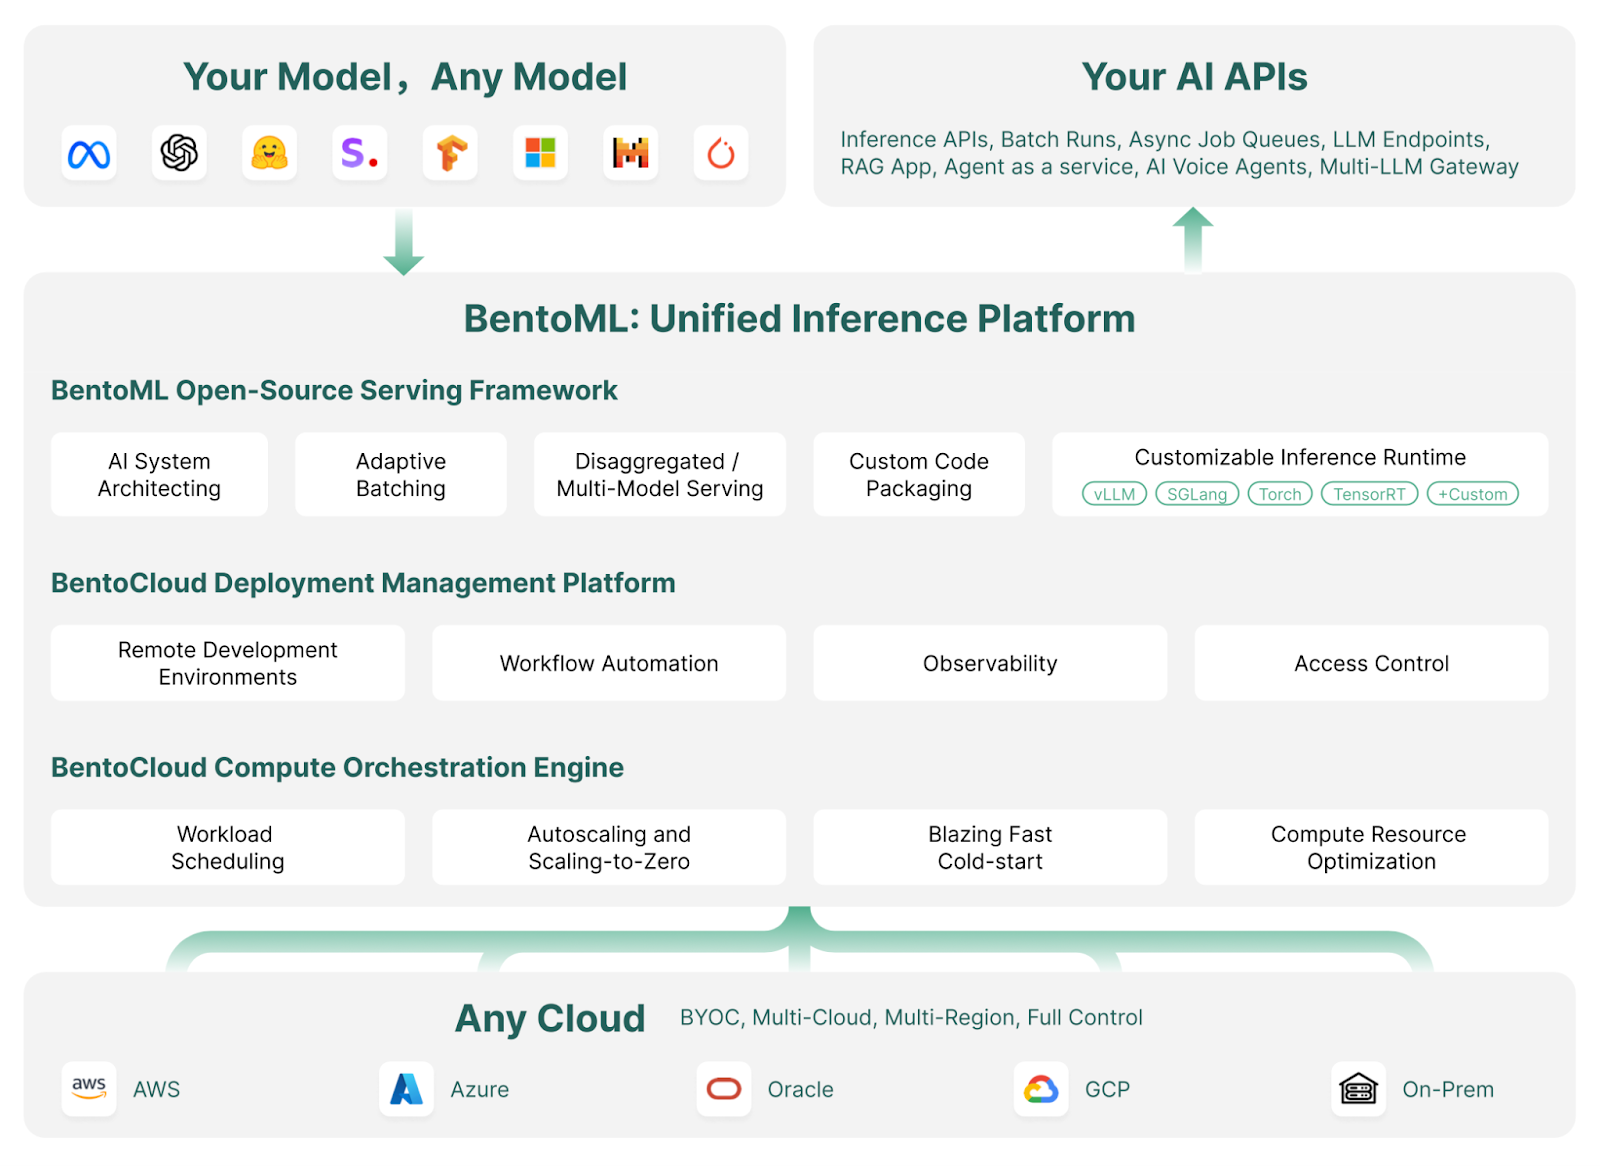
How BentoML works | Image source: BentoML
The Bento ecosystem's shining star is its cloud: BentoCloud is an extension of BentoML's framework, offering additional tools and services to make deploying, monitoring, and scaling AI models even easier.
By signing up, users can access free credits to get started, making it an attractive option for developers and enterprises.
If you are a non-technical individual looking for a no-code to low-code solution for developing an LLM application, I recommend following the Local AI with Docker, n8n, Qdrant, and Ollama guide.
In this section, we will serve a simple AI application that takes questions and context from the user and generates the response.
We will start by installing BentoML, PyTorch, and the Transformers library using pip. Run the following commands in your terminal:
$ pip install bentoml
$ pip install torch
$ pip install transformers
Next, we will create a service.py file to define the AI server.
Using BentoML commands, we will import the Transformers pipeline, which allows us to load the model and perform inference with just 2 lines of code.
We will set up example text inputs and context, configure the BentoML service with parameters like the number of CPUs and traffic timeout, and initialize the Question_Answering class using the Transformers pipeline.
Finally, we will create an API called generate(), which takes inputs and outputs and returns the generated answer.
from __future__ import annotations

import bentoml

with bentoml.importing():
    from transformers import pipeline


EXAMPLE_INPUT = "How can I generate a secure password?"
EXAMPLE_CONTEXT = """
To generate a secure password, you can use tools like the LastPass Password Generator.
These tools create strong, random passwords that help prevent security threats by ensuring your accounts are protected against hacking attempts.
A secure password typically includes a mix of uppercase and lowercase letters, numbers, and special characters. Avoid using easily guessable information like names or birthdays.
Using a password manager like LastPass can also help you store and manage these secure passwords effectively.
"""


@bentoml.service(
    resources={"cpu": "4"},
    traffic={"timeout": 10},
)
class Question_Answering:
    def __init__(self) -> None:
        # Load model into pipeline
        self.pipe = pipeline(
            "question-answering",
            model="deepset/roberta-base-squad2",
        )

    @bentoml.api
    def generate(
        self,
        text: str =EXAMPLE_INPUT,
        doc: str = EXAMPLE_CONTEXT,
    ) -> str:
        result = self.pipe(question=text, context=doc)
        return result["answer"]
Serve the AI service locally by typing the following command into the terminal:
$ bentoml serve service:Question_Answering As you can see, we have provided the command above with the file name (service) and the Python class (Question_Answering ) name for AI model inference.
Within a few seconds, it will generate a URL that you can copy and paste on the browser to access the BentoML server:
[cli] Starting production HTTP BentoServer from "app:Question_Answering" listening on http://localhost:3000 (Press CTRL+C to quit)The BentoML server is quite similar to FastAPI swagger UI.
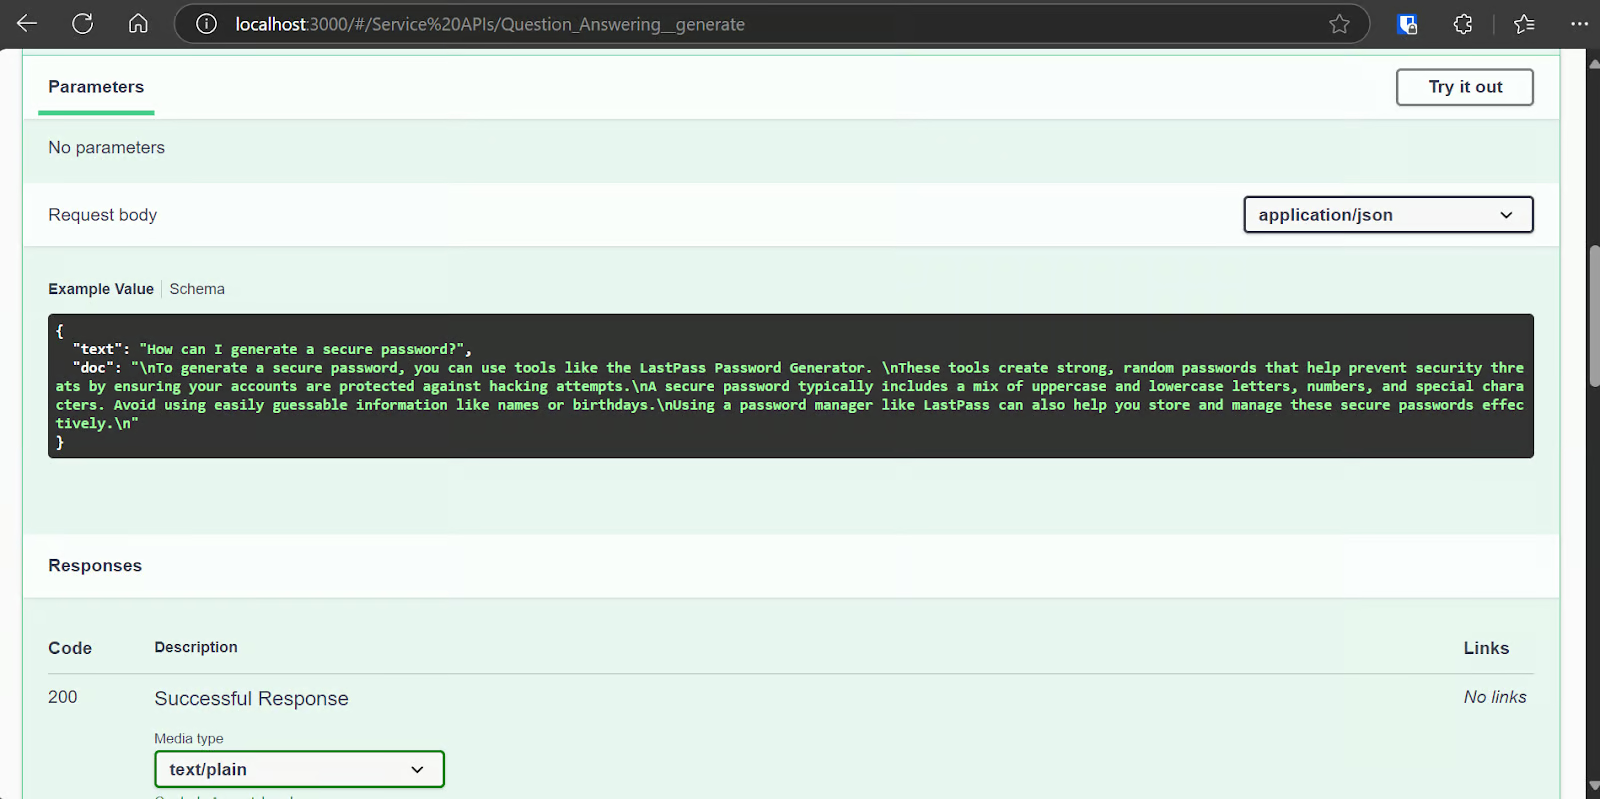
Let’s test our server using the “Try it out” option.
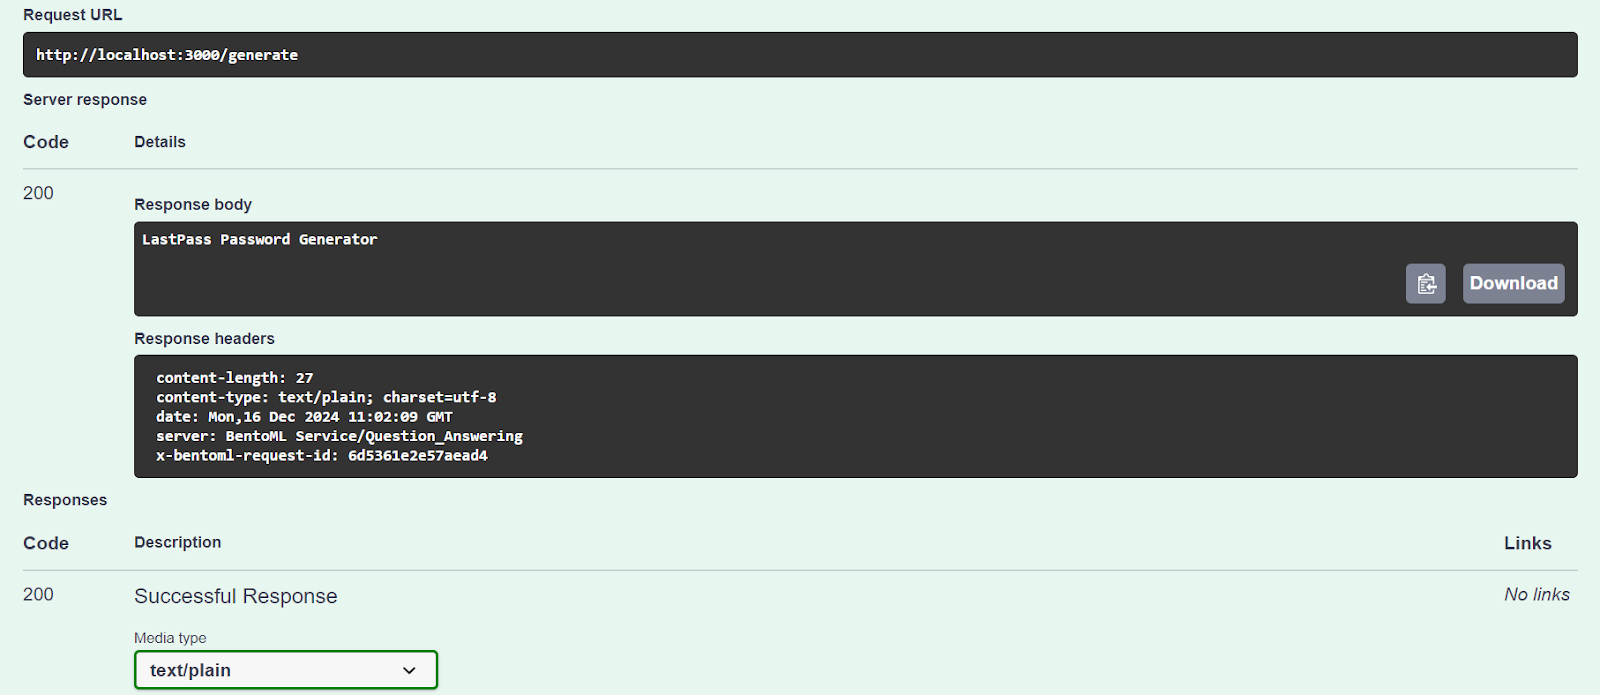
Our AI service is working fine and has generated an accurate response:
We can also access the AI server using the CURL command. Let’s ask a different question and provide it with context:
curl -X 'POST' \
  'http://localhost:3000/generate' \
  -H 'accept: text/plain' \
  -H 'Content-Type: application/json' \
  -d '{
  "text": "How can I buy a cheap car?",
  "doc": "Start by setting a budget and exploring sources like online marketplaces (Craigslist, Facebook Marketplace, Cars.com), local dealerships, or government auctions. Inspect the car thoroughly for issues like rust or mechanical problems, and consider bringing a trusted mechanic to avoid future repair costs. Research the reliability of specific brands and models using tools like Kelley Blue Book or Consumer Reports. Finally, negotiate the price to secure the best deal. Following these steps can help you find a dependable car within your budget."
}'
Our AI service is working smoothly, and it took 1 second to generate a response even on the CPU:
negotiate the priceIt’s time to build a proper large language model (LLM) AI application and deploy it on BentoML with minimal effort and resources.
We will use the vLLM framework to create a high-throughput LLM inference and deploy it on a GPU instance on BentoCloud. While this might sound complex, BentoCloud handles most of the heavy lifting, including infrastructure setup, so you can focus on building and deploying your service.
BentoML offers plenty of example code and resources for various LLM projects. To get started, we will clone the BentoVLLM repository.
Navigate to the Phi 3 Mini 4k project, and install all the required Python libraries:
$ git clone https://github.com/bentoml/BentoVLLM.git
$ cd BentoVLLM/phi-3-mini-4k-instruct
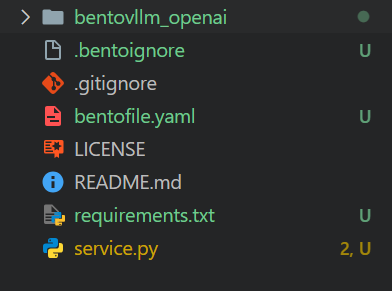
$ pip install -r requirements.txtThis is how the project directory looks like with all the files:
We will modify the bentofile.yaml to change the owner's and stage names.
The bentofile.yaml is simpler than a Dockerfile and uses different commands for setting up infrastructure, environment, and server configurations; you can learn all the commands from the Bento build options.
service: 'service:VLLM'
labels:
  owner: Abid
  stage: Guide
include:
  - '*.py'
  - 'bentovllm_openai/*.py'
python:
  requirements_txt: './requirements.txt'
  lock_packages: false
docker:
python_version: "3.11"service.py fileWe won't be changing the service.py file, instead we will learn about it.
@bentoml.service to handle deployment and resource management, like setting up GPUs and managing traffic.generate API is defined using the @bentoml.api decorator. It takes a user prompt, an optional system prompt, and a maximum token limit as inputs, which are then provided to the vLLM inference engine to generate the response. generate method streams the model's output in chunks, generating tokens as soon as they are available.import uuid
from typing import AsyncGenerator, Optional
import bentoml
from annotated_types import Ge, Le
from typing_extensions import Annotated
from bentovllm_openai.utils import openai_endpoints
MAX_TOKENS = 1024
PROMPT_TEMPLATE = """<|system|>
{system_prompt}<|end|>
<|user|>
{user_prompt}<|end|>
<|assistant|>
"""
SYSTEM_PROMPT = """You are a helpful, respectful and honest assistant. Always answer as helpfully as possible, while being safe. Your answers should not include any harmful, unethical, racist, sexist, toxic, dangerous, or illegal content. Please ensure that your responses are socially unbiased and positive in nature.
If a question does not make any sense, or is not factually coherent, explain why instead of answering something not correct. If you don't know the answer to a question, please don't share false information."""
MODEL_ID = "microsoft/Phi-3-mini-4k-instruct"
@openai_endpoints(model_id=MODEL_ID)
@bentoml.service(
name="bentovllm-phi-3-mini-4k-instruct-service",
traffic={
"timeout": 300,
"concurrency": 256, # Matches the default max_num_seqs in the VLLM engine
},
resources={
"gpu": 1,
"gpu_type": "nvidia-tesla-t4",
},
)
class VLLM:
def __init__(self) -> None:
from transformers import AutoTokenizer
from vllm import AsyncEngineArgs, AsyncLLMEngine
ENGINE_ARGS = AsyncEngineArgs(
model=MODEL_ID,
max_model_len=MAX_TOKENS,
dtype="half",
enable_prefix_caching=True,
disable_sliding_window=True,
)
self.engine = AsyncLLMEngine.from_engine_args(ENGINE_ARGS)
self.tokenizer = AutoTokenizer.from_pretrained(MODEL_ID)
@bentoml.api
async def generate(
self,
prompt: str = "Explain superconductors in plain English",
system_prompt: Optional[str] = SYSTEM_PROMPT,
max_tokens: Annotated[int, Ge(128), Le(MAX_TOKENS)] = MAX_TOKENS,
) -> AsyncGenerator[str, None]:
from vllm import SamplingParams
SAMPLING_PARAM = SamplingParams(max_tokens=max_tokens)
if system_prompt is None:
system_prompt = SYSTEM_PROMPT
prompt = PROMPT_TEMPLATE.format(user_prompt=prompt, system_prompt=system_prompt)
stream = await self.engine.add_request(uuid.uuid4().hex, prompt, SAMPLING_PARAM)
cursor = 0
async for request_output in stream:
text = request_output.outputs[0].text
yield text[cursor:]
cursor = len(text)I recommend taking the skill track Developing AI Applications to learn how to create AI-powered applications with the latest AI developer tools, including the OpenAI API, Hugging Face, and LangChain.
Go to the bentofile.yaml and add the environment variable for the Hugging Face token at the last line. This will help us load the model securely without issues from the Hugging Face server:
envs:
  - name: HF_TOKEN
Log in to BentoCloud using the CLI:
$ bentoml cloud loginIt will ask you to create the account and then ask you to create the API token.
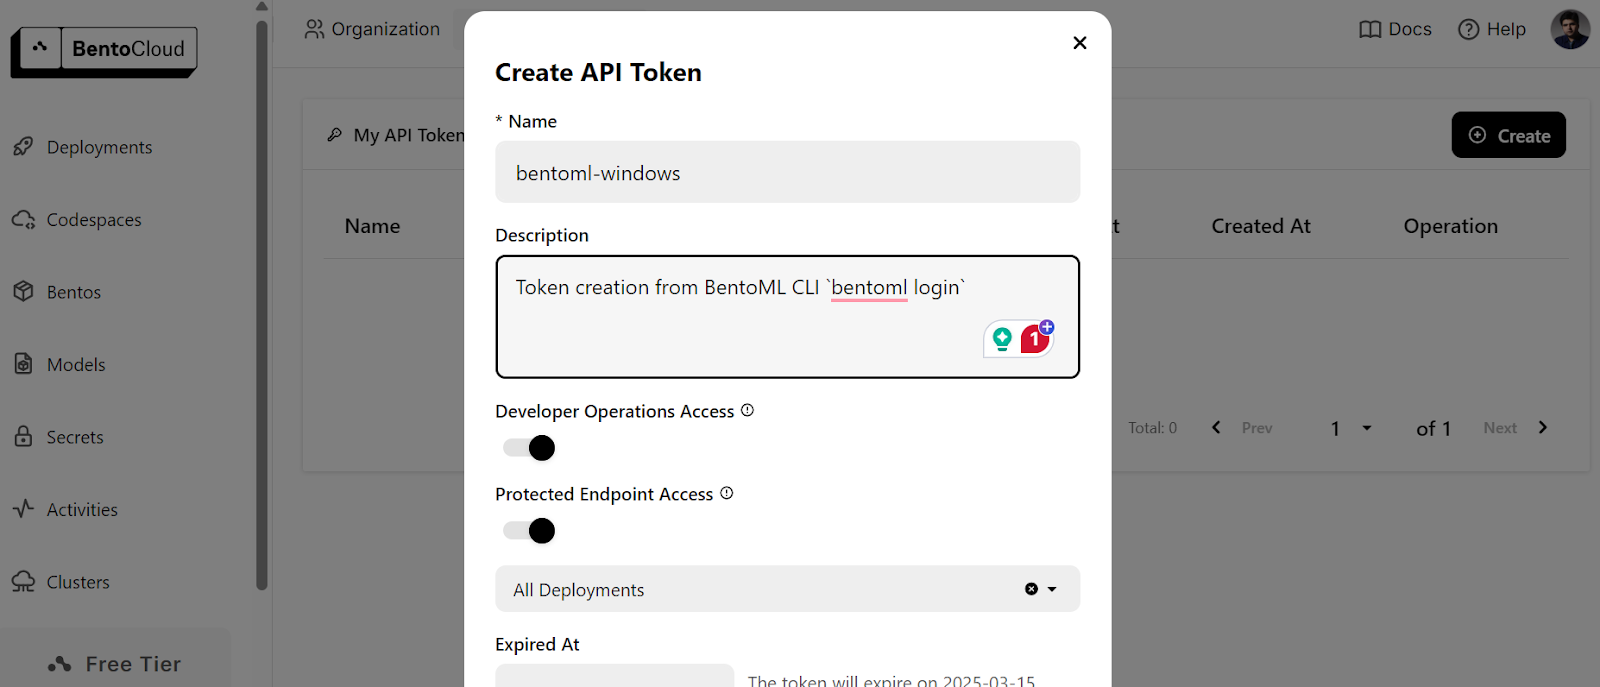
After successfully creating the API token, you will see the success message in your terminal:

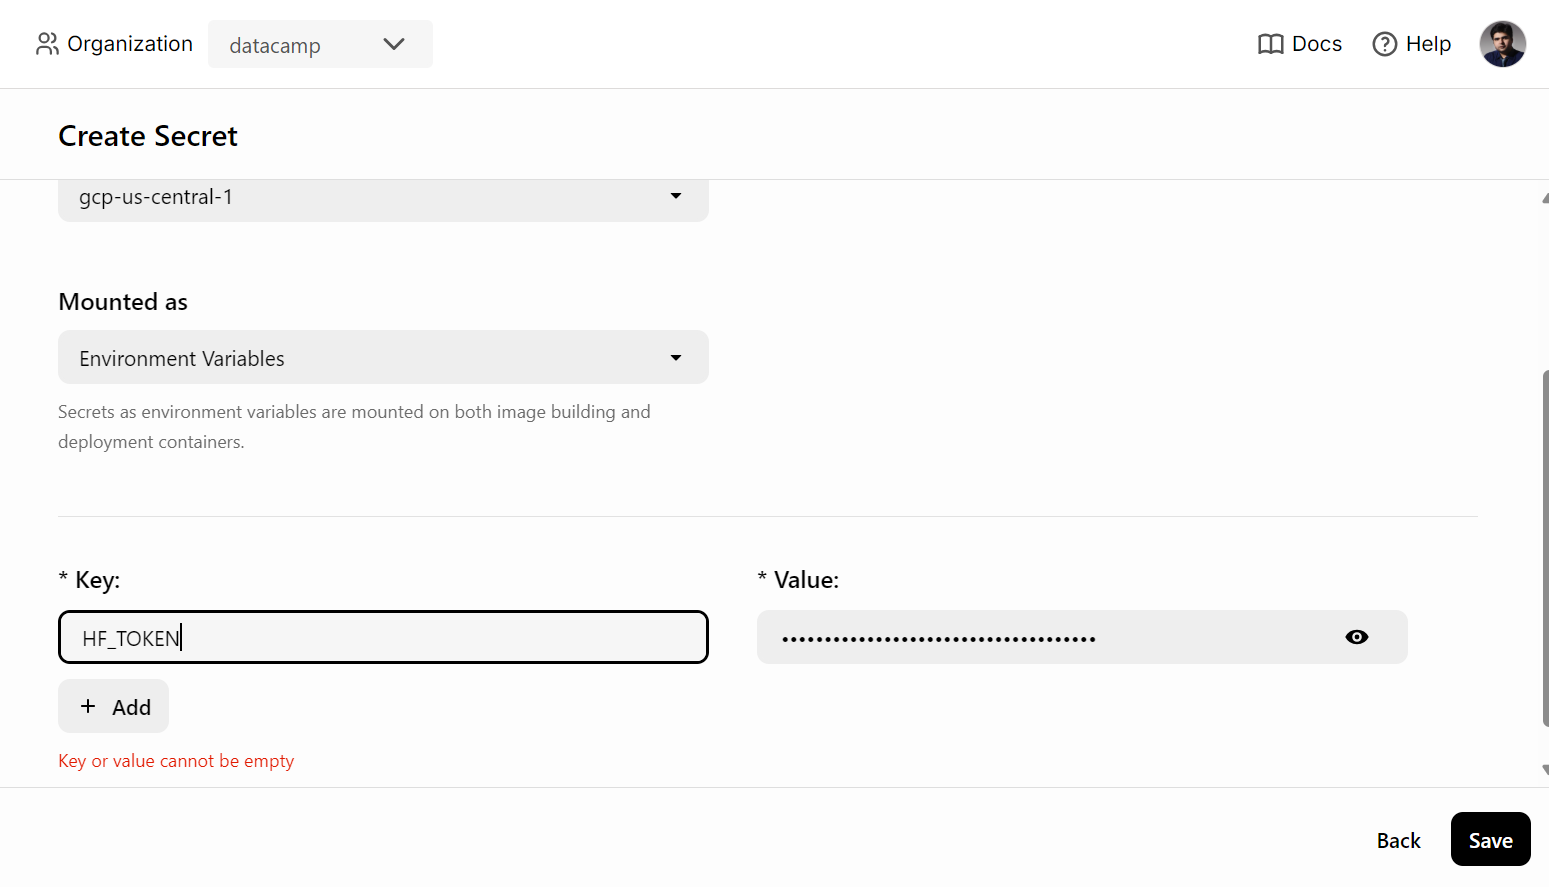
Before deploying the AI service on BentoCloud, we need to create an environment variable in BentoCloud by going to the "Secrets" tab and providing the key name and the Hugging Face API key.
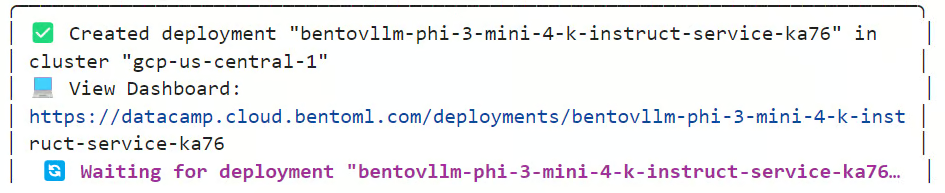
After that, use the following command to deploy the AI service:
$ bentoml deploy . --secret huggingfaceIt will take a few minutes to download the model and set up the environment to run the server.
You can check the status of your AI service by going to the “Deployments” tab.
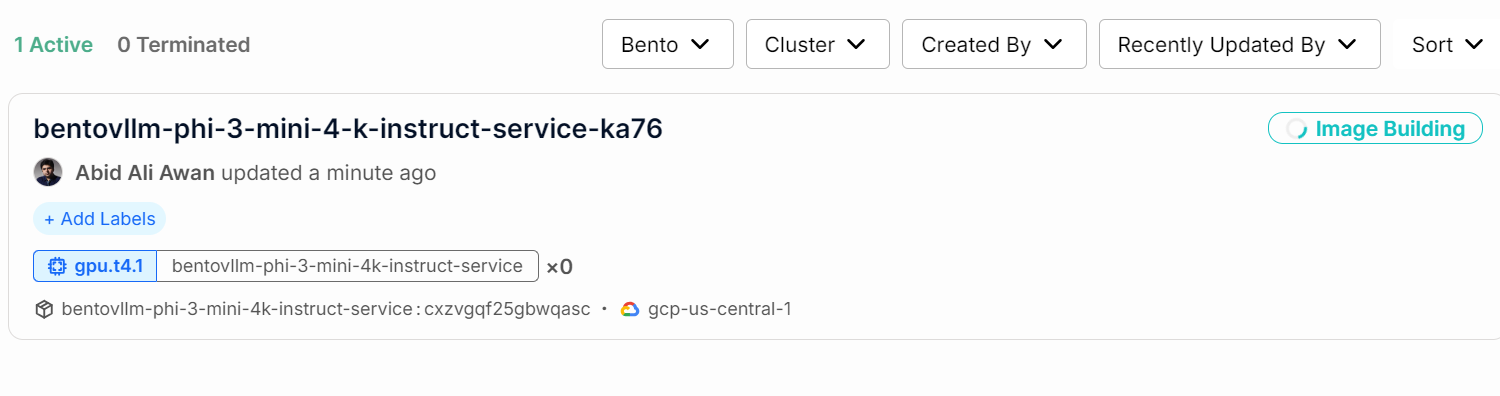
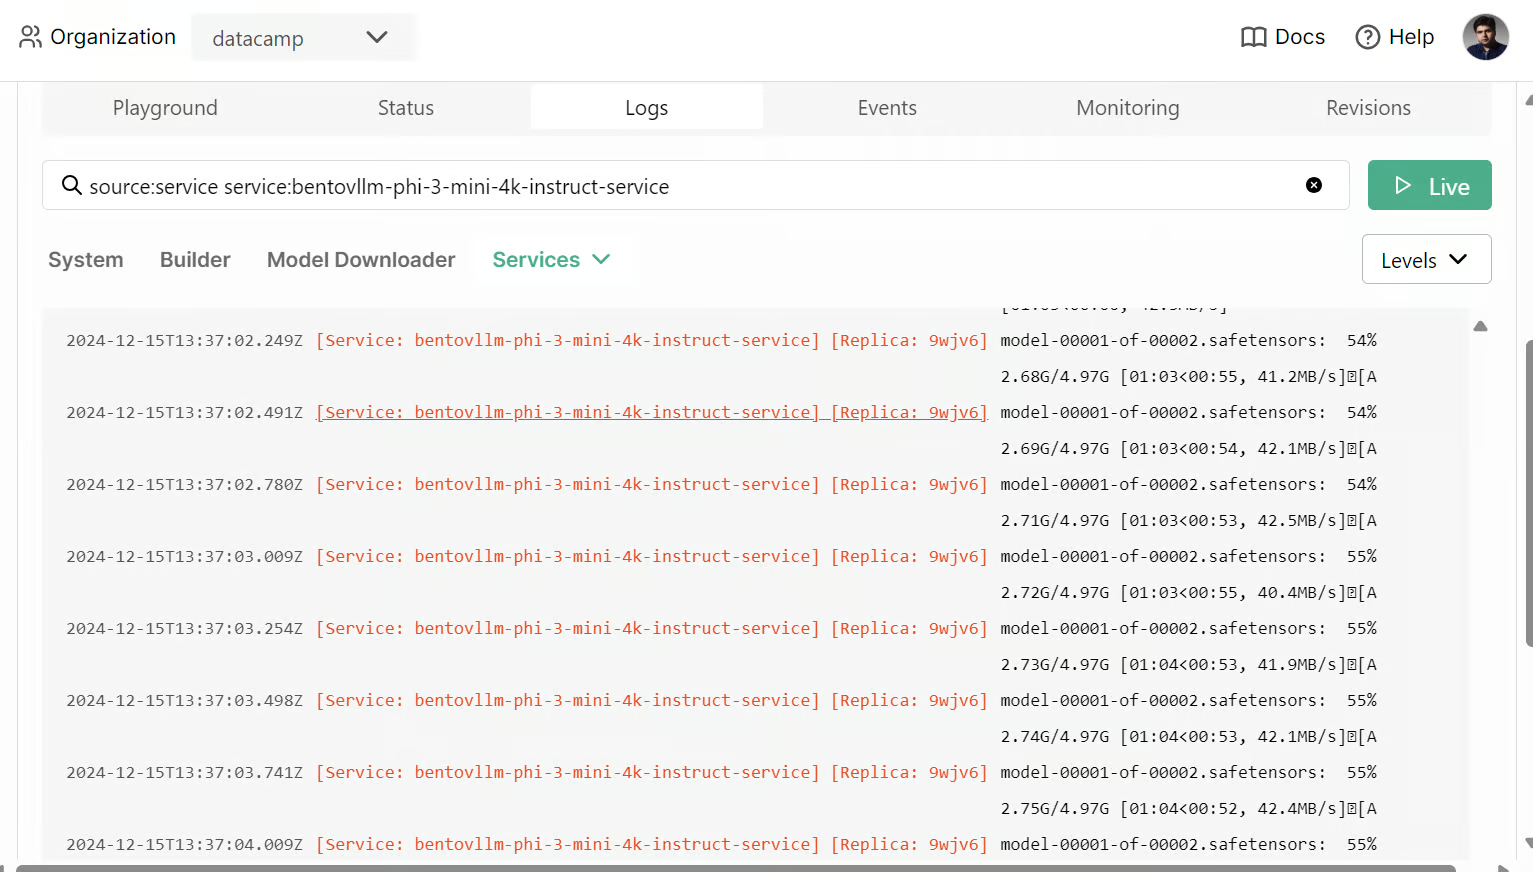
You can also check all the logs and observe what is happening in the background.
Once the AI service is successfully deployed, we will start testing the Phi 3 Mini vLLM service.
To begin, we can simply click on the “Playground” tab under the “Deployments” option, enter the prompt, and click the “submit” button to generate the response. The response will be streamed in real time.
 We can also use the BentoML Python client to access the deployed model and generate a response. This will help you integrate the AI service into your application:
import bentoml

with bentoml.SyncHTTPClient(
    "https://bentovllm-phi-3-mini-4-k-instruct-service-ka76-39800880.mt-guc1.bentoml.ai"
) as client:
    response = client.generate(
        prompt="What is the largest lake in the world?"
    )
    for chunk in response:
        print(chunk, end="", flush=True)
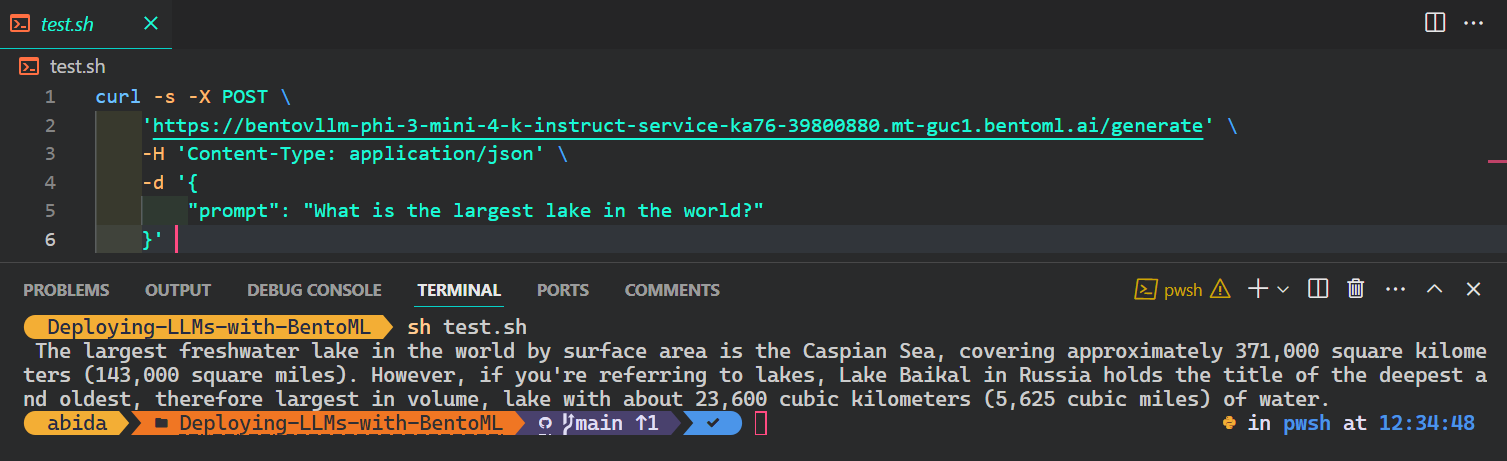
The most popular and easiest way to access the AI service from any operating system is to use the CURL command in the terminal:
$ curl -s -X POST \
    'https://bentovllm-phi-3-mini-4-k-instruct-service-ka76-39800880.mt-guc1.bentoml.ai/generate' \
    -H 'Content-Type: application/json' \
    -d '{
        "prompt": "What is the largest lake in the world?"
}' 
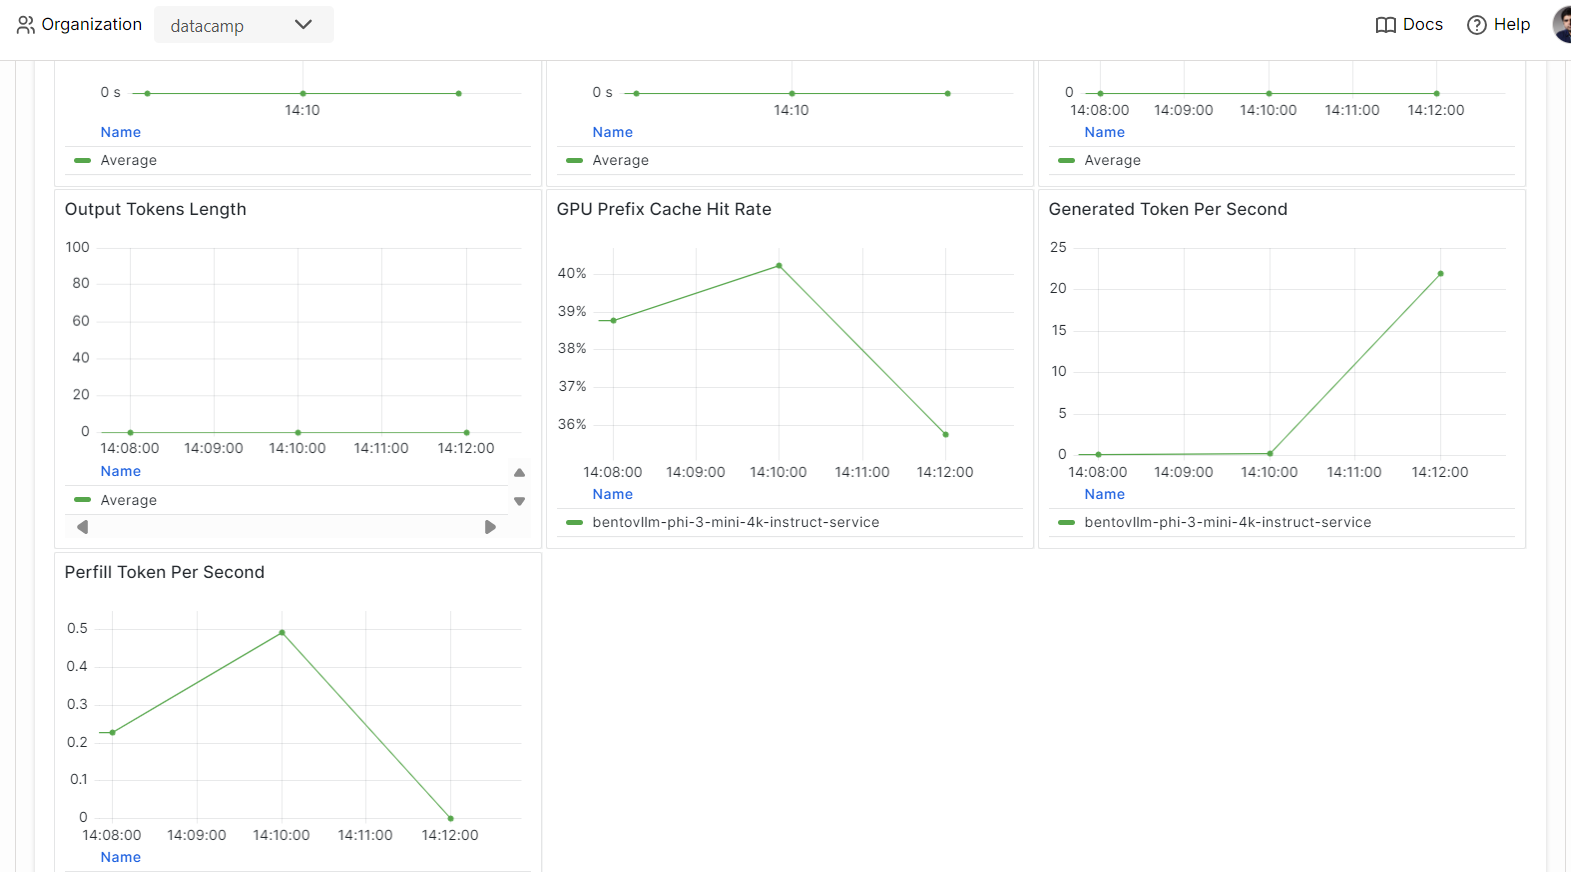
Go to the "Monitoring" tab and review all the statistics related to LLMs, user requests, hardware, and other monitoring analytics that will help you assess the performance of the AI server.
You can also check the "Logs" tab or use the BentoML CLI to generate real-time logs.
The serving and deploying models are one part of the MLOps pipeline. By completing the Fully Automated MLOps course, you can learn to build MLOps architecture, CI/CD/CM/CT techniques, and automation patterns to deploy ML systems that can deliver value over time.
If you want to learn more about the BentoML ecosystem, the best approach is to start building and deploying your AI service. You receive free credits, allowing you to use GPUs and CPUs to explore various services. This could include a Retrieval-Augmented Generation (RAG) application, function calling, Agentic LLMs, or a multimodal application that processes images and text to generate responses.
In this hands-on tutorial, we learned about BentoML and how to serve any AI application locally with just a few lines of code. We then used the vLLM inference engine to build a BentoML service and deployed it on BentoCloud with a few simple steps.
Consider taking the Associate AI Engineer for Developers career track to learn how to integrate AI into software applications using APIs and open-source libraries.
Learn more about AI with these courses!
Track
Course
Course
Tutorial
Abid Ali Awan
Tutorial
Dr Ana Rojo-Echeburúa
Tutorial
Stanislav Karzhev
Tutorial
Moez Ali
Tutorial
Bex Tuychiev
Tutorial
Abid Ali Awan