Course
Designing Agentic Systems with LangChain
3 hr
12.1K
Qwen3-Coder-Next is an open-weight coding model from the Qwen team, built for agentic programming and local developer workflows. It uses a sparse mixture-of-experts design to stay efficient while still performing strongly on modern coding and tool-use benchmarks, with support for long context and complex multi-step tasks.
What makes Qwen3-Coder-Next especially exciting is how competitive it is compared to top closed models. Early evaluations show it can reach performance levels close to systems like Claude Sonnet 4.5, while still being something you can run locally with full control over your setup, privacy, and speed, without relying on expensive hosted APIs.
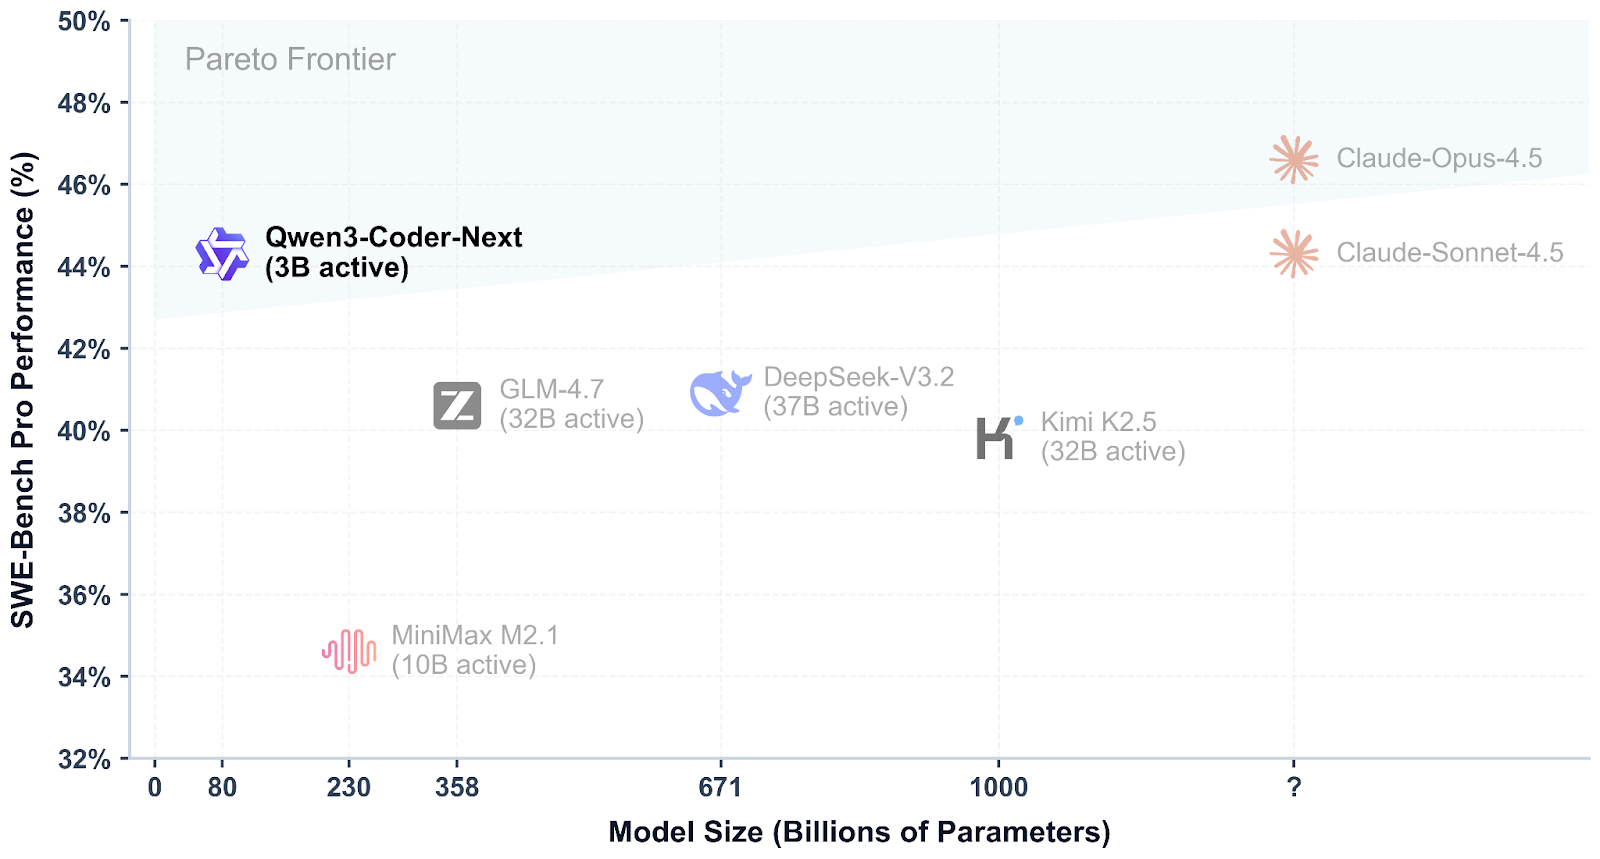
Source: Qwen/Qwen3-Coder-Next
In this tutorial, we will build llama.cpp from source, run Qwen3-Coder-Next locally using the llama.cpp inference server, then connect it to Qwen Code CLI. Finally, we will vibe code a simple data analytics dashboard.
Before building and running Qwen3-Coder-Next locally, you’ll need a working Linux development setup with the standard build tools required to compile llama.cpp and run GGUF models.
In addition to system packages, make sure you also have:
Start by updating your system and installing the core dependencies:
sudo apt-get update
sudo apt-get install -y build-essential cmake curl git libcurl4-openssl-dev
If you plan to use CUDA acceleration, confirm that your NVIDIA GPU is detected properly:
nvidia-smiIn our case, we are using an NVIDIA RTX 3090 with 24GB of VRAM. Since Qwen3-Coder-Next requires more memory than that for larger quantizations, the remaining model weights will be automatically offloaded into system RAM, allowing the model to still run locally with good performance.

To run Qwen3-Coder-Next smoothly, your hardware should meet these approximate memory targets:
If you don’t have 46GB available, you can still run smaller quantized versions (such as 3-bit).
A simple rule of thumb is:
Disk + RAM + VRAM ≥ quant size
If the entire quant fits in memory, you can expect fast local performance. If not, the model will still run by offloading, but inference will be slower.
Before running Qwen3-Coder-Next locally, we need a fast inference engine. The most popular option today is llama.cpp, which provides lightweight GGUF inference and an easy-to-run local server.
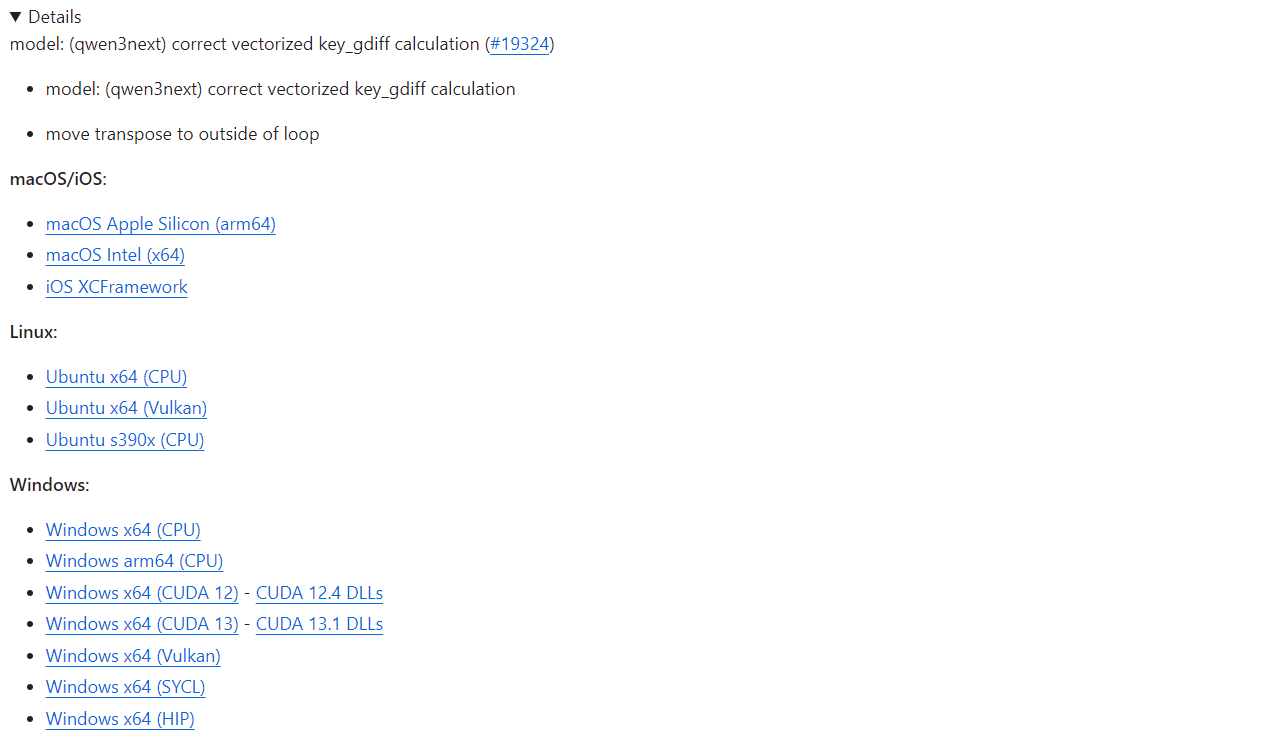
If you want the quickest setup, llama.cpp offers prebuilt binaries for macOS, Linux, and Windows (including CUDA-enabled builds). You can download them directly from the official GitHub release page: Release b7936 · ggml-org/llama.cpp.
With a prebuilt install, you can immediately run the llama.cpp CLI tools or start the inference server without compiling anything yourself.
In this tutorial, we will build llama.cpp manually instead of relying on prebuilt binaries for a few important reasons:
Let’s begin by downloading the official llama.cpp source code directly from GitHub. This ensures we are working with the most recent version, including the latest CUDA improvements and bug fixes:
git clone https://github.com/ggml-org/llama.cpp
cd llama.cpp
At this point, you should be inside the llama.cpp directory, which contains everything needed to build the project from scratch.
Next, we need to configure the build system using CMake. This step generates the required build files and enables GPU acceleration through CUDA:
cmake /workspace/llama.cpp -B /workspace/llama.cpp/build -DGGML_CUDA=ON -DBUILD_SHARED_LIBS=OFF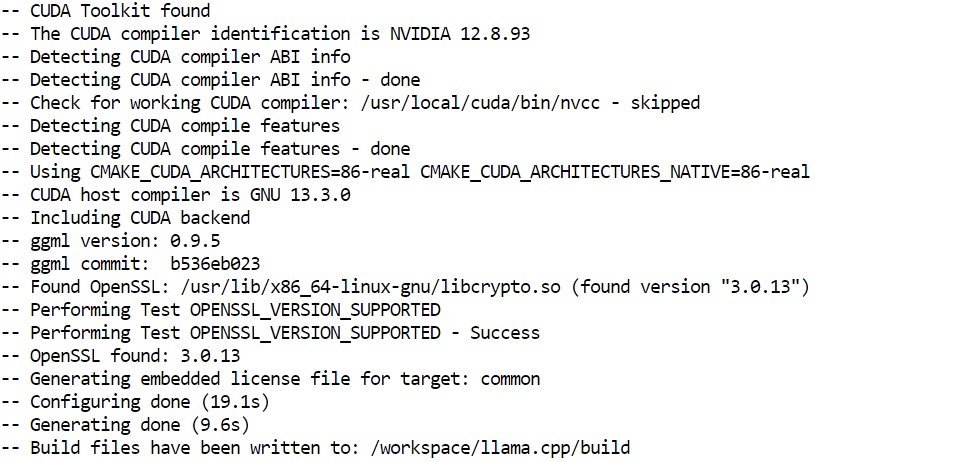
Now we compile the actual inference server binary. This is the component that will host Qwen3-Coder-Next locally and expose an API endpoint for coding tools and CLI integrations:
cmake --build /workspace/llama.cpp/build -j --clean-first --target llama-server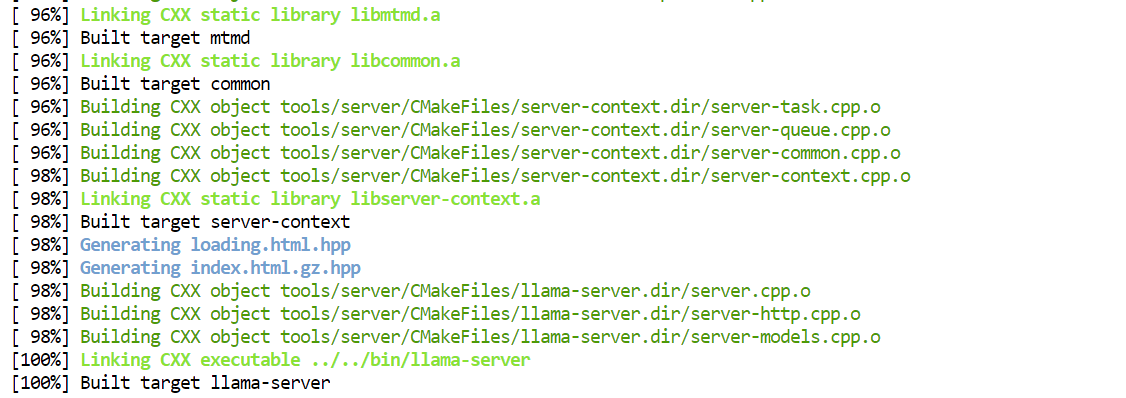
After the build completes, the compiled executables are stored inside the build/bin/ directory. To make them easier to run directly from the main project folder, you can copy them like this:
cp /workspace/llama.cpp/build/bin/llama-server /workspace/llama.cpp/llama-serverNow that llama.cpp is installed, the next step is downloading the Qwen3-Coder-Next GGUF model from Hugging Face.
Before you begin, make sure you have a recent Python installation (>= 3.11), since the Hugging Face tooling and transfer utilities depend on it.
To download large GGUF files efficiently, we will use the Hugging Face Hub client along with the high-speed Xet and transfer backends:
pip install -U "huggingface_hub[hf_xet]" hf-xet hf_transferNext, enable Hugging Face’s optimized transfer backend:
export HF_HUB_ENABLE_HF_TRANSFER=1Now we can download the Unsloth dynamic GGUF version of Qwen3-Coder-Next. In this tutorial, we will specifically fetch the UD-Q4_K_XL quantization.
This is a great default choice because it provides an excellent tradeoff between:
The Q4 format means the model is compressed down to 4-bit precision, making it much lighter than full FP16 weights while still maintaining impressive output quality.
hf download unsloth/Qwen3-Coder-Next-GGUF \
  --local-dir /workspace/models/qwen3-coder-next \
  --include "*UD-Q4_K_XL*"
Once the command runs, the model files will begin downloading into your local directory.

On a high-speed network, this typically takes only a few minutes. After the download completes, you’ll have the GGUF model ready to load into llama-server for local inference.
Once the GGUF model is downloaded, we can launch Qwen3-Coder-Next locally using the llama-server inference backend. This starts an OpenAI-compatible API server that coding tools and CLIs can connect to.
Run the following command:
./llama-server \
  --model "/workspace/models/qwen3-coder-next/Qwen3-Coder-Next-UD-Q4_K_XL.gguf" \
  --alias "Qwen3-Coder-Next" \
  --host 0.0.0.0 \
  --port 8080 \
  --threads 32 \
  --threads-batch 32 \
  --ctx-size 20000\
  --batch-size  1024\
  --ubatch-size 256 \
  --jinja \
  --flash-attn on \
  --temp 0.7 \
  --top-p 0.9 \
  --min-p 0.05 \
  --fit on \
  --swa off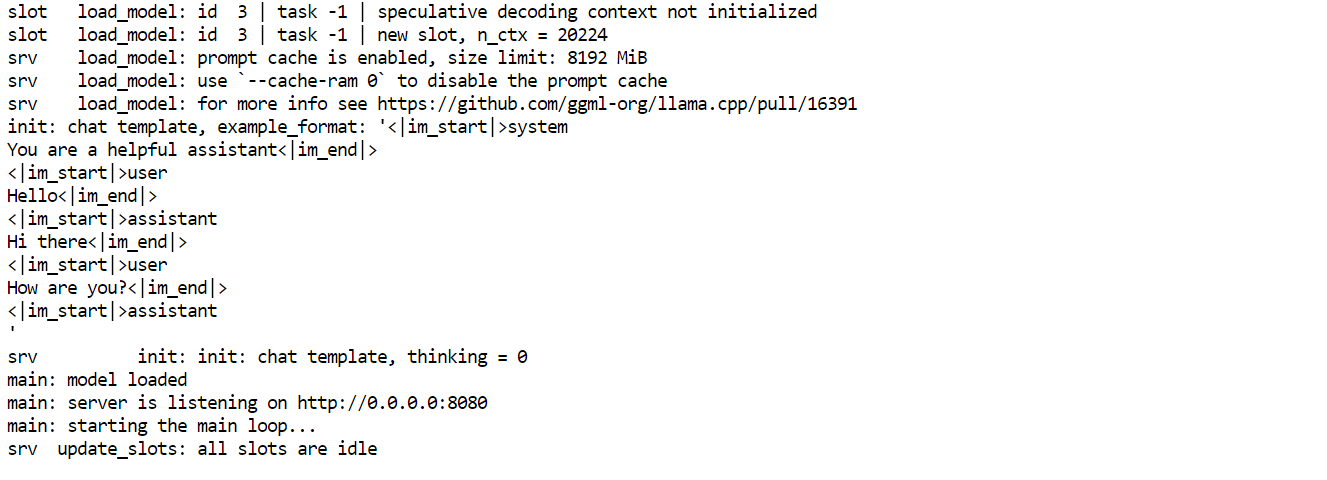
Key Arguments Explained:
--model: Path to the downloaded Qwen3-Coder-Next GGUF checkpoint--alias: Friendly model name shown in API clients--host 0.0.0.0: Exposes the server on all network interfaces (useful for remote access)--port 8080: Runs the inference API on port 8080--threads 32: Uses 32 CPU threads for maximum throughput--threads-batch 32: Parallelizes batch processing for faster token generation--ctx-size 20000: Sets a large context window (~20K tokens) for long coding sessions--batch-size 1024: Improves GPU utilization during inference--ubatch-size 256: Controls micro-batching for smoother performance--jinja: Enables chat template formatting required for instruction-style models--flash-attn on: Activates Flash Attention for faster long-context inference--temp 0.7: Keeps outputs focused but still creative for vibe coding--top-p 0.9: Nucleus sampling for balanced diversity--min-p 0.05: Filters extremely low-probability tokens for cleaner completions--fit on: Automatically fits layers into VRAM and offloads the rest into RAM--swa off: Disables sliding window attention (better for full-context tasks)Once the server starts, leave it running in that terminal window. Then, open a new terminal tab or session to test the API without stopping the server.
From the new terminal, you can confirm everything is working by querying the available models:
curl http://127.0.0.1:8080/v1/modelsIf the server is running correctly, you should see Qwen3-Coder-Next returned in the response, which means your local inference endpoint is ready to use.
Once the inference server is running, you can also interact with Qwen3-Coder-Next directly through the built-in llama.cpp Web UI.
Open your browser and visit: http://127.0.0.1:8080.
This launches a simple ChatGPT-style interface where you can quickly test prompts and verify that the model is responding correctly.
For example, start by asking the model to generate something practical, like a basic Python trading bot.
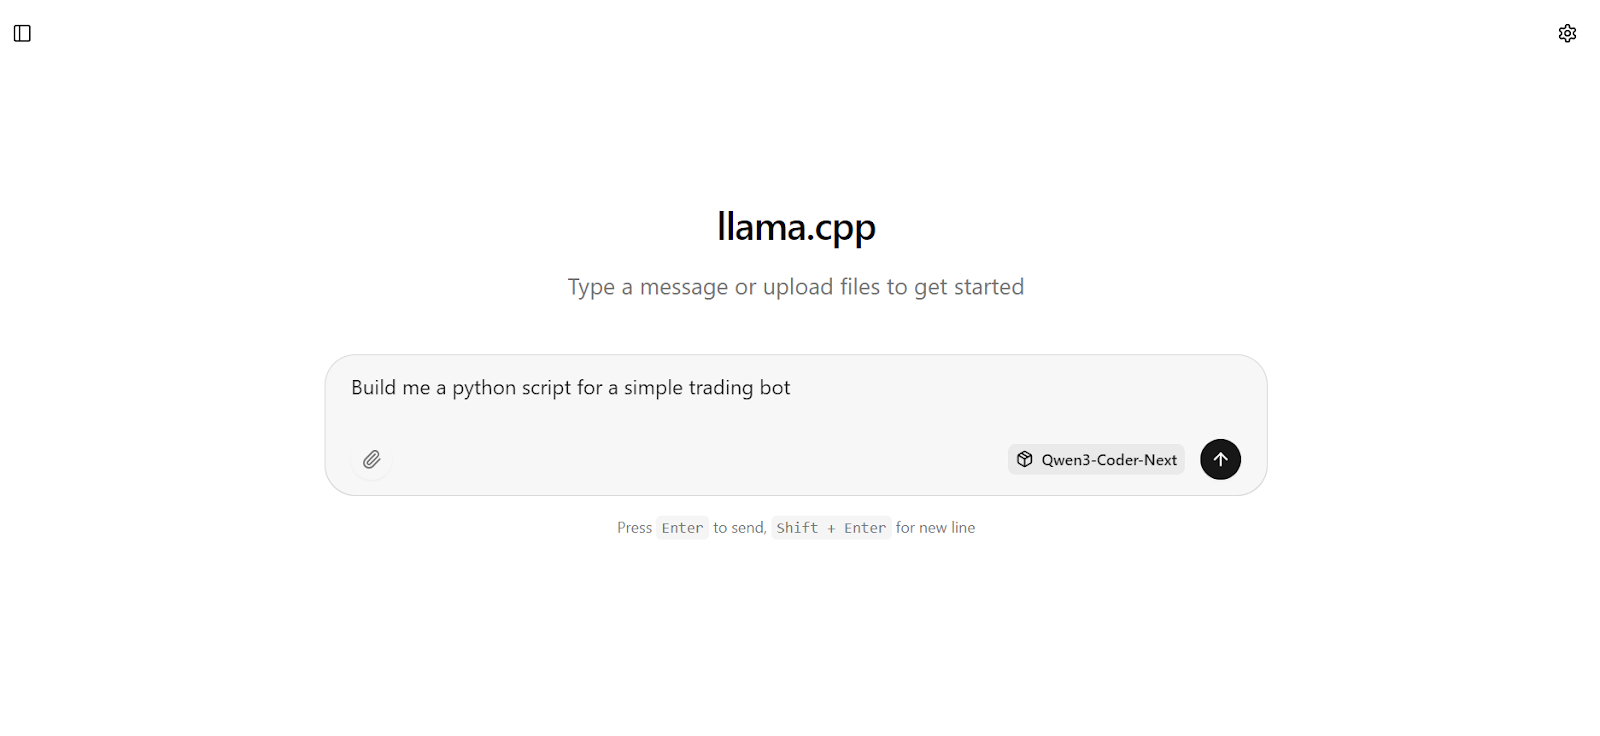 Within seconds, you’ll get a full response with working code and clear implementation steps.
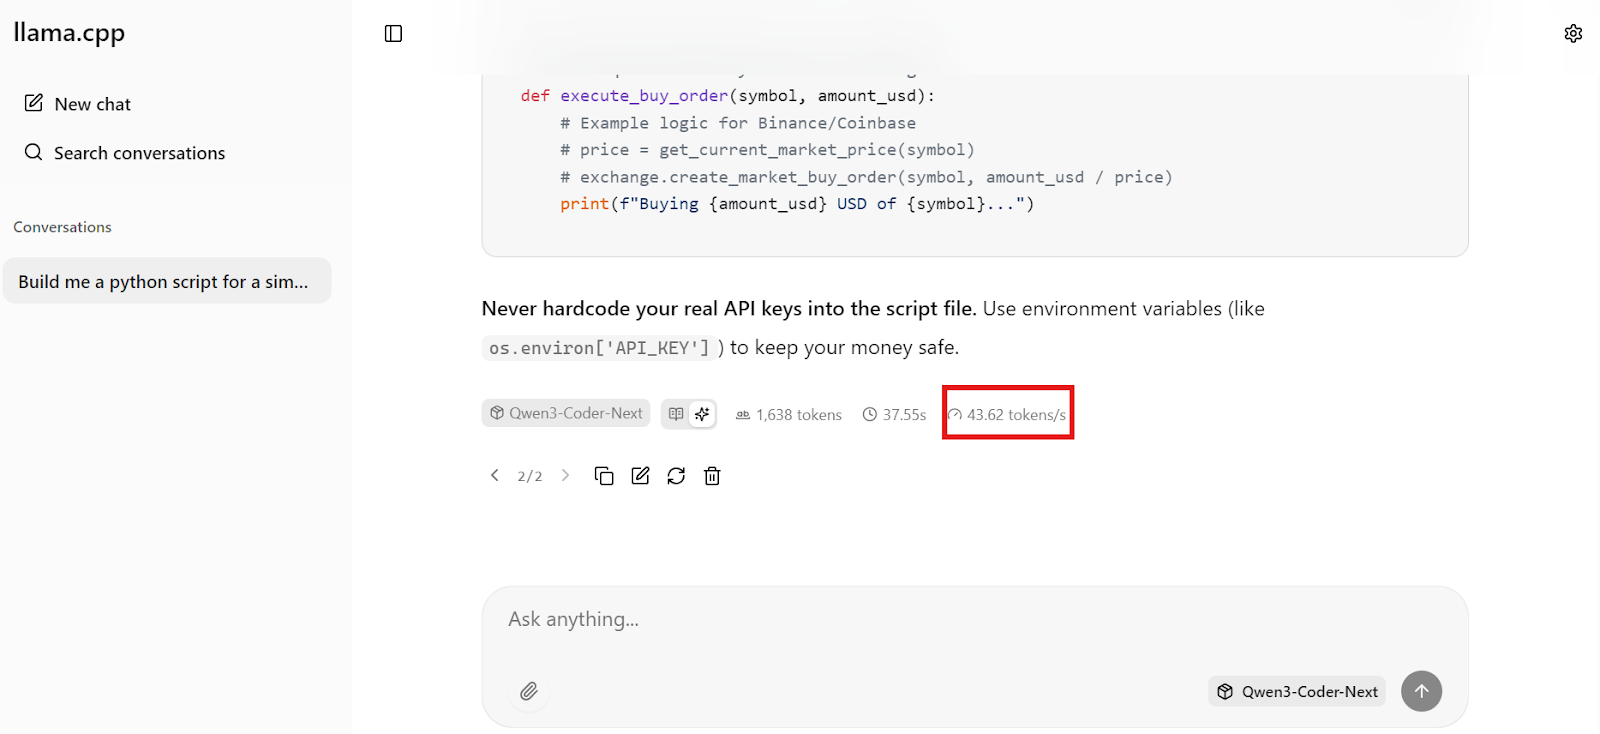
What’s especially impressive is the speed. On our setup, Qwen3-Coder-Next is generating around 44 tokens per second, which makes local coding feel extremely responsive, fast enough for real-time vibe coding workflows.
Now that the local inference server is running on http://127.0.0.1:8080/v1, we can connect it to Qwen Code CLI. This gives you a lightweight terminal-based coding assistant that talks to your local Qwen3-Coder-Next model through the OpenAI-compatible API.
Qwen Code CLI is a Node-based tool, so you need:
Install Node.js from NodeSource (recommended for getting the right version):
sudo apt update
sudo apt install -y curl ca-certificates
curl -fsSL https://deb.nodesource.com/setup_20.x | sudo -E bash -
sudo apt install -y nodejs
Now install the Qwen Code CLI globally:
npm install -g @qwen-code/qwen-code@latestVerify it installed correctly:
qwen --version 0.9.0Qwen CLI expects OpenAI-style environment variables. We’ll create a simple config file that tells it:
--aliasCreate the config directory and .env file:
mkdir -p ~/.qwen
cat > ~/.qwen/.env <<'EOF'
OPENAI_API_KEY="dummy"
OPENAI_BASE_URL="http://127.0.0.1:8080/v1"
OPENAI_MODEL="Qwen3-Coder-Next"
EOF
Now launch Qwen Code:
qwen 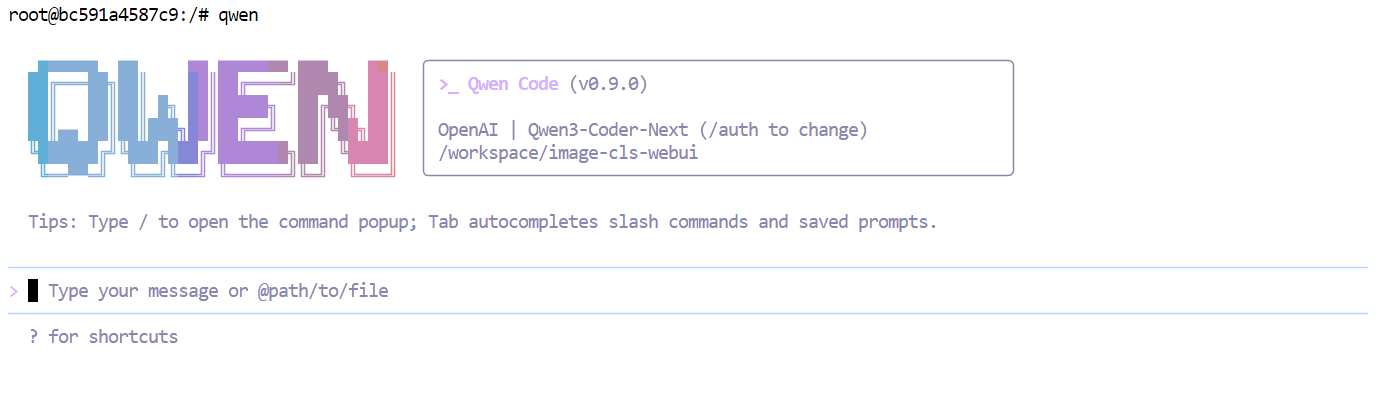 At this point, your CLI is wired up to your local Qwen3-Coder-Next server, so every prompt is running locally instead of hitting a hosted API.
Now that everything is running locally, we can start vibe coding a simple analytics dashboard using the Qwen Code CLI.
First, create a new project folder and move into it:
mkdir dashboardcd dashboardNext, launch the Qwen CLI inside this directory:
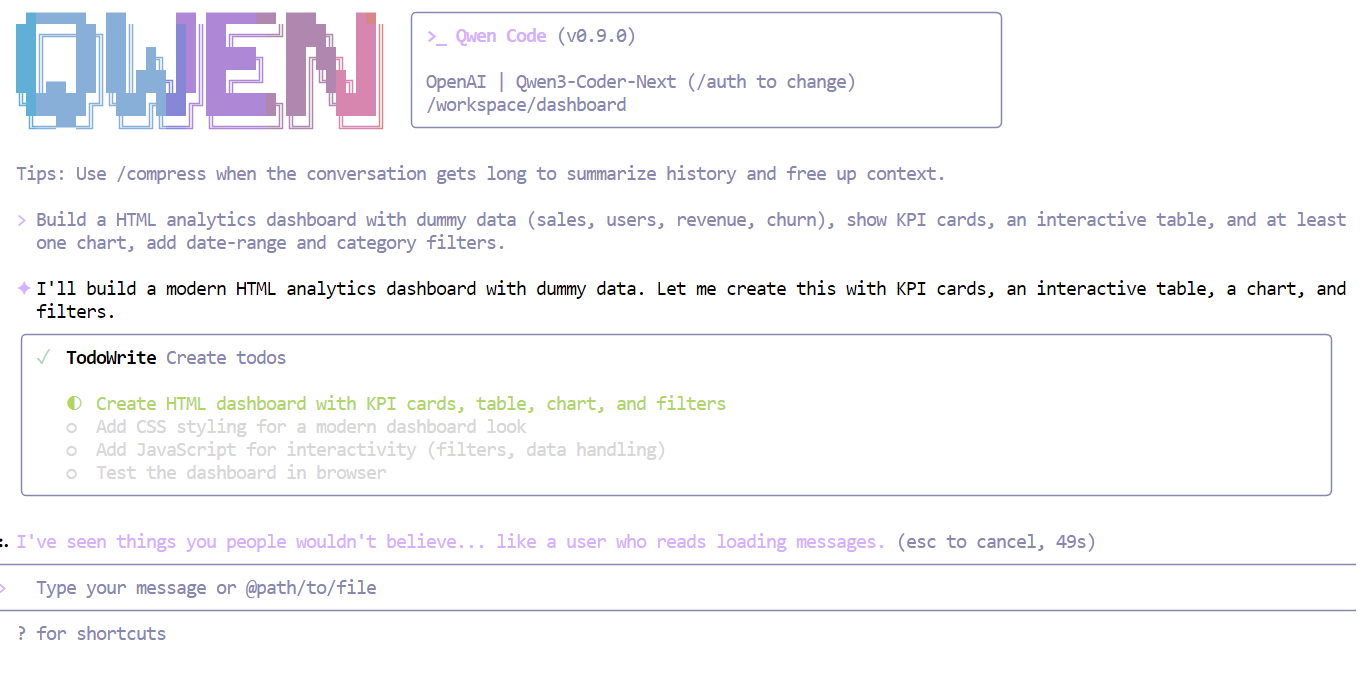
qwenNow give the model a clear, simple instruction, for example:
“Build an HTML analytics dashboard with dummy data (sales, users, revenue, churn), show KPI cards, an interactive table, and at least one chart, add date-range and category filters. “
Within seconds, Qwen3-Coder-Next understands the requirements and breaks the task into a structured plan before writing code.
After completing the checklist, the model generated a full working dashboard in one shot, including:
index.htmlstyle.cssscript.js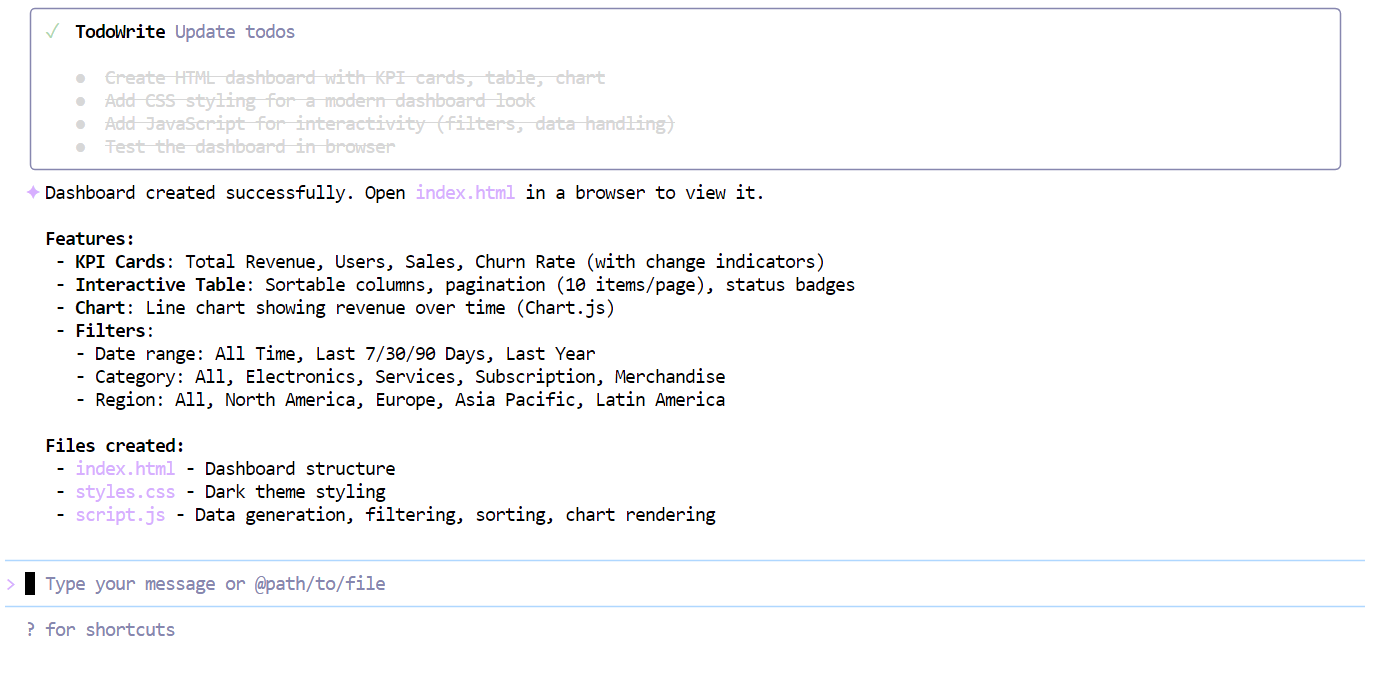
When you open the index.html file in your browser, you’ll immediately see a modern, well-structured dashboard with clean styling, KPI cards, and realistic placeholder metrics.
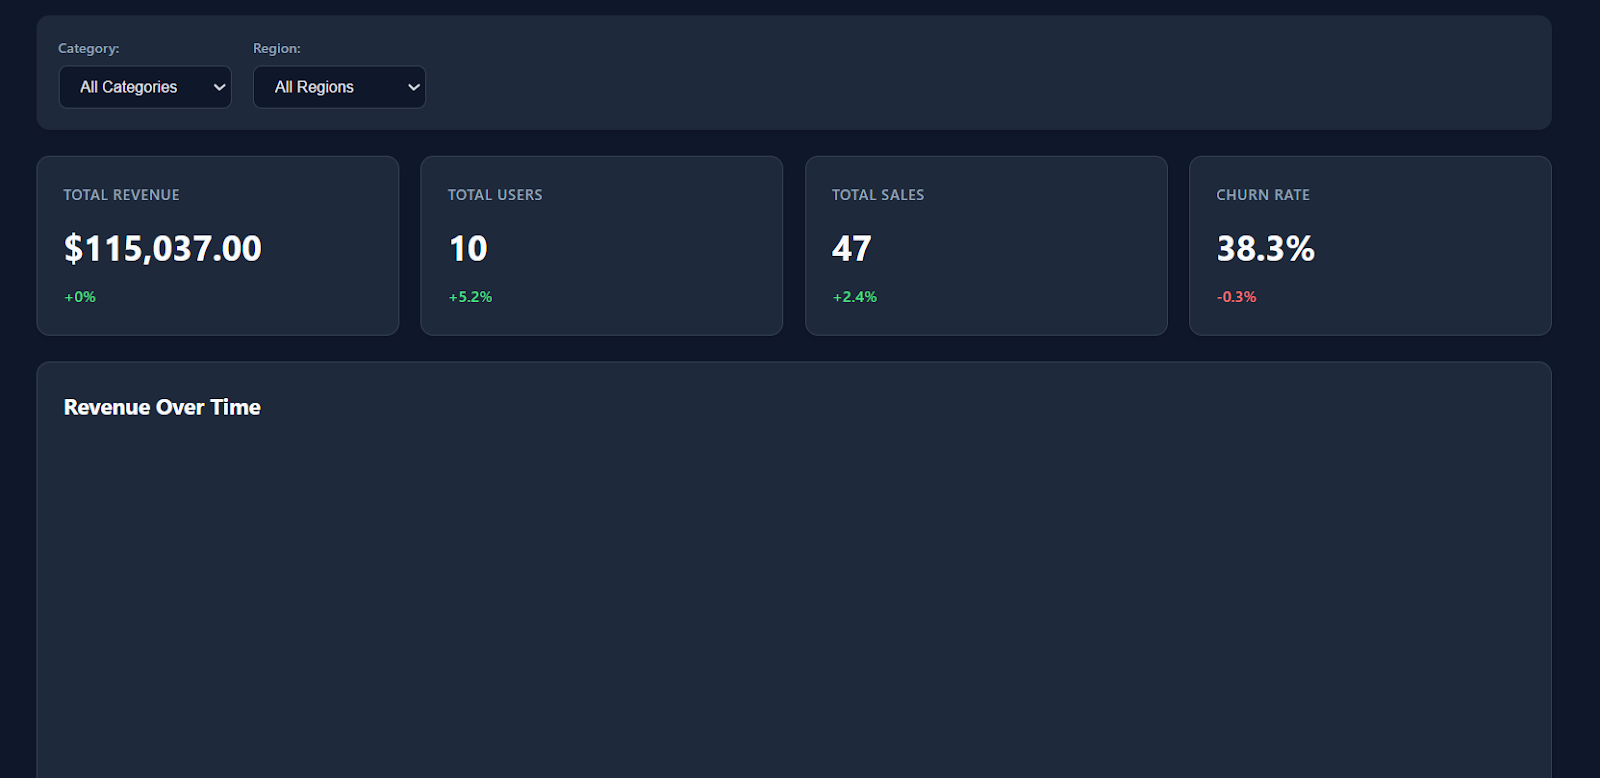
The filters, table interactions, and download options all work smoothly out of the box.
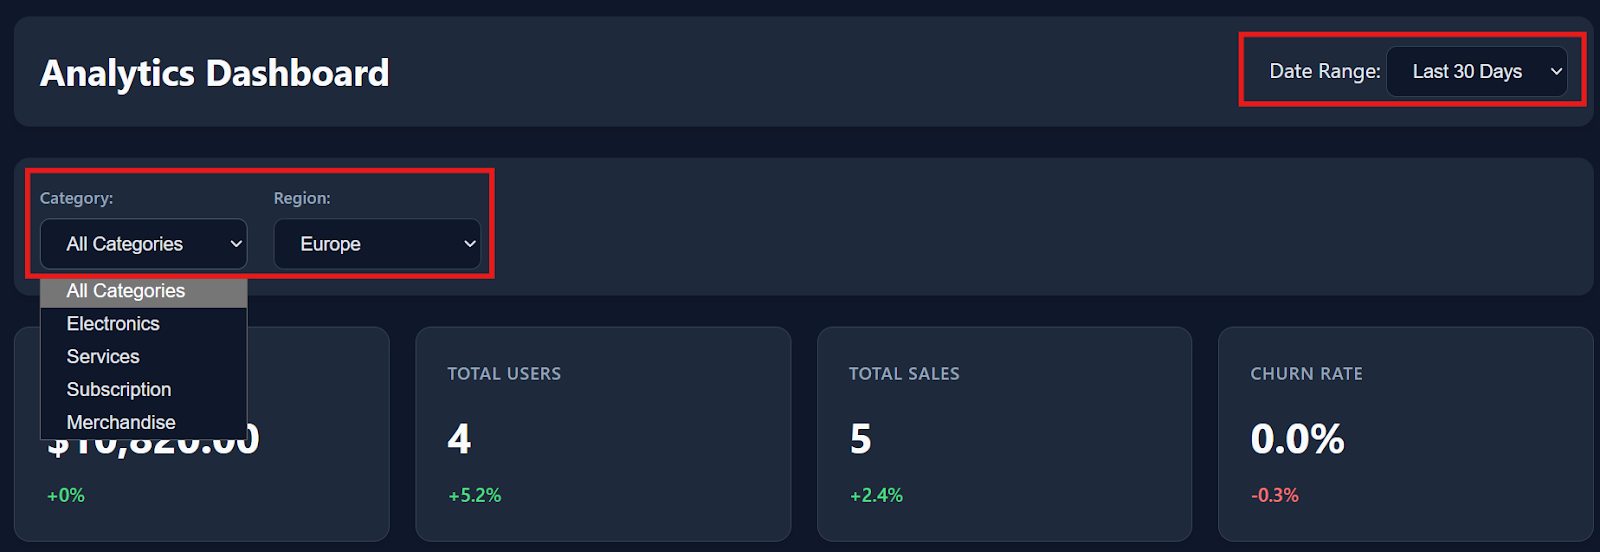
As you scroll down, the dashboard also includes detailed transaction data with around 150 dummy records, making it feel like a real analytics product.
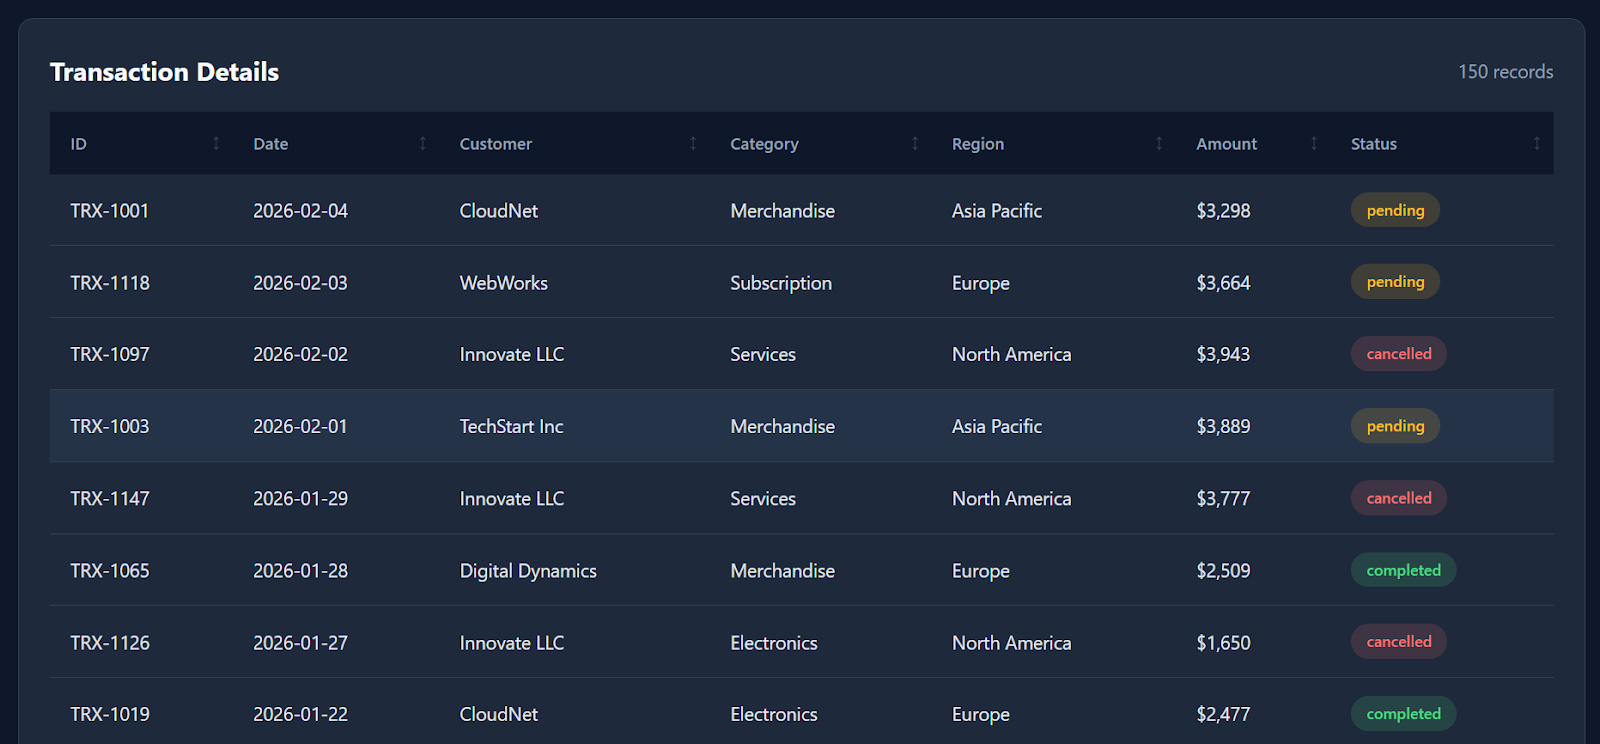
While it doesn’t generate every possible visualization (for example, a revenue-over-time line chart would be a nice addition), the fact that a locally running quantized model can produce a functional dashboard in essentially one shot is still extremely impressive.
Overall, the entire build took only a few minutes from prompt to working output.
I’ll be honest: my experience with Qwen3-Coder-Next was a bit mixed.
On paper, the evaluations suggest it should be close to frontier-level models like Claude Sonnet 4.5, and the idea of running an 80B MoE coding model locally is genuinely exciting.
In this tutorial, we successfully built llama.cpp with CUDA support, downloaded the Unsloth GGUF quant, launched a local inference server, and even vibe coded a working analytics dashboard in minutes. The local speed and responsiveness were impressive, especially for an open-weight setup.
But in practice, I didn’t consistently see the “Sonnet-level” reliability that some benchmarks imply. I spent a couple of hours trying to use the model inside more complex agent environments like opencode, and I kept running into issues such as tool errors, unstable generations, and occasional looping outputs.
Interestingly, the model felt much more reliable once I switched to a simpler workflow using Qwen Code CLI. In that setting, it performed well for direct coding tasks, quick prototyping, and vibe coding sessions. It was smooth, fast, and genuinely fun to use locally.
My takeaway: Qwen3-Coder-Next is absolutely worth experimenting with, especially if you want a powerful local coding assistant without cloud APIs. But I wouldn’t recommend it yet as a full replacement for production-grade coding agents unless you’re ready to spend time debugging, tuning llama.cpp settings, and optimizing performance for your hardware.
If you’re keen to learn more about working with AI in your workflows, I recommend checking out the AI-Assisted Coding for Developers course.
Top DataCamp Courses
Course
Course
Course
Tutorial
Abid Ali Awan
Tutorial
Abid Ali Awan
Tutorial
Abid Ali Awan
Tutorial
Abid Ali Awan
Tutorial
Aashi Dutt
Tutorial
Abid Ali Awan