Course
Introduction to Databricks
3 hr
40.1K
Databricks has long been a favorite among the data engineering community, and it is now steadily expanding its capabilities into the realms of artificial intelligence (AI) and machine learning (ML). This evolution means you can now train models, track experiments, register models, and deploy them to Databricks endpoints—all within the same unified platform. This integration simplifies workflows and makes Databricks a powerful tool for both data and AI professionals.
If you are new to Databricks, consider taking the Introduction to Databricks course to learn about the Databricks Lakehouse platform. This course will help you understand how Databricks can modernize data architectures and improve data management processes.
In this tutorial, I will walk you through deploying the distributed version of the DeepSeek R1 model on Databricks. DeepSeek R1 has been gaining significant popularity, with many companies opting to run it on their own cloud infrastructure instead of sending data to external servers.
This guide will help you set up a Databricks account, register the DeepSeek R1 model, deploy it using the user interface, and access it via the playground and locally using the CURL command.
To learn more about DeepSeek R1, including its features, development process, distilled models, pricing, and how it compares to other AI models like OpenAI's offerings, check out the DeepSeek-R1: Features, Comparison, Distilled Models & More blog.
There are two easy ways to use Databricks. You can either go to GCP, AWS, or the Azure Marketplace and subscribe to the Databricks service. Alternatively, you can sign up for a standalone Databricks account, which provides you with some computing resources without the need to create any computing clusters.
Here, I outline the two ways.
If you already have access to an AWS GPU, this method is highly recommended. It is simple and doesn't require too much hassle.
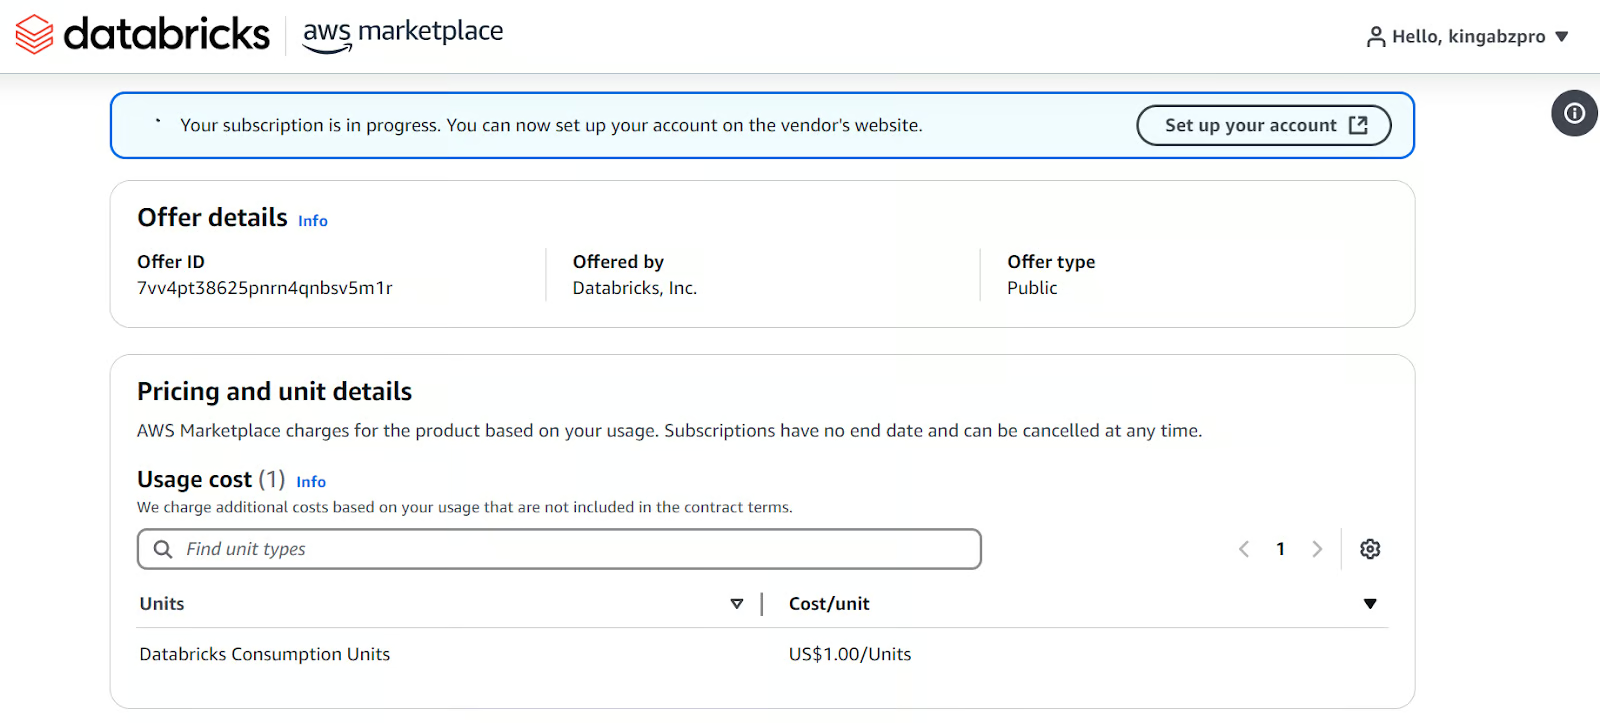
Setting up Databricks on AWS marketplace.
Once you are done with it, it will create a Databricks workspace for you with all kinds of options. All the payments will be made through AWS billing.
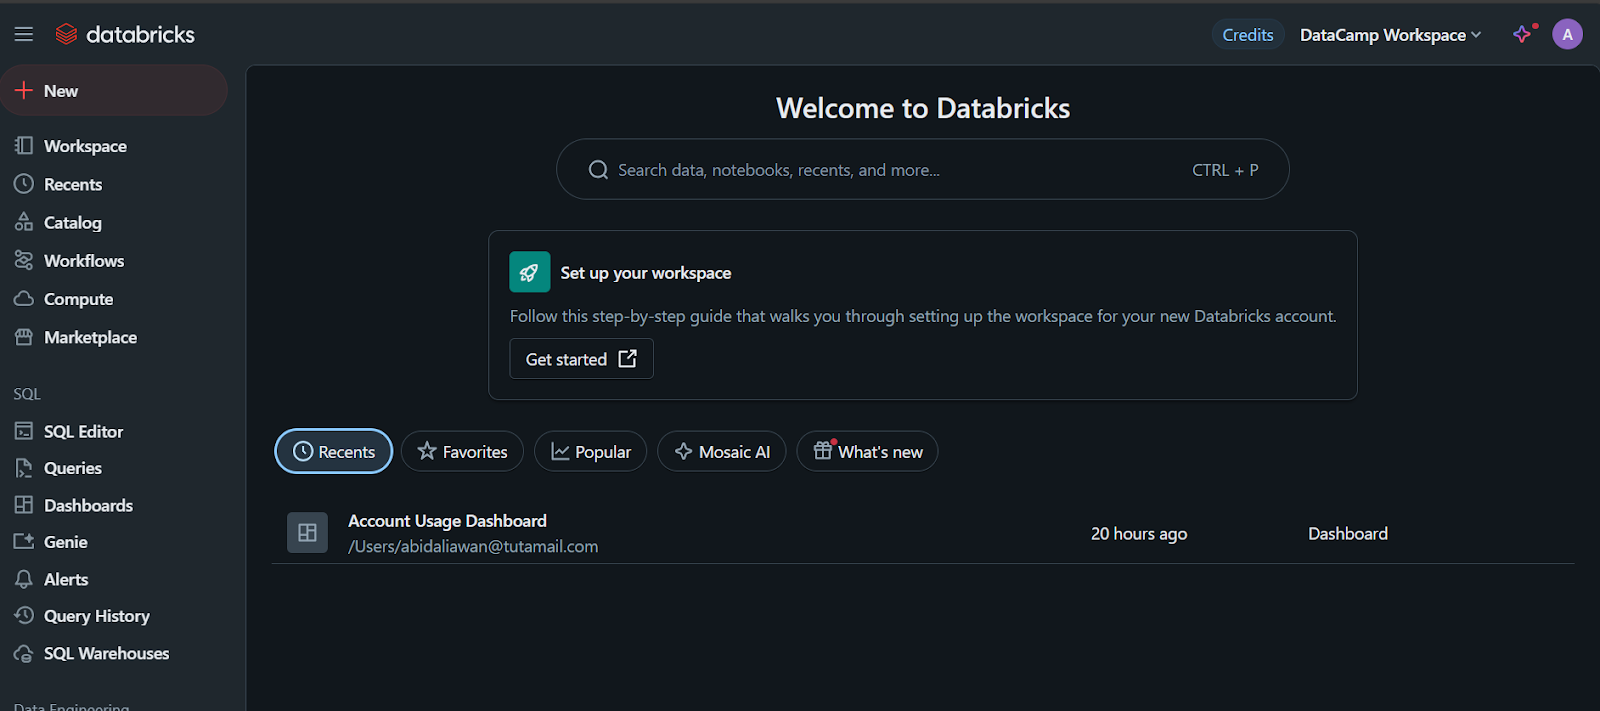
When you click on the “Compute” tab, you can create the compute cluster of your choice.
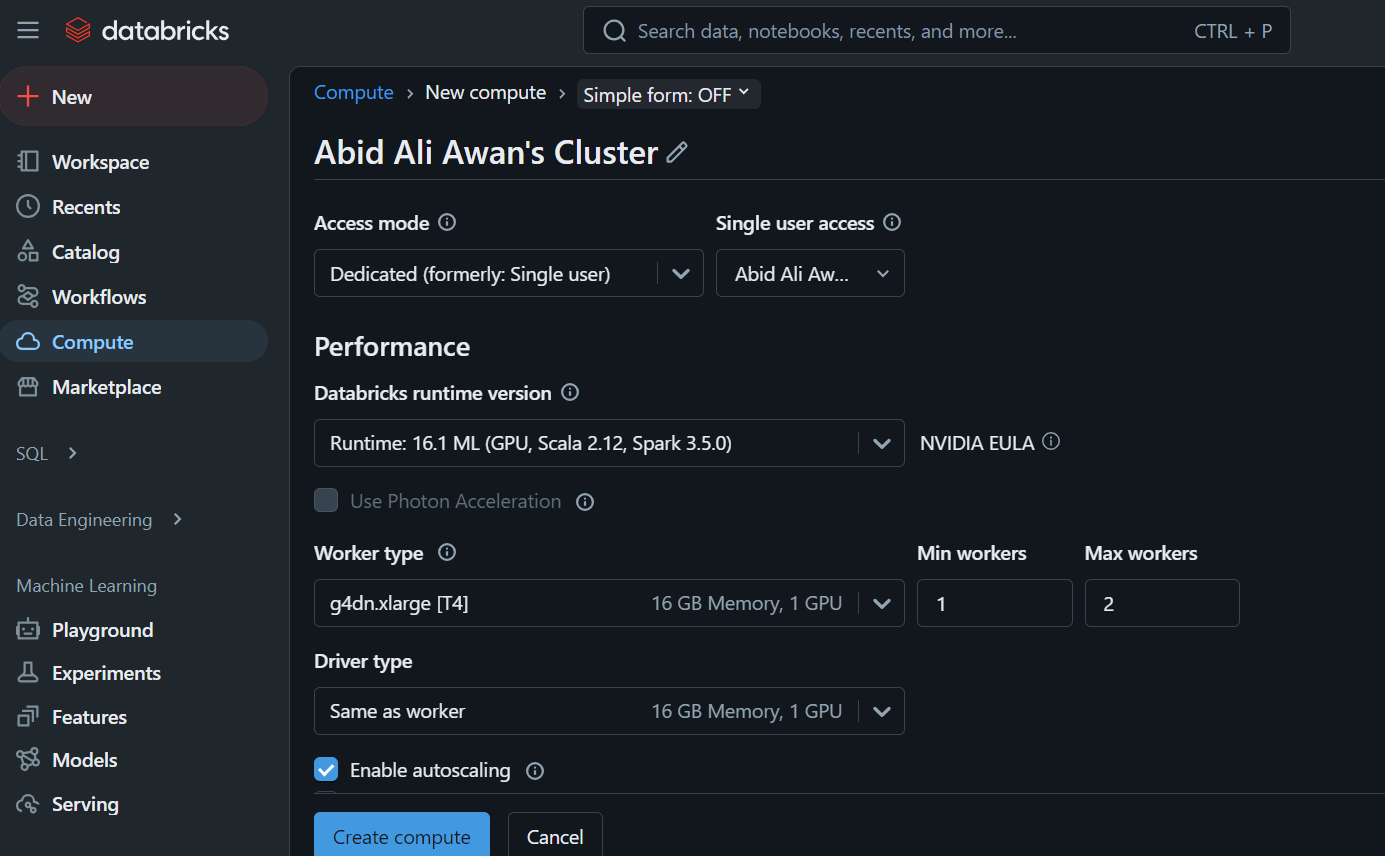
This cluster will be used later on in a notebook and to deploy the model.
If you prefer to use the standalone version of Databricks because you don’t have access to a cloud GPU or for any other reason, follow these steps:
The workspace and everything will be set up for you within a few seconds.
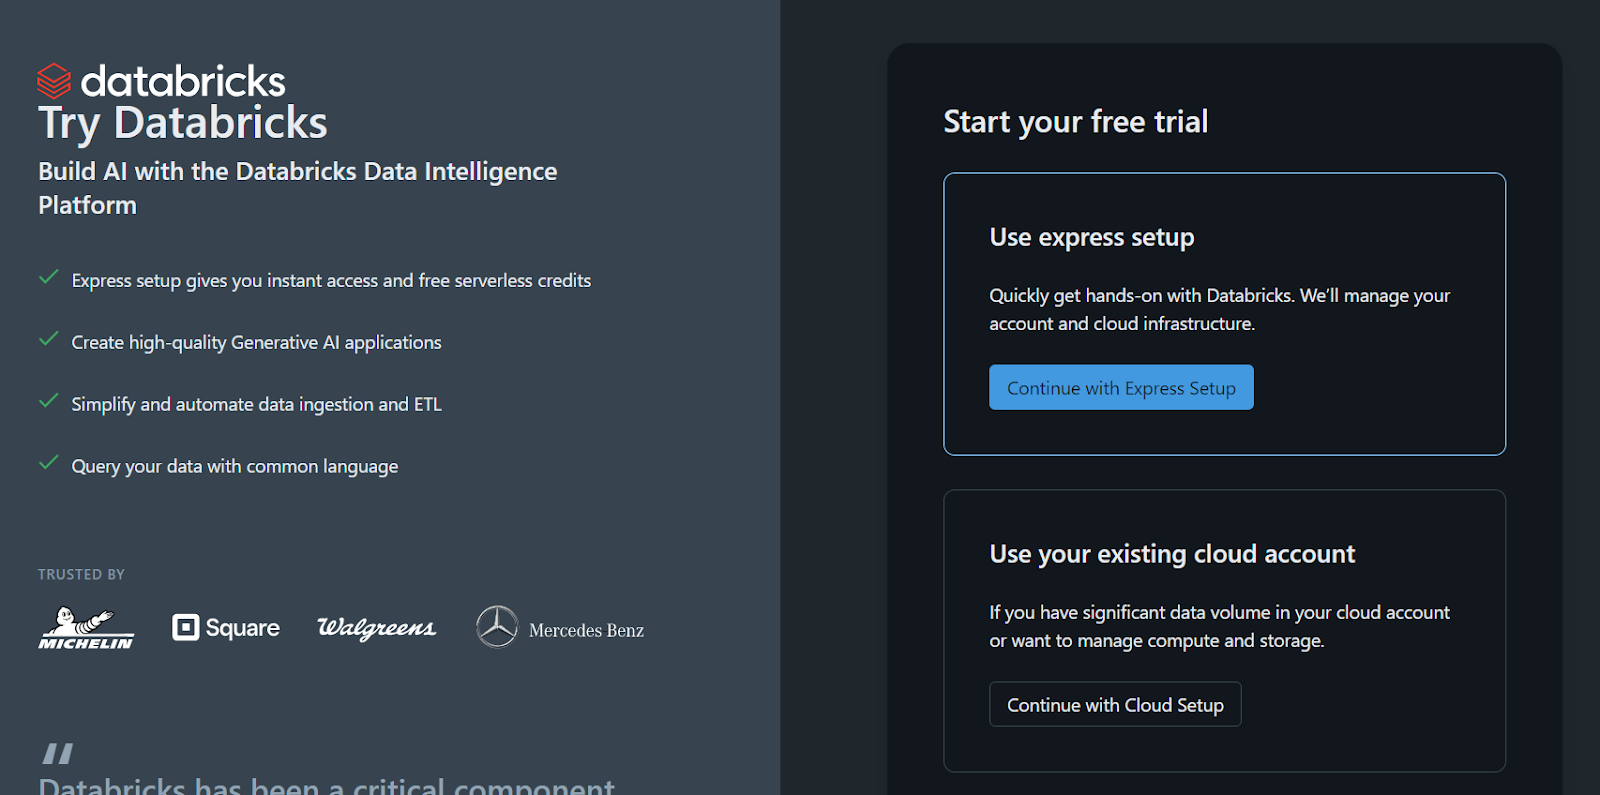
Sign up for the standalone version of Databricks.
Please note that there is a catch: you cannot create your own compute cluster or GPU cluster using this method. You can only register the model using a CPU in a notebook, which can be a hassle you might want to avoid.
If you’re working with DeepSeek R1 in a production or research setting, using a CPU instead of a GPU can be frustrating due to the performance hit, memory limitations, and potential costs. Learn more in the CPU vs GPU blog post.
The next step is to register the model.
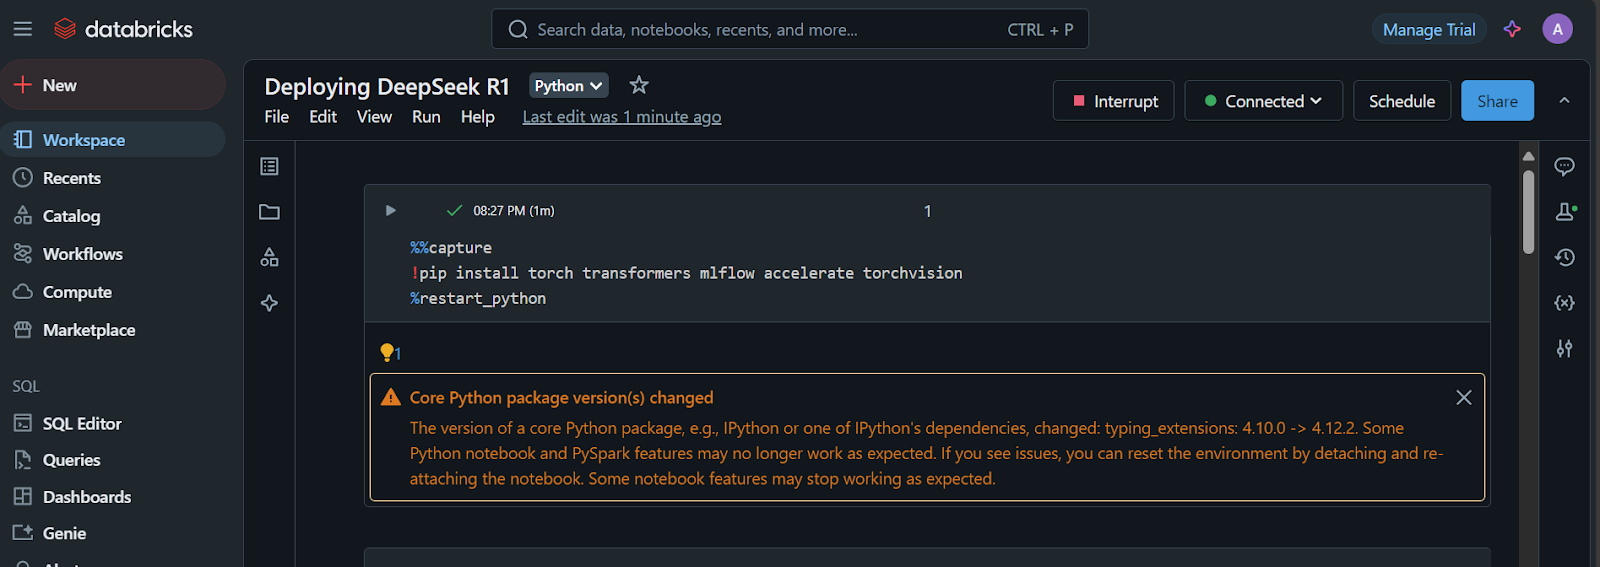
1. Install the required Python packages:
%%capture
!pip install torch transformers mlflow accelerate torchvision
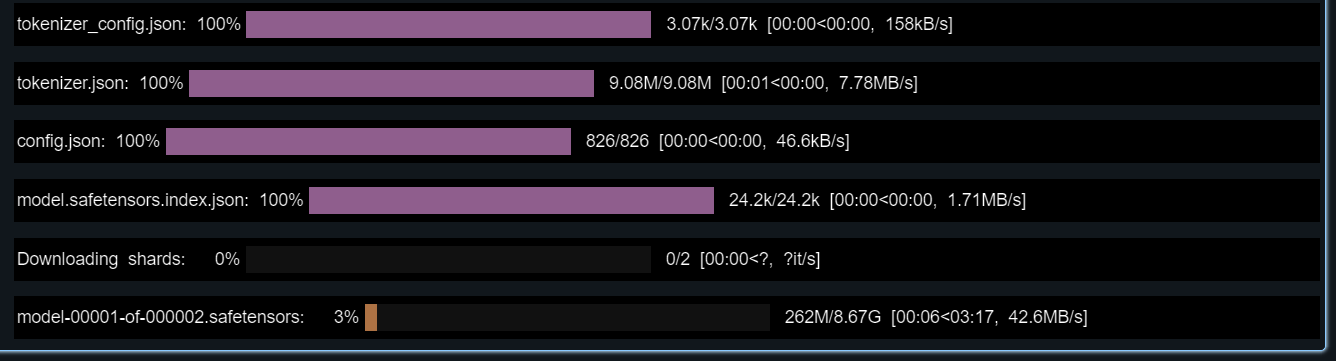
%restart_python2. Load the tokens, configurations, and model from the Hugging Face repository:
import pandas as pd
import mlflow
import mlflow.transformers
import torch
from mlflow.models.signature import infer_signature
from transformers import AutoModelForCausalLM, AutoTokenizer, AutoConfig, pipeline


# Specify the model from HuggingFace transformers
model_name = "deepseek-ai/DeepSeek-R1-Distill-Llama-8B"


# Load tokenizer and model
tokenizer = AutoTokenizer.from_pretrained(model_name)
config = AutoConfig.from_pretrained(model_name)


model = AutoModelForCausalLM.from_pretrained(
    model_name,
    config=config,
    torch_dtype=torch.float16
)
3. Test the loaded model by providing it with a sample prompt.
We will also create a signature that we will add during the model registration:
text_generator = pipeline("text-generation", model=model, tokenizer=tokenizer)
example_prompt = "How does a computer work?"
example_inputs = pd.DataFrame({"inputs": [example_prompt]})
example_outputs = text_generator(example_prompt, max_length=200)
signature = infer_signature(example_inputs, example_outputs)


print(example_outputs)
The model should be working perfectly!
The output it showed for me is:
[{'generated_text': "How does a computer work? What is the computer? What is the computer used for? What is the computer used for in real life?\n\nI need to answer this question, but I need to do it step by step. I need to start with the very basic level and build up from there. I need to make sure I understand each concept before moving on. I need to use a lot of examples to explain each idea. I need to write my thoughts as if I'm explaining them to someone else, but I need to make sure I understand how to structure the answer properly.\n\nOkay, let's start with the basic level. What is a computer? It's an electronic device, right? And it has a central processing unit (CPU) that does the processing. But I think the central processing unit is more efficient, so maybe it's the CPU. Then, it has memory and storage. I remember that memory is like RAM and storage is like ROM. But wait, I think"}]4. Set up the conda environment with the correct Python version and the required Python packages.
This will help us create the container that has all the necessary tools to run the model:
conda_env = {
    "name": "mlflow-env",
    "channels": ["defaults", "conda-forge"],
    "dependencies": [
        "python=3.11",
        "pip",
        {
            "pip": [
                "mlflow",
                "transformers",
                "accelerate",
                "torch",
                "torchvision"
            ]
        }
    ]
}
5. Register the model
Provide the mlflow.transformers.log_model function with the text generation pipeline, artifact path, signature, example input, model name, and conda environment:
with mlflow.start_run() as run:
mlflow.transformers.log_model(
transformers_model=text_generator,
artifact_path="deepseek_model",
signature=signature,
input_example=example_inputs,
registered_model_name="deepseek_r1_llama_8b",
conda_env=conda_env
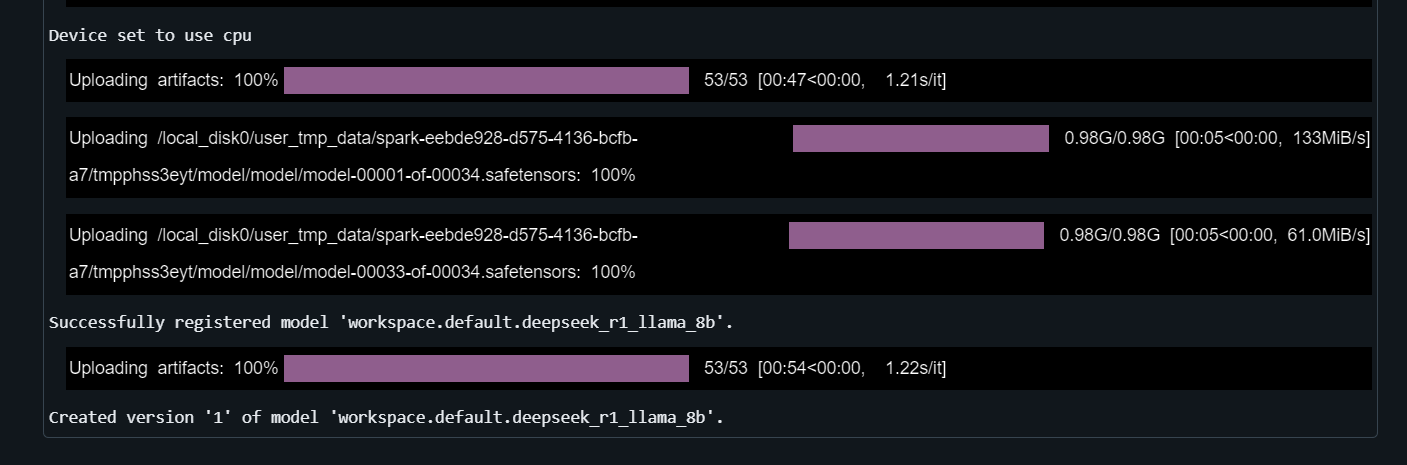
)It will take a few minutes to register the model.
Learn about the power of Databricks Lakehouse and enhance your data engineering and machine learning skills by taking the Data Management in Databricks course.
It’s time to deploy the model!
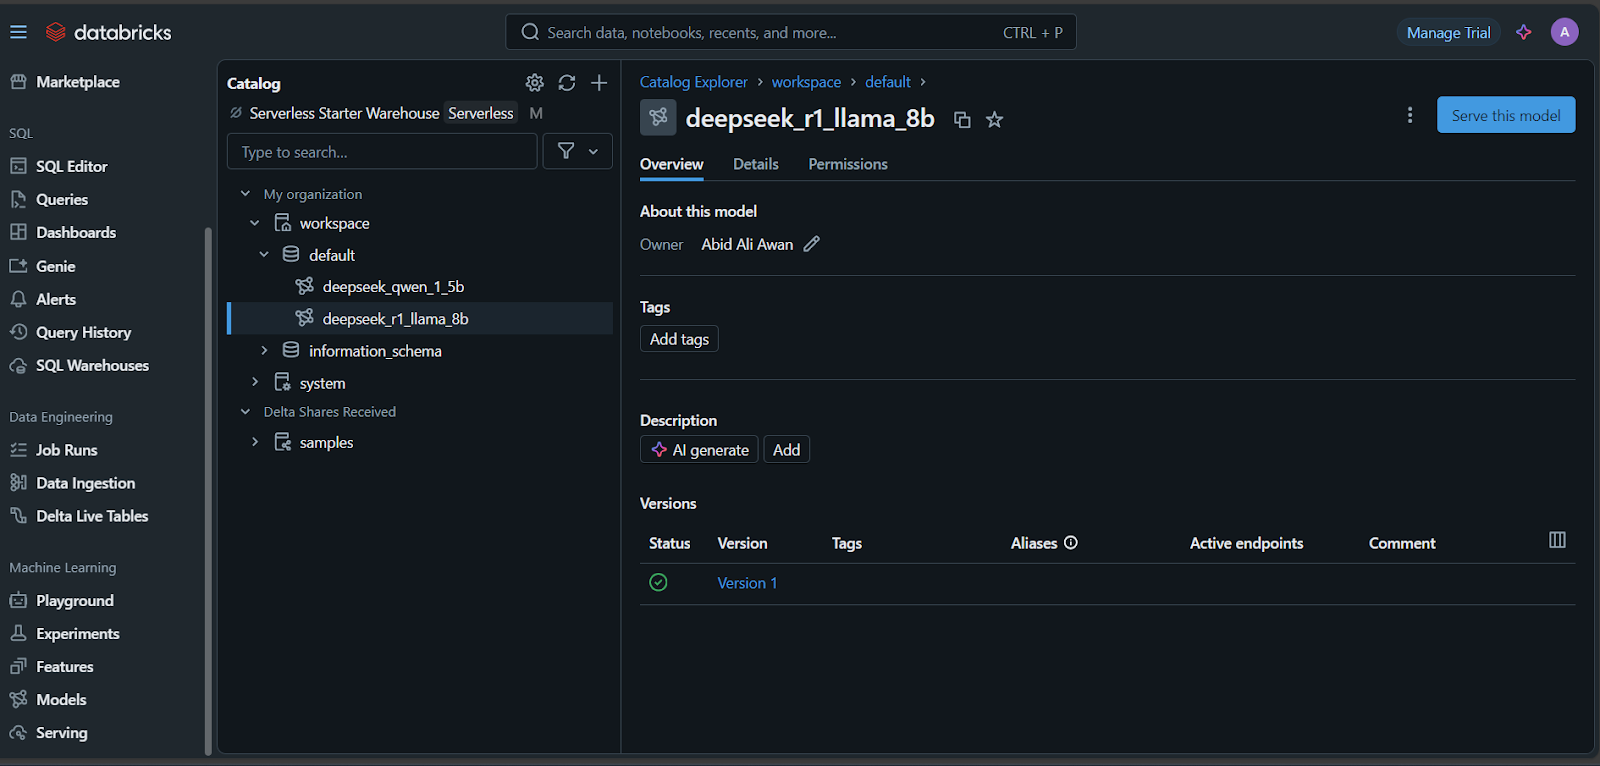
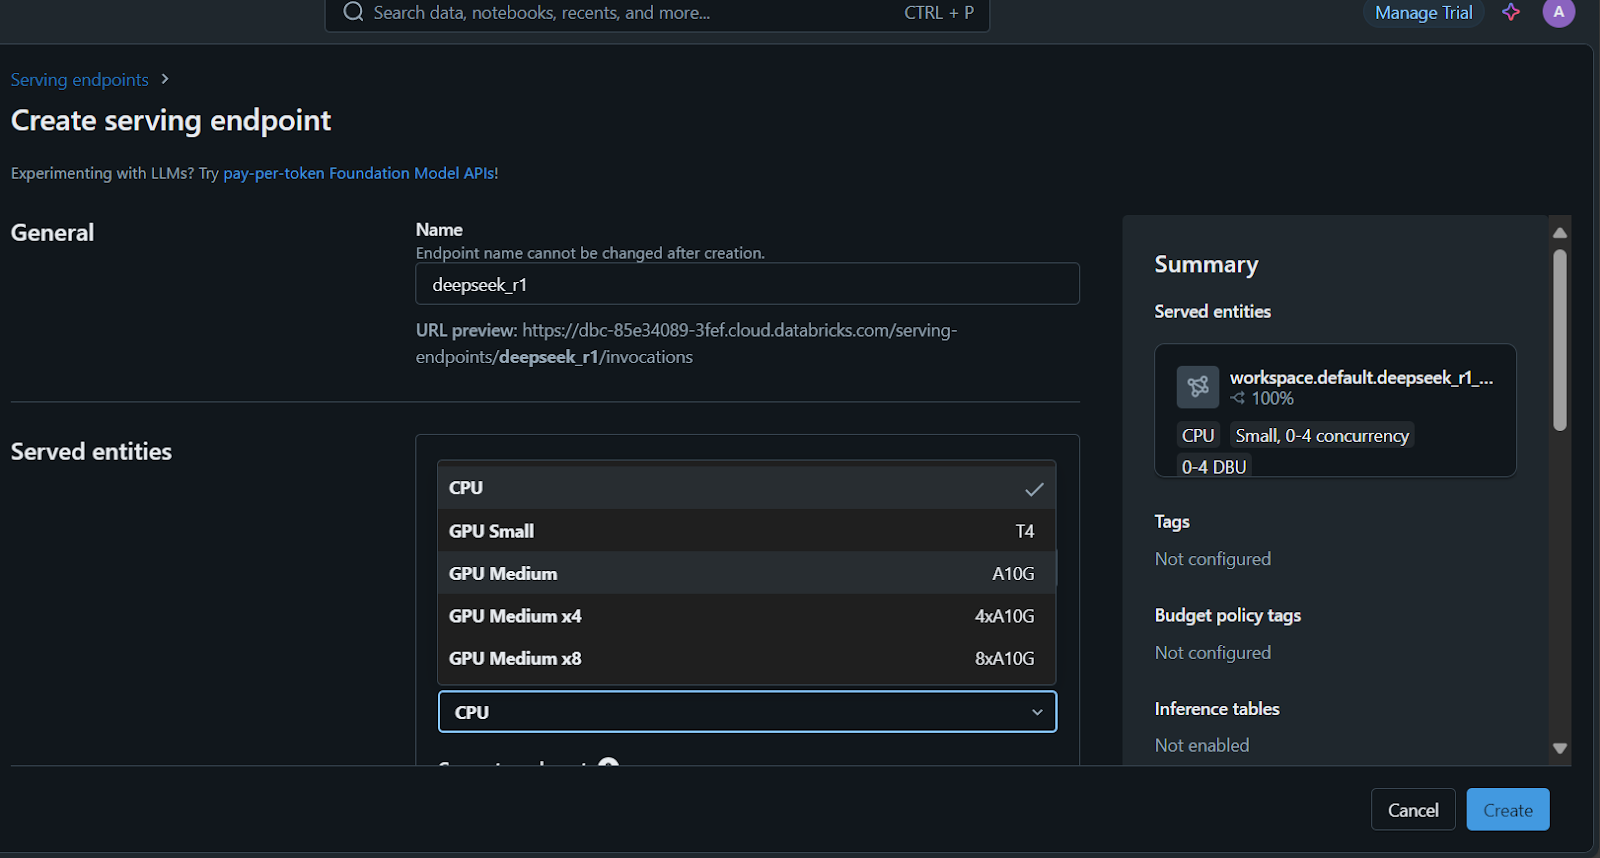
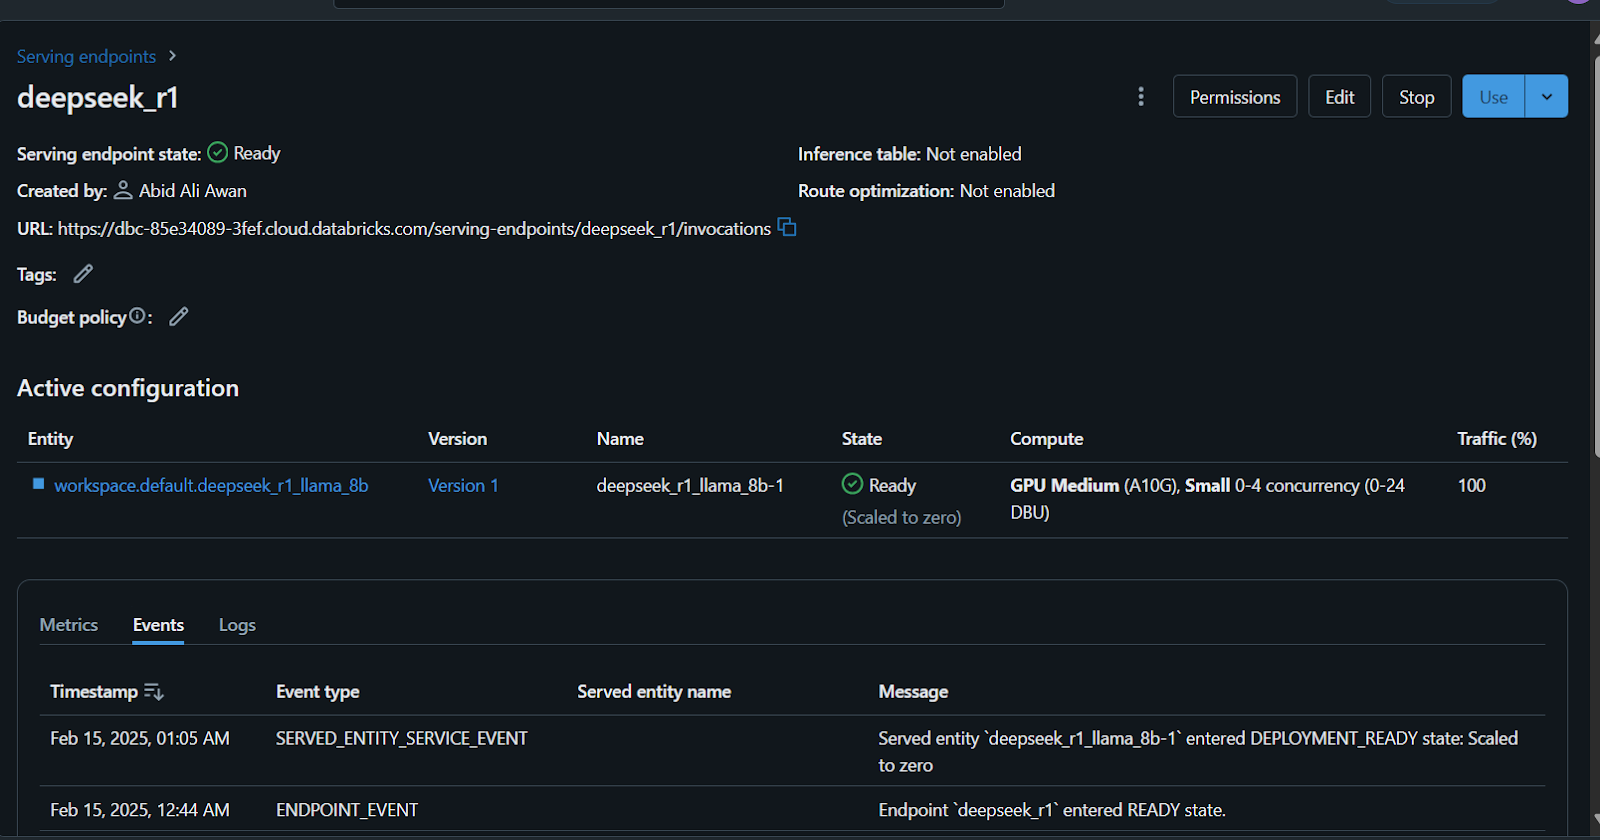
It will take a few minutes to set up the serving endpoint. The status will turn green once the setup is complete and display “Ready.”
Additionally, you can fine-tune the DeepSeek R1 on a custom dataset before registering the model. Follow the Fine-Tuning DeepSeek R1 tutorial to learn everything you need to know about this process.
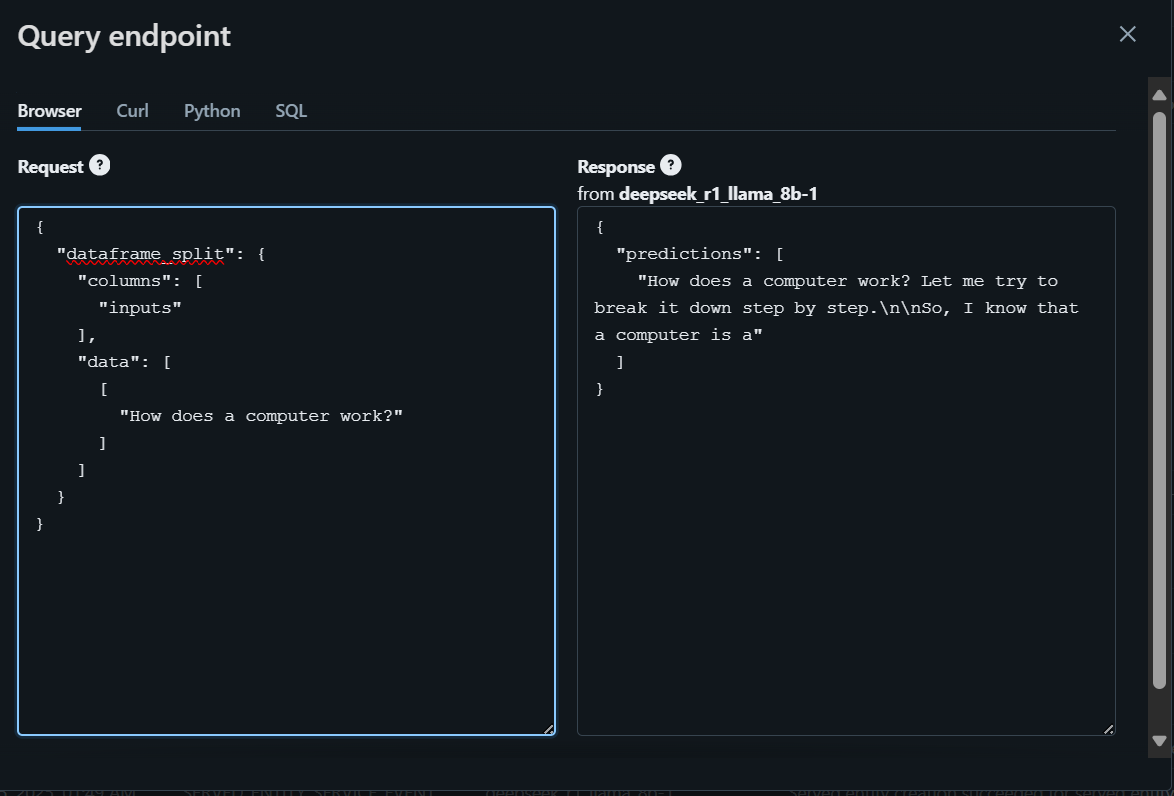
There are many ways to access or use this model.
To get started, we will write the question using the browser and generate the response.
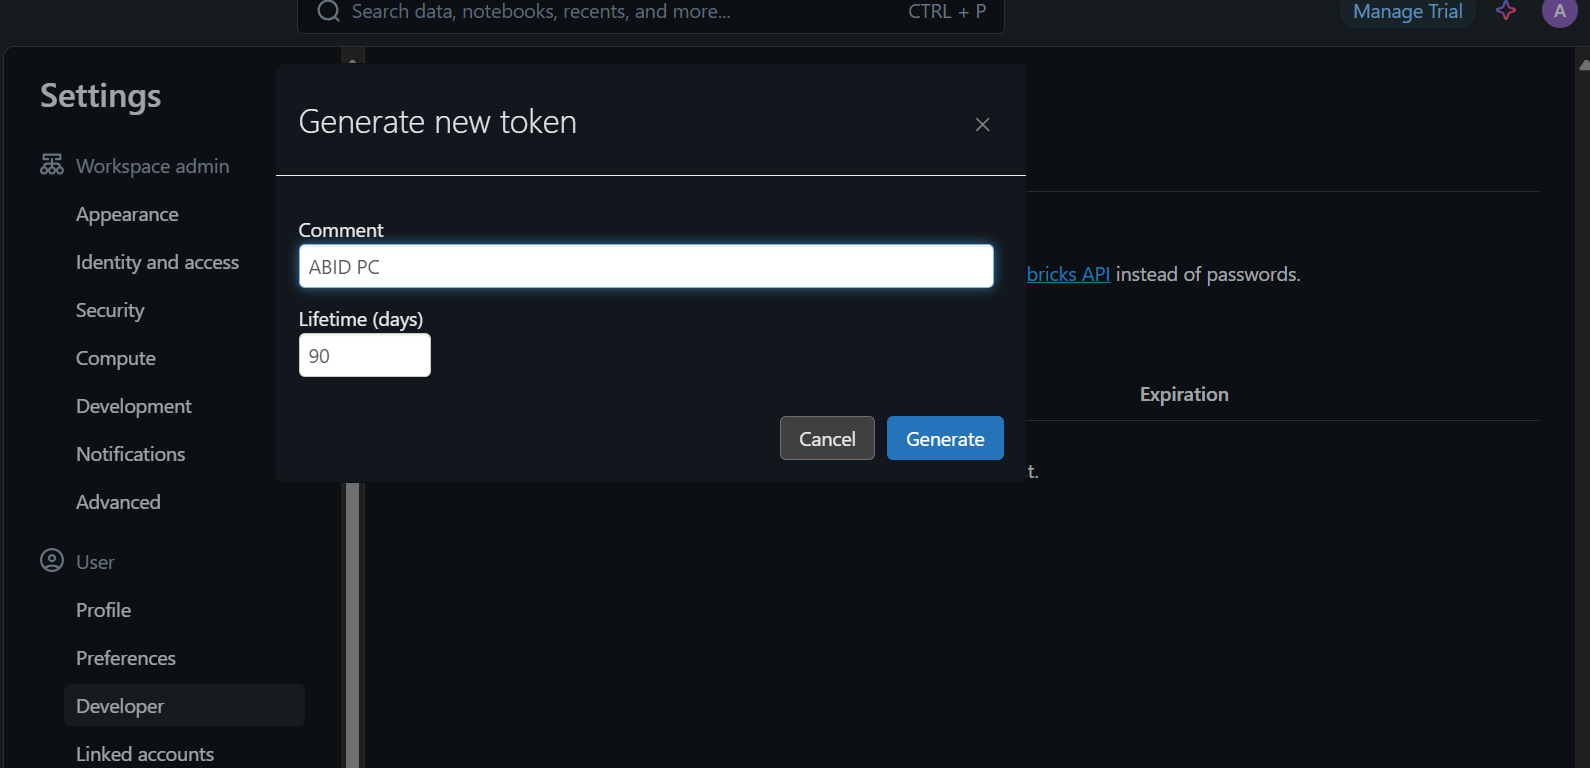
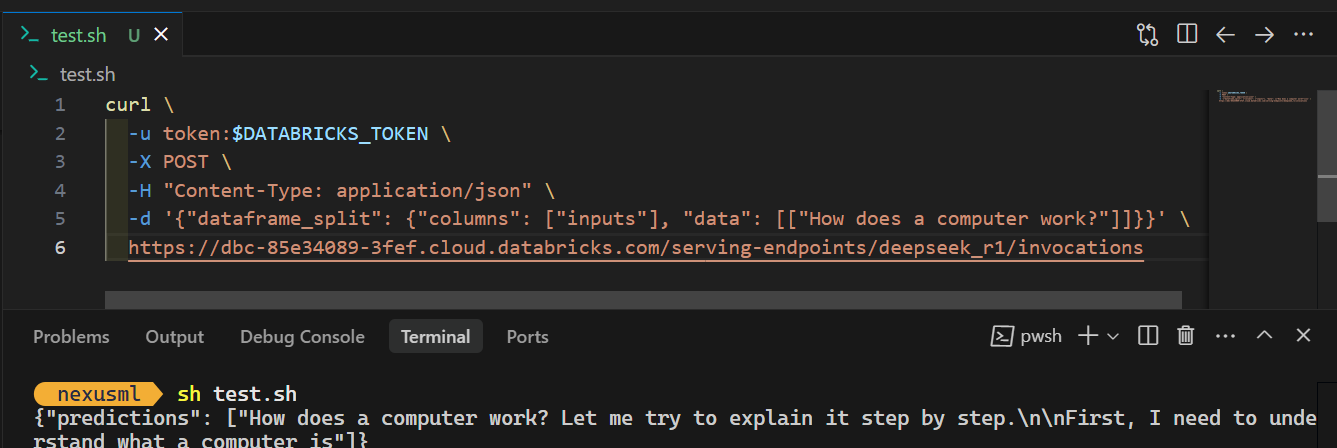
To access the model locally or integrate it into your application, you first need to generate a Databricks API key.
curl \
  -u token:$DATABRICKS_TOKEN \
  -X POST \
  -H "Content-Type: application/json" \
  -d '{"dataframe_split": {"columns": ["inputs"], "data": [["How does a computer work?"]]}}' \
  https://dbc-85e34089.cloud.databricks.com/serving-endpoints/deepseek_r1/invocations
When you run the command, generating the response will take a few seconds. It's that simple!
Check out the DeepSeek R1 vs V3 blog to learn about the best large language models available from DeepSeek.
Registering and deploying the DeepSeek R1 model on Databricks is straightforward. You can even register and deploy the large model using a CPU cluster or a local CPU machine, all without incurring any costs. However, running the model on a CPU can be slow and requires patience, especially when building the docker image.
In this tutorial, we covered the entire model deployment process step by step. We started by setting up Databricks and registering the pre-trained DeepSeek Distilled R1 model in the Databricks Model Registry. Then, we used the Databricks dashboard to deploy the model. Finally, we tested the deployed model and demonstrated how to use it locally with a simple CURL command.
If you are new to AI and large language models, I recommend taking the Introduction to LLMs in Python course. This will help you build a solid foundation, understand key terminologies, and get started with working on advanced models like DeepSeek R1!
Learn more about Databricks with these courses!
Course
Course
Course
blog
François Aubry
8 min
blog
Alex Olteanu
8 min
blog
Dr Ana Rojo-Echeburúa
8 min
Tutorial
Aashi Dutt
Tutorial
Abid Ali Awan
Tutorial
Aashi Dutt