Course
Before you start fine-tuning the GPT-4o Mini model, we recommend prompt engineering, prompt chaining, and function calling to customize the model responses and get domain-specific answers.
Fine-tuning is necessary when you want to adjust the style, tone, or format. It is used to improve reliability and accuracy, handle complex prompts, or perform a new task that the prompt engineer could not achieve.
In this tutorial, we will fine-tune the GPT-4o Mini model to classify text into "stress" and "non-stress" labels. Subsequently, we will access the fine-tuned model using the OpenAI API and the OpenAI playground. Finally, we will evaluate the fine-tuned model by comparing its performance before and after tuning it using various classification metrics.
Image by Author
Introducing GPT-4o Mini
GPT-4o Mini is the most cost-efficient general large language model available. It scores 82% on the MMLU and currently outperforms Claude 3.5 Sonnet on chat preferences in the LMSYS leaderboard. It is priced at 15 cents per million input tokens and 60 cents per million output tokens, which is 60% cheaper than GPT-3.5 Turbo.
GPT-4o mini currently supports text and images as input. The model has a context window of 128K tokens, supports up to 16K output tokens per request, and has knowledge up to October 2023. GPT-4o Mini can handle non-English text, as it is using the GPT-4o tokenizer. We get the best of both worlds at a low cost.
Learn about the use case, chat completion API, and detailed benchmarks of GPT-4o Mini by reading our blog, What Is GPT-4o Mini?
Setting Up the OpenAI API
Go to the OpenAI website and create an account. Fine-tuning is expensive, and using the GPT-4o Mini via API requires you to have a payment method attached to your account. To avoid any hiccups, make sure you have at least a 10 USD credit balance in your account before attempting to fine-tune the model.
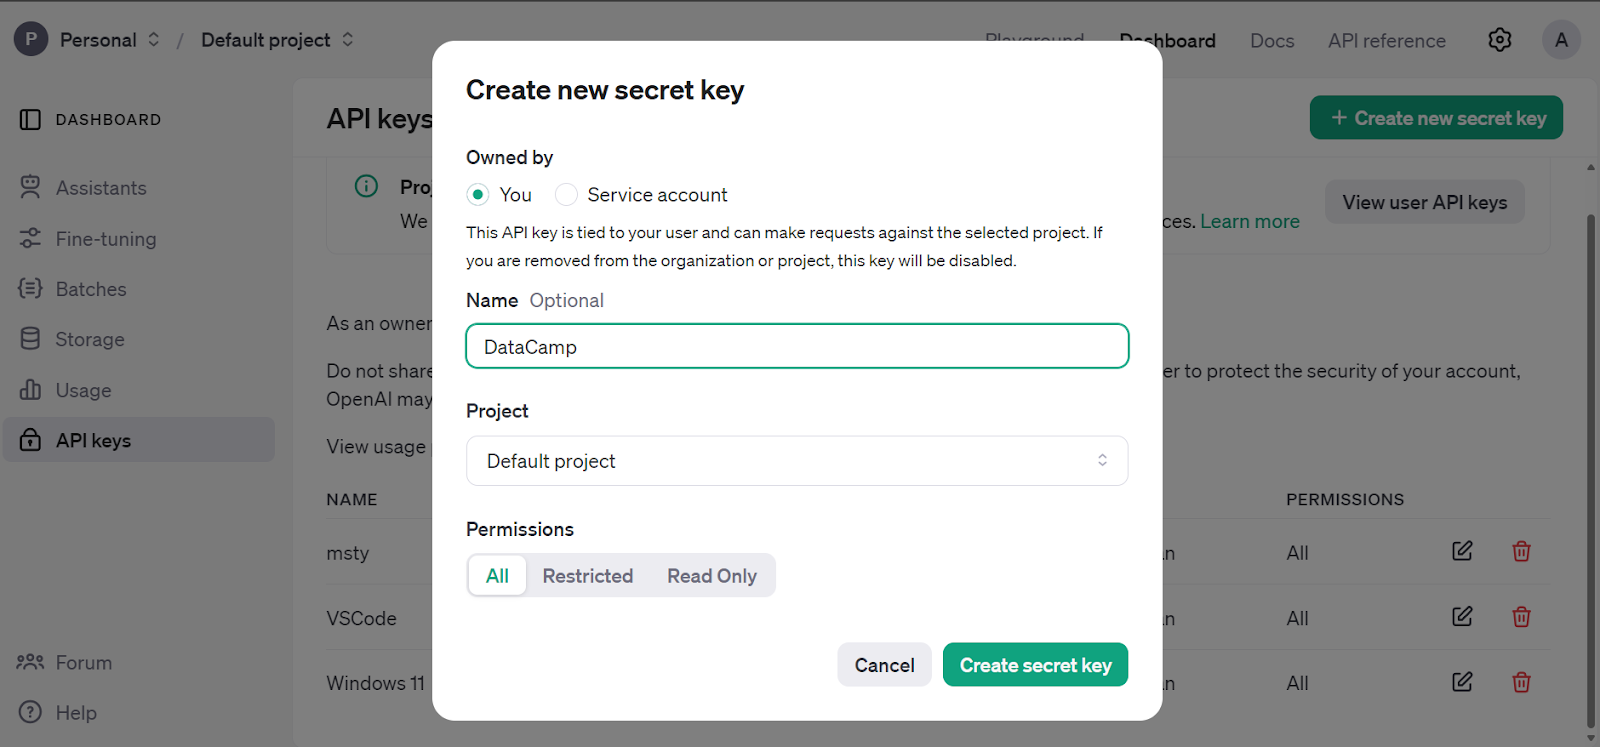
Go to the main dashboard, click on the “API keys” tab, and generate the OpenAI API secret key.
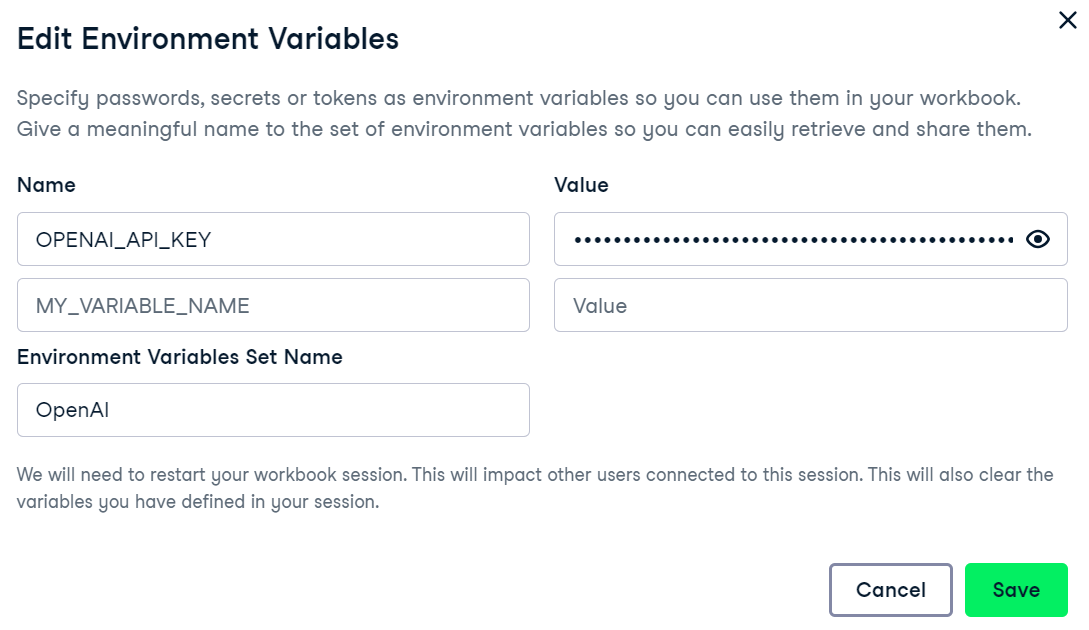
We are using DataCamp's DataLab as our code editor. To set up the OpenAI API key environment variable, go to the environment tab and click on the environment variable option. Then, add the environment variable for the API key and activate it as shown below.
Install the OpenAI Python package to access the GPT-4o Mini.
%%capture
%pip install openai
Create the client using the OpenAI API key and generate a response using the sample prompt. The chat completion function requires the model name and messages in a list of dictionary format.
from IPython.display import Markdown, display
from openai import OpenAI
import os

openai_api_key = os.environ["OPENAI_API_KEY"]

client = OpenAI(api_key=openai_api_key)

response = client.chat.completions.create(
  model="gpt-4o-mini",
  messages=[
    {"role": "system", "content": "You are a great philosopher."},
    {"role": "user", "content": "What is the meaning of life?"}
  ]
)
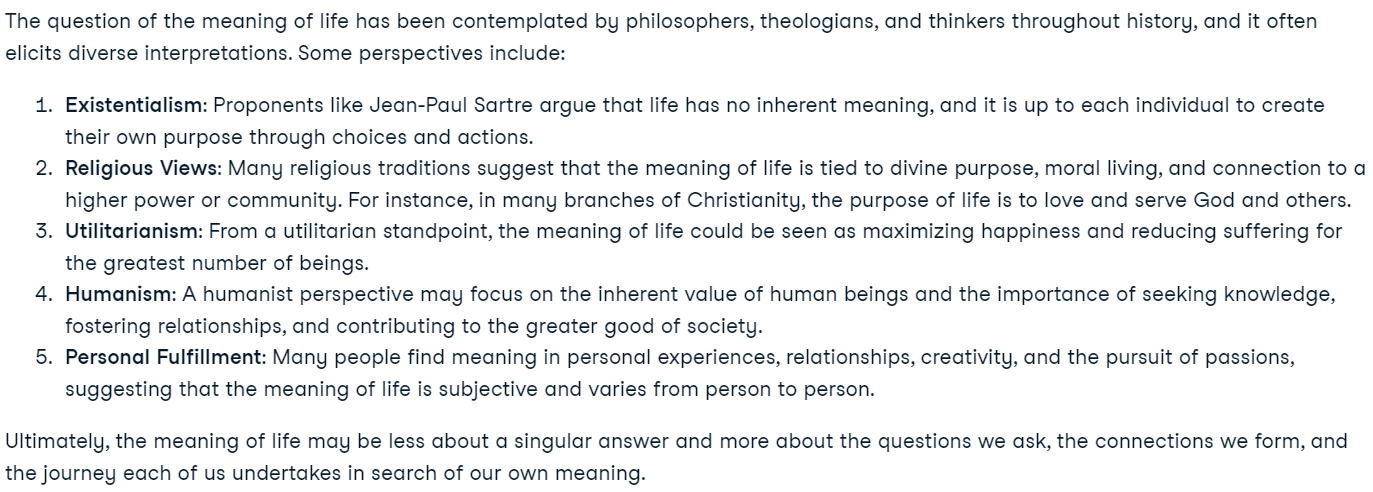
display(Markdown(response.choices[0].message.content))
Our OpenAI API is fully set up, and we are ready to initiate the fine-tuning job.
New to OpenAI's API? You can follow the simple and detailed tutorial GPT-4o API Tutorial: Getting Started with OpenAI's API to understand how to write a few lines of code to access state-of-the-art models.
Fine-tuning GPT-4o Mini
In this section, we will fine-tune the GPT-4o Mini model on Stress Detection from the Social Media Articles dataset from Kaggle. The dataset contains posts from Reddit and Twitter, classifying them into stress and non-stress labels.
Creating the dataset
We will now load and process the dataset.
- Load the top 200 rows from the Reddit post dataset.
- Drop all columns except 'title' and 'label'.
- Map the labels column to convert 0 and 1 into "non-stress" and "stress" labels.
- Split the dataset into training and validation sets.
- Save both the training and validation sets in JSONL format.
Note: Ensure the correct dataset format, which includes the system prompt, user query, and response. The response will be the label.
import pandas as pd
import json
from sklearn.model_selection import train_test_split

# Load the CSV file with the correct delimiter
file_path = 'Reddit_Title.csv'  # Change this to your local path
data = pd.read_csv(file_path, sep=';')

# Clean up and drop unnecessary columns, and select the top 200 rows
data_cleaned = data[['title', 'label']].head(200)

# Mapping the 'label' column to more human-readable text
label_mapping = {0: "non-stress", 1: "stress"}
data_cleaned['label'] = data_cleaned['label'].map(label_mapping)

# Split the data into training and validation sets (80% train, 20% validation)
train_data, validation_data = train_test_split(data_cleaned, test_size=0.2, random_state=42)

def save_to_jsonl(data, output_file_path):
    jsonl_data = []
    for index, row in data.iterrows():
        jsonl_data.append({
            "messages": [
                {"role": "system", "content": "Given a social media post, classify whether it indicates 'stress' or 'non-stress'."},
                {"role": "user", "content": row['title']},
                {"role": "assistant", "content": f"\"{row['label']}\""}
            ]
        })

    # Save to JSONL format
    with open(output_file_path, 'w') as f:
        for item in jsonl_data:
            f.write(json.dumps(item) + '\n')

# Save the training and validation sets to separate JSONL files
train_output_file_path = 'stress_detection_train.jsonl'
validation_output_file_path = 'stress_detection_validation.jsonl'

save_to_jsonl(train_data, train_output_file_path)
save_to_jsonl(validation_data, validation_output_file_path)

print(f"Training dataset save to {train_output_file_path}")
print(f"Validation dataset save to {validation_output_file_path}")Output:
Training dataset save to stress_detection_train.jsonl
Validation dataset save to stress_detection_validation.jsonl
Uploading the dataset
We will now use the OpenAI client to upload both the training and validation datasets for fine-tuning.
train_file = client.files.create(
  file=open(train_output_file_path, "rb"),
  purpose="fine-tune"
)

valid_file = client.files.create(
  file=open(validation_output_file_path, "rb"),
  purpose="fine-tune"
)

print(f"Training file Info: {train_file}")
print(f"Validation file Info: {valid_file}")
The OpenAI API will first validate the dataset, then upload the datasets and generate metadata that we can use to fine-tune the model.
Training file Info: FileObject(id='file-b2lo2chod6xuMhYg9JcEsnp6', bytes=48563, created_at=1727133513, filename='stress_detection_train.jsonl', object='file', purpose='fine-tune', status='processed', status_details=None)
Validation file Info: FileObject(id='file-Fae0AVSUhTGr49qhQz8d2yyp', bytes=12284, created_at=1727133514, filename='stress_detection_validation.jsonl', object='file', purpose='fine-tune', status='processed', status_details=None)
To check if the dataset has been successfully pushed to the cloud, go to the Dashboard and click on the “Storage” tab. Two files will be there and ready to be used.

Starting the fine-tuning job
Create the fine-tuning job using the client API. The fine-tuning function requires the training dataset file ID, validation dataset file ID, model name, and hyperparameters. We will fine-tune our model for three epochs. To improve the model performance, you can always train on the full dataset with at least 5 epochs.
model = client.fine_tuning.jobs.create(
  training_file=train_file.id,
  validation_file=valid_file.id,
  model="gpt-4o-mini-2024-07-18",
  hyperparameters={
    "n_epochs": 3,
	"batch_size": 3,
	"learning_rate_multiplier": 0.3
  }
)
job_id = model.id
status = model.status

print(f'Fine-tuning model with jobID: {job_id}.')
print(f"Training Response: {model}")
print(f"Training Status: {status}")
Once we run the function, the fine-tuning job will start and display the logs.
Fine-tuning model with jobID: ftjob-rgIMFxZSsWDqCNfOev54e4Jq.
Training Response: FineTuningJob(id='ftjob-rgIMFxZSsWDqCNfOev54e4Jq', created_at=1727135628, error=Error(code=None, message=None, param=None), fine_tuned_model=None, finished_at=None, hyperparameters=Hyperparameters(n_epochs=3, batch_size=3, learning_rate_multiplier=0.3), model='gpt-4o-mini-2024-07-18', object='fine_tuning.job', organization_id='org-jLXWbL5JssIxj9KNgoFBK7Qi', result_files=[], seed=748607710, status='validating_files', trained_tokens=None, training_file='file-b2lo2chod6xuMhYg9JcEsnp6', validation_file='file-Fae0AVSUhTGr49qhQz8d2yyp', estimated_finish=None, integrations=[], user_provided_suffix=None)
Training Status: validating_files
We can view the status of the fine-tuning job on the dashboard by clicking on the “Fine-tuning” tab and clicking on the job ID.
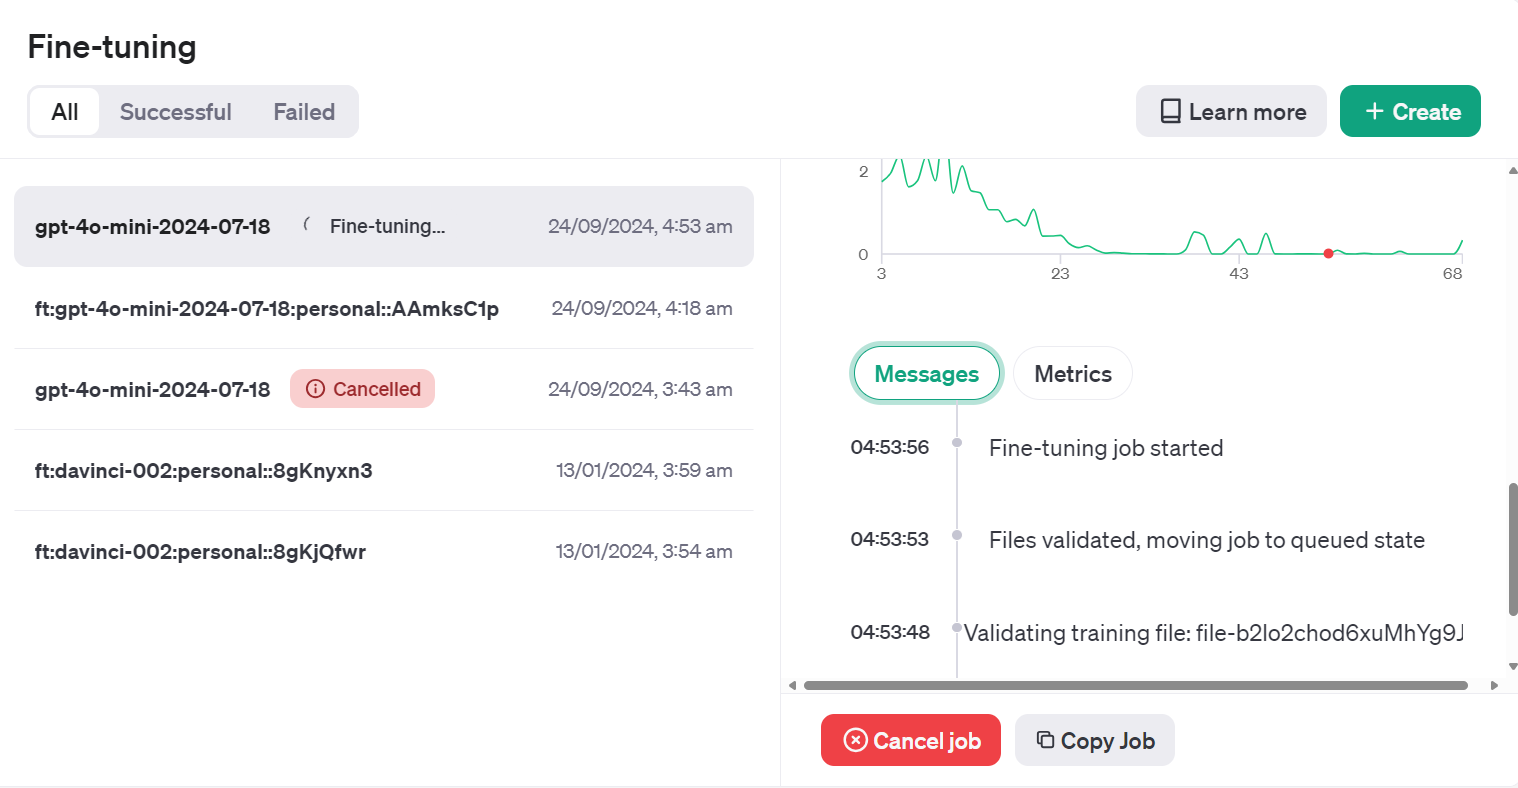
Or we can check the fine-tuning job status using the jobs.retrieve function.
# Retrieve the state of a fine-tune
client.fine_tuning.jobs.retrieve(job_id)
Output:
FineTuningJob(id='ftjob-rgIMFxZSsWDqCNfOev54e4Jq', created_at=1727135628, error=Error(code=None, message=None, param=None), fine_tuned_model=None, finished_at=None, hyperparameters=Hyperparameters(n_epochs=3, batch_size=3, learning_rate_multiplier=0.3), model='gpt-4o-mini-2024-07-18', object='fine_tuning.job', organization_id='org-jLXWbL5JssIxj9KNgoFBK7Qi', result_files=[], seed=748607710, status='running', trained_tokens=None, training_file='file-b2lo2chod6xuMhYg9JcEsnp6', validation_file='file-Fae0AVSUhTGr49qhQz8d2yyp', estimated_finish=1727135943, integrations=[], user_provided_suffix=None)If you think that the loss is not decreasing, you can always cancel the job using the jobs.cancel function.
# Cancel a job
client.fine_tuning.jobs.cancel(job_id)
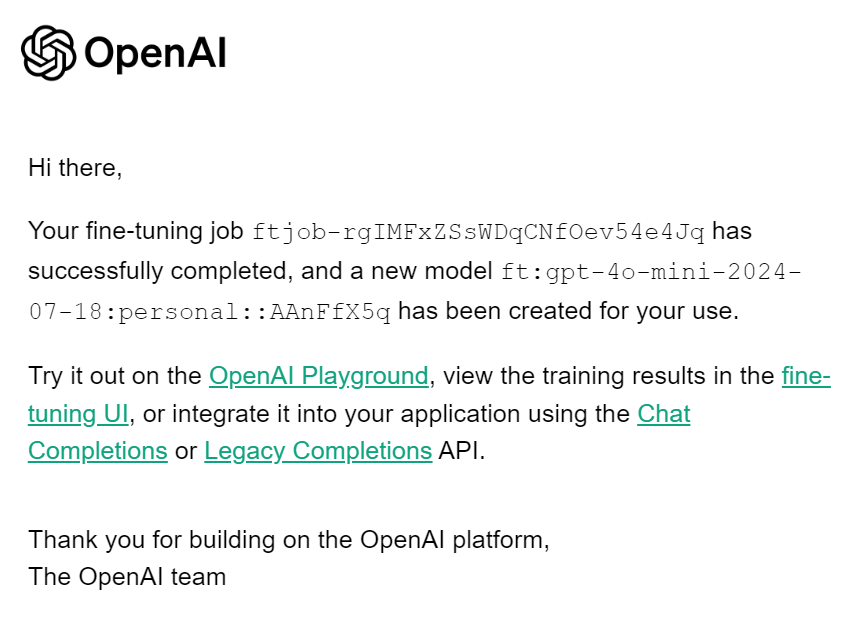
When the fine-tuning job is completed, you will receive an email telling you that the fine-tuned model is ready to be used.
Accessing the Fine-tuned Model using the API
To access the fine-tuned model, we need to obtain the name of the fine-tuned model. To do this, we will gather information on all fine-tuning jobs, select the latest one, and then select the model name.
result = client.fine_tuning.jobs.list()

# Retrieve the fine tuned model
fine_tuned_model = result.data[0].fine_tuned_model
print(fine_tuned_model)
This is our fine-tuned model name.
ft:gpt-4o-mini-2024-07-18:personal::AAnFfX5qGenerate repose by providing the chat completion function with a fine-tuned model name, messages with a correct system prompt, and a sample from the dataset..
completion = client.chat.completions.create(
  model = fine_tuned_model,
  messages=[
    {"role": "system", "content": "Given a social media post, classify whether it indicates 'stress' or 'non-stress'."},
    {"role": "user", "content": "Just went to my first homecoming, and they played a song I've always wanted to dance to at an official dance. Sorry for the terrible quality, but my happiness in this moment couldn't be exaggerated!"}
  ]
)
print(completion.choices[0].message.content)
Success! I have predicted the label correctly.
"non-stress"If you are unsatisfied with your model, you can always delete it using the following command. We won't be doing it as we must run additional model evaluations first.
# Delete a fine-tuned model (must be an owner of the org the model was created in)
client.models.delete(fine_tuned_model)
Accessing the Fine-tuned Model Using Playground
There is another way to access the fine-tuned model and test it on various prompts more efficiently.
Go to the OpenAI dashboard, click on the "Fine-tuning" tab, select the recently run job, and then click the "Playground" button located at the bottom right.
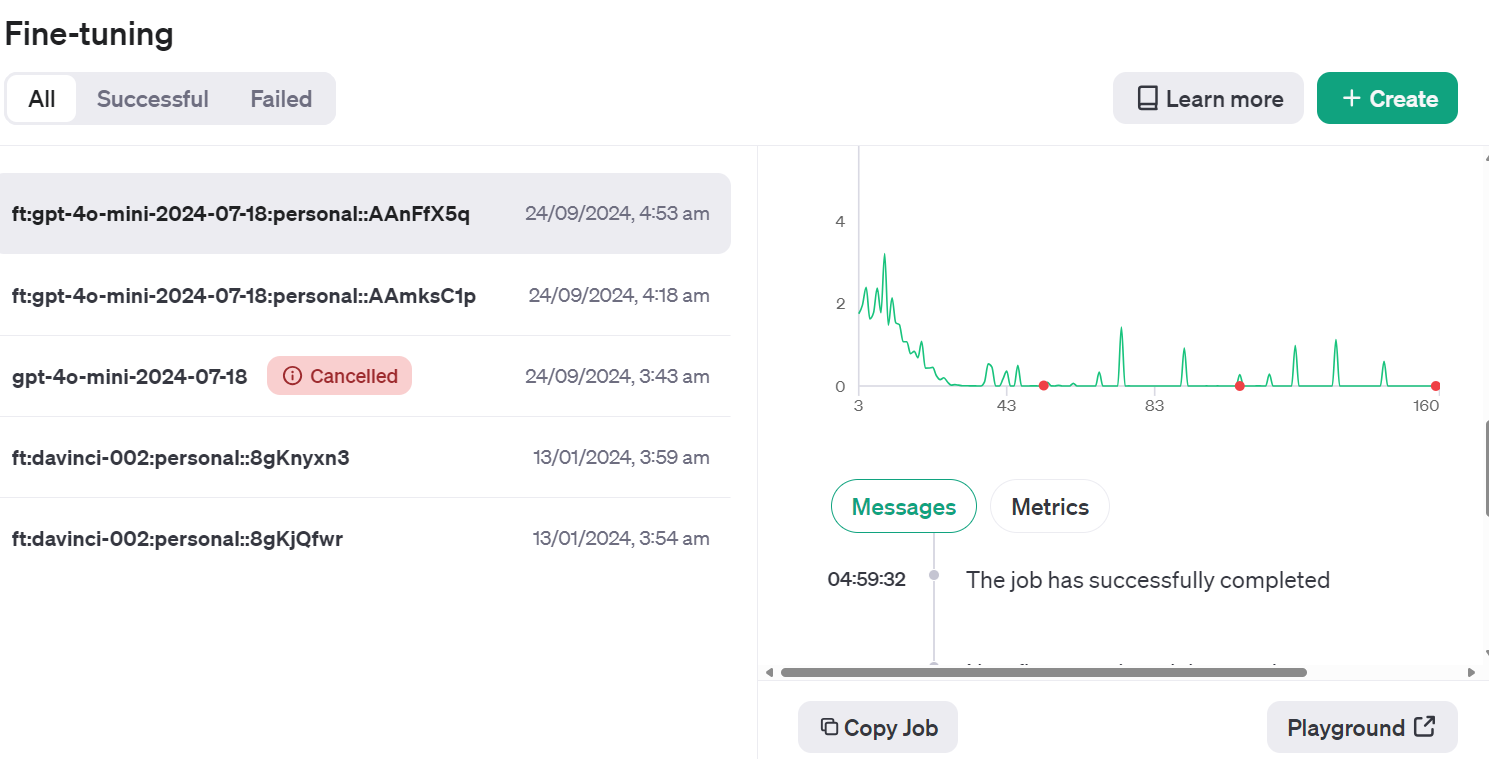
It will take you to the chatbot application. There, you can provide a system prompt and start typing the sample Reddit post.
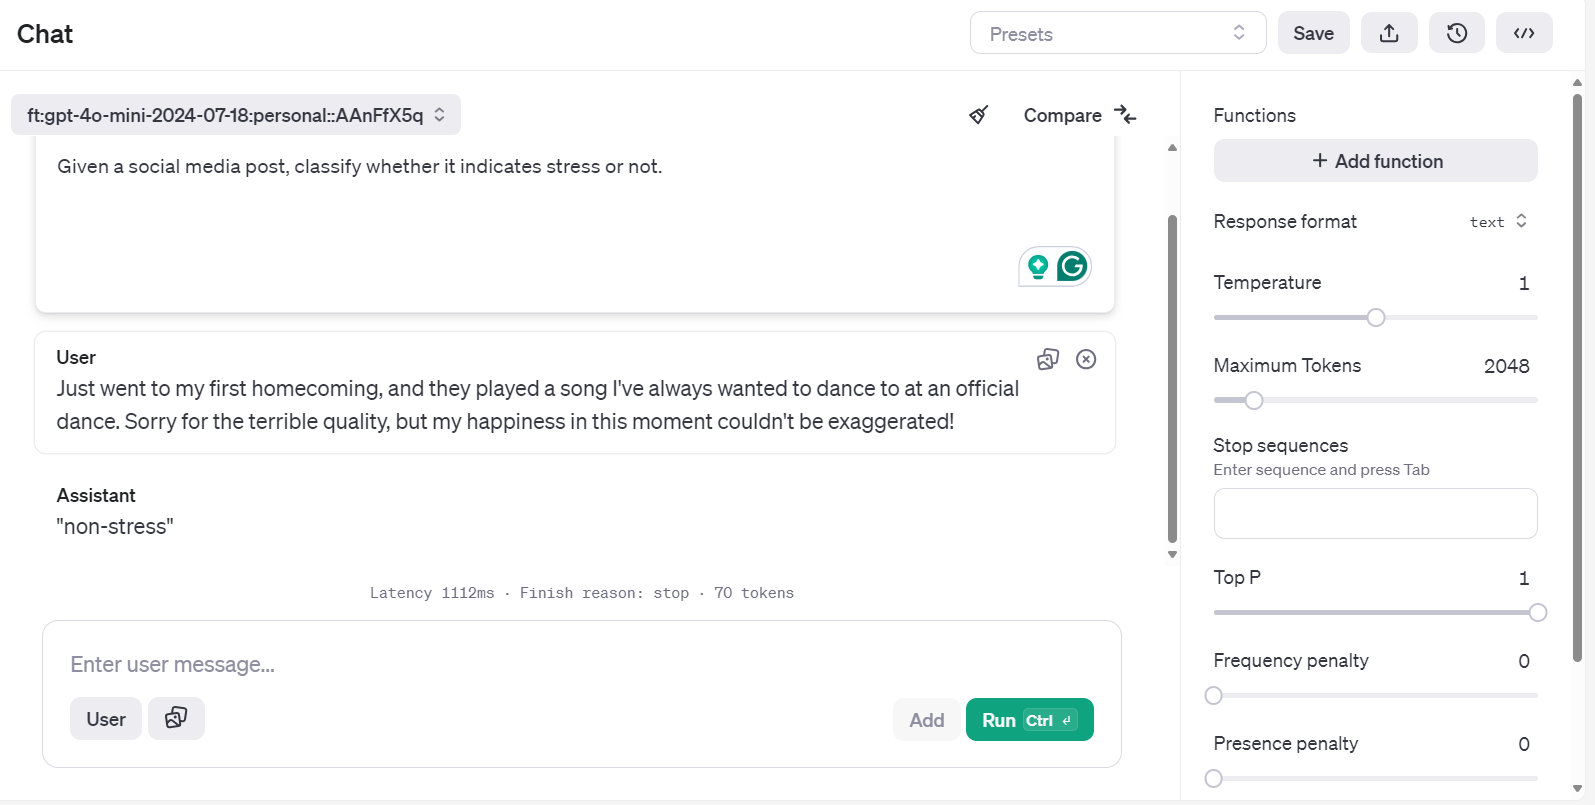
You can even run the same prompt and compare it with another model for better analysis.
Model Evaluation
We have fine-tuned the model and think that it is good enough. But have you even considered whether it was already better from the start? We haven't done a detailed before-and-after comparison.
In this section, we will use validation data to predict the labels using the base model and then compare it with a fine-tuned model. We will compare both models based on accuracy, classification report, and confusion metrics.
Model evaluation before fine-tuning
Create a predict function that inputs the dataset and model name to generate a list of predicted labels. It uses the same system messages and post titles from the dataset.
def predict(test, model):
    y_pred = []
    categories = ["non-stress", "stress"]

    for index, row in test.iterrows():
        response = client.chat.completions.create(
            model=model,
            messages=[
                {
                    "role": "system",
                    "content": "Given a social media post, classify whether it indicates 'stress' or 'non-stress'.",
                },
                {"role": "user", "content": row["title"]},
            ],
        )

        answer = response.choices[0].message.content

        # Determine the predicted category

        for category in categories:
            if category.lower() in answer.lower():
                y_pred.append(category)
                break
        else:
            y_pred.append("none")
    return y_pred
Then, we will create the evaluate function, which will use the predicted and actual labels to generate an accuracy score, classification report, and confusion metrics.
from sklearn.metrics import accuracy_score, classification_report, confusion_matrix
import numpy as np


def evaluate(y_true, y_pred):
    labels = ["non-stress", "stress"]
    mapping = {label: idx for idx, label in enumerate(labels)}

    def map_func(x):
        return mapping.get(
            x, -1
        )  # Map to -1 if not found, but should not occur with correct data

    y_true_mapped = np.vectorize(map_func)(y_true)
    y_pred_mapped = np.vectorize(map_func)(y_pred)

    # Calculate accuracy

    accuracy = accuracy_score(y_true=y_true_mapped, y_pred=y_pred_mapped)
    print(f"Accuracy: {accuracy:.3f}")

    # Generate accuracy report

    unique_labels = set(y_true_mapped)  # Get unique labels

    for label in unique_labels:
        label_indices = [
            i for i in range(len(y_true_mapped)) if y_true_mapped[i] == label
        ]
        label_y_true = [y_true_mapped[i] for i in label_indices]
        label_y_pred = [y_pred_mapped[i] for i in label_indices]
        label_accuracy = accuracy_score(label_y_true, label_y_pred)
        print(f"Accuracy for label {labels[label]}: {label_accuracy:.3f}")
    # Generate classification report

    class_report = classification_report(
        y_true=y_true_mapped,
        y_pred=y_pred_mapped,
        target_names=labels,
        labels=list(range(len(labels))),
    )
    print("\nClassification Report:")
    print(class_report)

    # Generate confusion matrix

    conf_matrix = confusion_matrix(
        y_true=y_true_mapped, y_pred=y_pred_mapped, labels=list(range(len(labels)))
    )
    print("\nConfusion Matrix:")
    print(conf_matrix)
Provide the predict function with the validation dataset and the base model name. Then, provide the predicted and actual labels to the evaluate function and generate a model evaluation report.
y_pred = predict(validation_data, "gpt-4o-mini-2024-07-18")
y_true = validation_data["label"]
evaluate(y_true, y_pred)
Our base model is quite good at classifying the text. We achieved 92.5% accuracy.
Accuracy: 0.925
Accuracy for label non-stress: 0.947
Accuracy for label stress: 0.905

Classification Report:
              precision    recall  f1-score   support

  non-stress       0.90      0.95      0.92        19
      stress       0.95      0.90      0.93        21

    accuracy                           0.93        40
   macro avg       0.93      0.93      0.92        40
weighted avg       0.93      0.93      0.93        40


Confusion Matrix:
[[18  1]
 [ 2 19]]
Model evaluation after fine-tuning
Let’s use the predict function with the fine-tuned model name to generate stress labels. Then, we can use the predicted label and actual labels to generate the detailed model equation report.
fine_tuned_model = "ft:gpt-4o-mini-2024-07-18:personal::AAnFfX5q"

y_pred = predict(validation_data,fine_tuned_model)
evaluate(y_true, y_pred)
Our model's performance has improved. We achieved 97.5% accuracy, which marks a significant improvement.
Accuracy: 0.975
Accuracy for label non-stress: 1.000
Accuracy for label stress: 0.952

Classification Report:
              precision    recall  f1-score   support

  non-stress       0.95      1.00      0.97        19
      stress       1.00      0.95      0.98        21

    accuracy                           0.97        40
   macro avg       0.97      0.98      0.97        40
weighted avg       0.98      0.97      0.98        40


Confusion Matrix:
[[19  0]
 [ 1 20]]
Fine-tuning on certain tasks can significantly improve accuracy. This was just a sample test, but in real-world projects, fine-tuning improves the accuracy and performance of the model on classification tasks, styling, and structured output.
If you are experiencing issues running the above code, please refer to the DataLab workspace: Fine-tuning GPT-4 Mini.
The next step in your journey is to use this fine-tuned model to create a proper AI application. You can learn about it by following the code along: Creating AI Assistants with GPT-4o.
Conclusion
In this tutorial, we successfully fine-tuned the GPT-4o mini model to classify text into "stress" and "non-stress" labels. We then accessed this fine-tuned model using the OpenAI API and the OpenAI playground, allowing for practical application and further testing.
The evaluation of the fine-tuned model provided insightful results, demonstrating an improvement in classification performance across various metrics when compared to the base model. This process highlighted the value of fine-tuning in achieving a more reliable and accurate output, particularly when dealing with tasks like text classification.
If you're looking to use a free, open-source model, we have an excellent tutorial called Fine-tuning Llama 3.2 and Using It Locally: A Step-by-Step Guide. In this guide, we will show you how to fine-tune the latest Llama model and convert it into the GGUF format for local use on your laptop.

As a certified data scientist, I am passionate about leveraging cutting-edge technology to create innovative machine learning applications. With a strong background in speech recognition, data analysis and reporting, MLOps, conversational AI, and NLP, I have honed my skills in developing intelligent systems that can make a real impact. In addition to my technical expertise, I am also a skilled communicator with a talent for distilling complex concepts into clear and concise language. As a result, I have become a sought-after blogger on data science, sharing my insights and experiences with a growing community of fellow data professionals. Currently, I am focusing on content creation and editing, working with large language models to develop powerful and engaging content that can help businesses and individuals alike make the most of their data.
