Track
Developing Large Language Models
16 hr
We have explored numerous guides on fine-tuning large language models (LLMs), but there are very few resources that cover the process of fine-tuning multimodal models. In this tutorial, we will explore a state-of-the-art multimodal model called the Llama 3.2 Vision Model and demonstrate how to fine-tune it using the Amazon product dataset. Our goal is to build a product description generator that provides accurate and simplified image captions for products listed on Amazon.
If you are new to fine-tuning LLMs, please take the Fine-tuning with Llama 3 course to become familiar with common methodologies and terminologies. You can also check out our Llama 3.2 90B tutorial, which covers how to build an image captioning app using Streamlit for the front end, Llama 3.2 90B for generating captions, and Groq as the API.
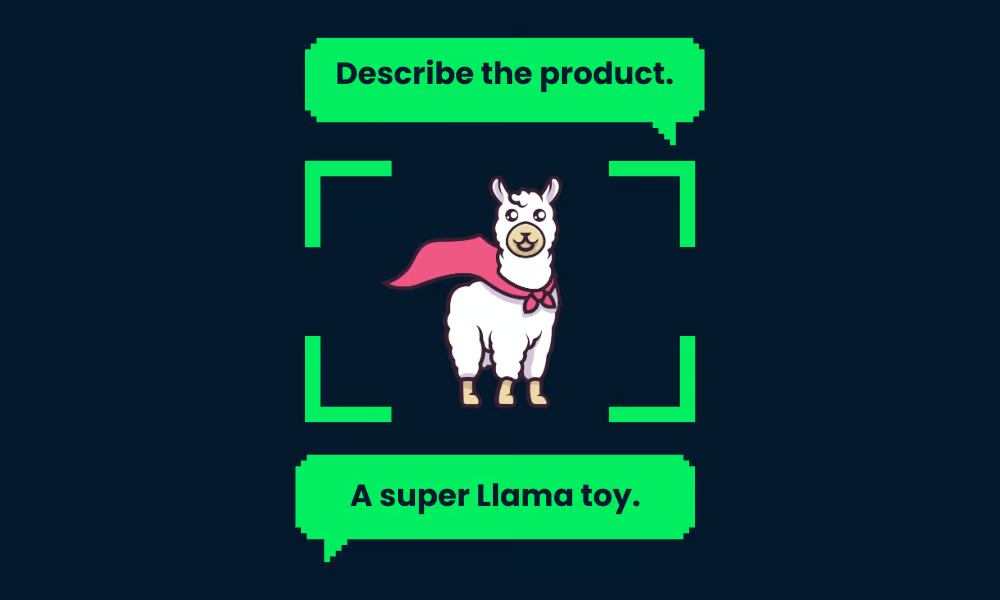
Image by Author
Llama 3.2 introduces multimodal models that can process both image and text data to generate natural and accurate responses. The Llama 3.2 vision models are available in 11B and 90B parameter variations and are specifically designed to handle image reasoning use cases with remarkable precision. These models outperform many existing open-source and closed multimodal models on common industry benchmarks.
Read the Llama 3.2 Guide: How It Works, Use Cases, and More to learn about all the model variables in detail.
The Llama 3.2 vision models excel at tasks such as document-level understanding, chart and graph analysis, image captioning, and visual grounding, where natural language descriptions are used to identify objects in images.
Llama 3.2 Vision model is built on top of the older Llama 3.1 text-only model, which is an advanced language model using a transformer architecture. It was fine-tuned with supervised learning (SFT) and reinforcement learning with human feedback (RLHF) to align with human preferences for helpfulness and safety.
To facilitate image recognition, Llama 3.2 Vision incorporates a separately trained vision adapter. This adapter uses cross-attention layers to integrate the outputs of the image encoder into the pre-trained Llama 3.1 language model, enabling it to effectively handle both text and image-based tasks.
Llama 3.2 Vision excels in use cases like visual question answering, document analysis, image captioning, image-text retrieval, and visual grounding.
For this project, we will be using Kaggle as our coding and computing environment, Unsloth as the fine-tuning framework, and the Amazon product description dataset. Unsloth is fast, consumes less GPU memory, and requires fewer lines of code compared to traditional methods.
If you are looking to fine-tune LLMs for a text generation solution, we have the perfect tutorial for you: Fine-tuning Llama 3.2 and Using It Locally: A Step-by-Step Guide.
Create a new Kaggle notebook and set the accelerator to use two T4 GPUs. Add your Hugging Face token as a Kaggle secret so you can securely push your model to your Hugging Face repository later. Then, install the unsloth Python package using the pip command.
%%capture
!pip install unsloth
Discover more about Unsloth by reading the Unsloth Guide: Optimize and Speed Up LLM Fine-Tuning.
In this setup, we are loading the Llama-3.2-11B-Vision-Instruct model, specifically the version provided by Unsloth, which is optimized for efficient fine-tuning and inference. The model is loaded in 4-bit quantization to significantly reduce memory usage and computational requirements, making it possible to run large vision models on the T4 GPUs.
from unsloth import FastVisionModel
import torch

model, tokenizer = FastVisionModel.from_pretrained(
    "unsloth/Llama-3.2-11B-Vision-Instruct",
    load_in_4bit = True,
    use_gradient_checkpointing = "unsloth",
)LoRA (Low-Rank Adaptation) is a technique for efficiently fine-tuning large pre-trained models by introducing learnable low-rank matrices into specific parts of the model. This approach is lightweight and computationally efficient and allows for task-specific fine-tuning without modifying the core structure of the pre-trained model.
To train a model using LoRA, we focus on selecting and fine-tuning specific components, such as vision layers, language layers, attention modules, and MLP modules. This allows us to adapt the model for specific tasks with minimal changes to the original architecture.
model = FastVisionModel.get_peft_model(
    model,
    finetune_vision_layers     = True,
    finetune_language_layers   = True,
    finetune_attention_modules = True,
    finetune_mlp_modules       = True,
    r = 16,
    lora_alpha = 16,
    lora_dropout = 0,
    bias = "none",
    random_state = 3443,
    use_rslora = False,
    loftq_config = None,
)Load the philschmid/amazon-product-descriptions-vlm dataset from the Hugging Face Hub and select only the first 500 samples. The dataset contains product images and product descriptions along with other necessary information.
from datasets import load_dataset
dataset = load_dataset("philschmid/amazon-product-descriptions-vlm",
                       split = "train[0:500]")


dataset
Dataset({
features: ['image', 'Uniq Id', 'Product Name', 'Category', 'Selling Price', 'Model Number', 'About Product', 'Product Specification', 'Technical Details', 'Shipping Weight', 'Variants', 'Product Url', 'Is Amazon Seller', 'description'],
num_rows: 500
})This is one of the images of the product.
dataset[45]["image"]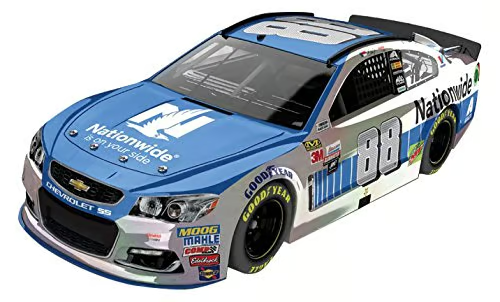
Here is its description.
dataset[45]["description"]'Authentic Dale Earnhardt Jr. 1:24 scale diecast car. Nationwide Raw Finish. Collectible model car for racing fans. Perfect gift for NASCAR enthusiasts.'Now, we will process the dataset that only contains the text and images. The prompt templates contain user questions, images, and product descriptions.
instruction = """
You are an expert Amazon worker who is good at writing product descriptions.
Write the product description accurately by looking at the image.
"""


def convert_to_conversation(sample):
    conversation = [
        {
            "role": "user",
            "content": [
                {"type": "text", "text": instruction},
                {"type": "image", "image": sample["image"]},
            ],
        },
        {
            "role": "assistant",
            "content": [{"type": "text", "text": sample["description"]}],
        },
    ]
    return {"messages": conversation}


pass


converted_dataset = [convert_to_conversation(sample) for sample in dataset]
The new dataset is not tabular; instead, it follows a prompt style similar to OpenAI's format.
converted_dataset[45]{'messages': [{'role': 'user',
'content': [{'type': 'text',
'text': '\nYou are an expert Amazon worker who is good at writing product descriptions. \nWrite the product description accurately by looking at the image.\n'},
{'type': 'image',
'image': <PIL.JpegImagePlugin.JpegImageFile image mode=RGB size=500x302>}]},
{'role': 'assistant',
'content': [{'type': 'text',
'text': 'Authentic Dale Earnhardt Jr. 1:24 scale diecast car. Nationwide Raw Finish. Collectible model car for racing fans. Perfect gift for NASCAR enthusiasts.'}]}]}We will select the 46th sample from the dataset and run inference on it to assess how well it writes the product description out of the box without fine-tuning.
FastVisionModel.for_inference(model)  # Enable for inference!

image = dataset[45]["image"]

messages = [
    {
        "role": "user",
        "content": [
            {"type": "image"},
            {"type": "text", "text": instruction},
        ],
    }
]
input_text = tokenizer.apply_chat_template(
    messages, add_generation_prompt=True
)
inputs = tokenizer(
    image,
    input_text,
    add_special_tokens=False,
    return_tensors="pt",
).to("cuda")

from transformers import TextStreamer

text_streamer = TextStreamer(tokenizer, skip_prompt=True)
_ = model.generate(
    **inputs,
    streamer=text_streamer,
    max_new_tokens=128,
    use_cache=True,
    temperature=1.5,
    min_p=0.1
)
The generated description is long and inaccurate. Even the writing style is different.
The image showcases a race car featuring the well-known sponsorship branding "Nationwide," likely the primary vehicle in the Nationwide Series. The vehicle has a blue hood with the "Nationwide" logo prominently displayed and white text that reads, "on your side," on the windscreen. The car is predominantly white and grey, adorned with sponsor decals on various parts of the vehicle.

The front grille showcases the Chevrolet "Bowtie" logo, and the car is equipped with Chevrolet emblems and other sponsor decals, including:

• A white 88 logo on the front windscreen

Notably, the vehicle's wheels are equipped with "GoodYearWe will now set the model for training and initialize a supervised fine-tuning (SFT) trainer to prepare a vision model for training on a custom data collator, dataset, and training configuration optimized for efficient fine-tuning.
from unsloth import is_bf16_supported
from unsloth.trainer import UnslothVisionDataCollator
from trl import SFTTrainer, SFTConfig

FastVisionModel.for_training(model)  # Enable for training!

trainer = SFTTrainer(
    model=model,
    tokenizer=tokenizer,
    data_collator=UnslothVisionDataCollator(model, tokenizer),  # Must use!
    train_dataset=converted_dataset,
    args=SFTConfig(
        per_device_train_batch_size=2,
        gradient_accumulation_steps=4,
        warmup_steps=5,
        max_steps=30,
        learning_rate=2e-4,
        fp16=not is_bf16_supported(),
        bf16=is_bf16_supported(),
        logging_steps=5,
        optim="adamw_8bit",
        weight_decay=0.01,
        lr_scheduler_type="linear",
        seed=3407,
        output_dir="outputs",
        report_to="none",  # For Weights and Biases
        remove_unused_columns=False,
        dataset_text_field="",
        dataset_kwargs={"skip_prepare_dataset": True},
        dataset_num_proc=4,
        max_seq_length=2048,
    ),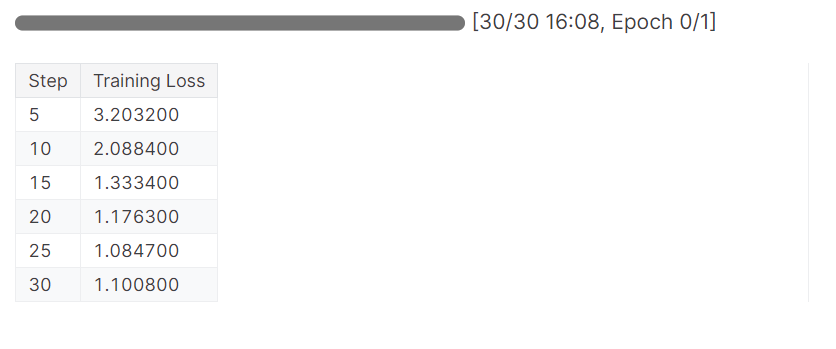
)Start the training process by running the trainer.train() code.
trainer_stats = trainer.train()The model has completed one epoch in 16 minutes, and the training loss has gradually reduced. This is a good result.
We will now test our model to check if the fine-tuning was successful. We are going to select the same sample image from the dataset and run the inference on it.
FastVisionModel.for_inference(model)  # Enable for inference!

image = dataset[45]["image"]

messages = [
    {
        "role": "user",
        "content": [
            {"type": "image"},
            {"type": "text", "text": instruction},
        ],
    }
]
input_text = tokenizer.apply_chat_template(
    messages, add_generation_prompt=True
)
inputs = tokenizer(
    image,
    input_text,
    add_special_tokens=False,
    return_tensors="pt",
).to("cuda")

from transformers import TextStreamer

text_streamer = TextStreamer(tokenizer, skip_prompt=True)
_ = model.generate(
    **inputs,
    streamer=text_streamer,
    max_new_tokens=128,
    use_cache=True,
    temperature=1.5,
    min_p=0.1
)
The results are great but not totally accurate. The hashtags were unnecessary. To get optimal results, we will need to train the model on the full dataset with at least 3 Eposh.
Bring the thrill of NASCAR racing to your desk or shelf with the 1/64 Die-Cast 2016 NASCAR 88 Dale Earnhardt Jr. Nationwide Chevrolet SS! Highly detailed and precision engineered, this collectible die-cast car captures the iconic look of Earnhardt's famous No. 88 ride. Perfect for kids and adults alike, this miniature masterpiece makes a great gift. #NASCAR #DieCast #CollectibleCars #DaleEarnhardtJr #Nationwide<|eot_id|>Let's save the model locally and then push it to the Hugging Face Hub. To upload the model to the Hugging Face server, we need to log in using our Hugging Face token.
Explore the transformative world of Hugging Face, the AI community's open-source hub for machine learning and large language models (LLMs), by reading the blog What is Hugging Face? The AI Community's Open-Source Oasis.
from huggingface_hub import login
from kaggle_secrets import UserSecretsClient
user_secrets = UserSecretsClient()

hf_token = user_secrets.get_secret("HUGGINGFACE_TOKEN")
login(hf_token)
After that, save the model and tokenizer locally.
model.save_pretrained("llama_3.2_vision_amazon_product") # Local saving
tokenizer.save_pretrained("llama_3.2_vision_amazon_product")
Then use push_to_hub to save the model on the Hugging Face hub.
model.push_to_hub(
    "kingabzpro/llama_3.2_vision_amazon_product"
)  # Online saving
tokenizer.push_to_hub(
    "kingabzpro/llama_3.2_vision_amazon_product"
)  # Online saving
Saved model to https://huggingface.co/kingabzpro/llama_3.2_vision_amazon_productThe above command will create the new model repository and push all the files to Hugging Face.
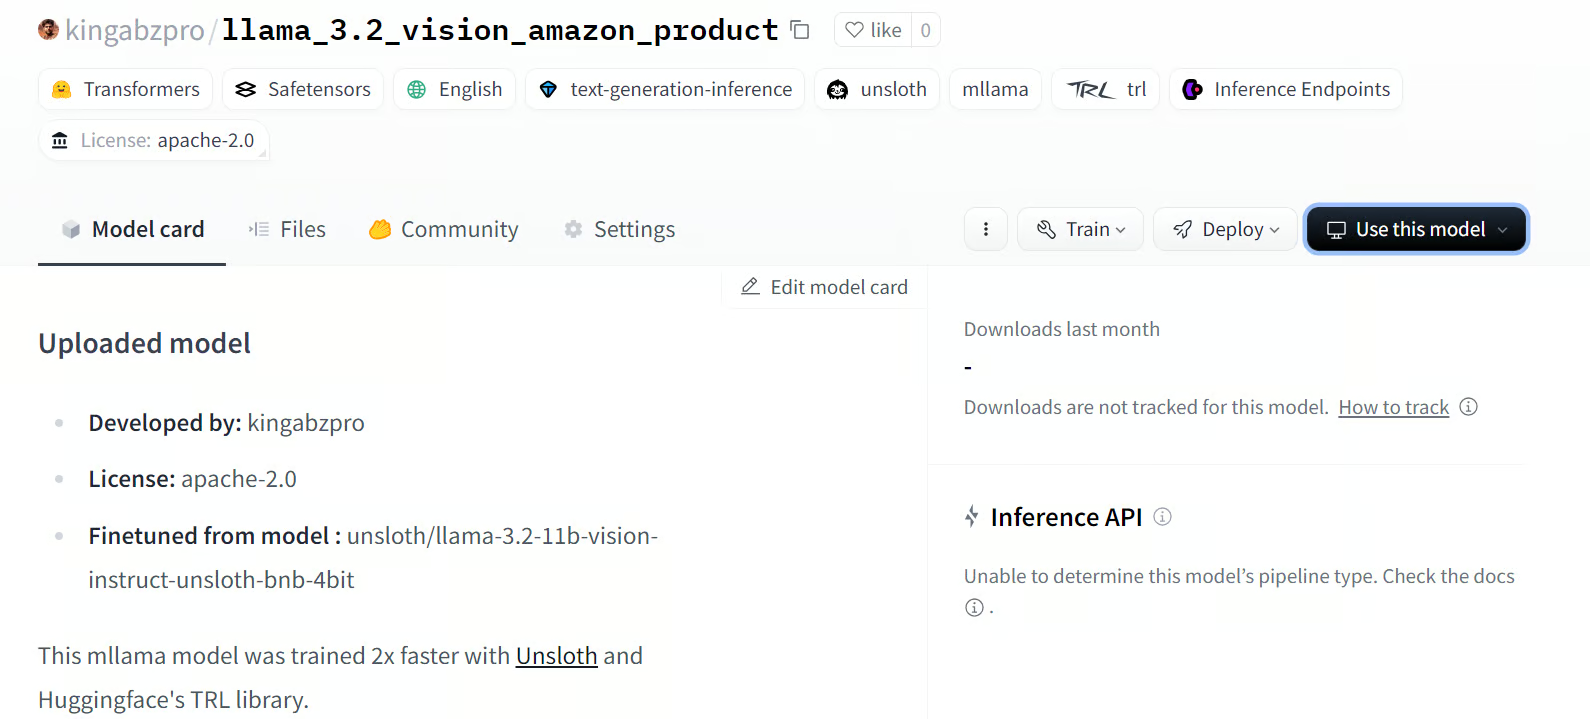
Source: kingabzpro/llama_3.2_vision_amazon_product
If you are facing issues in running the above code, please refer to the Kaggle notebook: Fine-tuning Llama 3.2 Vision on Amazon Dataset
Fine-tuning Llama 3.2 Vision models opens up a new world of possibilities, particularly in scenarios where both images and text are required to deliver relevant and accurate results. By fine-tuning it on a custom dataset, we can enhance performance and adapt the style for applications such as Visual Question Answering (VQA), Document VQA (DocVQA), Image Captioning, and Image-Text Retrieval.
In this tutorial, we dive deep into learning about Llama 3.2 Vision models. We also fine-tune the 11B variant of the model on the Amazon product descriptions dataset to build a highly customized product description generator that adopts the desired style and provides accurate descriptions of products.
The next step in your journey is to learn how to build the AI application and deploy it to the cloud using a Docker image by following the guide: How to Deploy LLM Applications Using Docker: A Step-by-Step Guide.
Top AI Courses
Track
Course
Course
Tutorial
Abid Ali Awan
Tutorial
Abid Ali Awan
Tutorial
Abid Ali Awan
Tutorial
Abid Ali Awan
code-along
Maxime Labonne
code-along
Maxime Labonne