Track
Associate AI Engineer for Developers
26 hr
Xiaomi’s MiMo-V2.5-Pro is one of the most surprising AI model releases so far. Xiaomi was not usually seen as a top player in the model race, but MiMo has quickly moved into the spotlight with strong benchmark results and a big jump in coding and agentic performance.
But this guide is not about trusting benchmarks blindly. What matters more is real-world use: speed, reliability, instruction following, and whether the model can actually finish coding tasks without breaking halfway.
In this guide, we will set up MiMo-V2.5-Pro for vibe coding. We will cover Xiaomi’s MiMo platform, the token plan, OpenCode installation, the web MCP server, connecting MiMo-V2.5 Pro model in OpenCode, and then testing how well it performs on real coding tasks.
Xiaomi MiMo is a family of AI reasoning models developed by Xiaomi, the Chinese tech company best known for smartphones and consumer electronics. The MiMo lineup marks Xiaomi's push into frontier AI, with models built for coding, math, and agentic workflows.
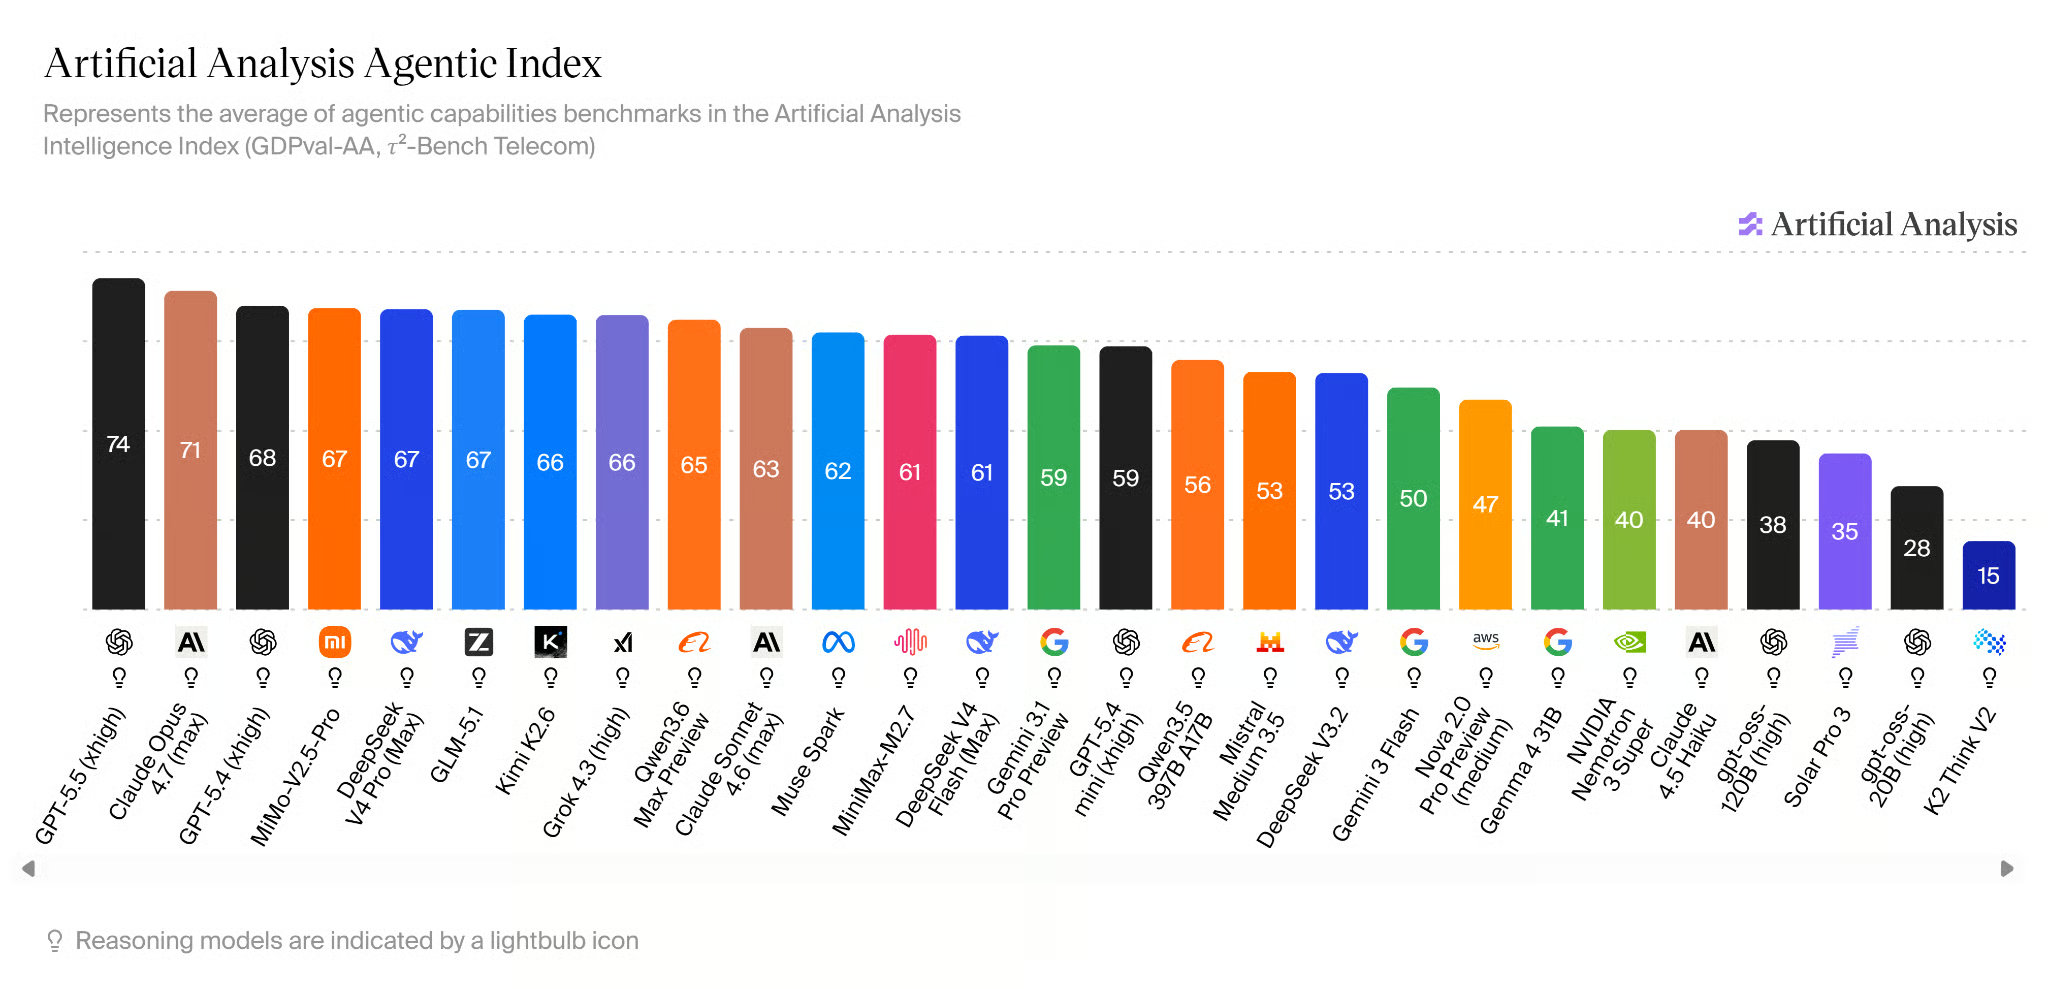
Source: AI Model & API Providers Analysis | Artificial Analysis
The family includes several variants at different sizes and capability levels, but MiMo-V2.5-Pro is the flagship, competing directly with established coding models from larger AI labs. It ranks fourth on the Artificial Analysis Agentic Index, just behind GPT-5.5, Claude Opus 4.7, and GPT-5.4, and surpassing frontier competitor models like DeepSeek V4 Pro or Kimi K2.6.
There are three simple ways to try the model:
The easiest way to test MiMo-V2.5-Pro is through Xiaomi MiMo Studio, where you can try the model directly before setting up an API or coding environment.
I used it to generate a high-quality portfolio website in a single HTML file, including animations, interactive sections, and polished visuals. It is a good starting point if you want to quickly test the model’s design, coding, and instruction-following abilities without any setup.
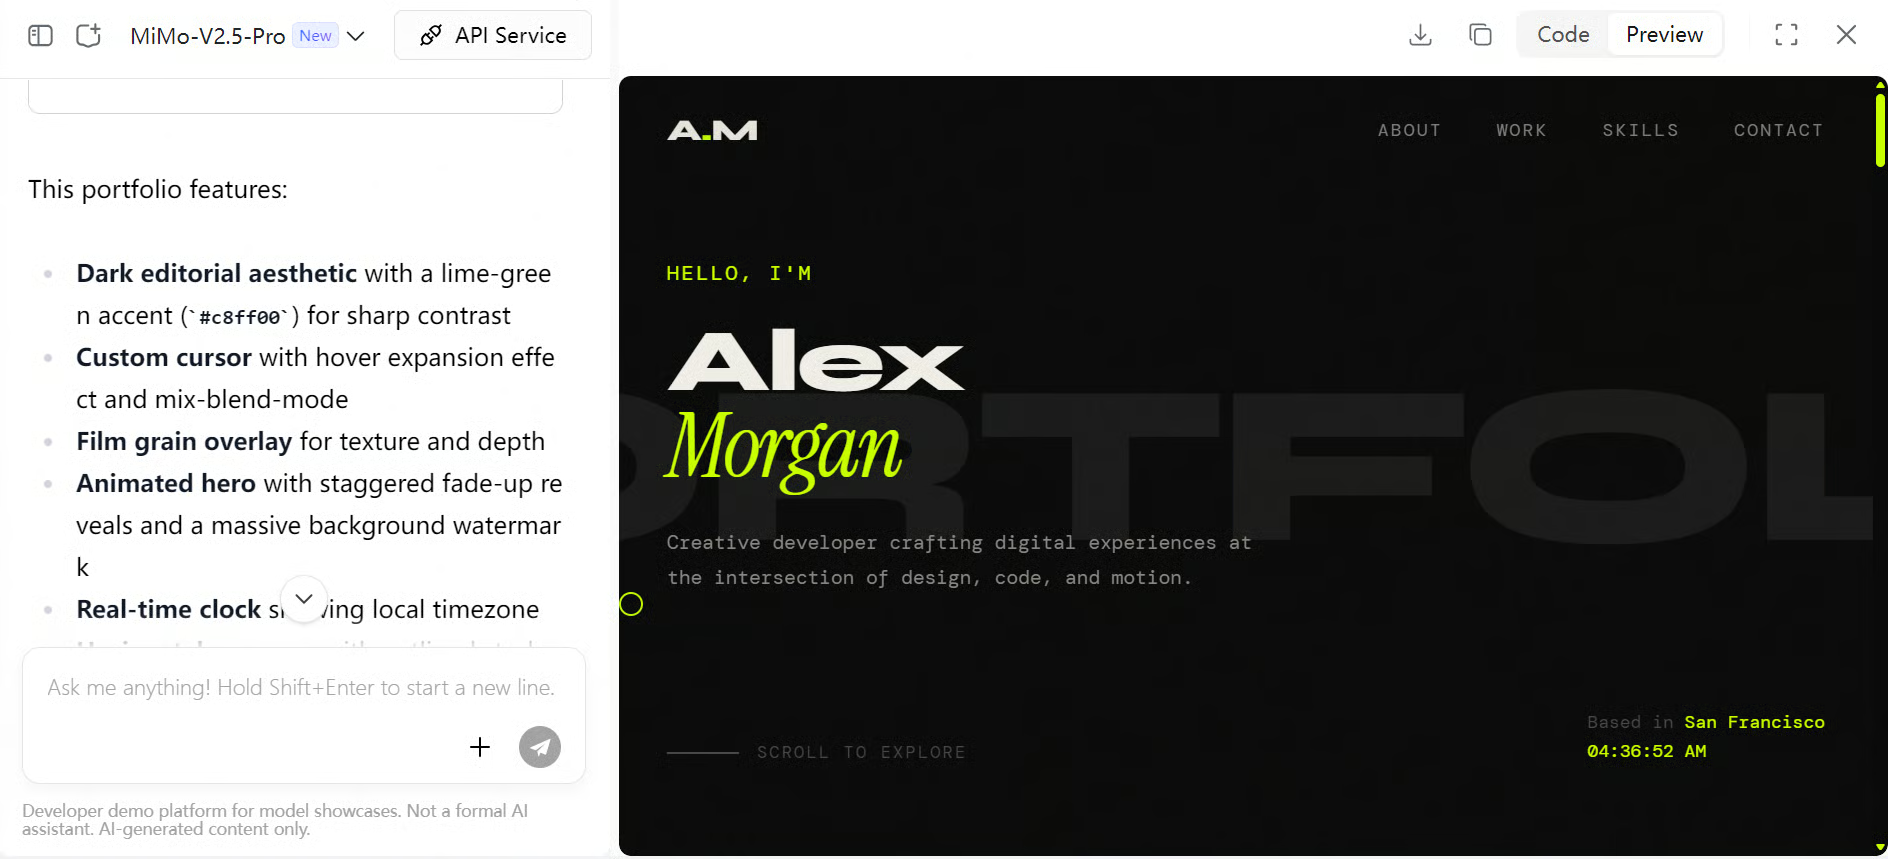
Source: Xiaomi MiMo Studio
You can also test the model through the Xiaomi MiMo API Open Platform. When I created an account, I received around $0.72 in free credit, but it was used up after only two prompts, which felt disappointing.
That pushed me to look into Xiaomi’s Token Plan, which offers discounted API access with monthly token usage.
For coding tasks, the Token Plan looked much cheaper than adding standard API credit directly.
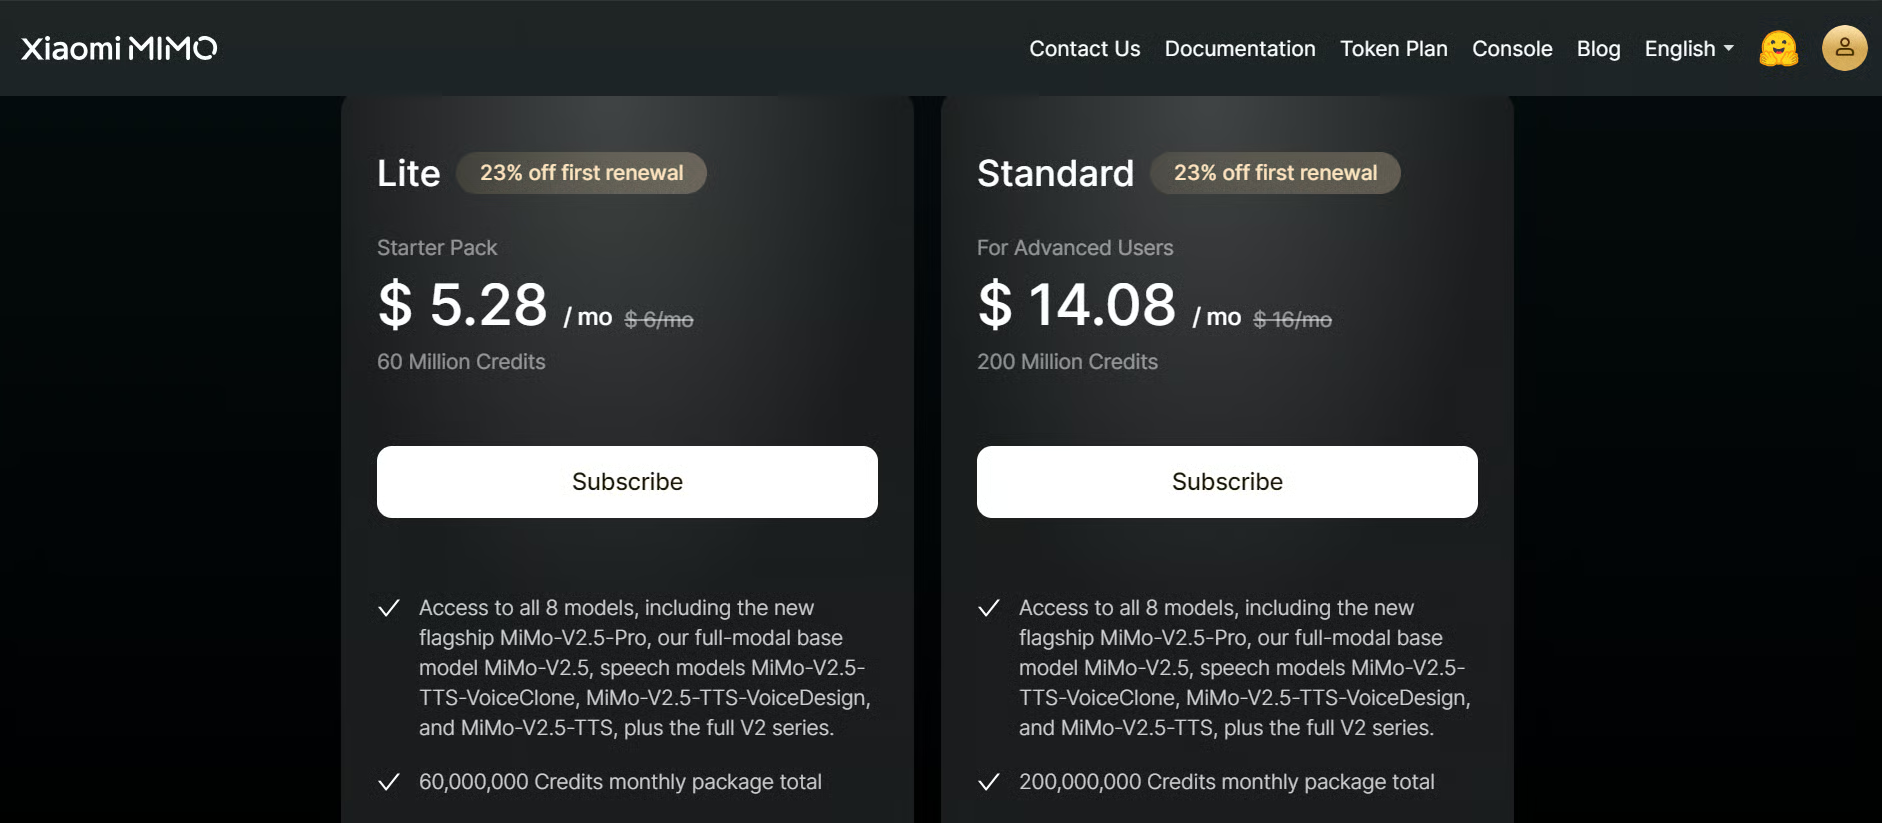
Source: Xiaomi MiMo API Open Platform
Due to a promotion, I was able to get the Lite Token Plan for around $4.62, which made it roughly 10x cheaper than using normal pay-as-you-go API credit in my case.

The coding Token Plan supports several popular coding and agent tools, including OpenCode, Claude Code, OpenClaw, Hermes Agent, Cherry Studio, Qwen Code, CodeBuddy, and Cline.
For this guide, we will use OpenCode to connect and test MiMo-V2.5-Pro in a real coding workflow.
Note: Monitor your token usage carefully. Coding agents can consume tokens quickly because they repeatedly read files, call tools, and send long context back to the model.
Before setting up Olostep MCP, you first need to install OpenCode.
The easiest way to install OpenCode is through the official install script.
In your terminal, run:
curl -fsSL https://opencode.ai/install | bashThis installs the OpenCode CLI on your machine. OpenCode also supports installation through npm, bun, brew, and other package managers, but the curl command is the simplest option.
After installation, check that OpenCode is available:
opencode --versionYou can also start OpenCode by running:
opencodeNext, create a free Olostep account, then go to the Olostep dashboard and create or copy your API key.
We will use Olostep because it gives our coding agent access to web search, web scraping, and documentation-to-code tools. This is useful when testing MiMo-V2.5-Pro, because the model can quickly check the latest framework documentation instead of relying only on its training data. This helps reduce mistakes, outdated code, and incorrect API usage.
Olostep requires an API key before you can use either the hosted MCP server or the local npx server. Keep the API key somewhere safe, as you will need it when updating the OpenCode config file.
In your terminal, run:
opencode mcp addOpenCode will start the MCP setup flow.
Use the following values:
MCP server name: Olostep
MCP server type: Remote
MCP server URL: https://mcp.olostep.com/mcp
OAuth authentication: No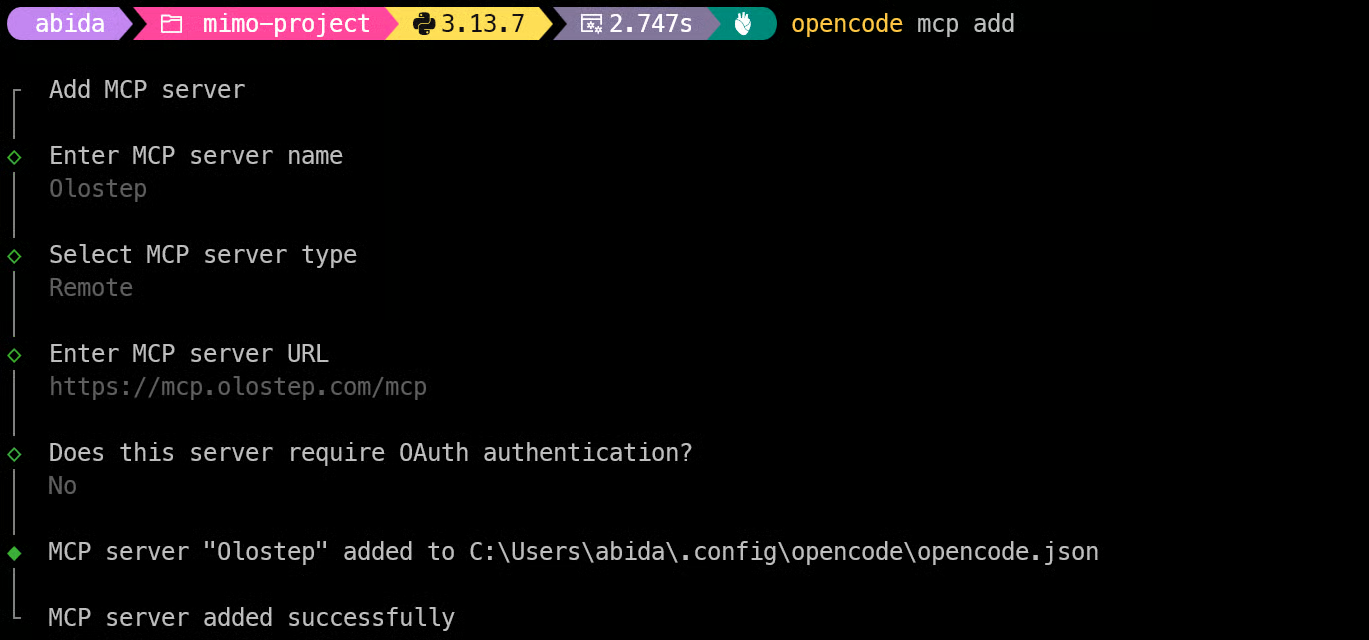
This adds Olostep as a remote MCP server in OpenCode.
After OpenCode adds the MCP server, it will show you the location of your config file.
For example, on Windows, mine is C:\Users\abida\.config\opencode\opencode.json.
Open this file and update the Olostep MCP configuration so it includes your authorization header.
Use this:
{
 "$schema": "https://opencode.ai/config.json",
 "mcp": {
   "Olostep": {
     "type": "remote",
     "url": "https://mcp.olostep.com/mcp",
     "headers": {
       "Authorization": "Bearer YOUR_API_KEY"
     },
     "enabled": true
   }
 }
}
Replace: YOUR_API_KEY with your actual Olostep API key.
For example:
"Authorization": "Bearer olo_xxxxxxxxxxxxxxxxx"Once the config file is saved, run:
opencode mcp list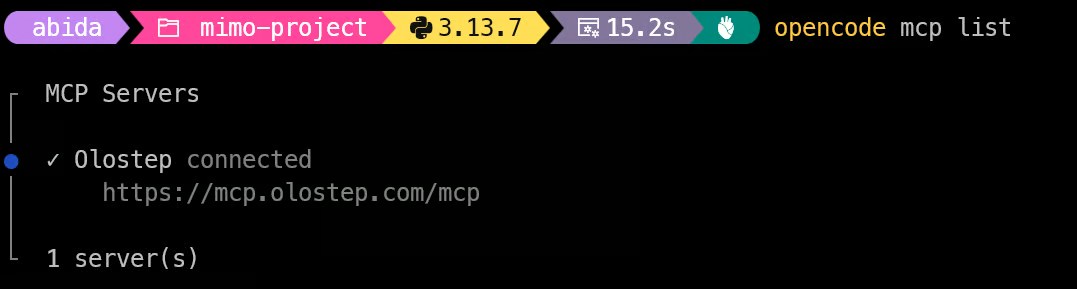
You should see Olostep listed as one of your MCP servers.
This confirms that OpenCode can now connect to Olostep through MCP.
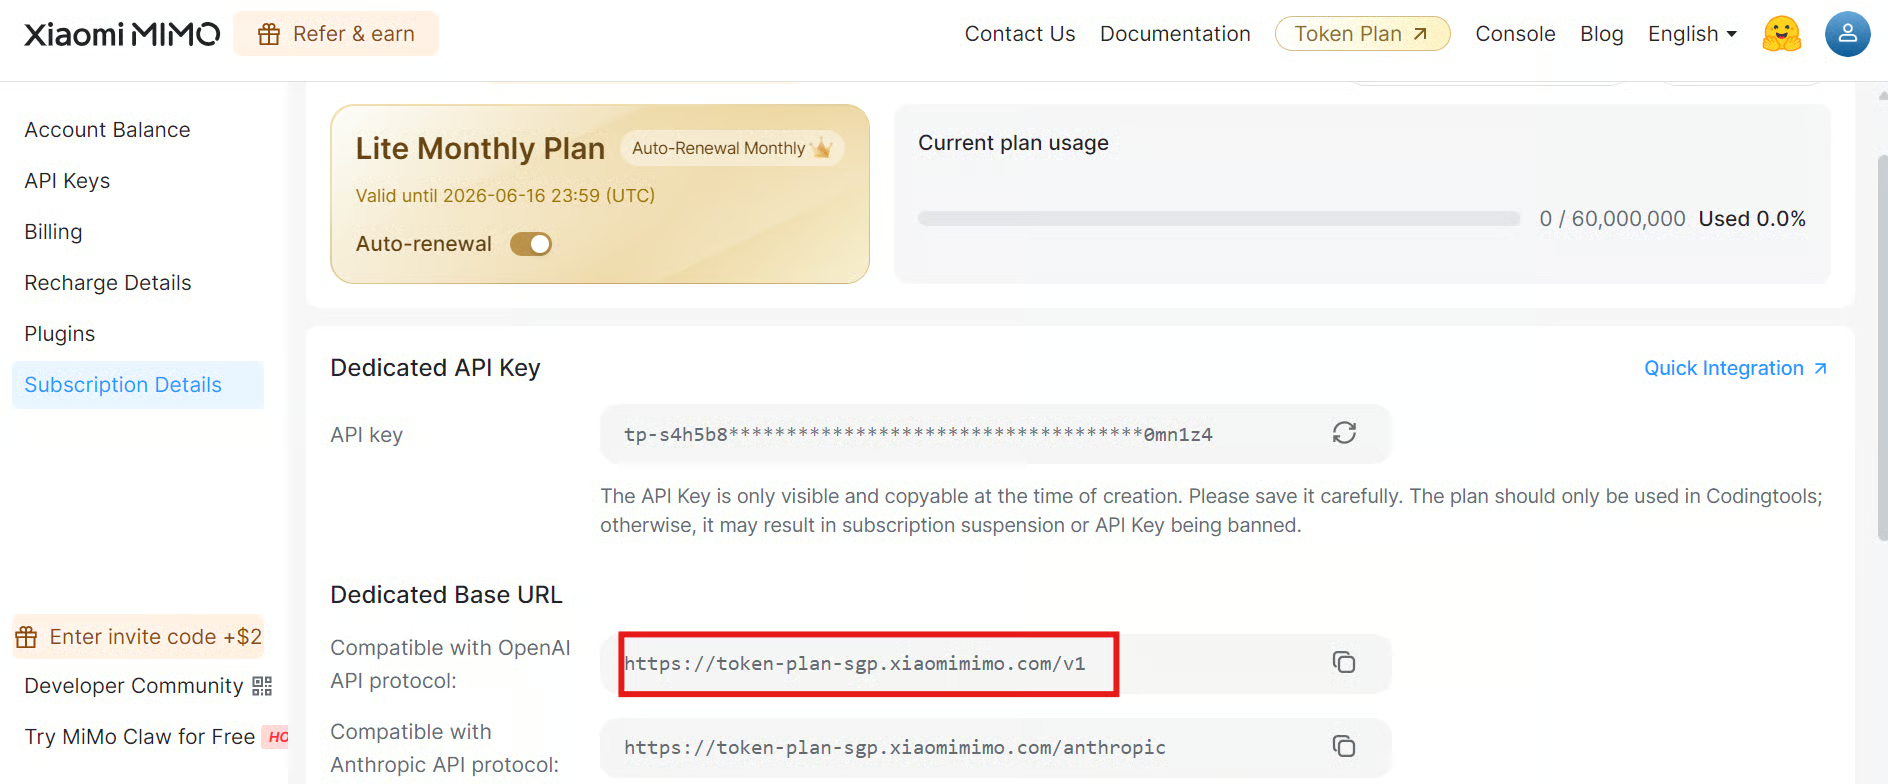
Go to the Xiaomi MiMo API Open Platform dashboard, “Subscription Details”, and create a new Token Plan API key. This key is different from the regular API key because it is linked to your Token Plan subscription and lets you use the model through your plan allowance.
In the same section, check your Dedicated Base URL. Xiaomi shows different base URLs depending on the region/server your Token Plan is assigned to.
For example, mine uses sgp, which refers to Singapore. Yours may show a different region, such as China or another supported server. The base URL is important because you need to select the matching Xiaomi Token Plan provider inside OpenCode.
Source: Xiaomi MiMo API Open Platform
Open your terminal, create a new project folder, and launch OpenCode:
mkdir mimo-project
cd mimo-project
opencode
Inside OpenCode, run:
/connectYou will see a list of available providers. Search for “Xiaomi”, then select the Token Plan option that matches your server region. In my case, I selected the Singapore Token Plan option because my base URL contains sgp.
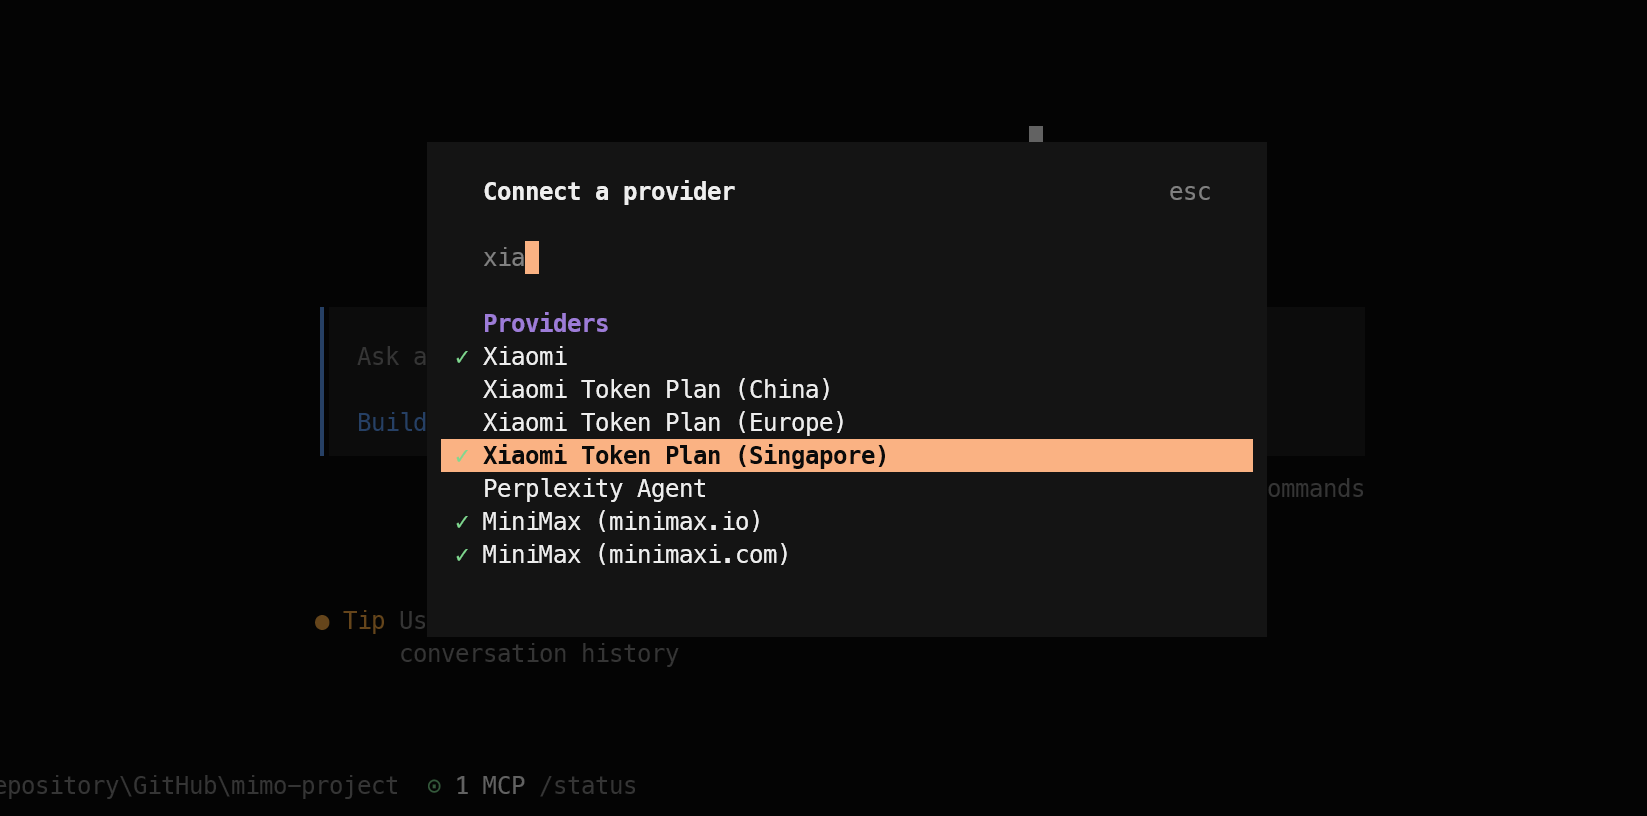
Paste your Token Plan API key when prompted.
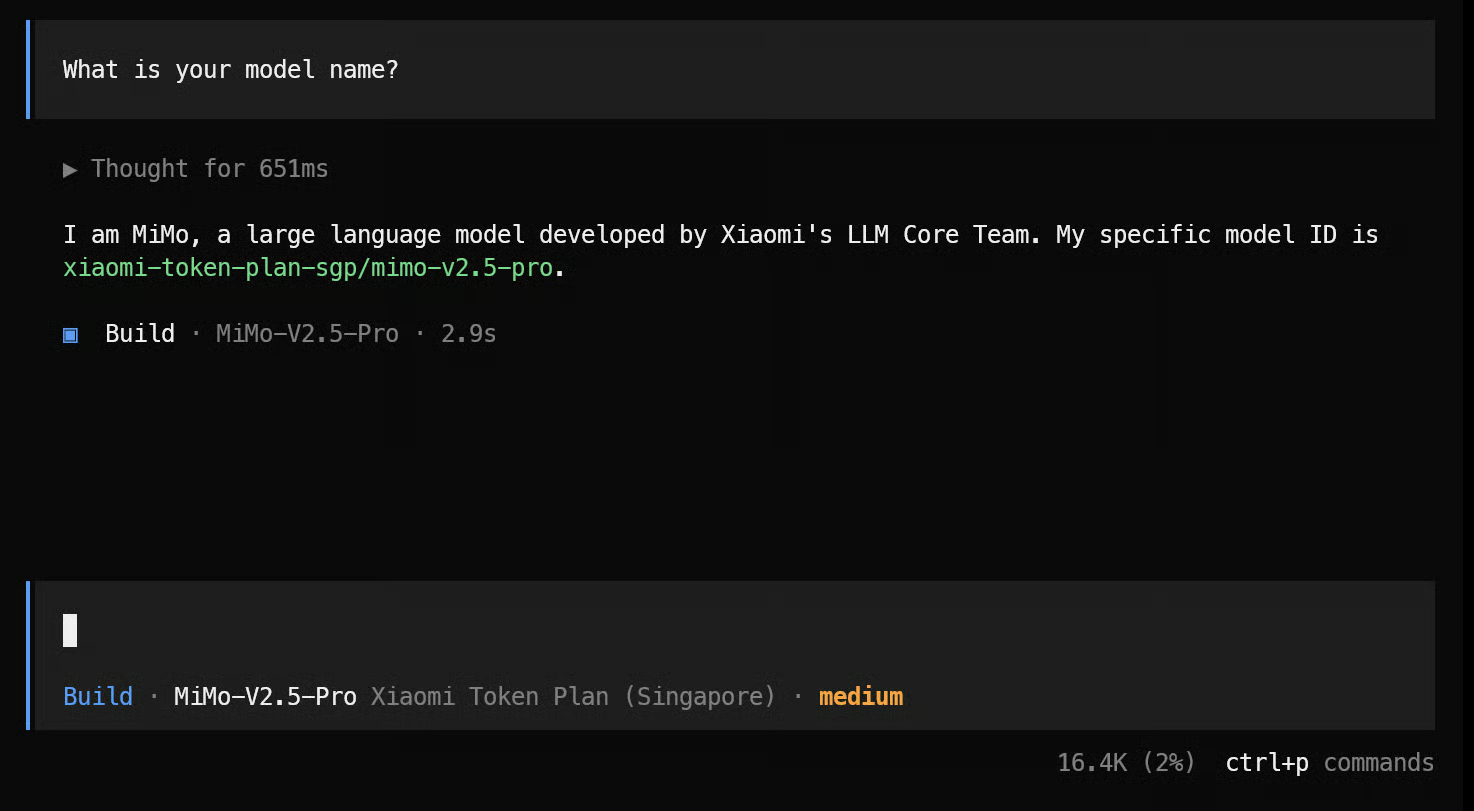
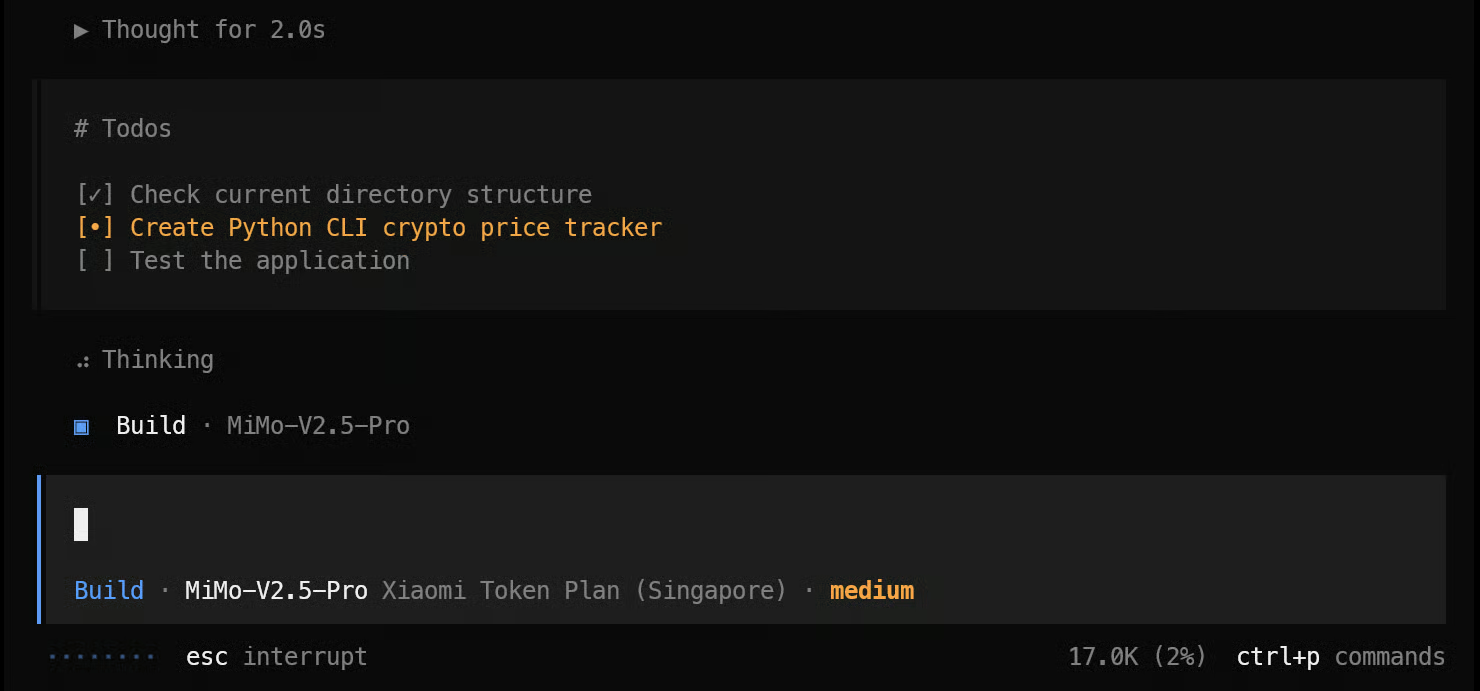
Once the connection is complete, OpenCode will ask you to select a model. Choose “MiMo-V2.5-Pro”. Then set the thinking level to “Medium”.
After this, send a quick test prompt. If the model responds successfully, your Xiaomi MiMo-V2.5-Pro setup in OpenCode is ready.
We will start with a simple project that is useful, easy to build, and quick to test. I asked the agent to create the following app:
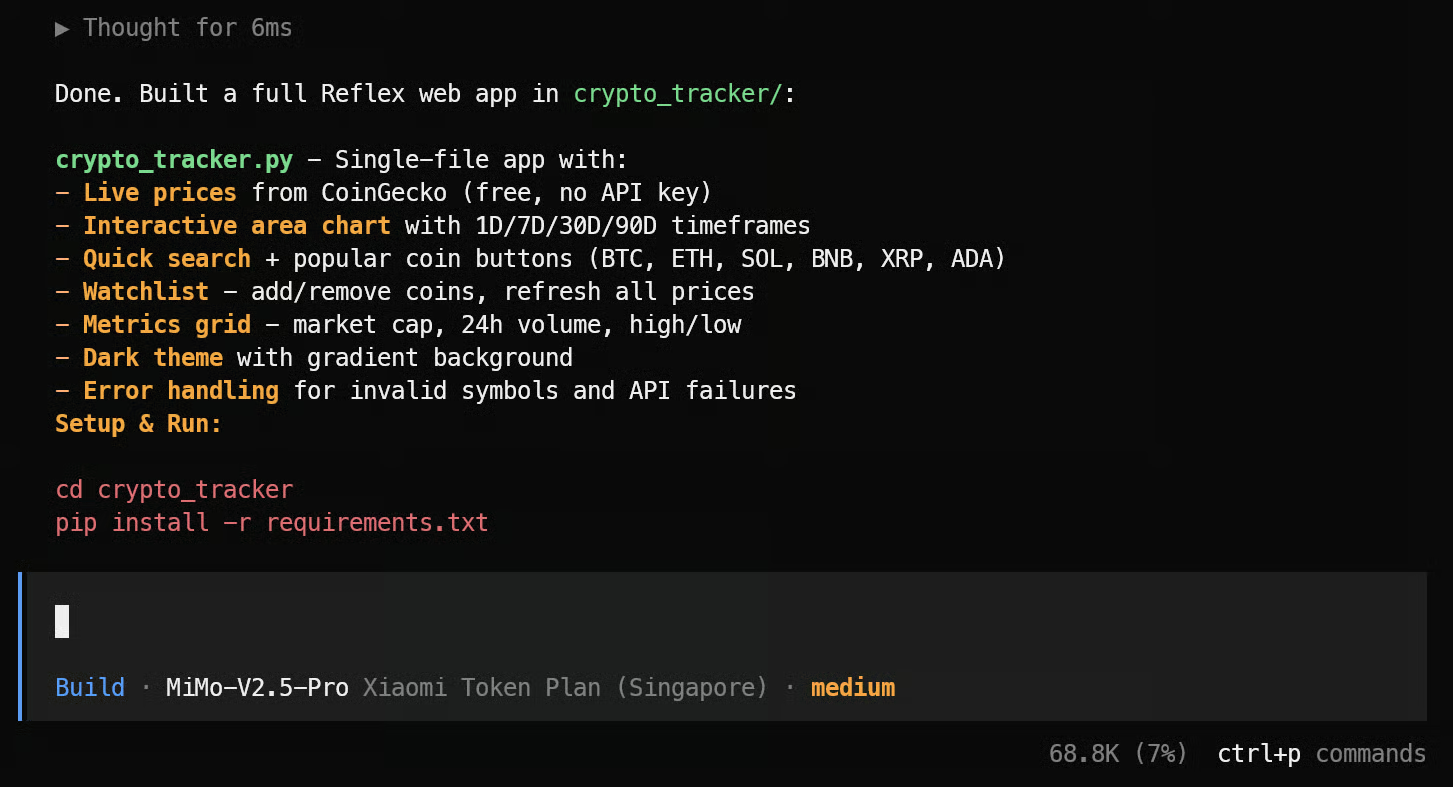
Build a simple Python CLI app that tracks live cryptocurrency prices. It should let users enter a coin symbol like BTC or ETH, fetch the current price from a public crypto API, display the price clearly in the terminal, and include basic error handling for invalid symbols or API issues.Within a few seconds, MiMo-V2.5-Pro started creating the Python CLI app and added the core functionality for checking live crypto prices.
In less than a minute, we had a working command-line app.

To test it, open another terminal window and run:
python crypto_tracker.pyYou can also ask the agent to test the app for you.
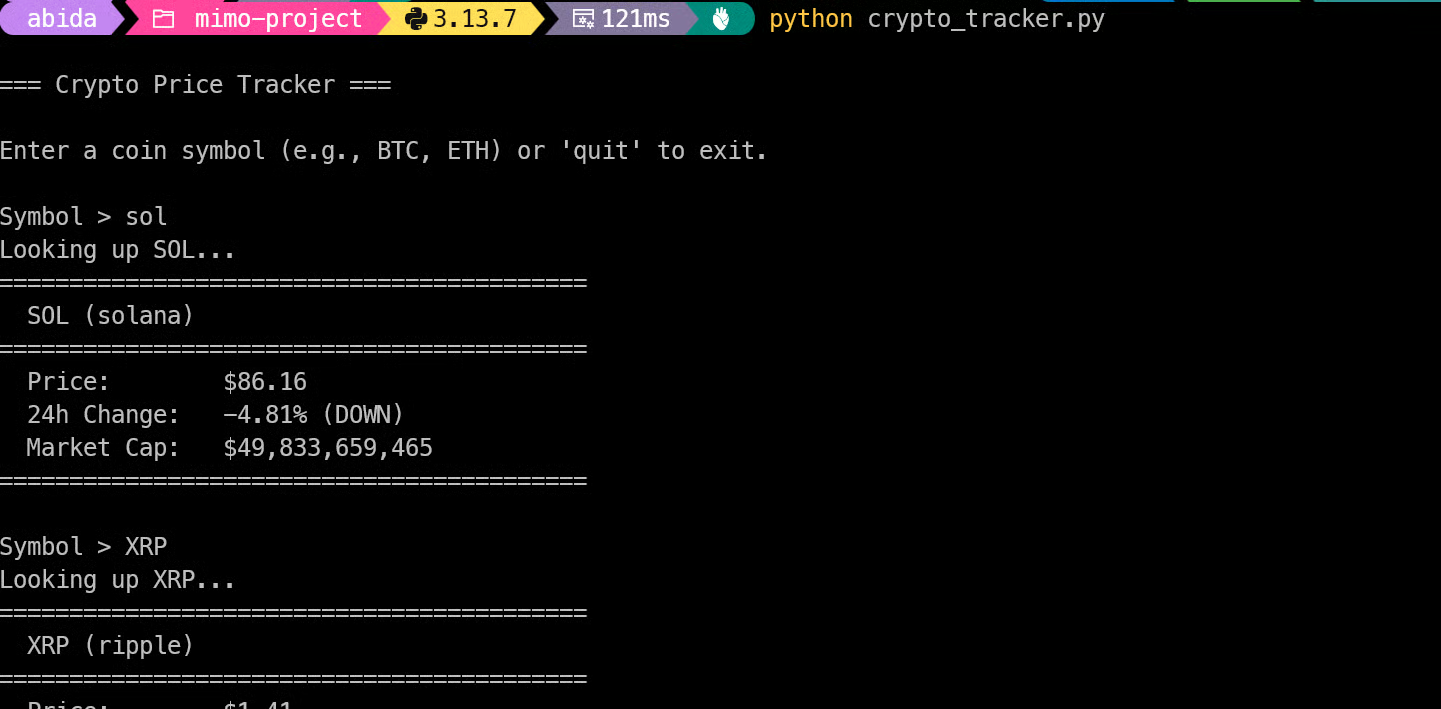
The CLI worked well in my test. It was fast, simple, and did not require authentication or account creation. The app runs out of the box and gives users a quick way to check live crypto prices directly from the terminal.
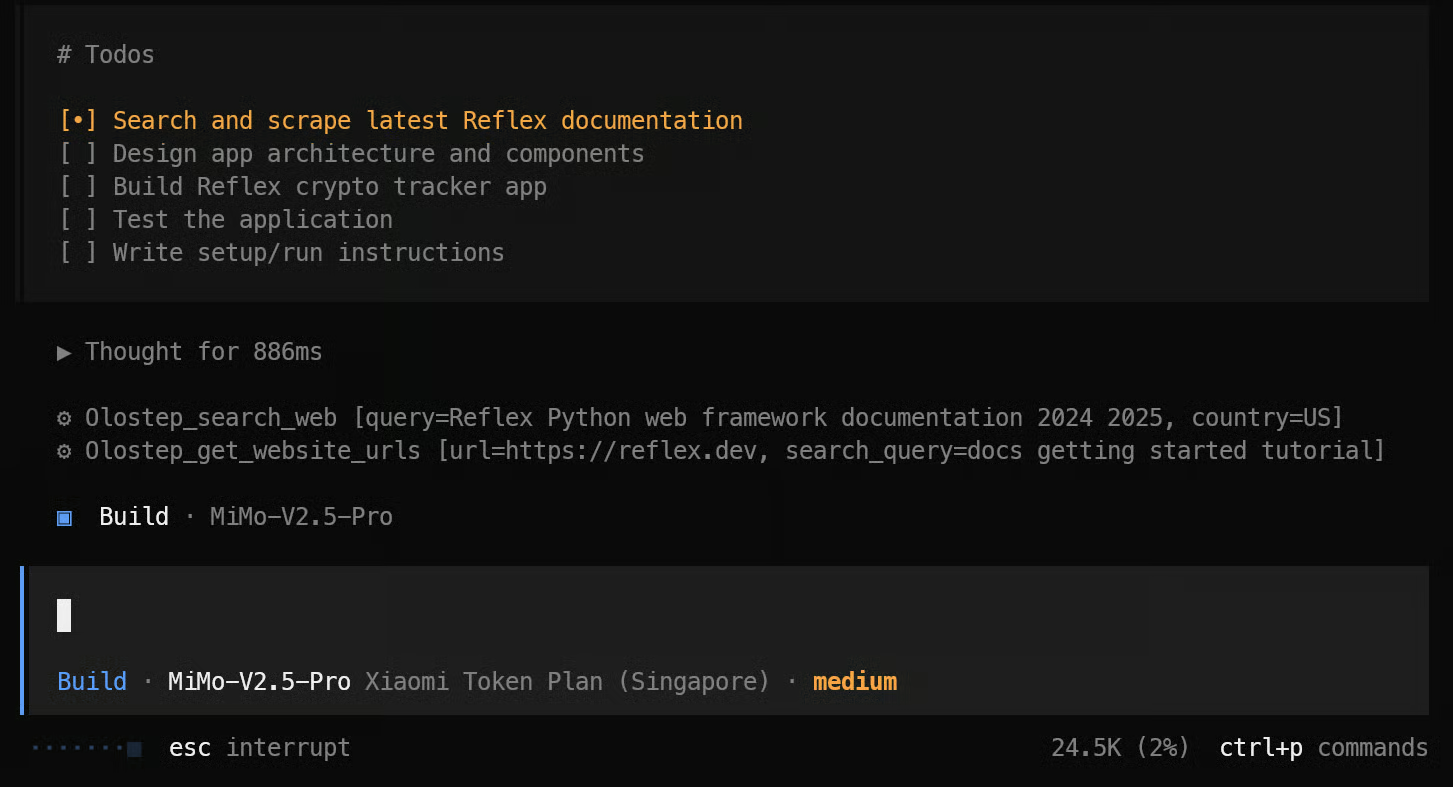
Next, we moved from a simple CLI project to a complete Python web application with a frontend. To make the test more realistic, I asked MiMo-V2.5-Pro to expand the previous crypto tracker into a Reflex web app.
Reflex is still a relatively new Python web framework, and many models struggle to build proper apps with it. So, instead of asking the model to code immediately, I asked it to search the latest Reflex documentation first using Olostep.
Here was the prompt:
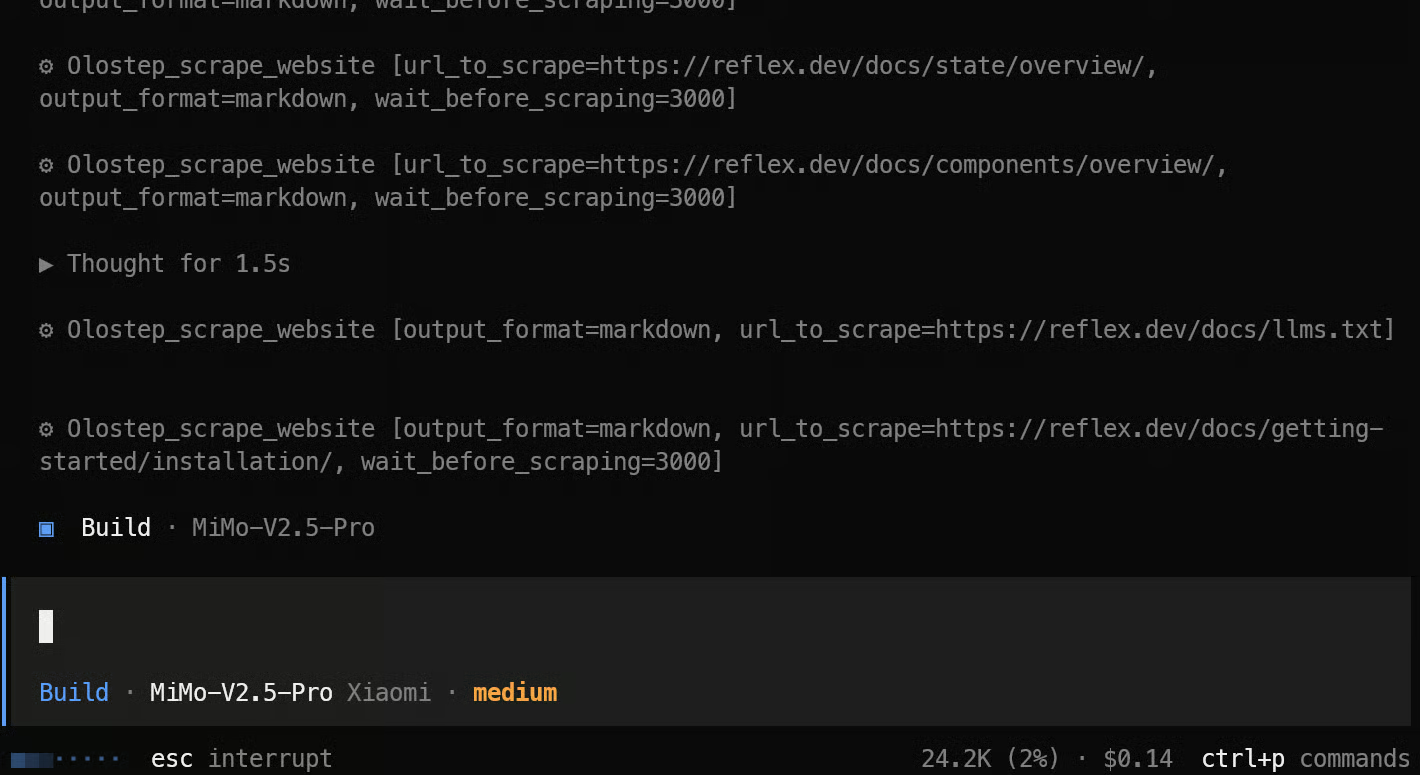
Build a beginner-friendly Python crypto price tracker using Reflex. Search the latest Reflex docs before coding, keep everything in Python, include live prices, useful charts/graphs, clean UI, error handling, and simple setup/run instructions while deciding the best implementation details yourself.As soon as I entered the prompt, MiMo-V2.5-Pro created a to-do list and started searching the latest Reflex documentation through Olostep.
It scraped the important documentation pages, gathered enough context, and then began building the Reflex app from scratch.
Once the app was complete, the agent provided a summary of what it built, the files it created, and the steps required to run the project.
Since I wanted to keep the process simple, I asked the agent to run the app for me and fix any issues that appeared.
After it confirmed that the app was working, I tested it myself by running:
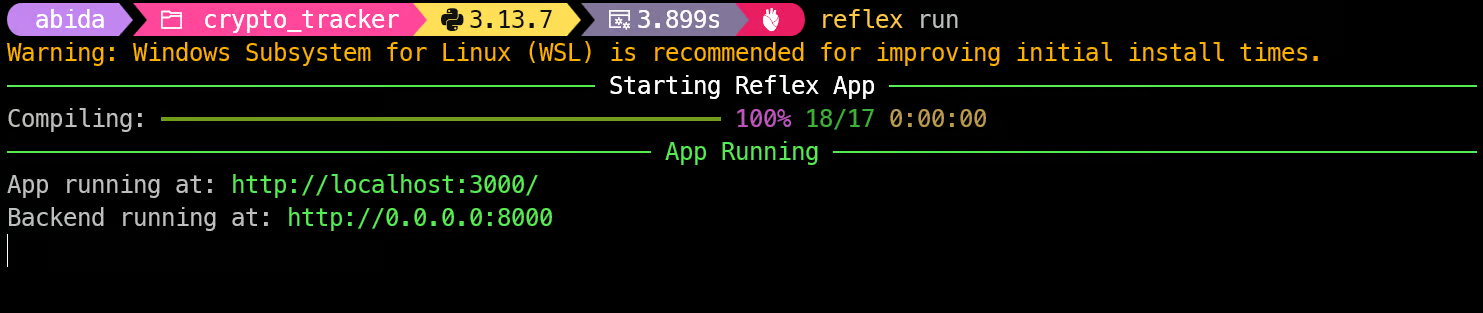
cd crypto_tracker
reflex run
The app then started locally at http://localhost:3000.
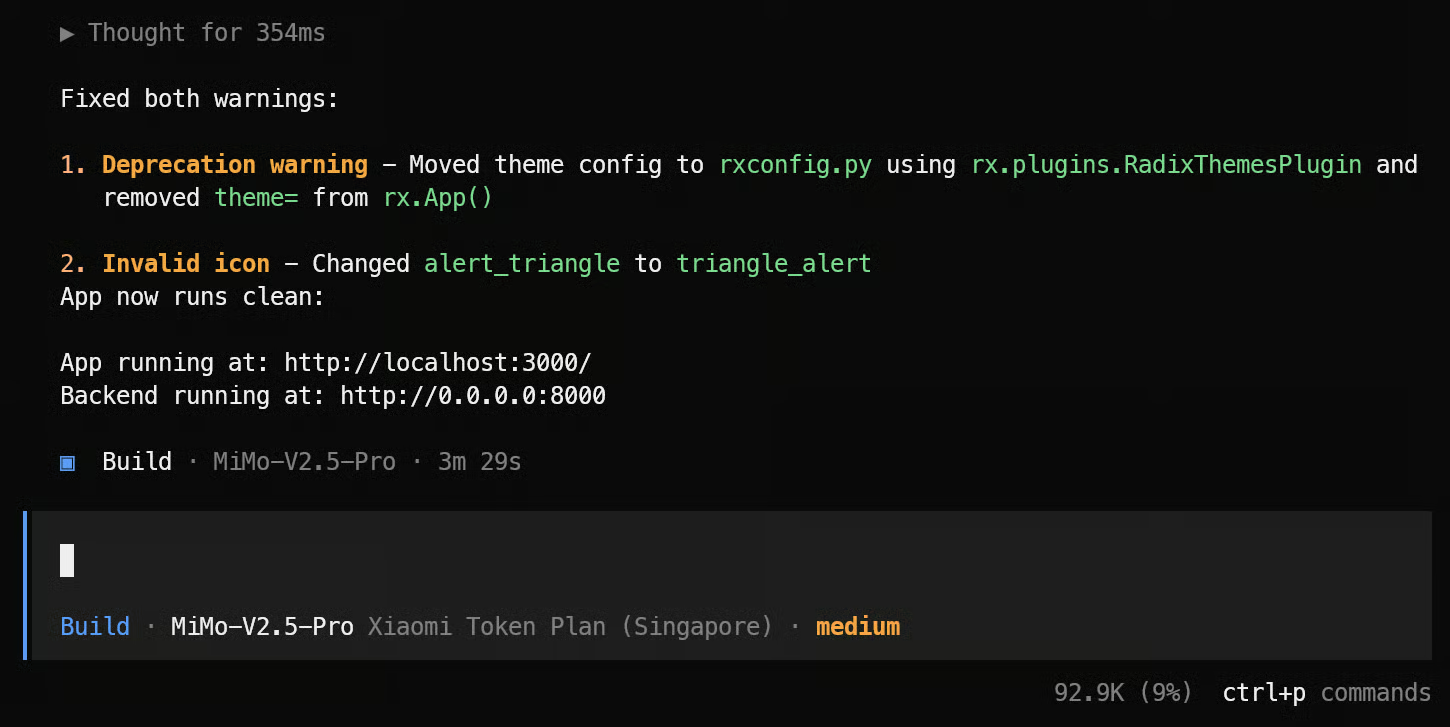
When I opened the app in the browser, the first version worked, but the UI had several issues. Some numbers were overflowing outside the cards, the input text was too dark and partially clipped, and a few stats were not clearly visible.
So I asked MiMo-V2.5-Pro to improve the UI:
Improve the CryptoTracker UI. Fix the search input so the placeholder is fully visible and readable by adjusting height, padding, line-height, font size, and placeholder color. Format prices and stats with currency symbols, commas, compact values, and 2-decimal percentages. Replace 0 values for 24H High/Low with real API data or "Not available." Improve chart spacing, tooltip, loading/error states, text contrast, responsive stat cards, and connect the Watch button to a simple watchlist. Keep the same dark theme and Reflex/Python structure.
Within a few minutes, it fixed the main UI issues and made the app feel much more polished.
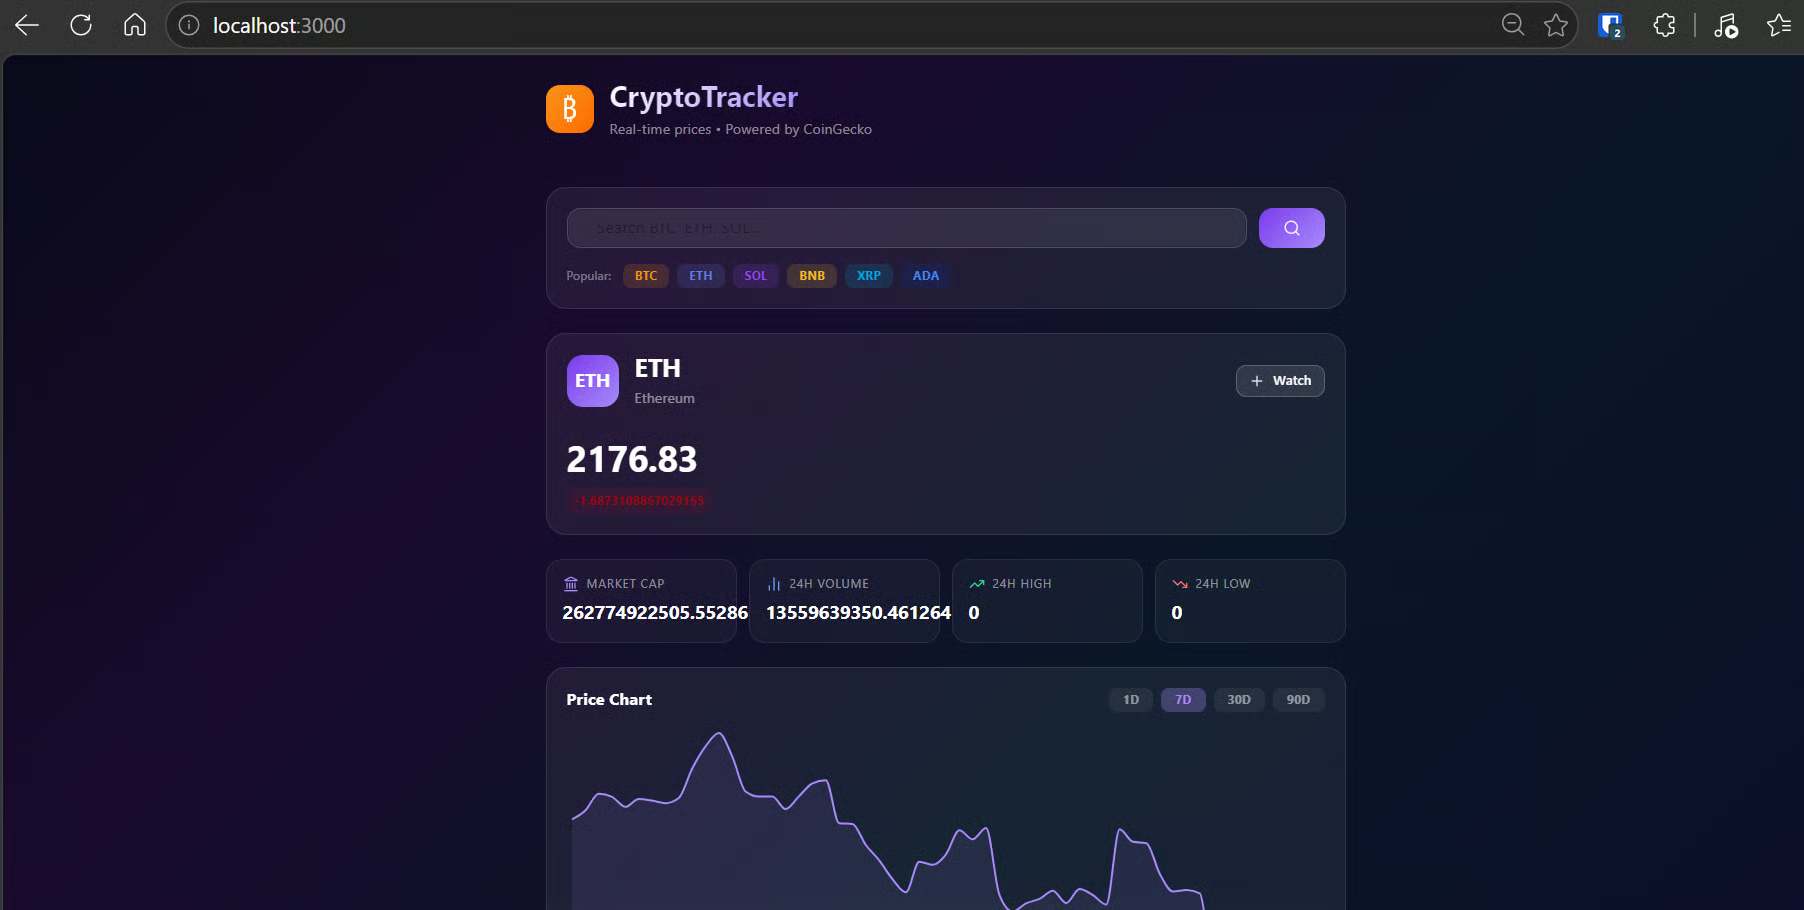
The final web app was interactive, fast, and modern. You can type a crypto symbol manually or click one of the popular token tags. The app displays live price data, market cap, 24-hour volume, 24-hour high, and 24-hour low.
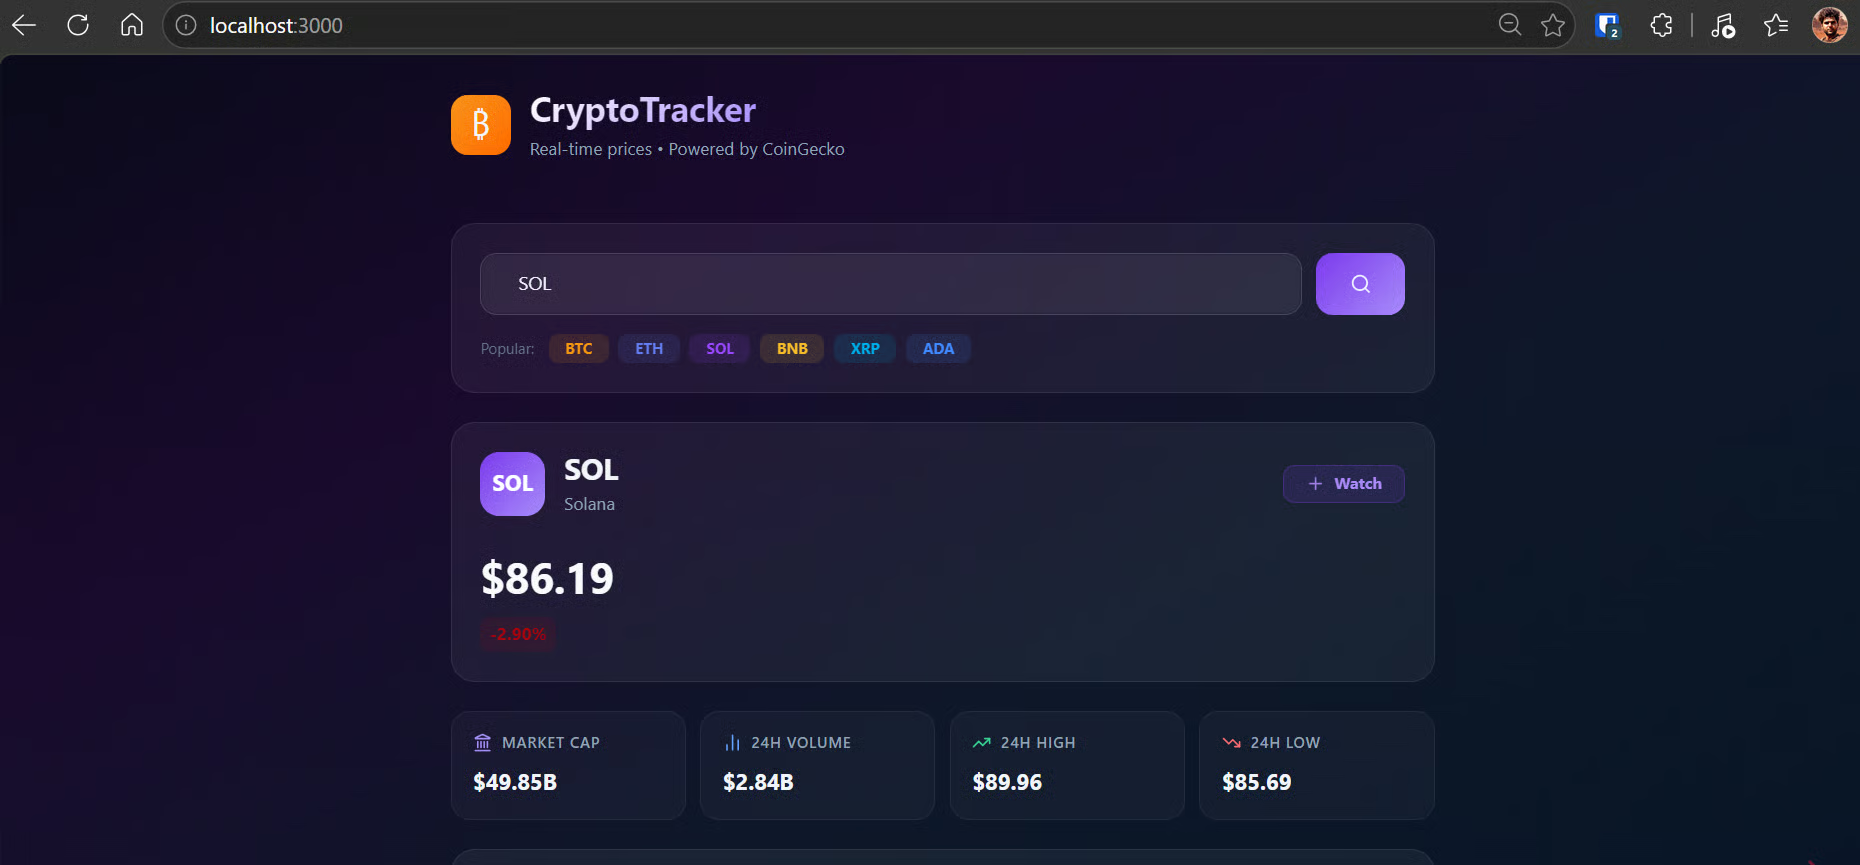
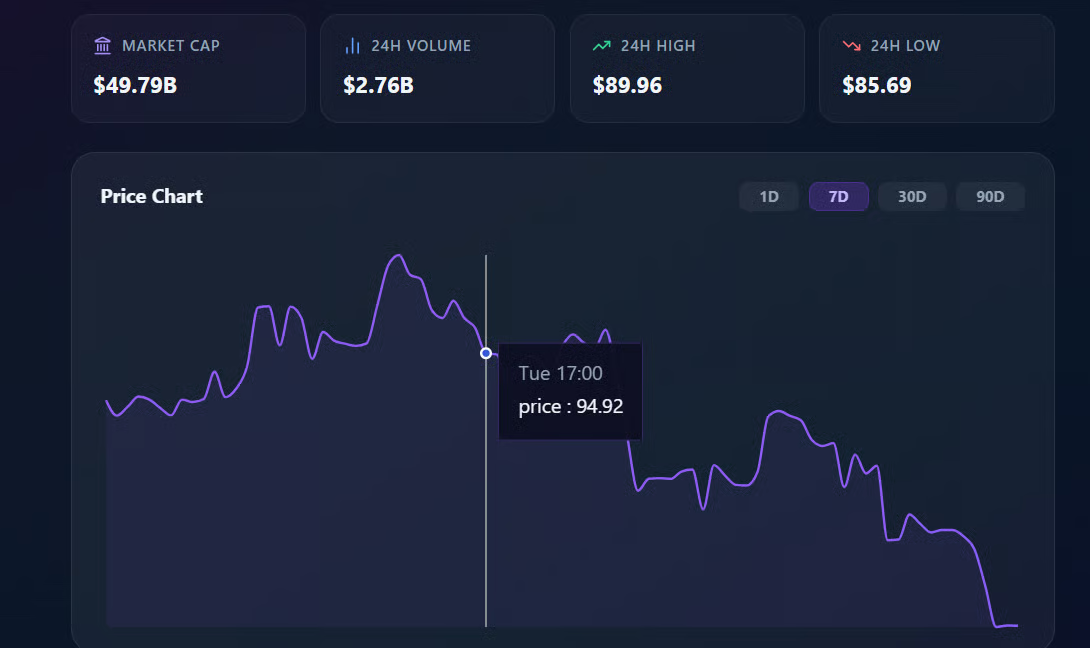
It also includes charts for different time ranges, such as 1 day, 7 days, 30 days, and 90 days, making it feel closer to a real crypto dashboard.
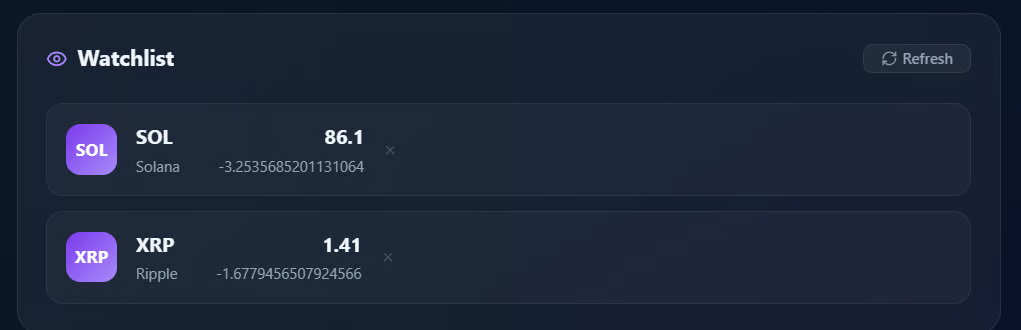
On top of that, you can add coins to a simple watchlist, which makes the app more useful than a basic price checker.
After using MiMo-V2.5-Pro for almost a full day, I genuinely like the model. It is fast, responsive, and much better at building projects from scratch than I expected. Compared with GLM-5.1, it feels more direct. It starts building quickly, tests things fast, and does not spend forever thinking before doing the work.
The main thing I am not fully sold on is the Token Plan. Even though it is subsidized, I reached almost 50% of my Lite plan quota in around three hours, which feels like a lot for one coding session. Since the quota resets monthly, heavy agentic coding can burn through it quickly.
There are some useful extras, though. The plan gives access to more than just MiMo-V2.5-Pro, including other MiMo models, and there are limited-time perks like discounted off-peak usage and free TTS access.
One issue I ran into was tool compatibility. MiMo worked well with OpenCode, but I had problems using it with tools like TRAE, Cursor, Roo Code, Codex, GitHub Copilot CLI, and Pi Code. It seems related to how some agent frameworks handle reasoning_content in multi-turn conversations.
Overall, I really like MiMo-V2.5-Pro as a model. It is fast, capable, and surprisingly good for real coding projects. I am just not a big fan of the Token Plan structure. For regular agentic coding, I would still compare it with options like Moonshot or Z.ai, especially if I wanted more predictable usage. But the model itself is genuinely impressive and worth testing.
Learn AI with DataCamp!
Track
Course
Course
blog
Allan Ouko
11 min
blog
Oluseye Jeremiah
8 min
blog
Abid Ali Awan
15 min
Tutorial
Abid Ali Awan
Tutorial
Brian Mutea
Tutorial
Abid Ali Awan