Track
AI Agent Fundamentals
6 hr
GLM 5.1 is one of the strongest open models you can run today, and Artificial Analysis currently describes it as the leading open-weights model on its Intelligence Index. Z.ai also positions it as a flagship release for coding, reasoning, and agentic workflows.
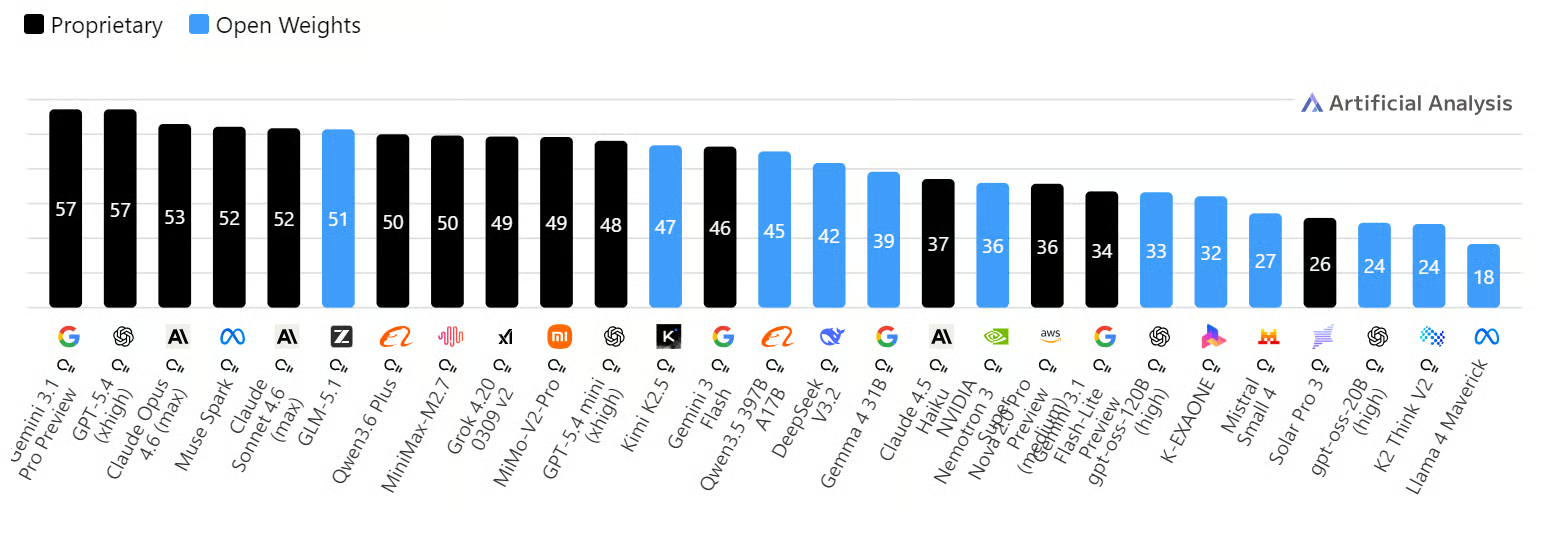
Source: AI Model & API Providers Analysis | Artificial Analysis
Running it locally gives you more control over the full workflow. Your data stays in your own environment, and you can test prompts, build integrations, and use it in coding projects with more privacy and less concern around external data exposure.
In this tutorial, you will set up an H100 RunPod environment, run GLM 5.1 locally, test it with API calls, connect it to the OpenAI Python SDK, access it through a WebUI, and integrate it with Claude Code.
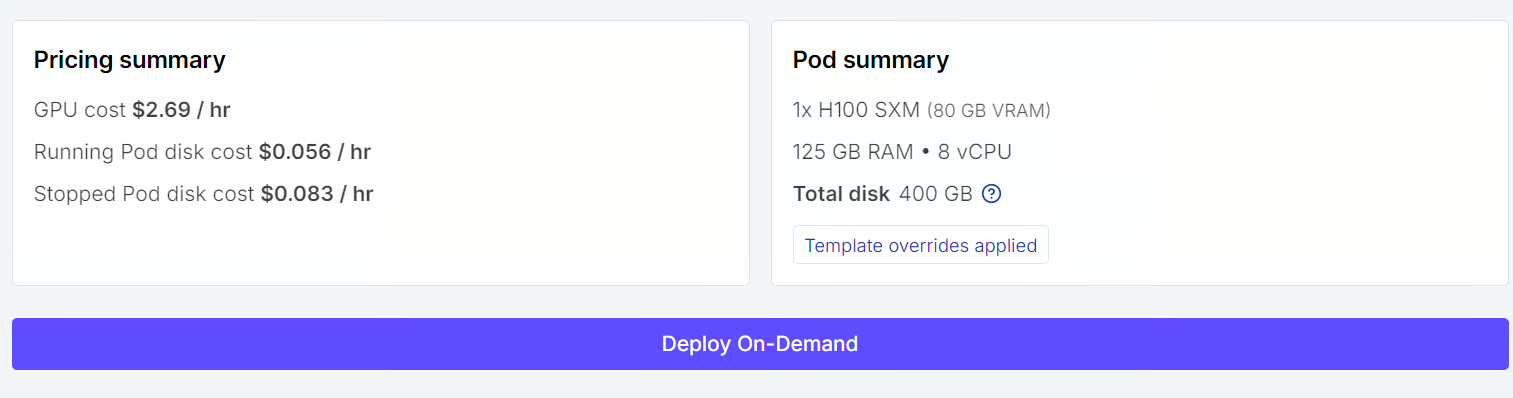
Start by going to the Pods tab in RunPod and selecting an H100 SXM machine. For the template, choose the latest PyTorch option, so you have a ready-to-use environment for running model workloads.
Before deploying, update the pod storage settings. Set the container disk to 100GB and the volume disk to 300GB so you have enough space for the model files, dependencies, and cached downloads.
We will do all of the work inside the mounted /workspace directory so everything stays in one place. You should also expose port 8910, which we will use for both the local model server and the llama.cpp WebUI.
Next, add your Hugging Face token as an environment variable named HF_TOKEN.

Once that is set, review the pod summary and click Deploy On-Demand. After the pod starts, open the JupyterLab instance attached to it.
Inside JupyterLab, launch a new terminal and run the following commands to install the required system packages:
apt-get update
apt-get install -y pciutils build-essential cmake curl git tmux libcurl4-openssl-dev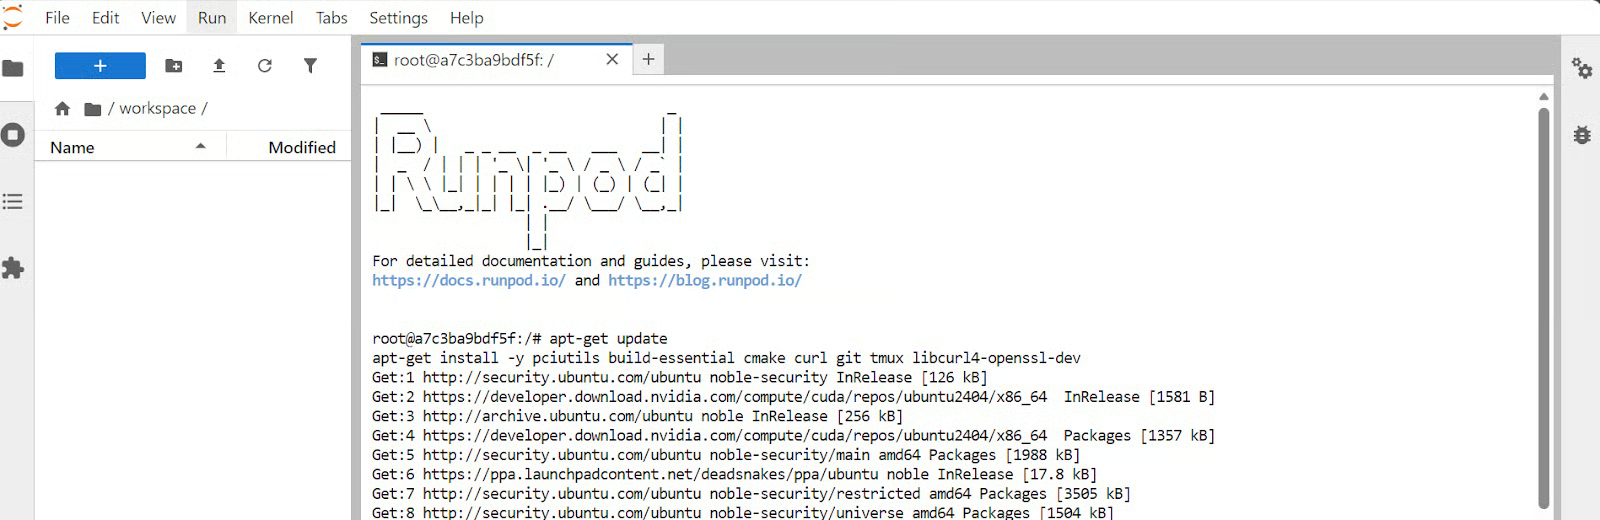
Now that the pod is ready, the next step is to build llama.cpp with CUDA support so it can use the H100 GPU for local inference.
First, clone the llama.cpp repository from GitHub:
git clone https://github.com/ggml-org/llama.cppNext, configure the build and place the generated build files in a separate build folder:
cmake llama.cpp -B llama.cpp/build \
-DBUILD_SHARED_LIBS=OFF \
-DGGML_CUDA=ON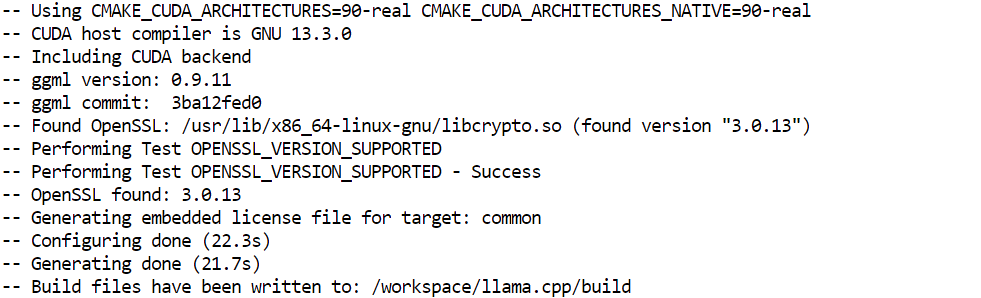
After that, compile the main binaries we need in optimized Release mode:
cmake --build llama.cpp/build --config Release -j --clean-first \
--target llama-cli llama-mtmd-cli llama-server llama-gguf-split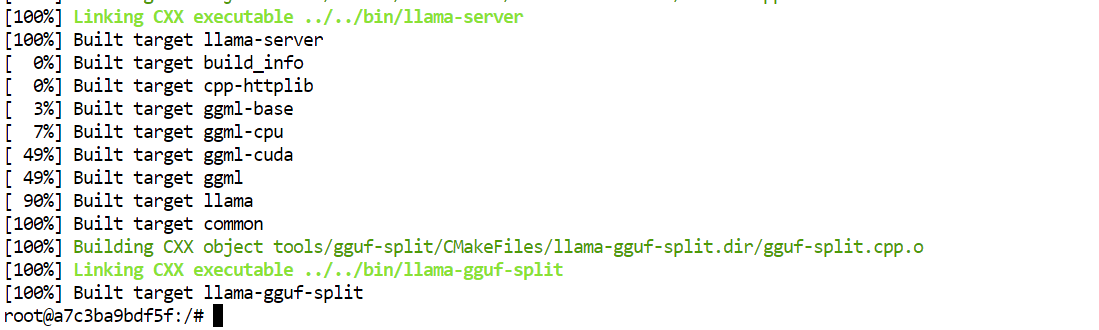
Finally, copy the compiled binaries into the main llama.cpp folder so they are easier to run later:
cp llama.cpp/build/bin/llama-* llama.cppBy the end of this step, you will have the main llama.cpp tools ready, including llama-server, which we will use later to run GLM 5.1 locally.
Before downloading the model, it helps to understand why we are using the 2-bit version for this setup.
The full GLM 5.1 model has 744B parameters, with 40B active parameters, a 200K context window, and requires roughly 1.65TB of disk space. That is far too large for a practical local setup.
The Unsloth Dynamic 2-bit GGUF version reduces the size to roughly 220–236GB, cutting the storage requirement by about 80% while still keeping important layers in higher precision for better performance.
That makes the 2-bit model the right choice for our hardware. With 80GB of VRAM and 125GB of RAM, this quantized version is still resource-intensive but much more realistic to run locally while still giving strong performance for coding and agentic workflows.
Now, let’s install the tools needed to download the model files efficiently.
First, install the Hugging Face Hub package with hf_xet support, along with the hf-xet helper:
pip -q install -U "huggingface_hub[hf_xet]" hf-xetNext, install hf_transfer to speed up large model downloads:
pip -q install -U hf_transferAfter that, enable high-performance transfers for faster downloads:
export HF_XET_HIGH_PERFORMANCE=1Finally, download the GLM 5.1 model files into a local folder:
hf download unsloth/GLM-5.1-GGUF \
--local-dir models/GLM-5.1-GGUF \
--include "*UD-IQ2_M*"
Even this smaller version is still a large download. In my setup, the 2-bit model took around 17 minutes to finish, so do not worry if it takes a little time.

Now it is time to launch the local server and load the model into memory.
Run the following command:
./llama.cpp/llama-server \
  --model ./models/GLM-5.1-GGUF/UD-IQ2_M/GLM-5.1-UD-IQ2_M-00001-of-00006.gguf \
  --alias "GLM-5.1" \
  --host 0.0.0.0 \
  --port 8910 \
  --jinja \
  --fit on \
  --threads 16 \
  --threads-batch 16 \
  --ctx-size 32768 \
  --batch-size 2048 \
  --ubatch-size 512 \
  --flash-attn on \
  --temp 0.7 \
  --top-p 0.95 \
  --cont-batching \
  --metrics \
  --perf
The main argument to pay attention to here is --fit on. This tells the server to automatically place as much of the model as possible on the GPU, while offloading the rest to system RAM. That is especially useful in our setup, because it helps us run a very large model across the available 80GB VRAM and 125GB RAM without having to manually control layer placement.
The other arguments mostly handle the server name, port, performance settings, batching, and context length for inference.
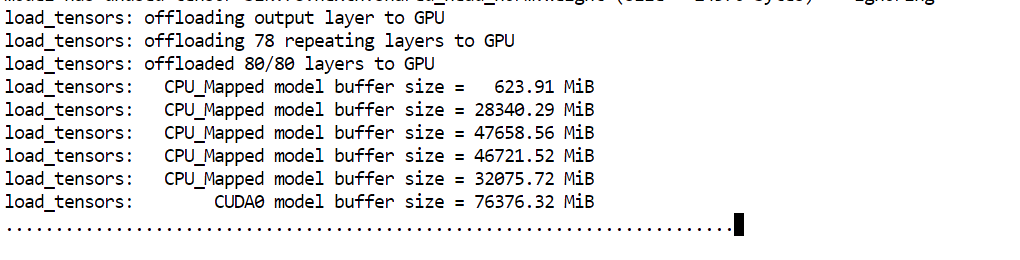
Once the model finishes loading, you will see a message showing that the server is listening at: http://0.0.0.0:8910.

At that point, GLM 5.1 is running locally and ready to be tested in the next step.
With the server running, the next step is to make sure the model is responding correctly through its local API.
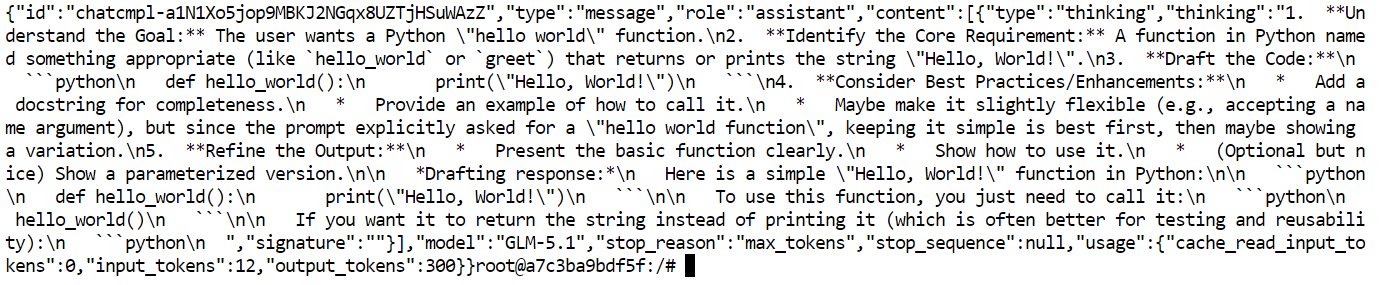
Open a new terminal inside JupyterLab so the server can keep running in the original one. Then send a simple test request with curl:
curl http://127.0.0.1:8910/v1/messages \
-H "Content-Type: application/json" \
-H "x-api-key: local-test" \
-d '{
"model": "GLM-5.1",
"max_tokens": 300,
"messages": [
{"role": "user", "content": "Write a Python hello world function."}
]
}'
This request sends a prompt to your locally running GLM 5.1 server and asks it to generate a short response. The main things to notice here are the local server URL, the model name, and the messages format used in the request body.
If everything is working correctly, the terminal will return a JSON response containing the model’s output.
Now that the local API is working, the next step is to connect it to the OpenAI Python SDK. This is useful because many existing apps and scripts already use the OpenAI client, so pointing it to your local GLM 5.1 server makes integration much easier.
First, upgrade pip and install the OpenAI package:
python -m pip install --upgrade pip
pip install openai
Next, run a short Python script that connects the SDK to your local server:
python - <<'PY'
from openai import OpenAI

client = OpenAI(
    api_key="local-key",
    base_url="http://127.0.0.1:8910/v1",
)

resp = client.completions.create(
    model="GLM-5.1",
    prompt="Answer briefly and in plain text only.\n\nQuestion: What is the capital city of Australia?\nAnswer:",
    temperature=0.2,
    max_tokens=12,
)

print(resp.choices[0].text.strip())
PY
The main thing happening here is that we are not calling the OpenAI cloud API. Instead, we are using the same SDK but changing the base_url so it points to the local GLM 5.1 server running on port 8910.
If everything is set up correctly, the output should be:
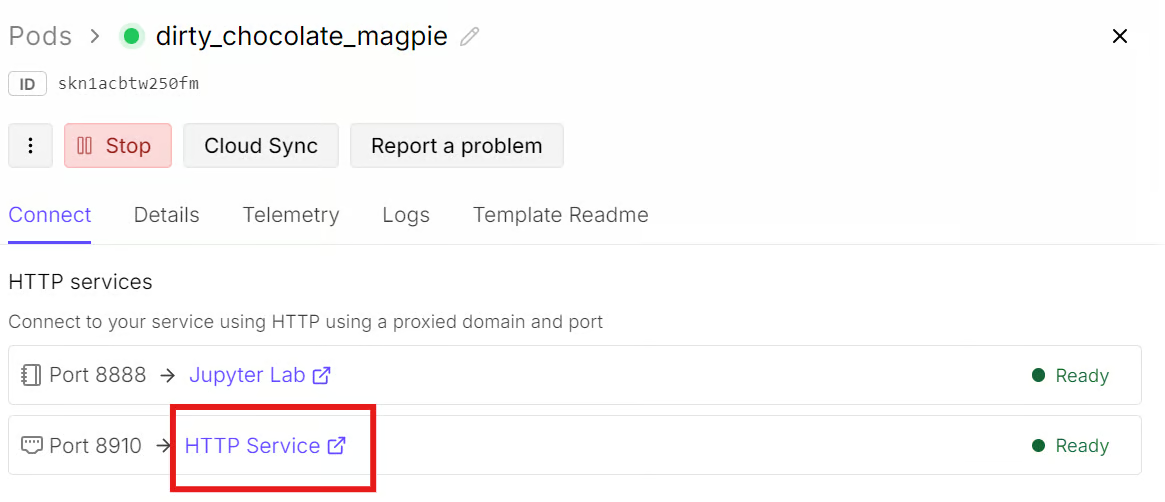
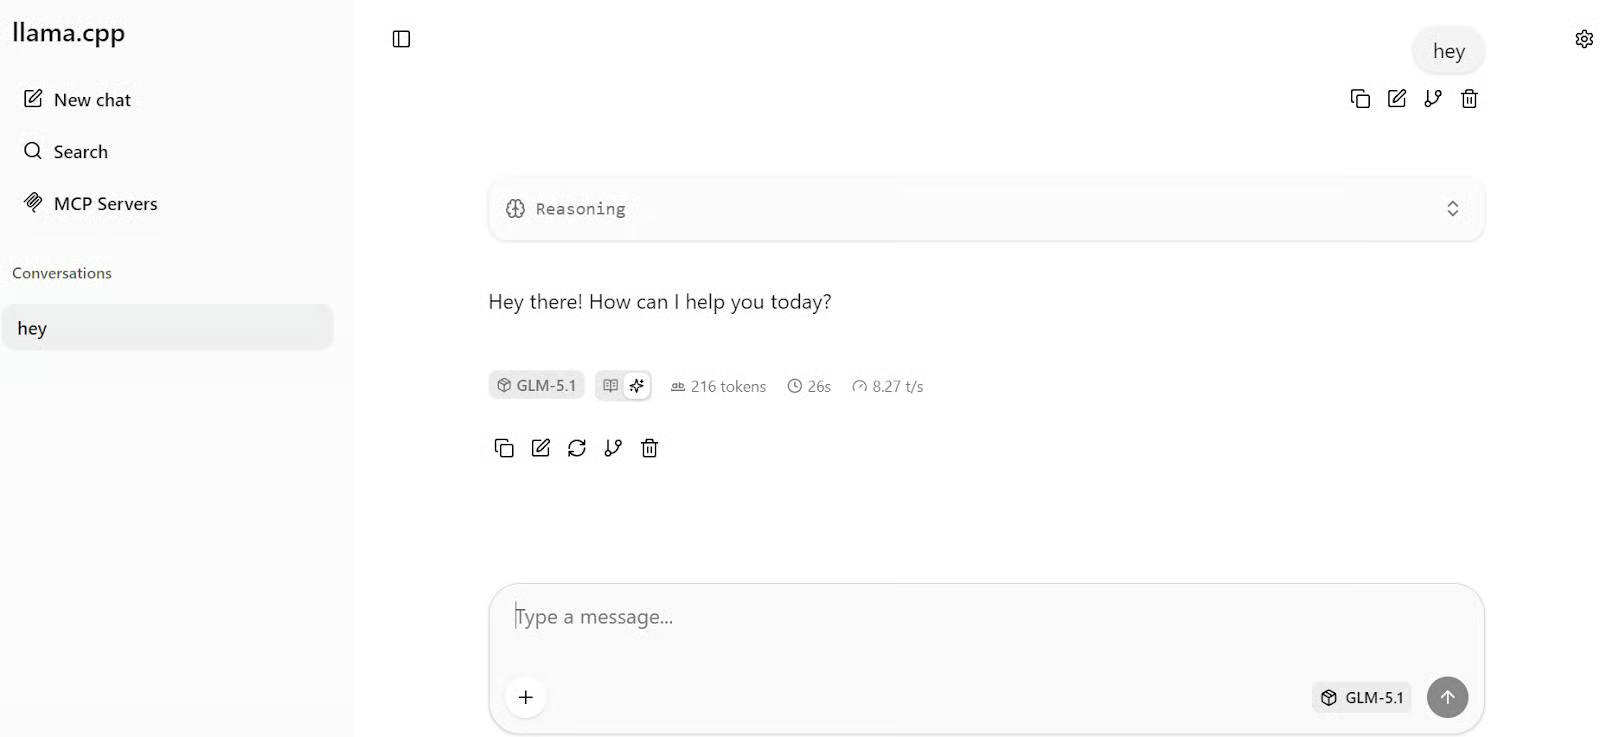
CanberraThe latest llama.cpp server also includes a built-in WebUI, which means you can interact with your local GLM 5.1 model through a simple chat interface instead of only using the terminal or API calls.
To open it, go back to your RunPod dashboard and open the Connect tab for your pod. Since port 8910 is already exposed, click the HTTP Service link for that port. This will open the llama.cpp WebUI in a new browser tab.
Once the page loads, you can start chatting with the model directly. Type in your first prompt, and the response should appear within a few seconds. In my setup, the model was generating at around 8 tokens per second, which is a solid speed for a model of this size.
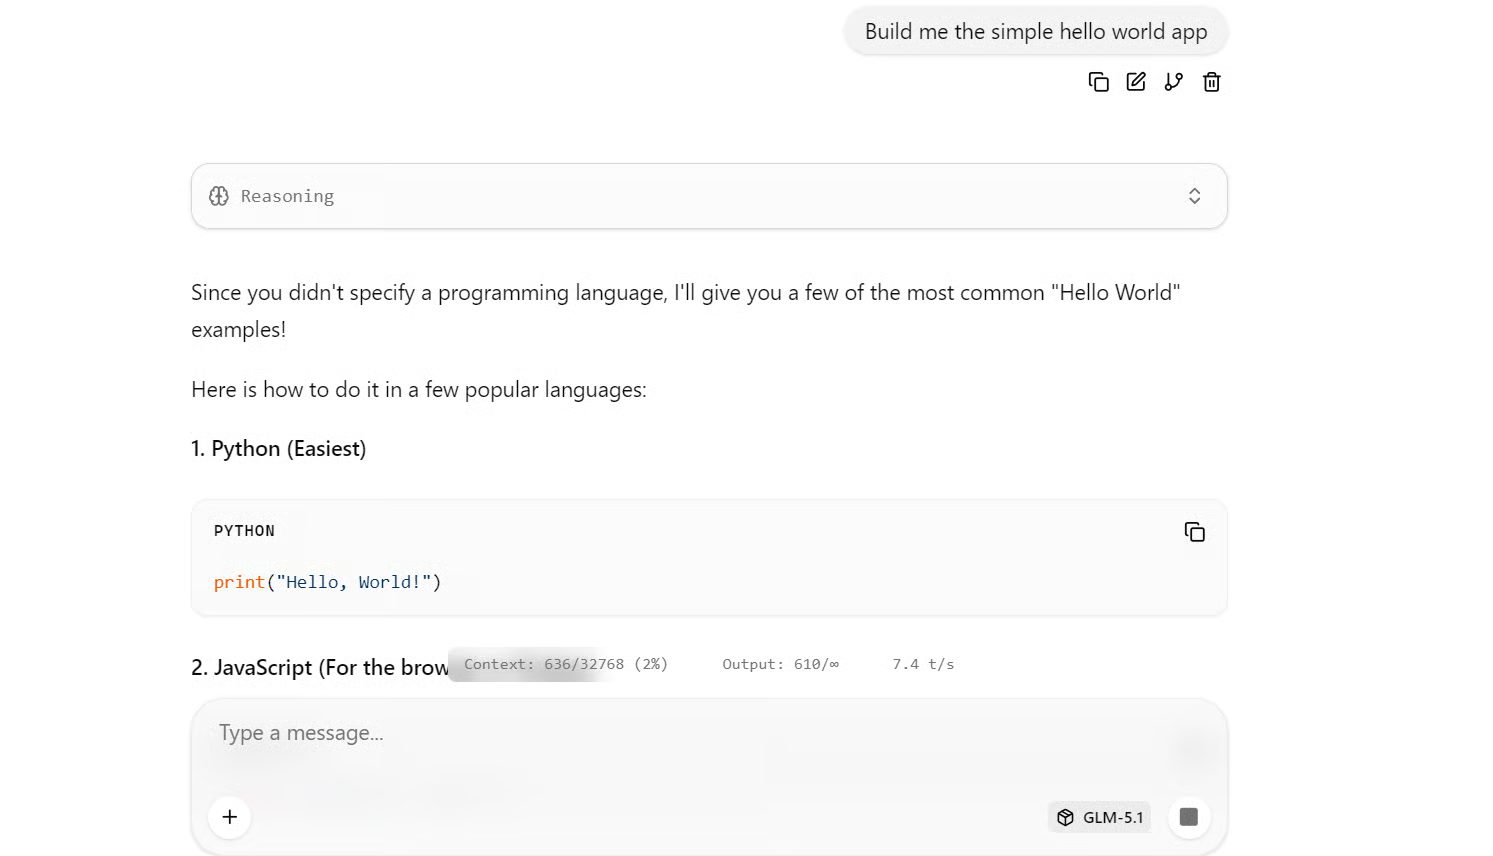
For a quick test, try asking it to build a simple Hello World app. It has generated working examples in several popular programming languages.
Now that GLM 5.1 is running locally, the next step is to connect it to Claude Code. This is a useful test because GLM 5.1 is positioned as a strong coding model, so using it inside a coding agent workflow gives a better sense of how it performs on real development tasks.
Start by installing Claude Code:
curl -fsSL https://claude.ai/install.sh | bash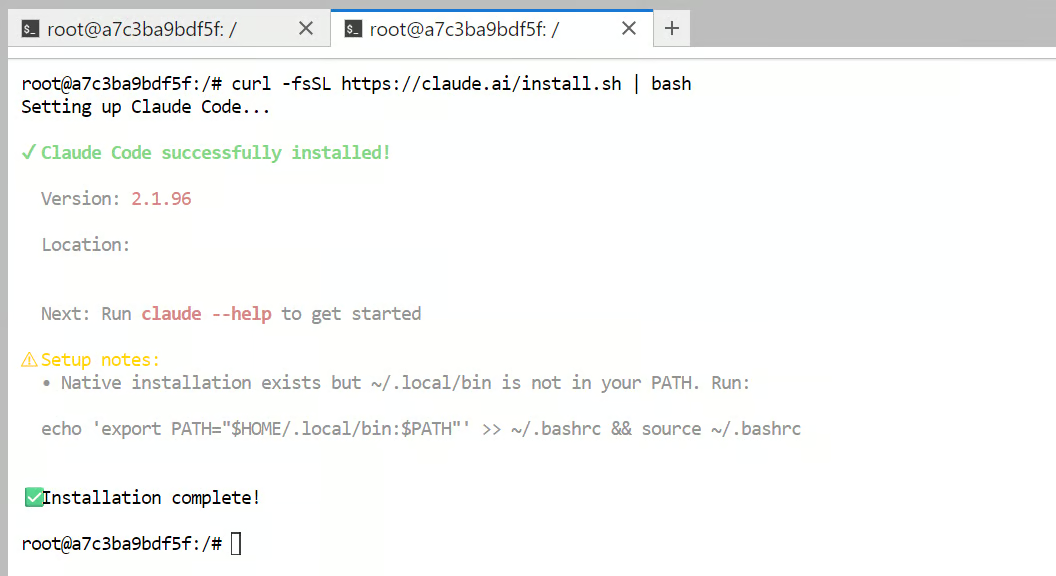
Next, add Claude Code to your shell PATH so the claude command works from the terminal:
echo 'export PATH="$HOME/.local/bin:$PATH"' >> ~/.bashrc && source ~/.bashrcAfter that, configure Claude Code so it points to your local GLM 5.1 server instead of the hosted Anthropic API:
cat >> ~/.bashrc <<'EOF'
export ANTHROPIC_BASE_URL="http://127.0.0.1:8910"
export ANTHROPIC_AUTH_TOKEN="local-dev-token"
export ANTHROPIC_MODEL="GLM-5.1"
export ANTHROPIC_DEFAULT_SONNET_MODEL="GLM-5.1"
export API_TIMEOUT_MS=1200000
EOF
Then reload your shell configuration so those environment variables take effect:
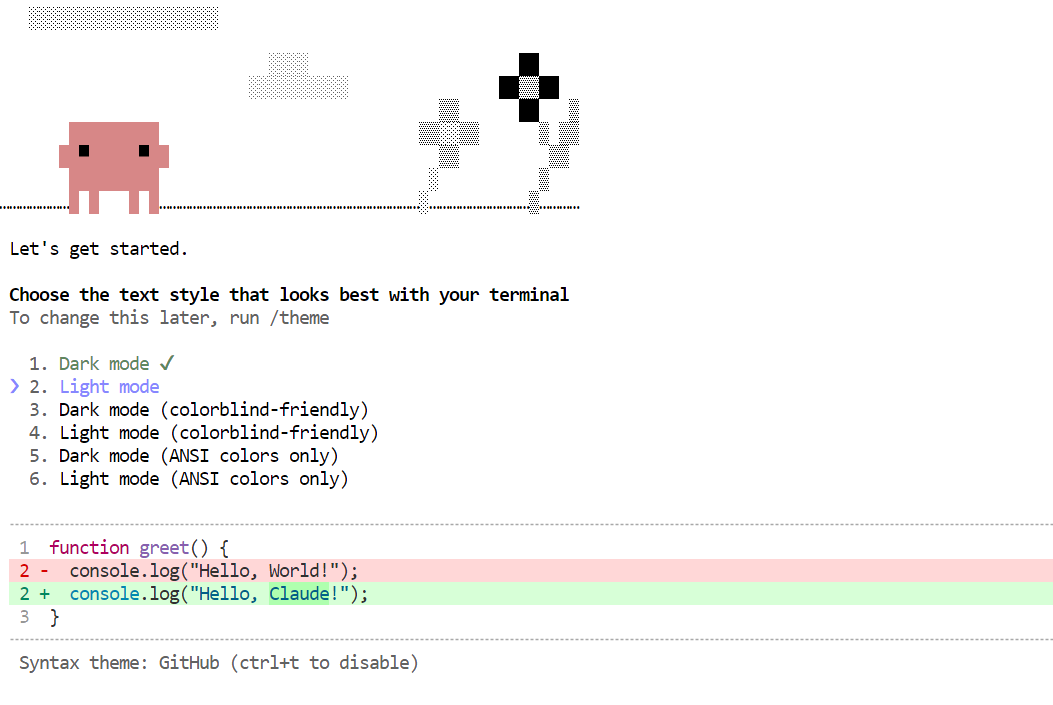
source ~/.bashrcNow, create a test folder and launch Claude Code inside it:
mkdir -p test-claude-local
cd test-claude-local
claude
The first time Claude Code starts, it may ask you to complete a few setup steps, such as choosing a theme or trusting the working directory. Once that is done, you can start giving it tasks.
For a simple first test, try this prompt:
Build the simple Hello World app in Python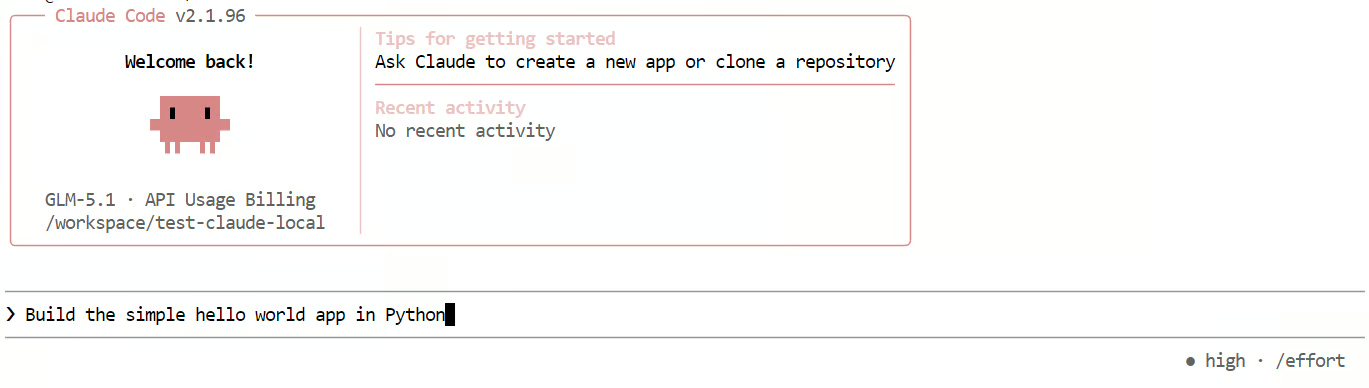
This lets you check whether Claude Code is successfully sending requests to your local GLM 5.1 server and using it for code generation.
In my experience, this setup worked, but it was noticeably slower than the earlier tests.
With longer context and coding-style prompts, generation speed dropped to around 2 tokens per second, and the model often spent too much time reasoning before producing even simple answers.
That is one of the main trade-offs I noticed with GLM 5.1 in this workflow: it is capable, but it can be slower and more verbose than you may want for lightweight coding tasks.
This section covers a few common problems you may run into when running GLM 5.1 locally and how to fix them quickly.
This usually means the model is too large for the available GPU and system memory, so try a smaller quant or lower the context size. llama.cpp also supports --fit on, which helps automatically fit the model across available memory.
Make sure you are opening the correct exposed port from RunPod and not the JupyterLab URL. The llama.cpp server includes its own built-in WebUI, so the server port is the one that matters, and the URL should point to 0.0.0.0:8910 on the exposed HTTP service.
This is usually a base URL or endpoint mismatch. llama.cpp supports OpenAI-compatible routes and Anthropic Messages-compatible routes, so check that your tool is pointing to the correct path, such as /v1 or /v1/messages.
This can happen because performance depends on both the client and the backend model behavior. Claude Code supports configuration through settings and environment variables, but slower responses are often caused by the model taking longer to reason or generate.
Longer context windows and larger generations increase memory pressure and response time. Reducing context size, prompt length, or generation settings can help improve speed in local setups.
Overall, setting up GLM 5.1 locally was fairly straightforward. Downloading the model, running the server, and testing it for basic use did not take much effort. For simple local experiments, the process feels very manageable.
The main challenge starts when you want to use it for agentic coding workflows. That requires more RAM and VRAM, and token generation can slow down noticeably as the context window fills up. Even though the model can feel fast at first, thinking mode adds a lot of delay, so for local use, it often makes more sense to disable thinking mode if speed matters.
Beyond performance, there is also the practical side to consider. Running a local model means managing the model server, handling GPU setup, and dealing with infrastructure issues yourself. It also becomes harder when GPU rental platforms such as RunPod or Vast.ai have limited availability, which has become more common due to growing demand.
That is why, in many cases, a managed API option can be the better choice. You may give up some privacy and control, but you get better speed, less maintenance, and a much smoother experience for larger or more complex coding tasks. If the cost is only a few dollars per month, it can be a worthwhile tradeoff compared to managing everything yourself.
So, if your goal is to experiment, learn, or run GLM 5.1 for lighter local tasks, running it locally is a good option. But if your goal is reliable agentic coding at scale, a managed service is often the more practical path. For a detailed comparison, I recommend checking out our GLM-5 vs GPT-5.3-Codex guide.
Agentic AI Courses
Track
Course
Course
Tutorial
Abid Ali Awan
Tutorial
Abid Ali Awan
Tutorial
Abid Ali Awan
Tutorial
Abid Ali Awan
Tutorial
Abid Ali Awan
Tutorial
Abid Ali Awan