Course
Introduction to Claude Models
3 hr
10.9K
I have been full-time vibe coding for the past six months, building and shipping multiple SaaS products end to end. This includes a book library application with online access, budget tracking tools, and a payment platform focused on USD payments and freelancer payouts. Along the way, I also explored stablecoin wallets and other SaaS ideas from scratch.
After building several products in parallel, one lesson became very clear. Even with better AI tools, MCPs, agents, and AI-assisted workflows, the most important decision is not perfection. It is choosing a tech stack that fits your product goals, development speed, and level of experience.
This does not mean picking the most advanced tools. It means picking tools that work well together, reduce friction, and let you ship a working MVP within hours.
In this blog, I’ll break down the core components of a modern SaaS stack, introduce three practical stack patterns, and show how to get started with building your own SaaS in a few hours.
When people talk about a “tech stack,” they really mean all the moving parts that work together to turn an idea into a usable SaaS product. In vibe coding, the goal is not to over-engineer, but to choose tools that remove friction and let you ship fast while still being production-ready.
Here is a simple view of how the core pieces of a modern SaaS fit together:
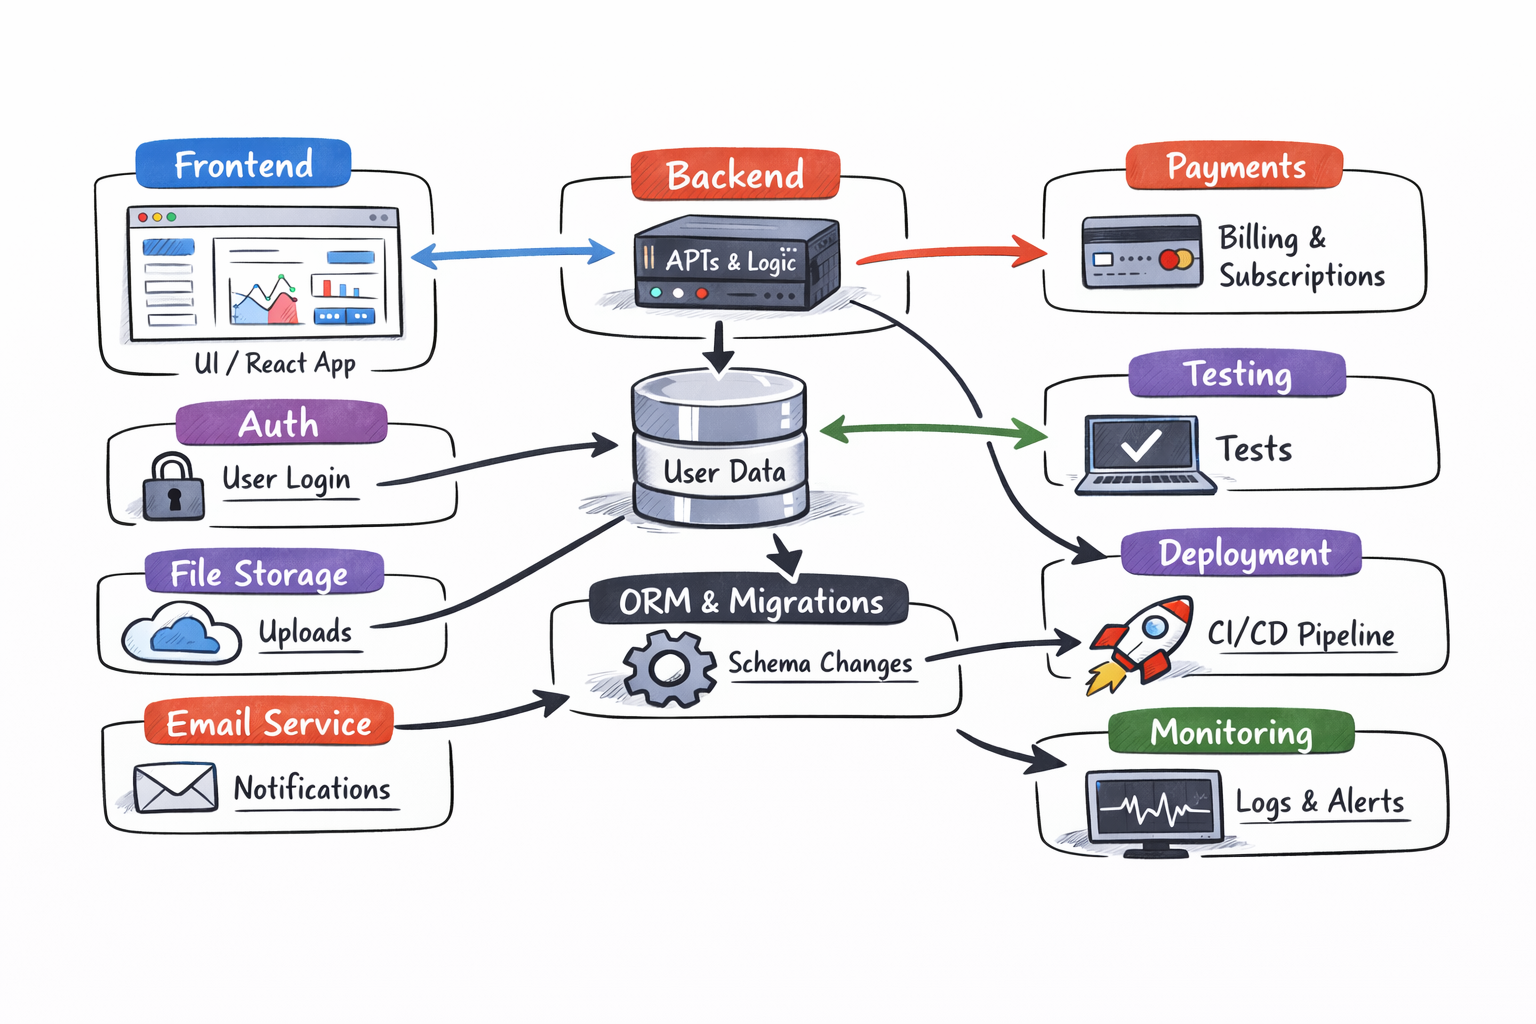
Image generated with ChatGPT
The frontend is everything the user sees and interacts with: pages, forms, dashboards, and settings.
In a modern SaaS, this is usually a React-based app that renders fast, looks clean, and is easy to iterate on. Styling systems and component libraries help you move quickly without redesigning every button from scratch.
A good frontend setup focuses on responsiveness, accessibility, and developer speed.
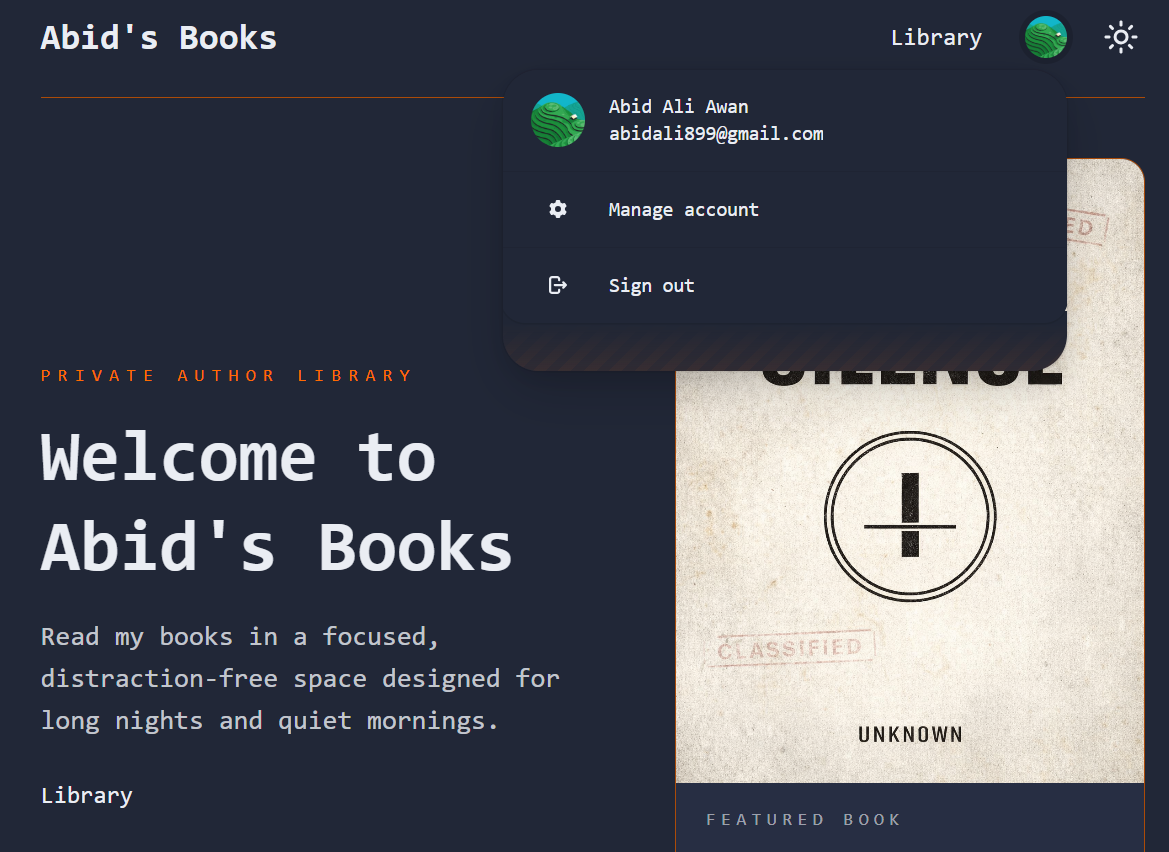
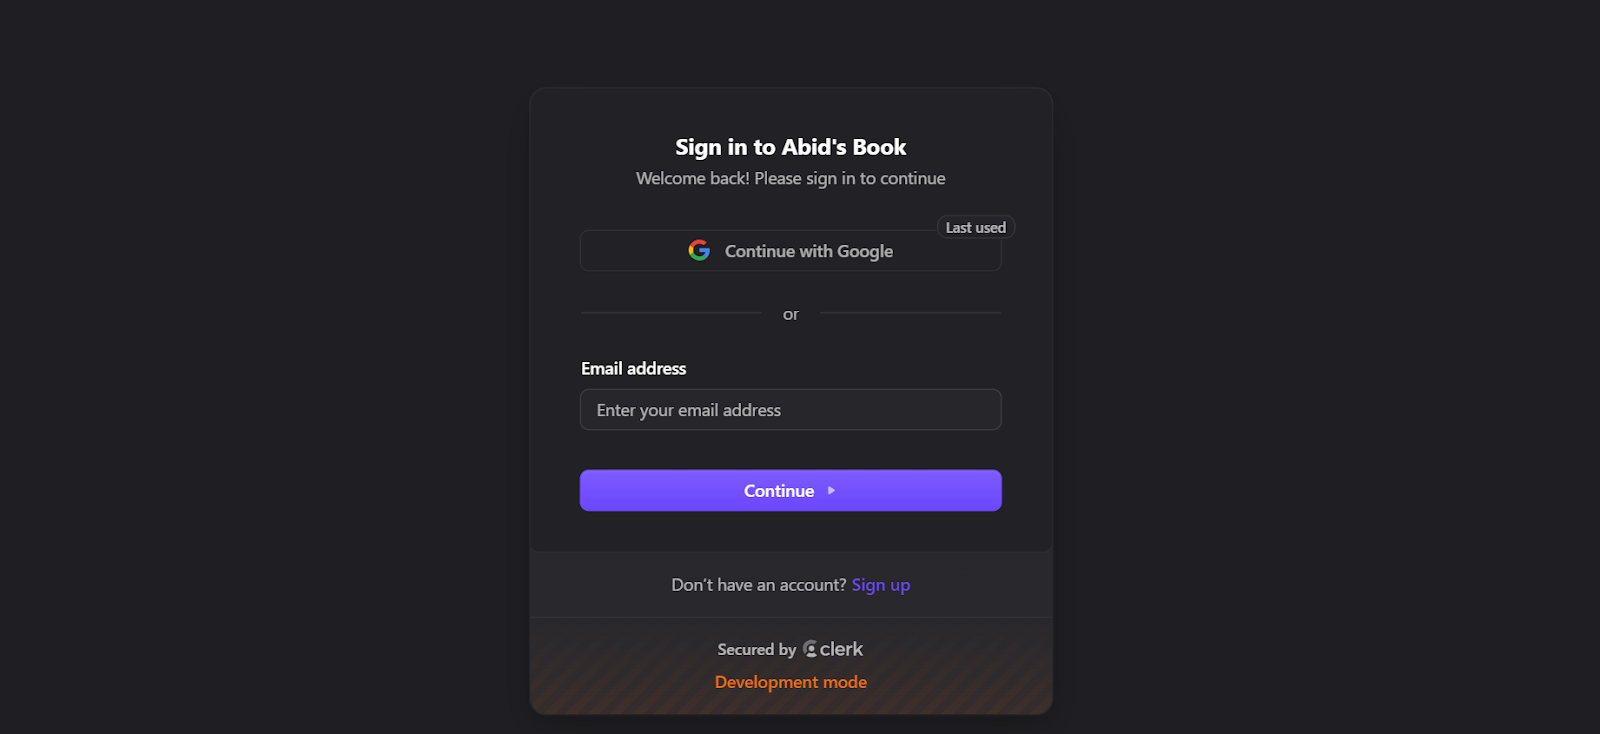
Source: Abid's Books
The backend is the brain of the app. It handles business logic, permissions, form submissions, and data processing. In a vibe-coding setup, the backend often lives alongside the frontend, so you don’t need a separate server to start. This makes features like user actions, background tasks, and integrations much easier to ship and maintain.
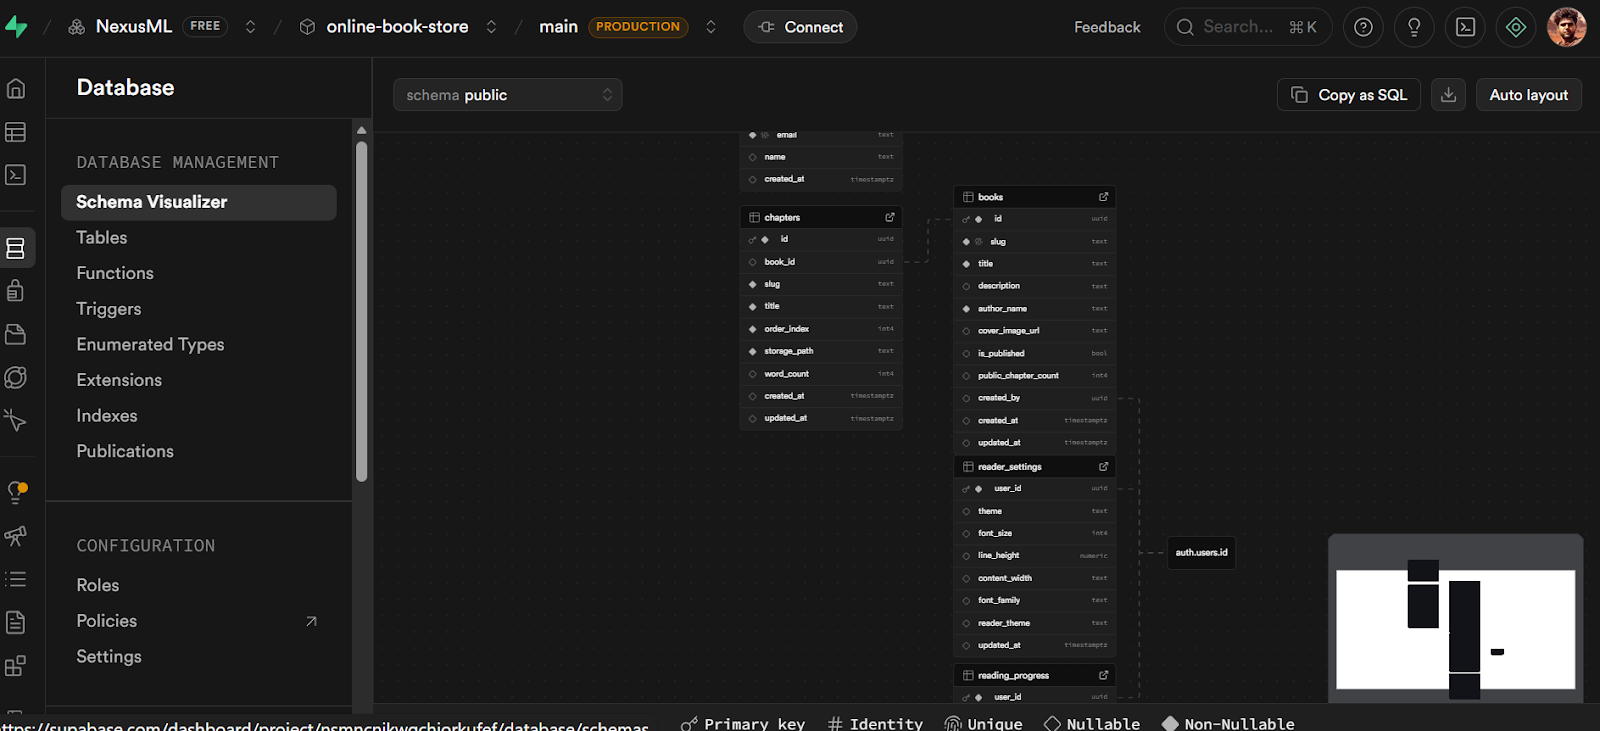
The database stores everything that needs to persist: users, subscriptions, settings, and application data. Most SaaS products rely on a relational database because it’s reliable, flexible, and well understood.
A managed database removes the burden of backups, scaling, and maintenance, letting you focus on the product instead of operations.
An ORM sits between your code and the database, giving you type safety and a clear schema.
Migrations let you evolve your database structure over time without breaking production. This is critical for SaaS products, where data integrity matters as soon as you have real users.
Authentication handles sign-ups, logins, password resets, and permissions. Offloading this to a dedicated service saves enormous time and avoids security mistakes. For SaaS, this also makes it easier to add features like social login, teams, and role-based access later.
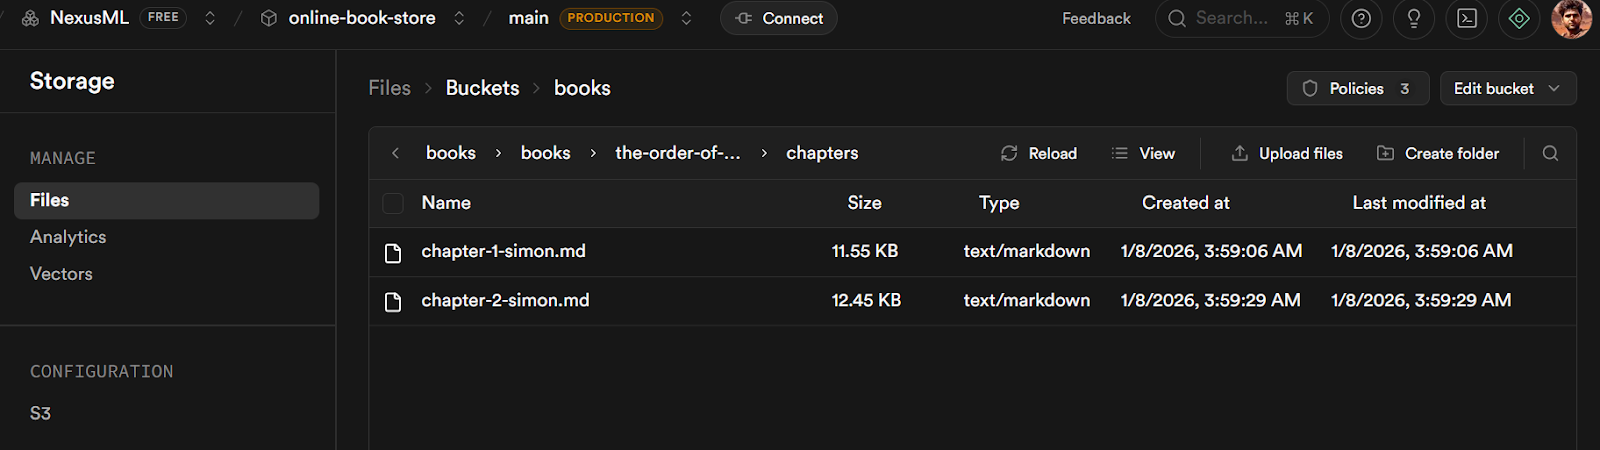
Most SaaS products need to store files at some point: profile images, documents, exports, or AI-generated assets. Blob storage is optimized for this and is separate from the database. It’s cheaper, faster, and scales independently.
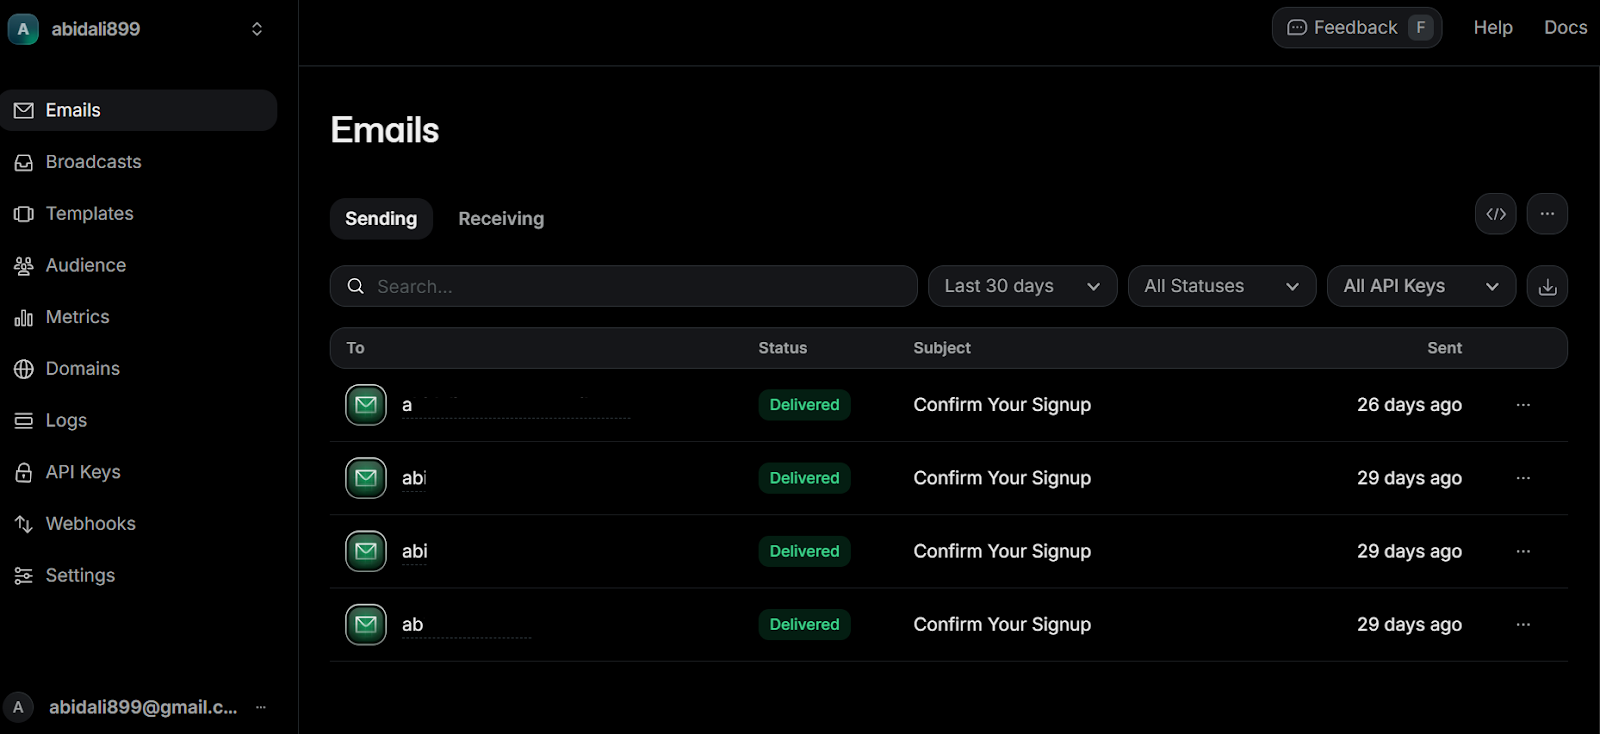
Email is essential for onboarding, verification, password resets, and notifications. A dedicated email service ensures reliable delivery and keeps this concern separate from your core application logic.
If your SaaS is paid, you need billing, subscriptions, invoices, and webhooks. Using a payment provider abstracts away tax rules, compliance, and edge cases so you can focus on pricing and value, not financial infrastructure.
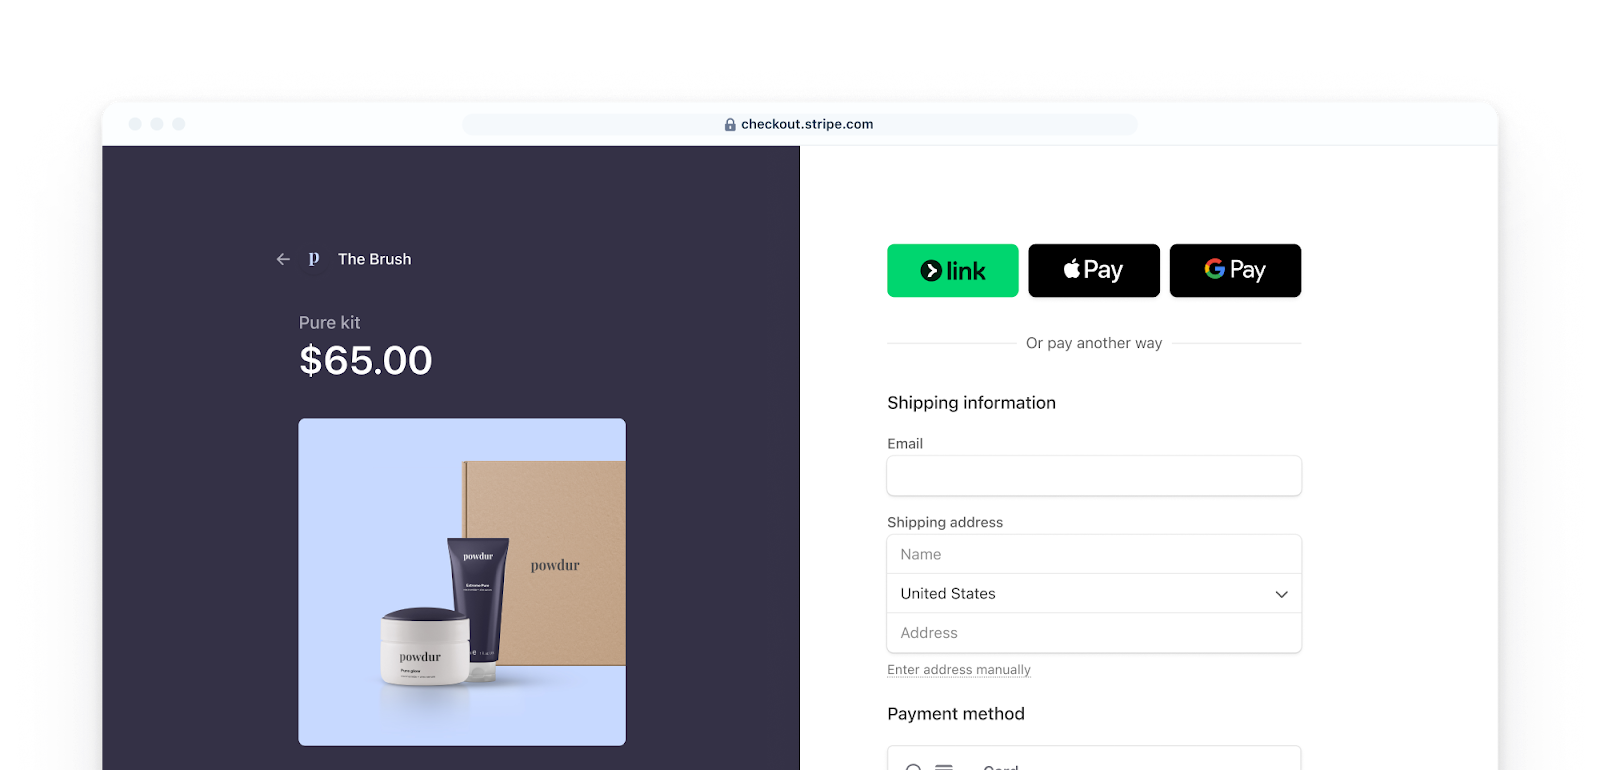
Source: Payments | Stripe Documentation
Testing ensures you can ship quickly without breaking things. Unit tests cover logic, while end-to-end tests simulate real user behavior. In vibe coding, the focus is on just enough testing to move fast with confidence.
Deployment turns your code into a live product. A modern SaaS stack uses automated builds, previews, and continuous integration so every change can be tested and shipped safely. This short feedback loop is key to fast iteration.
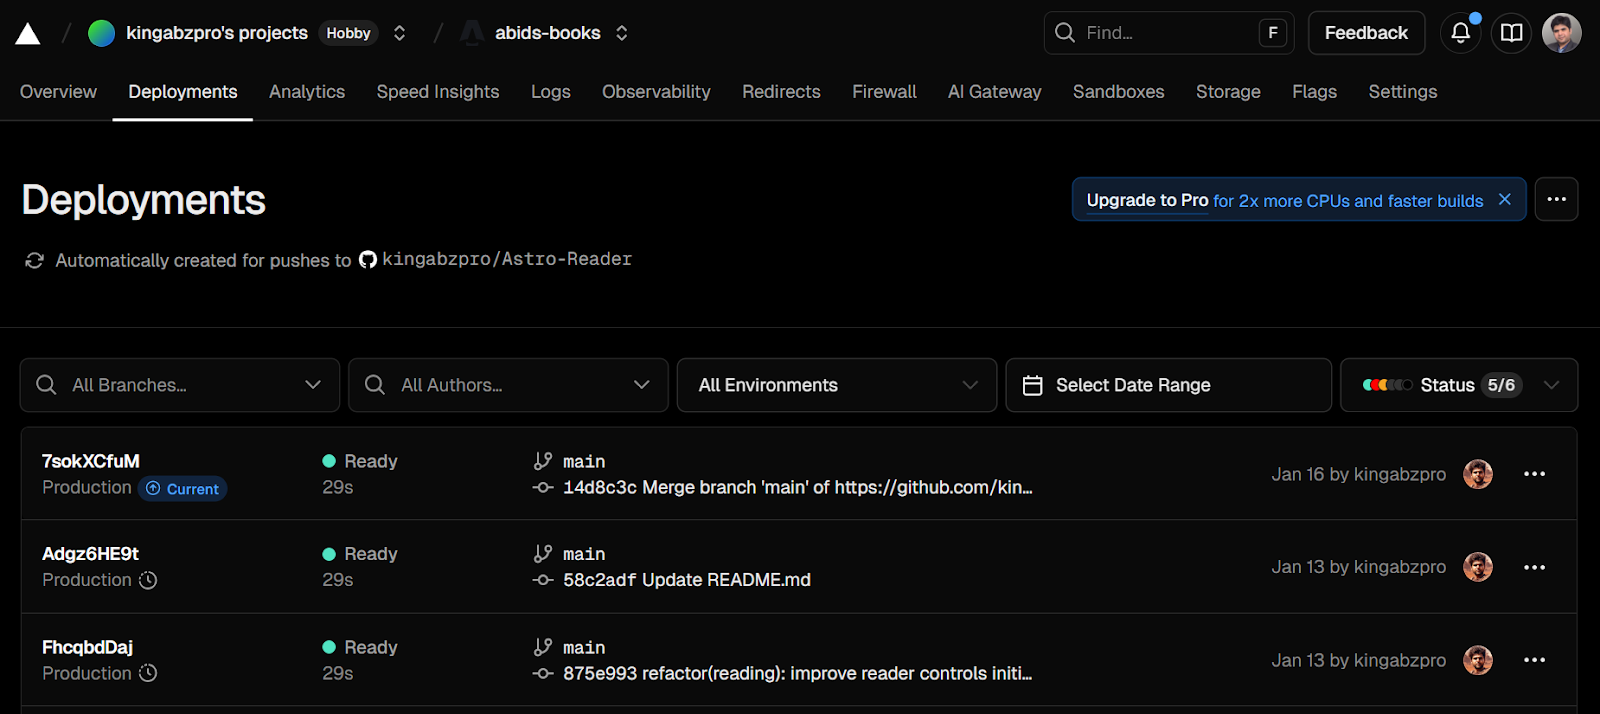
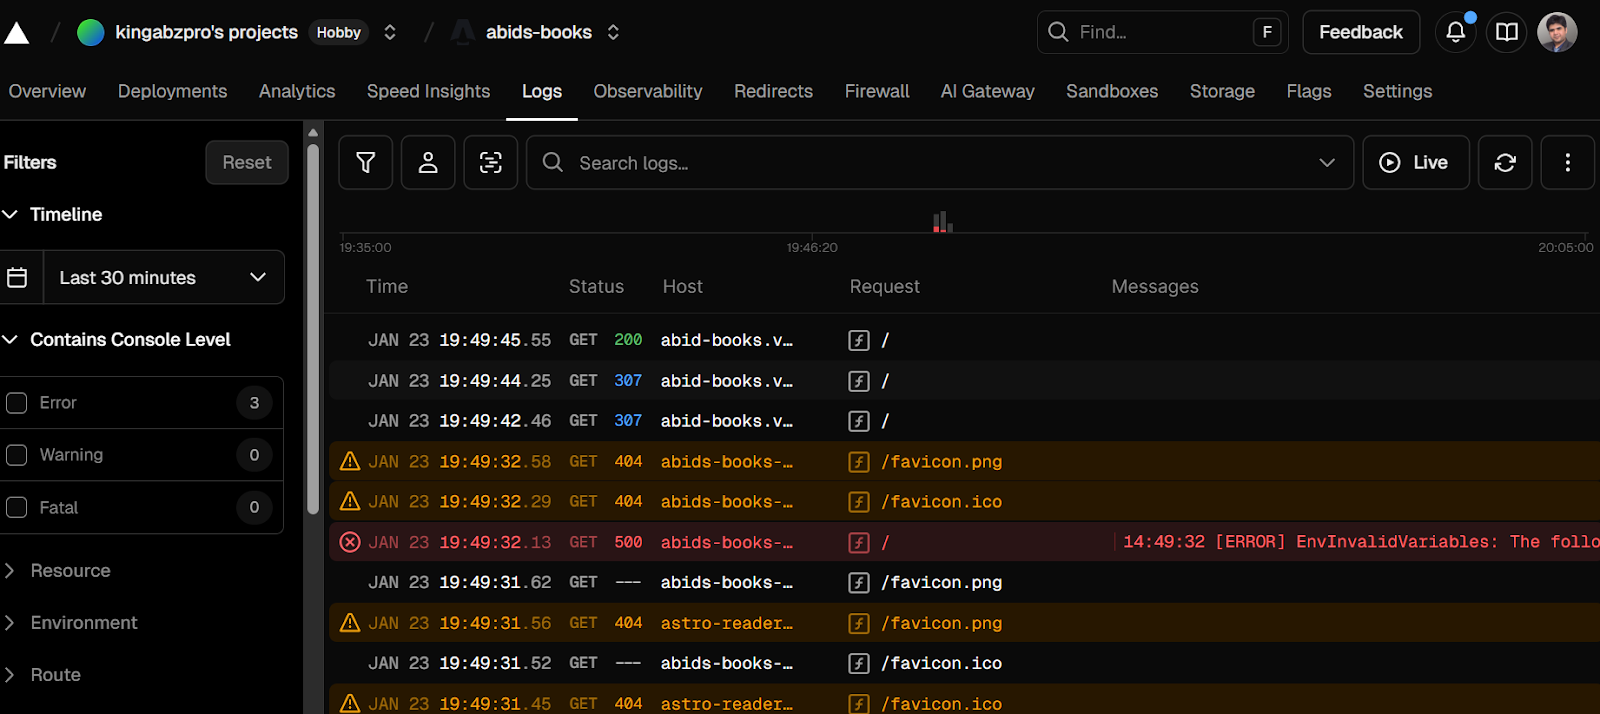
Once users are live, you need visibility. Logs and basic monitoring help you catch errors, understand behavior, and debug issues quickly, without setting up complex observability systems on day one.
A proper SaaS stack is not about using “fancy” tools. It is about clear separation of concerns: UI, logic, data, auth, storage, payments, and deployment, all doing one job well. Vibe coding simply means choosing defaults that reduce friction, so you can spend more time building features and less time wiring infrastructure.
In practice, most modern SaaS products fall into one of three stack patterns. Each one has a different goal and a different tradeoff profile. Giving them clear names makes it easier to reason about which stack to use and when to switch.
The three vibe-coding stacks are:
Most vibe coders will start with the Sprint Stack, move to the Leverage Stack as the product stabilizes, and reach for the Control Stack only when scale, cost, or compliance makes full ownership necessary.
This stack is designed for speed over ceremony. It keeps everything simple, modern, and production-ready without pulling you into infrastructure decisions too early.
Next.js handles both the frontend and backend, allowing you to move quickly using server actions and API routes.
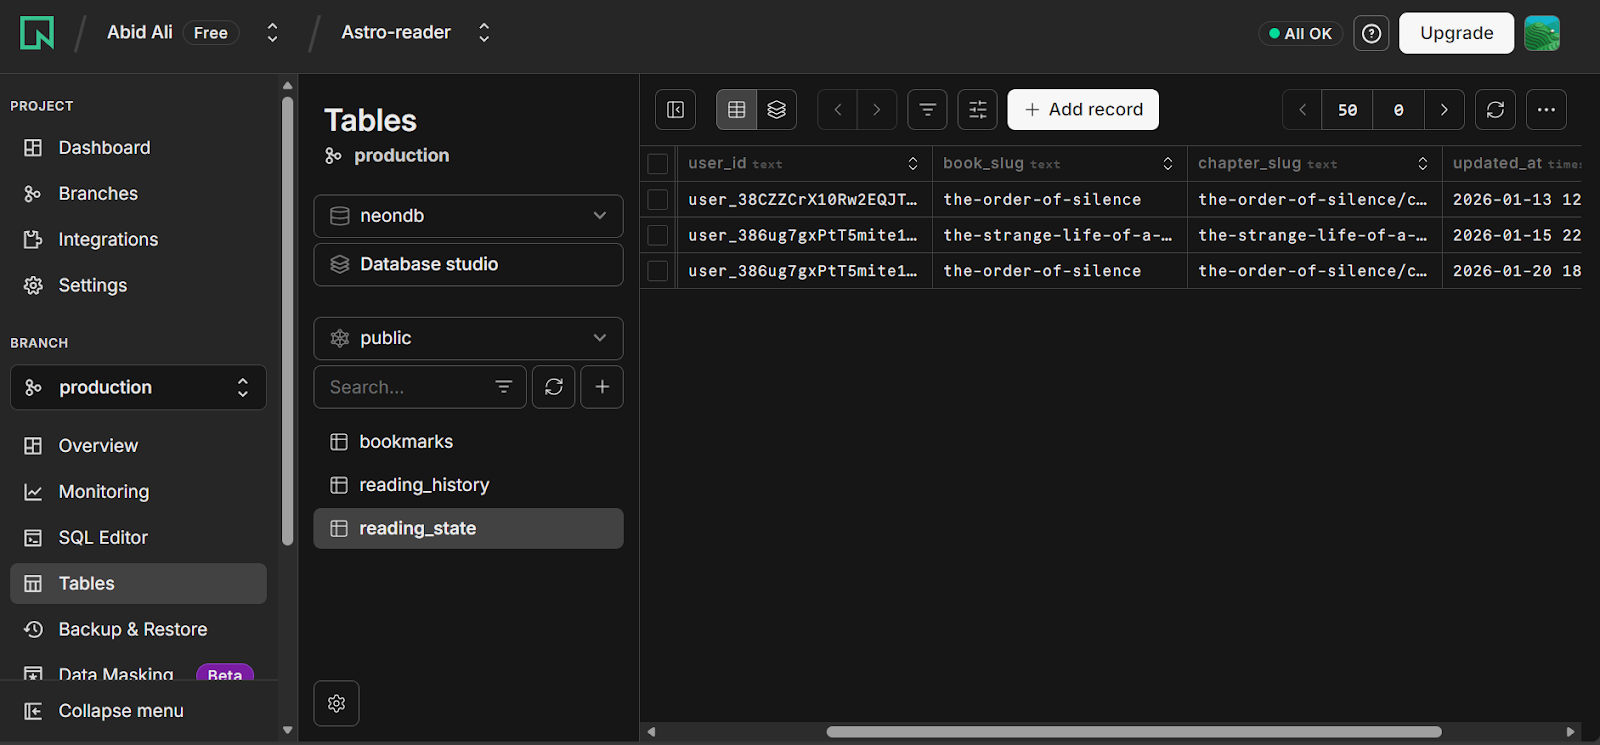
Neon provides a scalable Postgres database with zero operational overhead, while Drizzle keeps schemas and migrations lightweight and type safe.
Clerk handles authentication end-to-end, including sign-ups, logins, password resets, and transactional emails, removing the need for a separate email service.
Stripe is added only when payments are required. Testing is kept intentionally minimal so you can ship fast, and Vercel takes care of deployment, previews, and logs out of the box.
Best when: you want to go from idea to live product in hours, iterate quickly, and avoid managing infrastructure entirely.
This stack is for builders who want maximum leverage with minimal operational work. Instead of managing separate systems for data, authentication, storage, and background tasks, most backend concerns live inside a single managed platform.
Next.js powers the frontend and backend logic and is deployed on Vercel for fast previews and simple hosting.
Supabase acts as the backend foundation by providing a managed Postgres database with dashboards and optional backups, built-in authentication, file and blob storage, real-time updates, and scheduled background jobs.
Resend handles transactional email, Stripe manages billing and subscriptions, and PostHog and Sentry provide analytics and error visibility using free tiers.
Testing remains lightweight with Vitest and Playwright, while CI/CD is handled through GitHub Actions with database migrations kept in sync.
Best when: you want one central dashboard for most backend needs, generous free tiers, and a SaaS stack that scales without pulling you into infrastructure work early.
This stack is for builders who want full control, zero vendor lock-in, and everything runnable locally. Every component is open source and runs through Docker Compose, which means anyone can clone the repository and start a complete SaaS environment with a single command.
Next.js runs the frontend and backend locally, while Postgres provides a self-hosted relational database.
Schema management is handled by Drizzle running locally. Authentication is managed using Better Auth, keeping identity and access fully under your control.
MinIO replaces cloud blob storage with an S3-compatible local service. Mailpit captures outbound emails during development, and Redis powers caching and background jobs through BullMQ.
Meilisearch handles fast full text search, and optional observability tools such as Grafana, Prometheus, and Loki can be added for deeper insight.
Deployment remains flexible using Coolify or Dokku on a VPS, with GitHub Actions building and deploying Docker images over SSH.
Best when: you want a SaaS stack that works entirely offline, can be shared with docker compose up, and avoids vendor lock-in while remaining production-capable.
Getting started does not need a long or complicated process. The goal is to remove friction, build momentum, and ship something real as early as possible. The steps below are intentionally simple and work with any of the three vibe-coding stacks.
Start by choosing which stack you will use. Do not overthink this decision. You can always migrate later, but switching tools mid-build slows momentum.
Having accounts ready upfront prevents context switching once you start building.
After choosing your stack, set up the core services you will rely on from day one. This typically includes authentication, database access, email delivery, payments, and deployment. Creating these accounts early allows you to integrate them naturally as you build, rather than retrofitting them later.
Depending on your stack, you will usually need to create accounts and generate API keys for:
Once accounts are created, generate the required API keys and service URLs and store them as environment variables. Keep these values in an .env file locally and never commit secrets to version control. Only commit safe configuration, such as example environment files or public keys.
Setting this up early keeps your development flow smooth and avoids breaking changes when you are close to launch.
Do not start from an empty repository. Use a starter template that already includes your framework, basic layout, and essential configuration.
A good starter should give you:
This can save hours of setup time and help you focus on product logic instead of boilerplate.
Claude Code works best when you treat it as an interactive pair programmer, not just a code generator. Using the Claude Code extension inside VS Code gives you fast feedback, strong context awareness, and a much more conversational way to build.
When starting a new project, always begin in plan mode and make sure reasoning is enabled. This helps Claude think through architecture, data flow, and edge cases before writing code. It leads to a cleaner structure and fewer rewrites later.
You should also connect the essential MCP servers early. At minimum, enable:
This allows Claude to reason with real documentation and real-world implementations instead of guessing.
Before writing any code, always give a clear and detailed introduction to what you are building. Be explicit about:
This context anchors the AI from the start and avoids mismatched assumptions.
Example starter prompt:
Build a minimal, production-ready course-selling SaaS using Next.js + Supabase + Stripe + Vercel.
Must include marketing pages, auth, Stripe subscriptions (Checkout + webhooks + portal), dashboard, and protected course content.
Keep it minimal, secure (server-only secrets, webhook verification), and deployable.Deploy as soon as your app runs locally.
Connect your repository to your deployment platform (Vercel), enable preview deployments, and push frequently. A live URL helps you catch environment issues early and makes it easier to share progress and gather feedback.
The earlier your app is live, the better your decisions will be.
Once real users interact with your product, let their behavior guide your roadmap.
Focus on:
Fix the most painful issue first, then repeat. Small iterations compound faster than large rewrites.
Once your SaaS is live and users are interacting with it, visibility becomes more important than new features. This is the stage where you make the product reliable, predictable, and easier to evolve.
Start by adding monitoring and error tracking so you know when something breaks before users report it. Pair this with basic automated testing to protect core flows like signup, login, and payments as you iterate.
Next, introduce automations for repetitive or time-based work. This can include scheduled jobs, background processing, cleanup tasks, or email workflows. Automations reduce manual effort and keep the system consistent as usage grows.
Finally, focus on user behavior tracking. Track how users move through the product, where they hesitate, and which features they actually use. This data is far more valuable than opinions or assumptions.
If I had to give one core piece of advice, it would be to start with a solid skeleton. I usually ask my coding agent to first build the foundation of the application, with clear placeholders for features I know I will add later. Starting this way gives the project structure from day one and makes future changes far less painful.
This is where plan mode in Claude Code really shines. I begin by asking it to think through the architecture, user flows, and data model before writing any code. Once the plan looks right, I move on to execution.
From there, Claude Code helps me build features, write and run tests, and even deploy the app using the CLI commands. It can also reference documentation, spot common issues, and suggest fixes automatically, which removes a lot of friction during development.
Once the application runs locally, the next step is deployment. I try to deploy to Vercel as early as possible. Having a live URL changes how you think about the product. It creates momentum, makes progress feel real, and allows you to share your work with friends or early users to get feedback quickly.
As the product grows, keeping things organized becomes important. Whenever I want to add a new feature, I create a GitHub issue first, then open a new branch tied to that issue.
I work on the feature in isolation and finish by opening a pull request. This simple workflow helps track progress, keeps changes contained, and makes the project easier to manage over time, even when working alone.
If you want to dive deeper into some of the specific tools mentioned in this guide, here are a few resources I highly recommend:
The most important thing is to just start shipping. Pick a stack, open your editor, and let the vibes guide you to your first live URL.
Top DataCamp Courses
Course
Course
Course
blog
Abid Ali Awan
15 min
blog
Allan Ouko
11 min
blog
Oluseye Jeremiah
8 min
blog
Dr Ana Rojo-Echeburúa
6 min
Tutorial
Marie Fayard
Tutorial
François Aubry