Course
Introduction to LLMs in Python
3 hr
33.6K
Microsoft has joined the competitive landscape of large language models alongside Meta AI with the introduction of the Phi-3.5 series. This series includes a small language model, a vision language model, and employs a Mixture-of-Experts approach to achieve top-tier performance.
In this tutorial, we will explore the Microsoft Phi-3.5 family of models. We will load the Phi-3.5-mini-instruct model and fine-tune it to classify e-commerce products based on their text descriptions. In the final steps, we will demonstrate how to merge the LoRA (Low-Rank Adaptation) with the base model and push it to Hugging Face. This will enable efficient cloud deployment, making the model accessible for various applications.
Take the Master Large Language Models (LLMs) Concepts course and learn about LLM applications, training methodologies, ethical considerations, and the latest research.
Image by Author
The Microsoft Phi-3.5 release introduces three innovative models: Phi-3.5-mini, Phi-3.5-vision, and the latest addition, Phi-3.5-MoE, a Mixture-of-Experts model.
Phi-3.5-mini is optimized for enhanced multi-lingual support with an impressive 128K context length. Despite its smaller size, it delivers performance that rivals larger models, thanks to rigorous enhancements through supervised fine-tuning, proximal policy optimization, and direct preference optimization, ensuring precise instruction adherence.
Phi-3.5-vision is a cutting-edge, lightweight multimodal model which was trained on the datasets composed of synthetic data and filtered public websites. It excels in multi-frame image understanding and reasoning, making it ideal for detailed image comparison, multi-image summarization/storytelling, and video summarization, with broad application potential.
The standout model, Phi-3.5-MoE, features a Mixture-of-Experts architecture with 16 experts and 6.6 billion active parameters. It offers exceptional performance with reduced latency and robust safety, alongside comprehensive multi-lingual support.
The Phi-3.5 model family offers cost-effective, high-performance solutions for the open-source community, advancing small language models and generative AI.
To learn about Phi-3 architecture, features, and applications, follow the Phi-3 Tutorial: Hands-On With Microsoft’s Smallest AI Model guide.
In this section, we will load the Phi-3.5-mini-instruct model and run the model inference in the Kaggle platform.
pip command.%%capture
%pip install -U transformers acceleratetext-generation pipeline with model and tokenizer. from transformers import AutoTokenizer,AutoModelForCausalLM,pipeline
import torch
base_model = "microsoft/Phi-3.5-mini-instruct"
tokenizer = AutoTokenizer.from_pretrained(base_model)
model = AutoModelForCausalLM.from_pretrained(
base_model,
return_dict=True,
low_cpu_mem_usage=True,
torch_dtype=torch.float16,
device_map="auto",
trust_remote_code=True,
)
pipe = pipeline(
"text-generation",
model=model,
tokenizer=tokenizer,
torch_dtype=torch.float16,
device_map="auto",
)messages = [
{"role": "system", "content": "You are a helpful assistant."},
{"role": "user", "content": "What is the tallest building in the world?"}
]
# Apply the chat template to the messages
prompt = tokenizer.apply_chat_template(messages, tokenize=False, add_generation_prompt=True)
# Generate the output using the pipeline
outputs = pipe(prompt, max_new_tokens=120, do_sample=True)
# Print the generated text
print(outputs[0]["generated_text"])We got an accurate and detailed result.
<|system|>
You are a helpful assistant.<|end|>
<|user|>
What is the tallest building in the world?<|end|>
<|assistant|>
As of my knowledge cutoff in 2023, the tallest building in the world is the Burj Khalifa, located in Dubai, United Arab Emirates. It stands at a remarkable 828 meters (2,716.5 feet) tall once its antenna is included. Completed in January 2010, the Burj Khalifa marks a significant achievement in architecture and engineering, setting numerous records. It provides office space, luxury condominiums, and various leisure facilities. This landmark continues toprompt = """
In a call center environment, classify customer interactions as 'Fraudulent' or 'Non-Fraudulent'.
Consider factors such as the nature of the inquiry, caller verification details, transaction history, and any red flags raised during the call.
[Lisa Adams, contacts the call center claiming unauthorized transactions on her credit card statement. She demands a full refund, asserting that she has never visited the merchant in question.] =
"""
outputs = pipe(prompt, max_new_tokens=120, do_sample=True)
print(outputs[0]["generated_text"])As we can see, the model has performed quite well, flagging the call as fraudulent and providing an explanation.
 In a call center environment, classify customer interactions as 'Fraudulent' or 'Non-Fraudulent'.
        Consider factors such as the nature of the inquiry, caller verification details, transaction history, and any red flags raised during the call.
        [Lisa Adams, contacts the call center claiming unauthorized transactions on her credit card statement. She demands a full refund, asserting that she has never visited the merchant in question.] =

        Call Interaction Classification: Fraudulent

        Explanation:
        The situation described by Lisa Adams indicates a potential case of credit card fraud. There are several red flags in this interaction that suggest the customer might be reporting unauthorized transactions:

1. The caller claims unauthorized transactions - This is a common indicator of fraud, especially if the transactions were for places or services the customer did not recognize or didn't patronize according to their personal knowledge or documented transaction history (e.g., no visits to the
If you are experiencing issues running the model on the Kaggle platform, please refer to the Simple Model Inference of Phi-3.5 Kaggle notebook. It comes with a pre-built setup and code along with outputs.
In this guide, we will learn to load and process the E-commerce text classification data. We will also load the model and tokenizer, evaluate the model on the test dataset before fine-tuning, build the trainer, fine-tune the model on the training set, and test the model after fine-tuning.
If you’re new to the process, be sure to read our guide, An Introductory Guide to Fine-Tuning LLMs, and learn the theory behind LLM fine-tuning.
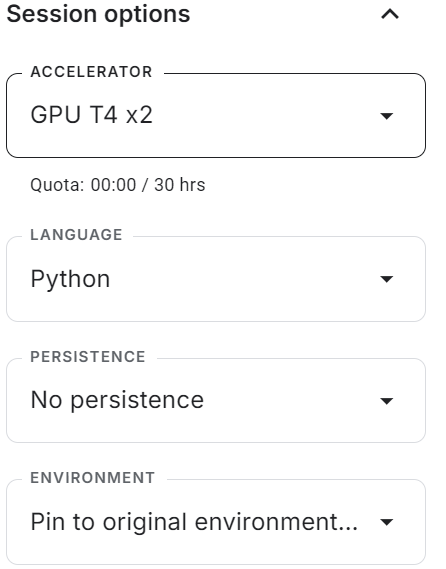
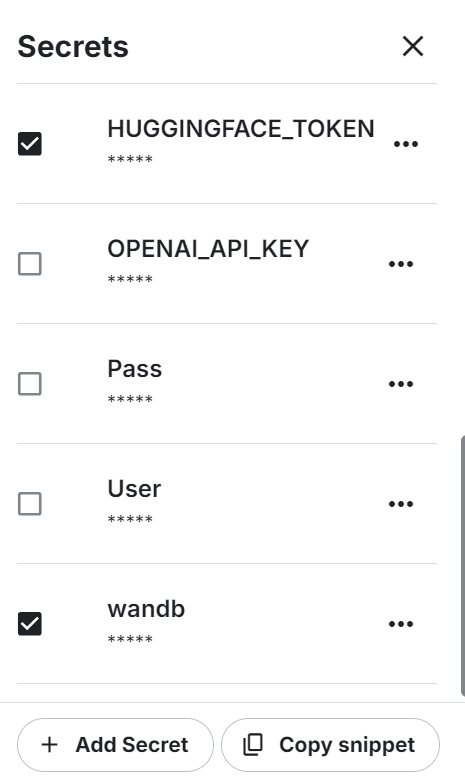
Launch the new Kaggle notebook with GPU acceleration enabled. Then, make sure you have set the Hugging Face and Weights & Biases API token as environment variables using the Kaggle secrets.
Install all the necessary Pythons packages.
%%capture
%pip install -U bitsandbytes
%pip install -U transformers
%pip install -U accelerate
%pip install -U peft
%pip install -U trl
Log in to the Weights and biases service, sign the API key, and initiate the new project.
import wandb

from kaggle_secrets import UserSecretsClient
user_secrets = UserSecretsClient()

wb_token = user_secrets.get_secret("wandb")

wandb.login(key=wb_token)
run = wandb.init(
    project='Fine-tune Phi-3.5-it on Ecommerce Text Classification',
    job_type="training",
    anonymous="allow"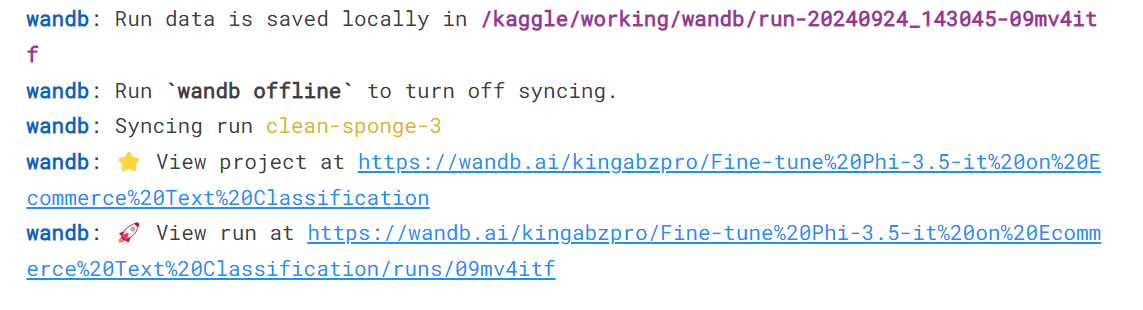
In the end, load all the necessary Python packages and functions that we are going to use during the fine-tuning and evaluation process.
import numpy as np
import pandas as pd
import os
from tqdm import tqdm
import bitsandbytes as bnb
import torch
import torch.nn as nn
import transformers
from datasets import Dataset
from peft import LoraConfig, PeftConfig
from trl import SFTTrainer
from trl import setup_chat_format
from transformers import (AutoModelForCausalLM,
AutoTokenizer,
BitsAndBytesConfig,
TrainingArguments,
pipeline,
logging)
from sklearn.metrics import (accuracy_score,
classification_report,
confusion_matrix)
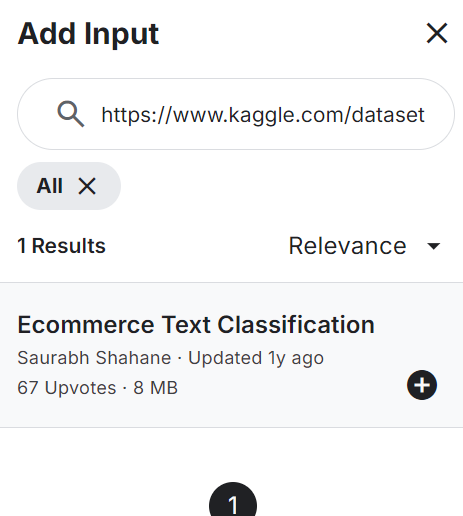
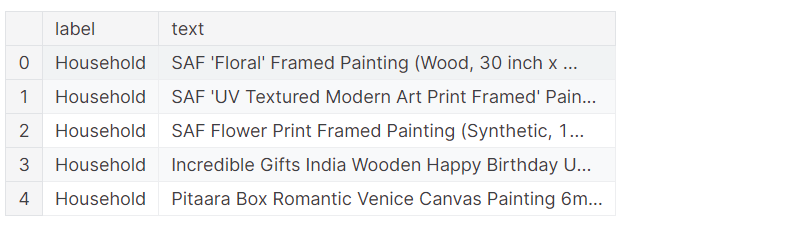
from sklearn.model_selection import train_test_splitAdd the E-commerce Text Classification dataset to your notebook, as shown below. The dataset consists of two columns: labels (e-commerce categories) and text descriptions of the product.
Load the CSV file, process it, and view the top 5 rows.
df = pd.read_csv("/kaggle/input/ecommerce-text-classification/ecommerceDataset.csv")
df.columns = ["label","text"]
df.loc[:,'label'] = df.loc[:,'label'].str.replace('Clothing & Accessories','Clothing')
df.head()
The dataset consists of the description of the products and the category label.
Shuffle the dataset and select only the top 2000 rows. This is an example guide, meant to speed up the fine-tuning process by fine-tuning the model on a limited set of samples.
Next, we will split the data into train, evaluation, and test datasets.
# Shuffle the DataFrame and select only 2000 rows
df = df.sample(frac=1, random_state=85).reset_index(drop=True).head(2000)

# Split the DataFrame
train_size = 0.8
eval_size = 0.1

# Calculate sizes
train_end = int(train_size * len(df))
eval_end = train_end + int(eval_size * len(df))

# Split the data
X_train = df[:train_end]
X_eval = df[train_end:eval_end]
X_test = df[eval_end:]
We will create two functions. The generate_prompt function will convert text columns in the prompt, including instructions, text descriptions, and labels. The generate_test_prompt function is the same but without the label.
# Define the prompt generation functions
def generate_prompt(data_point):
    return f"""
            Classify the E-commerce text into Electronics, Household, Books and Clothing.
text: {data_point["text"]}
label: {data_point["label"]}""".strip()

def generate_test_prompt(data_point):
    return f"""
            Classify the E-commerce text into Electronics, Household, Books and Clothing.
text: {data_point["text"]}
label: """.strip()

# Generate prompts for training and evaluation data
X_train.loc[:,'text'] = X_train.apply(generate_prompt, axis=1)
X_eval.loc[:,'text'] = X_eval.apply(generate_prompt, axis=1)

# Generate test prompts and extract true labels
y_true = X_test.loc[:,'label']
X_test = pd.DataFrame(X_test.apply(generate_test_prompt, axis=1), columns=["text"])
Convert the pandas train and evaluate data dataframes into the Hugging Face datasets.
# Convert to datasets
train_data = Dataset.from_pandas(X_train[["text"]])
eval_data = Dataset.from_pandas(X_eval[["text"]])

train_data['text'][3]
The text consists of system instructions, a text description of the product, and a label.

Load the 4-bit quantized model and tokenizer from the Hugging Face Hub using the repository ID. Then, set up the model and tokenizer so that they are ready to be used.
base_model_name = "microsoft/Phi-3.5-mini-instruct"

bnb_config = BitsAndBytesConfig(
    load_in_4bit=True,
    bnb_4bit_use_double_quant=False,
    bnb_4bit_quant_type="nf4",
    bnb_4bit_compute_dtype="float16",
)

model = AutoModelForCausalLM.from_pretrained(
    base_model_name,
    device_map="auto",
    torch_dtype="float16",
    quantization_config=bnb_config,
)

model.config.use_cache = False
model.config.pretraining_tp = 1

tokenizer = AutoTokenizer.from_pretrained(base_model_name)

tokenizer.pad_token_id = tokenizer.eos_token_idWe need to evaluate the base model before fine-tuning it to determine if the fine-tuning has improved the results or not. For this, we will create a predict function that takes the test dataset and generates e-commerce categories based on the product and text description.
def predict(test, model, tokenizer):
    y_pred = []
    categories = ["Electronics", "Household", "Books", "Clothing"]

    for i in tqdm(range(len(test))):
        prompt = test.iloc[i]["text"]
        pipe = pipeline(task="text-generation",
                        model=model,
                        tokenizer=tokenizer,
                        max_new_tokens=4,
                        temperature=0.1)

        result = pipe(prompt)
        answer = result[0]['generated_text'].split("label:")[-1].strip()

        # Determine the predicted category
        for category in categories:
            if category.lower() in answer.lower():
                y_pred.append(category)
                break
        else:
            y_pred.append("none")

    return y_pred

y_pred = predict(X_test, model, tokenizer)
We have a list of predicted categories, and now we will compare them with the actual categories to generate the model evaluation report. The "evaluate" function takes a list of predicted and actual categories and generates a detailed evaluation report. This report includes the average accuracy, individual accuracy for each category, a classification report, and a confusion matrix.
def evaluate(y_true, y_pred):
    labels = ["Electronics", "Household", "Books", "Clothing"]
    mapping = {label: idx for idx, label in enumerate(labels)}

    def map_func(x):
        return mapping.get(x, -1)  # Map to -1 if not found, but should not occur with correct data

    y_true_mapped = np.vectorize(map_func)(y_true)
    y_pred_mapped = np.vectorize(map_func)(y_pred)

    # Calculate accuracy
    accuracy = accuracy_score(y_true=y_true_mapped, y_pred=y_pred_mapped)
    print(f'Accuracy: {accuracy:.3f}')

    # Generate accuracy report
    unique_labels = set(y_true_mapped)  # Get unique labels

    for label in unique_labels:
        label_indices = [i for i in range(len(y_true_mapped)) if y_true_mapped[i] == label]
        label_y_true = [y_true_mapped[i] for i in label_indices]
        label_y_pred = [y_pred_mapped[i] for i in label_indices]
        label_accuracy = accuracy_score(label_y_true, label_y_pred)
        print(f'Accuracy for label {labels[label]}: {label_accuracy:.3f}')

    # Generate classification report
    class_report = classification_report(y_true=y_true_mapped, y_pred=y_pred_mapped, target_names=labels, labels=list(range(len(labels))))
    print('\nClassification Report:')
    print(class_report)

    # Generate confusion matrix
    conf_matrix = confusion_matrix(y_true=y_true_mapped, y_pred=y_pred_mapped, labels=list(range(len(labels))))
    print('\nConfusion Matrix:')
    print(conf_matrix)


evaluate(y_true, y_pred)
We achieved an average accuracy of 65%. Let's determine if fine-tuning can improve this score.
Accuracy: 0.645
Accuracy for label Electronics: 0.950
Accuracy for label Household: 0.531
Accuracy for label Books: 0.561
Accuracy for label Clothing: 0.658

Classification Report:
              precision    recall  f1-score   support

 Electronics       0.46      0.95      0.62        40
   Household       0.83      0.53      0.65        81
       Books       0.96      0.56      0.71        41
    Clothing       0.86      0.66      0.75        38

   micro avg       0.69      0.65      0.67       200
   macro avg       0.78      0.67      0.68       200
weighted avg       0.79      0.65      0.67       200


Confusion Matrix:
[[38  0  1  0]
 [33 43  0  2]
 [ 9  6 23  2]
[ 2 3 0 25]]Extract the linear model name from the model.
def find_all_linear_names(model):
    cls = bnb.nn.Linear4bit
    lora_module_names = set()
    for name, module in model.named_modules():
        if isinstance(module, cls):
            names = name.split('.')
            lora_module_names.add(names[0] if len(names) == 1 else names[-1])
    if 'lm_head' in lora_module_names:  # needed for 16 bit
        lora_module_names.remove('lm_head')
    return list(lora_module_names)
modules = find_all_linear_names(model)
modules
['gate_up_proj', 'down_proj', 'qkv_proj', 'o_proj']Use the linear module name to create the LoRA. We will only fine-tune the LoRA and leave the rest of the model to save memory and for faster training time.
Next, configure the model's hyperparameters for the Kaggle environment. You can change these parameter to improve the accuracy and reduce the training time based on your machine. To learn about each hyperparmeter follow the Fine-Tuning Llama 2 tutorial.
We will now set up a supervised fine-tuning (SFT) trainer and provide a train and evaluation dataset, LoRA configuration, training argument, tokenizer, and model.
output_dir="Phi-3.5-mini-instruct"

peft_config = LoraConfig(
    lora_alpha=16,
    lora_dropout=0,
    r=64,
    bias="none",
    task_type="CAUSAL_LM",
    target_modules=modules,
)

training_arguments = TrainingArguments(
    output_dir=output_dir,                    # directory to save and repository id
    num_train_epochs=1,                       # number of training epochs
    per_device_train_batch_size=1,            # batch size per device during training
    gradient_accumulation_steps=4,            # number of steps before performing a backward/update pass
    gradient_checkpointing=True,              # use gradient checkpointing to save memory
    optim="paged_adamw_8bit",
    logging_steps=1,
    learning_rate=2e-5,                       # learning rate, based on QLoRA paper
    weight_decay=0.001,
    fp16=False,
    bf16=False,
    max_grad_norm=0.3,                        # max gradient norm based on QLoRA paper
    max_steps=-1,
    warmup_ratio=0.03,                        # warmup ratio based on QLoRA paper
    group_by_length=False,
    lr_scheduler_type="cosine",               # use cosine learning rate scheduler
    report_to="wandb",                  # report metrics to w&b
    eval_strategy="steps",              # save checkpoint every epoch
    eval_steps = 0.2
)

trainer = SFTTrainer(
    model=model,
    args=training_arguments,
    train_dataset=train_data,
    eval_dataset=eval_data,
    peft_config=peft_config,
    dataset_text_field="text",
    tokenizer=tokenizer,
    max_seq_length=512,
    packing=False,
    dataset_kwargs={
    "add_special_tokens": False,
    "append_concat_token": False,
    }
)We will use the .train function to initiate the fine-tuning process.
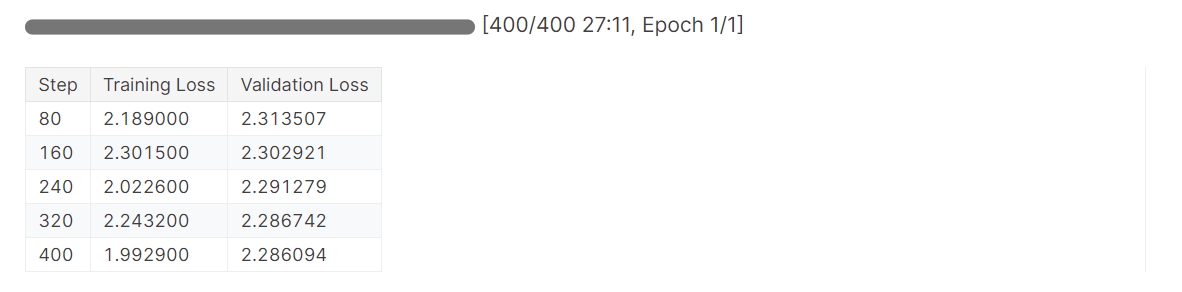
# Train model
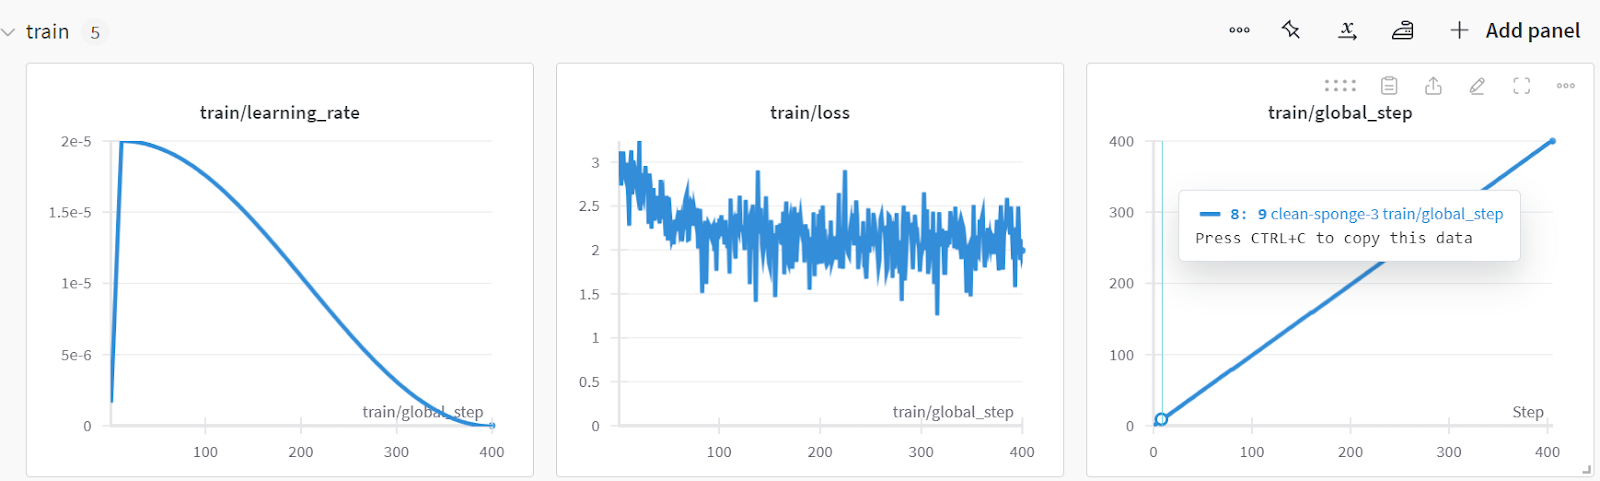
trainer.train()The loss has gradually reduced, and we could have achieved even better results with more epochs.
Finish the Weights & Biases run to generate the evaluation report.
wandb.finish()
model.config.use_cache = True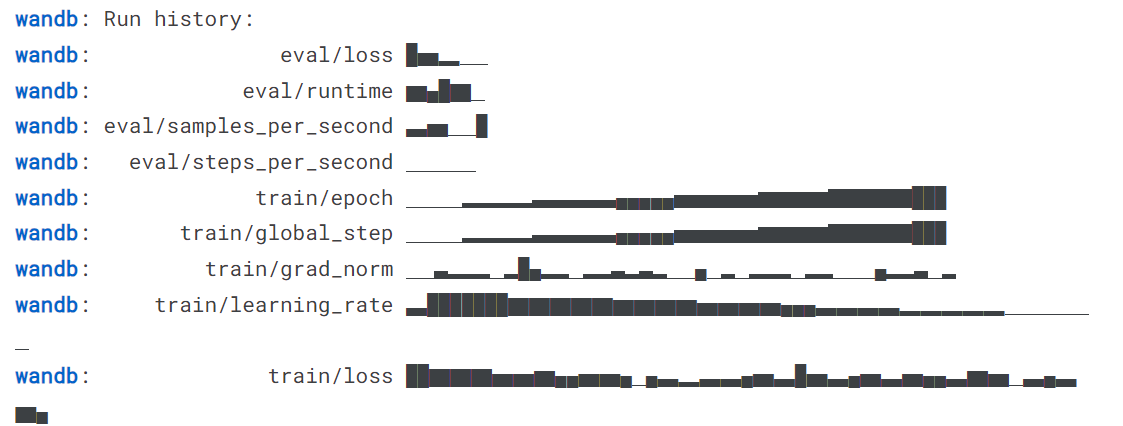
You can analyze the model performance by visiting the Weights & Biases website, selecting your project, and viewing the training analysis.
Save the model and tokenizer locally so that we can use them later for model merging and push them to the remote server.
# Save trained model and tokenizer
trainer.save_model(output_dir)
tokenizer.save_pretrained(output_dir)
This guide is quite code-heavy. If you're seeking a simpler solution, you can fine-tune an open-source model by following the LlaMA-Factory WebUI Beginner's Guide: Fine-Tuning LLMs tutorial. For an even simpler solution where you don't have to worry about hardware issues, we highly recommend the Fine-tuning GPT-4o Mini: A Step-by-Step Guide tutorial. This will help you fine-tune on the cloud with minimal code.
Let’s test whether the model performance improved after fine-tuning. We will first generate a list of predicated labels and provide it to the evaluate function along with actual labels.
y_pred = predict(X_test, model, tokenizer)
evaluate(y_true, y_pred)
The model accuracy improved by approximately 32.31%, and the rest of the performance metrics look amazing. Apart from the Books category, the model was able to identify the categories quite accurately.
Accuracy: 0.860
Accuracy for label Electronics: 0.825
Accuracy for label Household: 0.926
Accuracy for label Books: 0.683
Accuracy for label Clothing: 0.947
Classification Report:
precision recall f1-score support
Electronics 0.97 0.82 0.89 40
Household 0.88 0.93 0.90 81
Books 0.90 0.68 0.78 41
Clothing 0.88 0.95 0.91 38
micro avg 0.90 0.86 0.88 200
macro avg 0.91 0.85 0.87 200
weighted avg 0.90 0.86 0.88 200
Confusion Matrix:
[[33 6 1 0]
[ 1 75 2 3]
[ 0 3 28 2]
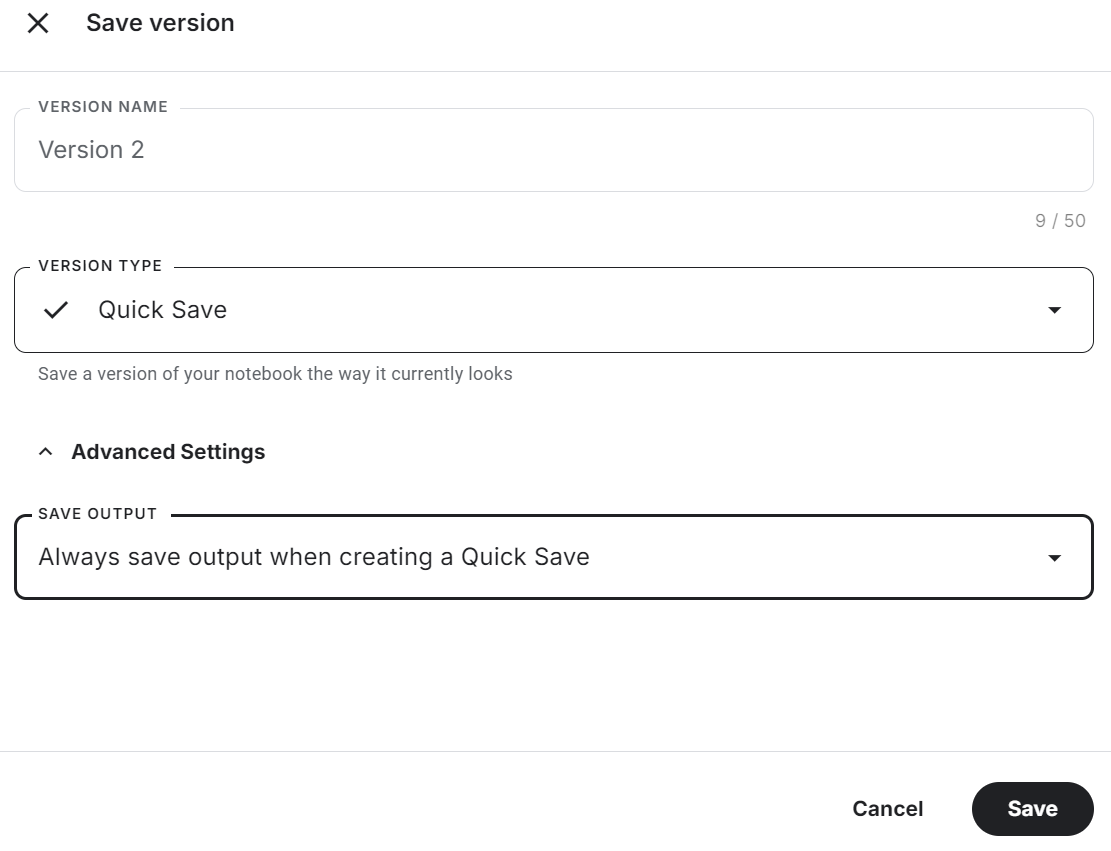
[ 0 1 0 36]]Make sure to save the Kaggle notebook by clicking on the "Save Version" button in the top right. Then, select the quick save option and change the save output option to include saving the model file and all of the code.
If you encounter issues while fine-tuning the model, please refer to the Fine-tune Phi-3.5 for Text Classification Kaggle notebook.
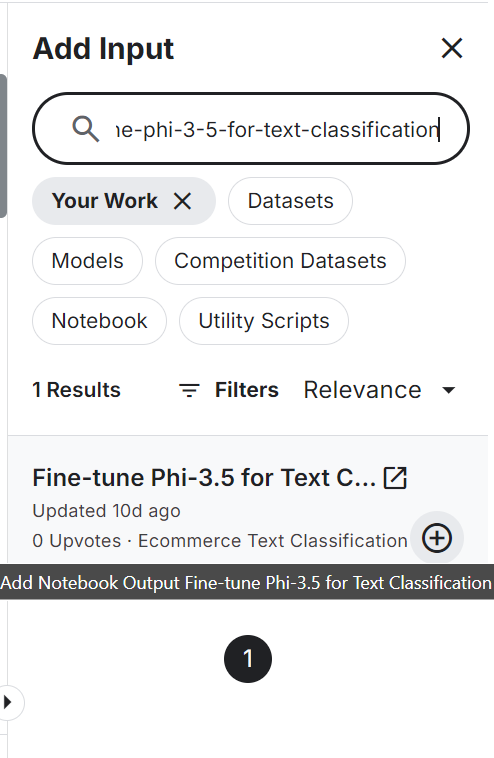
To merge and export the model to Hugging Face, we will first create a new Kaggle notebook and add the saved notebook to access the fine-tuned model and tokenizer.
Adding another Kaggle notebook is similar to adding a dataset and a model. Click on the “+ Add Input” button, paste the link of the notebook, and then press the add button.
Setting the Hugging Face API as an environment variable using the Kaggle secrets and installing all the necessary Python packages for loading and merging the model.
%%capture
%pip install -U bitsandbytes
%pip install -U transformers
%pip install -U accelerate
%pip install -U peft
Set the base model and fine-tuned model variables with the model ID and the model adopter's location.
# Model
base_model = "microsoft/Phi-3.5-mini-instruct"
fine_tuned_model = "/kaggle/input/fine-tune-phi-3-5-for-text-classification/Phi-3.5-mini-instruct/"
Load the full model from the Hugging Face hub alongside the tokenizer.
from transformers import AutoModelForCausalLM, AutoTokenizer, pipeline
from peft import PeftModel
import torch
# Reload tokenizer and model
tokenizer = AutoTokenizer.from_pretrained(base_model)

base_model_reload = AutoModelForCausalLM.from_pretrained(
        base_model,
        return_dict=True,
        low_cpu_mem_usage=True,
        torch_dtype=torch.float16,
        device_map="auto",
        trust_remote_code=True,
)
Merge the base model with the adopter using two lines of code.
# Merge adapter with base model
model = PeftModel.from_pretrained(base_model_reload, fine_tuned_model)
model = model.merge_and_unload()
To test if the model has been successfully merged, we will create a text generation pipeline with the merged model and tokenizer, and pass the sample prompt to generate the response.
text = "Inalsa Dazzle Glass Top, 3 Burner Gas Stove with Rust Proof Powder Coated Body, Black Toughened Glass Top, 2 Medium and 1 Small High Efficiency Brass Burners, Aluminum Mixing Tubes, Powder Coated Body, Inbuilt Stainless Steel Drip Trays, 360 degree Swivel Nozzle,Bigger Legs to Facilitate Cleaning Under Cooktop"
prompt = f"""Classify the E-commerce text into Electronics, Household, Books and Clothing.
text: {text}
label: """.strip()

pipe = pipeline(
    "text-generation",
    model=model,
    tokenizer=tokenizer,
    torch_dtype=torch.float16,
    device_map="auto",
)

outputs = pipe(prompt, max_new_tokens=4, do_sample=True, temperature=0.1)
print(outputs[0]["generated_text"].split("label: ")[-1].strip())1].strip())
The model has accurately predicted the production category.
HouseholdWe will save the full model locally by providing it with the model directory.
model_dir = "Phi-3.5-mini-instruct-Ecommerce-Text-Classification"
model.save_pretrained(model_dir)
tokenizer.save_pretrained(model_dir)
Push the saved model to the Hugging Face hub. First, log in to the Hugging Face CLI using the API key extracted from Kaggle secrets, and then use the push_to_hub function to push both the model and tokenizer.
from huggingface_hub import login
from kaggle_secrets import UserSecretsClient
user_secrets = UserSecretsClient()

hf_token = user_secrets.get_secret("HUGGINGFACE_TOKEN")
login(token = hf_token)


model.push_to_hub(model_dir, use_temp_dir=False)
tokenizer.push_to_hub(model_dir, use_temp_dir=False)
It has created a new model repository and pushed all the files to the Hugging Face model repository.
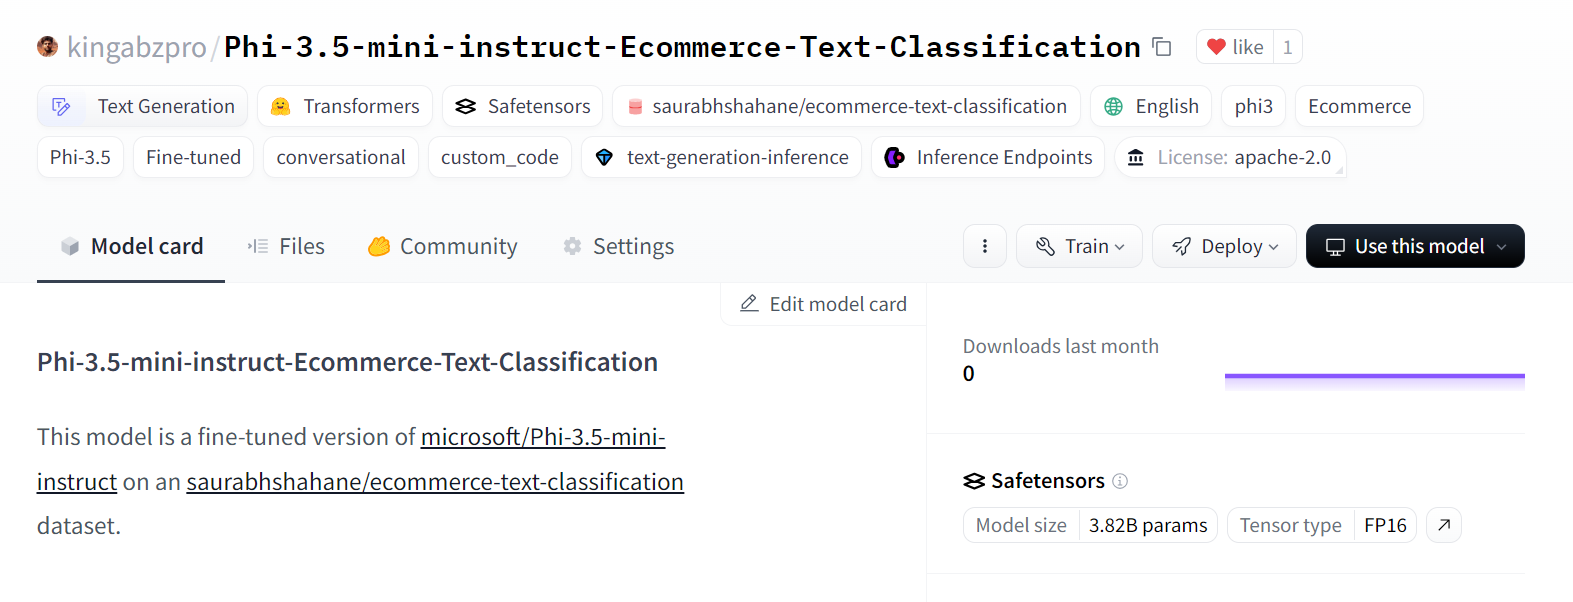
Source: kingabzpro/Phi-3.5-mini-instruct-Ecommerce-Text-Classification
If you are having trouble merging the model and exporting it, please check out the Phi-3.5 Fine-tuned Adapter to the full model Kaggle notebook.
Also, take a look at our newest tutorial on Fine-tuning Llama 3.2 and Using It Locally: A Step-by-Step Guide. In this tutorial, you will learn how to fine-tune the model on a custom dataset using free GPUs, merge and export the model to the Hugging Face Hub, and convert the fine-tuned model to GGUF format so it can be used locally with the Jan application.
Large language models are becoming smaller and more efficient, leading to reduced operational costs and improved adaptability across various fields. In this tutorial, we explored the Phi-3.5 Mini, Vision, and MoE models. We also learned how to access Phi-3.5 Mini models using Kaggle Notebooks.
Next, we fine-tuned the models on classification data and evaluated their performance, achieving a significant improvement from 65% to 86% accuracy—a remarkable accomplishment. Such performance is not achievable through RAG or function calling alone.
Finally, we integrated the LoRA with the base model and exported the complete model to the Hugging Face Hub, where it is available for everyone to use.
The next step in your journey is to build a project by following the list of 12 LLM Projects For All Levels. It includes LLM projects for beginners, intermediate students, final-year scholars, and experts. Each project comes with a code source, visual guide, and supporting links.
Top LLM Courses
Course
Course
Course
Tutorial
Abid Ali Awan
Tutorial
Zoumana Keita
Tutorial
Abid Ali Awan
Tutorial
Josep Ferrer
Tutorial
Abid Ali Awan
Tutorial
Abid Ali Awan