Track
Developing Large Language Models
16 hr
Building on the success of QwQ and Qwen2.5, Qwen3 represents a major leap forward in reasoning, creativity, and conversational capabilities. With open access to both dense and Mixture-of-Experts (MoE) models, ranging from 0.6B to 235B-A22B parameters, Qwen3 is designed to excel in a wide array of tasks.
In this tutorial, we will fine-tune the Qwen3-32B model on a medical reasoning dataset. The goal is to optimize the model's ability to reason and respond accurately to patient queries, ensuring it adopts a precise and efficient approach to medical question-answering.
We keep our readers updated on the latest in AI by sending out The Median, our free Friday newsletter that breaks down the week’s key stories. Subscribe and stay sharp in just a few minutes a week:
If you want to learn more about Qwen 3 and how it stacks up, check out our introductory guide to the model, Qwen 3: Features, DeepSeek-R1 Comparison, Access, and More.
Image by Author
Go to your RunPod dashboard and make sure you have a minimum of $5 in your account. Next, choose the A100 SXM model and select the latest version of PyTorch. Finally, click the “Deploy On-Demand” button to launch your Pod.
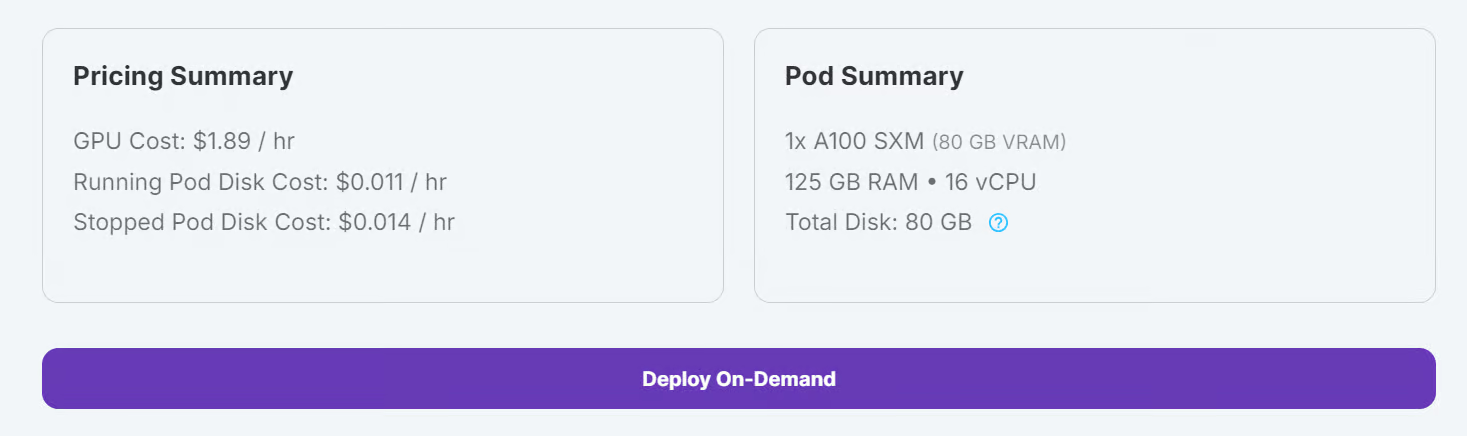
Source: My Pods
Modify your Pod settings and adjust the container disk size to 100 GB. Additionally, include your Hugging Face access token as an environment variable.
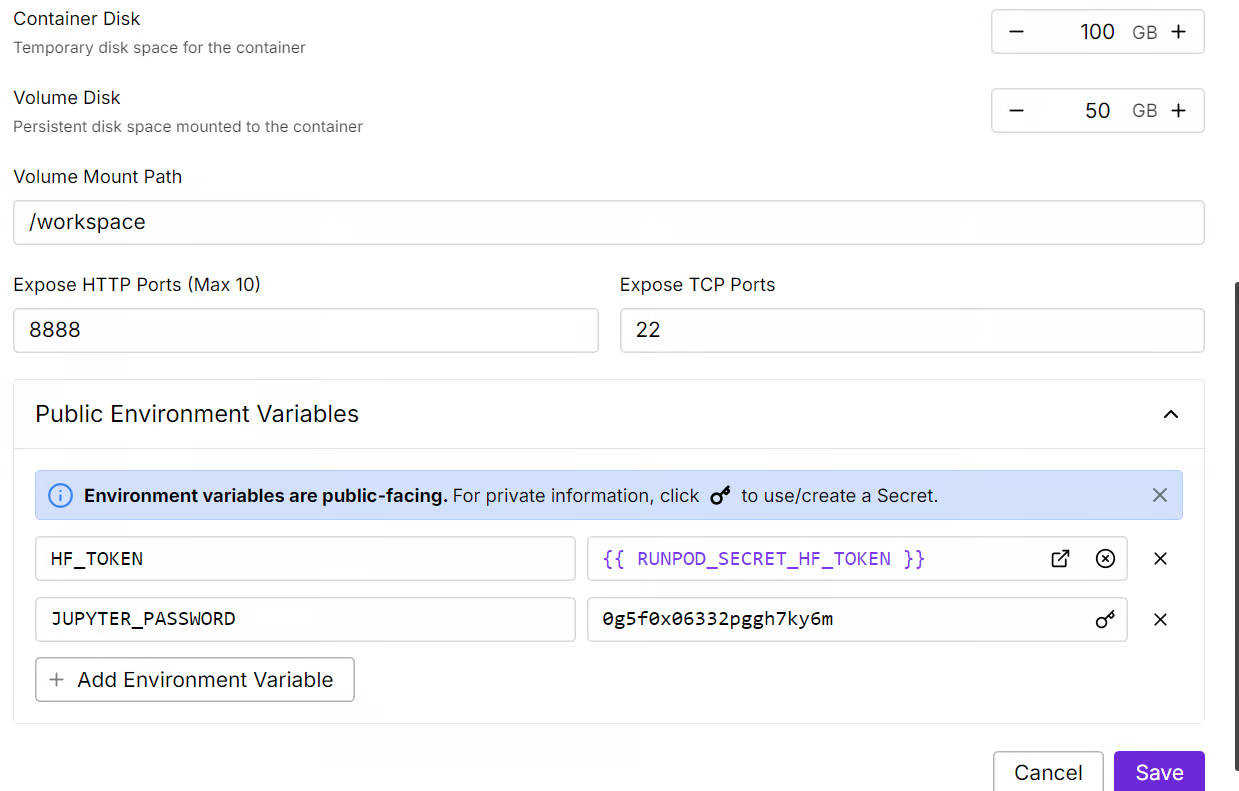
Source: My Pods
Once the settings are applied, click on “Connect” to launch Jupyter Lab.
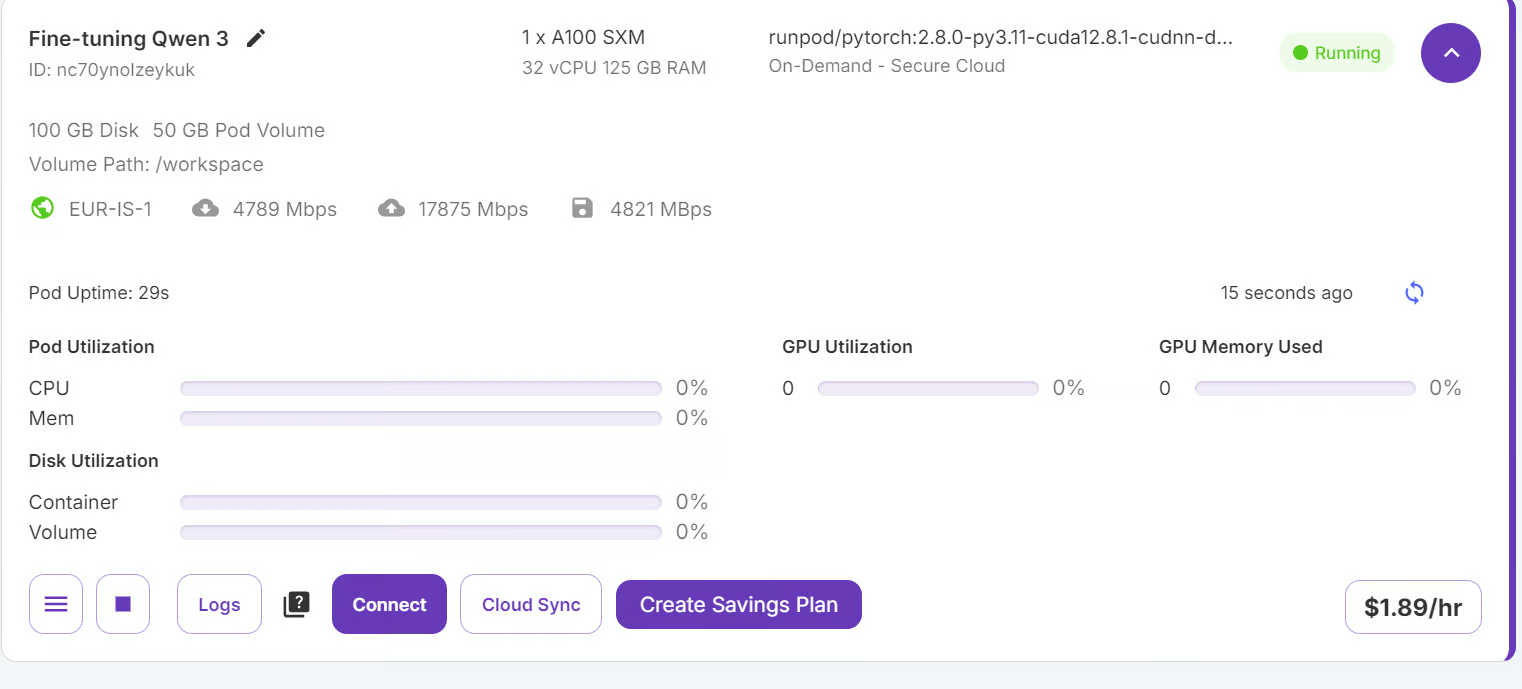
Source: My Pods
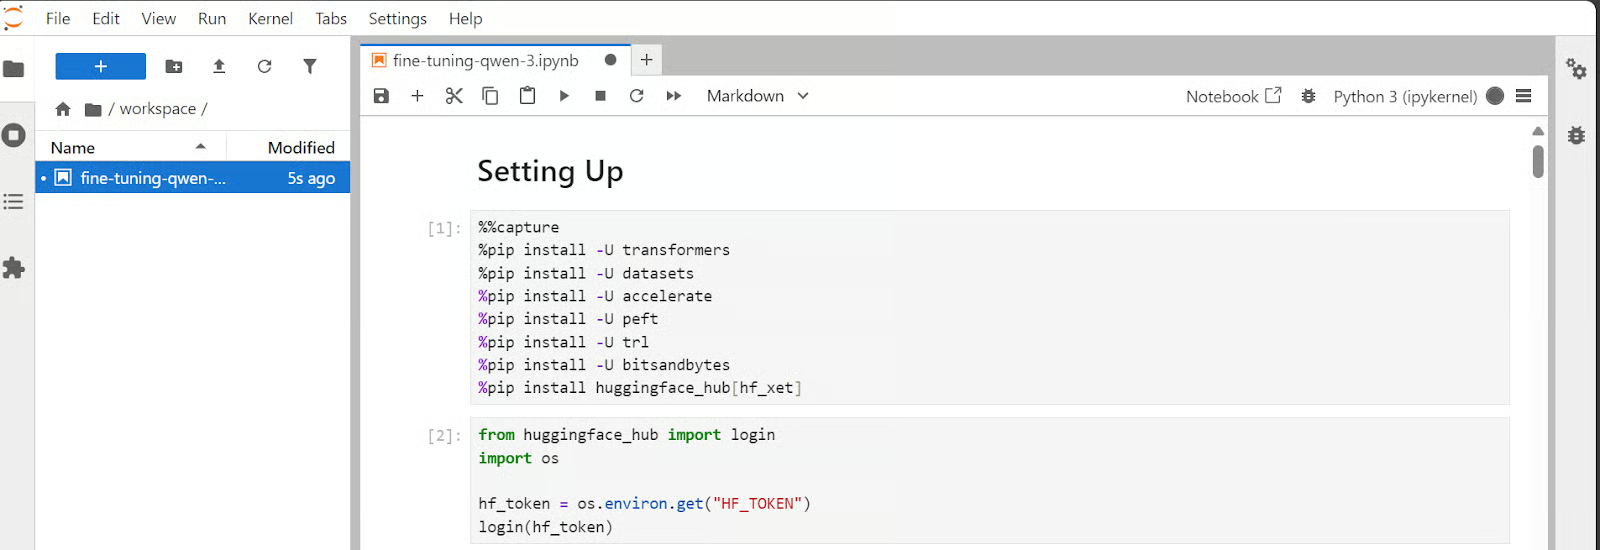
Jupyter Lab comes pre-installed with the necessary packages and extensions, allowing you to start training without additional setup.
Source: My Pods
Before proceeding, ensure all required Python packages are installed and up to date.
Run the following commands in a Jupyter Notebook cell:
%%capture
%pip install -U accelerate
%pip install -U peft
%pip install -U trl
%pip install -U bitsandbytes
%pip install -U transformers
Use the Hugging Face access token you saved earlier to log in to Hugging Face Hub.
from huggingface_hub import login
import os

hf_token = os.environ.get("HF_TOKEN")
login(hf_token)Even though we have 80GB of VRAM, we will load the Qwen3 model using 4-bit quantization. This will allow us to easily fit the model onto the GPU and fine-tune it without any hassle.
Download and load the Qwen3-32B model and tokenizer from Hugging Face Hub.
from transformers import AutoModelForCausalLM, AutoTokenizer, BitsAndBytesConfig
import torch
bnb_config = BitsAndBytesConfig(
load_in_4bit=True,
bnb_4bit_use_double_quant=False,
bnb_4bit_quant_type="nf4",
bnb_4bit_compute_dtype=torch.bfloat16,
)
model_dir = "Qwen/Qwen3-32B"
tokenizer = AutoTokenizer.from_pretrained(model_dir, use_fast=True)
model = AutoModelForCausalLM.from_pretrained(
model_dir,
quantization_config=bnb_config,
device_map="auto",
torch_dtype=torch.bfloat16,
trust_remote_code=True
)
model.config.use_cache = False
model.config.pretraining_tp = 1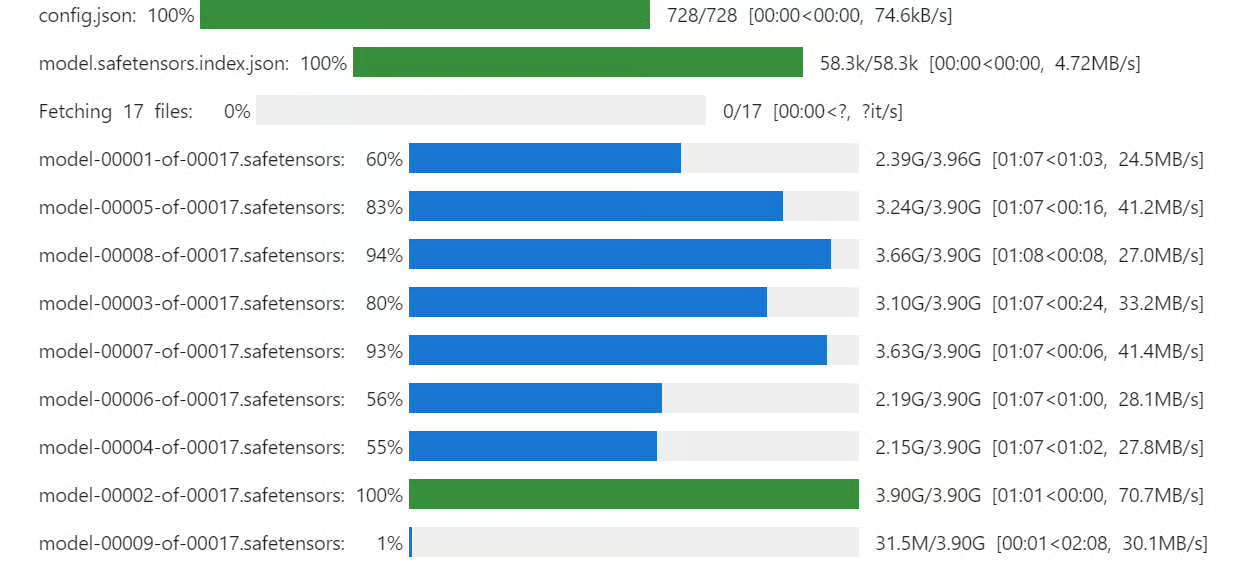 3. Loading and Processing the Dataset
In this section, we will focus on developing a prompt style that encourages the model to engage in critical thinking. We will create a prompt structure that includes a system prompt with placeholders for the question, a chain of thought, and the final response.
train_prompt_style = """Below is an instruction that describes a task, paired with an input that provides further context.
Write a response that appropriately completes the request.
Before answering, think carefully about the question and create a step-by-step chain of thoughts to ensure a logical and accurate response.

### Instruction:
You are a medical expert with advanced knowledge in clinical reasoning, diagnostics, and treatment planning.
Please answer the following medical question.

### Question:
{}

### Response:
<think>
{}
</think>
{}"""
Next, we will create the Python function that will use the train prompt style and apply the respective value to it to create the “text” column.
EOS_TOKEN = tokenizer.eos_token  # Must add EOS_TOKEN

def formatting_prompts_func(examples):
    inputs = examples["Question"]
    complex_cots = examples["Complex_CoT"]
    outputs = examples["Response"]
    texts = []
    for question, cot, response in zip(inputs, complex_cots, outputs):
        # Append the EOS token to the response if it's not already there
        if not response.endswith(tokenizer.eos_token):
            response += tokenizer.eos_token
        text = train_prompt_style.format(question, cot, response)
        texts.append(text)
    return {"text": texts}
Then, we will load the first 2000 samples from the FreedomIntelligence/medical-o1-reasoning-SFT dataset and then apply the formatting_prompts_func function to create the “text” column.
from datasets import load_dataset
dataset = load_dataset(
"FreedomIntelligence/medical-o1-reasoning-SFT",
"en",
split="train[0:2000]",
trust_remote_code=True,
)
dataset = dataset.map(
formatting_prompts_func,
batched=True,
)
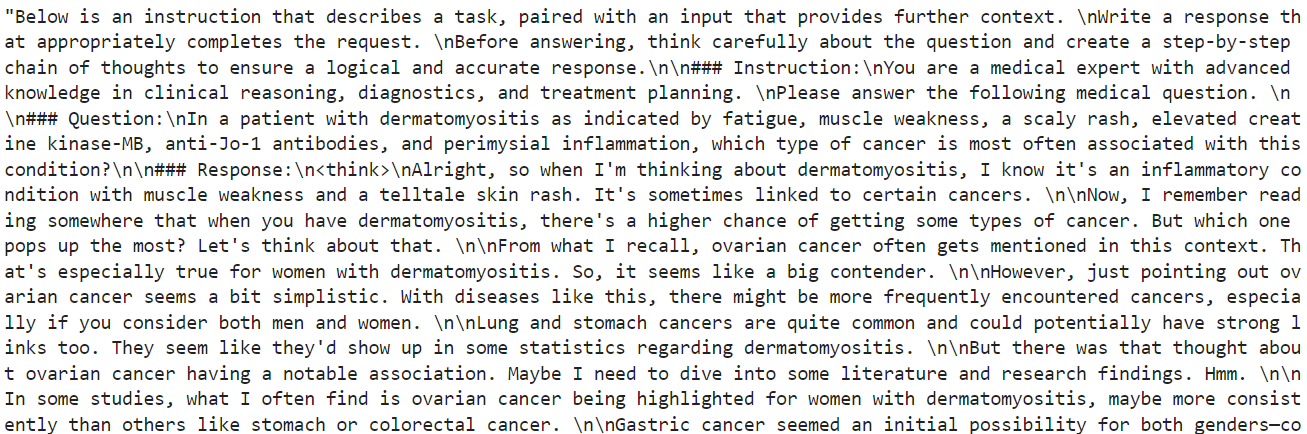
dataset["text"][10]As we can see, the text column contains the system prompt, instructions, questions, chain of thought, and answers to the question.
The new STF trainer does not accept the tokenizer, so we will convert the tokenizer into a data collator using the simple transformer function.
from transformers import DataCollatorForLanguageModeling

data_collator = DataCollatorForLanguageModeling(
    tokenizer=tokenizer,
    mlm=False
)The inference prompt style is different from the train prompt. It includes everything from the training prompt style except for the chain of thought and response.
inference_prompt_style = """Below is an instruction that describes a task, paired with an input that provides further context.
Write a response that appropriately completes the request.
Before answering, think carefully about the question and create a step-by-step chain of thoughts to ensure a logical and accurate response.

### Instruction:
You are a medical expert with advanced knowledge in clinical reasoning, diagnostics, and treatment planning.
Please answer the following medical question.

### Question:
{}

### Response:
<think>

"""
To test the model's performance before fine-tuning, we will take the 11th sample from the dataset and provide it to the model after formatting and converting it into tokens.
question = dataset[10]['Question']
inputs = tokenizer(
    [inference_prompt_style.format(question) + tokenizer.eos_token],
    return_tensors="pt"
).to("cuda")

outputs = model.generate(
    input_ids=inputs.input_ids,
    attention_mask=inputs.attention_mask,
    max_new_tokens=1200,
    eos_token_id=tokenizer.eos_token_id,
    use_cache=True,
)
response = tokenizer.batch_decode(outputs, skip_special_tokens=True)
print(response[0].split("### Response:")[1])
As a result, we received a long thinking part and no response, even after the 1200 new tokens. This is quite different from the dataset, which is short and concise.

We will now implement LoRA (Low-Rank Adaptation). LoRA works by freezing the majority of the model's parameters and introducing a small set of trainable parameters, which are added in a low-rank decomposition format. This allows the model to adapt to new tasks without the need to update or store the full set of model weights.
This approach is memory-efficient, faster, and cost-effective while still achieving accuracy comparable to full fine-tuning.
from peft import LoraConfig, get_peft_model

# LoRA config
peft_config = LoraConfig(
    lora_alpha=16,                           # Scaling factor for LoRA
    lora_dropout=0.05,                       # Add slight dropout for regularization
    r=64,                                    # Rank of the LoRA update matrices
    bias="none",                             # No bias reparameterization
    task_type="CAUSAL_LM",                   # Task type: Causal Language Modeling
    target_modules=[
        "q_proj",
        "k_proj",
        "v_proj",
        "o_proj",
        "gate_proj",
        "up_proj",
        "down_proj",
    ],  # Target modules for LoRA
)

model = get_peft_model(model, peft_config)
We will now configure and initialize the SFTTrainer (Supervised Fine-Tuning Trainer), a high-level abstraction provided by Hugging Face's transformers and trl libraries. The SFTTrainer simplifies the fine-tuning process by integrating key components—such as the dataset, model, data collator, training arguments, and LoRA configuration—into a single, streamlined workflow.
from trl import SFTTrainer
from transformers import TrainingArguments


# Training Arguments
training_arguments = TrainingArguments(
    output_dir="output",
    per_device_train_batch_size=1,
    per_device_eval_batch_size=1,
    gradient_accumulation_steps=2,
    optim="paged_adamw_32bit",
    num_train_epochs=1,
    logging_steps=0.2,
    warmup_steps=10,
    logging_strategy="steps",
    learning_rate=2e-4,
    fp16=False,
    bf16=False,
    group_by_length=True,
    report_to="none"
)

# Initialize the Trainer
trainer = SFTTrainer(
    model=model,
    args=training_arguments,
    train_dataset=dataset,
    peft_config=peft_config,
    data_collator=data_collator,
)Before we start training, we will clear the cache and free up some RAM and GPU VRAM to avoid running into out-of-memory (OOM) issues during the training process. Here’s how we can do that:
import gc, torch
gc.collect()
torch.cuda.empty_cache()
model.config.use_cache = False
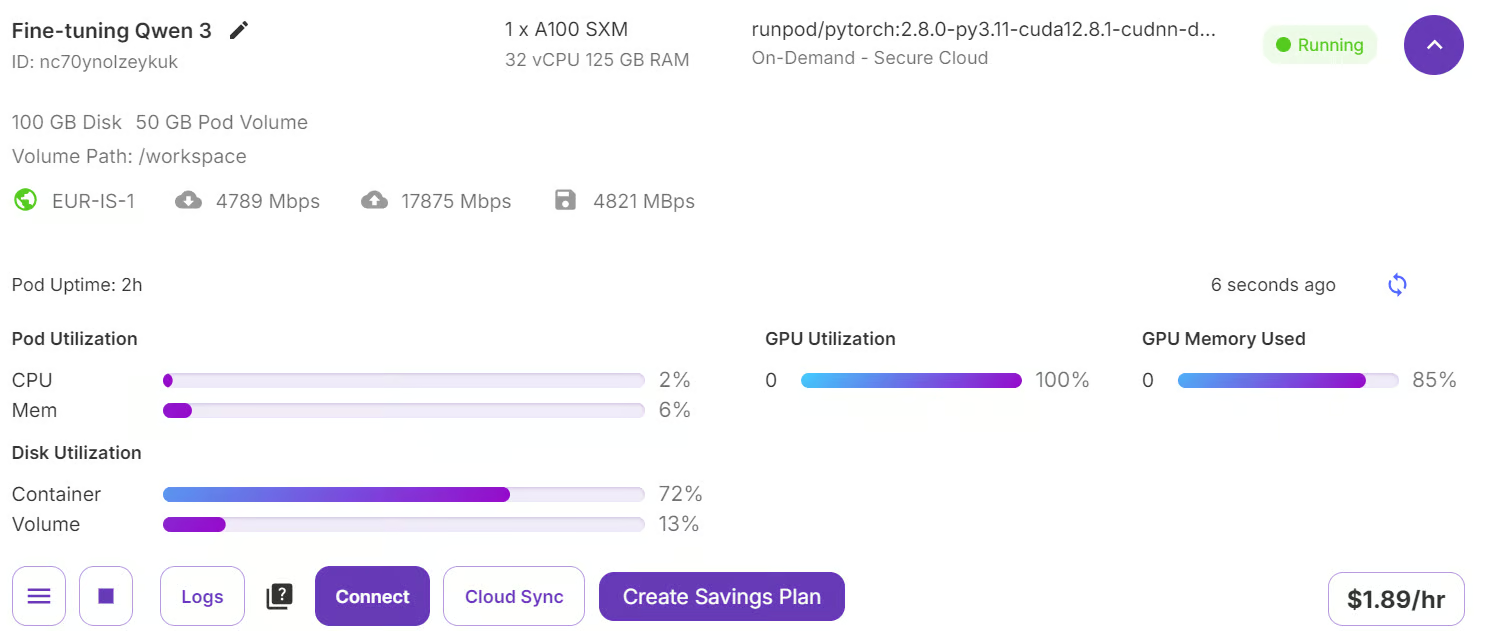
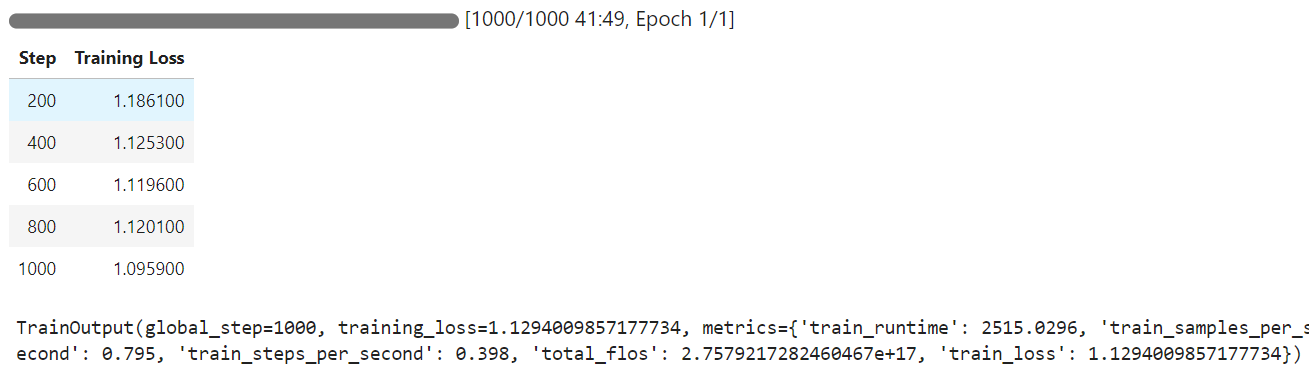
trainer.train()When the training begins, you will notice that your pod is using 100% of the GPU and 85% of the GPU VRAM. This indicates that we have hit the sweet spot.
The training time took 42 minutes to complete, and as you can see, the training loss gradually reduced.
We will now test the fine-tuned model on the same sample as before and then compare the results.
question = dataset[10]['Question']
inputs = tokenizer(
[inference_prompt_style.format(question) + tokenizer.eos_token],
return_tensors="pt"
).to("cuda")
outputs = model.generate(
input_ids=inputs.input_ids,
attention_mask=inputs.attention_mask,
max_new_tokens=1200,
eos_token_id=tokenizer.eos_token_id,
use_cache=True,
)
response = tokenizer.batch_decode(outputs, skip_special_tokens=True)
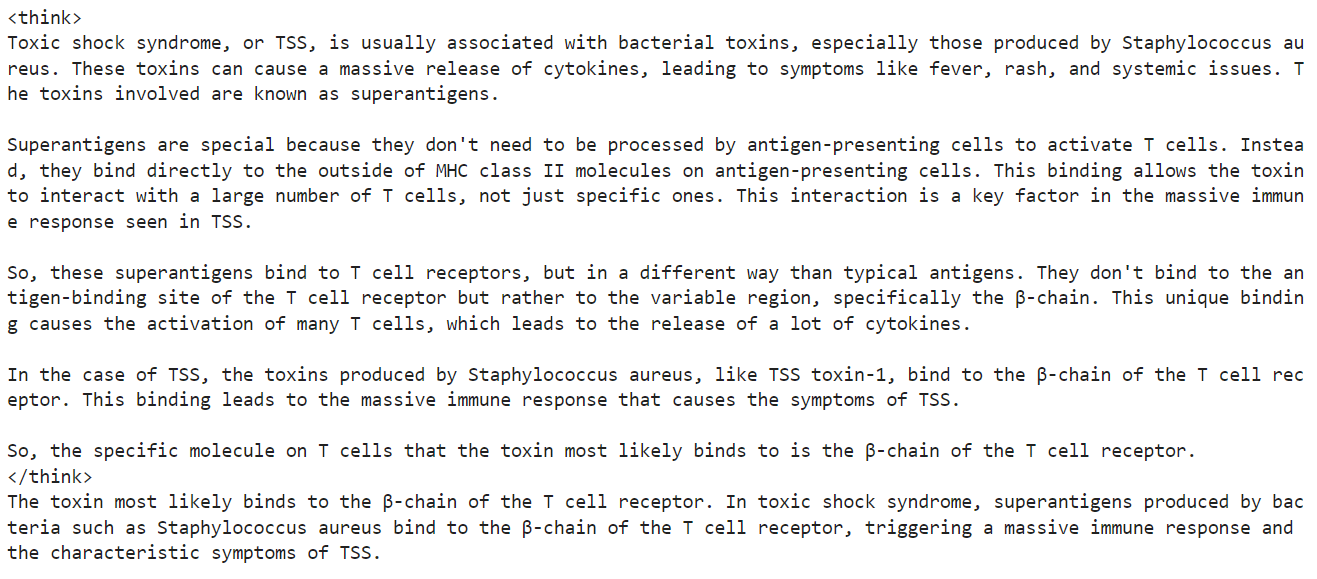
print(response[0].split("### Response:")[1])We shortened the thinking section and precise answer, which aligns with the dataset. This is an amazing result.

Let's test the performance of the fine-tuned Qwen3 on another sample from the dataset.
question = dataset[100]['Question']
inputs = tokenizer(
    [inference_prompt_style.format(question) + tokenizer.eos_token],
    return_tensors="pt"
).to("cuda")

outputs = model.generate(
    input_ids=inputs.input_ids,
    attention_mask=inputs.attention_mask,
    max_new_tokens=1200,
    eos_token_id=tokenizer.eos_token_id,
    use_cache=True,
)
response = tokenizer.batch_decode(outputs, skip_special_tokens=True)
print(response[0].split("### Response:")[1])
Once again, the thinking process was precise and short, and the response was accurate, similar to the dataset.
If you are having trouble fine-tuning your Qwen3 model, please consult the companion notebook: fine-tuning-qwen-3.
The final step is to save the model and tokenizer and upload them to the Hugging Face hub, allowing us to build an application or share the model with the open-source community.
new_model_name = "Qwen-3-32B-Medical-Reasoning"
model.push_to_hub(new_model_name)
tokenizer.push_to_hub(new_model_name)
Once the model and tokenizer are uploaded, a link to the repository will be generated. For example: kingabzpro/Qwen-3-32B-Medical-Reasoning · Hugging Face
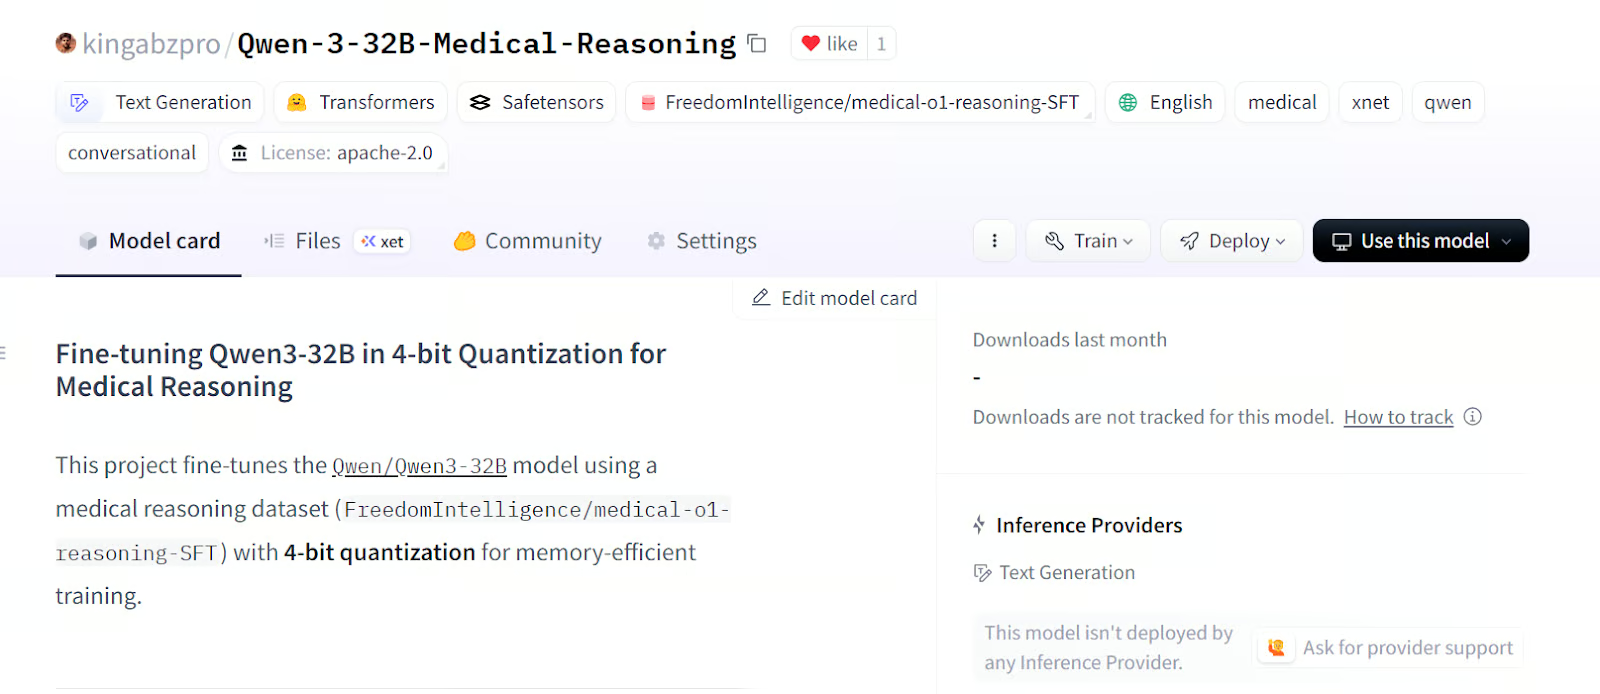
Source: kingabzpro/Qwen-3-32B-Medical-Reasoning
The model repository has the appropriate tags, a description, a companion notebook, and all the necessary files for you to load and test yourself.
Qwen-3 represents another significant step toward the democratization of AI. You can easily download Qwen-3, run it on your PC ( without internet access), fine-tune it, or even host it on your local server. Truly, Qwen-3 embodies the principles of open AI.
In this tutorial, we have learned how to fine-tune the Qwen-3 model on a medical reasoning dataset using the Runpod platform. Remarkably, the entire process cost less than $3. To further improve the performance of your fine-tuning, you can train the model on the full dataset for at least 3 epochs.
You can learn more about the Qwen 3 model with our guide, Qwen 3: Features, DeepSeek-R1 Comparison, Access, and More. You can also view our guides on How to Use Qwen 2.4-VL Locally and Fine-Tuning DeepSeek R1 (Reasoning Model).
Top DataCamp Courses
Track
Course
Course
Tutorial
Abid Ali Awan
Tutorial
Abid Ali Awan
Tutorial
Dr Ana Rojo-Echeburúa
Tutorial
Abid Ali Awan
Tutorial
Abid Ali Awan
Tutorial
Abid Ali Awan