Course
Working with the OpenAI API
3 hr
141.6K
After the launch of DeepSeek R1, OpenAI has responded with its own state-of-the-art reasoning model, o3-mini. This new model is designed to be smaller, faster, and more efficient than its predecessor, the o1 model, while excelling in tasks related to coding, STEM, and logical problem-solving.
OpenAI has made this model freely available to all users, including those using ChatGPT and other platforms, making advanced reasoning capabilities more accessible than ever.
For more details about the o3-mini, you can refer to the blog post, OpenAI’s O3: Features, O1 Comparison, Release Date & More.
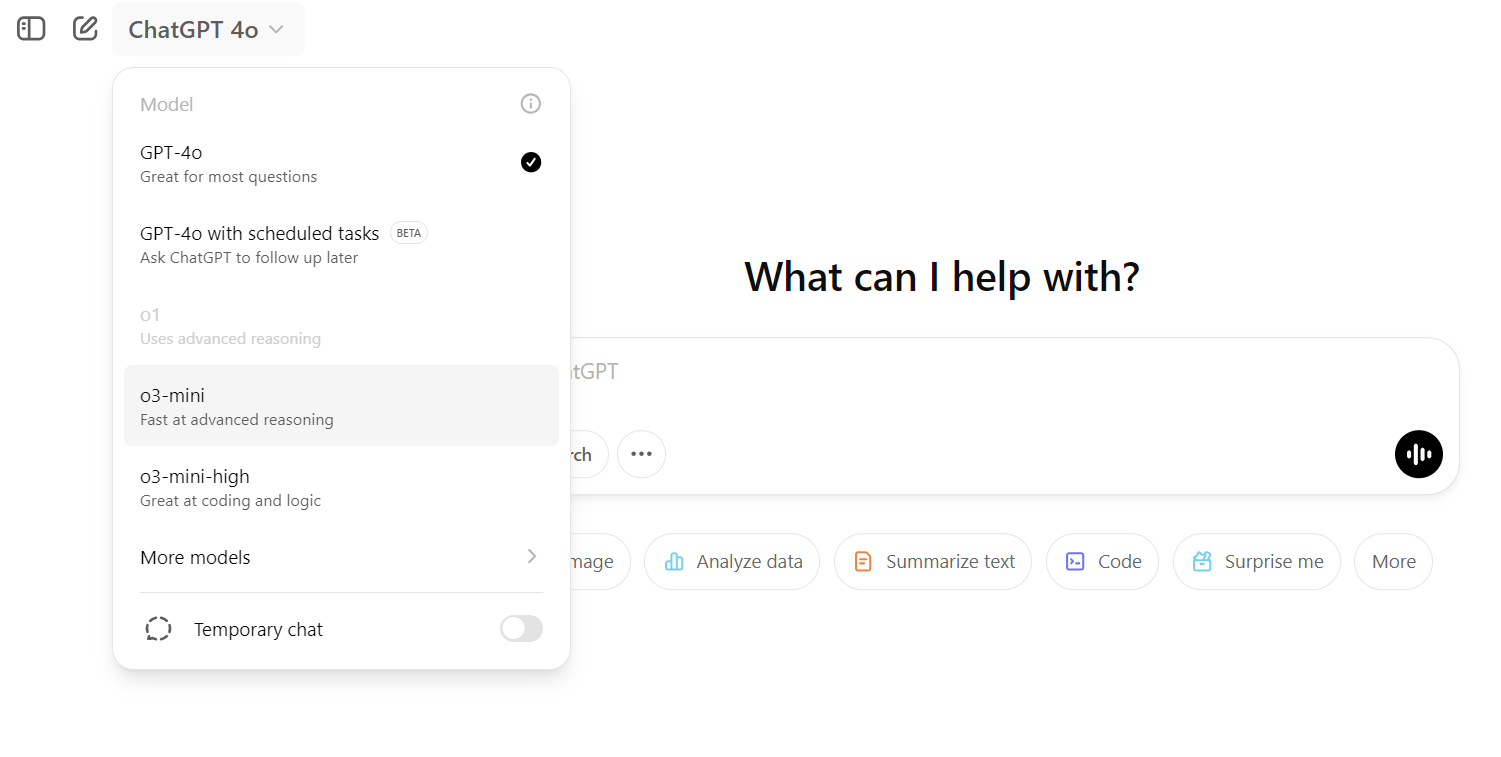
Source: ChatGPT
In this tutorial, we will explore the technical capabilities of the o3-mini model. Specifically, we will test its ability to handle complex technical tasks, generate accurate code, and provide clear instructions for building, testing, and deploying a proper machine learning model. By the end, we aim to determine whether the o3-mini lives up to its promise as a cutting-edge reasoning model for technical and logical problem-solving tasks.
Image by Author
We will be asking o3-mini to use the Placement Prediction dataset to build a machine learning application that can determine if a student is eligible for job placement or not. From planning to deploying the solution, we will seek assistance from the o3-mini model on ChatGPT.
In the project planning phase, we will provide the o3-mini model with all the necessary information and outline our goals. We will ask it to create all the required folders and files for building, training, and deploying the Placement Prediction application.
Specifically, we will:
Here’s the prompt:
“I want to build a machine learning project to predict whether a student will be placed or not based on their academic and extracurricular data. The dataset contains the following columns:

- **StudentID**: Unique identifier for each student.

- **CGPA**: The overall grades achieved by the student.

- **Internships**: Number of internships a student has completed.

- **Projects**: Number of projects a student has completed.

- **Workshops/Certifications**: Indicates whether the student has attended workshops or completed certifications to upskill themselves.

- **AptitudeTestScore**: Score achieved in an aptitude test, which evaluates quantitative and logical thinking.

- **SoftSkillRating**: A rating of the student’s communication and interpersonal skills.

- **ExtraCurricularActivities**: Indicates whether the student is active in extracurricular activities (Yes/No).

- **PlacementTraining**: Indicates whether the student has undergone placement training (Yes/No).

- **SSC and HSC**: Senior Secondary and Higher Secondary marks.

- **PlacementStatus**: The target column, which has two classes: "Placed" and "Not Placed."

Here is a sample dataset row:

StudentID,CGPA,Internships,Projects,Workshops/Certifications,AptitudeTestScore,SoftSkillsRating,ExtracurricularActivities,PlacementTraining,SSC_Marks,HSC_Marks,PlacementStatus

1,7.5,1,1,1,65,4.4,No,No,61,79,NotPlaced

I need help creating a structured project with the following components:

1. **Data Analysis**: Perform exploratory data analysis (EDA) to understand the dataset, visualize trends, and identify correlations between features and the target variable.

2. **Model Building**: Create a machine learning pipeline to preprocess the data and train a model to predict the placement status.

3. **Experiment Tracking**: Set up a system to track experiments, including model performance metrics, hyperparameters, and results.

4. **Model Training**: Train the model using appropriate algorithms and evaluate its performance using metrics like accuracy, precision, recall, and F1-score.

5. **Hyperparameter Tuning**: Optimize the model’s performance by tuning hyperparameters using techniques like grid search or random search.

6. **Model Inference Application**: Build an application (e.g., a web app or API) to allow users to input student data and get predictions on placement status.

7. **Dockerfile for Containerization**: Create a Dockerfile to containerize the application for easy deployment.

8. **Cloud Deployment**: Deploy the application on a cloud platform (e.g., AWS, Azure, or Google Cloud) to make it accessible online.

9. **Accessing the Model**: Provide a way to access the deployed model via an API or web interface.

Please provide the following:

- A folder structure for organizing the project files. (Also provide bash command for creating the folders and files.)

- Python scripts or code snippets for each of the above components.

- Suggestions for tools and libraries to use (e.g., pandas, scikit-learn, Flask, Docker, etc.).

- Guidance on setting up experiment tracking (using MLflow).

- Steps for deploying the model on a Hugging Face Space.”
In return, you will receive a detailed response on the project structure and how to build everything from scratch.
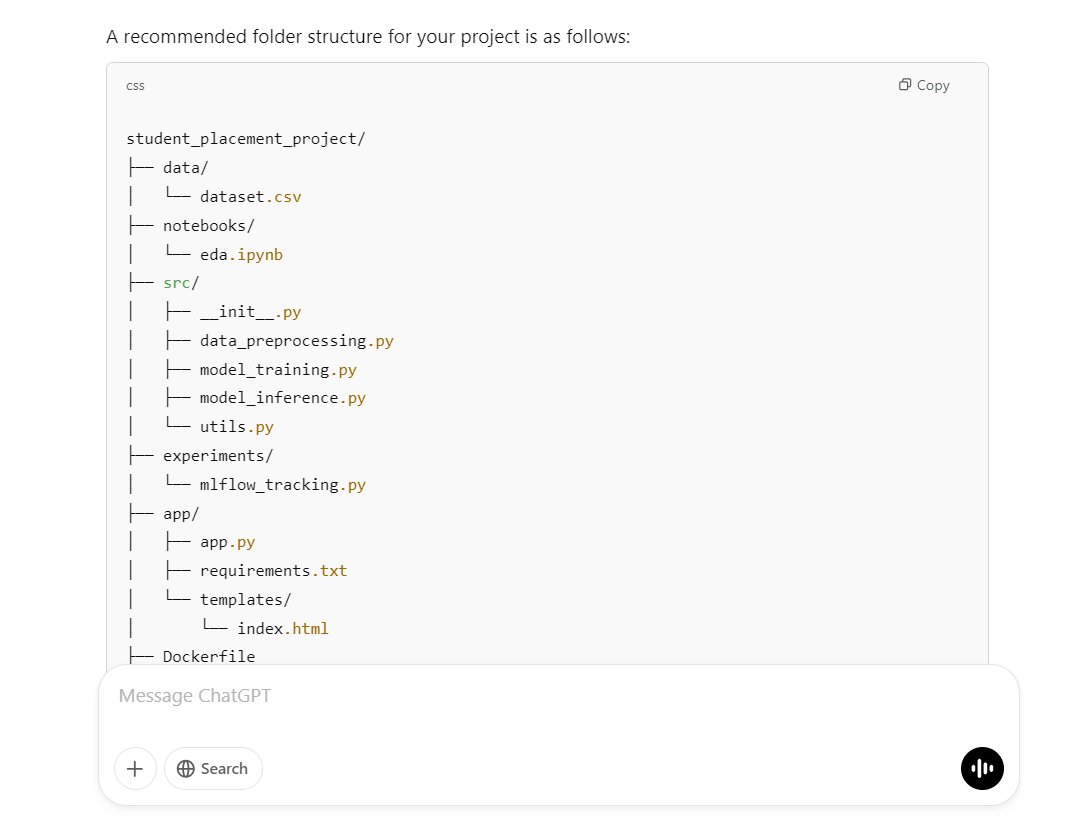
The provided script will create the project directory, folders, and all necessary files:
mkdir -p student_placement_project/{data,notebooks,src,experiments,app/templates}
touch student_placement_project/data/dataset.csv \
student_placement_project/notebooks/eda.ipynb \
student_placement_project/src/{__init__.py,data_preprocessing.py,model_training.py,model_inference.py,utils.py} \
student_placement_project/experiments/mlflow_tracking.py \
student_placement_project/app/{app.py,requirements.txt} \
student_placement_project/app/templates/index.html \
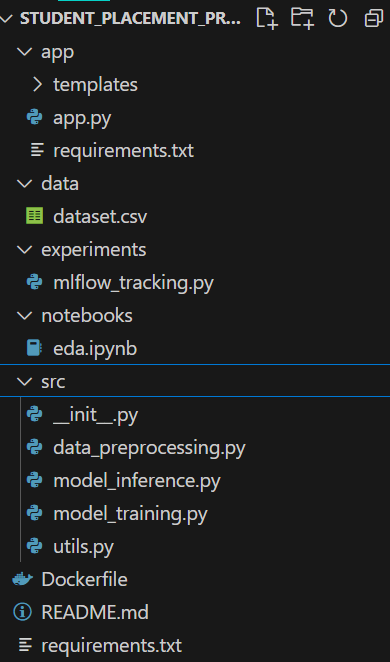
student_placement_project/{Dockerfile,requirements.txt,README.md}As we can see, this script has completed all the necessary tasks for us.
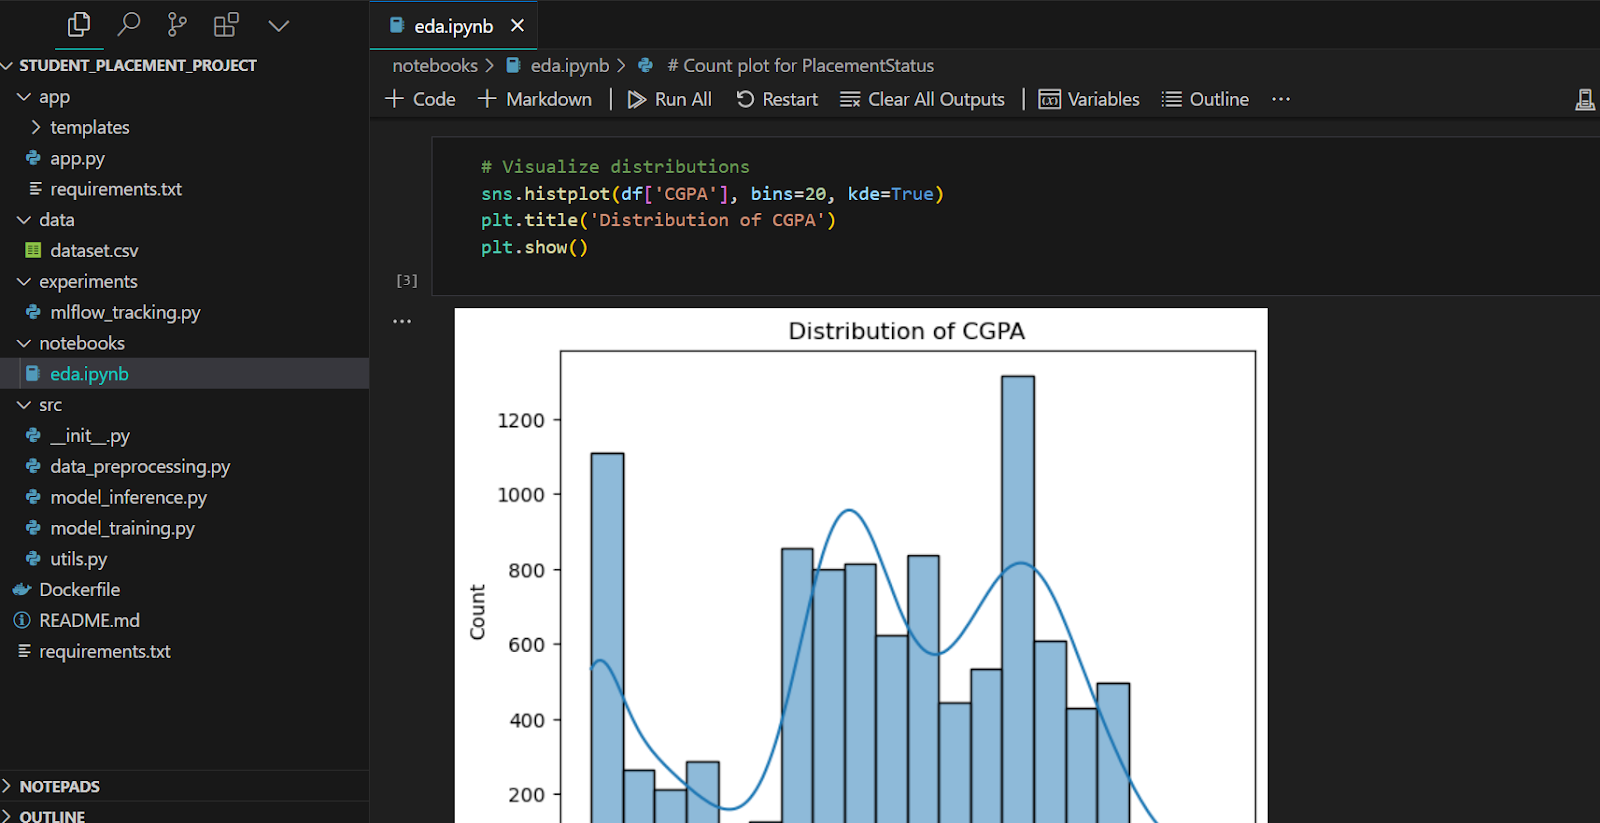
The response has provided the code for the Jupyter notebook file. All you have to do is paste the code one by one and run it to see the output.
# notebooks/eda.ipynb
import pandas as pd
import seaborn as sns
import matplotlib.pyplot as plt
import numpy as np

# Load dataset
df = pd.read_csv('../data/dataset.csv')

# Basic info and descriptive statistics
print(df.info())
print(df.describe())

# Visualize distributions
sns.histplot(df['CGPA'], bins=20, kde=True)
plt.title('Distribution of CGPA')
plt.show()

# Correlation matrix
plt.figure(figsize=(10, 8))

# Compute correlation matrix only on numeric columns
numeric_df = df.select_dtypes(include=[np.number])
plt.figure(figsize=(10, 8))
corr = numeric_df.corr()
sns.heatmap(corr, annot=True, cmap="coolwarm")
plt.title("Feature Correlation Matrix")


# Count plot for PlacementStatus
sns.countplot(x='PlacementStatus', data=df)
plt.title('Placement Status Count')
plt.show()
This is what it looks like. All the data analytics and graphs are in one file for anyone to review.
Next, we will create the data preprocessing file. Apart from a few minor changes, this code works smoothly.
# src/data_preprocessing.py
import pandas as pd
from sklearn.model_selection import train_test_split
from sklearn.preprocessing import StandardScaler


def load_and_preprocess_data(filepath):
    df = pd.read_csv(filepath)

    # Convert categorical columns
    df["ExtracurricularActivities"] = df["ExtracurricularActivities"].map(
        {"Yes": 1, "No": 0}
    )
    df["PlacementTraining"] = df["PlacementTraining"].map({"Yes": 1, "No": 0})
    df["Workshops/Certifications"] = df["Workshops/Certifications"].astype(
        int
    )  # assuming it's already 0/1

    # Convert target column to binary
    df["PlacementStatus"] = df["PlacementStatus"].map({"Placed": 1, "NotPlaced": 0})

    # Feature selection (excluding StudentID)
    X = df.drop(["StudentID", "PlacementStatus"], axis=1)
    y = df["PlacementStatus"]

    # Split dataset
    X_train, X_test, y_train, y_test = train_test_split(
        X, y, test_size=0.2, random_state=42
    )

    # Scaling numeric features (optional)
    scaler = StandardScaler()
    X_train_scaled = scaler.fit_transform(X_train)
    X_test_scaled = scaler.transform(X_test)

return X_train_scaled, X_test_scaled, y_train, y_test, scalerThe training script imports the data processing function, processes the data first, and then trains the random forest model. In the end, it displays the model performance metrics.
# src/model_training.py
import joblib
from sklearn.ensemble import RandomForestClassifier
from sklearn.metrics import accuracy_score, precision_score, recall_score, f1_score
from data_preprocessing import load_and_preprocess_data


def train_model(data_path):
    X_train, X_test, y_train, y_test, scaler = load_and_preprocess_data(data_path)

    # Initialize and train classifier
    clf = RandomForestClassifier(n_estimators=100, random_state=42)
    clf.fit(X_train, y_train)

    # Predictions and evaluation
    y_pred = clf.predict(X_test)
    metrics = {
        "accuracy": accuracy_score(y_test, y_pred),
        "precision": precision_score(y_test, y_pred),
        "recall": recall_score(y_test, y_pred),
        "f1_score": f1_score(y_test, y_pred),
    }
    print("Model Evaluation Metrics:", metrics)

    # Save model and scaler
    joblib.dump(clf, "model_rf.joblib")
    joblib.dump(scaler, "scaler.joblib")

    return clf, scaler, metrics


if __name__ == "__main__":
    train_model("data/dataset.csv")
The 78% accuracy is not too bad.
$ python .\src\model_training.py

Model Evaluation Metrics: {'accuracy': 0.781, 'precision': 0.7462121212121212, 'recall': 0.7137681159420289, 'f1_score': 0.7296296296296296}
If you’re eager to learn about more topics in this area, check out our popular LLM tutorial, Fine-Tuning DeepSeek R1 (Reasoning Model). It covers the fine-tuning of the world's first open-source reasoning model on the medical chain of thought dataset to develop better AI doctors for the future.
We don't want to keep the Python scripts in a different folder. We will move the mlflow_tracking.py file to the src folder and remove the experiment folder. Please note that you will need to make a few minor changes manually instead of asking for the o3-mini model.
# src/mlflow_tracking.py
import mlflow
import mlflow.sklearn
from model_training import train_model


def run_experiment(data_path):
    mlflow.set_experiment("Student_Placement_Prediction")

    with mlflow.start_run():
        # Train the model
        clf, scaler, metrics = train_model(data_path)

        # Log parameters (example)
        mlflow.log_param("model_type", "RandomForest")
        mlflow.log_param("n_estimators", 100)

        # Log metrics
        mlflow.log_metric("accuracy", metrics["accuracy"])
        mlflow.log_metric("precision", metrics["precision"])
        mlflow.log_metric("recall", metrics["recall"])
        mlflow.log_metric("f1_score", metrics["f1_score"])

        # Log the model
        mlflow.sklearn.log_model(clf, "model")

        print("Experiment logged in MLflow.")


if __name__ == "__main__":
    run_experiment("data/dataset.csv")
The Python script ran smoothly and generated all the information.
$ python .\src\mlflow_tracking.py
Model Evaluation Metrics: {'accuracy': 0.781, 'precision': 0.7462121212121212, 'recall': 0.7137681159420289, 'f1_score': 0.7296296296296296}
2025/02/17 00:03:34 WARNING mlflow.models.model: Model logged without a signature and input example. Please set `input_example` parameter when logging the model to auto infer the model signature.
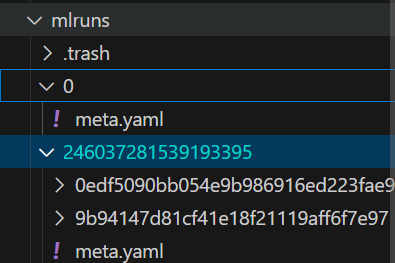
Experiment logged in MLflow.All the machine learning experiments are stored locally, which you can visualize using the MLflow UI.
The o3-mini response also provides an optional step that you can add to the model_training.py script. We have included this step to see if your model performance will increase or not.
# src/model_training.py
import joblib
from sklearn.ensemble import RandomForestClassifier
from sklearn.metrics import accuracy_score, precision_score, recall_score, f1_score
from data_preprocessing import load_and_preprocess_data
from sklearn.model_selection import GridSearchCV


def tune_model(X_train, y_train):
    param_grid = {"n_estimators": [50, 100, 150], "max_depth": [None, 5, 10]}
    clf = RandomForestClassifier(random_state=42)
    grid_search = GridSearchCV(clf, param_grid, cv=5, scoring="f1")
    grid_search.fit(X_train, y_train)
    print("Best parameters:", grid_search.best_params_)
    return grid_search.best_estimator_

def train_model(data_path):
    X_train, X_test, y_train, y_test, scaler = load_and_preprocess_data(data_path)

    # Initialize and train classifier
    clf = tune_model(X_train, y_train)

    # Predictions and evaluation
    y_pred = clf.predict(X_test)
    metrics = {
        "accuracy": accuracy_score(y_test, y_pred),
        "precision": precision_score(y_test, y_pred),
        "recall": recall_score(y_test, y_pred),
        "f1_score": f1_score(y_test, y_pred),
    }
    print("Model Evaluation Metrics:", metrics)

    # Save model and scaler
    joblib.dump(clf, "model_rf.joblib")
    joblib.dump(scaler, "scaler.joblib")

    return clf, scaler, metrics


if __name__ == "__main__":
    train_model("data/dataset.csv")
As you can see, our model performance has slightly increased using hyperparameter optimization.
$ python .\src\model_training.py
Best parameters: {'max_depth': 5, 'n_estimators': 150}
Model Evaluation Metrics: {'accuracy': 0.791, 'precision': 0.7493917274939172, 'recall': 0.7439613526570048, 'f1_score': 0.7466666666666667}It is time to create the model inference. We will be developing a Flask web application.
First, we need to load the model and the scaler. After that, we will process the user input and provide it to the model to generate the prediction. It’s a fairly simple application.
import joblib
import numpy as np
app = Flask(__name__)
# Load the trained model and scaler (update paths as necessary)
model = joblib.load("model_rf.joblib")
scaler = joblib.load("scaler.joblib")
@app.route("/")
def home():
return render_template("index.html")
@app.route("/predict", methods=["POST"])
def predict():
try:
# Expecting form data from the HTML template
CGPA = float(request.form.get("CGPA"))
Internships = int(request.form.get("Internships"))
Projects = int(request.form.get("Projects"))
Workshops_Certifications = int(request.form.get("Workshops_Certifications"))
AptitudeTestScore = float(request.form.get("AptitudeTestScore"))
SoftSkillRating = float(request.form.get("SoftSkillRating"))
ExtracurricularActivities = request.form.get("ExtracurricularActivities")
PlacementTraining = request.form.get("PlacementTraining")
SSC_Marks = float(request.form.get("SSC_Marks"))
HSC_Marks = float(request.form.get("HSC_Marks"))
# Convert categorical fields to numerical
extra_act = 1 if ExtracurricularActivities.lower() == "yes" else 0
placement_training = 1 if PlacementTraining.lower() == "yes" else 0
# Construct feature vector
features = [
CGPA,
Internships,
Projects,
Workshops_Certifications,
AptitudeTestScore,
SoftSkillRating,
extra_act,
placement_training,
SSC_Marks,
HSC_Marks,
]
# Scale features and make prediction
features_scaled = scaler.transform(np.array(features).reshape(1, -1))
prediction = model.predict(features_scaled)
result = "Placed" if prediction[0] == 1 else "Not Placed"
return render_template("index.html", prediction=result)
except Exception as e:
return render_template("index.html", prediction=f"Error: {e}")
if __name__ == "__main__":
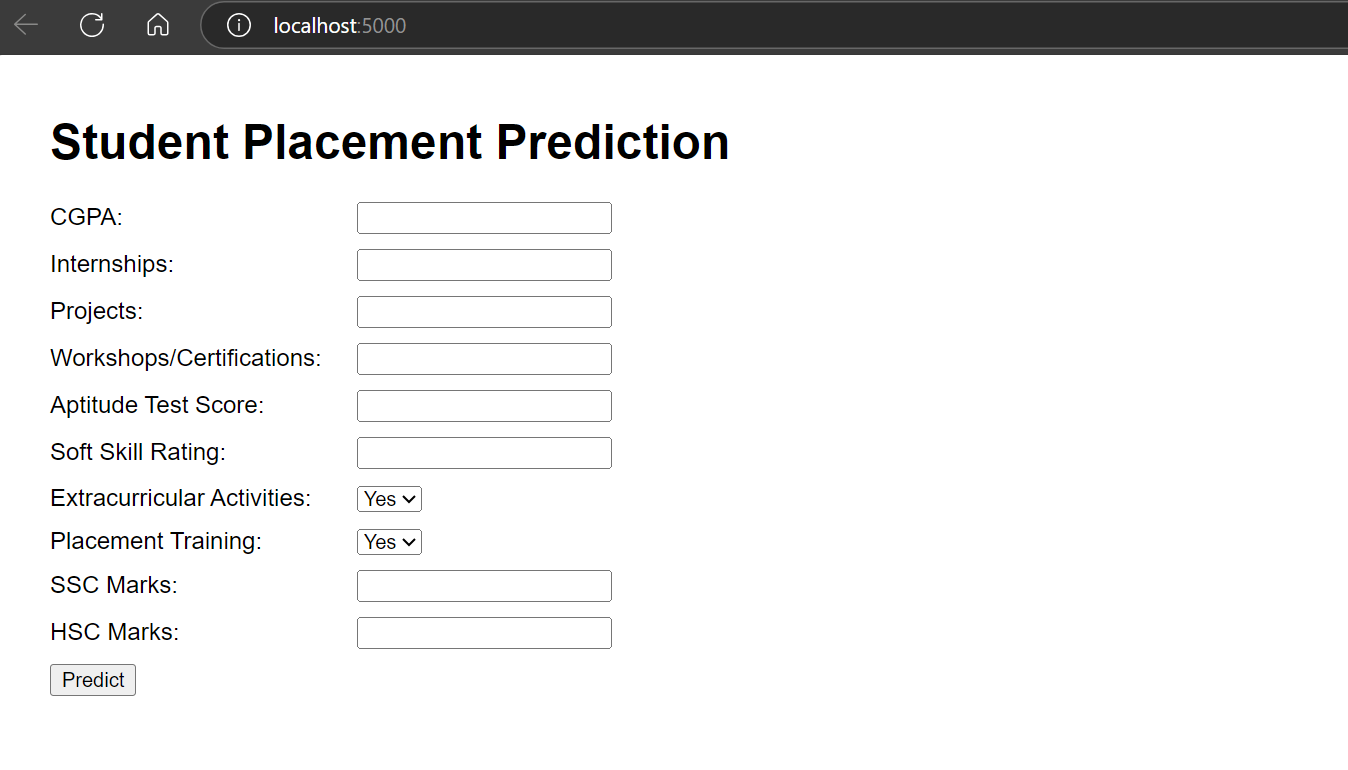
app.run(host='0.0.0.0', port=5000, debug=True)To create the application user interface, we have pasted the HTML code into the index.html file. Everything is provided by the o3-mini model. You can even ask the o3-mini model to improve the user interface.
<!-- app/templates/index.html -->
<!DOCTYPE html>
<html>
<head>
<title>Student Placement Prediction</title>
</head>
<body>
<h1>Student Placement Prediction</h1>
<form action="/predict" method="post" id="predictForm">
<!-- Create inputs for each feature. Example for CGPA: -->
<label for="CGPA">CGPA:</label>
<input type="number" step="0.1" id="CGPA" name="CGPA" required><br><br>
<!-- Add more inputs as per features -->
<button type="submit">Predict</button>
</form>
<div id="result"></div>
<script>
document.getElementById('predictForm').addEventListener('submit', async (e) => {
e.preventDefault();
const formData = new FormData(e.target);
const data = Object.fromEntries(formData.entries());
// Adjust keys to match what the API expects
data.ExtracurricularActivities = data.ExtracurricularActivities || 'No';
data.PlacementTraining = data.PlacementTraining || 'No';
const response = await fetch('/predict', {
method: 'POST',
headers: {'Content-Type': 'application/json'},
body: JSON.stringify(data)
});
const result = await response.json();
document.getElementById('result').innerText = JSON.stringify(result);
});
</script>
</body>
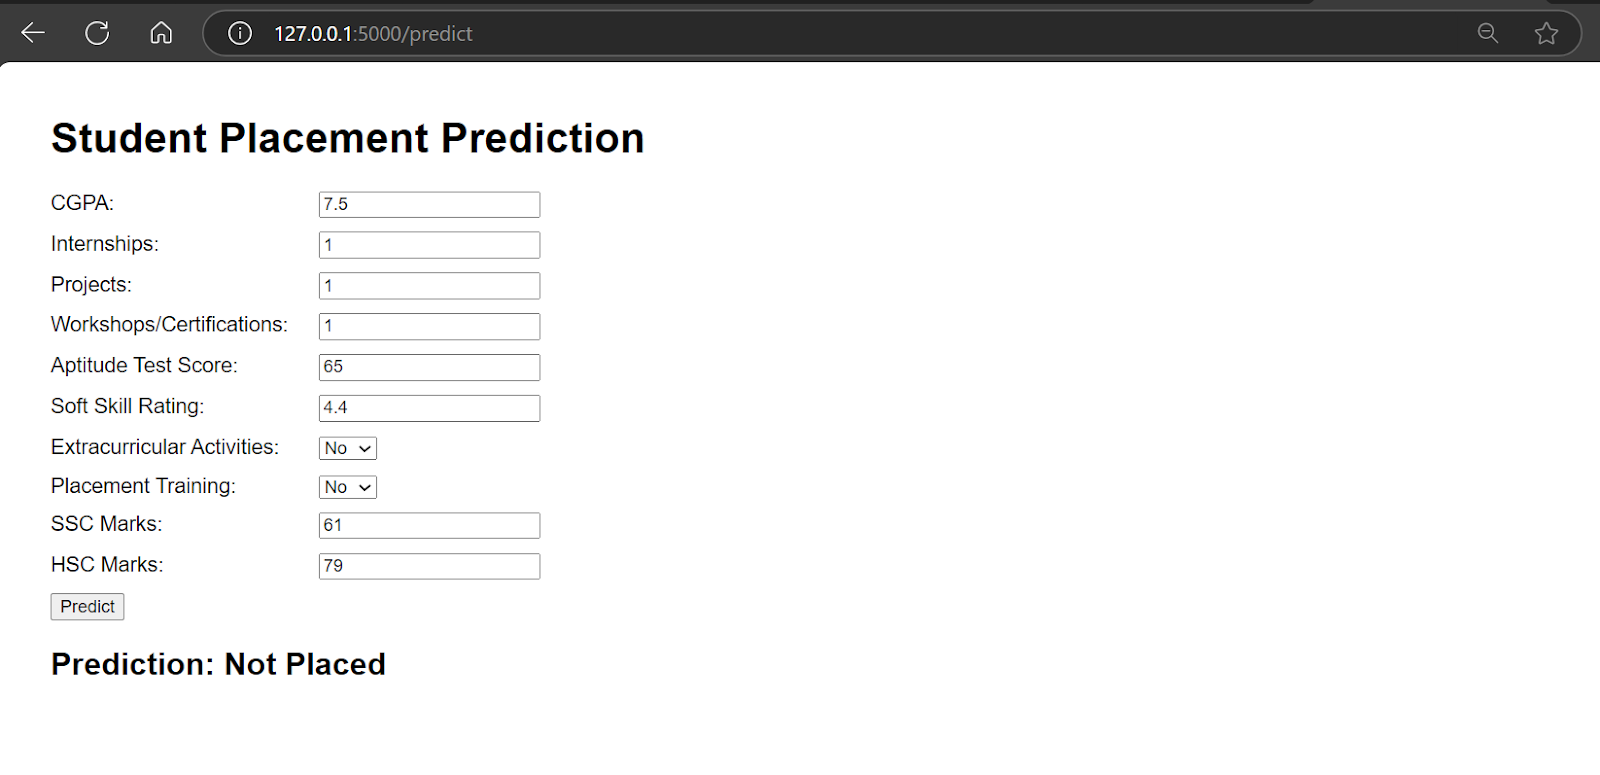
</html>Once everything is set up, run the app and click on the URL generated by Flask.
$ python .\app\app.py

 * Running on all addresses (0.0.0.0)
 * Running on http://127.0.0.1:5000
 * Running on http://192.168.100.41:5000
Our web application is working smoothly.
The o3-mini model has also provided us with the Dockerfile, and all we have to do is build it locally and test it before deploying it to the cloud.
# Use an official Python runtime as a parent image
FROM python:3.12-slim

# Set the working directory in the container
WORKDIR /app

# Copy the requirements file and install dependencies
COPY requirements.txt ./
RUN pip install --upgrade pip && pip install -r requirements.txt

# Copy the entire project
COPY . .

# Expose port (adjust as necessary)
EXPOSE 5000

# Command to run the Flask app
CMD ["python", "app/app.py"]
Build the Docker image using the following command.
$ docker build -t kingabzpro/student_placement . 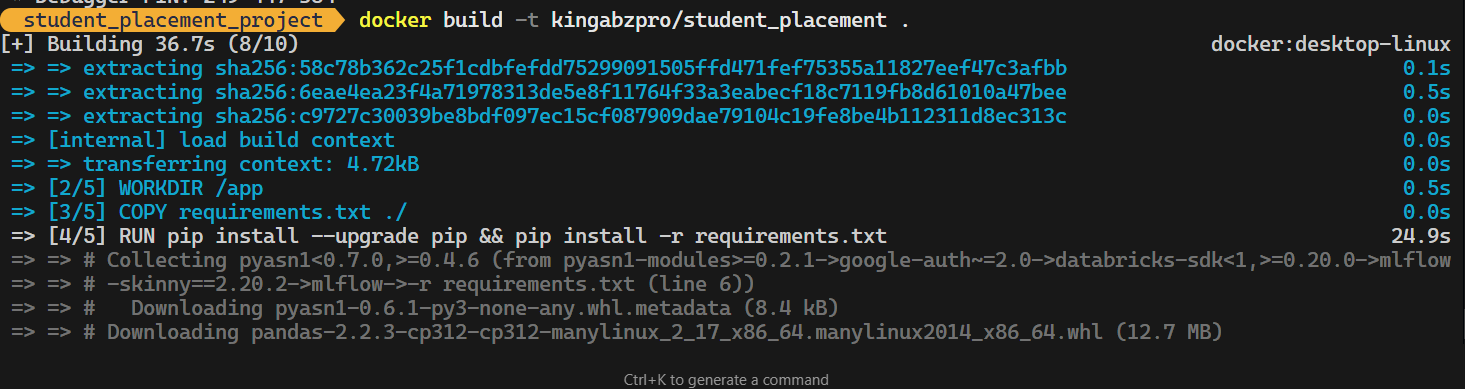
Run the Docker Image locally.
$ docker run -p 5000:5000 kingabzpro/student_placementYou can see that our Docker is running perfectly.
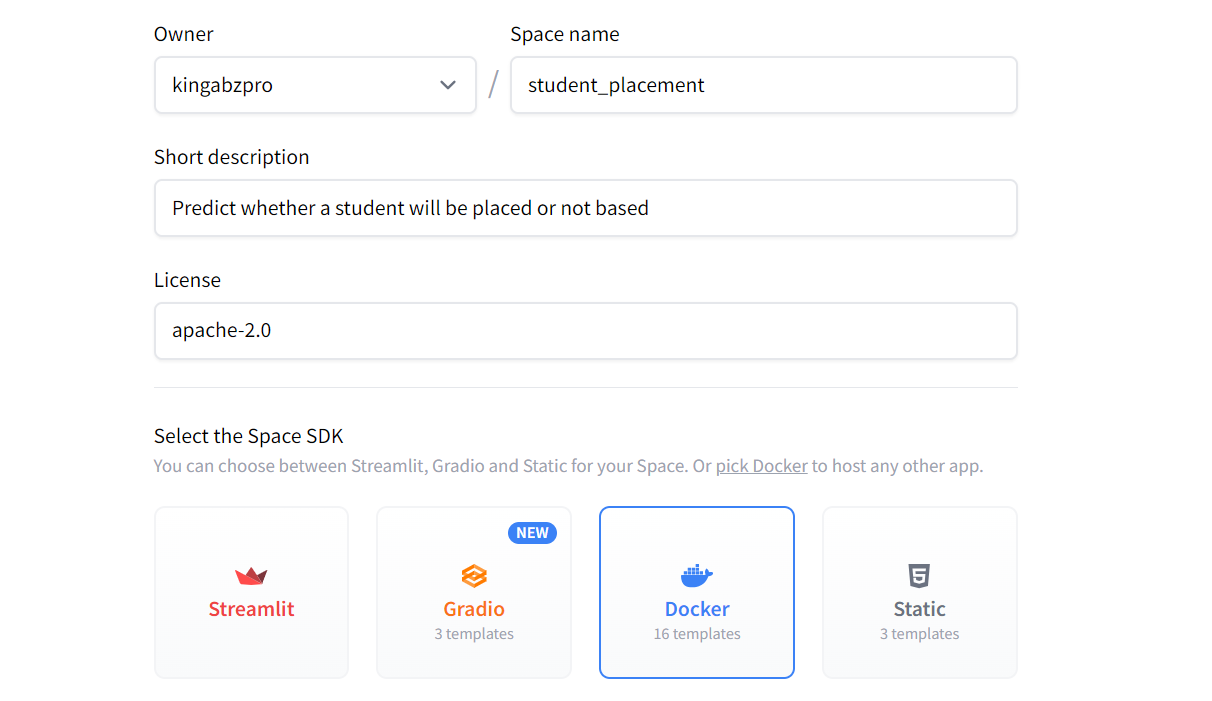
It is time to deploy our machine learning application on the Hugging Face Cloud (Space).
To get started, you can create a new space. Add all the necessary information about the application and select Docker as the SDK.
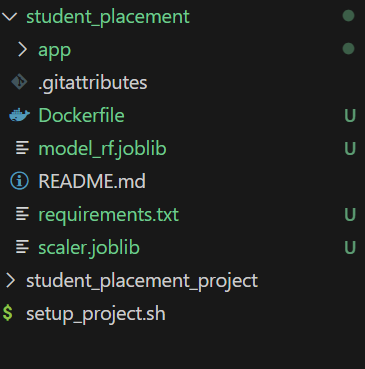
After that, it will generate a URL for you to clone the application locally.
$ git clone https://huggingface.co/spaces/kingabzpro/student_placementNext, move the model, scaler, app folder, Dockerfile, and requirements.txt to the application repository.
You can make changes to the app.py file by updating the last line to:
app.run(host="0.0.0.0", port=7860, debug=True)Check the exposed port in the Dockerfile. We need to do this to avoid any port errors or issues:
# Expose port (adjust as necessary)
EXPOSE 7860
Once you have made all the changes, commit your updates and push them to the remote repository:
$ cd .\student_placement\
$ git add .
$ git commit -m "Initial commit of Dockerized student placement app"
$ git push
As soon as you push the changes, it will start building and then deploy the user interface for your application.
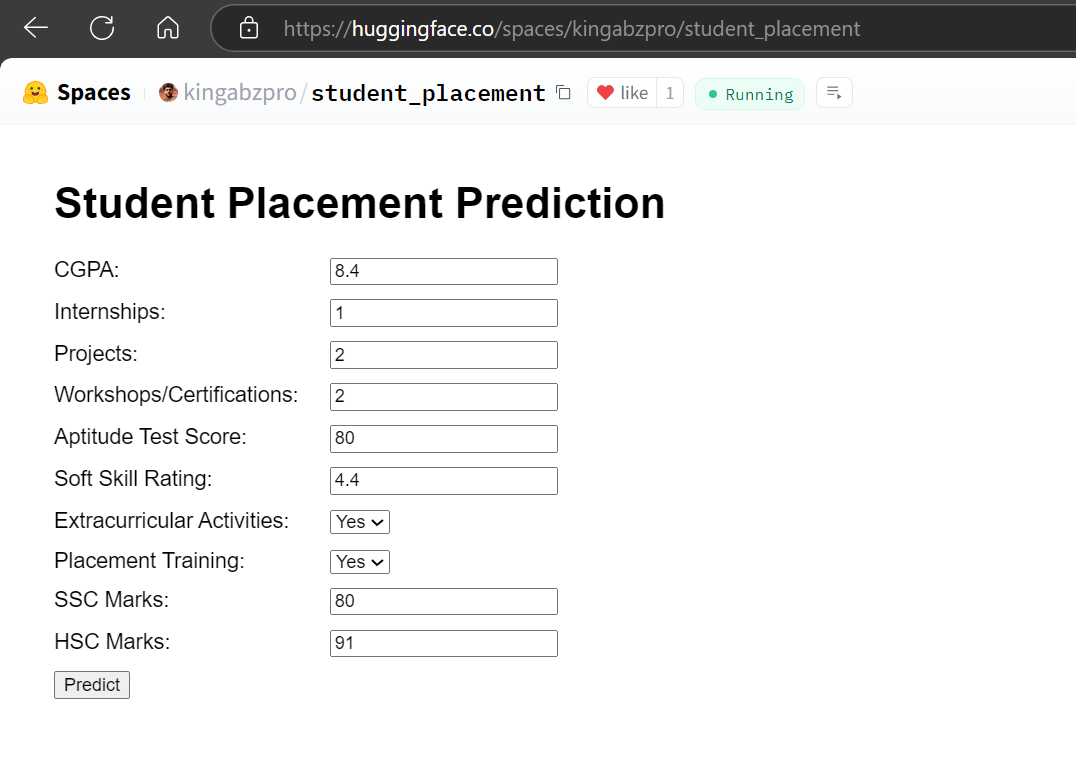
Source: Student Placement
o3-mini has done a superb job, from project directory management to successfully deploying the web application to the cloud.
You can also read about Google’s state-of-the-art model and learn how to build your own AI application by following the tutorial Building Multimodal AI Application with Gemini 2.0 Pro.
The o3-mini model is unique, which means you need to be cautious when making follow-up requests and debugging code. Here are a few tips to help you work effectively with it:
When providing instructions, ensure they are clear and consistent. If you give multiple commands, o3-mini will prioritize the most recent instruction. This means the latest command in a long chain of prompts will take precedence, potentially overriding earlier ones.
Some code issues may need to be resolved manually instead of relying on the model to fix them. If you ask o3-mini to fix a specific part of the code, it will only modify that section. However, this can lead to related parts of the code breaking, as the model doesn’t always account for dependencies or the broader context.
Include all relevant details in your prompt, such as raw data, clearly defined rows and columns, and any additional context. This helps the model understand your request more accurately and produce better results.
Clearly outline what you want the model to return. For example, specify whether you need folders, files, Docker commands, or a step-by-step guide on how to implement the solution. This ensures the output aligns with your expectations.
Start with a well-structured base prompt that covers 90% of what you need. Once the base is established, you can provide follow-up commands to refine, fix, or add more steps to the process.
The o3-mini model stands out as a superior choice compared to GPT-4o, offering faster performance than o1 and excelling in tasks like Python and HTML coding. Remarkably, Python code generated by o3-mini runs smoothly most of the time without issues. It can even enhance HTML code, helping you improve your user interface and make it more visually appealing.
In this tutorial, we explored the power of the o3-mini model in the context of a machine learning project. The o3-mini model proves to be an excellent tool for data scientists, machine learning engineers, and technical professionals. Its ability to handle complex tasks efficiently makes it a valuable asset in any workflow.
To get the best results, all you need to do is provide comprehensive context, including all relevant content and deliverables, in your initial prompt. Once the model generates the output, you can move to your code editor, start running scripts, and implement the provided code along with its instructions.
Next, you need to learn how to deploy your own state-of-the-art LLMs on the cloud. Instead of relying on OpenAI, this gives you full control over pricing, accuracy, and accessibility of your data. Follow the How to Deploy LLMs with BentoML tutorial to learn everything about this process.
Top DataCamp Courses
Course
Course
Course
blog
Alex Olteanu
8 min
blog
Richie Cotton
8 min
Tutorial
Abid Ali Awan
Tutorial
Zoumana Keita
Tutorial
Alex Olteanu
code-along
Zoumana Keita