Track
So, you're just starting out with Power BI. Maybe you’re working through our Power BI fundamentals skills track, or you’ve just finished it. You may be wondering how to publish your Power BI reports to the web or showcase your new skills in a portfolio.
Normally, only people with Power BI access and a paid license can see your published reports. But with Publish to Web, you can share that report with everyone—no Power BI account is needed.
This feature is amazing if you’re working with public data. Let’s say you’re passionate about environmental data or public health stats. You can create and share a few reports on your blog or website so people can view and interact with them. All this without leaving the page.
This article explores the Power BI Publish to Web feature in detail. We provide a step-by-step guide for creating and managing public-facing Power BI reports. We also review some security and privacy concerns you should be aware of and offer tips for ensuring no sensitive data is shared.
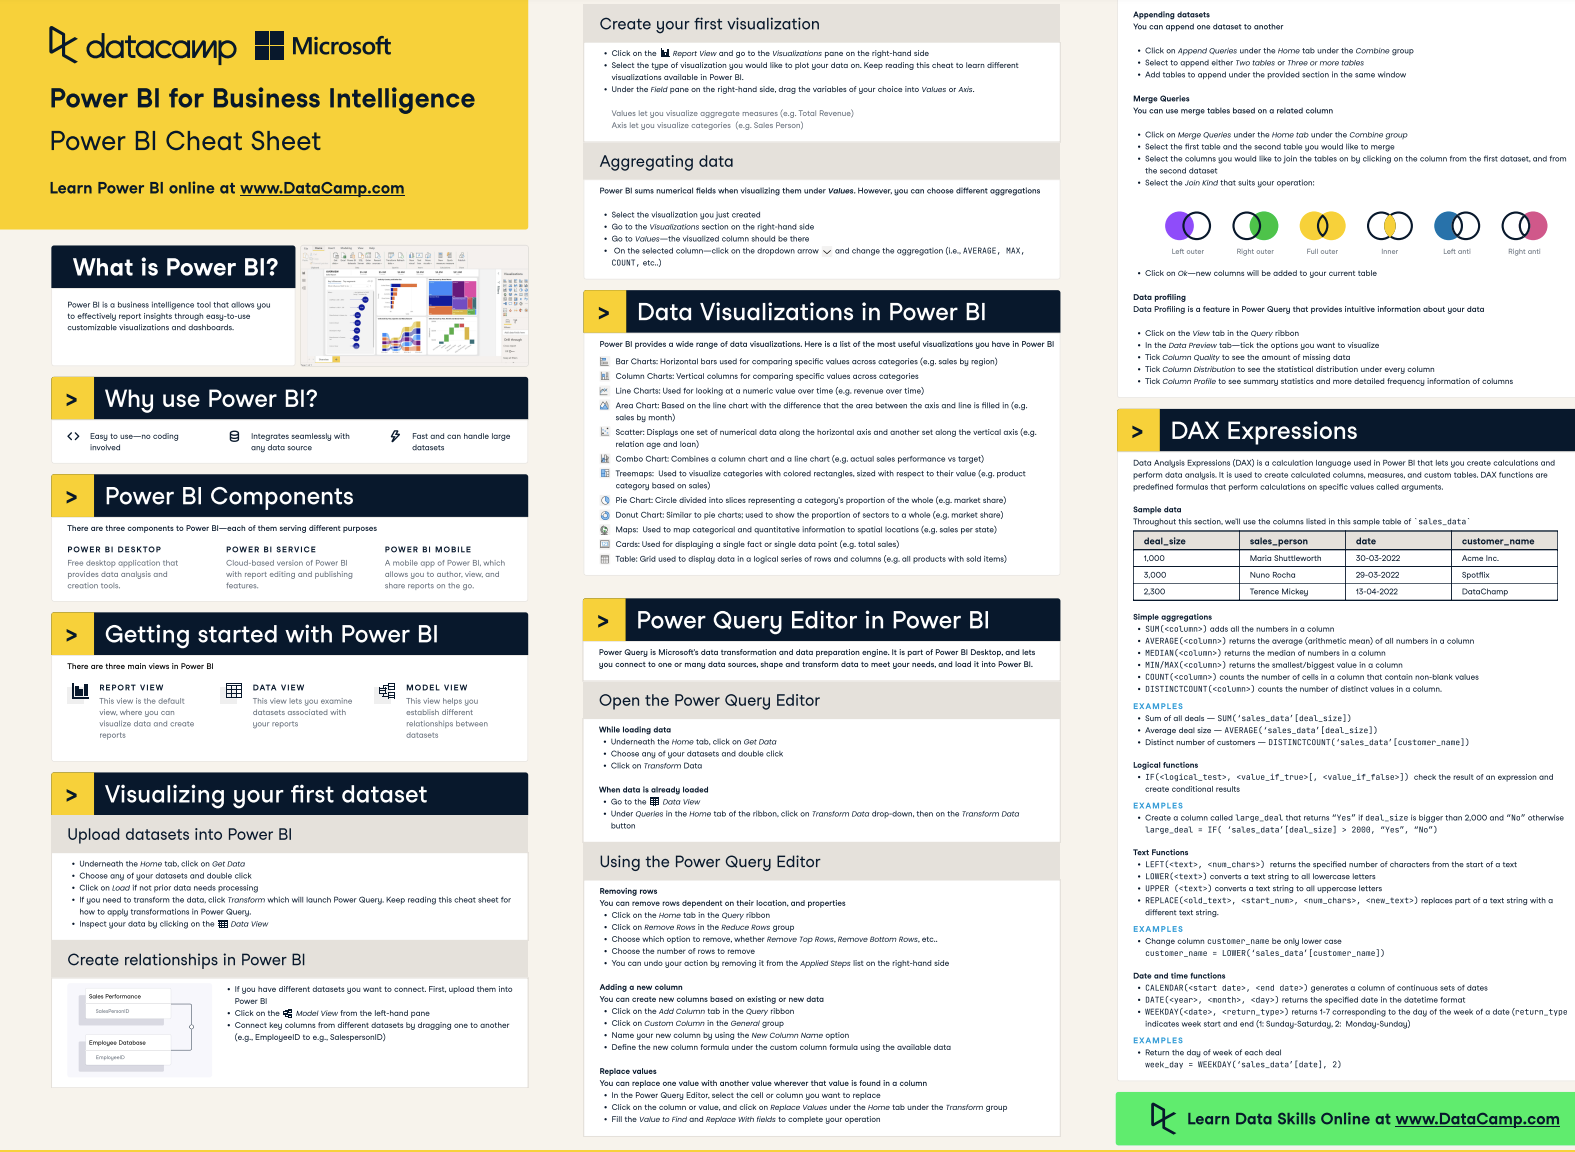
Check out our Power BI cheat sheet for a quick reference on the core concepts of Power BI, such as data visualization and DAX.
What is Power BI Publish to Web?
It’s a feature in Power BI that lets you generate an embed code for your report. You can insert this code into a website or blog, making your report available to anyone with internet access.
Wait, what’s an embed code? It’s a small piece of HTML code that allows you to embed and display content, like videos or Power BI reports, directly within a website.
But Publish to Web isn’t just another sharing method. Unlike sharing within your organization (where you control who can access the report), Publish to Web makes your report public. Anyone with the link can view it. So, it’s great for public-facing content, not so much for sensitive or confidential data.
Why Use Publish to Web?
Firstly, your viewers do not need to have a Power BI account. Anyone with the link or access to the website where it’s embedded can view the report.
Viewers can still interact with your report—hover over data points, use slicers, etc.—just like they would if they had a Power BI account.
Publish to Web allows you to build a portfolio on the web. This is an excellent way to showcase your skills in analyzing and visualizing data with Power BI.
Using this feature also gives you practical experience in managing and sharing Power BI reports. It’s an excellent way to get hands-on practice with Power BI Service and embedding reports.
If you’ve never published reports or worked with Power BI Service, check out our course on deploying and maintaining reports in Power BI.
Comparing Publish to Web With Other Sharing Methods
Power BI offers different ways to share your reports. Choose the method that aligns with your requirements and skill level.
- Share within your organization: This is the typical method of sharing reports. You control who sees what, and everyone needs a Power BI license to access the reports.
- Power BI apps: These are collections of dashboards and reports you can share with your organization. It's like creating a package of reports for different teams or departments. Again, everyone needs a Power BI account to access these.
- Export to PDF/PPT: You can export your reports to PDF or PowerPoint to share via email or presentations. This is more static—people can't interact with the data.
- Power BI Embedded: This is a bit more advanced. It allows developers to integrate Power BI reports into their own applications. Great for custom solutions but requires some coding skills and more setup.
|
Aspect |
Publish to Web |
Share within Organization |
Power BI Apps |
Export to PDF/PPT |
Power BI Embedded |
|---|---|---|---|---|---|
|
Accessibility |
Public (anyone with the link) |
Private |
Private |
Public or Private |
Private |
|
Interactivity |
Yes |
Yes |
Yes |
No |
Yes |
|
Best for |
Public sharing, broad audience |
Internal collaboration, specific user groups |
Organized sharing in teams |
Static sharing, presentations |
Custom applications, advanced embedding |
|
Security |
No access control, public |
Access control within organization |
Access control within organization |
No access control once shared |
Access control through custom application |
|
Setup Complexity |
Low |
Low to Moderate |
Moderate |
Low |
High (requires development skills) |
When to Use Publish to Web
Publish to Web is used when you want to reach a broad audience and aren’t worried about security or data privacy.
You could be writing a blog post about the latest market trends, or you want to embed an interactive report on your company’s public website.
You could also be creating a portfolio to stand out to future employers and start a career as a Power BI developer. If you don’t know where to start, check out these 8 Power BI project ideas to develop your skills.
Step-by-Step Guide to Publish to Web in Power BI
In this section, we go over the steps you must follow to use the Publish to Web feature in Power BI. Here’s a quick summary of the steps:
|
Step |
Description |
|
1. Prepare your report |
Transform and visualize your data, optimize the data model, and check for any sensitive information. |
|
2. Publish to Power BI Service |
Publish your report from Power BI Desktop to Power BI Service. |
|
3. Generate the embed code |
Navigate to File > Embed report > Publish to web in Power BI Service, then generate the embed code. |
|
4. Customize the embed code |
Customize the size and settings of your embedded report as needed. |
Step 1: Prepare your report
First, make sure your report is ready to go. Import, transform, and visualize your data. Follow a few key visualization best practices to ensure that your report is clear and engaging.
Before moving on to the next step, optimize your data model to minimize any performance issues. Also, be sure to double-check that your report doesn’t include any sensitive or confidential information.
Check out this blog post by the Power BI team for some helpful tips on improving the performance of your public-facing reports. These tips are especially useful if you plan to embed your report on high-traffic platforms and expect heavy usage.
You can also prepare your report entirely within Power BI Service (which means you can skip step 2 below). We have a separate Power BI dashboard tutorial to teach you how to do this.
Step 2: Publish to Power BI Service
- Click on the Home tab.
- Select Publish from the ribbon.
- Choose the workspace where you want to publish your report and hit publish. This uploads your report to the Power BI Service.
Step 3: Generate the embed code
Now that your report is in the Power BI Service, let’s generate the embed code.
- Navigate to your report in Power BI Service
-
- Go to the Power BI Service and log in.
- Find your workspace and open the report you just published.
- Publish to Web
-
- Click on File in the top menu.
- Select Embed report and then Publish to web (public).
- You’ll see a warning about making your report public. If everything looks good, click Create embed code.
Step 4: Customize the embed code
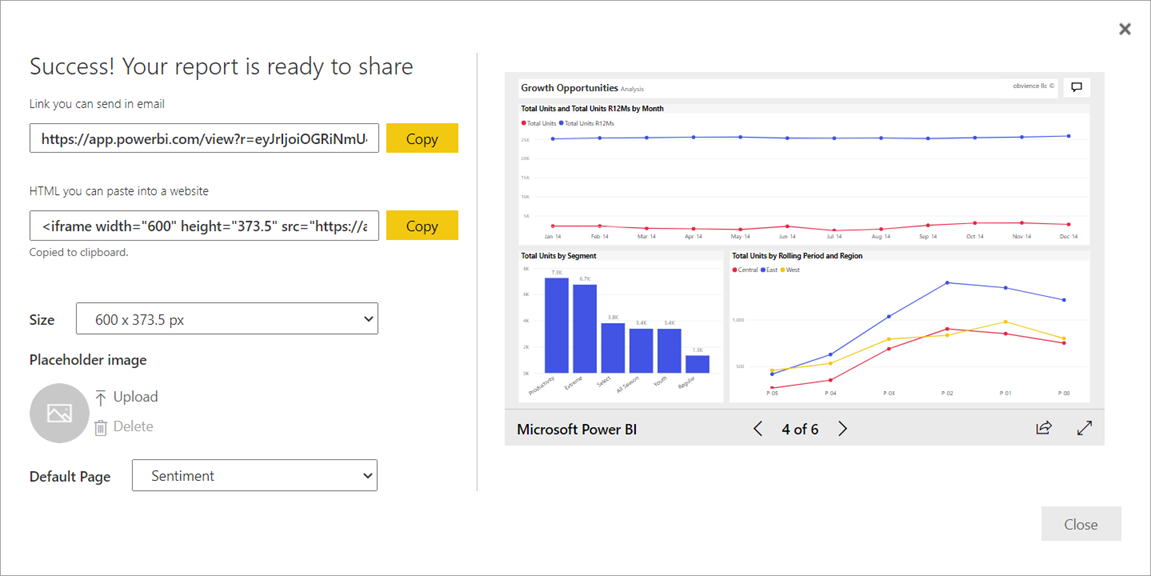
Once you click Create embed code, you can customize how the embedded report looks.

Source: Power BI - Customizing the embed code
You can adjust the size of your embedded report to fit your website layout. You can do this by manually changing the iframe width and height values or by clicking on the ‘Size’ dropdown menu.
Here’s a quick reference guide for each of the dimensions:
|
Ratio |
Size |
Dimension (width x height) |
|
16:9 |
Small |
640 x 416 px |
|
16:9 |
Medium |
800 x 506 px |
|
16:9 |
Large |
960 x 596 px |
|
4:3 |
Small |
640 x 536 px |
|
4:3 |
Medium |
800 x 656 px |
|
4:3 |
Large |
960 x 776 px |
You can also upload a placeholder image to your embedded report. This improves performance by showing an image instead of loading the report immediately. The user must click the “View interactive content” button to view the full report. This is recommended if you expect lots of concurrent viewers and heavy usage.
Lastly, you can select a default page for the report to open on.
Once you’re ready, add the embed code to your website. The exact method will vary depending on where your website is hosted.
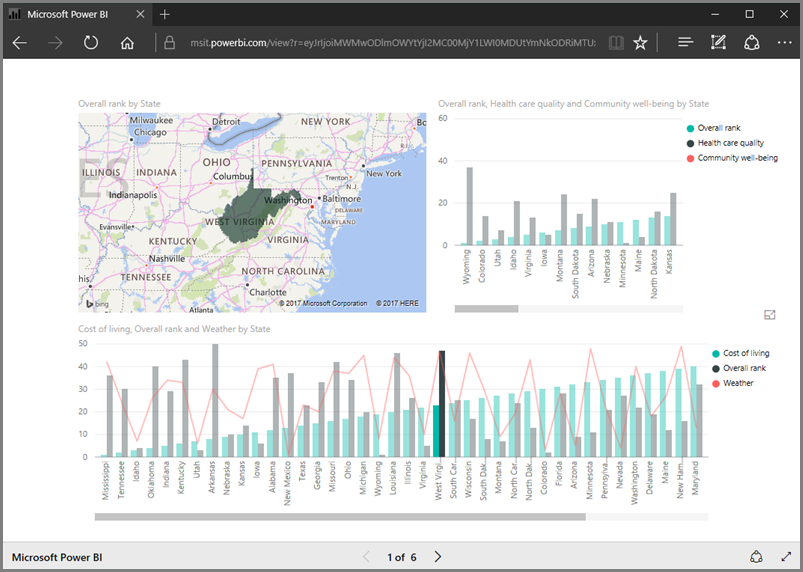
Here’s an example of a Power BI report that has been shared with Publish to Web:

Source: Power BI - Publish to Web example report
Managing Published Reports
When you publish a Power BI report to the web, it becomes publicly accessible, which is great for sharing reports with a wide audience. But you also need to keep track of what you’ve published.
Monitoring your embed codes
Luckily, Power BI makes it pretty straightforward to keep an eye on what you’ve published:
- Open your web browser and head to the Power BI Service.
- Click on your profile picture or the gear icon in the top right corner and select Settings.
- In the settings menu, you’ll see an option for Manage embed codes. Click on this, and you’ll get a list of all the reports you’ve published on the web.
Revoking access
Sometimes, you might need to revoke access to a report. The data may be outdated, or you realize it includes information that shouldn't be public.
Here’s how you can remove a published report:
- In the Manage embed codes section, locate the report you want to take down.
- Click on the ellipsis (…) next to the report and select Delete. This action revokes the embed code, so the report is no longer accessible via the link or embedded iframe.
Security and Privacy Concerns With Publish to Web
Public accessibility
When you use Publish to Web, your report is publicly accessible to anyone with the link.
This means that viewers don’t need to log in, which can be risky if sensitive data is included.
SEO indexing
Published reports can be indexed by search engines, making them discoverable through searches. While this can be good for visibility, it also means your data is more exposed.
Just because someone doesn’t have the link to your report doesn’t mean they can’t get it (such as, through a search engine).
No row-level security
Publish to Web doesn’t support row-level security, meaning there’s no way to restrict parts of the data from different users. What you see is what everyone sees.
How to Ensure No Confidential or Sensitive Data is Shared
Here are some tips to make sure you’re not accidentally sharing anything sensitive:
Review the data
Before publishing, go through your data to ensure it doesn’t include any confidential information. For example, look for personal identifiers, financial details, or proprietary business data.
Where possible, use aggregated data rather than detailed data. This can help protect individual data points.
Design with security in mind
Remove or obscure any fields that contain sensitive information. This might include names, addresses, or any data that could be considered confidential.
If you need to include detailed data, consider anonymizing it. Replace sensitive information with generic identifiers.
Use internal sharing for sensitive data
For reports that contain sensitive information, use Power BI’s internal sharing options instead of Publish to Web. Sharing within your organization ensures that only authorized users can view the report.
Regularly review your reports
Review your reports, removing any that no longer need to be public. Doing this regularly will ensure they still meet your privacy and security standards.
Limitations of Power BI Publish to Web
Of course, as useful as this tool is, it’s impractical to remember that there are some downsides to it:
- No access control: Once you publish to the web, anyone with the link can view your report. There’s no way to restrict access or require authentication. This means you can't control who sees your data.
- No row-level security: Everyone sees the same data. You can’t tailor views for different users based on their roles or permissions. This can be a major drawback if you need to show different levels of detail to different audiences.
- Lack of interactivity control: Reports are interactive, but you can't customize these interactions. This limits personalized user experiences.
- Limited customization with the embed code: You can change the size and a few basic settings. Unfortunately, you can't control how the embedded report interacts with the surrounding content.
- No advanced features: Some advanced features, like bookmarks or drill-through, may not work as expected when you publish to the web.
- Limited support for custom visuals: Some custom visuals might not display properly or at all in the web-published report.
- Data caching: To reduce performance issues, Power BI caches a report's data for one hour. This starts when a user retrieves the report or runs a query. When you refresh the underlying data, it can take some time before your users see the updates.
Final Thoughts
Publish to Web is a fantastic feature in Power BI that allows you to share your reports with a broad audience without them needing a Power BI account.
It's perfect for showing off your data visualization skills, building a portfolio of work to show to future employers, and creating content for everyone to enjoy. Just remember to be mindful of what you share and avoid leaking sensitive data.
If you’re ready to take the next step and start your career with Power BI, our comprehensive Data Analyst in Power BI career track covers everything you need to know to land your first job as a Power BI developer. It also fully prepares you to get certified.
Power BI Publish to Web FAQs
How do I generate an embed code using Publish to Web?
To generate an embed code using Publish to Web in Power BI:
- Publish your report from Power BI Desktop to the Power BI Service.
- Open the report in Power BI Service.
- Click on File > Embed report > Publish to web (public).
- Confirm the warnings and click Create embed code.
- Copy the generated embed code and use it to embed your report on a website or blog.
Can anyone access my Power BI report once it’s published to the web?
Yes, once a Power BI report is published to the web using Publish to Web, it becomes publicly accessible. Anyone with the link can view the report without needing a Power BI account or any authentication, so it's important to ensure no sensitive data is included in the report.
How do I customize the appearance of my embedded report?
You can customize the appearance of your embedded report by modifying the iframe attributes in the embed code. Adjust the width and height to fit your webpage layout. You can also add a placeholder image to improve the performance of the report if you expect heavy usage. Additionally, you can specify a default page if your report has multiple pages.
Can I update my report after it’s been published to the web?
Yes, you can refresh your data in Power BI Service or by publishing an updated report from Power BI Desktop. Data refreshes automatically update the embedded reports. However, data caching may prevent the user from viewing the most up-to-date data for up to 60 minutes. For this reason, frequent data refreshes are discouraged.
Does DirectQuery work with Publish to Web?
No, DirectQuery does not work with Publish to Web. If you attempt to use Publish to Web with a report that relies on DirectQuery, you will receive an error message. You will need to use an Import data model instead for your report to be eligible for Publish to Web.


