
Tracks
Cơ bản về Trí tuệ Nhân tạo
10 giờ
Running large language models locally has become increasingly popular, especially when you don’t want to send private data to external servers. When everything runs on your machine, your prompts and data stay within your environment, which gives you more control and better privacy.
If you want that same power, I’ll walk you through how to use LM Studio to run and chat with LLMs locally. It’s a GUI-first tool, so you don’t need terminal experience or deep technical knowledge. The setup is straightforward, and you can get started quickly. Let’s jump in!
If you’re interested in running agentic tools locally, I recommend checking out our tutorials on setting up OpenClaw and Claude Code with Ollama, respectively.
LM Studio is a cross-platform application that lets you download and run large language models locally on your machine so that your data never leaks to external servers.
It comes with a built-in model browser where you can search, browse, and download models directly from Hugging Face. You can download pretty much any model you want, including different versions of DeepSeek, Llama, Gemma, Phi, or Mistral. You don’t need any extra setup either.
LM Studio is also a great option for beginners, especially if you’re not comfortable working with command-line prompts. It gives you a user-friendly interface where you can select a model, adjust the configuration, and start chatting with it right away.
You can also upload your local files and chat with them: LM Studio can attach .docx, .pdf, and .txt files to chat sessions. If a document fits in context, it is added in full, and if it is very long, LM Studio can use retrieval-augmented generation (RAG)to pull relevant information from those files to answer your queries.
Since LM Studio is cross-platform, it works smoothly across Windows, Mac, and Linux, so you’re not limited by your setup. And once you get past the basics, there’s more you can do with it. You can connect your local LLMs to external tools, data sources, and APIs by integrating MCP servers, which makes it flexible enough for more advanced workflows.
LM Studio and Ollama are both designed to run and chat with large language models locally. However, there are a few key differences:
|
Feature |
LM Studio |
Ollama |
|
Interface |
GUI-first, user-friendly interface |
CLI-first, terminal-based interface |
|
Built-in RAG |
Yes, no extra setup needed |
Requires external tools |
|
MCP support |
Built-in |
Limited / not native |
|
Model downloads |
Access to Huggingface from the app |
Using commands such as |
|
Ease of setup |
Very beginner-friendly |
Slight learning curve if you’re new to CLI |
Before you start downloading models in LM Studio, it helps to understand what your system can actually handle. The model you choose directly depends on your available RAM, and picking the wrong one can slow things down or make the app unusable.
A quick lookup table with suitable models for different available RAM:
|
RAM |
What you can run comfortably |
|
8GB |
Small models (1B–4B) |
|
16GB |
Mid-sized models (7B-9B) |
|
32GB+ |
Larger models (13B and above) |
GPU is optional, but it makes a noticeable difference. If you have one, model responses become much faster and smoother. NVIDIA GPUs with CUDA support work best, Apple Silicon uses Metal effectively, and AMD has partial support depending on the setup.
Here are some practical recommendations for picking a model that actually runs well on your machine without pushing it too hard.
|
RAM/VRAM |
Recommended models |
|
8GB |
Qwen 2.5 3B / 4B, Phi-3 Mini (3.8B), Gemma 2 2B |
|
16GB |
Llama 3 8B, Gemma 2 9B, Mistral 7B, Qwen 2.5 7B |
|
24GB |
Llama 3.1 8B (higher quality quant), Mixtral 8x7B (quantized), Qwen 2.5 14B |
|
32GB+ |
Llama 3.1 70B (heavily quantized), Qwen 2.5 32B, Mixtral variants (better configs) |
You’ll also notice different versions of the same model with labels like Q4_K_M or Q8_0. This refers to quantization levels, which basically tell how the model is compressed. Lower quantization, like Q4, reduces memory usage and runs faster, but you lose some quality. A higher quantization, like Q8, keeps better output quality, but it requires more RAM and runs slower.
If you’re unsure, Q4 or Q5 is usually a safe place to start, especially on a 16GB setup like mine.
To get started with LM Studio, head over to the official website and download the app. The website automatically detects your operating system and offers to download the relevant version.
 You might be asked to allow permissions depending on your system settings. In my case, on Mac, it was available as an application right after opening the installer I downloaded.
When you open LM Studio for the first time, you’ll land on a clean interface with the model browser. You can immediately search for models, explore available options, and begin downloading one to run locally.
Open LM Studio and click the search icon from the left sidebar.
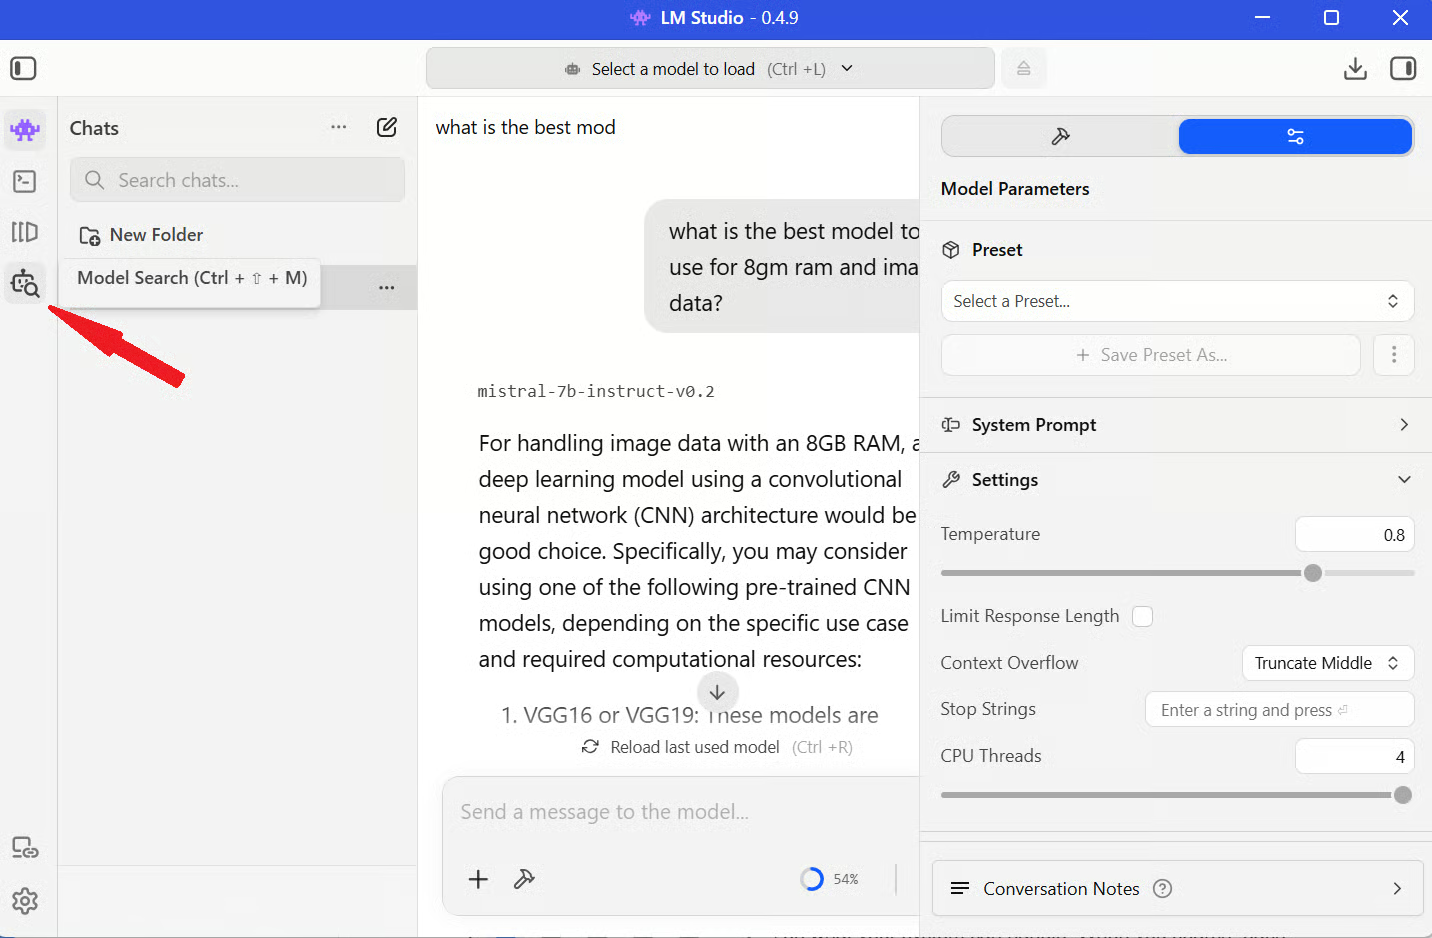
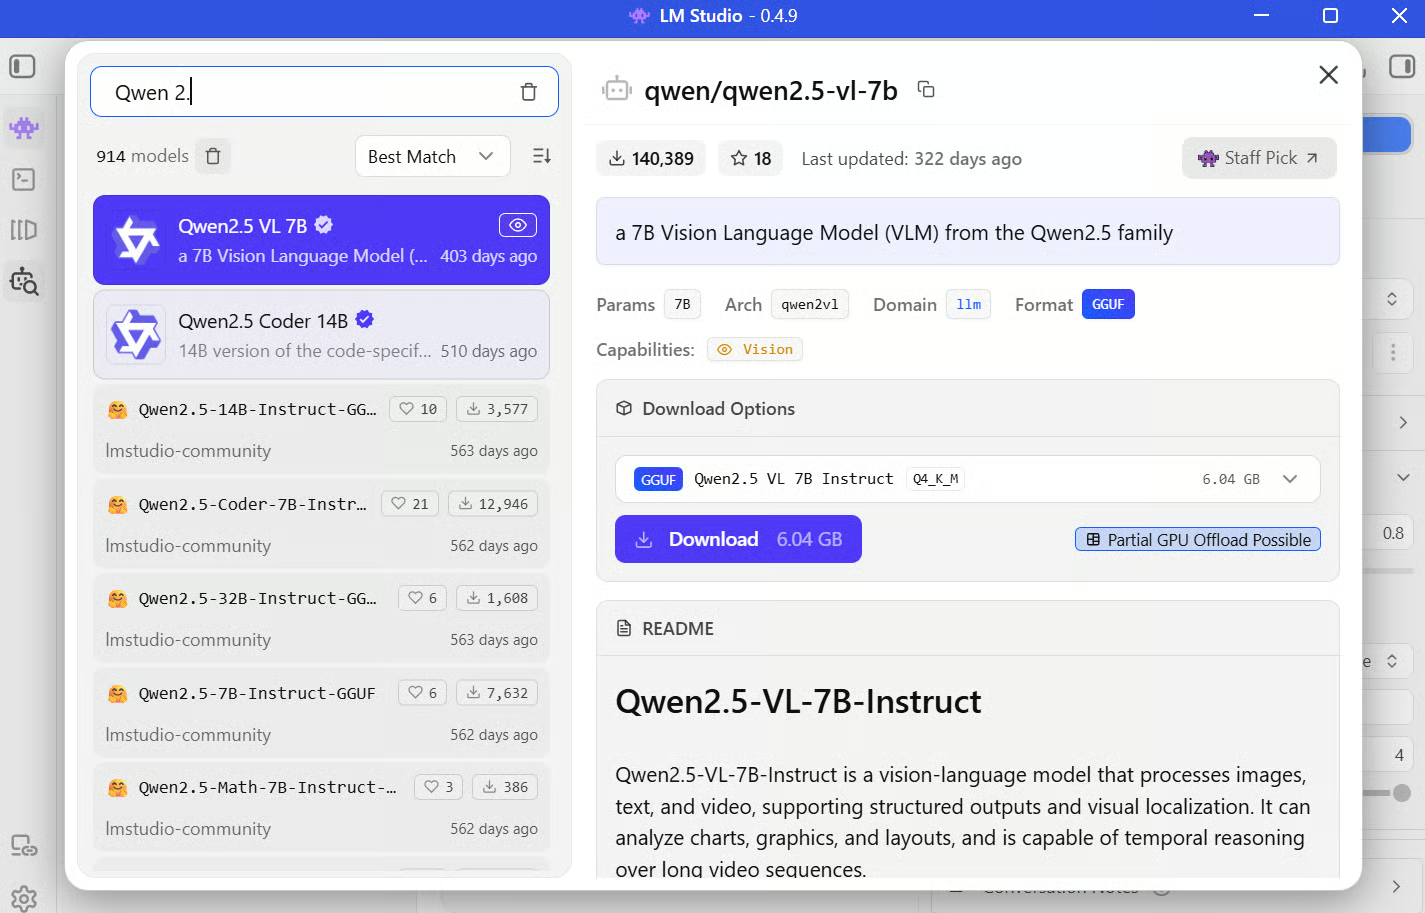
This is essentially your model marketplace where you can search for specific models, filter by size, and explore different options. When you search, each model comes with a model card, which gives you useful context like size, capabilities, and sometimes recommended use cases. It’s worth skimming this before downloading so you know what to expect.
If you’re following along and want a reliable starting point, go with something like Qwen 2.5 7B (Q4_K_M) for a 16GB system (or take one of the suggestions I made above). It strikes a good balance between performance and quality, and it runs smoothly without pushing your machine too hard.
As you browse, you’ll notice most models are available in GGUF format. GGUF, which stands for GPT-Generated Unified format, is a binary format to store and run LLMs efficiently on consumer-grade hardware.
This format maps high-precision weights (e.g., Float16) of models to lower-bit integers (e.g., 4-bit, 5-bit) and packages the model weights, metadata, and configuration into a single optimized file. It makes loading faster and ensures compatibility with inference engines like llama.cpp, which LM Studio relies on under the hood.
Let’s get to the exciting part and put the model to use.
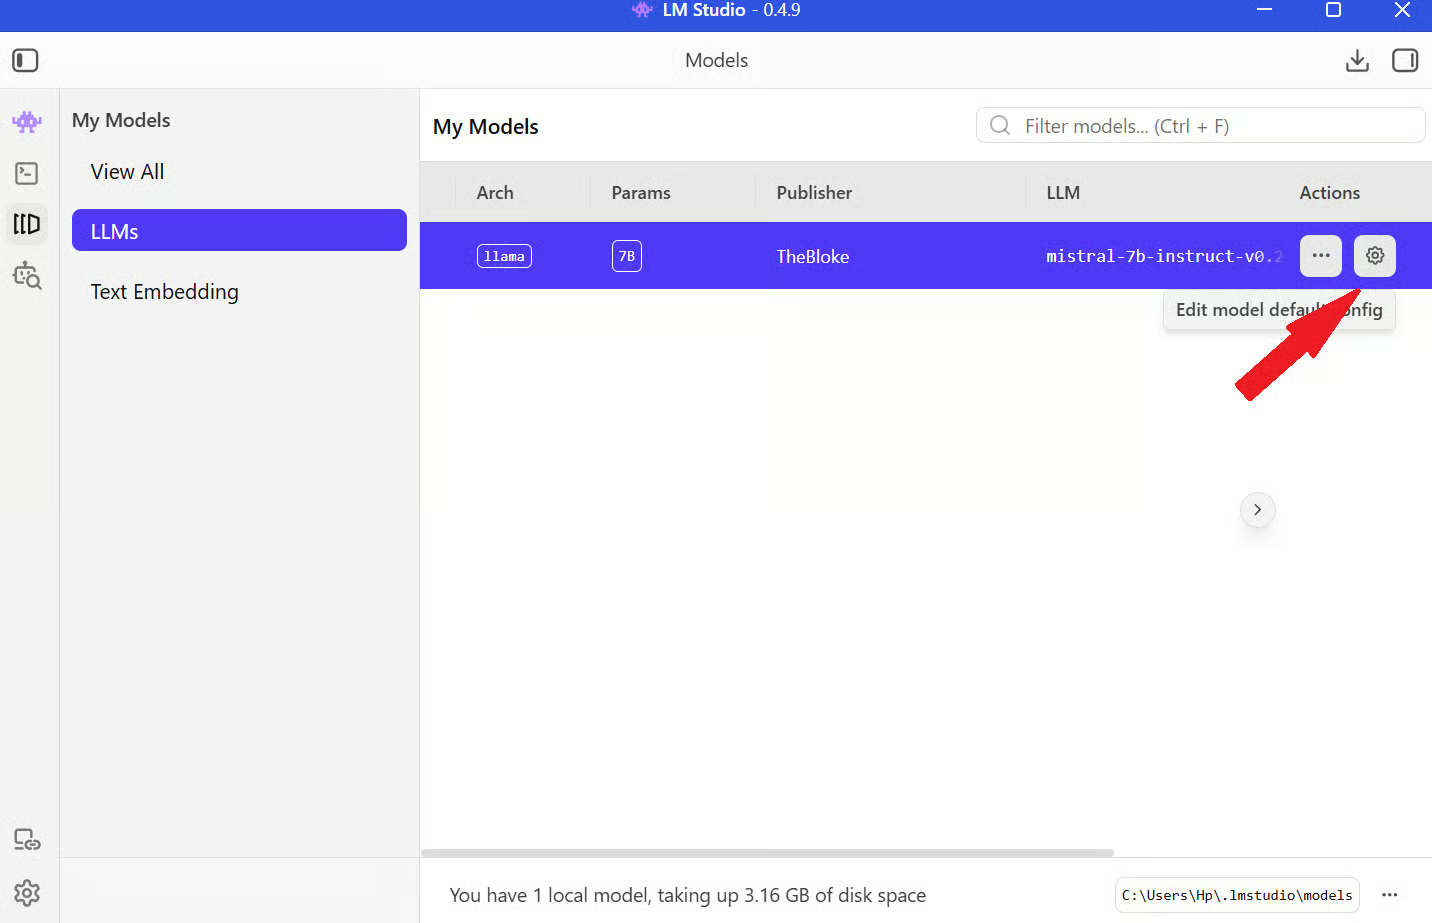
Step 1: Open LM Studio and navigate to the My Models section from the left menu bar.
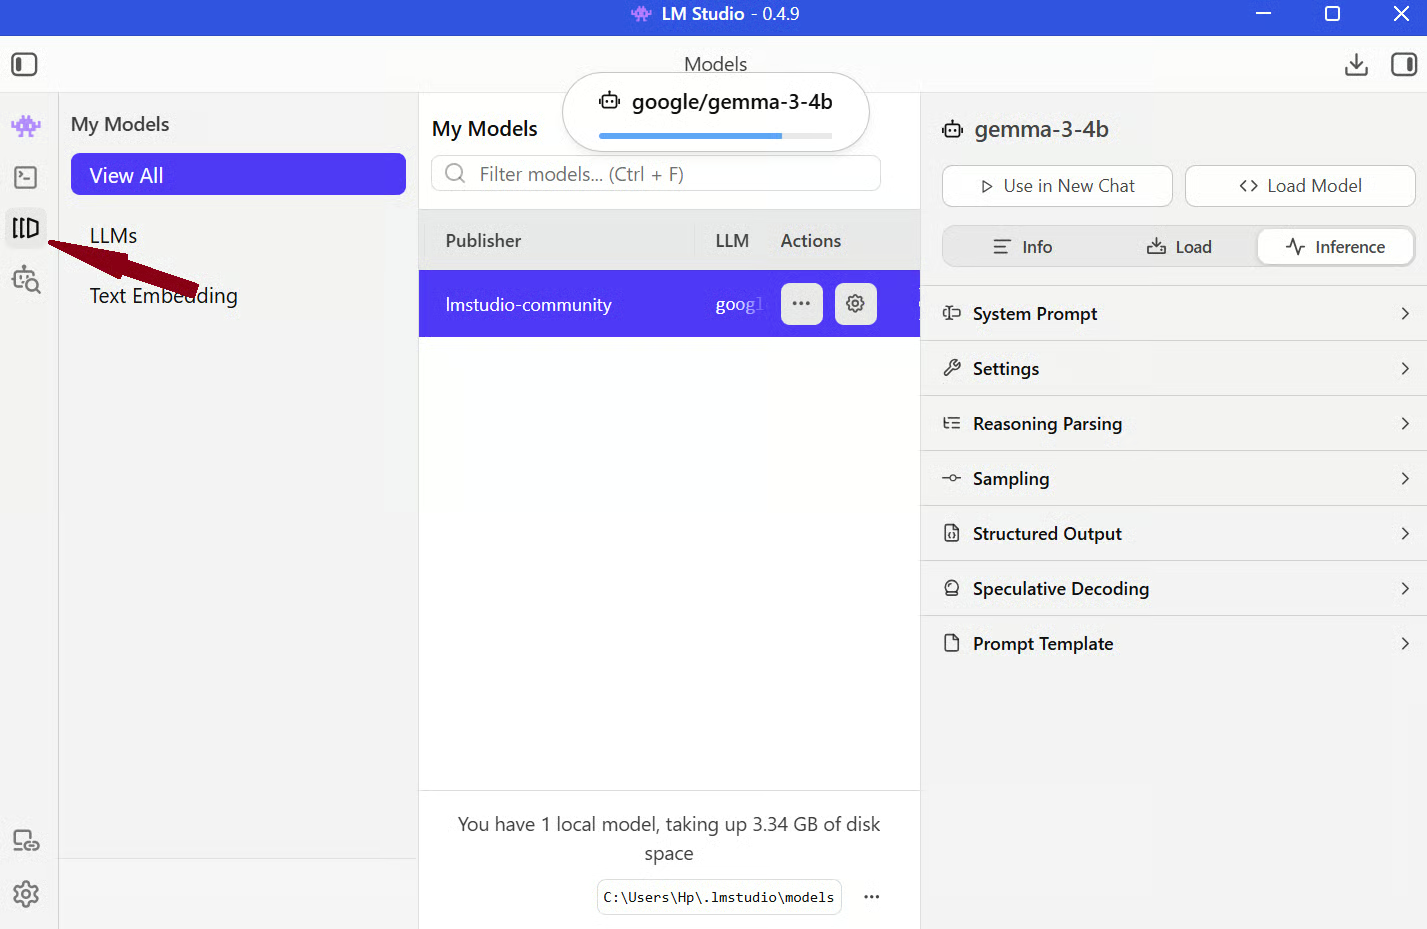
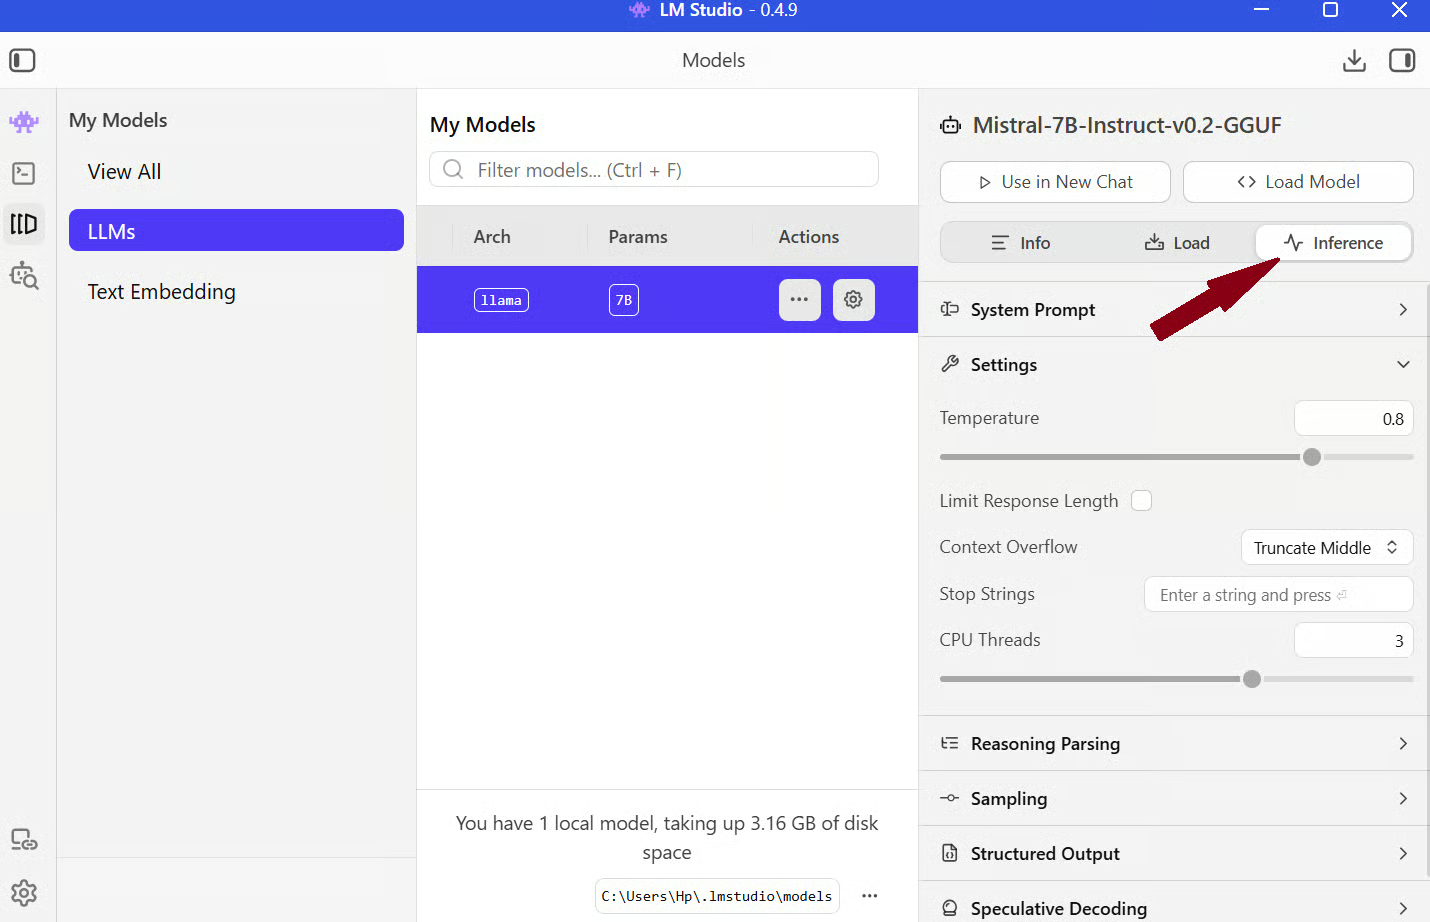
Step 2: Click the Settings icon on the model and click Load Model.
Once it’s loaded, go to the Inference tab on the same screen, and you’ll see controls for context length, temperature, and more.
Once everything is set up, you can start chatting with the model just like you would with any AI assistant. Here’s a simple example:
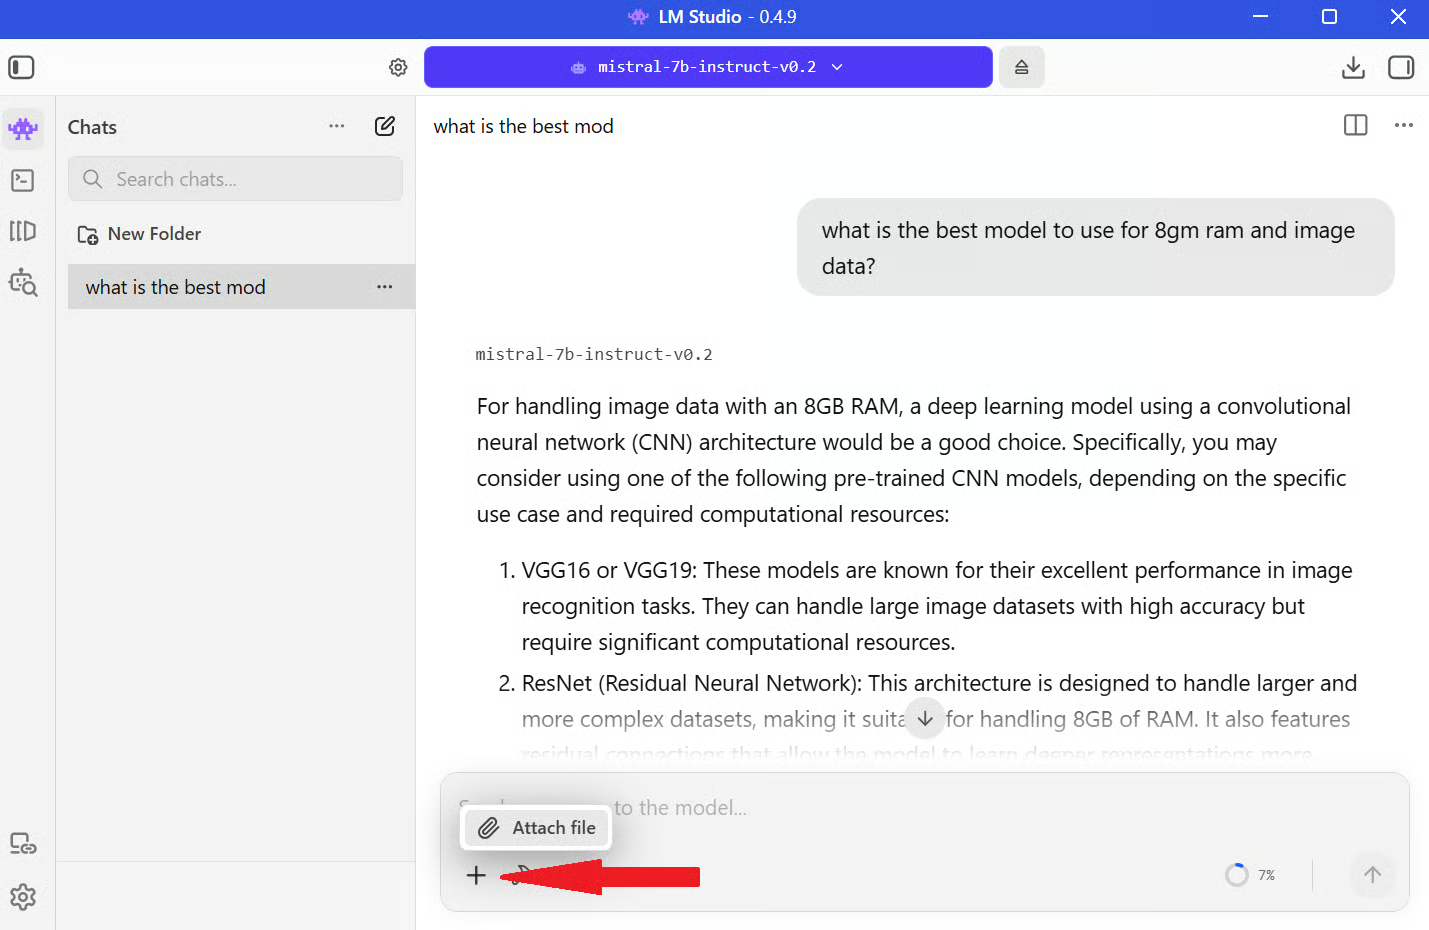
I prompted, “What is the best model to use for 8GB RAM and image data?”
The model suggested using a model with a convolutional neural network (CNN) architecture, as shown in the image.

That’s the basic flow. The quality of responses depends a lot on your configurations. For example, if you set “Explain everything in simple terms with short answers” in the system prompt settings, the model stays consistent with that style across multiple responses.
One of the most useful features in LM Studio is its built-in RAG support. You can directly upload your documents to the chat and start asking questions.
To get started, open a chat session with your loaded model. You’ll see a + icon for attaching files. Click it to upload documents like PDFs or text files directly into the chat.
Once the file is added, LM Studio prepares it for querying automatically, so you don’t need to configure anything manually. Under the hood, the document is split into smaller chunks so the model can work with it efficiently. These chunks are then converted into embeddings, which are numerical representations of the text.
When you ask a question, LM Studio retrieves the most relevant chunks and passes them to the model along with your query. This way, the model gets extra information from your documents and responds accordingly.
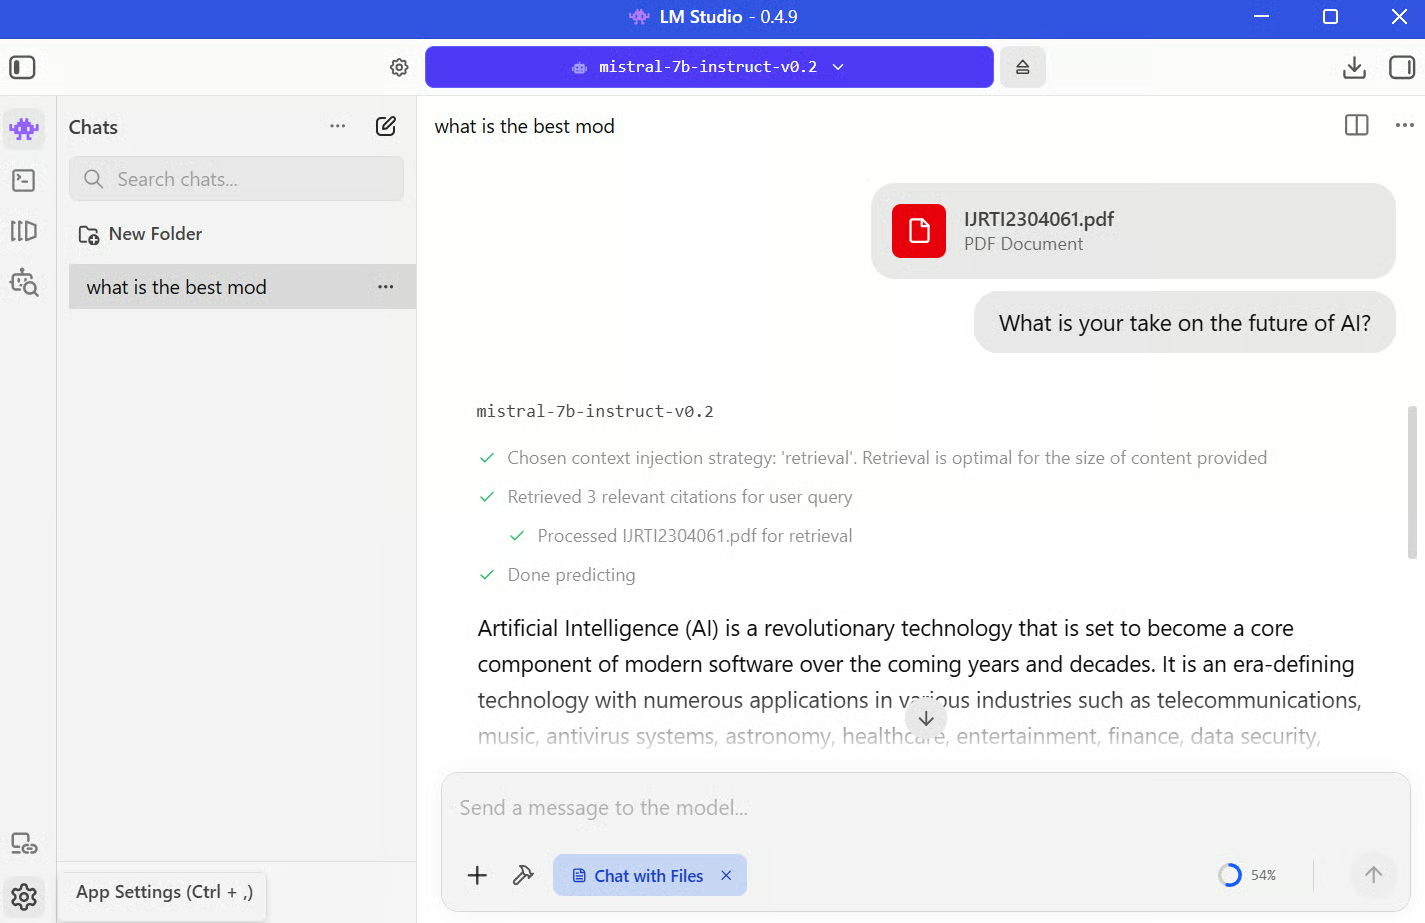
For example, I uploaded a research paper on artificial intelligence and asked, “What is your take on the future of AI?”
LM Studio pulls the most relevant sections from the document and sends them to the model along with your prompt. The model then generates a response based on both the provided context and its existing knowledge.
You can see the same thing happening visually in the image below:
There are a few limitations to keep in mind. The model still depends on its context window, so very large documents may not be fully considered at once. Retrieval quality also depends on how well the document is chunked, which means some answers might miss details if the relevant sections aren’t retrieved correctly.
One of the more powerful things you can do with LM Studio is run it as a local API server. This lets you use your local LLM inside scripts, apps, or other tools.
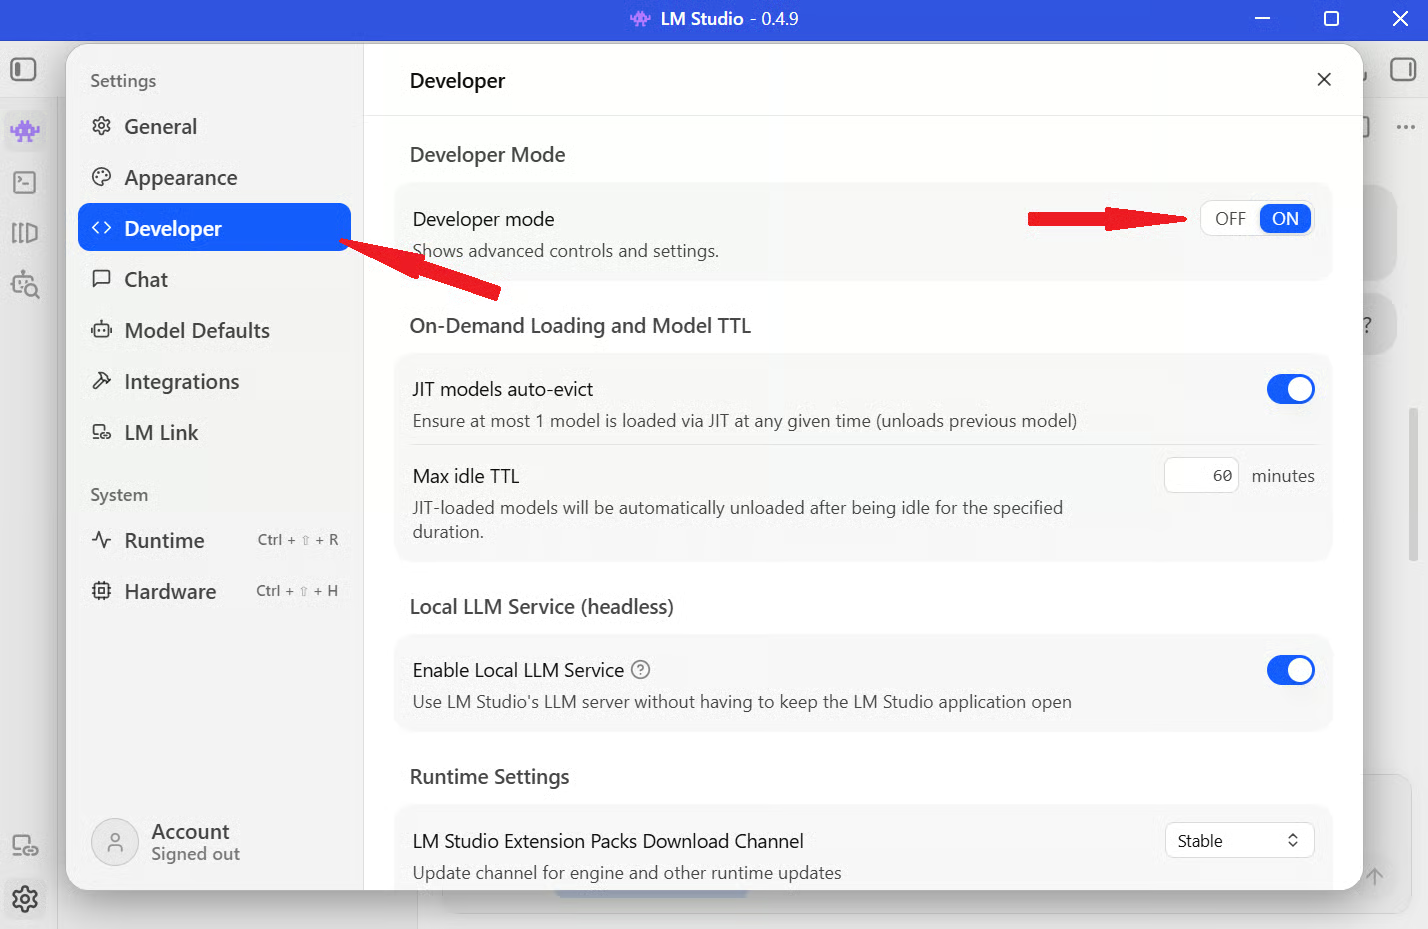
Step 1: To enable this, Open LM Studio and click the Settings icon in the bottom-left corner of the screen.
Step 2: Go to the Developer section from the left sidebar and turn on the Developer Mode toggle.
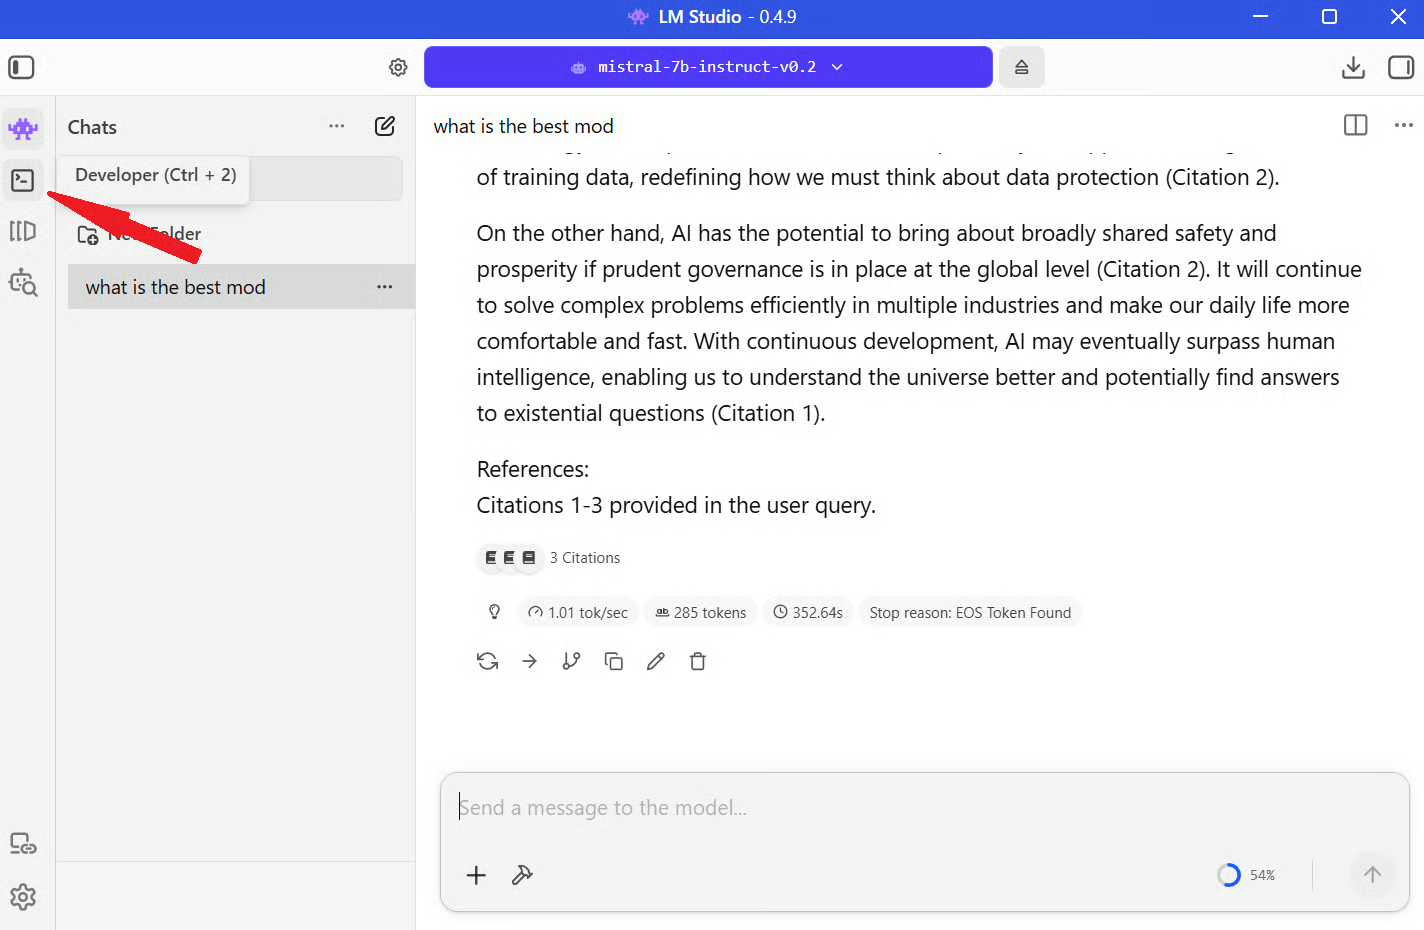
Step 3: Go back to the chat interface and click the Developer icon from the left menu bar.
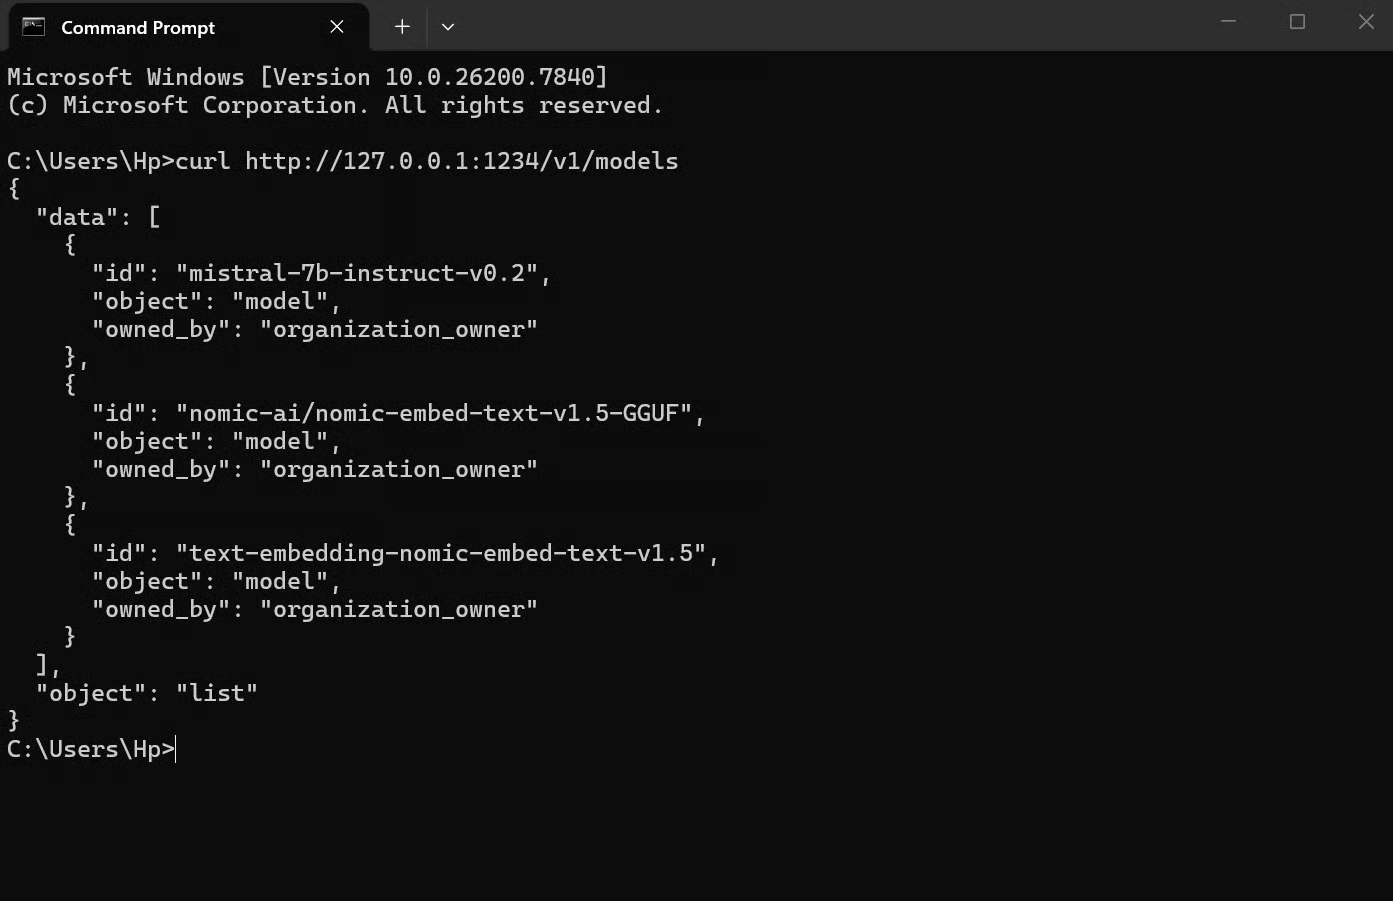
Step 4: Turn on the toggle next to Status to start the server, as in the image below. Once it’s running, you can copy the server address and test it with a simple curl request:
curl http://127.0.0.1:1234/v1/models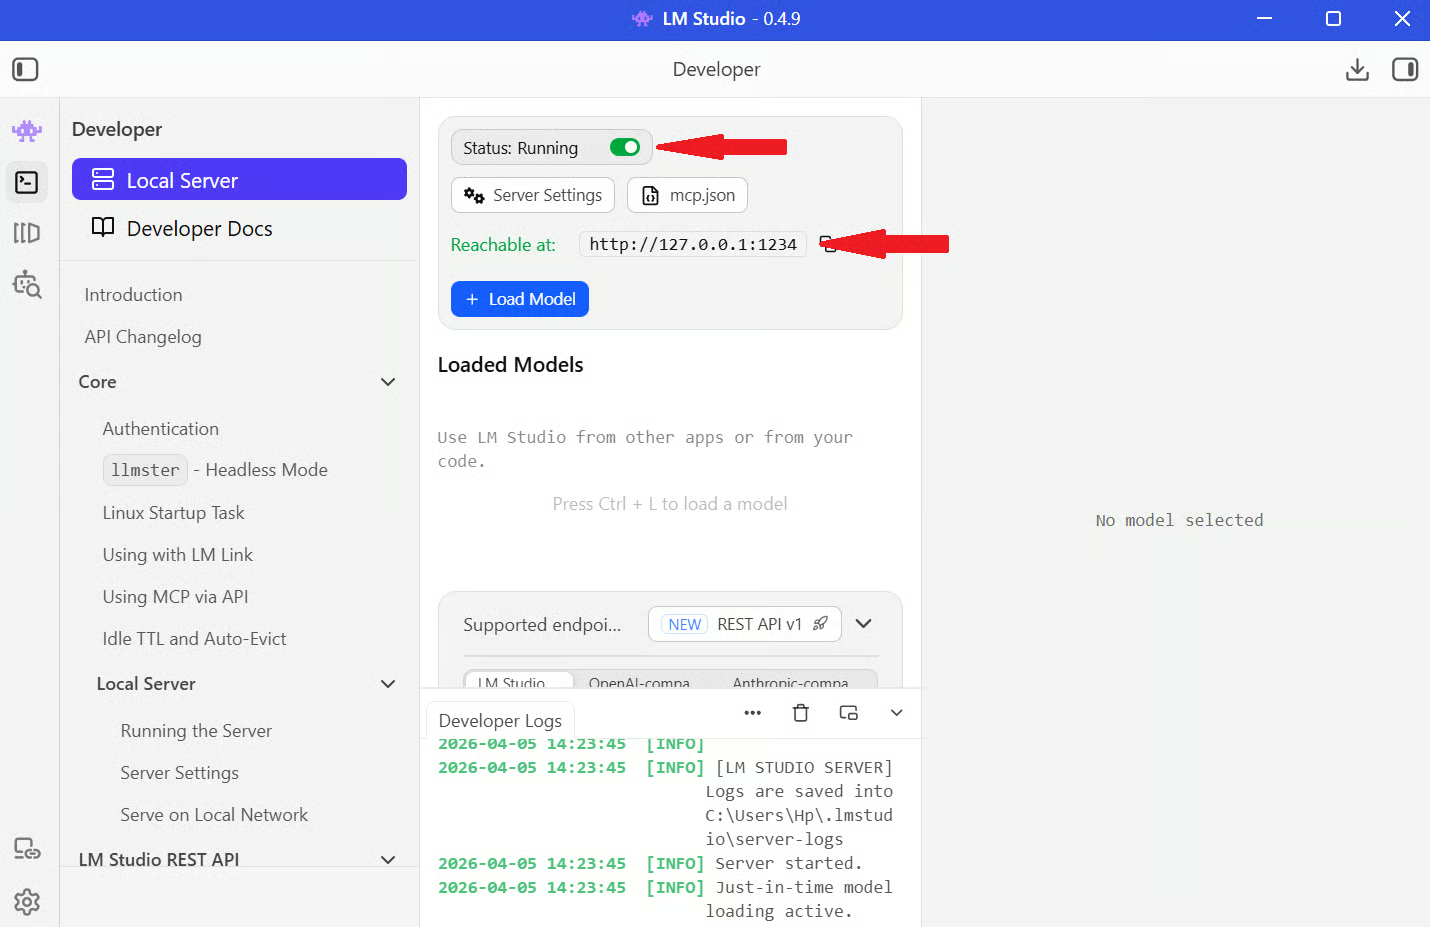
If everything is set up correctly, you’ll see a JSON response listing the available model.
Once your local server is running, you can treat it like any other API. The only difference is that instead of calling OpenAI’s servers, you’re calling your own machine.
Here’s a simple example:
from openai import OpenAI

client = OpenAI(base_url="http://localhost:1234/v1", api_key="lm-studio")

response = client.chat.completions.create(
    model="local-model",
    messages=[
        {"role": "user", "content": "Explain how local LLMs work"}
    ],
)

print(response.choices[0].message.content)
What’s happening here:
base_url tells the code to use your local LM Studio server instead of OpenAI
api_key can be anything (LM Studio doesn’t enforce it)
model refers to the model you loaded in LM Studio
messages is your prompt
When you run this, your request goes to “localhost:1234”, the model processes it, and you get a response back, just like any API call. This works because LM Studio follows the OpenAI API format.
LM Studio gives you a clean, practical interface to work with LLMs locally, and you can control the environment completely. You can select the models, configure the settings, chat with it, and even extend the setup to run it as a local API server.
What stands out is that running large language models locally used to involve a lot of setup and tooling. LM Studio reduces that to something that feels closer to installing and using a regular desktop app.
If you want to build on this, the next step is learning how to integrate these models into real workflows. You can explore courses like Working with the OpenAI API or broader AI fundamentals tracks to understand how to structure prompts, build applications, and work with models effectively.
AI Courses
Tracks
Tracks
Courses
blogs
Khalid Abdelaty
11 phút
blogs
Abid Ali Awan
10 phút
Tutorials
Abid Ali Awan
Tutorials
Dario Radečić
Tutorials
François Aubry
Tutorials
Abid Ali Awan