Track
AI Agent Fundamentals
6 hr
The Kimi Browser Extension, formerly Kimi WebBridge, is a browser extension for AI agents that clicks, fills, navigates, and extracts. Tedious work, on autopilot.
Under the hood, it works through three components working together:
This architecture means the agent can use your existing browser sessions. If you're already logged into Amazon or any other site, WebBridge can act on those authenticated pages without needing to re-login or deal with CAPTCHA separately.
There are two ways to connect the Kimi Browser Extension to an AI agent: through the Kimi Desktop app (Kimi Work) or through Kimi Code CLI in the terminal. Both use the same browser extension, and the difference is how you interact with the agent.
|
Kimi Work (Desktop) |
Kimi Code CLI (Terminal) |
|
|
Setup |
Install app + extension |
Install CLI + extension |
|
Interface |
Chat UI in the desktop app |
Terminal with natural language prompts |
|
Output |
Results appear in the chat |
Full control over outputs and files |
|
Best for |
Quick one-off tasks |
Reproducible pipelines and tutorials |
|
Rate limits |
Shared free tier (can hit limits) |
More reliable for extended use |
I tested both approaches while preparing this tutorial. I'll walk you through the Kimi Work setup first, then show the Kimi Code CLI path I switched to when I hit rate limits, which is common during peak usage.
If you've followed Moonshot's agent work, this is the same direction as Agent Swarm in Kimi K2.5: parallel, tool-driven execution, except the tool here is your browser.
First, let’s look at the path coming from Kimi Work.
Go to kimi.com/en/products/kimi-webbridge and click With Kimi Desktop. Download and install the Kimi Desktop App. Note that Kimi Work is supported on Windows and Apple Silicon Macs only. On Intel Macs, the desktop app is limited to Kimi Chat, so use the Kimi Code CLI path below instead.
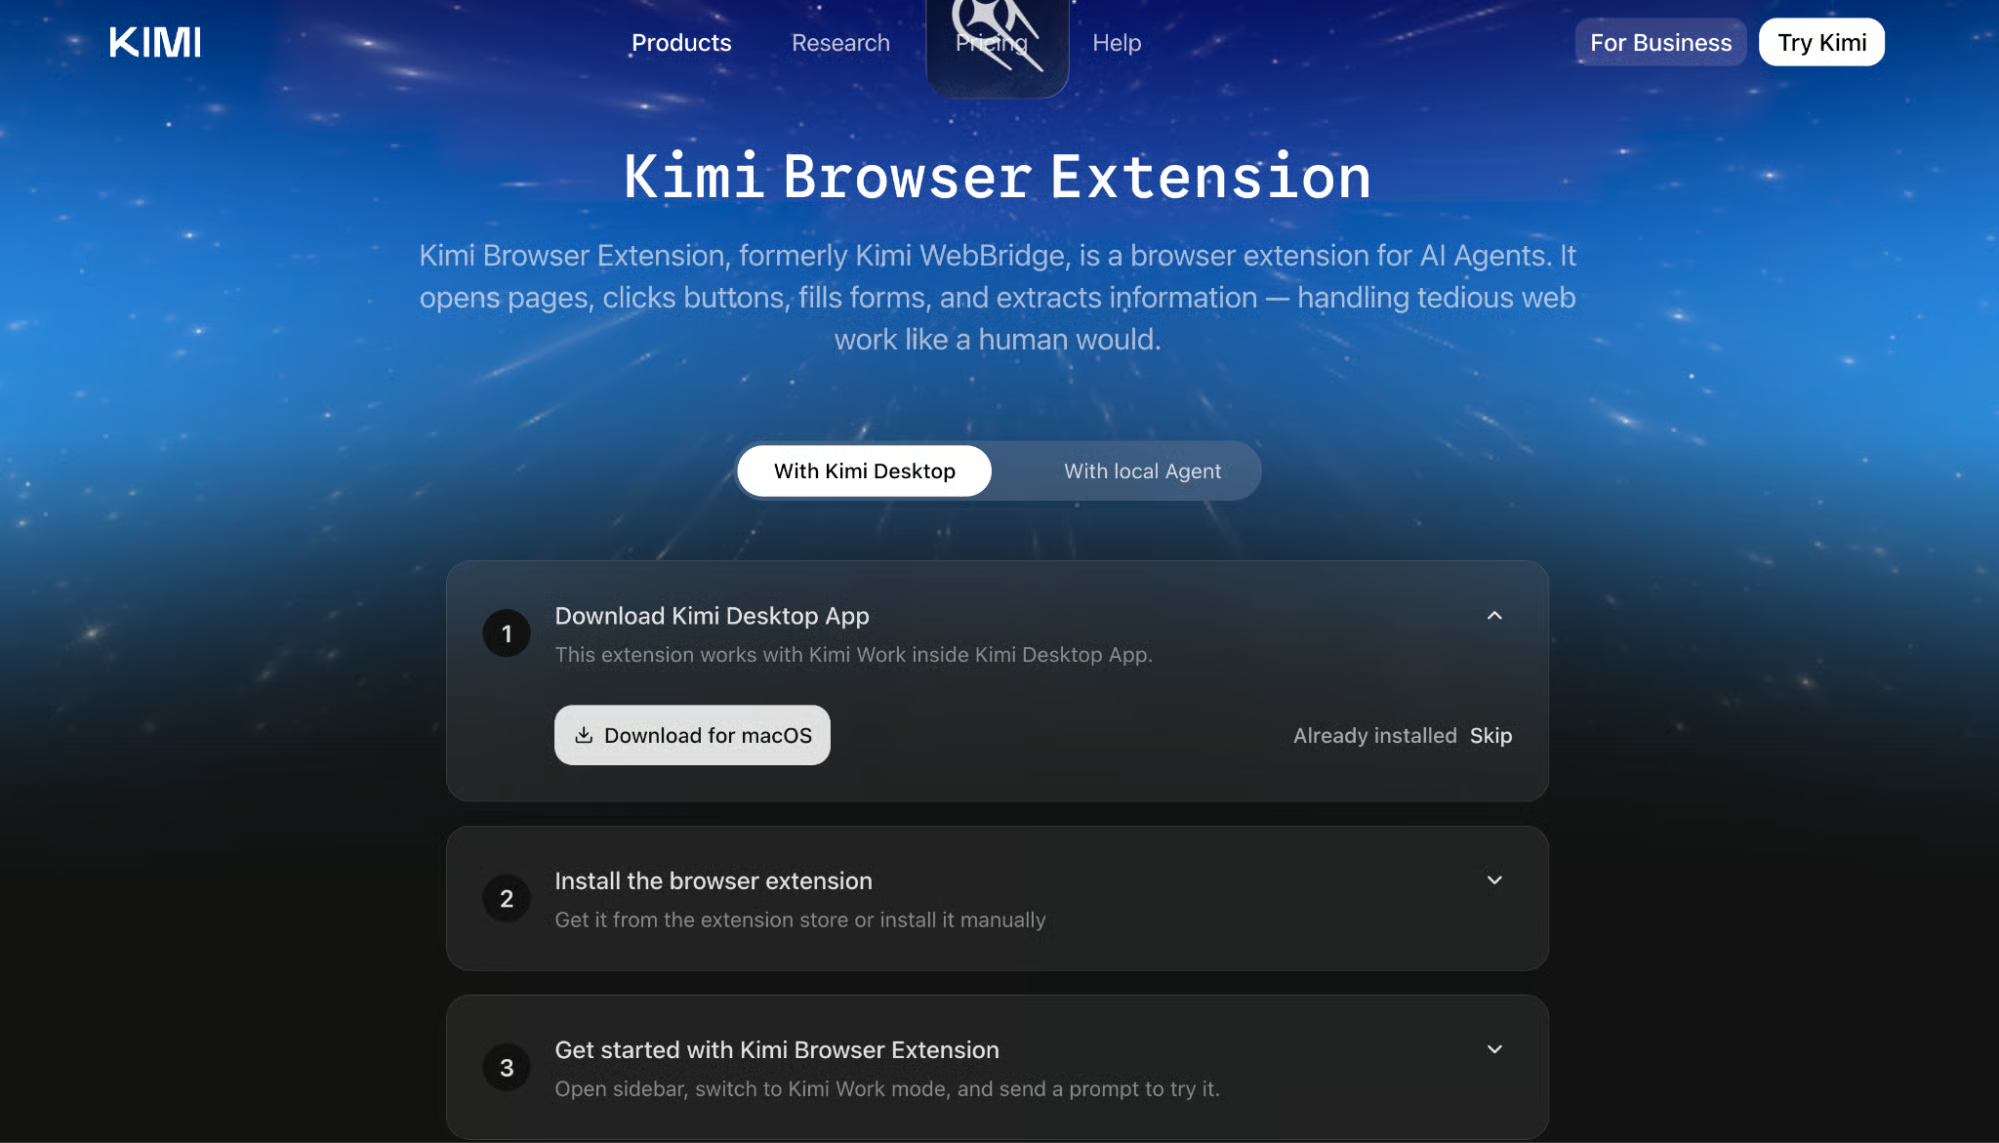
Note: You can set this up manually as well by following the steps mentioned on the website, or you can use your local agents like Hermes, OpenClaw, Cursor, Codex, etc to set Kimi WebBridge for you.
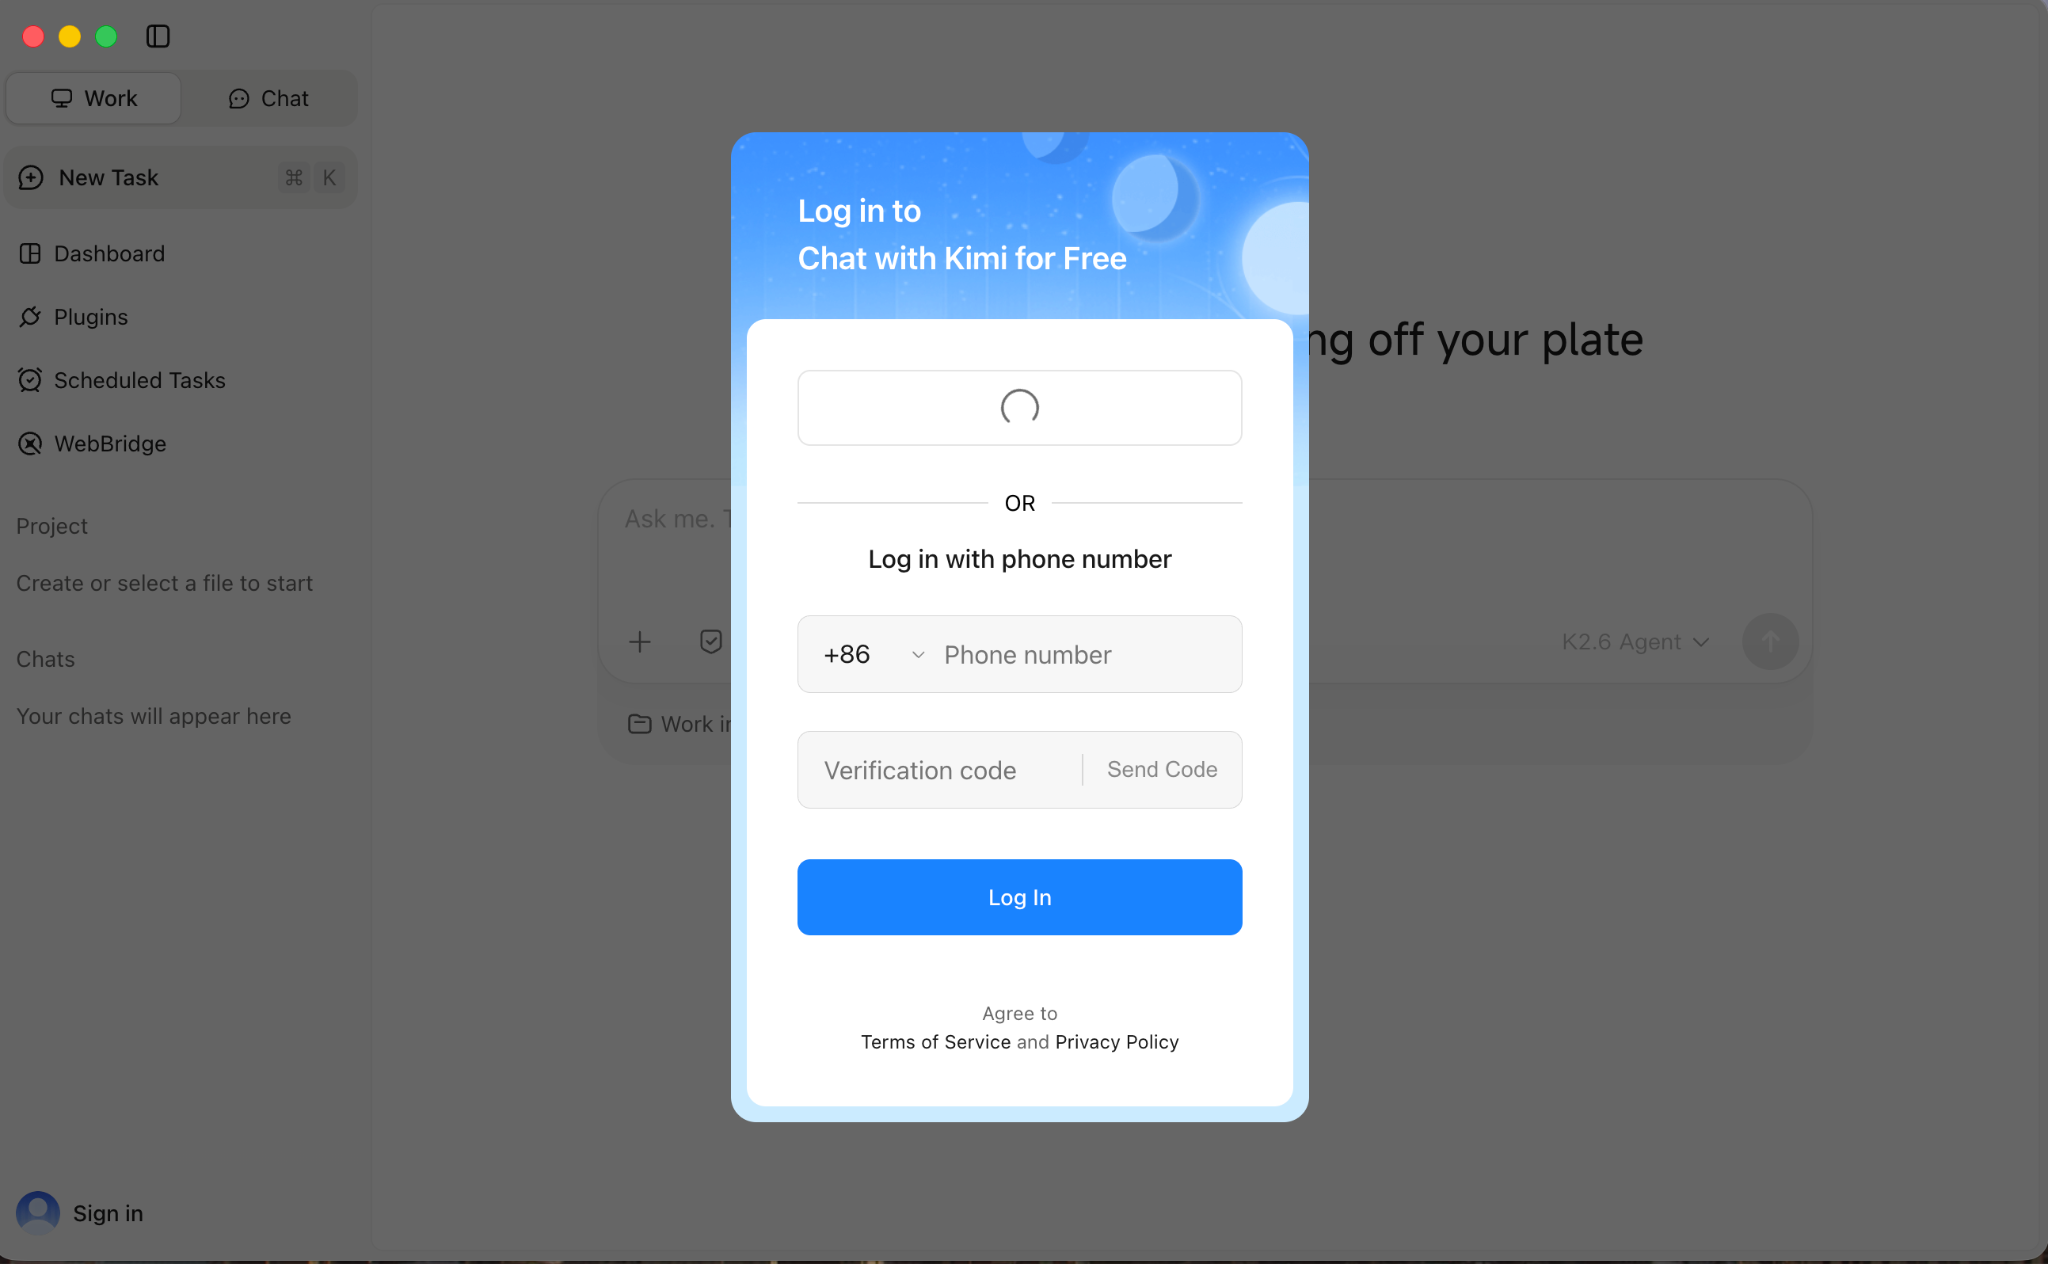
Open the Kimi Desktop App and log in using your phone number or Google account.
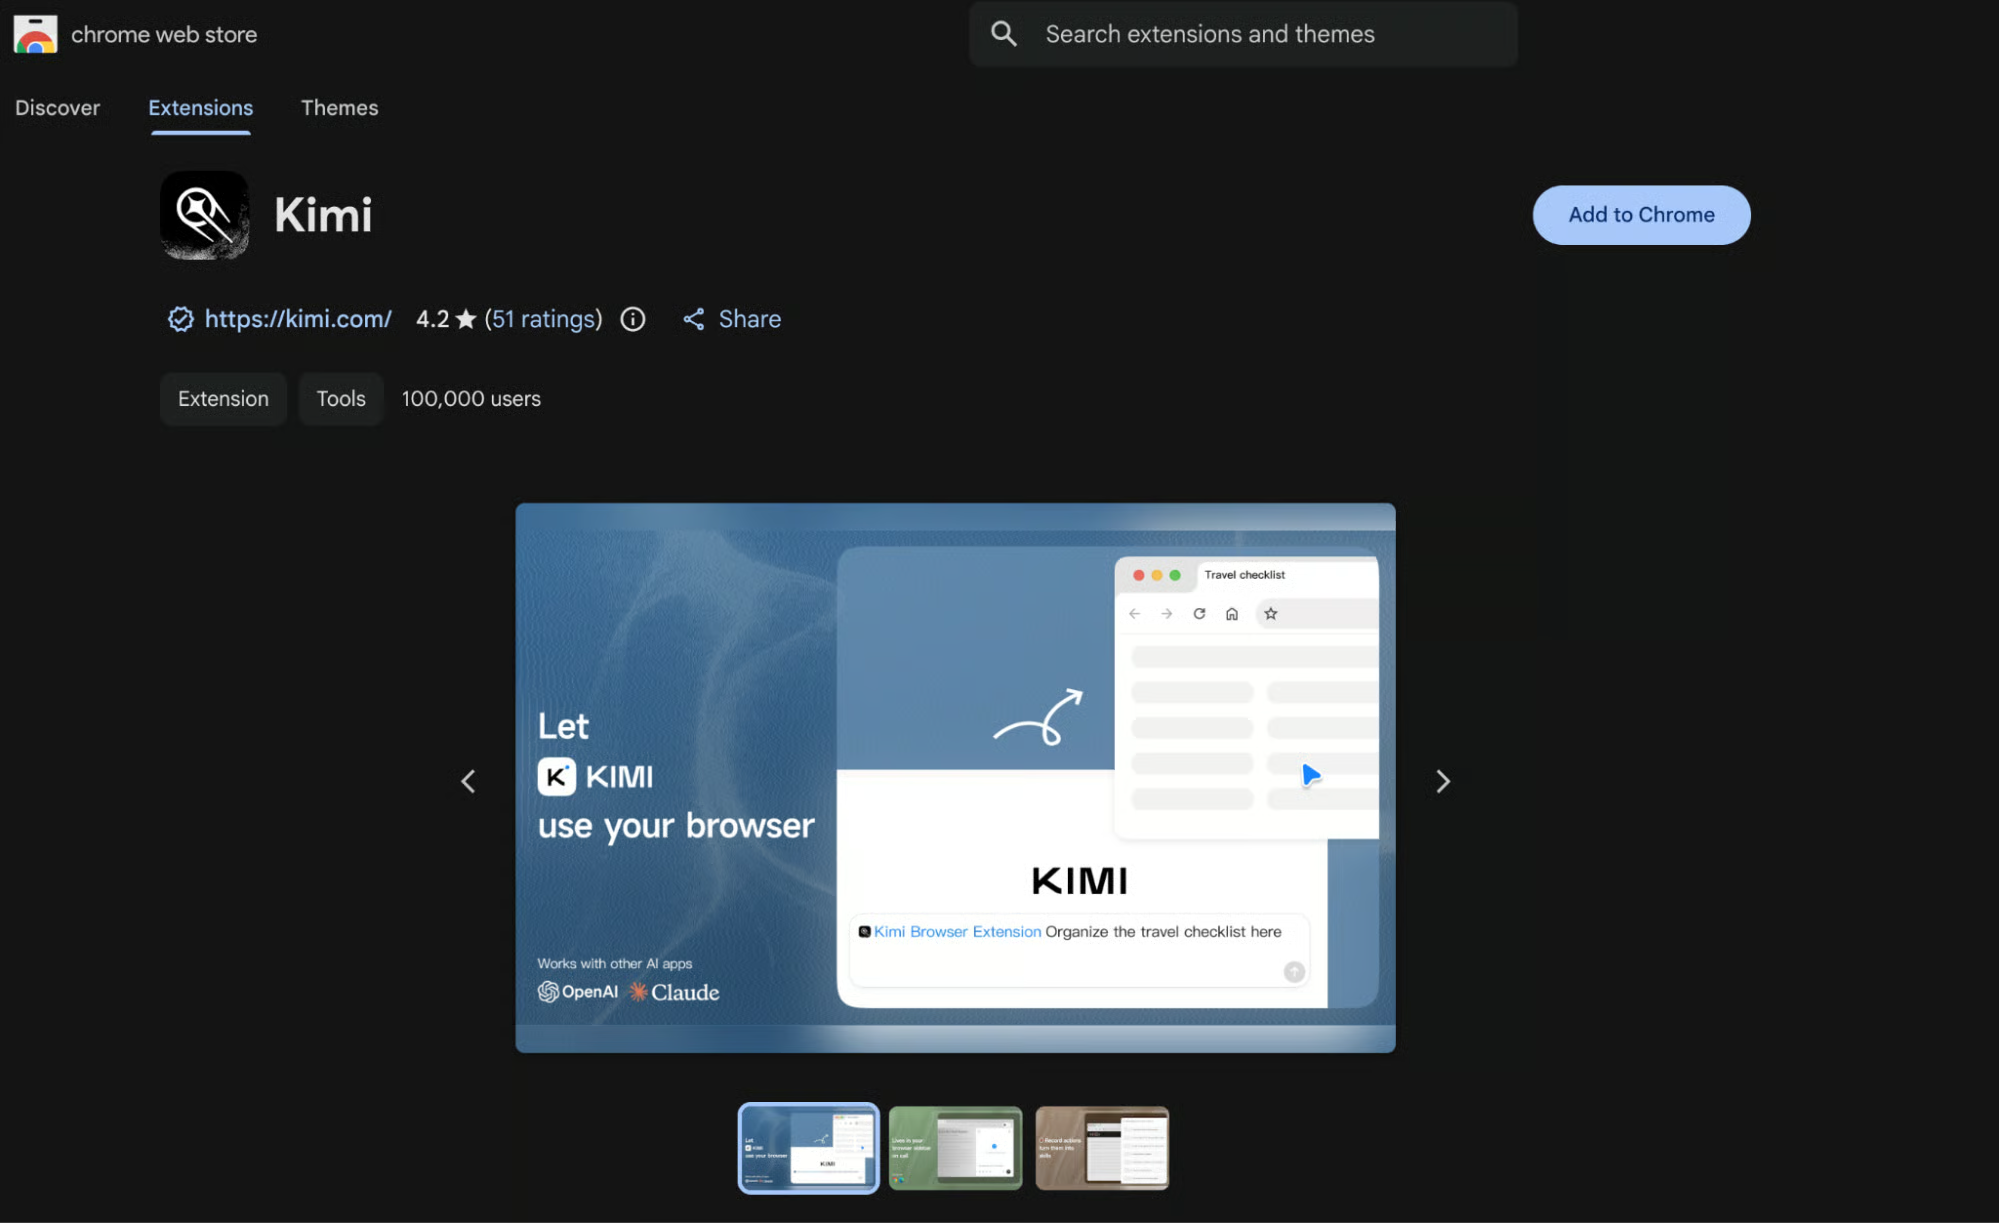
Go to the Chrome Web Store and add the Kimi browser extension (also works in Brave). Once installed, you should see an extension pop-up.
Next, you enable the browser extension in Kimi Work.
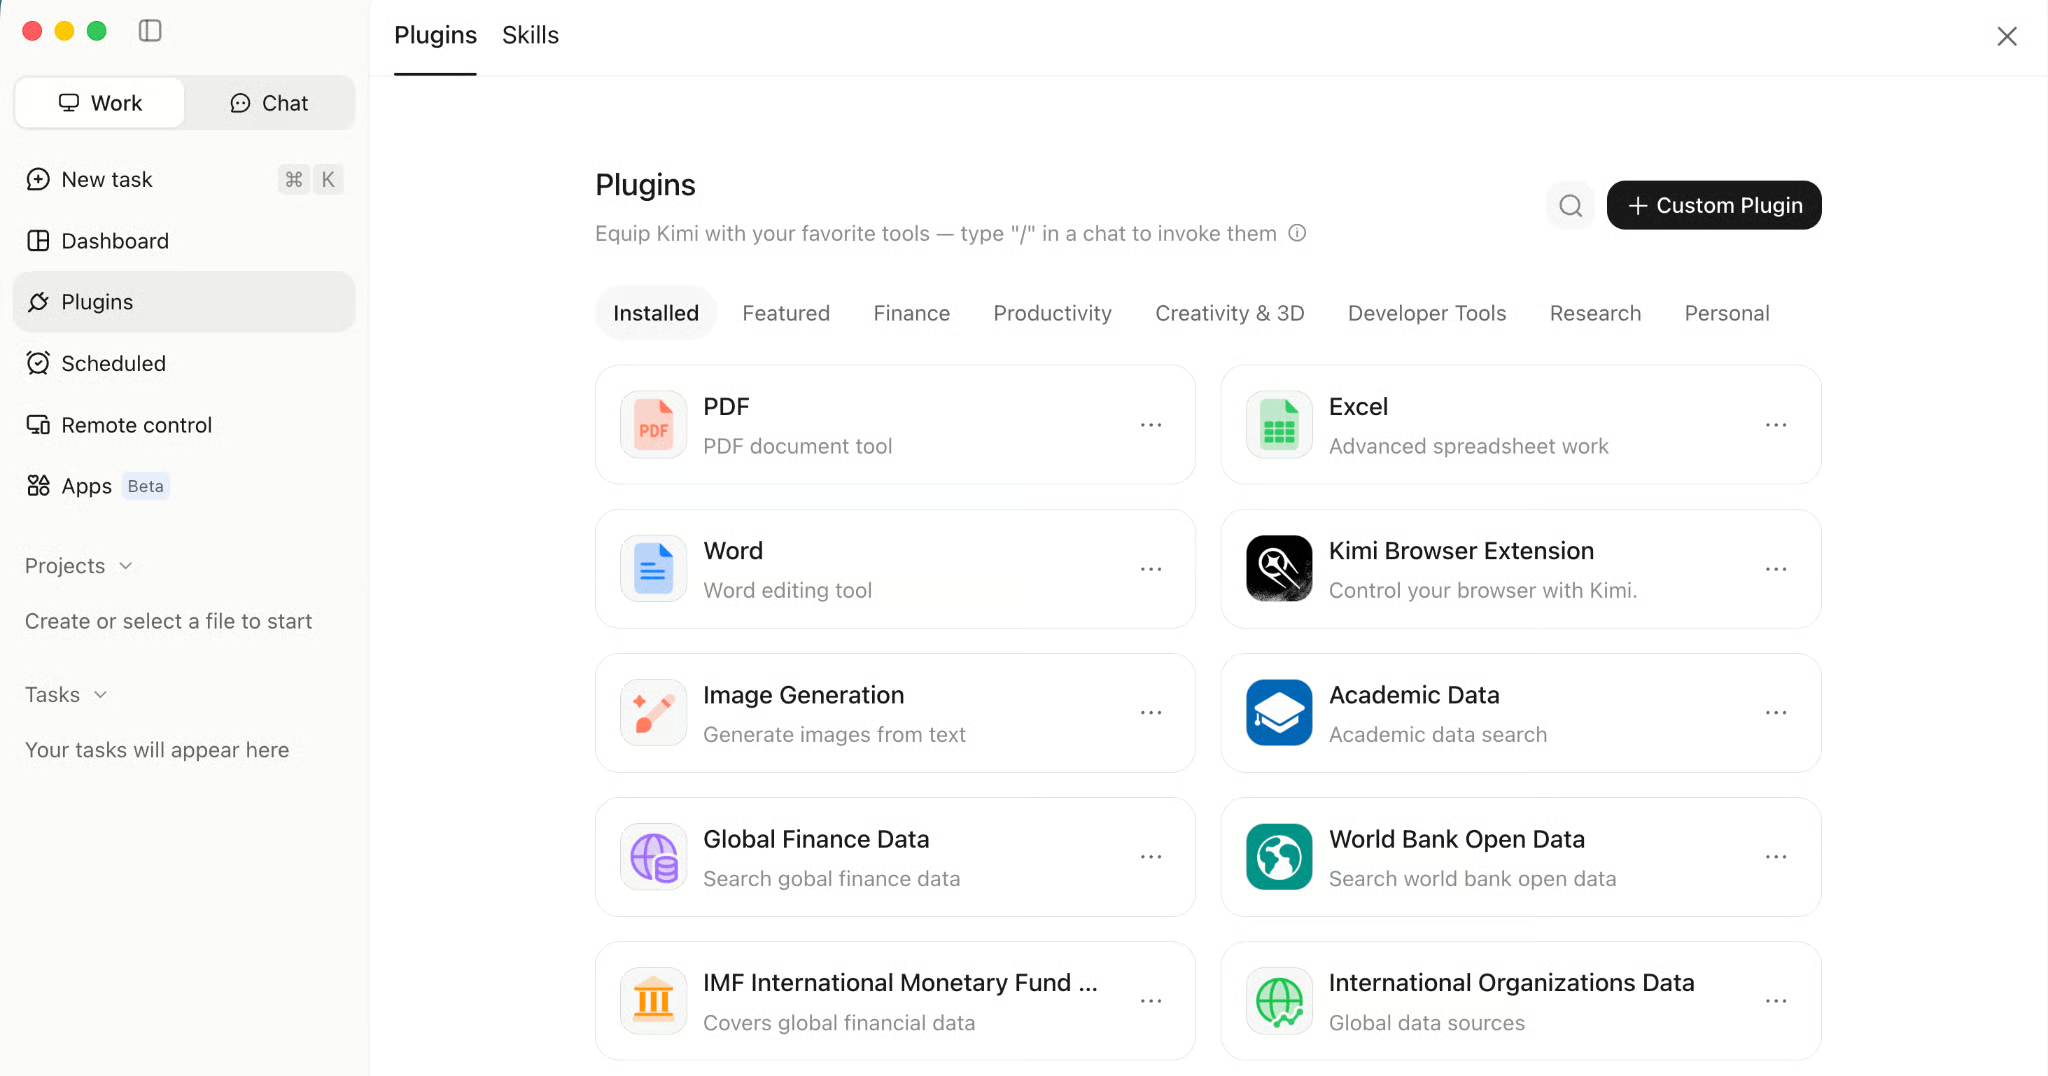
Open the Kimi Desktop App and go to Plugins in the left sidebar. Switch to the Installed or Featured tab, select Kimi Browser Extension, and install it.
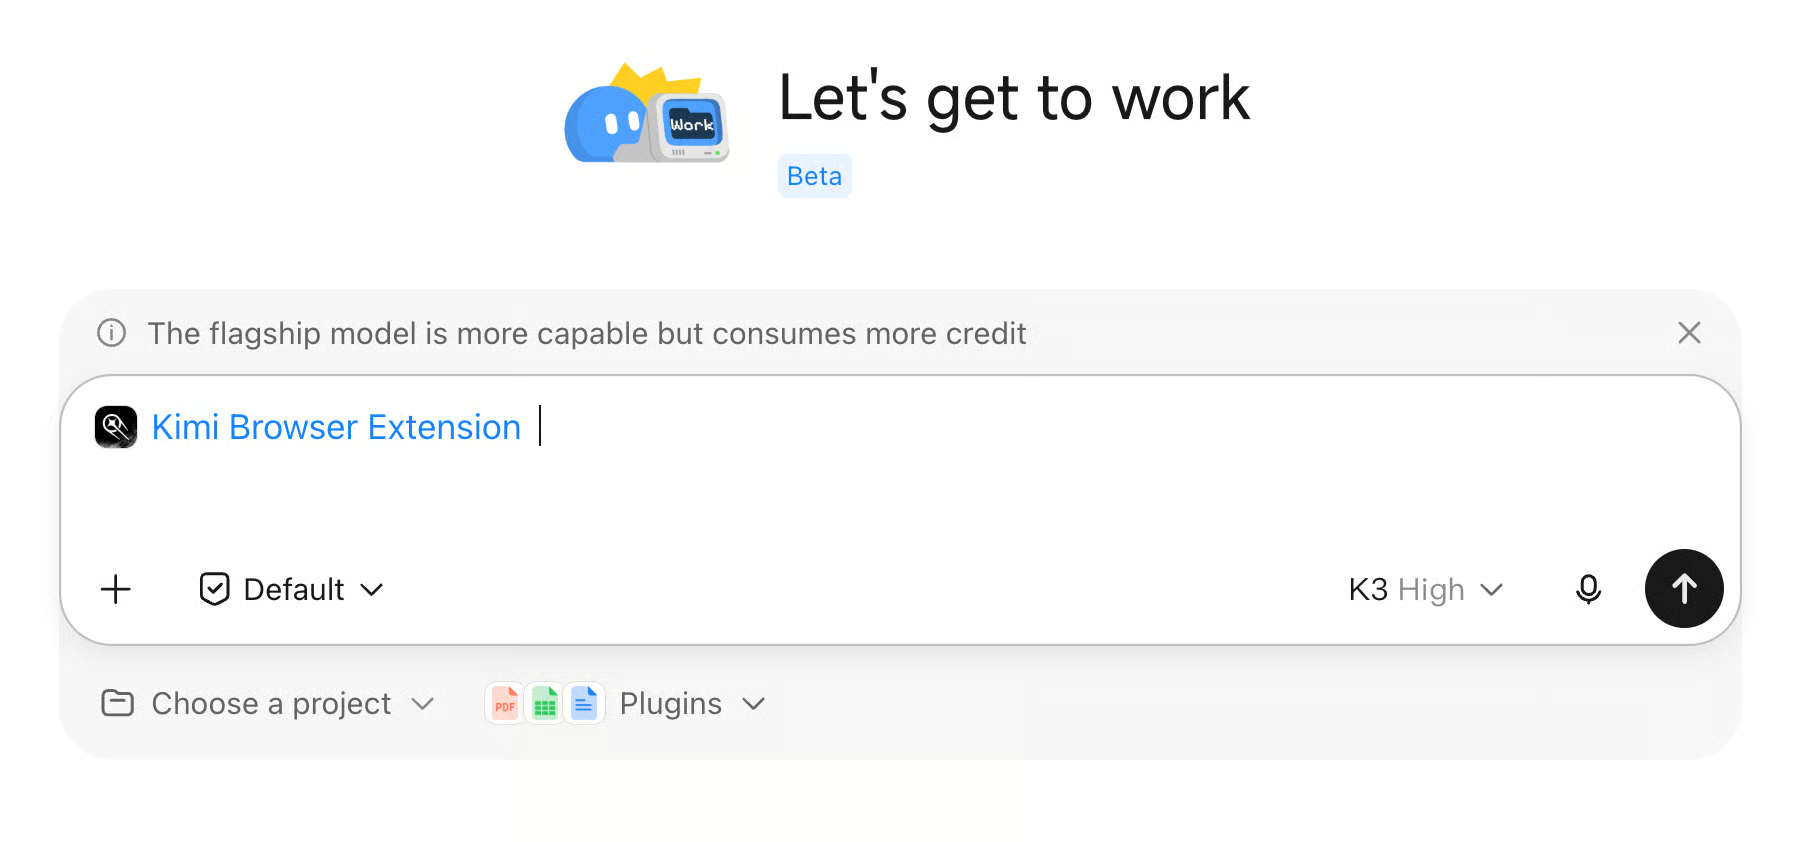
Switch to Work mode in the Kimi Desktop App. You'll see Kimi Browser Extension listed at the top of the chat input, confirming it's active.
The model defaults to Kimi K2.8. You can also switch it to Kimi K3, which is ideal for browser automation tasks. If you want to learn using it via API as well and look for inspiration on what you can do with it, I recommend reading our Kimi K3 API tutorial.
Next, you can now try a prompt like:
Prompt:
Go to Amazon, Flipkart, eBay, and Walmart. Search for "mechanical keyboard" on each. Extract the top 2 results from each site — product name, price, rating, number of reviews, and delivery time.One thing to keep in mind: since Kimi Work is still in Beta and runs on shared infrastructure, you may occasionally see this message:
"Too many people are chatting with Kimi right now. Please try again soon."
If that happens, the Kimi Code CLI path below is more reliable for extended use.
Kimi Code CLI is Moonshot AI's open-source terminal agent, which gives you the same WebBridge capabilities through your terminal, with full control over outputs and prompts.
Run the official install script in your terminal:
macOS and Linux:
curl -fsSL https://code.kimi.com/kimi-code/install.sh | bashWindows(PowerShell):
irm https://code.kimi.com/kimi-code/install.ps1 | iexIf you already have Node.js 22.19.0 or later installed, you can install directly via npm:
node --version
npm install -g @moonshot-ai/kimi-code
Or with pnpm:
pnpm add -g @moonshot-ai/kimi-codeAfter installation, verify it worked from a fresh terminal:
kimi --versionNow, open your terminal and type:
kimiOn first launch, run /login and select Kimi Code (kimi.ai/code) as the platform. This opens a browser to complete OAuth authorization (no API key needed), using your Google account or phone number.
When asked to select a model, choose kimi-k3. It is the flagship built for long-horizon agent tasks like browser navigation and data extraction. Note that K3 always thinks; turning thinking off routes the request to K2.8 Preview instead.
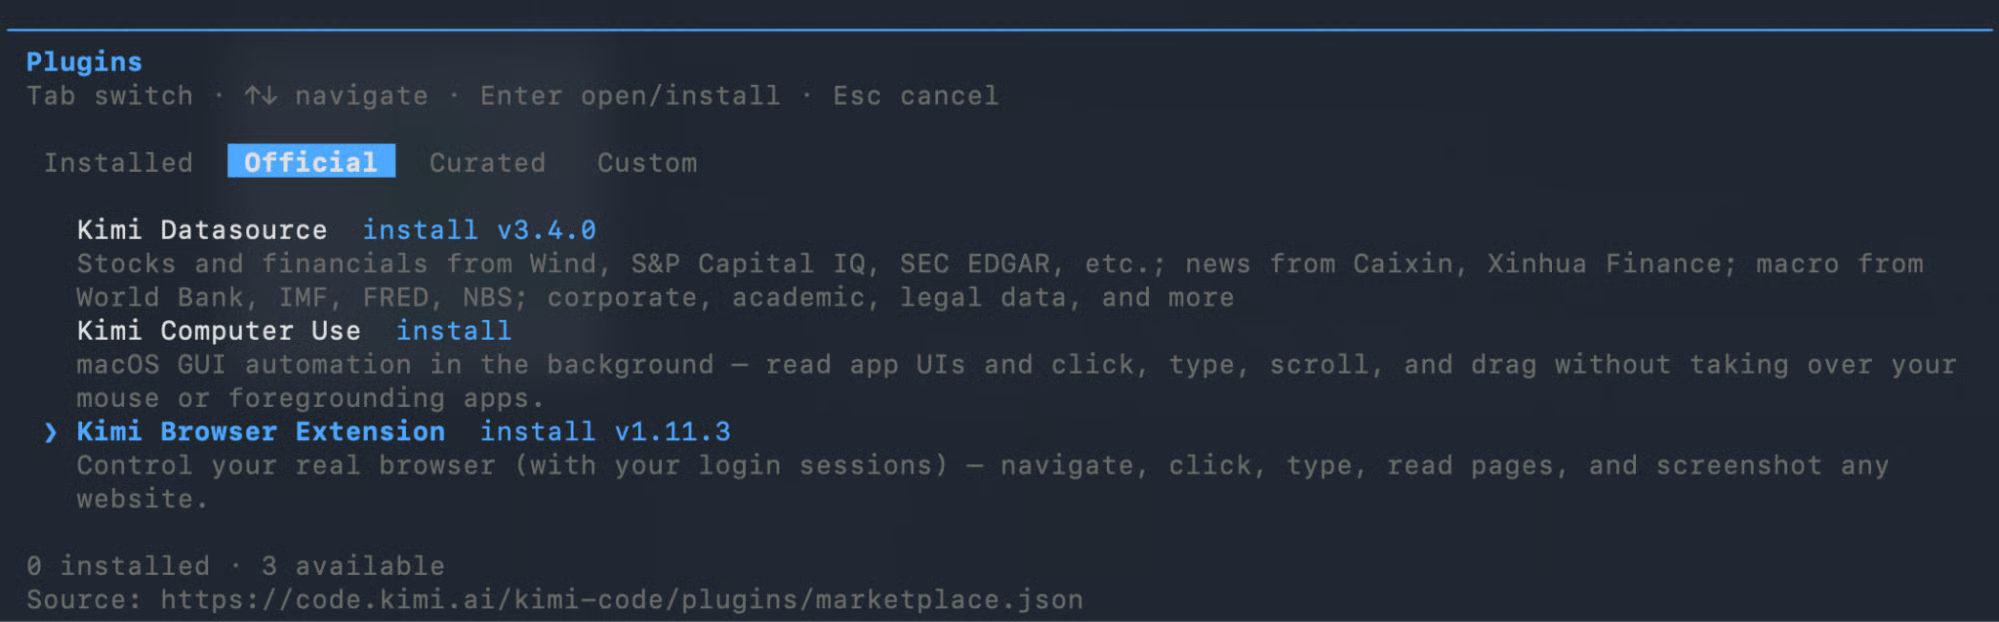
Inside the Kimi Code terminal, run /plugins to open the plugins menu. Press Tab to navigate to the Official tab, select the Kimi Browser Extension, and press Enter to install. Then, run /reload or /new to activate it.
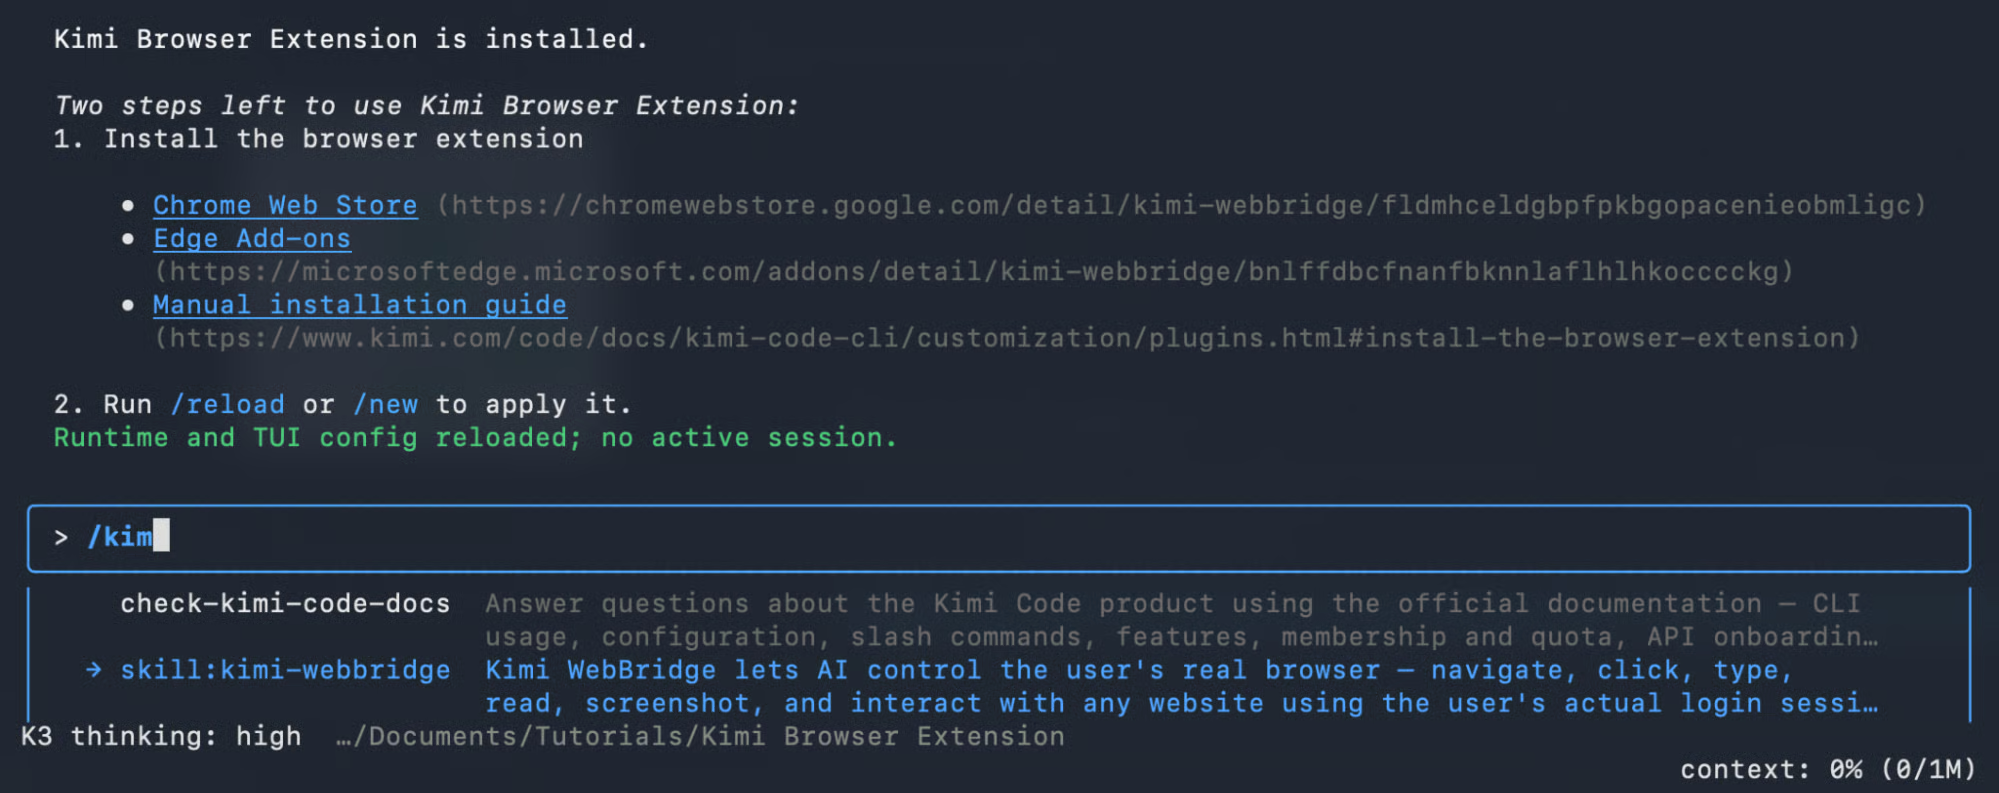
Kimi Code will prompt you to install the Chrome extension if you haven't already. It provides links to the Chrome Web Store and Edge Add-ons, as well as a manual installation guide. Once installed, run /reload or start a new session. If you start typing /kimi, you’ll see the skill kimi-webbridge (that still carries the previous name):
Now try a simple prompt to confirm everything is working:
Go to amazon.com and search for "mechanical keyboard". Take a screenshot of the results page and give me the names of top 2 keyboardsYou'll see Kimi immediately start running commands against your browser:
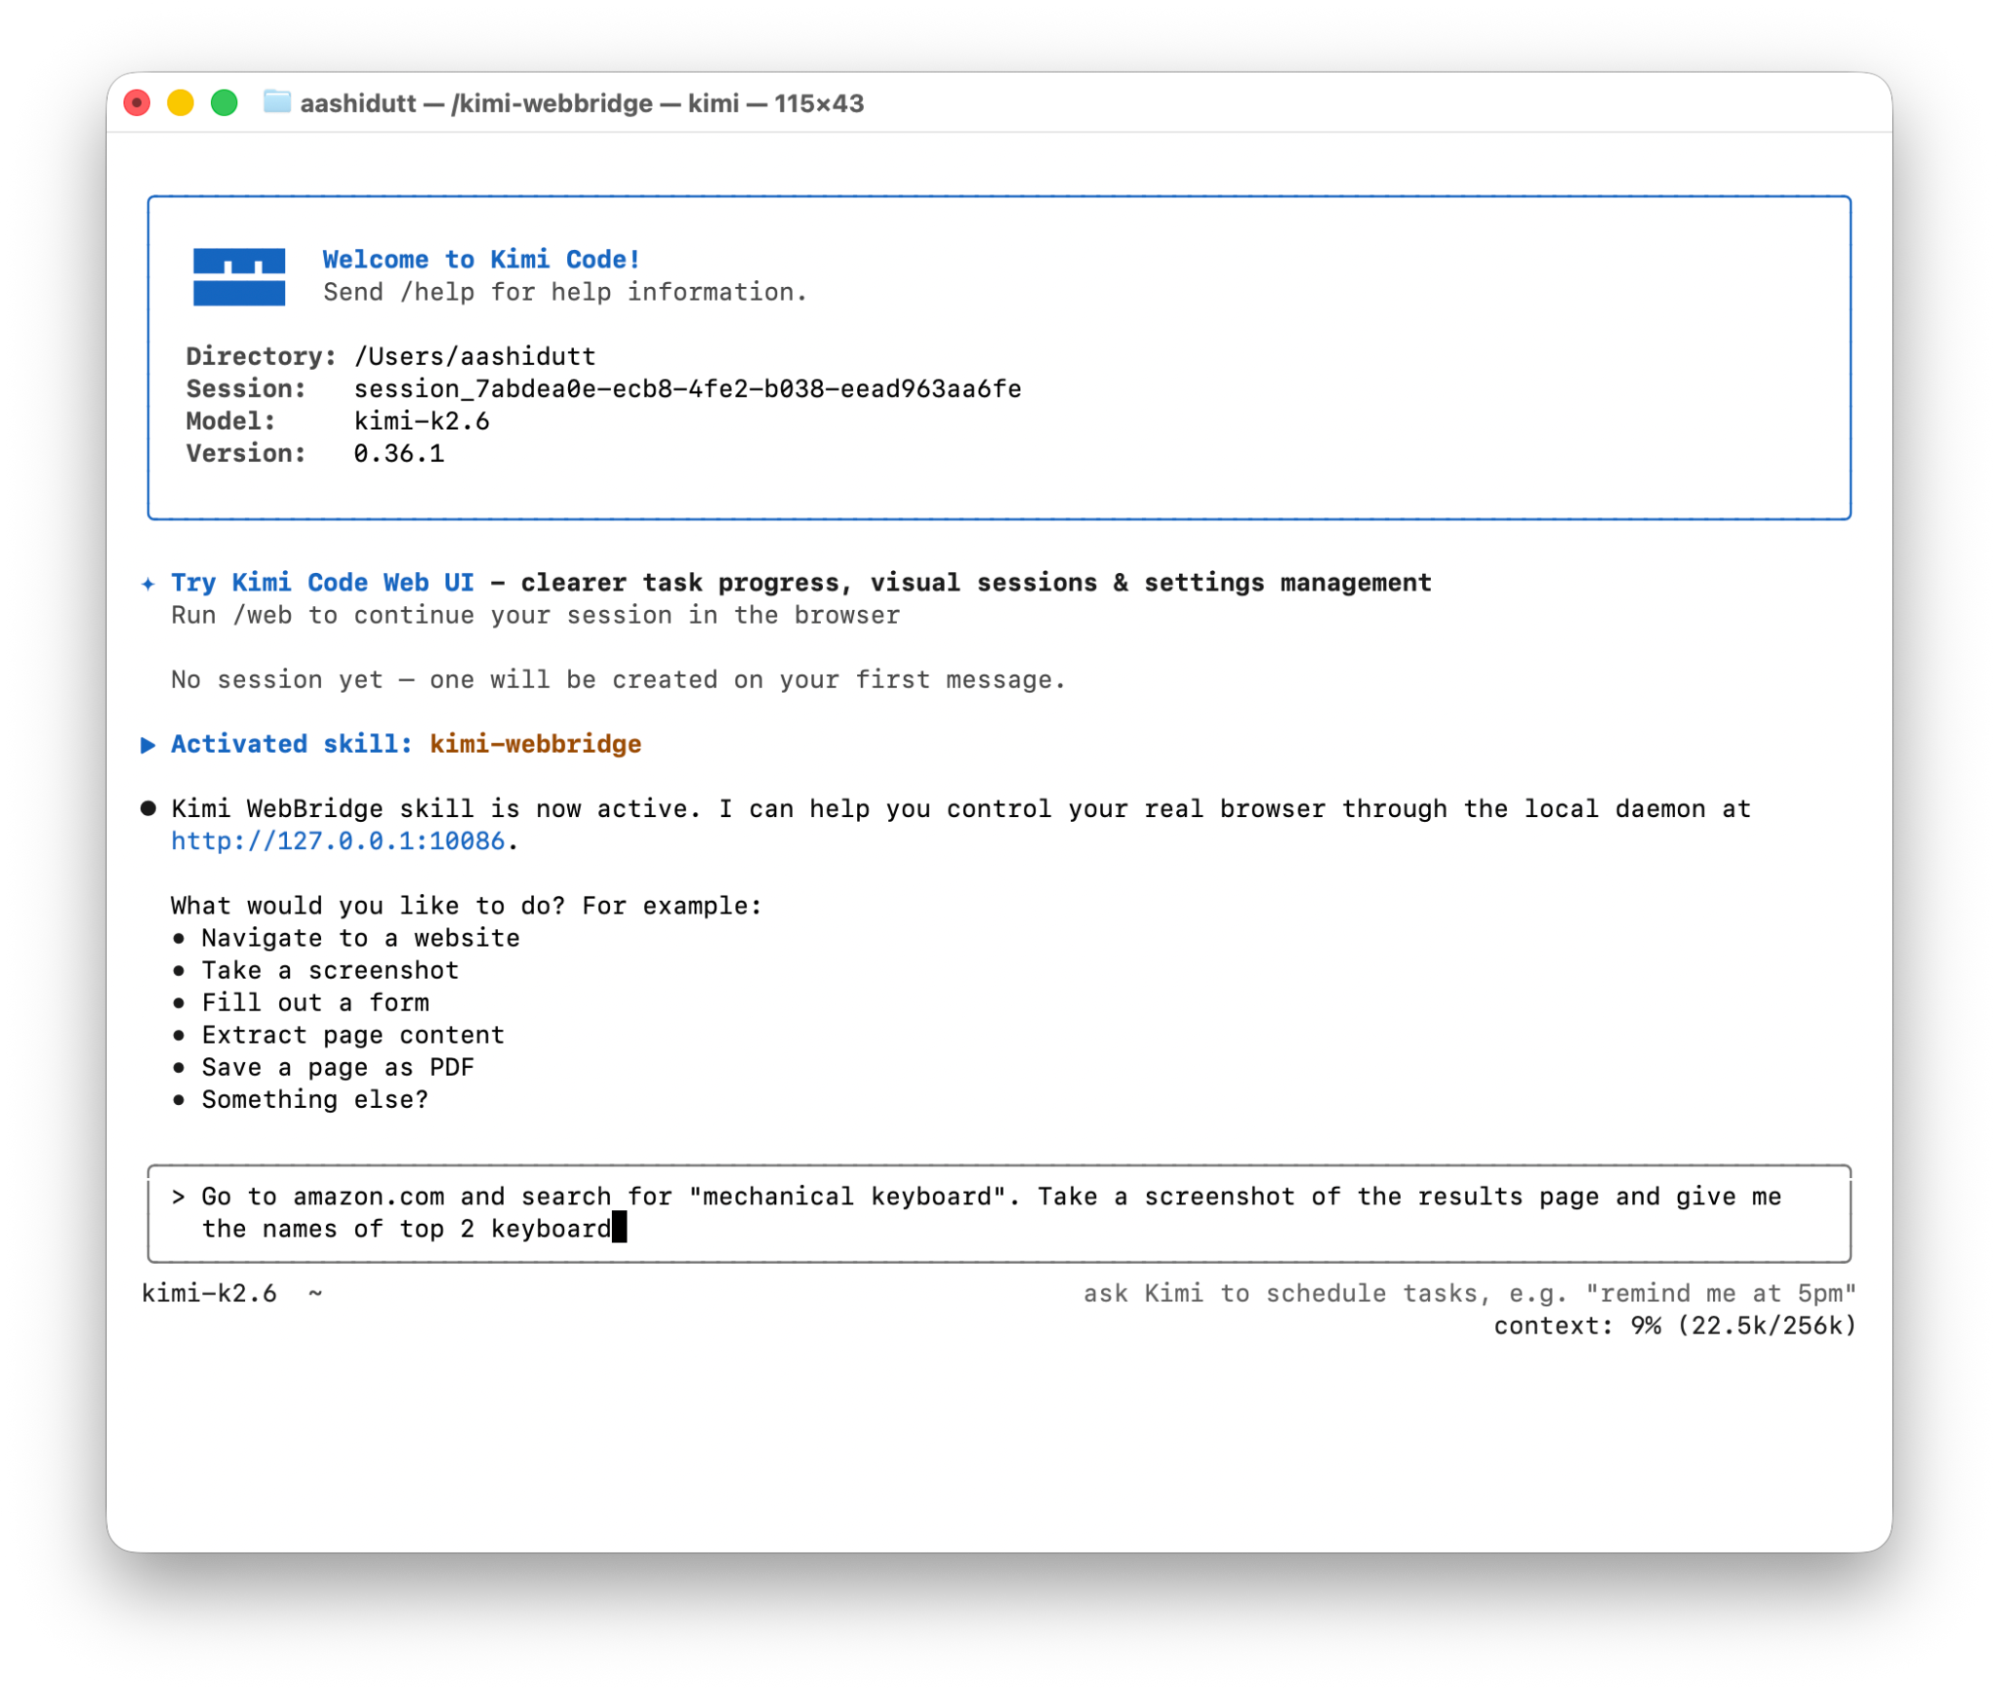
The agent uses curl commands to talk to the local daemon of the browser extension, which in turn controls your browser using the Chrome DevTools Protocol. Your browser will open Amazon, type the search query, wait for results, take a screenshot, then extract and return the product names.
Here's what the results look like:
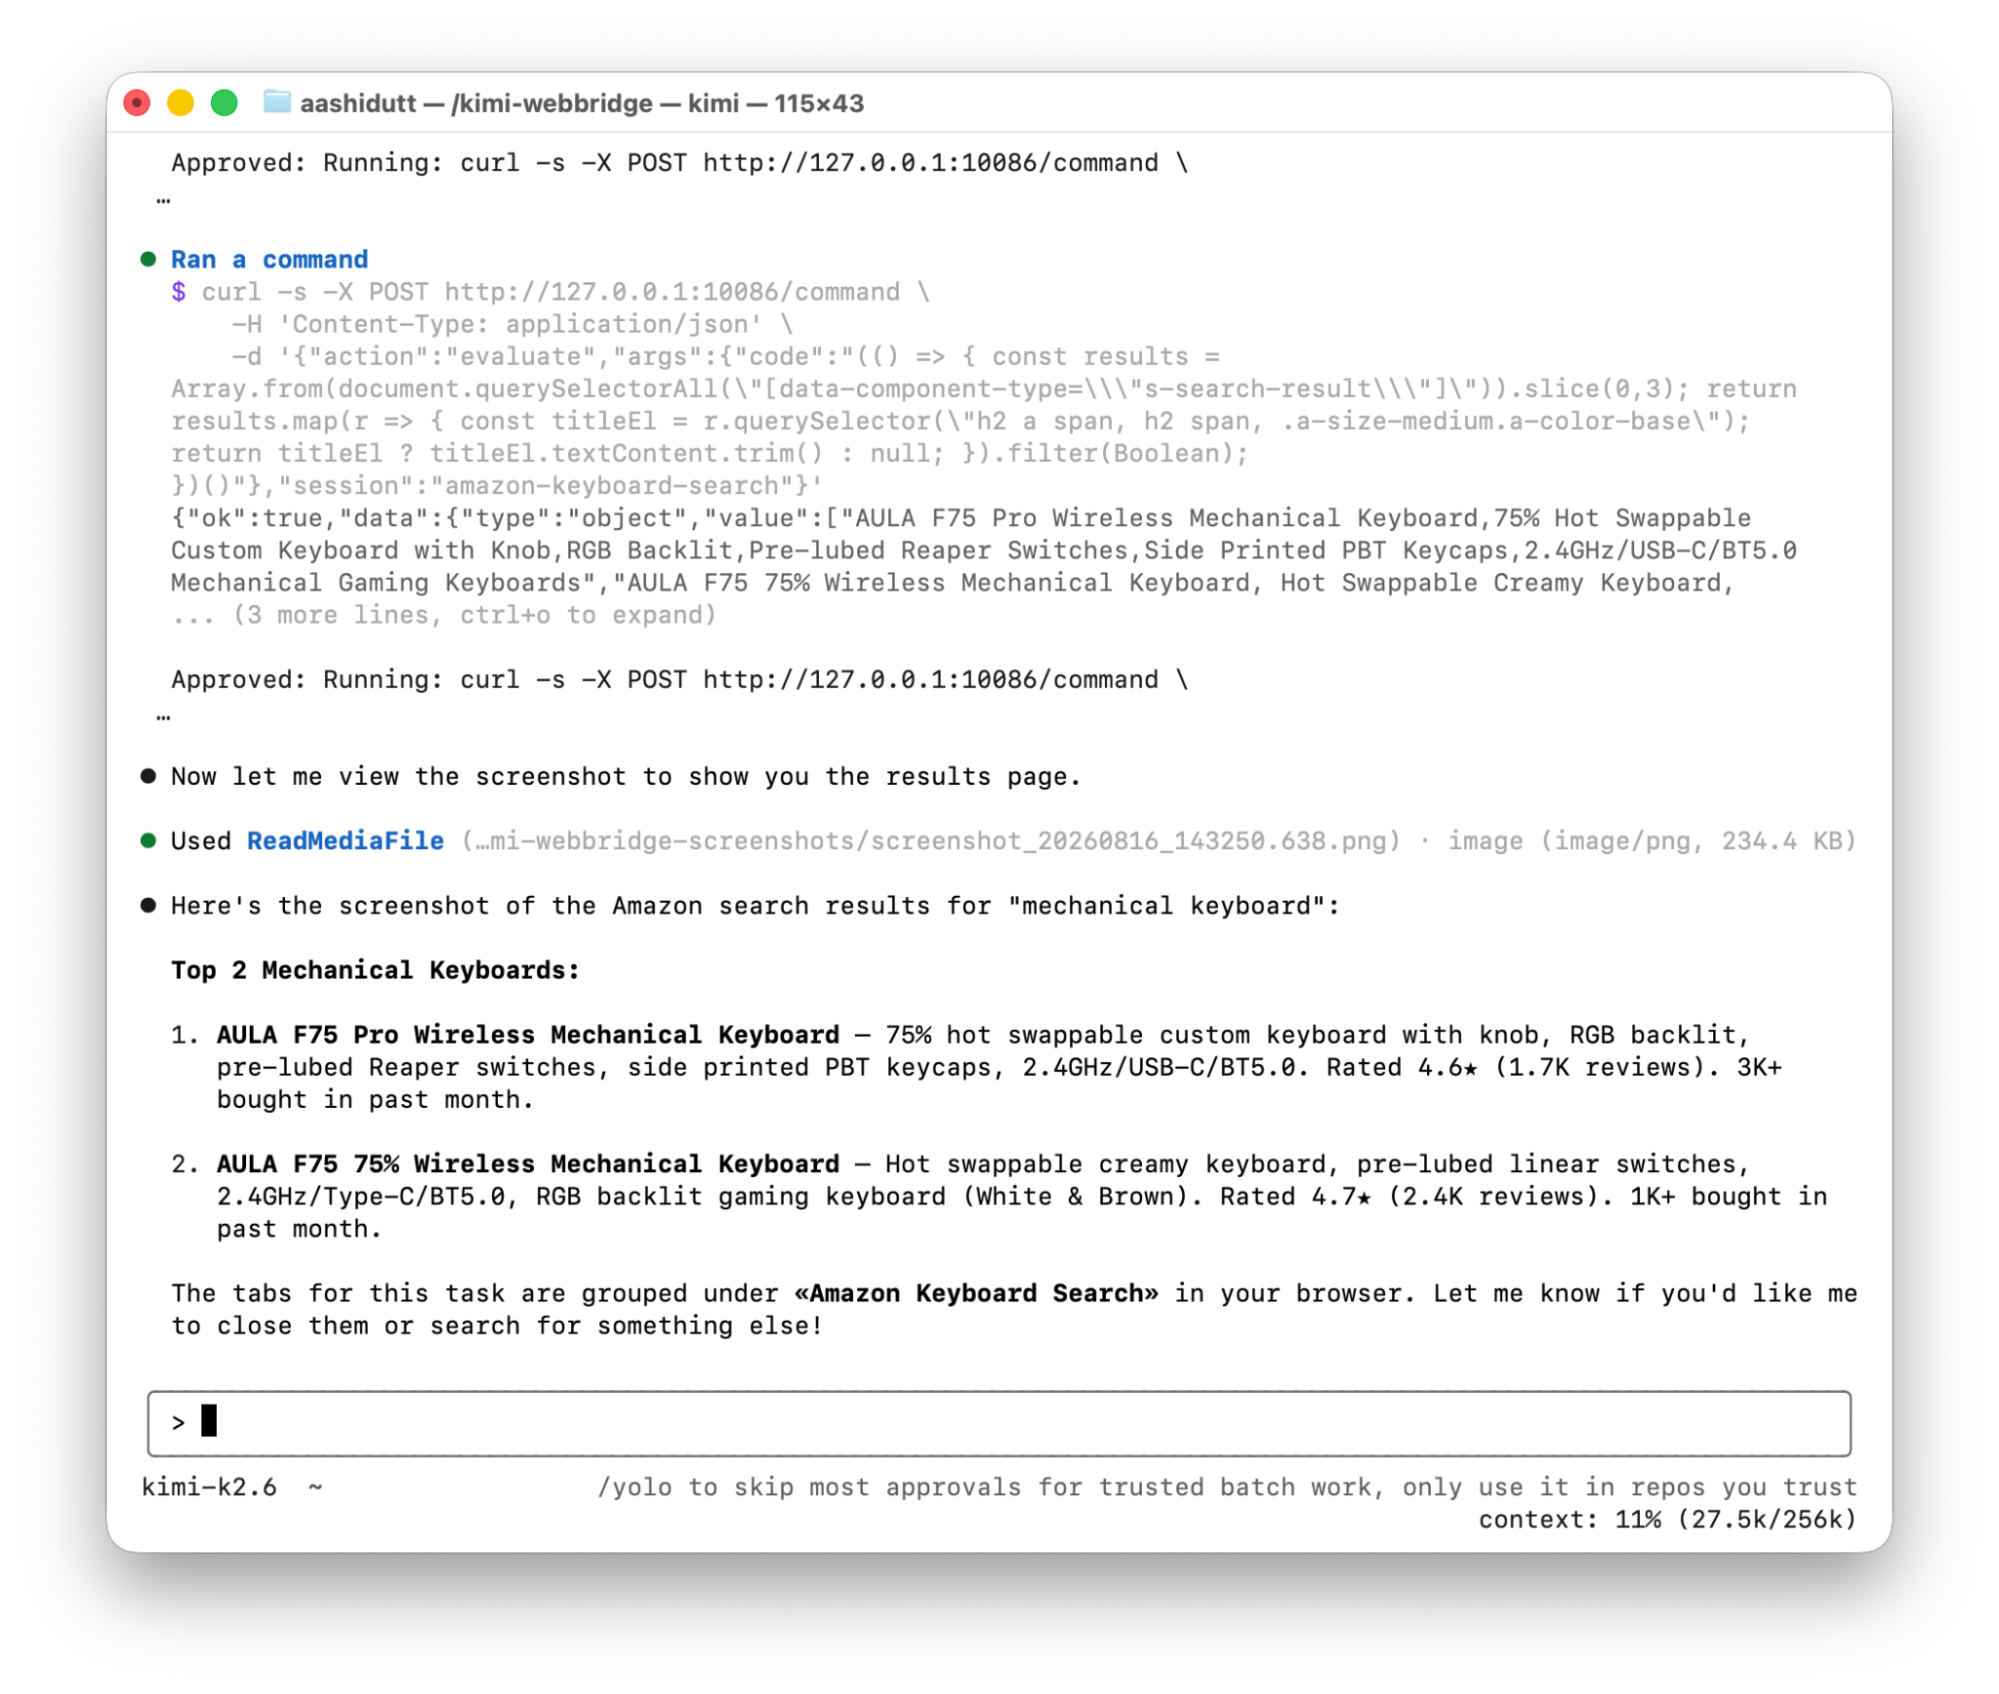
This is data extracted from Amazon's live results page with no scraping code and no API.
After the single-site demo worked cleanly, I tried the multi-site prompt:
Prompt:
Go to Amazon, Flipkart, eBay, and Walmart. Search for "mechanical keyboard" on each. Extract the top 2 results from each site — product name, price, rating, number of reviews, and delivery time.The extension opened all four sites in parallel as a tab group labeled "Keyboard Research". You could see the progress tracker update in real time:
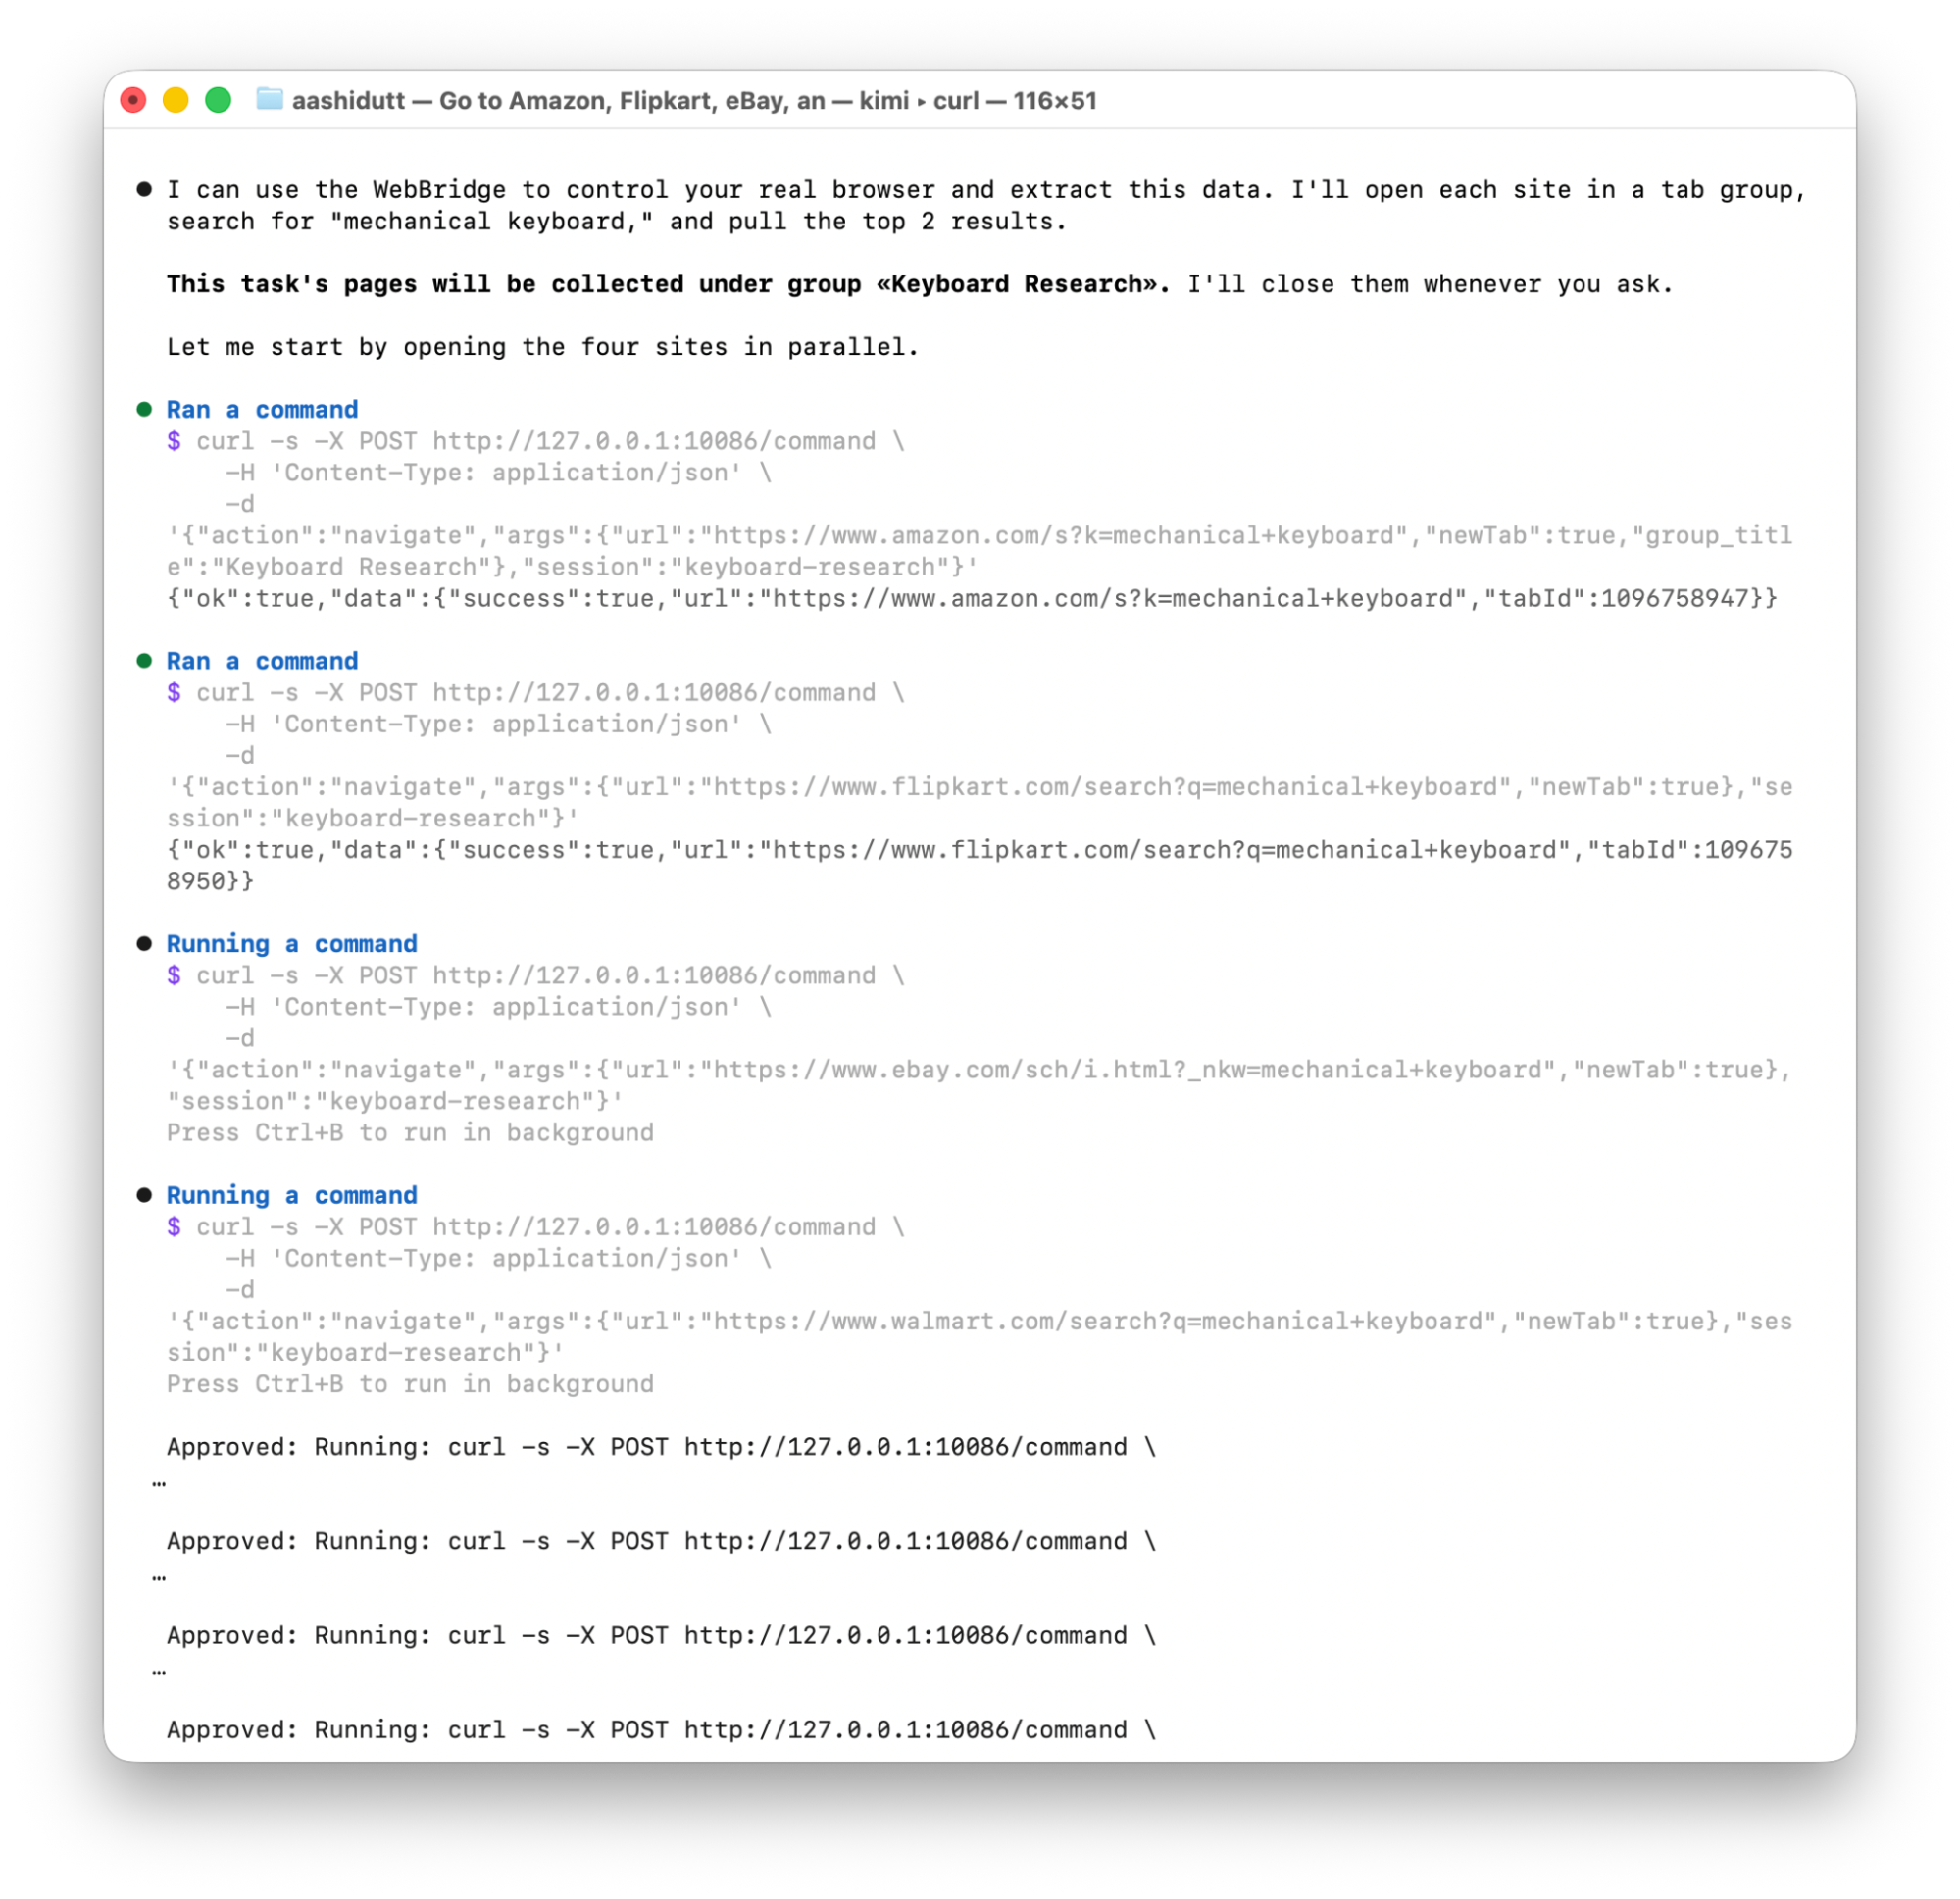
The agent gathered context files like webbridge-req-amazon.json, webbridge-req-snapshot1.json, and worked through each site. However, multi-site extraction required significantly more approvals and time than the single-site version, since each tab needed to be processed sequentially.
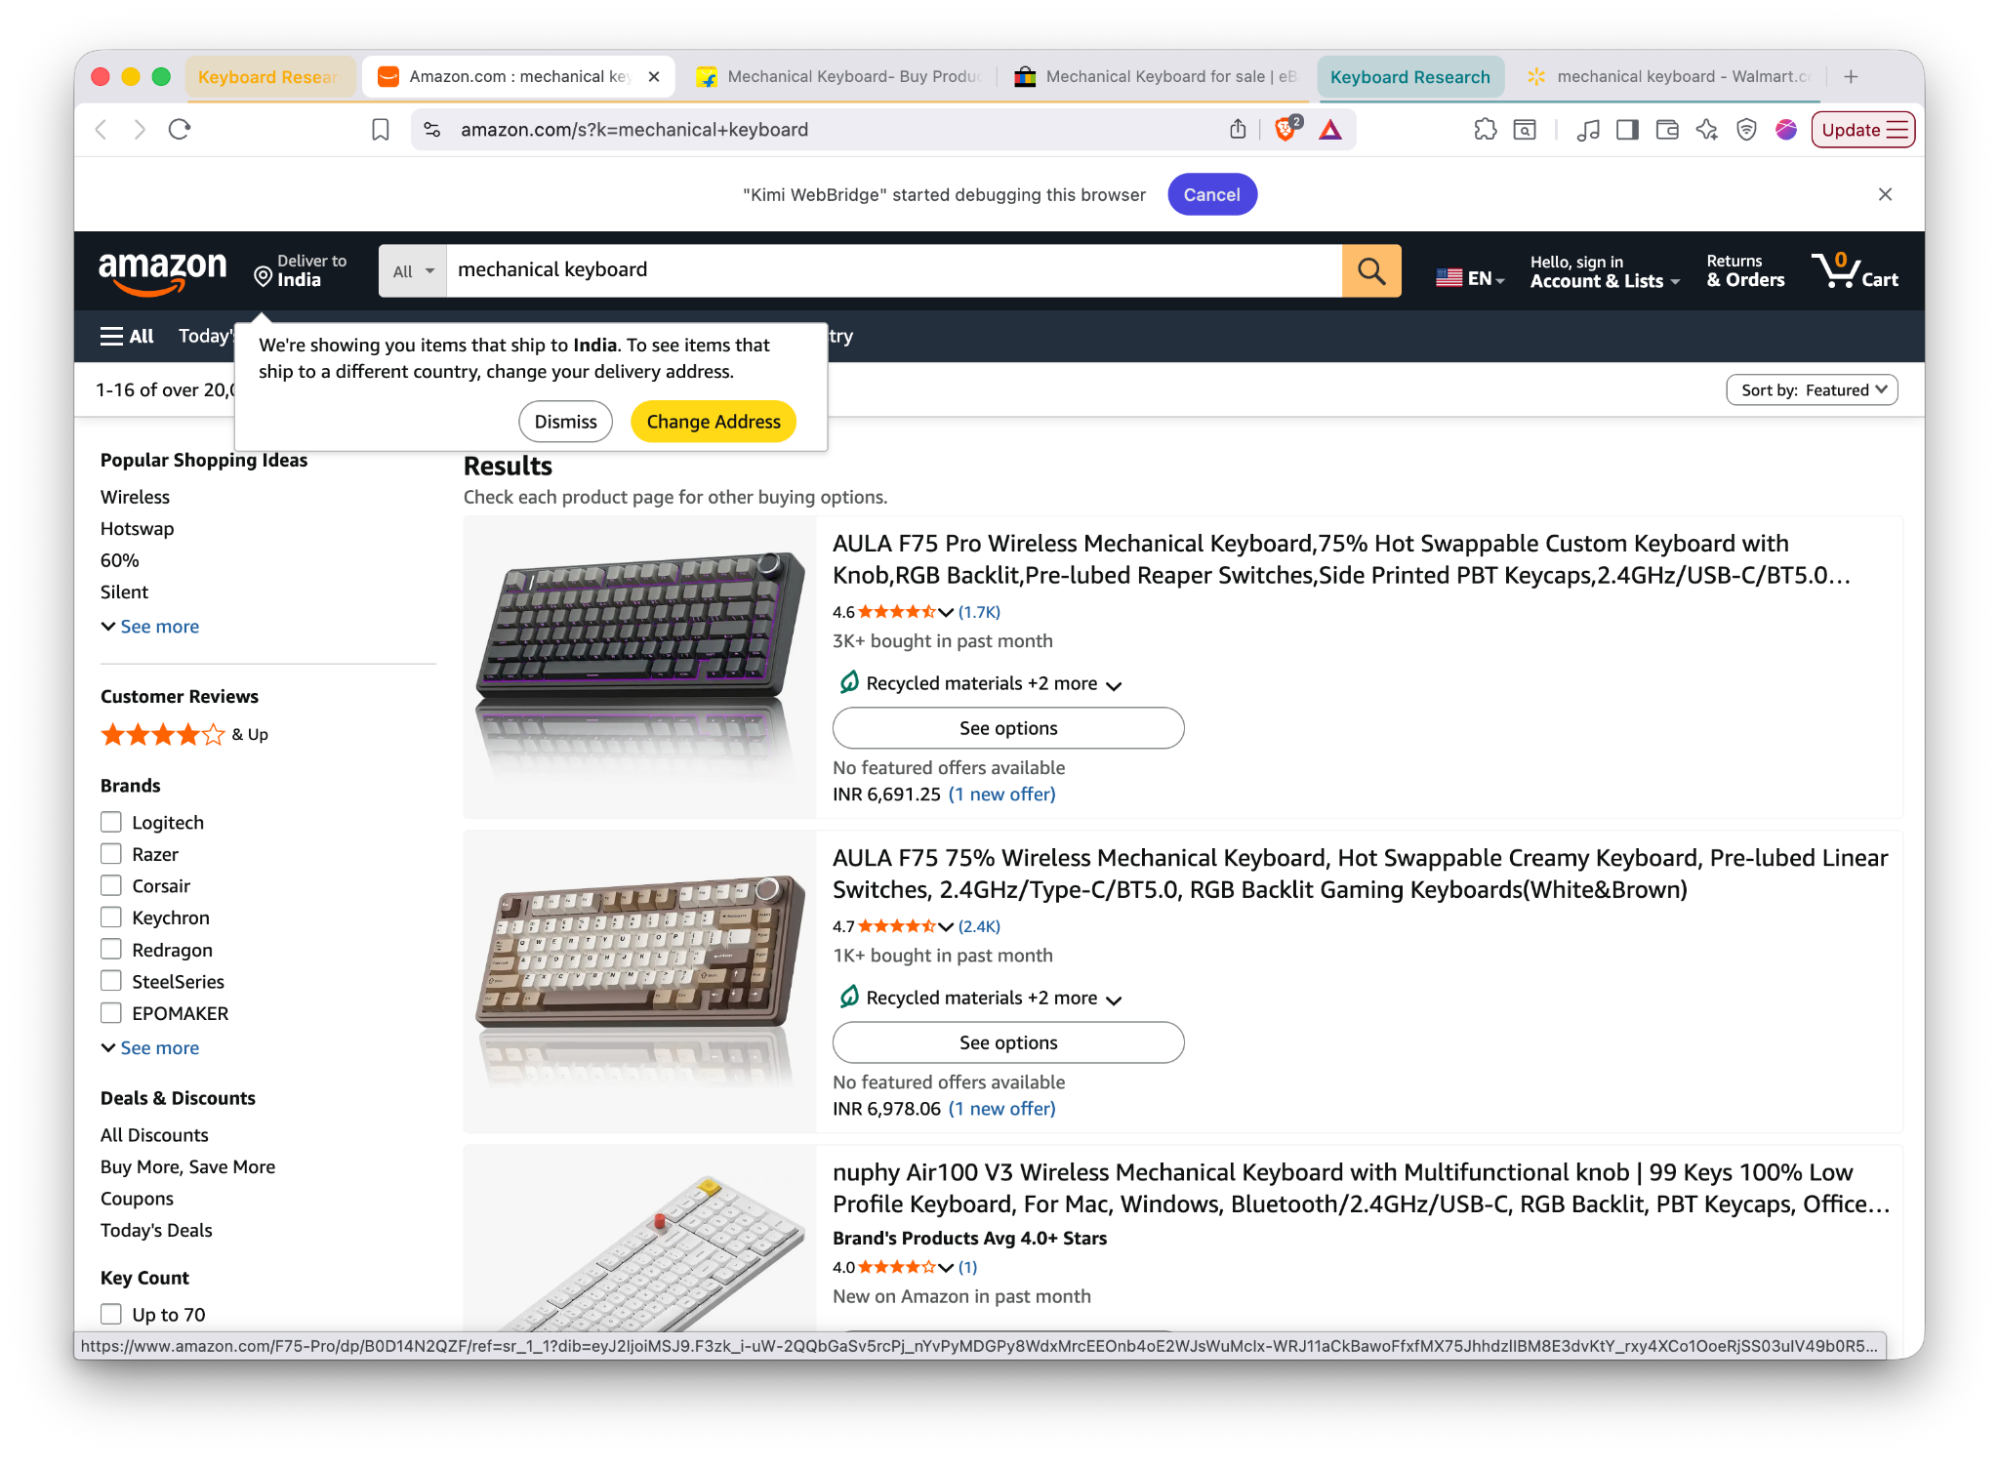
Practical takeaway: For a tutorial demo, start with a single site. Multi-site extraction works, but it takes longer and requires more patience with approvals. As the browser extension matures, this will improve, but it's worth setting accurate expectations in your own projects.
Here's a quick overview of the model family so you know what's running under the hood:
|
Model |
Best for |
|
kimi-k3 |
Flagship model for long-horizon agent work, coding, and knowledge work (1M context, always thinking, native vision) |
|
kimi-k2.7-code |
Coding tasks like writing, debugging, and refactoring code (256K context window) |
|
kimi-k2.7-code-highspeed |
The same coding model served at roughly 6× the output speed |
|
kimi-k2.6 |
Cheaper general-purpose model with thinking and non-thinking modes (also 256K context window) |
For tasks with the browser extension, kimi-k3 is the right choice. It's built for agentic workflows like sequential decisions, tool use, and long-horizon planning, which is exactly what navigating multiple websites and extracting structured data requires.
In this tutorial, I walked through two ways to use the Kimi browser extension: one through the Kimi Desktop app and the other through the Kimi Code CLI in the terminal. I tested both during demos and showed what the extraction output looks like for an Amazon search.
From here, you could extend this to extract data from any site you're already logged into, automate form submissions, compare prices across retailers, or build a scheduled research workflow.
Learn Agentic AI With DataCamp!
Track
Track
Course
blog
Abid Ali Awan
15 min
Tutorial
Aashi Dutt
8 min
Tutorial
Abid Ali Awan
11 min
Tutorial
Abid Ali Awan
11 min
Tutorial
Bexruz (Bex) Tuychiev
9 min
Tutorial
Khalid Abdelaty
12 min